
Glow effects are perfect for highlighting parts of an image or drawing the attention of viewers.
In this post, we will cover how to create a realistic glow effect for text as well as other objects.
How to Add Glowing Effect to Text
In the first example, we will look at how to create a neon text effect in Photopea.
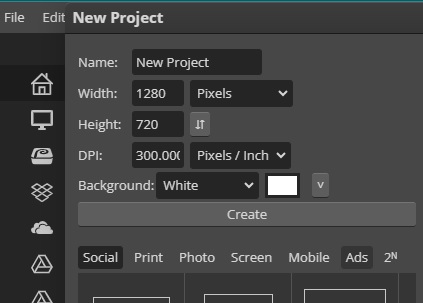
Step 1: Create a New Project
Go to Photopea.com and open a new project by going to File >> New. Select the desired width, height, and DPI for your Document and click on the “Create” button.
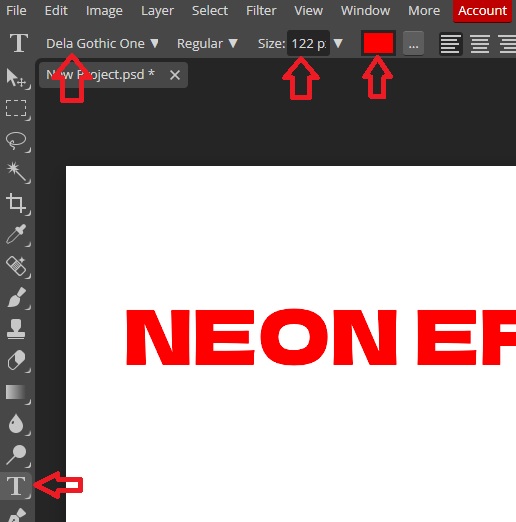
Step 2: Add Your Text
Grab the Type Tool from the tools bar, go to the Options Bar, change the font type, font size, and color, then type in your text.
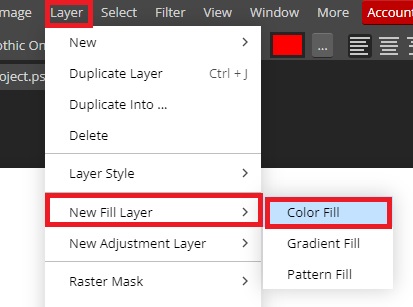
Step 3: Change the Background
The Glow Effect doesn’t work well against a bright background. We need to add a darker image as the background or a dark color fill. For this example, we will use the New Layer Fill.
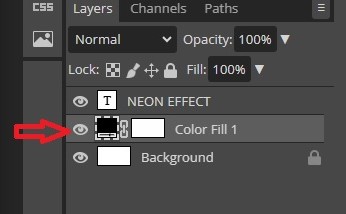
Go to Layers>> New Layer Fill>>Color Fill
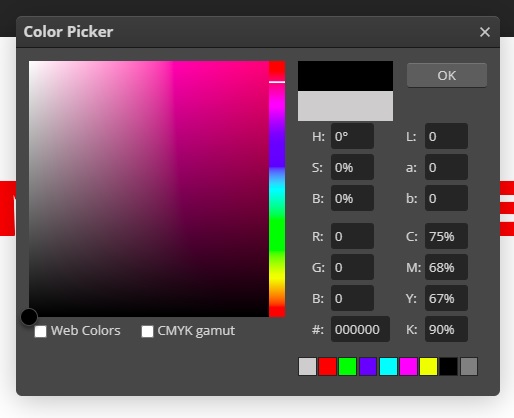
From the Color Picker, choose black as our background color. You can choose any other color as long as it is not a bright color. Once you are done, click OK.
Move the Color Fill layer down from the Layers Panel so that it sits below your text.
Your text will now be on a black background. Highlight the text with the Text Tool and change its color to white from the options bar.
Step 4: Convert Text to Smart Object
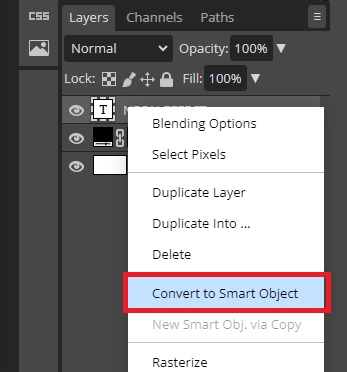
Right-click on your text and select Convert to Smart Object.
Step 5: Choose Blending Options
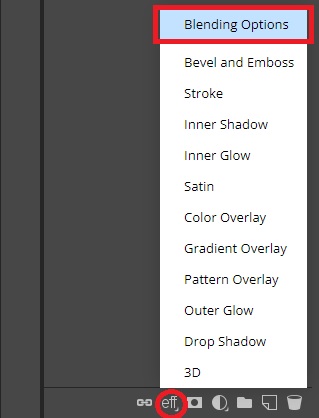
With the text layer still selected, go to the Layer Style and choose Blending Options.
From the Layer Style window that pops up, choose Inner Glow and choose these settings:
- Blend Mode: Hard Light
- Opacity: 35%
- Size: 7%
- Click on the color picker next to Gradient, and from the # part of the Color Picker, enter 7200ff and click OK.
- Click inside the Contour Box and set the X to 48 and Y to 62, and click OK.

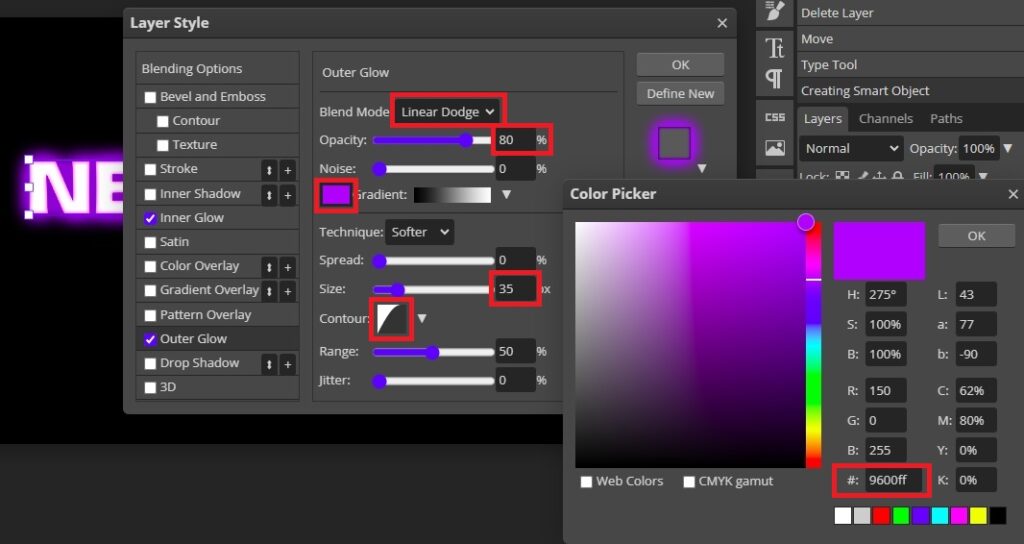
Next, select Outer Glow and enter the following settings:
- Blend Mode: Linear Dodge
- Opacity: 80%
- Click the color picker and change the color to 9600ff. This is a lighter shade of the first color.
- Size: 35%
- Click inside the Contour Box and set X at 64 and Y at 94, and click OK.
Once you are done click OK to exit the Layer Style.
Step 6: Refine the Effect
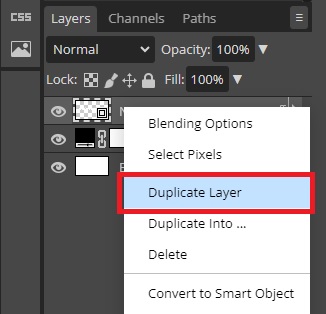
Right-click on the text layer and click Duplicate Layer.
Drag down the Copied Text Layer so that it sits below the first text layer, then right-click on it and select Blending Options.
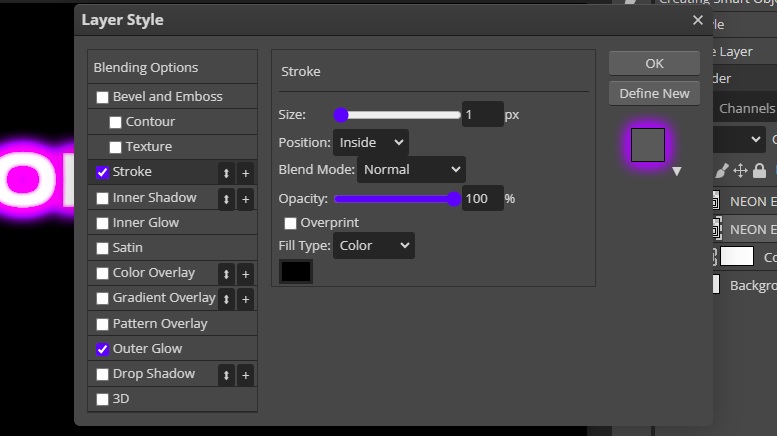
From the Layer Style, unselect the Inner Glow, select Stroke, and enter the following settings:
- Size: 1
- Position: Inside
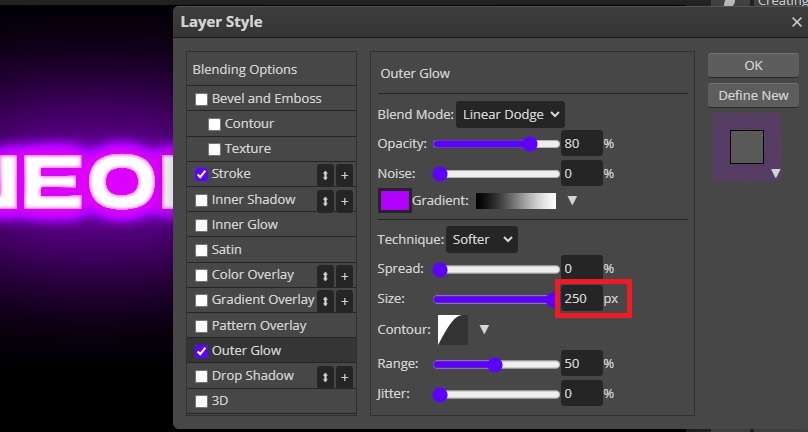
Now go to the Outer Glow, change the size to 250 Pixels, and click OK.
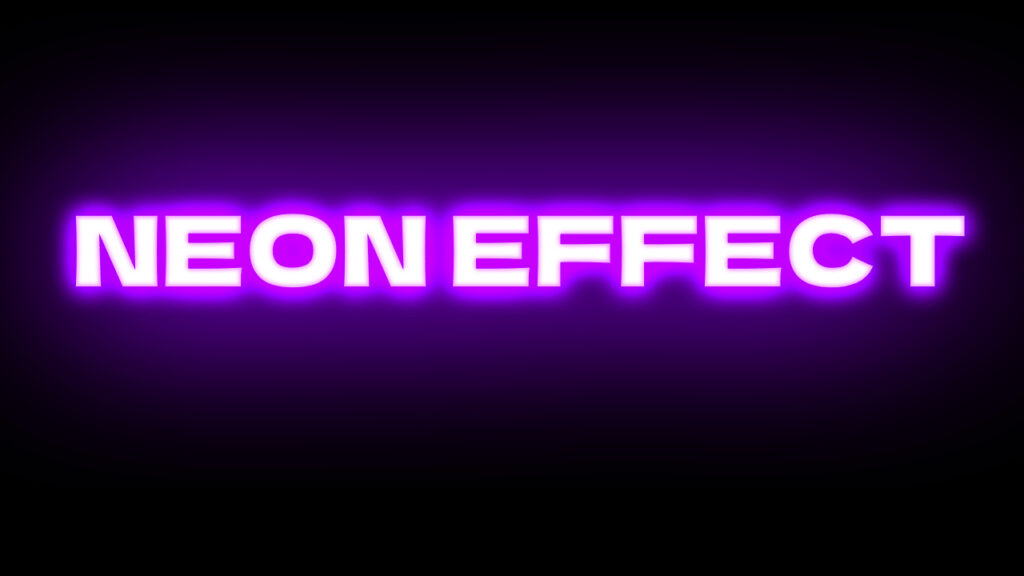
Here are the results so far.
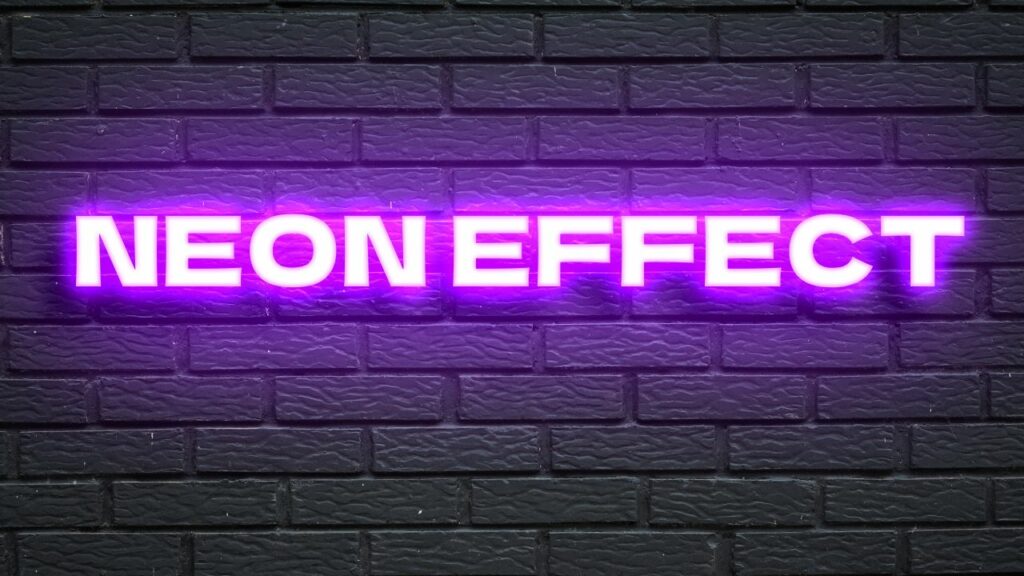
Step 7: Change the Background to An Image
We can add an image as our background to refine the glow effect further. Simply drag and drop your image into the photopea document. Or go to the file menu and click on open & place to open the background image.
From the layers Panel, drag the image layer down so that it sits below our two text layers.

To refine the effect, we will add a drop shadow. Right-click on the Copied Text Layer and select Blending Options. Select Drop Shadow and add the following settings:
- Blend Mode: Linear Light
- Opacity: 21%
- Angle: 50 degrees
- Distance: 47 px
- Spread: 10%
- Size: 43
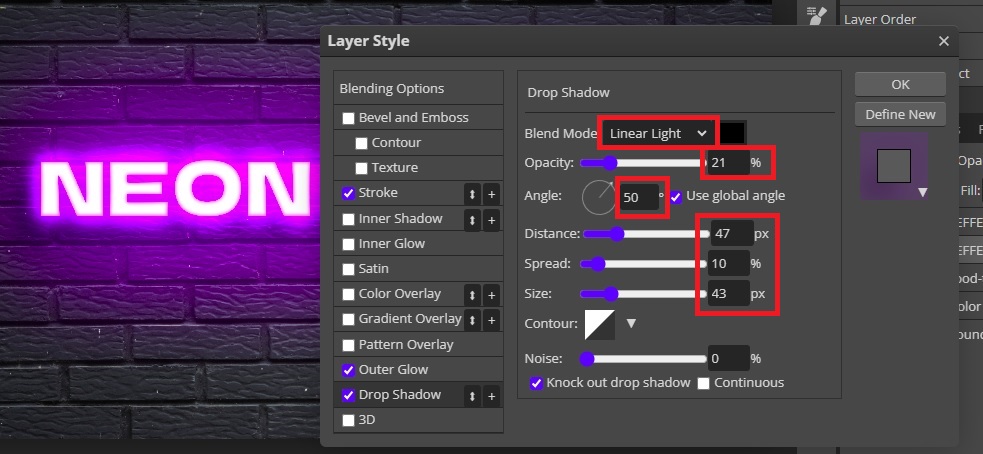
Click OK once you are done.
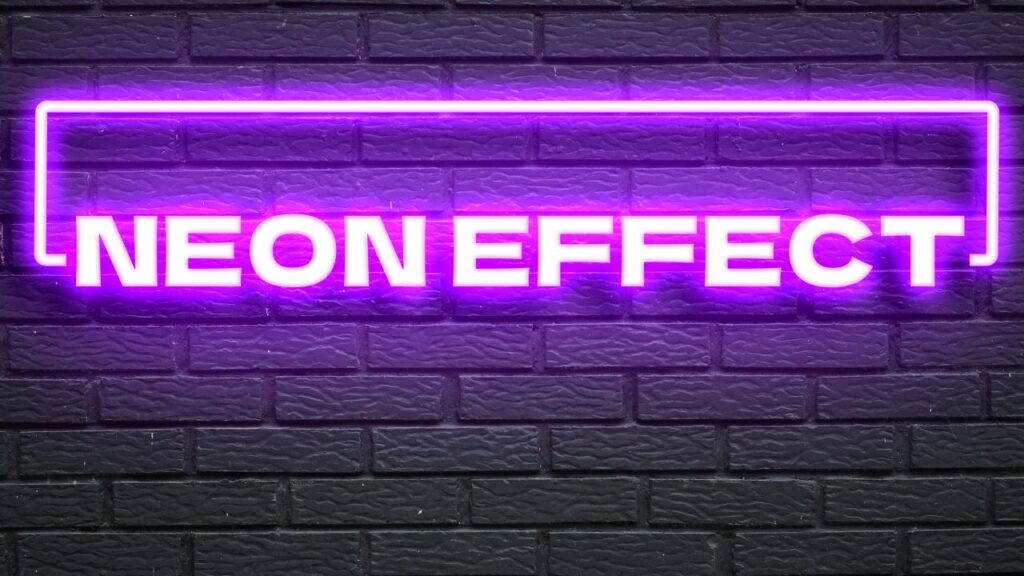
You can add more elements, such as a line, and copy the same layer style to add more details. In the below image, we added a line above the text and repeated all the steps:
- Adding inner glow and outer glow
- Duplicating the layer, removing the inner glow, and adding a Stroke
- Adjusting the outer glow
How to Add a Glowing Effect to an Object in photopea
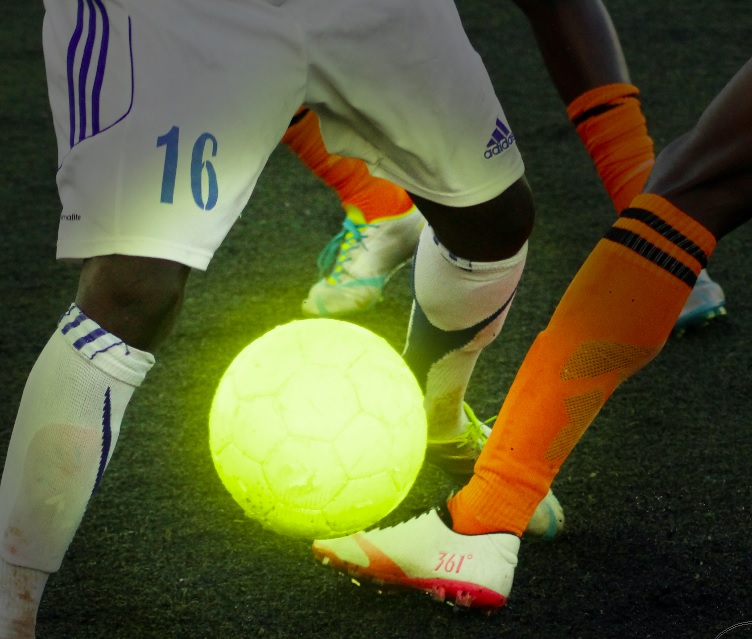
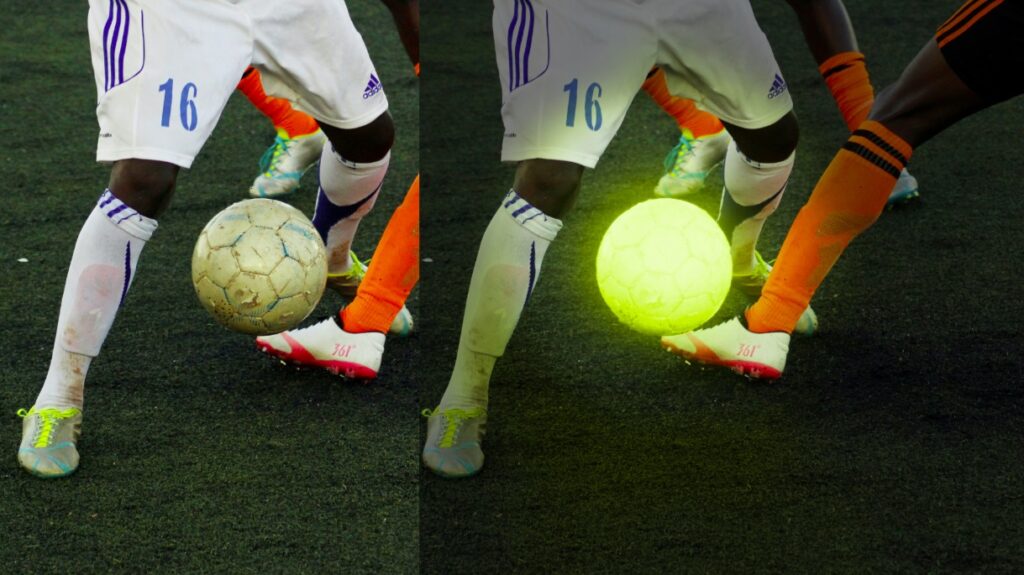
Now that you know how to make text glow, let’s discuss how to make an individual object within an image glow. In this example, we will make the ball glow.
Step 1: Open Your Image
Drag and drop your image onto Photopea or go to File >> Open, select your image and click Open.
Step 2: Select the Ball
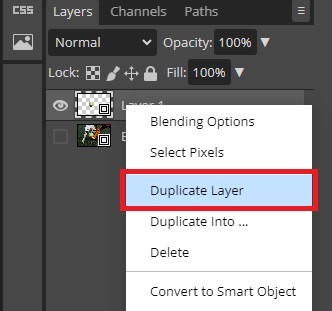
First of all, Duplicate the image layer. To do that right click on the image inside the layers panel and choose duplicate.
Selected the duplicated layer and then you need to use your preferred selection tool to select the ball. In our case, we will be using the Magnetic Lasso Select. Start by zooming in to get a better view of the target.
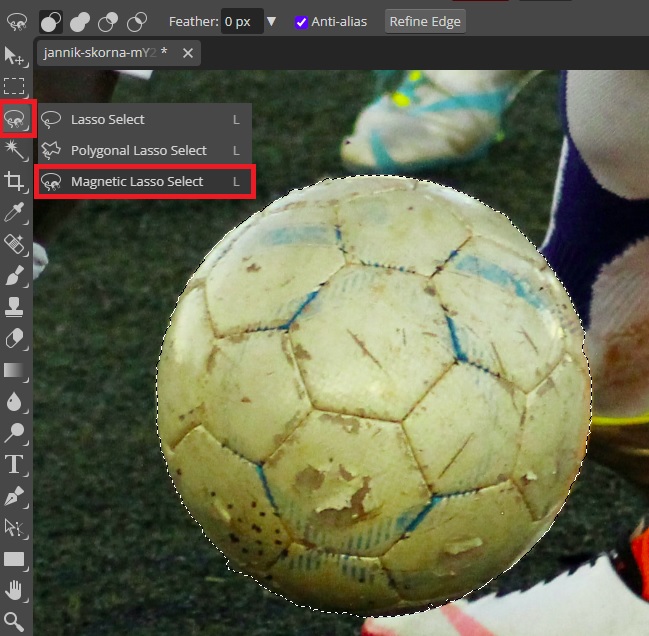
Once you are done with the selection, press Ctrl (Cmd) + 0 to adjust the image to fit the screen.
Check out a comprehensive guide on how to make selections in Photopea.
Step 2: Create the Raster Mask
With the selection active, Go to the layers panel and click on the raster mask icon. And now the ball will be on its own layer and image areas other than the ball will disappear.

You can turn off and on the background layer by clicking on the eye icon to ensure the ball is on its own layer.
Now right click on the layer and choose rasterize.

then right-click on the mask and choose Apply.

Step 3: convert the ball layer to smart object
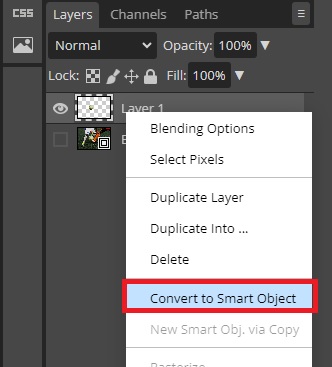
Right-click on the ball layer and select Convert to Smart Object.
Now right-click on the ball layer and select Duplicate Layer.
Step 4: Add blur Filter
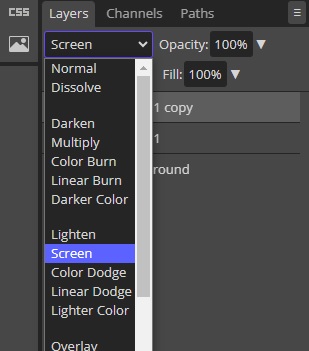
With the duplicate layer selected, go to blending options and select Screen.
Next, go to Filters >> Blur >> Gaussian Blur

Set the radius to 5px and click OK.
Duplicate the Copy Layer again, double-click on the Gaussian Blur, set the radius to 150px, and click OK.

Duplicate the second copy again, double click on Gaussian Blur as we did before and this time set the radius to 300px and click OK.
Note: You may need to adjust the blur values depending on the dimensions of the image you are using, so make sure to choose the blur values that look good on your image.
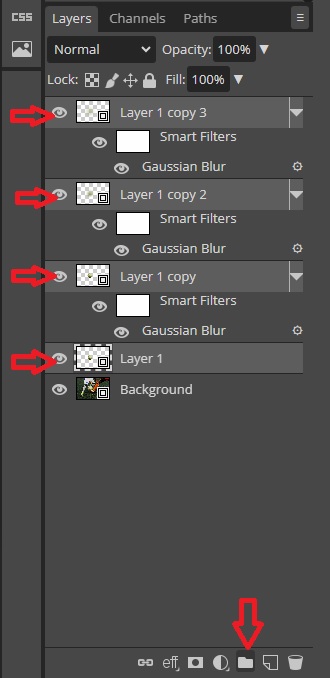
Step 5: Place the Ball Layers into a Folder
Hold the Shift key and select all the ball layers, then click on the Folder icon at the bottom of the Layers Palette. The layers will be placed in a folder.
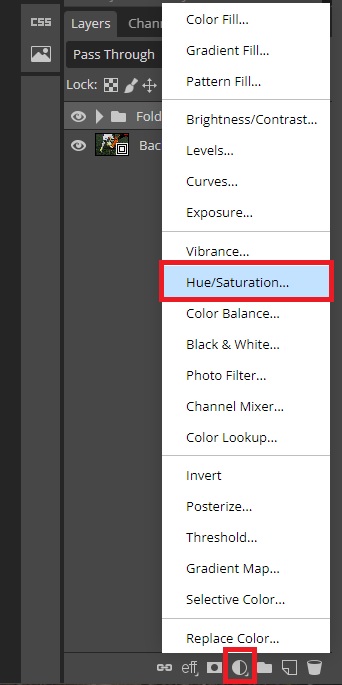
Step 6: Adjust Hue/Saturation
With the folder selected, go to New Adjustment Layer and select Hue/Saturation.
From the Hue/Saturation window, make sure the Range is set at Master, then go to the bottom of the window and select the Clipping Mask icon.
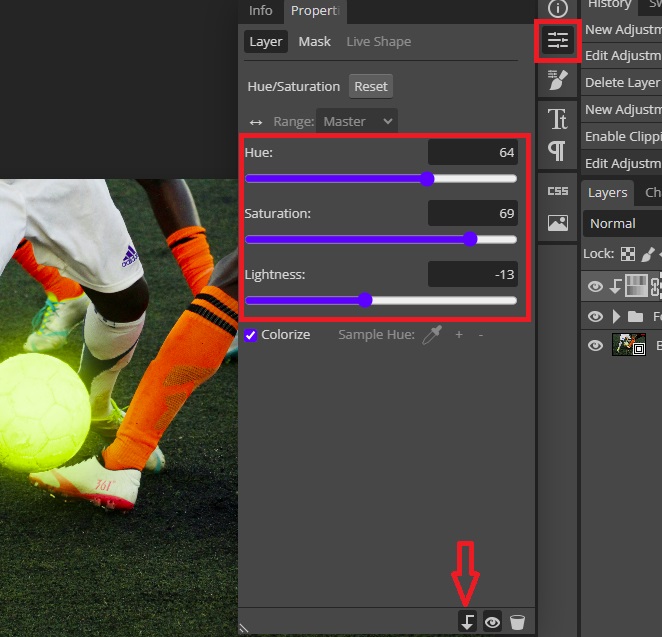
Now select the Colorize radio button and then increase or decrease the Hue, Saturation, and Lightness to your liking. When done, click the Properties icon to collapse the Hue/Saturation window.
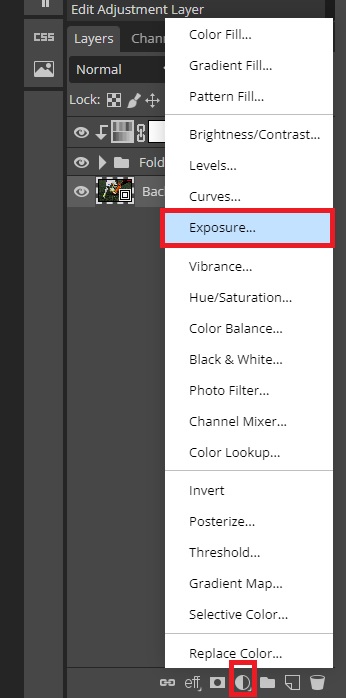
Step 7: Reduce Background Exposure
To make our glow effect stand out, we need to reduce the exposure of the background. Select the background image, click on the New Adjustment Layer icon, and select Exposure.
From the Exposure window, we will reduce the Exposure to about -2.00 and then click the Properties icon to collapse the window.
Note: Choose exposure values according to the image you are using.
Step 8: Refine the Effects
Now select the Exposure Mask, select the Brush Tool, and ensure the foreground color is Black.
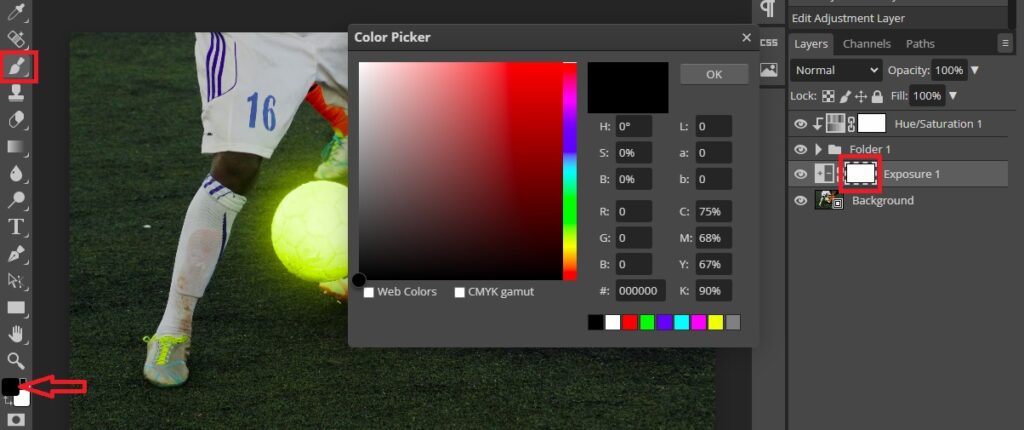
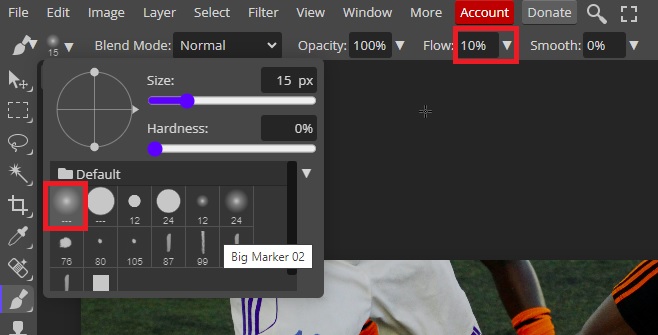
From the Options Bar, select a soft brush, ensure the brush opacity is at 100%, and reduce the Flow to 10%.
Choose the brush color according to the glow of the ball and then use the brush to paint around the players’ legs so that the ball appears to be illuminating them.
To refine the effects further, duplicate the Hue/Saturation layer and drag it down so that it sits below the Folder. Now select the Layer Mask and press Ctrl (CMD) + I to invert the mask.
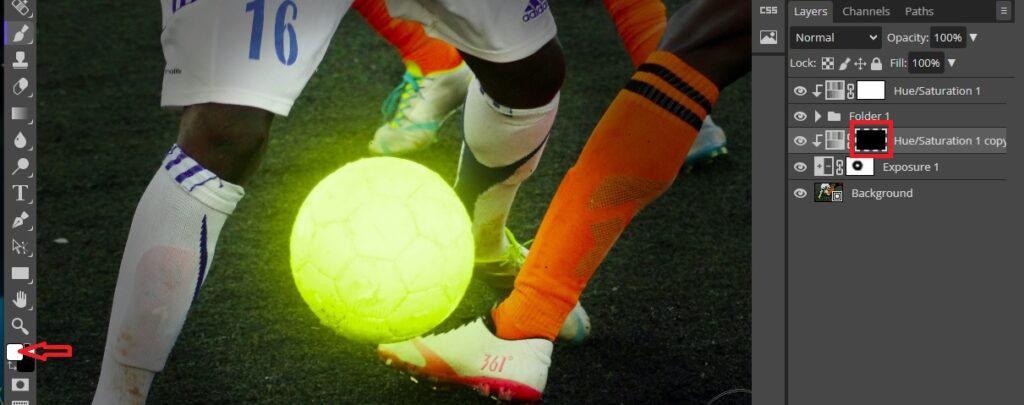
Select the Brush Tool, and ensure the foreground color is White, then paint around the legs of the players. That will make the color of the ball appear to be reflecting off the player’s feet and clothing.
Now you can go ahead and save your work. Export your image as JPG or PNG. To be able to work on your image later, Save As PSD.
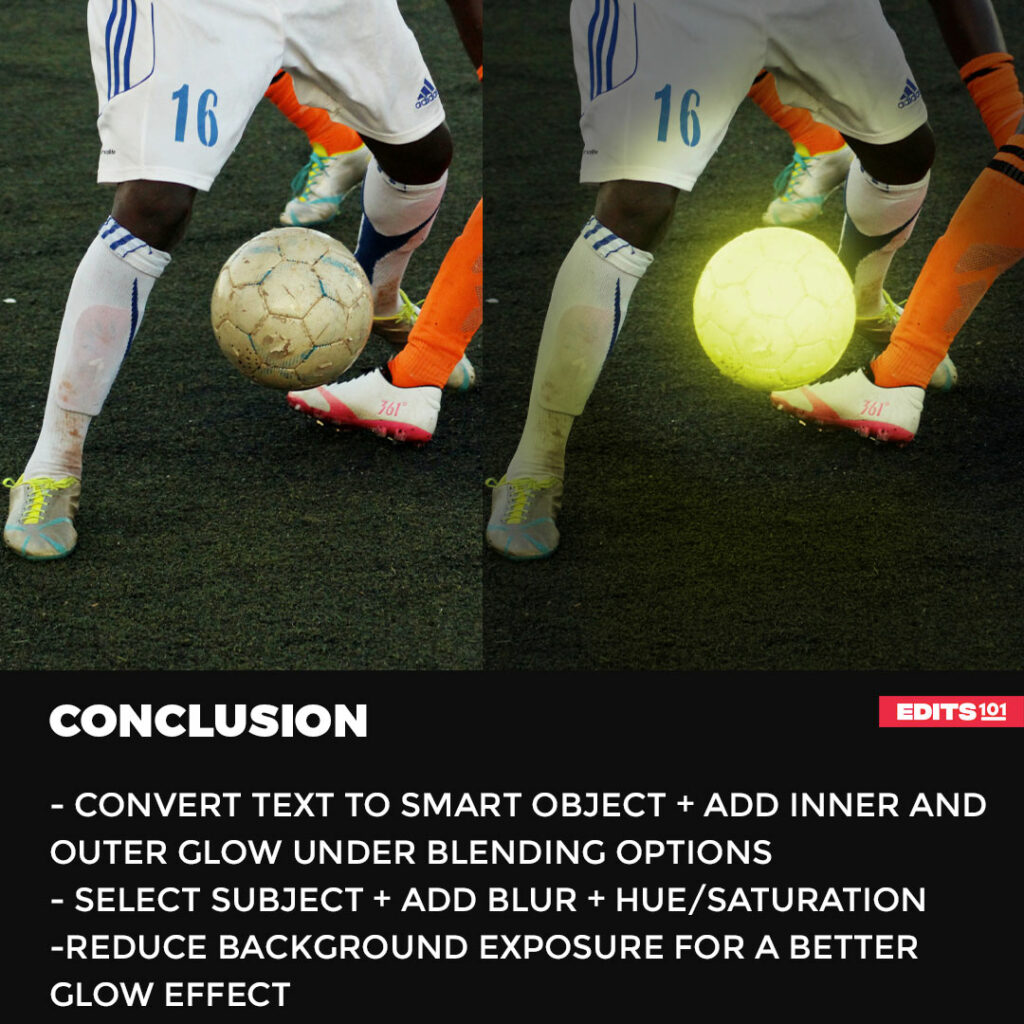
Conclusion
In this comprehensive tutorial, we started by looking at how to add a glow effect in Photopea to a layer using the Inner Glow and Outer Glow options located under Blending Options.
Later, we looked at a more hands-on option that involved selecting the subject with the Magnetic Lasso Select and then adding the glow effect using the Gaussian Blur, Hue/Saturation, and reducing Exposure.
Following these steps will help you add a glow effect in Photopea to any layer.
Thanks for reading & feel free to check out more of our articles!
Expert Rating
Summary
Creating a glow effect in Photopea may require some practice to master, the process becomes relatively easy with familiarity. Photopea is a functional and scalable image editing software that offers various tools and features for creating different effects, including the glow effect.


