
Do you want to create a lavish and expensive image? With Photopea, you could become a wizard who could transform anything into gold!
One of the most challenging effects to create when editing an image is the gold effect. It involves a thorough understanding of color theory, image processing methods, and lighting techniques.
In this tutorial, you will learn and discover how to harness texture, adjust colors and apply shadows to create a gold effect. Let’s get started!
Turn Anything To Gold
Now we will discuss the step by step process of turning anything to gold in photopea.
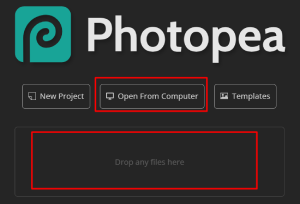
STEP 1: Open the File in Photopea
First, open your file in Photopea. You can either click the “Open File from Computer” option on the Photopea homepage if you know the file’s exact location.
Alternatively, you can drag and drop any files onto the homepage.
Read our detailed guide on how to use photopea for beginners.
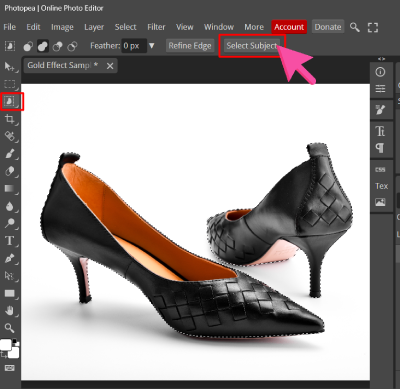
STEP 2: Remove the Background
The first step of the editing process is to remove the background from the subject. To do this, use any Selection Tools or Magic Wand Tools.
In this demonstration, we will use Object Selection Tool and click the Select Subject button to remove the image’s background.
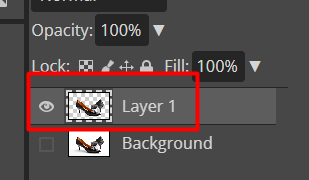
STEP 3: Duplicate image layer
Click Ctrl + J with the selection active to create a duplicate layer for the cut-out automatically. This way, the background will be removed, and only the shoe will be placed on a new layer.
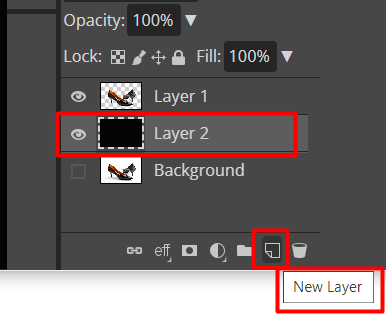
STEP 4: Add a New Layer
Click the New Layer icon at the bottom part of the Layers panel to add a new layer.
Alternatively, Click Shift + Ctrl + N on your keyboard, creating a new blank layer.
Move the new layer below Layer 1 and fill it with black color.
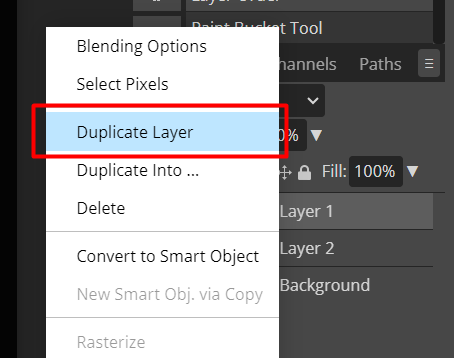
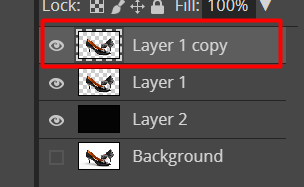
STEP 5: Duplicate the Image Layer
Right-click on the layer panel, then click on the Duplicate Layer button from the drop-down menu that will pop up.
STEP 6: convert the image to Black & White
After duplicating the Image Layer, convert the duplicate to black and white.
To do this, Click on Image > Adjustments > Black and White.
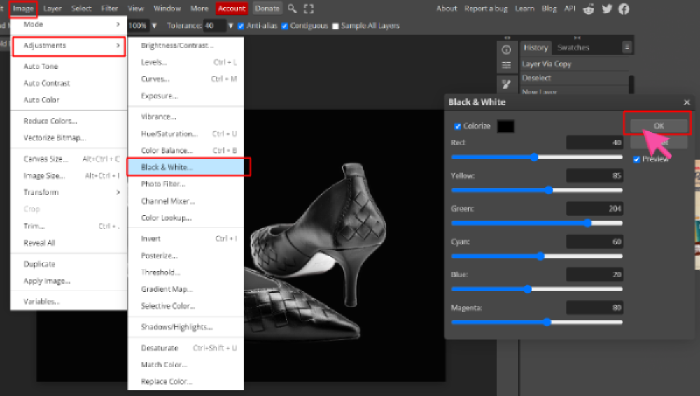
No adjustments are needed on the Black & White dialog box. Just click OK, and the image will be converted to black and white.
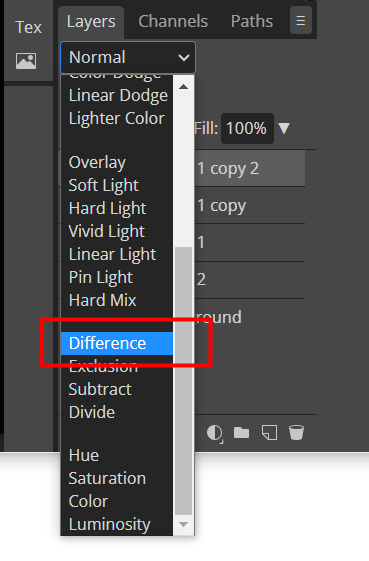
STEP 7: Change Blending Mode
Duplicate the Black & White copy and change the blending mode to Difference.
To change the blending mode, go to the Layers panel and navigate the drop-down menu for blending modes.
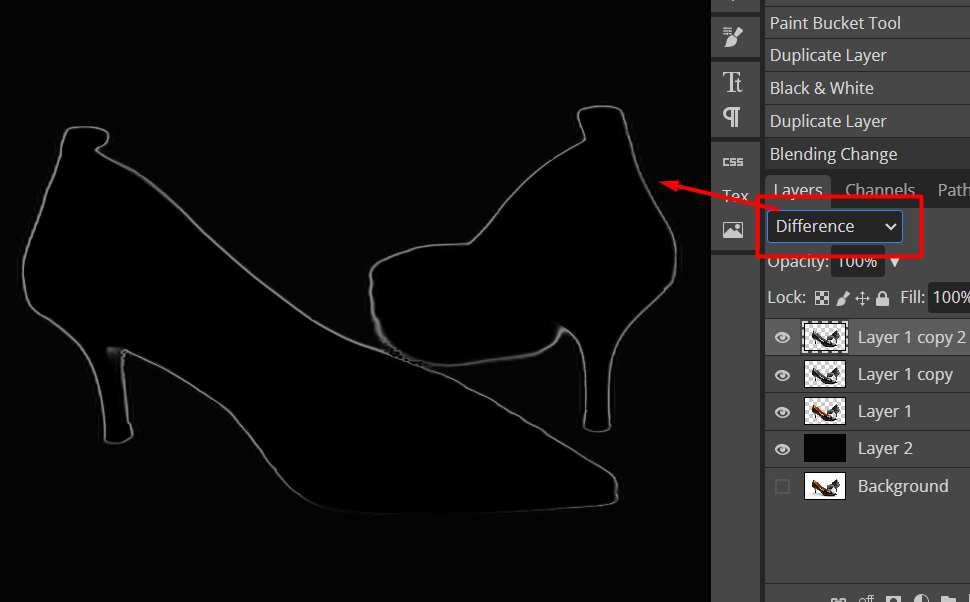
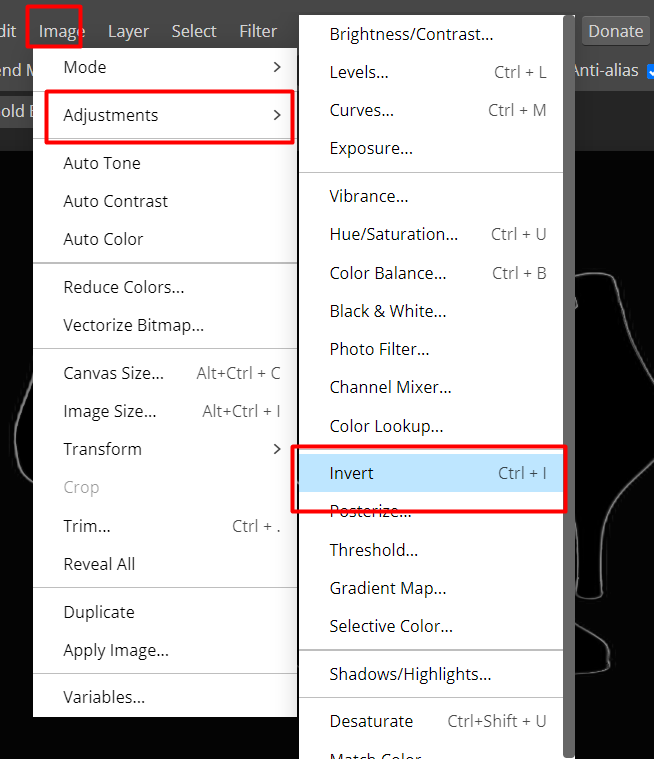
STEP 8: Invert the Effect
On the same layer, go to Image > Adjustments > Invert. Alternatively, press Ctrl + I to invert the color.
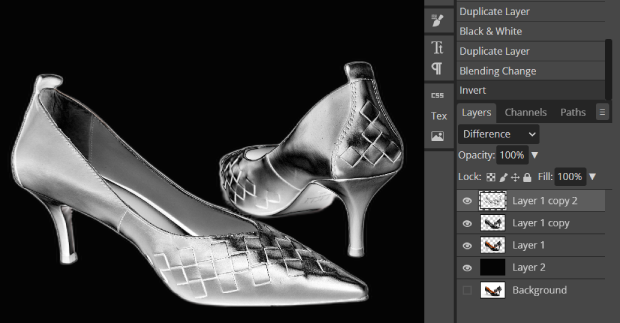
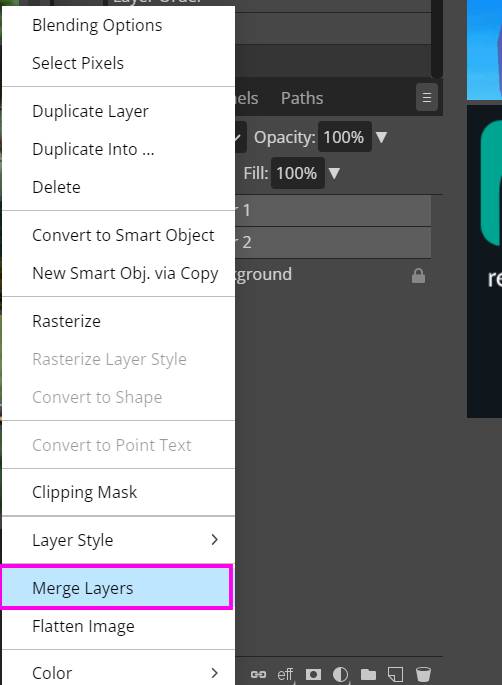
Merge down the two Black & White layers by selecting both layers first and then right-clicking > Merge down.
Repeat the process:
- Duplicating the Black & White layer
- Changing Blending Mode to Difference
- Then, Inverting the Color of the layer
- Merging the two Black and White layers
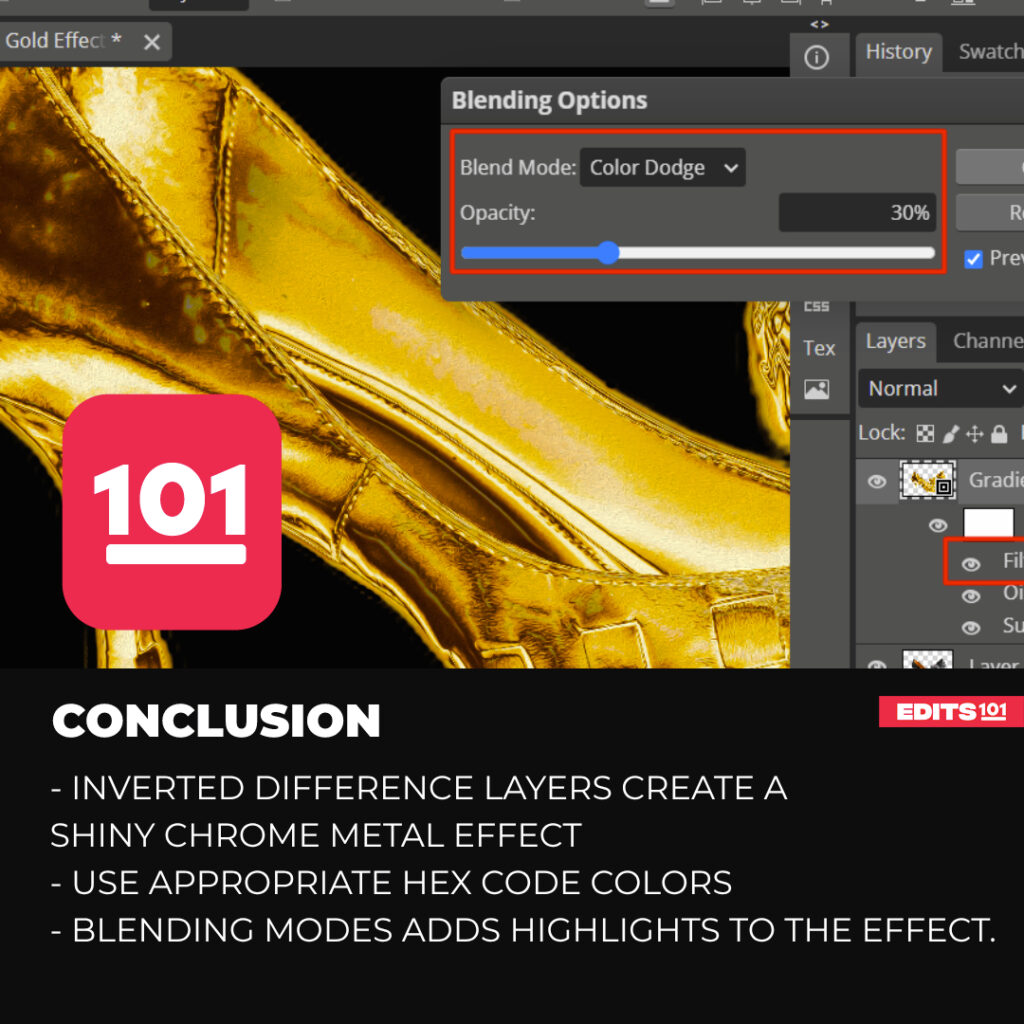
This process creates a shiny chrome metal effect on the photo.
Note: If you are happy with the effect, you can skip the repeating process.

STEP 9: Gradient Map Adjustment Layer
Click on the New Adjustment Layer button at the bottom of the Layers Panel. On the options, Select Gradient Map.
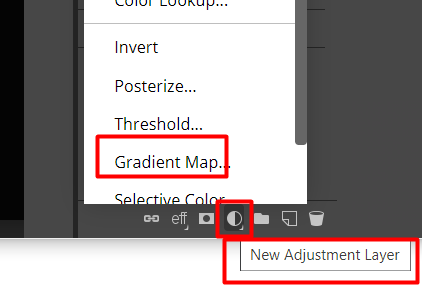
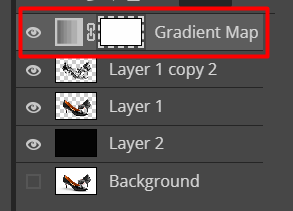
Once clicked, A new layer for Gradient Map will be created and placed at the top of the layer stack.
In the Gradient Map layer, set up a gradient with 3 colors. Use the following Hex Codes to achieve the effect. Start with the left side of the color slider.
- Dark Brown: #2d1203
- Mid-Orange: #e07e00
- Bright Yellow: #f7e4a3
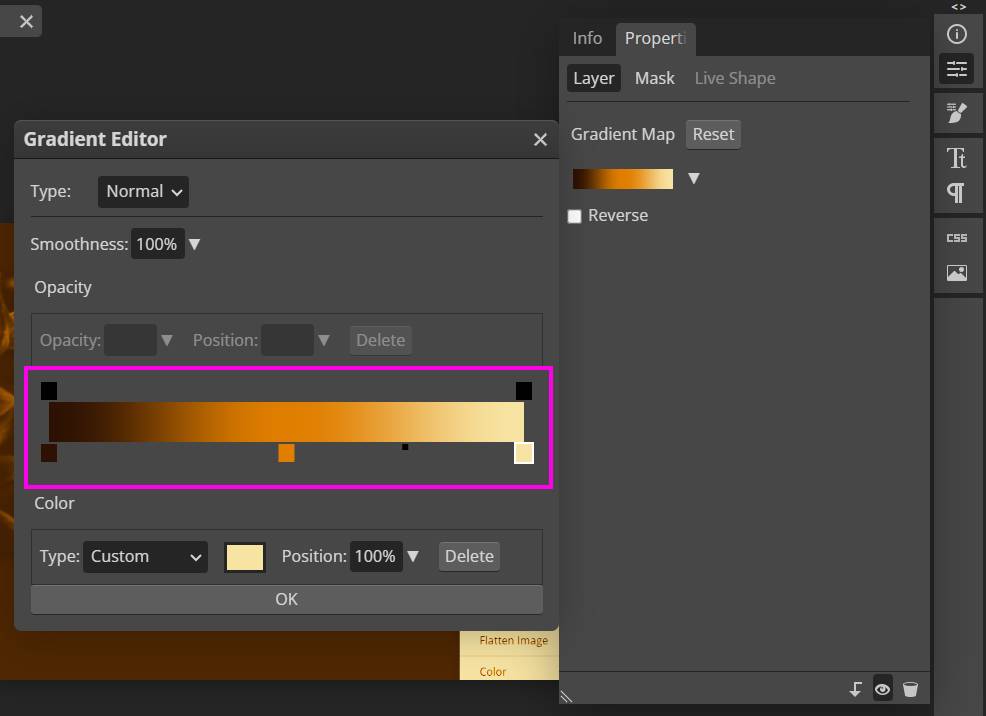
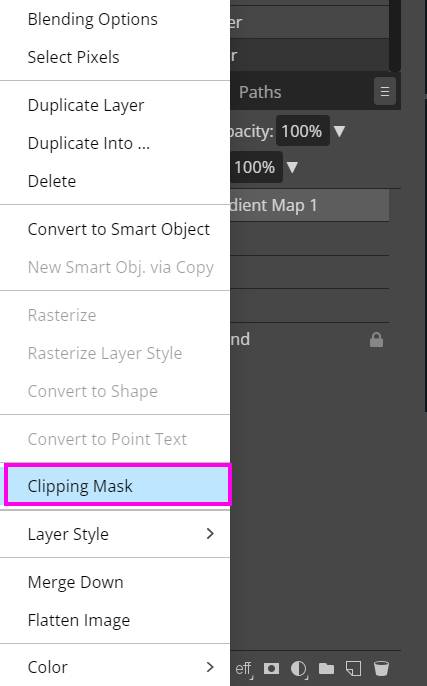
Click OK once done. Then, click the button in the properties panel to clip the gradient map. Or right-click on the gradient map layer and choose clipping mask from the list of options.
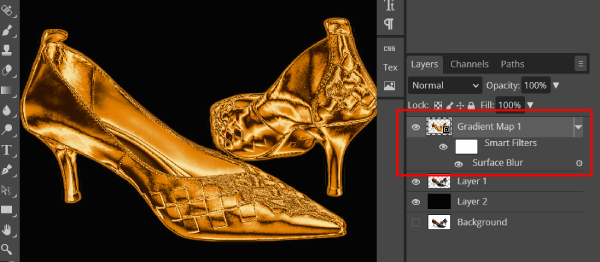
Click the Gradient Map layer and the Black and White layer. Right-click > Convert to Smart Object.

Apply Additional Filters
You must make the final and finishing touches to the photo in order to achieve a realistic gold effect.
- On the Gradient Map 1 Layer, Go to Filter > Blur > Surface Blur > Adjust the Radius to 10 px and Threshold to 20 px.
Read out comprehensive guide to blurs.
- On the same layer, Go to Filter > Stylize > Oil Paint > Adjust settings as needed.
We have set the Radius to 2 px and the Cleanliness to 1.5 px.
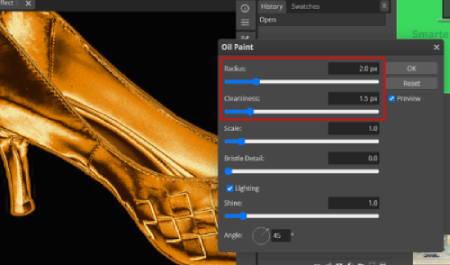
Click OK once you’re satisfied with the result
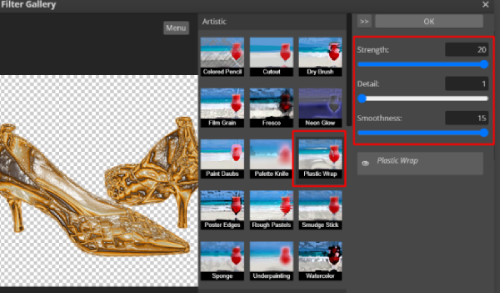
- Go to Filter > Filter Gallery > Artistic Effect > Plastic Wrap.
- Set the Strength and Smoothness to the maximum. Then, set the Detail to a minimum.
- Click OK once done.
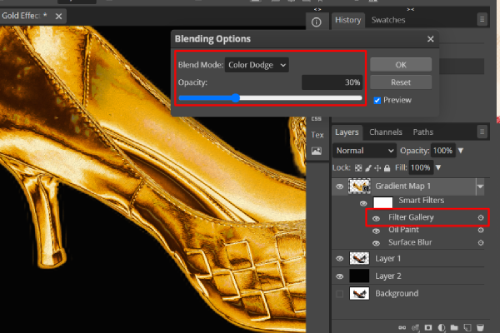
On the Filter Gallery layer, Click on the settings icon.
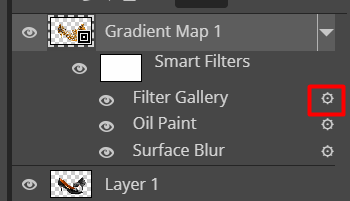
Switch the effect’s blending mode to color dodge so that those white areas function as bright highlights. Then, reduce the opacity to 30%.
- Apply Inner Glow. Right-click on the Gradient Map Layer, Click Blending Options > Inner Glow > Adjust these settings.
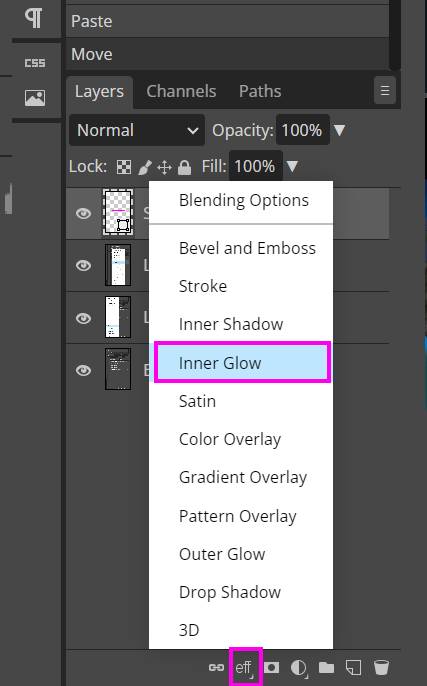
- Blend Mode: Color Dodge
- Size: 50 px
- Opacity: 20
Click OK once done.
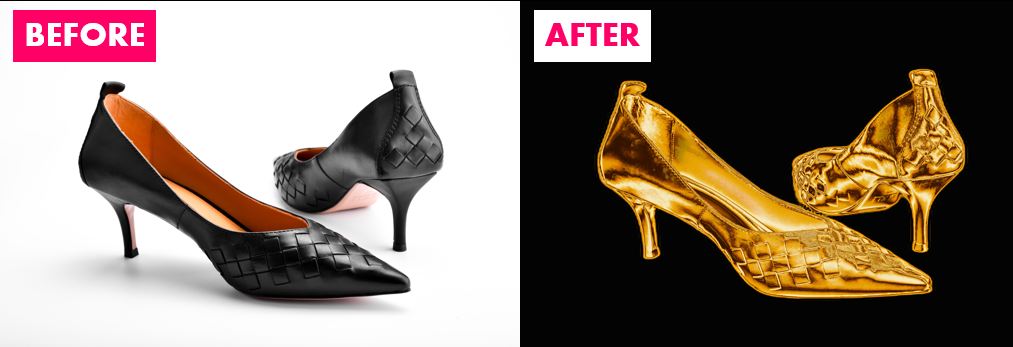
This is the Before and After result of this process.
Don’t forget to click Ctrl+S to save the file and export it to different file formats using File > Export As > Choose File Format.
Conclusion
In this tutorial, you learn how to harness texture, adjust colors, change blending modes and apply shadows and filters to create a gold effect to pictures. Here are the 10 easy steps on how to create this effect.
- Open the File in Photopea App
- Remove the Background of the Image
- Create a Layer for the Transparent Image
- Add a New Layer
- Duplicate the Image Layer
- Change the Image Layer to Black & White
- Change the Blending Mode
- Invert the Effect
- Add a Gradient Map Adjustment Layer
- Apply Additional Filters and Effects
It takes a lot of work, but editing an image to achieve the desired gold effect is fascinating and enjoyable.
Thanks for reading, and feel free to check out more of our articles!
Expert Rating
Summary
In Photopea, turning anything into gold requires practice and experimentation. While it may be slightly challenging, it offers functional and scalable possibilities to add a luxurious touch to designs, making it valuable for graphic design projects.


