
Various blur filters and tools that can be used to achieve different effects. Some of these filters include the Gaussian Blur, Motion Blur, Radial Blur, Lens Blur, and others.
Blur filters in Affinity Photo
Blur filters are destructive, which means that they permanently change the pixels in an image. When you apply a blur filter, Affinity Photo calculates a new set of pixel values for every pixel in the image.
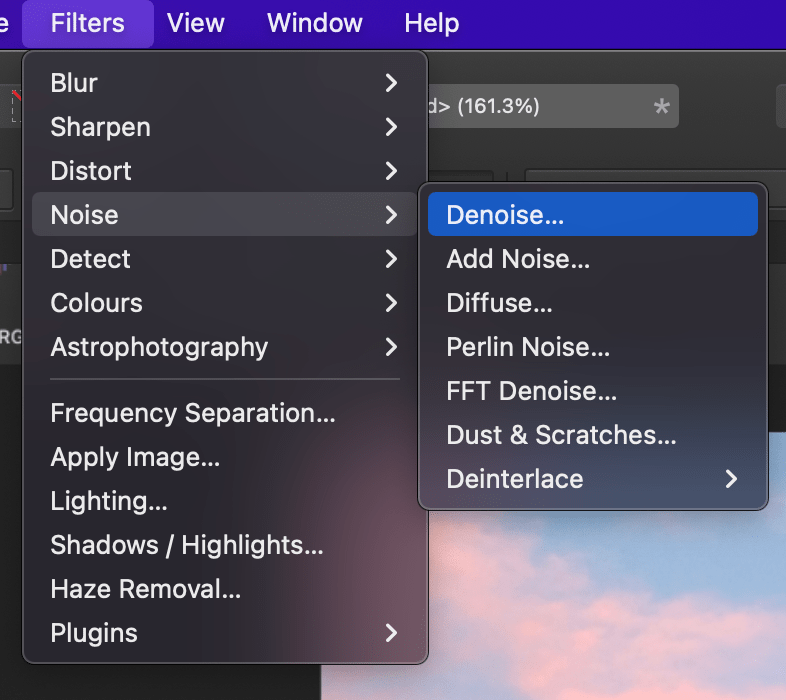
This can often result in a loss of detail and clarity in the image. For this reason, it’s important to use these filters with caution and to always make sure you create a duplicate layer. There are fifteen blur filters available in Affinity Photo which can be found under Filters > Blur.
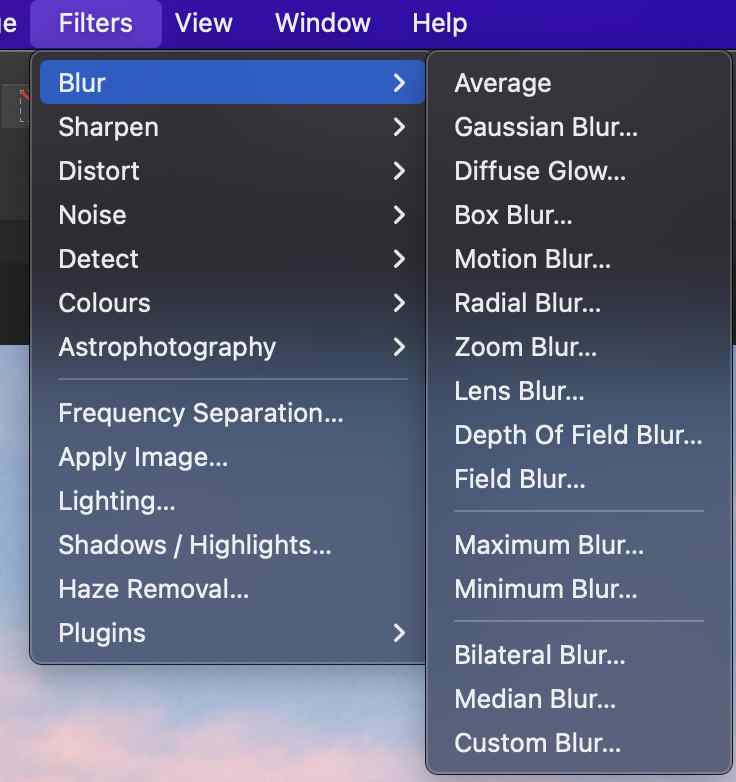
Blur Filters List
– Average: This filter calculates the average of the colour of each pixel and their surrounding pixels and applies it to the entire image. This ensures that the colours in the image are balanced.
– Gaussian Blur: The Gaussian Blur filter is one of the most common ways to blur an image and works well for areas that need a soft focus effect, such as backgrounds or foregrounds with bokeh effects. This filter is used to blur an image in a smooth way.
– Diffuse Glow: The Diffuse Glow filter is used to create a blur that produces a white glow effect on the highlights within an image. This filter can be used to gradually extend and soften the brightness of a particular source of light.
– Box Blur: The Box Blur filter is used to blur an image depending on the average colour of neighbouring pixels. If the radius is set very high, a box blur effect will be cerated.
– Motion Blur: This filter is used to create the effect of motion in an image, such as a moving car or a person dancing. It blurs objects in a way that it is as if they were in motion while the photo was taken and intensifies moving subjects.
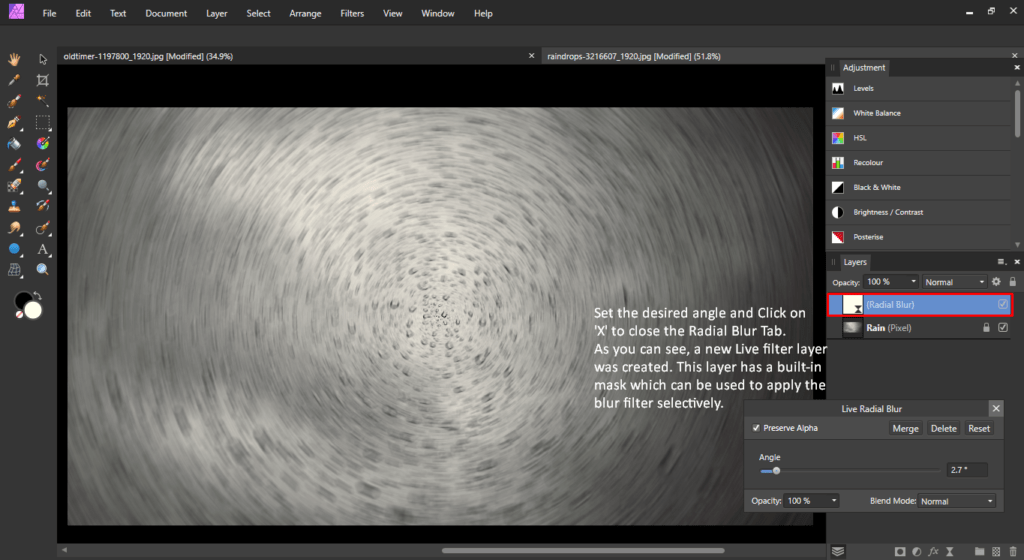
– Radial Blur: This filter creates a blur that radiates out from a particular point in the image to create circular concentric lines. This filter evokes a circular motion and speed.
– Zoom Blur: This filter creates a blur that zooms into a particular point in the image.
– Lens Blur: This filter is used to create depth of field effects and can be used to blur the background or foreground of an image.
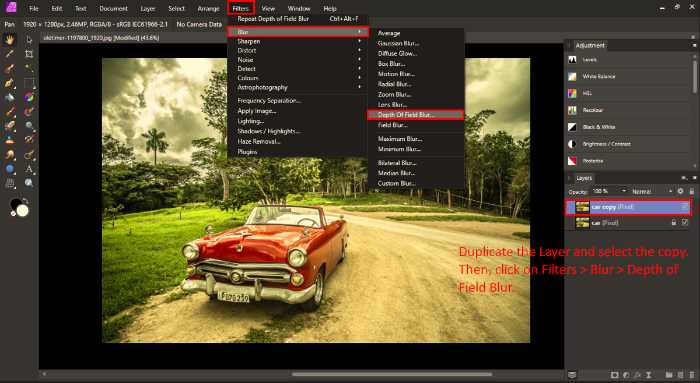
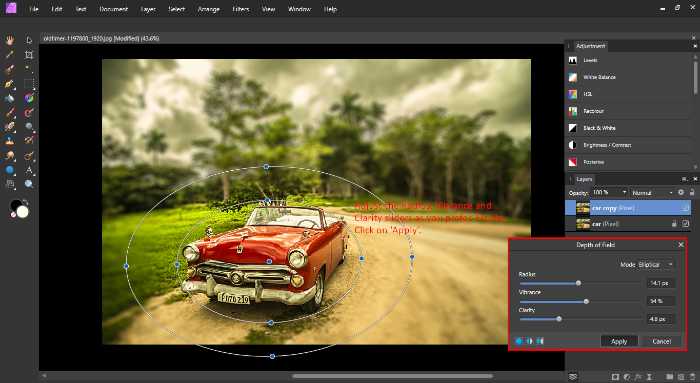
– Depth of Field Blur: This filter is to create an effect of depth of field or miniaturisation by applying an elliptical blur or a tilt-shift blur to the image. This effect is commonly used for creating miniature obbjects or building models.
– Field Blur: This filter is used to blur all or part of an image based a selection or selections that you make using focal points.
– Maximum Blur: The Maximum Blur filter is used to intensify lighter parts of an image, such as highlights, white parts and light rays. It compares adjoining pixels with each other and then blurs darker pixels into lighter ones.
– Minimum Blur: The Minimum Blur filter does exactly the opposite of the Maximum Blur. It is used to expand darker areas of an image. This filter compares pixels to a reference point that you choose and then blurs lighter pixels into darker ones.
– Bilateral Blur: The filter blurs a picture while preserving high-contrast areas. This is best utilised for noise reduction in pictures and for attaining elaborate creative effects.
– Median Blur: The Median Blur filter is used to expand colour regions in your photo and it is perfect for eliminating noise from an image.
– Custom Blur: The Custom Blur filter allows you to create a blur effect of your own choosing. You can use Affinity Photo’s tools to select the pixels you want to keep in focus and then apply a blur that works for each area individually, rather than applying an average blur across all parts of the image.
Each of these filters has its own unique set of options and sliders that can be tweaked to get the best results. Experiment with each of them and see which one works best for your image and style.
Adding a Blur Filter (Destructive)
What we’ll be going over:
- Duplicate Layer (As applying a filter directly to a layer is destructive)
- Add Filter to the duplicated layer
- Add mask to the duplicated layer and adjust blur where you want it to be
Adding a blur filter directly to the layer is destructive. This mean that after adding the filter it cannot be undone. So what do we do to protect the original layer? (incase we do not like the outcome of the blur)
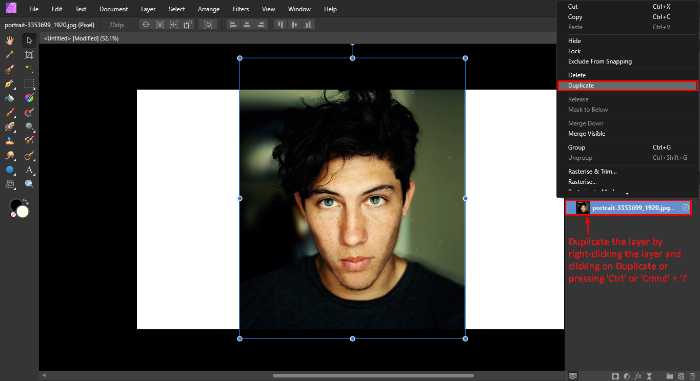
First Duplicate the target layer. Go to “Layer” in the top menu & Select “Duplicate” or else use shortcut (CMD+J) on Mac or (CTRL+J) on windows. We would name this layer “Blur Filter Layer”
Add your desired filter on the new duplicate filter (Filter(in the top menu) > Blur), and apply the new filter.
After doing so, add a mask on the Duplicate Layer (We called it “Blur Filter Layer”). By adding a mask you can have targeted areas with the blurred filter applied. (Mask out the blur where needed) Select the mask and paint on the mask layer (using brush tool) to hide/reveal blurred areas.
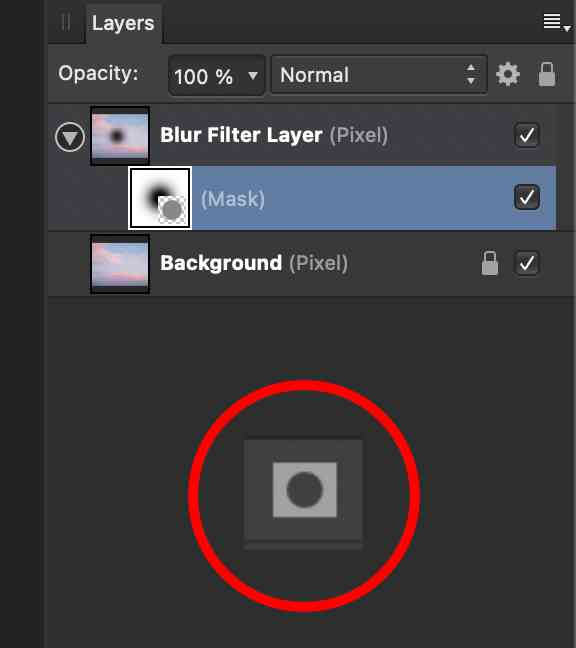
Important: You have to make sure that you’ve got the original layer beneath the duplicated layer. Why?
This is because when you mask the filter layer (by painting black on the mask), it would show the original image.
These two images will show you how to apply a Blur Filter, specifically the Depth of Field Blur to a particular image.
Blur Live Filter in Affinity Photo
Live filter layers are Affinity Photo’s non-destructive editing features that allow you to continuously change effects and settings on an image without permanently changing the pixels.
There are twelve blur live filters available in Affinity Photo, such as the Gaussian Blur, Motion Blur, Radial Blur, Zoom Blur, Lens Blur, and others. (The same as the normal filter panel)
To use a blur live filter, first select the layer you want to apply the blur to. Then, go to the Layer menu and click on New Live Filter Layer > Blur. This will open up the live filter window where you can choose from one of the twelve blur live filters.
Live filters have a built-in mask that allows you to selectively blur certain areas of the image. To adjust the settings for a live filter, simply double-click on the layer and move the sliders as needed.

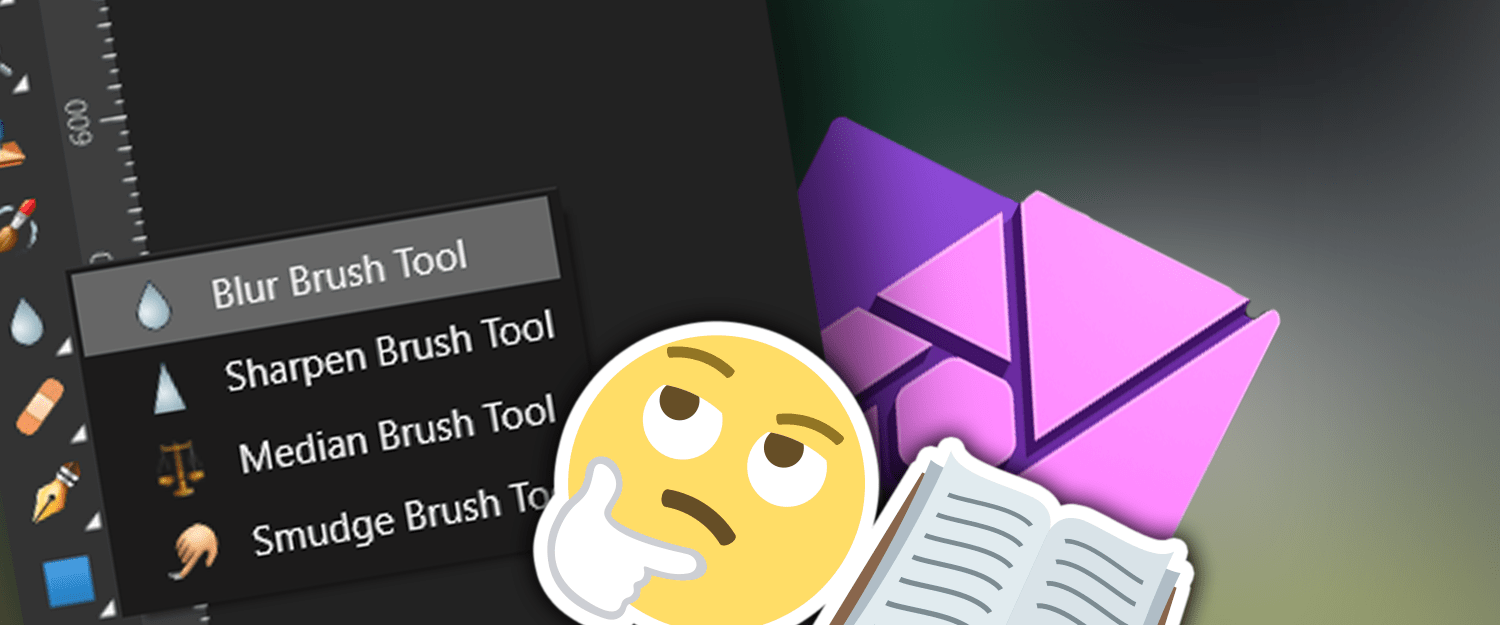
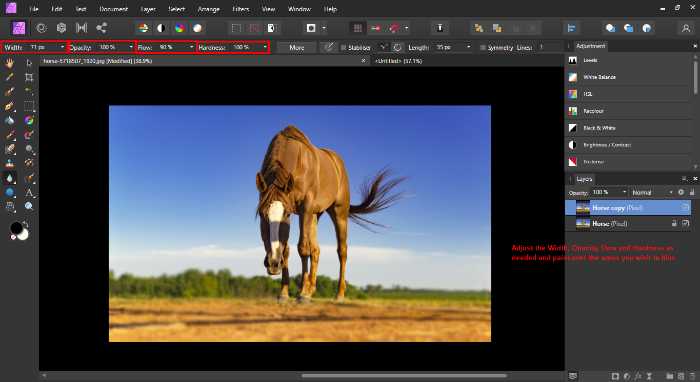
Blur Brush Tool in Affinity Photo
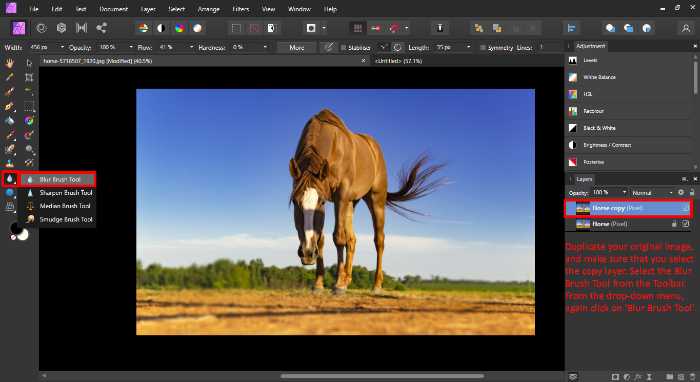
The Blur Brush Tool is a brush-based tool that lets you blur specific areas of an image. This can be useful for blurring out details or for adding a soft focus effect to certain parts of the image.
The blur amount and radius can be controlled, making it easy to get the desired results. To use this tool, select the Blur Brush Tool from the toolbar. To blur an area, simply paint over it with this tool while pressing down on the mouse button.
The more you paint over a specific area, the more blurred it will become. Affinity Photo also has a built-in masking feature that can be used to selectively apply blurring effects to specific areas of the image.
This can be useful for blurring out details or for adding a soft focus effect to certain parts of the image. The blur amount and radius can be controlled, making it easy to get the desired results. It is important to note that the blur will only be applied to the selected layer.
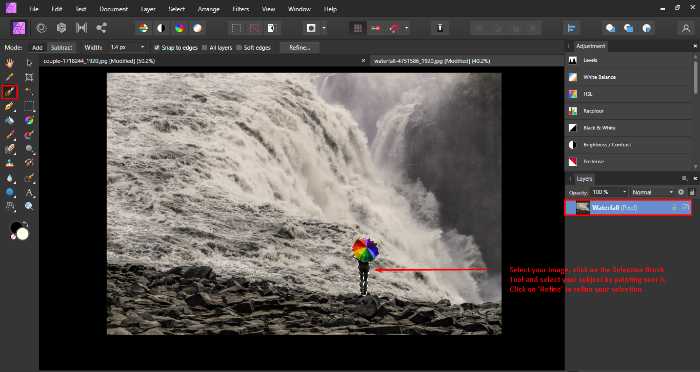
Blurring a background
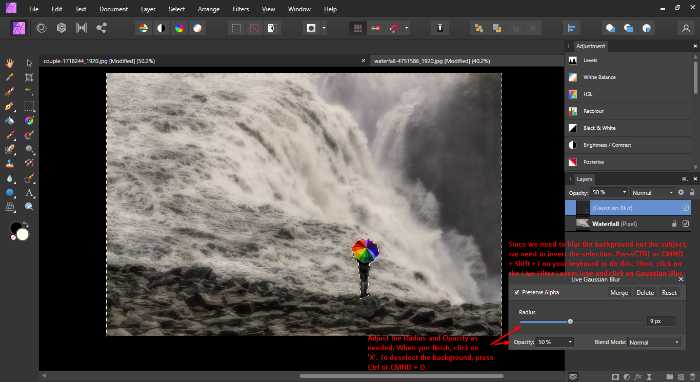
If you wish to blur the background of an image, Affinity Photo offers a few different ways to do this. The easiest way is to use the Gaussian Blur live filter.
Select the layer you want to blur and then go to the Layer menu and click on New Live Filter Layer > Gaussian Blur. This will open up the live filter window where you can adjust the blur settings. Simply adjust the slider until you get your desired result and Affinity Photo will apply it to that layer instantly.
Affinity Photo’s blur live filters, have built-in masking features which can be used to selectively apply a blur effect on specific areas within your picture such as a particular background or foreground while allowing other parts of the image to remain sharp.
The built-in mask allows you to choose where the blur should be applied and where not. (Remember: Black hides & White Reveals)
There are also other ways to blur a background in Affinity Photo such as using brush-based tools, like the Blur Brush Tool or by creating a blurred copy of the image where its pixels are altered.
Experiment with each of these methods according to the image at hand and see which one gives you the best results.
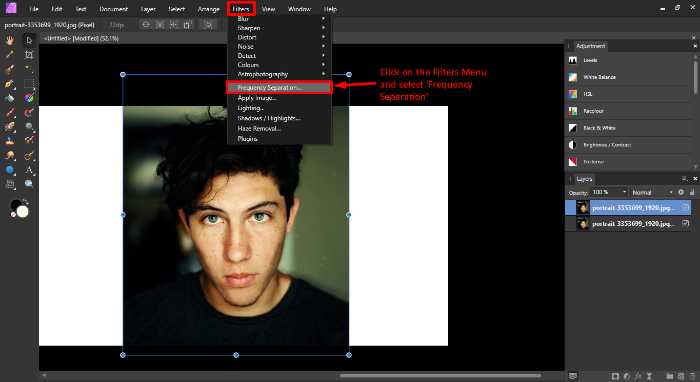
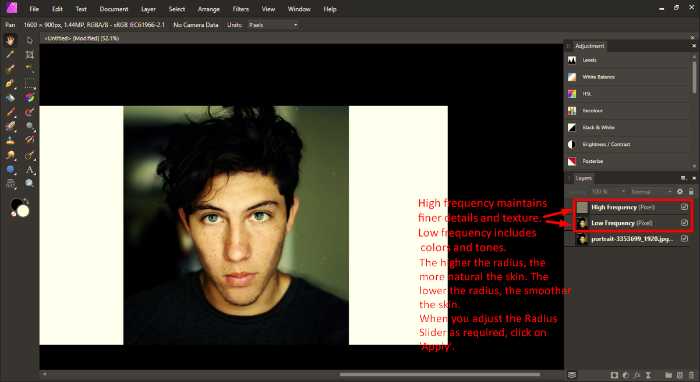
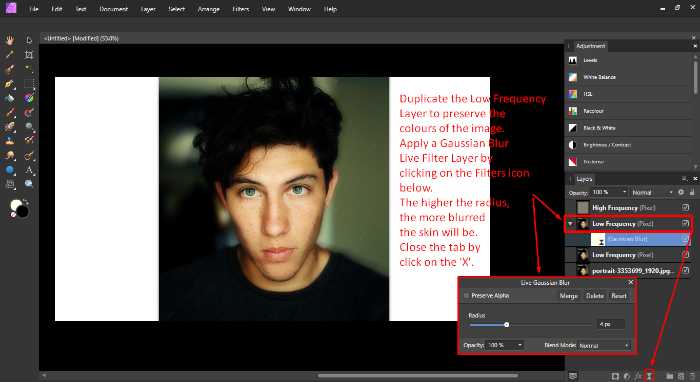
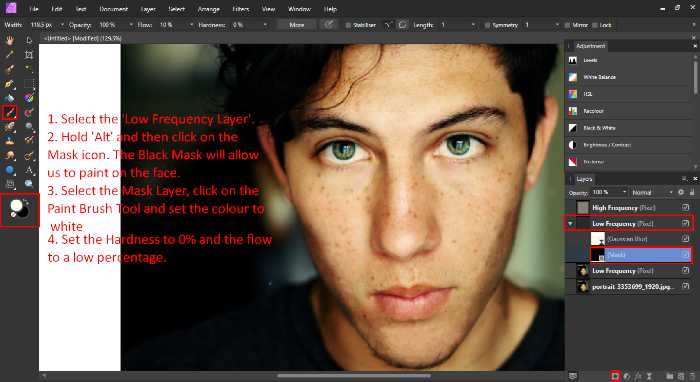
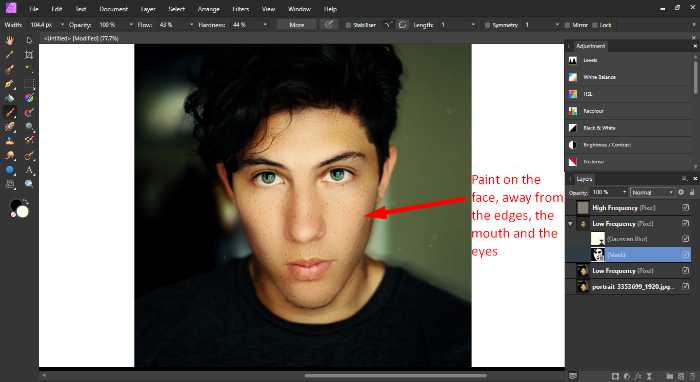
How to smooth out skin in Affinity Photo (Using Blur tools)
Blur filters are also useful for smoothening out skin. Affinity Photo’s Gaussian Blur filter can be used to soften wrinkles and other fine details on the face while also smoothening it in general. Affinity Photo’s Median Blur filter is also a good option for smoothening skin as it gives more of a natural look to the image.
This blur filter can be used with other filters and tools such as Frequency Separation and Healing Brushes. Experiment with different filters and tools to see which one gives you the best results.
The following images will help you understand how to smooth out skin in Affinity Photo. In this example, we will smoothen the face of this person step-by-step.
Expert Rating
Summary
Blurs are an effective technique to learn & apply to your images. They are not easy to master or understand, however, as you’d go along in your work flow you’ll understand where & when to add each blur.
Conclusion
Whether you want to blur your image entirely, or just a particular part of it, Affinity Photo has the right tools for you. The possibilities are endless: you can create a soft focus effect by blurring the edges of objects within a photo; you can soften skin tones at portrait distances; you can apply creative filters that creates beautiful bokeh effects with light sources; and you can blur the background to draw focus on the subject.
Thanks for reading & feel free to check out more of our articles!


