
In this article, we’ll discuss where to find free mockups and how to edit them in Photopea. After reading this guide, you’ll be able to find and edit mockups confidently in Photopea and professionally showcase your designs.
Mockups
With mockups, you can demonstrate how your designs will look in real-world contexts, such as on apparel, packaging, or technology devices.
A PSD (Photoshop Document) mockup file is a design file that enables you to present your designs in a realistic manner by overlaying your ideas on actual objects or environments. It can include things like text, photos, and graphics and is frequently used to demonstrate designs to clients or other team members. Only Adobe Photoshop can open and edit the files because they are in that program’s exclusive format.
Fortunately, Photoshop Mockups may be opened for free on websites like GIMP and Photopea.
Where Can You Use The Mockups?
Here are the 10 most common things you can depict with mockup templates:
- Apparel and accessories: t-shirts, hoodies, hats, and bags
- Technology and devices: smartphones, laptops, tablets, and smartwatches
- Packaging: boxes, bags, and bottles
- Stationery items: business cards, letterheads, and envelopes
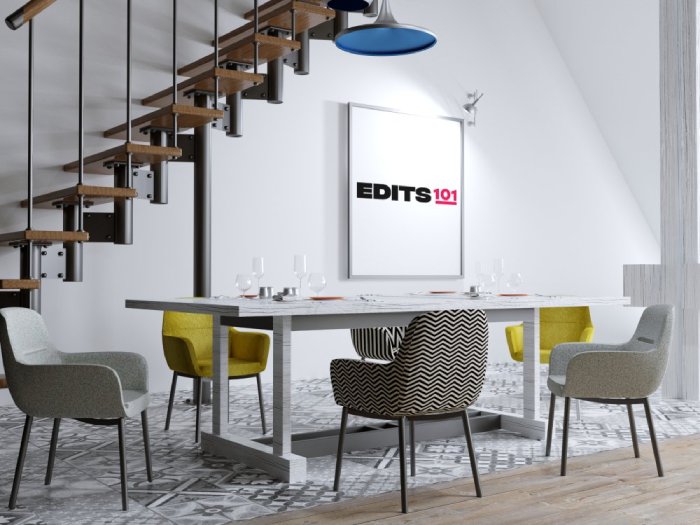
- Interior design projects: furniture, decor, and room layouts
- Advertising and marketing materials: billboards, flyers, and brochures
- Website and app design: website layouts and app interfaces
- Social media graphics: Instagram posts and Pinterest pins
- Product labels: skincare and cosmetic labels
- Food and beverage packaging: cans, bottles, and pouches
By placing your designs in a mockup, you can show their aesthetic appeal and how they will look in the real world.
How to Create Mockups in Photopea?
To create Mockups, follow these 4 easy steps:
Step 1: Open the Image in Photopea
Prepare the photo that you will use as a basis for the Mockup.
To open the image, Click Open File from Computer and find the location of the image. Alternatively, Drag the file in the Photopea app.
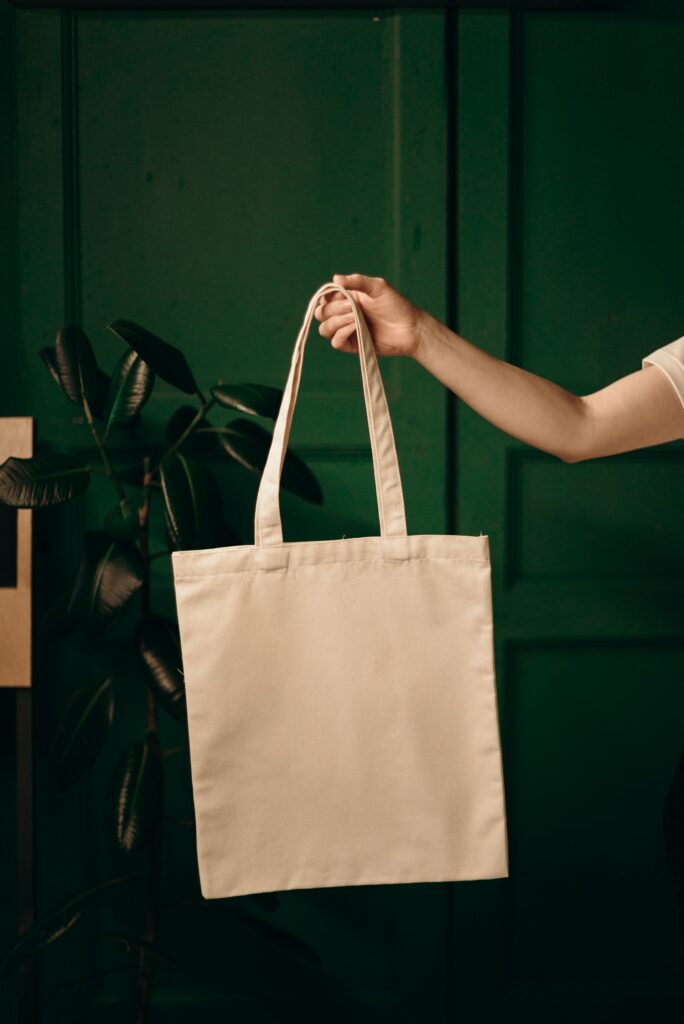
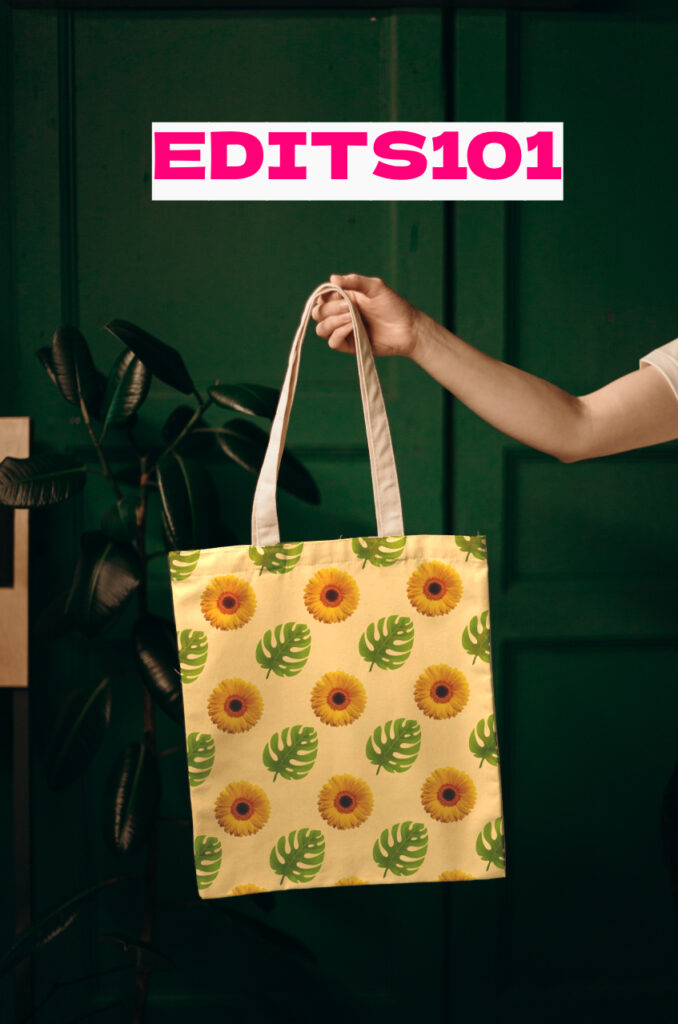
In this tutorial, I will use this downloaded image from Pexels.com
I will be putting a design in this bag for demonstration.
Step 2: Perform the Selection
You can use 6 options to select the area where you want to put the design. You can use Lasso Select, Polygonal Lasso Select, Magnetic Lasso Select, Magic Wand, Quick Selection, and Object Selection.
To know more about Photopea’s Selection Tools, click here.
These tools can be found in the left side Toolbar.

Now, select the Area where you want to put the design. I usually use Quick Selection Tool in selecting an area in an image. I prefer this tool since it quickly selects even the smallest part of the image.
To use this, Go to Magic Wand in the left side Toolbar. Find Quick Selection in the options, then click Select Subject at the Top Menu.
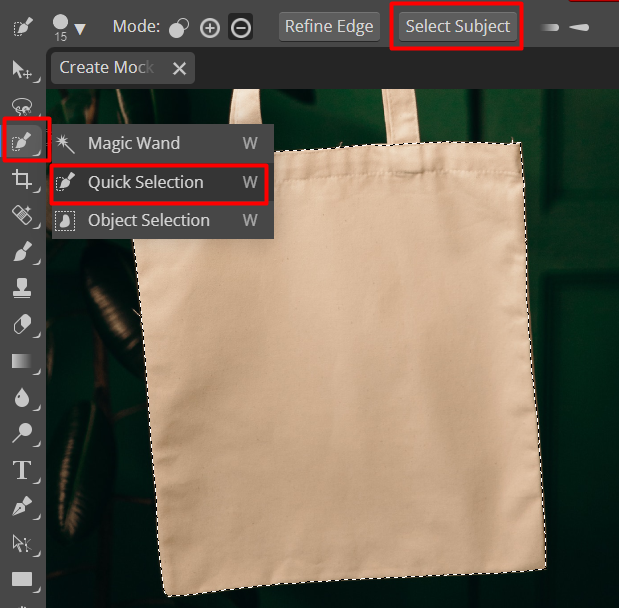
Make sure to select ONLY the area where you want to put your design.
Step 3: Create Clipping Mask
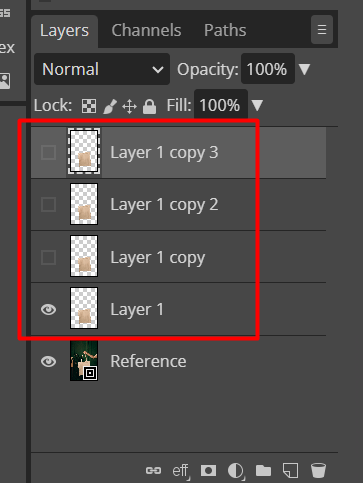
Click Ctrl+J four times on your keyboard to create 4 separate layers and copies of the selected area. Then, hide the three (3) layer copies.
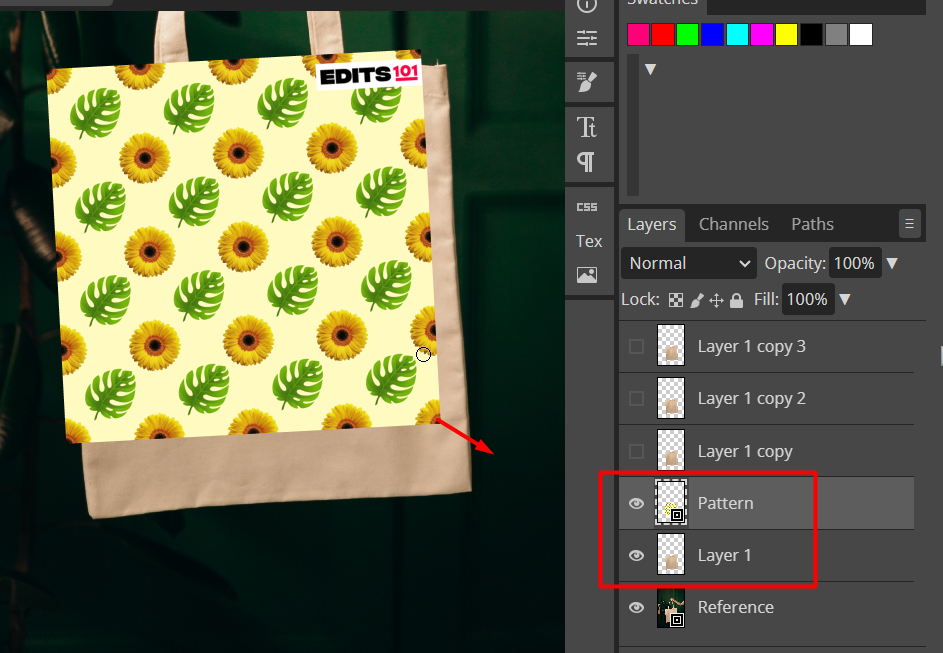
Once hidden, Go to Layer 1, then drag the design to the working area.
Resize the design according to the size of the area where you want to put the design. Also, adjust its alignment based on the orientation of the subject.
Next, Right-click on the Design Layer and then, click Clipping Mask on the drop-down menu.
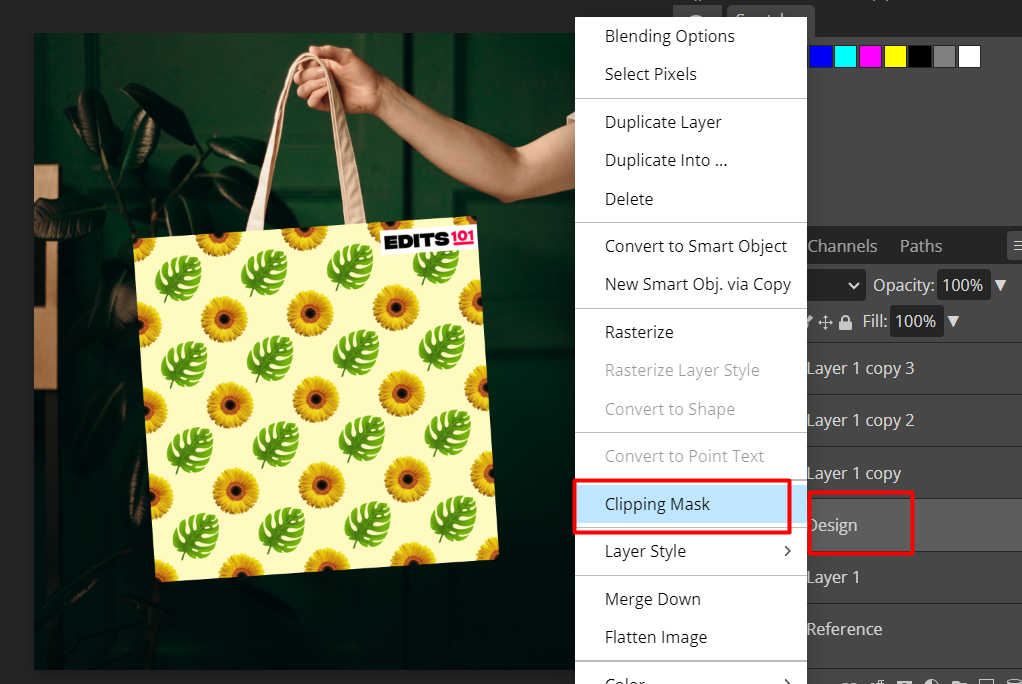
You will now see that the design is merged with the subject. Now, let’s make some adjustments and effects to make the mock-up realistic.
Step 4: Adjust the Mockup
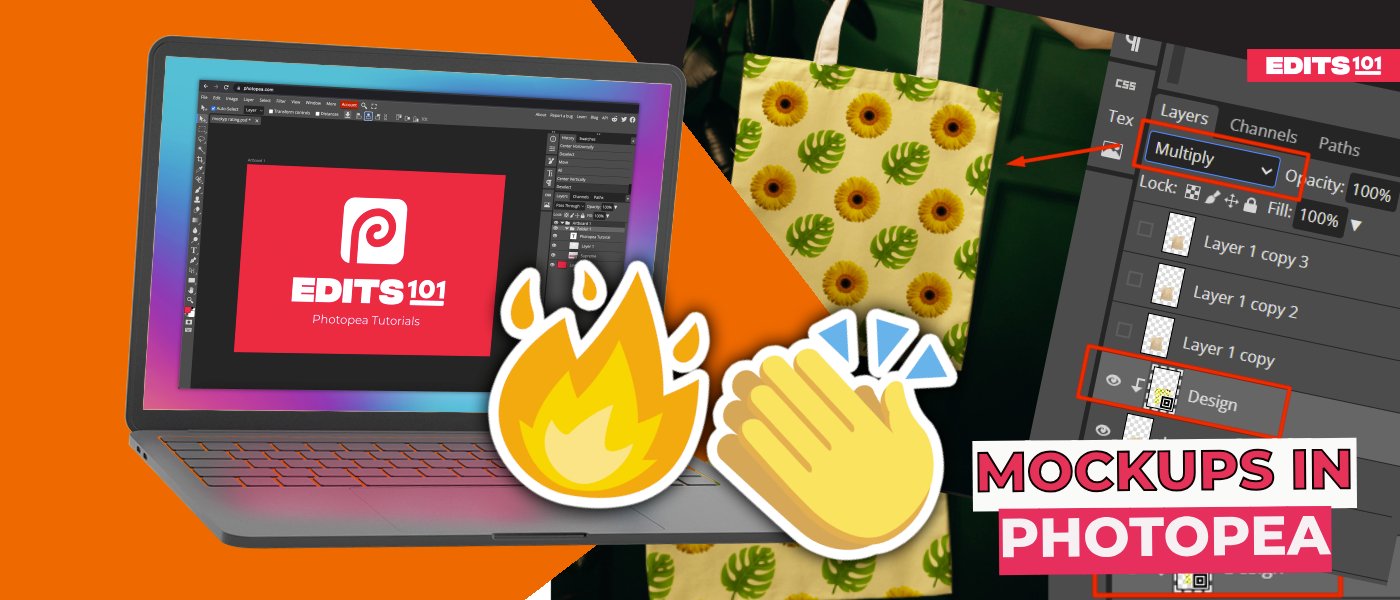
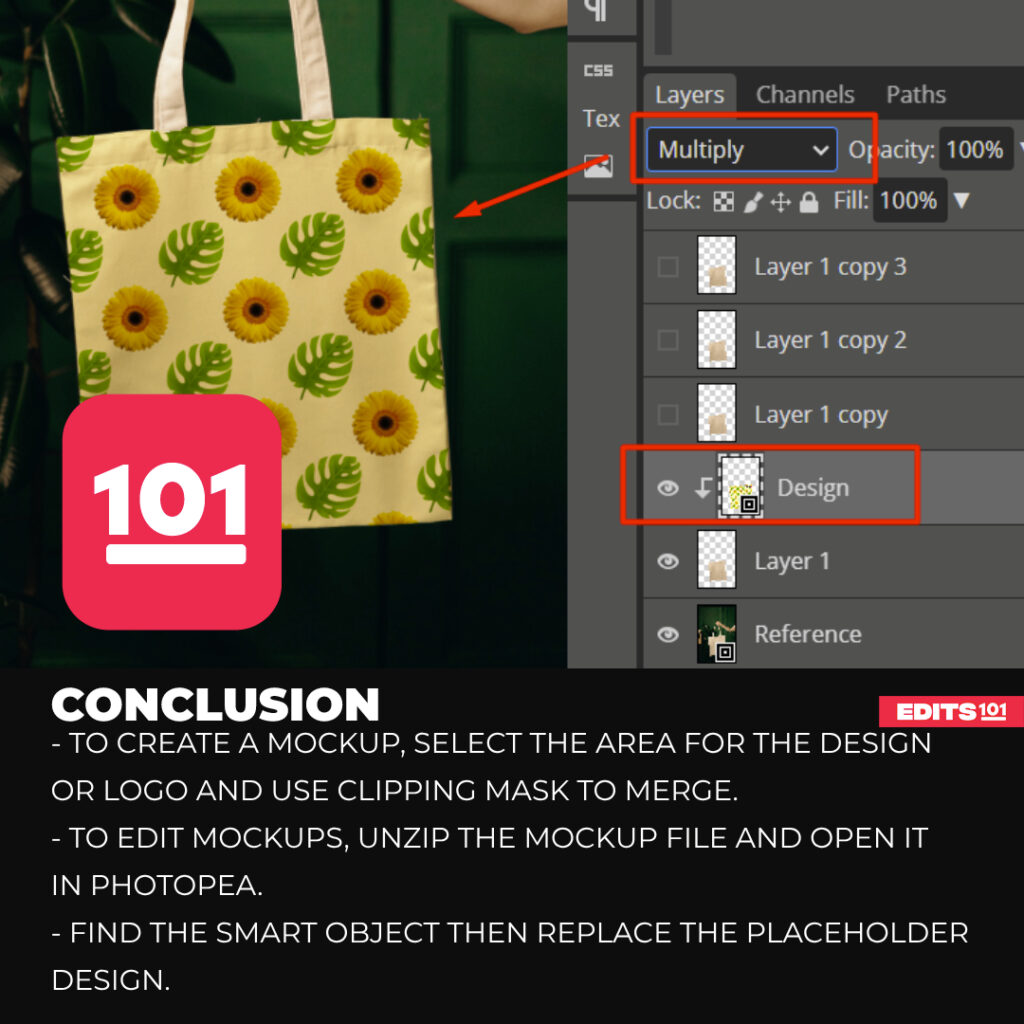
First, click on the Clipped Design Layer, and find the blending options located at the topmost part of the Layers panel. Then, click Multiply on the drop-down menu.
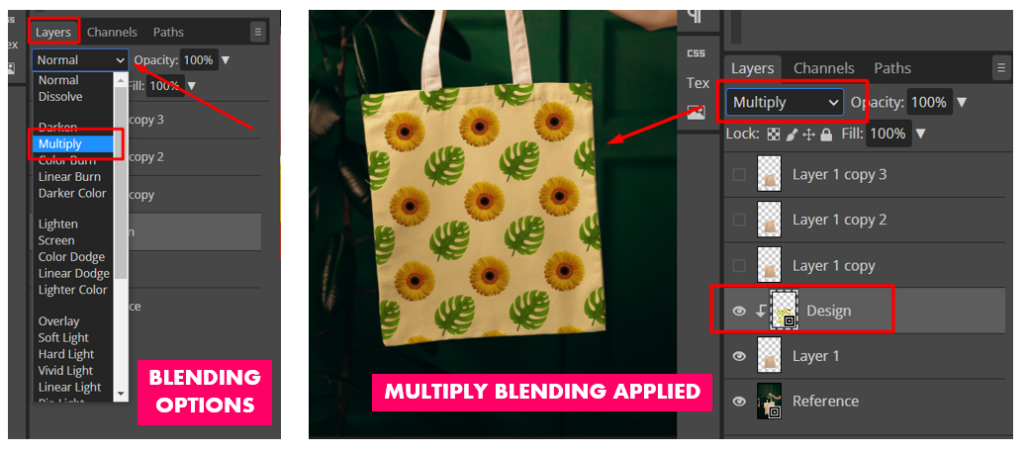
Apply necessary adjustments to the layers until it looks realistic.
In this tutorial, I use these blending modes for each layer.
- For the Layer 1 copy, I changed the blending mode to Linear Burn. Then, I clicked Ctrl + L and adjust the Black color slider to 170.
- Layer 1 copy 2 has a blending mode of Linear Dodge.
- Lastly, I use Screen Blending Mode for Layer 1 copy 3.
This is the final mock-up created from these processes and adjustments.
What Are Mockup Templates?
Mockup templates are a convenient way to visualize your designs in various real-life contexts. These are pre-made templates that can be easily edited and customized.
Whether you are designing a website, a product package, or a marketing campaign, mockup templates can help you engagingly present your ideas.
Best Websites to Download Free Mockups
The first step is to download the mockup you want to use. Several websites offer mockups that you can use for personal and commercial purposes.
Free Mockup Websites
The following are the best free websites to download mockups.
Graphic Burger
It is a highly recommended website for free mockup templates. The site offers a wide selection of realistic-looking templates that are easy to download and edit. The best part is that you don’t need to create an account or register to access them.
Freepik
It is a popular website for free photos, designs, and templates and also offers a diverse range of mockup templates. While they are free to use, attribution may be required, so checking the website’s requirements is important.
Free-Mockups
It is a website that is dedicated to offering free mockup templates. With a huge library to choose from, this site provides a wide range of options for designers. Similar to Graphic Burger, you do not need to create an account or register to download mockup templates from this site.
PSD Mockups
This website does not host the mockup templates but provides links to other websites where the mockup template can be downloaded. PSD Mockups serves as a directory of sorts, directing users to other sources for mockups.
Anthony Boyd
Anthony Boyd Graphics is a great website to get mockup templates for free. The templates are really high-quality and easy to edit using Photopea. Mockups are free for personal and commercial use. No sign-up is needed to download the templates.
You don’t have to give credit to the website, but it’s nice if you do.
While the website doesn’t have as many options as some other sites, their templates are really professional.
Paid Mockup Websites
Following are a few paid sites to download mockups.
Creative Market
Creative makemarketArguably one of the largest graphic platforms in the world. It has a lot of mockups which are great and professional. There is a huge library of mockups, and you can buy them at a very reasonable price. You can find everything graphics related on this site.
Eymockup
It is a slightly lesser-known website with a great library of mockups. They are available at very reasonable prices. You can check it out if you are looking for professional mockups, but dont want to spend a lot of money.
Ls.Graphics
Ls Graphics is also not a very popular site but has a great library of professional mockups, keep in mind that the mockups on this website are of top quality but are also expensive. If you are looking for something professional and have money to spend, this is the place for you.
What To Do After Downloading The Mockup?
After downloading the mockup, you have to follow the steps mentioned below.
- Unzip the mockup file: When you download the mockup, it will probably be in a zip file.
- Find the PSD file: Once you unzip, now find a file with the extension .psd.
How to Edit Mockups In Photopea?
Now that you have downloaded and unzipped the mockup, it’s time to edit and use it. Let’s take a look at 2 examples:
- T-shirt mockups
- Book Cover Mockups
These are not a lot of differences between them, but there are things you need to keep in mind while editing.
How to Edit T-shirt Mockups in Photopea?
Follow the steps below to edit the t-shirt mockup.
Step 1: Open The File in Photopea
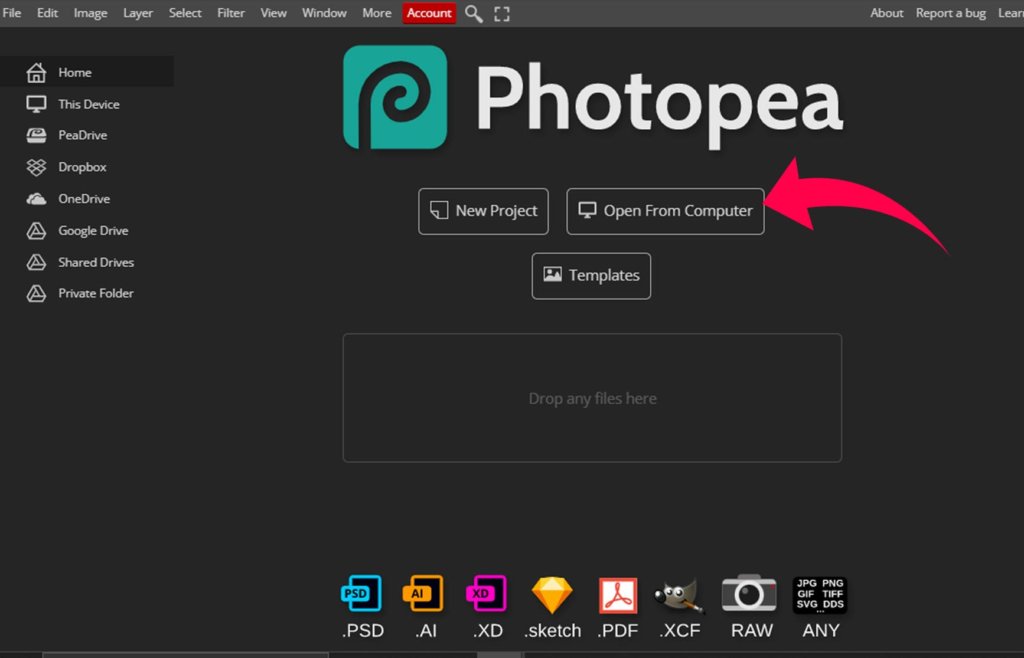
First of all, open Photopea, then click Open From Computer.
A new window will pop up, find the mockup where you have saved it, click on the .psd file, and then choose Open.
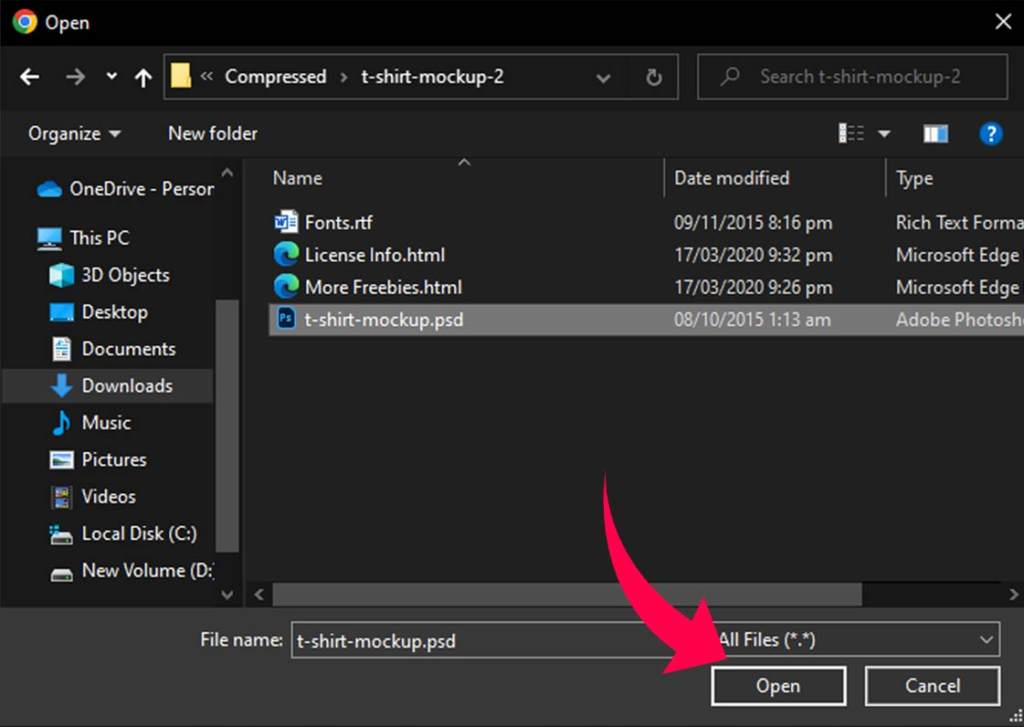
And your mockup is ready to be edited.
Step 2: Place your design
Now the mockup is opened inside Photopea, and you have to look for a Smart Object to place your design inside.
Usually, mockup templates are well organized, and you will find a smart object named something like, Replace your design here, The design here, … or it will be color labeled.
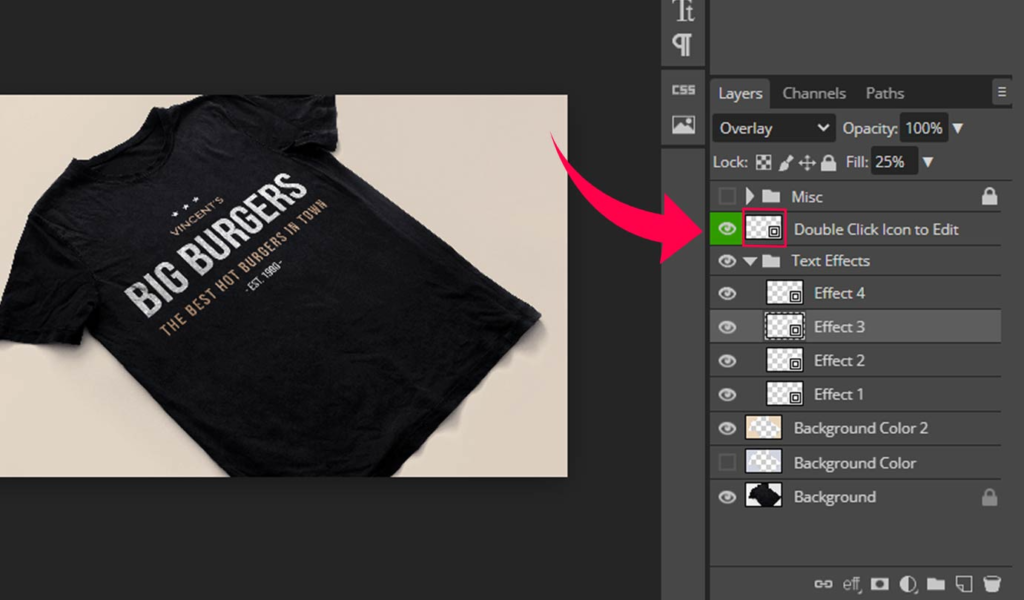
Double-click on the smart object’s thumbnail and a new window will open in Photopea.
A placeholder design will be already there. Now hide or delete the already present layers.
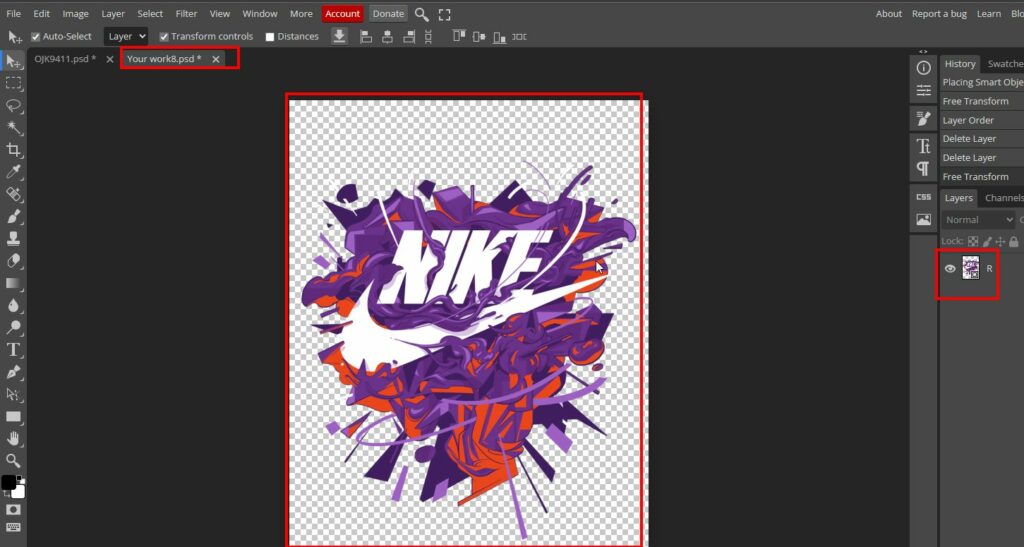
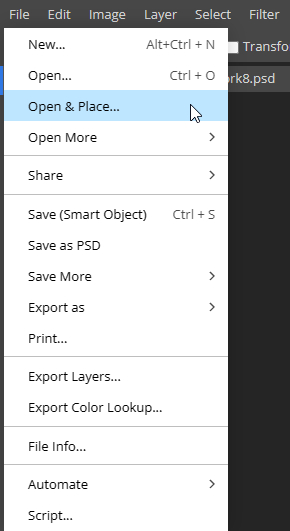
Go to the File menu and choose Open & Place.
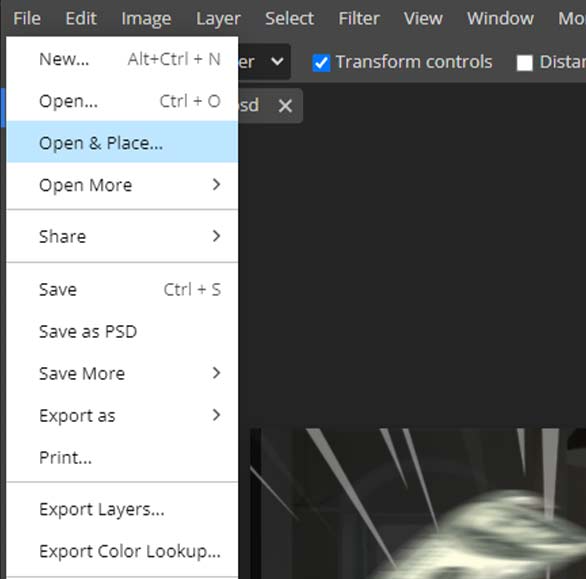
Find your design and click Open. Make sure Your design is in PNG format.
Place your design, press Enter, and then press Ctrl + S or Cmd + S. Go back to the main working canvas, and now the mockup is updated there.
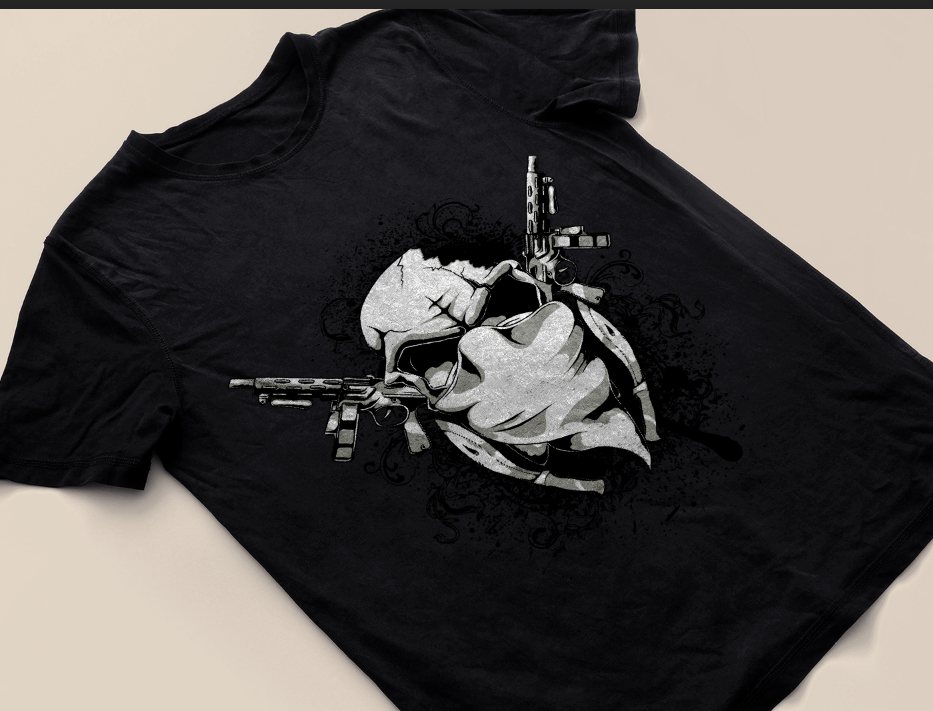
Now, if you don’t like the design placement, you can always go back and move your design to your liking, press Enter, and then press Ctrl + S or Cmd + S. And go back to the main tab, and the mockup will be updated.
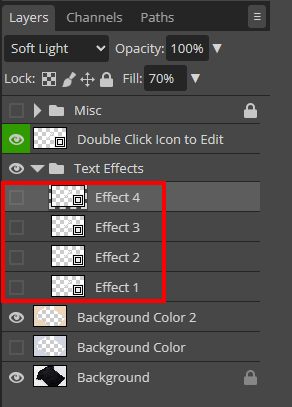
Note: Sometimes, you will see that the design is not looking the same as you added in the smart object. It is because, in some mockups, effects are applied to the design.
You can turn them off in the layers panel to keep the original design by clicking on the eye icon on the layer panel.
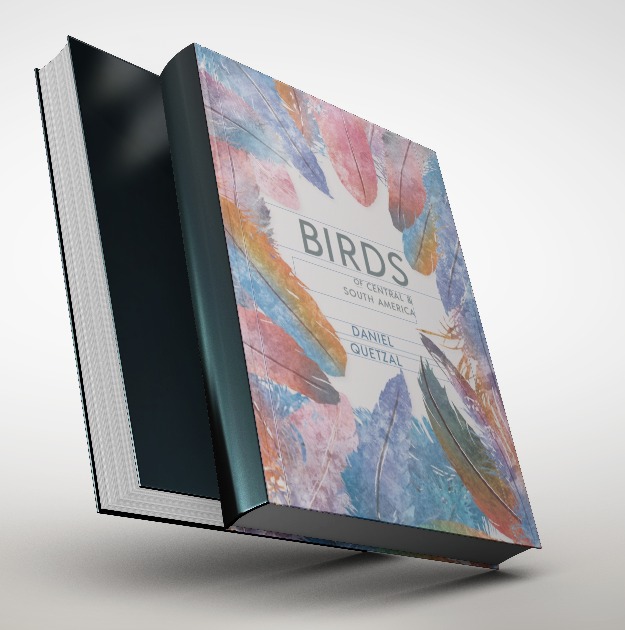
How To Edit Book Cover Mockups In photopea?
The process of editing book cover mockups is the same as that of the t-shirt mockup.
Things you need
The book cover has many components, depending on the type of mockup you download.
Follow the same process as we have demonstrated above and open the mockup in photopea.
Main Cover
The main cover is something you will find in every mockup. To find the main cover smart object and double-click on it.
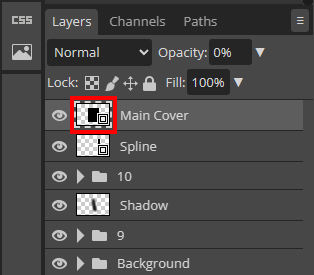
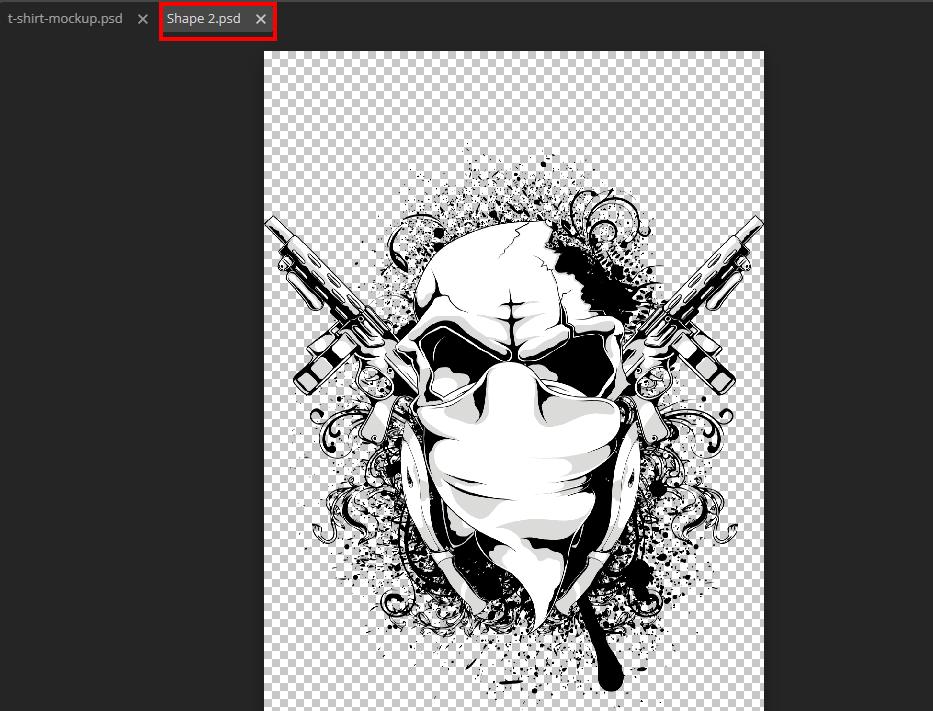
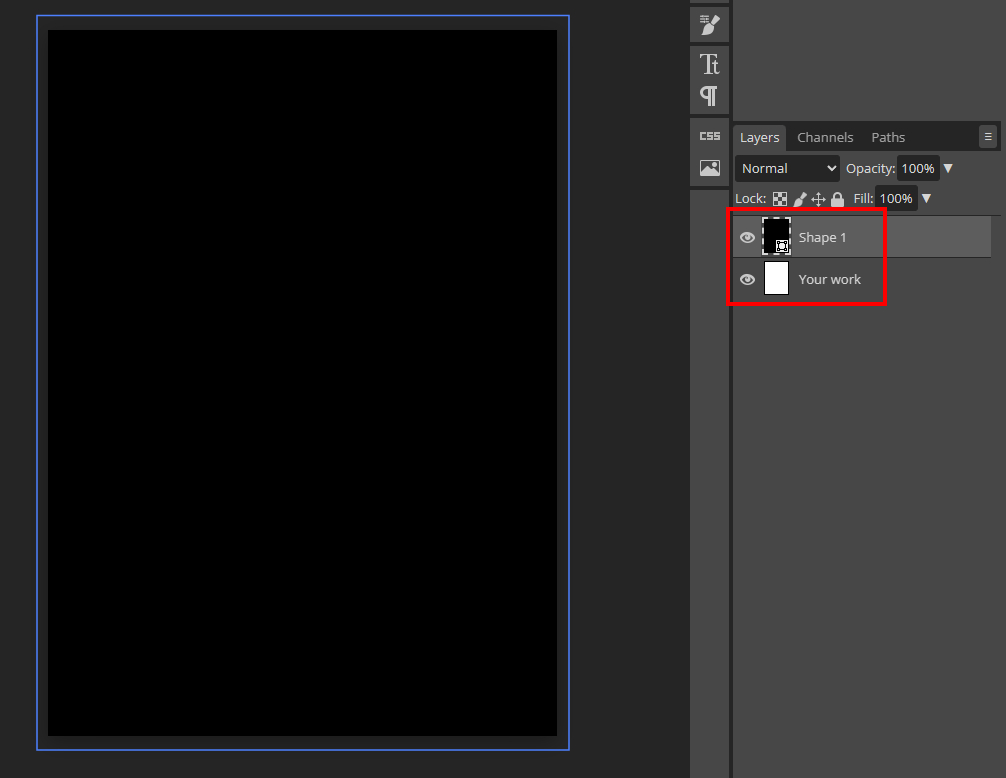
It will open in a new tab. In our case, we have a black shape placed in the smart object; we need to replace the shape with the actual front cover.
Now go to the file menu and choose open & place.
Open the main cover image and press Ctrl + S to save the changes.
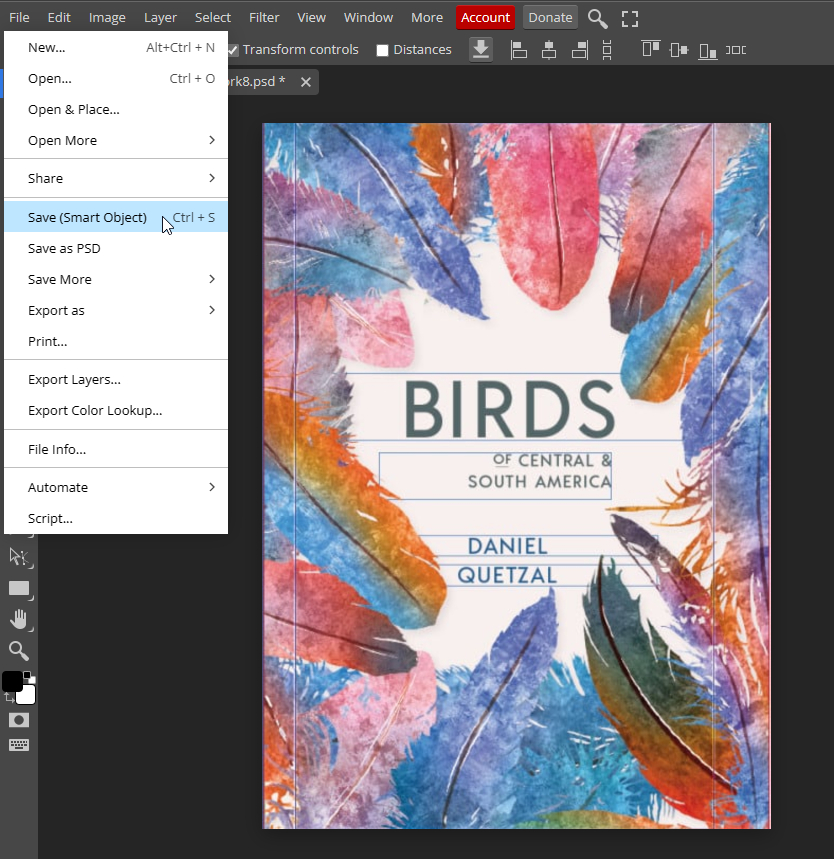
Now go back to the main document, and you will see that the black shape on the cover has been replaced with the actual cover we placed inside the mockup.
Spline
Repeat the same process as we did with the main cover.
Double-click on the spline smart object. Go to the file menu and choose open and place. After adjusting the spline, press Ctrl + S.
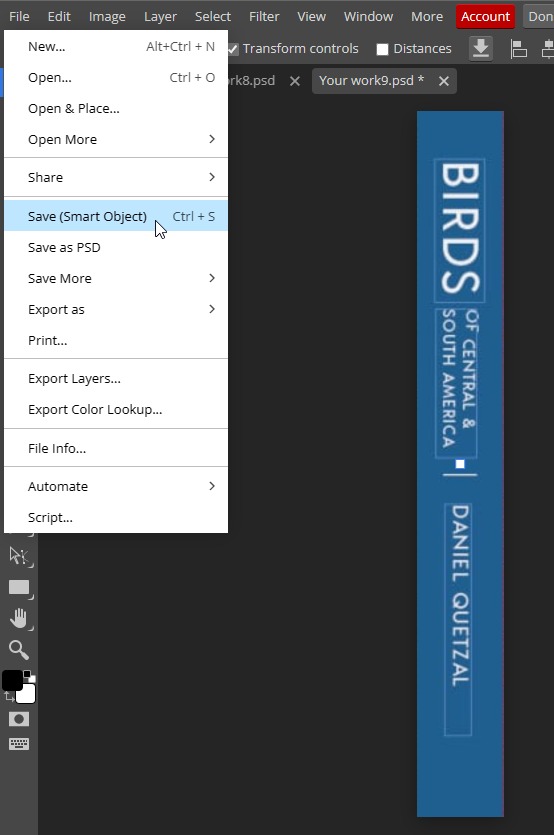
And now, go back to the main document, which will be updated.
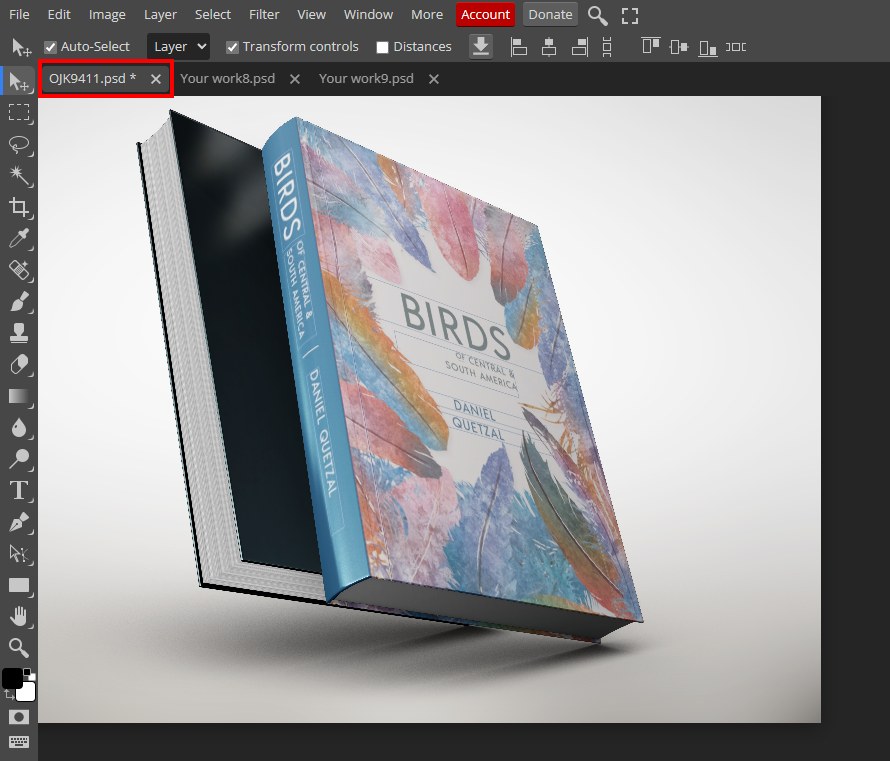
Back Cover
Now repeat the same process as we did with the main cover and replace the contents within the smart objects with your own back cover and save the smart object. And your mockup will be ready, Export it in the image format, and you are done.
Issues With Book Cover Mockups
But there is one major issue most people face: the size of the smart object and the size of your design do not match.
Most of the time, size is mentioned with the mockup or on the website page where you are downloading the mockup from. Sometimes the smart object is larger, or sometimes the book cover design has different dimensions.
There are multiple solutions to this problem.
- Scale up or scale down the design according to the smart object. If you don’t do this, the mockup will have harsh edges that will not look professional.
- Find the mockup before designing the book cover to get an idea of the size.
- Redesign the book cover according to the mockup smart object dimensions if you are the book cover designer.
- Or you can find the mockup according to your book cover size. It might not be easy, but if you look hard enough, you will probably find the mockup the size same as the book cover.
Conclusion
To create Mockups, first, you have to open the image in Photopea. Then, perform the selection using any tool, create a clipping mask on the design layer, and adjust the blending modes in each layer to make it realistic.
Finding pre-made mockups is easy; we have listed the free and paid resources above, where you can find all sorts of mockups for t-shirts, mugs, book covers, shopping bags, bottles, etc.
Editing the mockup in Photopea may seem daunting, but it is very simple. Unzip the mockup file, and find the file with the PSD extension. Open it in Photopea, find the smart object, replace the placeholder design, and hit save.
Thanks for reading & feel free to check out more of our articles!
Expert Rating
Summary
Mockups give your designs a real world context, you can see how the design will look like in real world before its even printed or shared. It is easy to edit mockups in photopea as you only have to find the smart object and replace the design. It takes very little practce, you will not face any difficulty in editing mockups. The use of the mockups is increasing day by day, so they have a lot of functionality and scalability.


