
By using blending Modes, it expands your arsenal of tools when it comes to photo-editing. With Affinity’s wide range of Blend Modes, you can create all sorts of amazing effects in just a few clicks.
In this blog post, we will explain in-depth about Blending Modes in Affinity Photo are and how they can be used to improve your photos. We’ll also show you some examples of how these modes can be applied to achieve different results.
It is easy to get confused with blending modes, so thats why we’ve created this guide. Let’s get started!
What are Blend Modes?
Blend Modes can be a little confusing to understand at first, but with a bit of practice, you’ll be able to use them like a pro!
Basically, Blend Modes in Affinity Photo allow you to “combine” layers together.
You can try out different modes to see what kind of results you can get, and experiment with different layer combinations to see what works best for your photos.
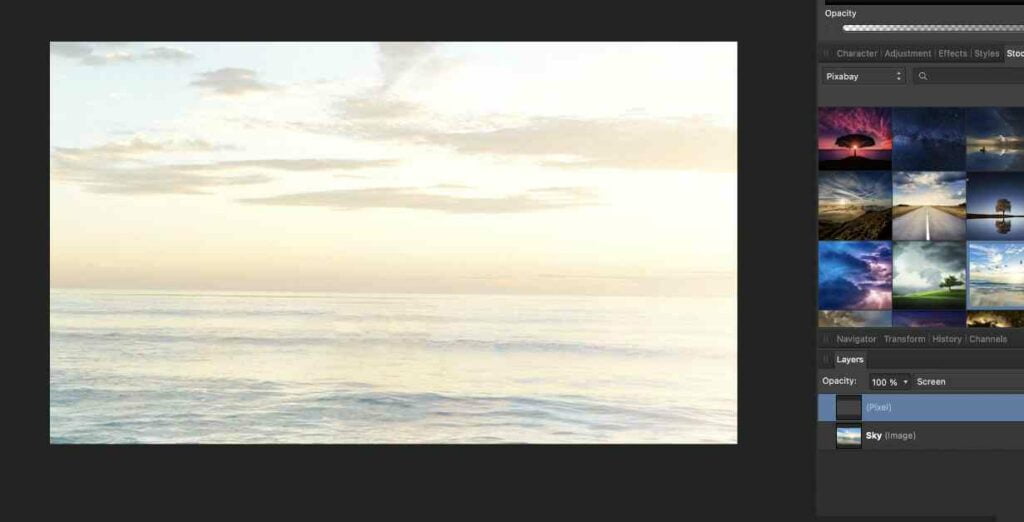
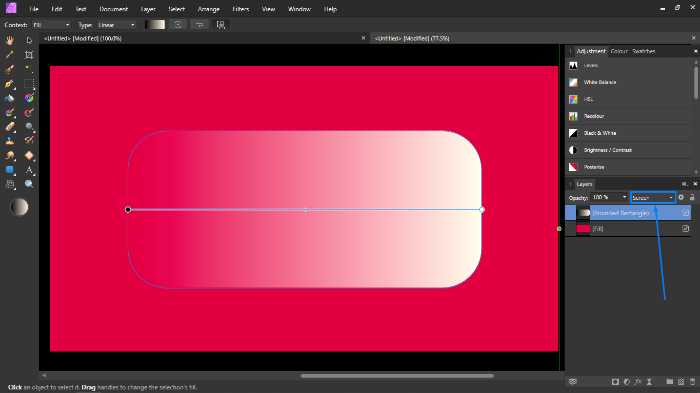
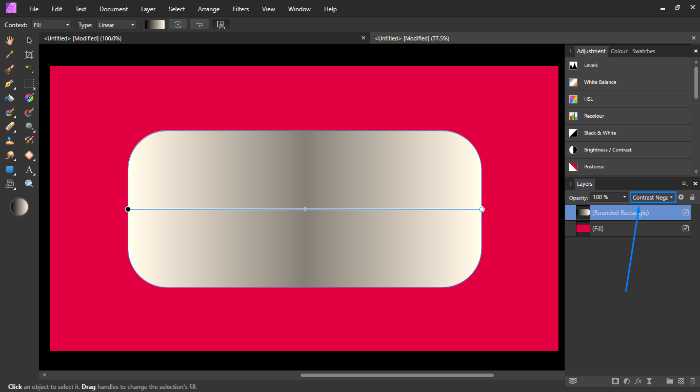
In Affinity, the Blend Mode is located at the top of the Layers panel. It is indicated by a small drop-down arrow. The default Blend Mode is “Normal”, which means that Affinity Photo will not blend the layers together if you use this mode.
To change the Blend Mode, simply select it from the list and Affinity Photo will automatically update the layer to reflect your selection. If you want to revert back to the default Normal Blend Mode, click on the drop-down arrow and select “Normal” from the menu.
How do Blend modes work in Affinity Photo?
Blend modes control how the colours of an upper layer’s pixels blend with those of the layers beneath. Each pixel has numerical values, which Affinity Photo uses to create blends. Each blend mode uses these values differently to determine the way the pixels to blend together.
Black has a value of 0, while white has a value of 100. This means that the lower layer’s pixels will completely obscure any pixels on the upper layer with a value of 0. Midtone grey is a mixture of black and white, so it would be a value of 50.
To understand them better, remember that the original image has particular colours for each pixel. Every layer you add above it, be it an adjustment layer, a fill layer, and so forth, also has its own set of colours. Blending Modes then blends the colours of each layer together according to the Blend Mode you’ve chosen, and creates a new image with interesting effects.
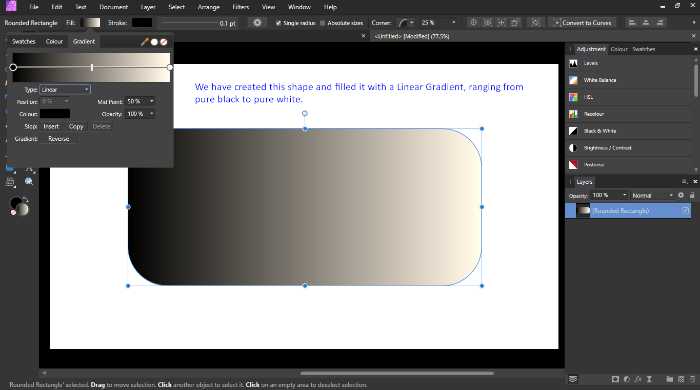
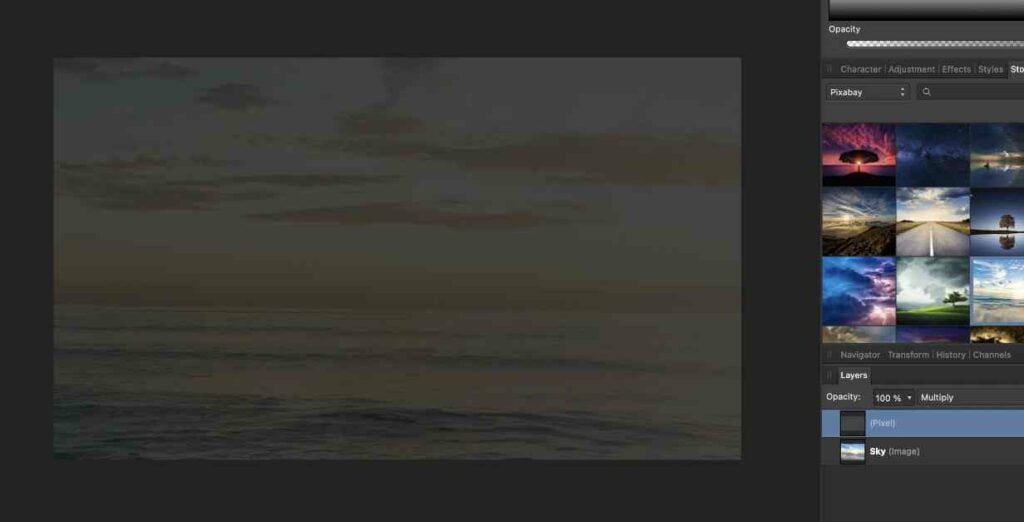
Here’s a quick example to explain clearly how Blend Modes work. Let’s say you have two photos: one with a blue sky and one with a white sky. On them there is a 50% grey layer. We will be changing its blending mode.
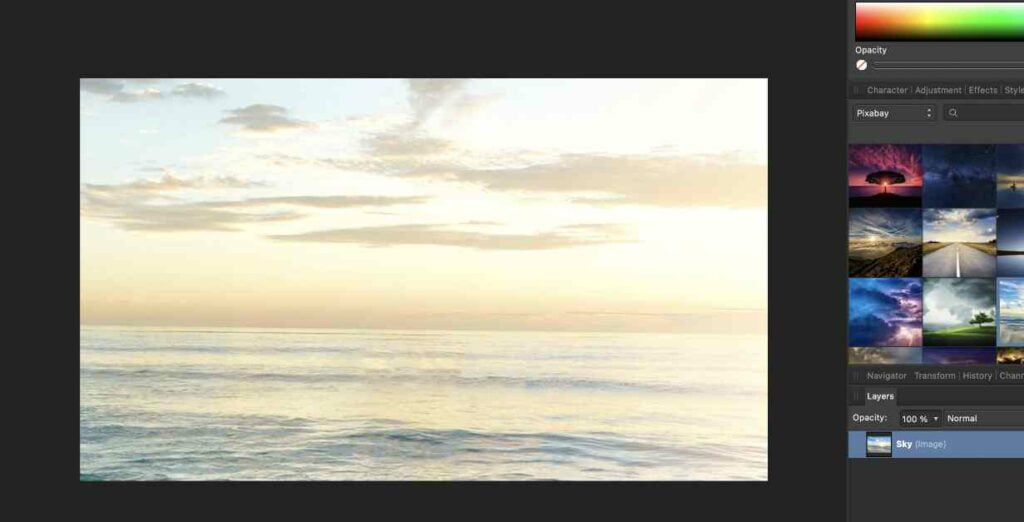
If you use “Multiply” as your Blend Mode, it will darken the blue sky. (Reducing the opacity of the white values from the layer)
On the other hand, if you use “Screen”, it will brighten it up. (Reducing the opacity of the black values from the layer)
Now that you’ve got an idea on how Affinity Photo Blend Modes work, let’s take a look at the different modes available.
What Blend Modes are available in Affinity Photo?
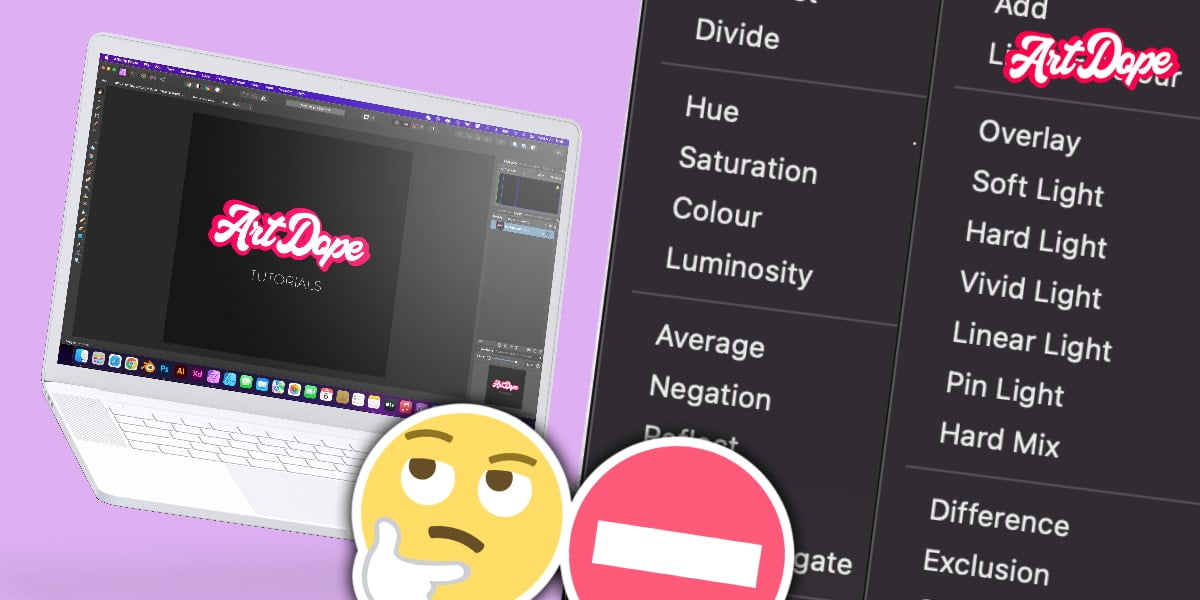
Affinity Photo offers 32 different Blend Modes. They are split into various categories, including Normal, Darken, Lighten, Contrast, Comparative and Composite.
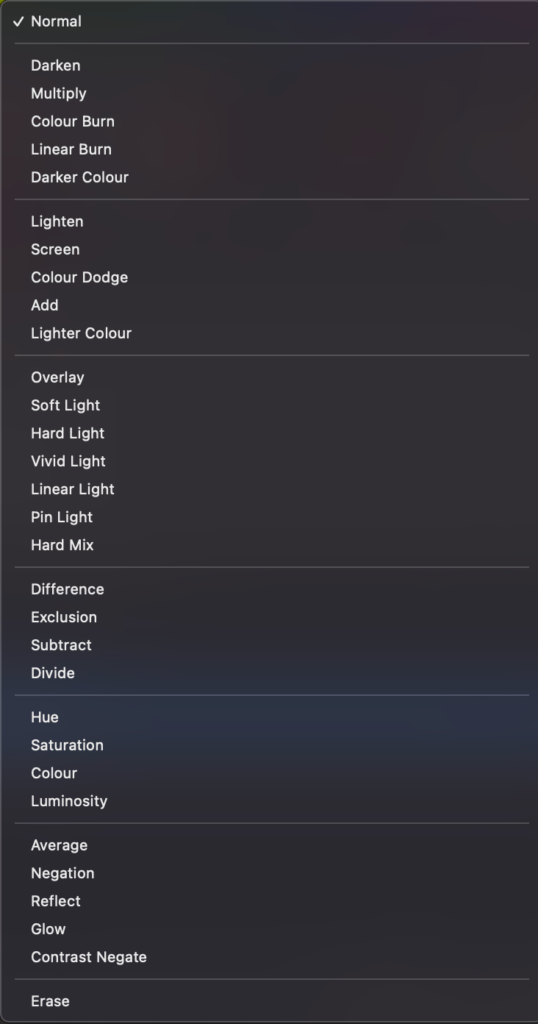
Normal Blend Mode
- Normal
- Pass-through (In-grouping Normal changes to pass-through, however, Normal is still available)
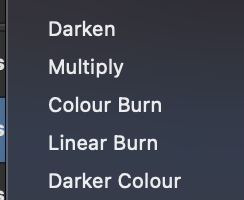
Darkening Blending Modes
- Darken
- Multiply
- Colour Burn
- Linear Burn
- Darker Colour
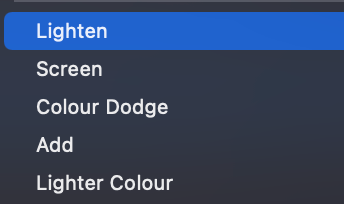
Lightening Blend Modes
- Lighten
- Screen
- Colour Dodge
- Add
- Lighter Colour
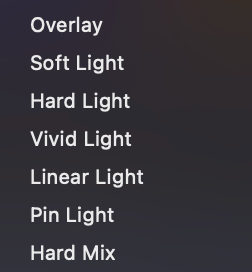
Contrast Blend Modes
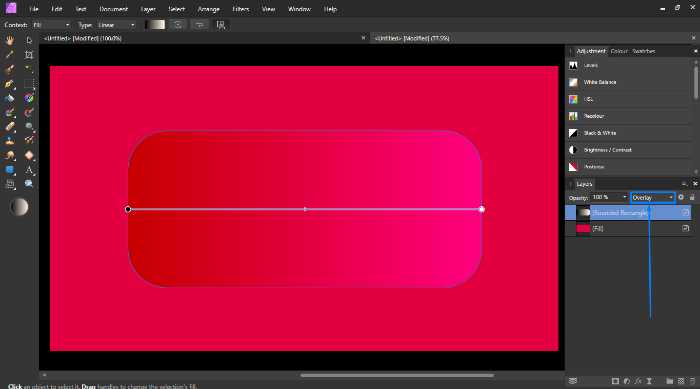
- Overlay
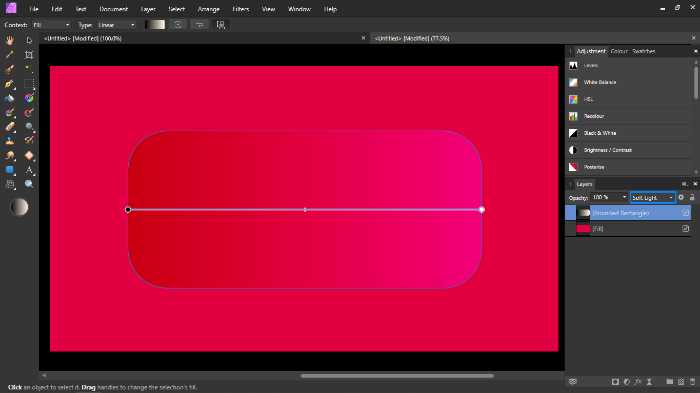
- Soft Light
- Hard Light
- Vivid Light
- Pin Light
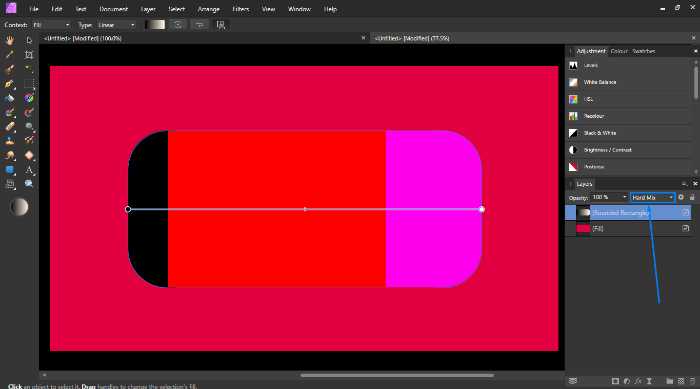
- Hard Mix
Comparative Blend Modes
- Difference
- Exclusion
- Subtract
- Divide
Composite Blend Modes
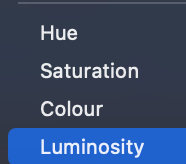
- Hue
- Saturation
- Colour
- Luminosity
Added Comparative Blend Modes (Affinity Only)
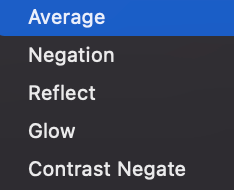
- Average
- Negotiation
- Reflect
- Glow
- Contrast Negate
Erase Blend Modes (Affinity Only)
- Erase
The most popular Blending Modes are definitely the Multiply, Screen & Overlay. They’re easy to use and applied in a variety of ways to get different results.
Normal: This is the default Blend Mode and it doesn’t blend the layers together at all. If you change the opacity of the layer, Affinity Photo will show the original image underneath according to the opacity percentage you set.
Darkening Blending Modes
These blending modes darken the selected layer on the layers below, resulting in a darker overall image. White values are made transparent based on their lightness. 100% White = 100% Transparent.
Most common Darkening Blending Mode
Multiply: Black layer with a Multiple Blend mode remains dark while lighter colours (white) becomes transparent. The amount of transparency is determined through the colour value.
This blend mode multiplies the colours together and darkens them, resulting in a darker image. This Blend Mode is great for texturing your images or creating a double exposure effect.
Other Blending Modes
Darken: The Darken Blend Mode will only display pixels from the upper layer that are darker than those in the lower layer. Basically, it compares the pixel values of the two layers and chooses the darkest one. This is great for darkening an image or intensifying shadows.
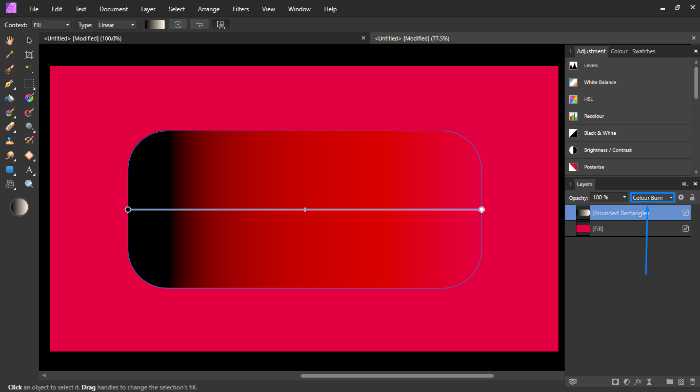
Colour Burn: This blend mode is perfect for giving your photos a deeper and darker look by increasing the contrast of the different layers. Colour Burn darkens shadows, minimises highlights and enhances colours while preserving whites.
Linear Burn: Linear Burn is similar to Colour Burn, but it darkens the colours in a more subtle way by decreasing the brightness. This mode is perfect for boosting darkness and shadows without impacting on the highlights.
Darker Colour: This Blend Mode is similar to Darken, but it compares the base and blend colours and preserves the colour of the darker one. Because the result hue is created utilizing the lowest channel values from both the base and blend colours, Darker Colour does not produce a third colour.

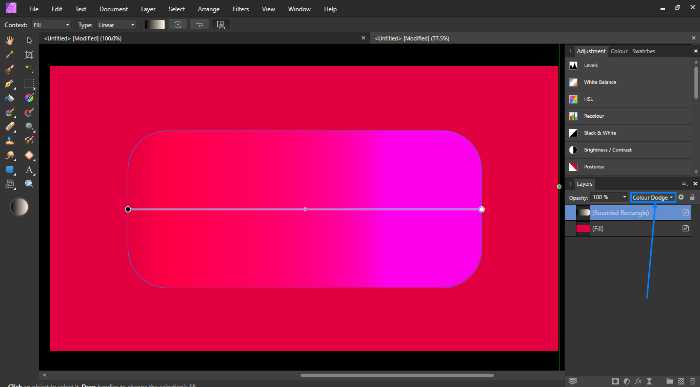
Lightening Blending Modes
This is the opposite of darken. These blending modes lighten the selected layer on the layers below, resulting in a lighter overall image. Black values are made transparent based on their lightness. 100% Black = 100% Transparent.
Most common Lighten Blending Modes
Screen: Screen is the inverse of multiply, which results in a brighter image. This mode is great for lightening up dark photos or adding highlights to them. (Pure white with a screen blend mode remains white. Pure Black becomes transparent)
Other Blending Modes
Lighten: The Lighten Blend Mode does the opposite of what Darken Blend Mode does. It displays only the lightest pixels from the different layers and replaces darker pixels.
Colour Dodge: Colour Dodge will lighten the base colour and increase the brightness by decreasing contrast between the channels. It’s perfect for giving your photos a brighter look or intensifying lights and highlights.
Add: The Blending Mode brightens the base colour to reflect the blend colour by increasing brightness based on the colour information in each layer. By increasing the colour, this blend mode adds brightness to the image. (Known as Linear Dodge (Add) in Photoshop)
Lighter Colour: Lighter Colour is similar to Add, but it compares the channel values of both the base and blend colours to create a third colour. This mode is perfect for lightening up an image without affecting its colours.
Contrast Blending Modes
These are a combination of both the Darkening & Lightening Blending Modes. They are designed to emphasise contrast.
Most Common Contrast Blending Modes
Overlay: Basically, Overlay is a combination of Multiply and Screen. Affinity Photo multiplies the colours together and then screens them, which gives you a more subtle effect than using either mode on its own. Darker areas are darkened, while lighter areas are lightened.
Soft Light: The Soft Light blend mode is perfect for adding a subtle light effect to your images. It does this by either darkening or lightening the colours, depending on the blend colour. If the blend colour is lighter than 50% grey, the image is lightened. If it’s darker than 50% grey, the image is darkened.
Other Blending Modes
Hard Light: Hard Light is similar to Soft Light, but it has a more intense effect. It increases or decreases the contrast of the image depending on the blend colour. When the blend colour is lighter than 50% grey, the image is lightened and screened for increased contrast. If it’s darker than 50% grey, the image will be darkened and multiplied.
Vivid Light: The Vivid Light Blend Mode is great for increasing or decreasing the contrast, depending on the blend colour. If the blend colour is lighter than 50% grey, the hue will be lightened and if it’s darker than 50% grey, the image will be darkened by increasing the contrast.
Linear Light: Linear Light combines a Linear Dodge blend mode on lighter pixels and a Linear Burn blend mode on darker pixels. It lightens or darkens the image depending on the blend colour. If the blend colour is lighter than 50% grey, the image will be lightened by increasing the brightness and if it’s darker than 50% grey, the image will be darkened by decreasing the brightness.
Pin Light: The Pin Light blend mode replaces the colours depending on the blend colour. If the blend colour (light source) is lighter than 50% grey, pixels that are darker than the blend colour are substituted, while those that are lighter than the blend colour remain unchanged. If the blend colour is darker than 50% grey, lighter pixels are replaced, and darker pixels do not change. This mode is great for adding special effects to an image.
Hard Mix: The Hard Mix blend mode is great for creating a high contrast image. The value of each RGB channel in the blend layer is added to the corresponding RGB channel in the base layer.
Comparative Blending Modes
These are quite extreme blending modes. They create interesting & creative effects.
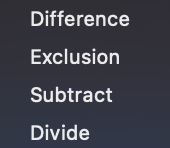
Difference: The Difference blend mode creates a difference between the two layers. This is accomplished by subtracting the values of the blend layer from the base layer or vice versa. It depends on the sector possessing a higher brightness value. The resulting value is preserved and combined with the original base colours.
Exclusion: The Exclusion blend mode effect is very similar to Difference, but with lower contrast. This is accomplished by subtracting the lighter colour from the darker colour or vice versa. The resulting value is added to the original base colours.
Subtract: The Subtract blend mode decreases brightness by subtracting the pixel values of the blend layer from the base colours. If the calculated value is negative, black is displayed.
Divide: The Divide Blend Mode creates halftone effects. Affinity Photo divides the pixel values of a layer with those of the other layer. This Blend Mode is perfect for adding brightness to grey colours or colours having a lower channel value. Lower layers are lightened based on the luminance of the upper layer.

Composite Blending Modes
These are mainly used for colouring & adding lightness within the target area.
Most Common Composite Blending Mode
Colour: With this blend mode, the lightness of the base layer is preserved and the hue and saturation of the blend layer are blended. Colour is useful for tinting colour images and colouring monochromatic photos. Grey areas remain unaffected.
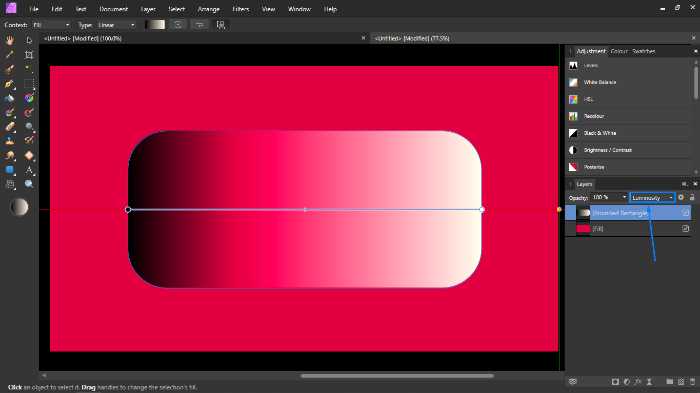
Luminosity: On the contrary to Colour, this blend mode preserves the hue and saturation of the base layer while blending the luminosity of the blend layer. It adds brightness to an image without affecting its colours.
Other Blending Modes
Hue: The Hue Blend Mode replaces the hue of the base layer with that of the blend layer while preserving the luminance and saturation of the original image.
Saturation: The Saturation Blend Mode preserves the hue and luminance while replacing the saturation of the base layer with that of the blend layer.
Comparative Blending Modes (Affinity Only)
Average: The Average Blend Mode takes the average of all the pixel values of the different layers. The effect represents half of both layers combined together. By lowering the Opacity to 50%, you can achieve the same effect.
Negation: The Negation Blend Mode is similar to the Exclusion blend mode, but it gives a brighter effect and more vibrancy.
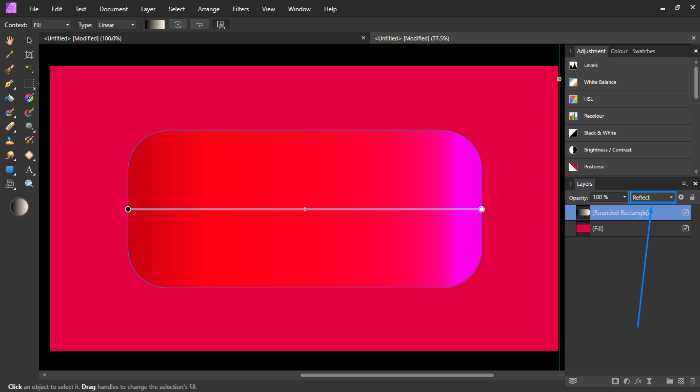
Reflect: With this blend mode, the blend layer has the appearance of reflecting off of the base image. It is handy to emphasize the area of light and gleaming objects.
Glow: Affinity Photo’s Glow Blend Mode brightens the composition by the amount of brightness in the blend layer. The base layer has the appearance of reflecting off of the blend image.
Contrast Negate: Affinity Photo’s Contrast Negate Blend Mode works according to the percentage of the luminosity. If the blend colour value is greater than 50% luminosity, all pixels with a luminosity value of less than 50% are replaced by the blend colour. On the other hand, pixels with a luminosity value of more than 50% are replaced by an inverted blend colour. In the case that the blend colour value is greater than 50% luminosity, this blend mode works the other way round.
Erase Blending Mode
Erase: The Erase Blend Mode deletes any pixels in the blend layer that match the corresponding colour in the base layer. Affinity Photo uses the transparency of the blend layer to determine which pixels to delete.
Tips for using Blend Modes
Here are some tips to help you get the most out of Affinity Photo’s Blend Modes.
First of all, don’t forget that Blend Modes affect all underlying layers (un-destructively), not just the ones directly below them. Different blend modes affect the Layers such as pixel layers, mask layers, live filter layers, and adjustment layers.
The ‘Normal’ Blend Mode is the default option applied to all new layers. This mode simply combines the two layers together without any special effects. Be sure to experiment with different Blend Modes to see which ones work best for your particular project. Remember that you can always change the Opacity of a layer to get the desired effect.
The default blend mode for a group layer is ‘Passthrough’. This means that the blend mode of the parent layer is passed onto the group since it has no particular blend characteristics. However, you can always change the blend mode by selecting a different mode from the drop-down menu in the Layers panel.
Expert Rating
Summary
Blending modes are quite fun in my opinion. When starting out, you find yourself scrolling through them while compositing; without knowing what they really do. The main ones to keep in mind are “Multiply, screen & overlay”. Once you level up, you’ll end up using “Add” & “colour burn” as well. Easy to play around with but difficult to master & fully comprehend all the tools. Though through experience, you won’t be using all the blending modes in the future.
Conclusion
To conclude, Affinity Photo’s Blend Modes offer a wide range of possibilities for creative image editing. Be sure to experiment with different modes to see which ones work best for your particular project. And don’t forget, you can always change the Opacity of a layer to get the desired effect.
Thanks for reading & feel free to check out more of our articles!


