

Adding frames and borders to photos can give them a unique and polished look. Affinity Photo makes it easy to add frames and borders to your photos with its comprehensive set of tools.
In this blog post, we will explain how to add frames & borders and show you some of the different types that you can create.
Borders and Frames explained
Borders and frames are essentially the same thing when it comes to photos. A border is simply a line or overlay that goes around the edge of a photo. A frame is a more decorative border that can be made up of different colours, patterns, or images.
These additions can help to add visual interest to your photos and can be used to highlight certain elements within the photo. For example, you could use a frame to draw attention to the subject of your photo or to make a statement about the mood or theme of the image.
How to add a frame to a photo in Affinity Photo
In Affinity Photo, there are many ways to add borders and frames to your photos.
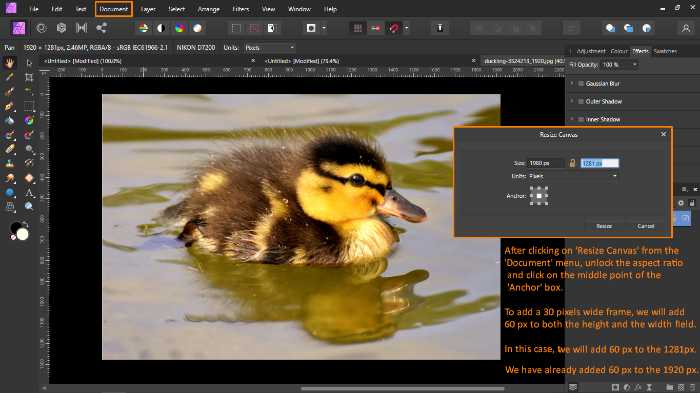
One way would be to open your image and then click on the ‘Document’ menu. From there, select ‘Resize Canvas‘ this will open up a new window where you can resize your image.
Beforehand, we have to unlock the aspect ratio by clicking on the padlock icon. Don’t forget to click on the middle point of the ‘Anchor’ box so that your image stays in the centre of the frame. Then, you can change either the width or height and Affinity Photo will automatically adjust the other dimension.
To add a frame, simply enter the amount of pixels you would like to add around your image. For example, if you want to add a frame that is 30 pixels wide, you would add “60” to both the height and the width field.
Once you’re happy with your settings, click ‘Resize’ and Affinity Photo will add the expand the document to reveal a transparent background. This method allows you to create a more precise frame that fits the dimensions of your photo. Take a look at the image below to see how this works.
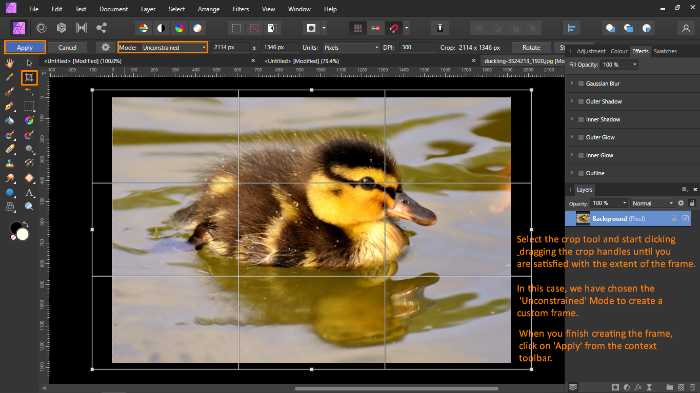
Another way would be to use the Crop tool (see image below). The Crop tool is found in the toolbar and it looks like a square with a diagonal line inside it. Adjust the preferred cropping ‘Mode’ from the Context toolbar.
To add a frame, simply click and drag the corners of the crop box out of the image until you are satisfied with the border. Affinity Photo will automatically create a frame for you based on the size and shape of the crop box. This method allows you to preview how the frame will look on your image before you add it.
Filling in transparent Background (Version 1)
You can also add an image to the border or use a gradient as the frame. You can also add your own textures and patterns if you want to get creative.
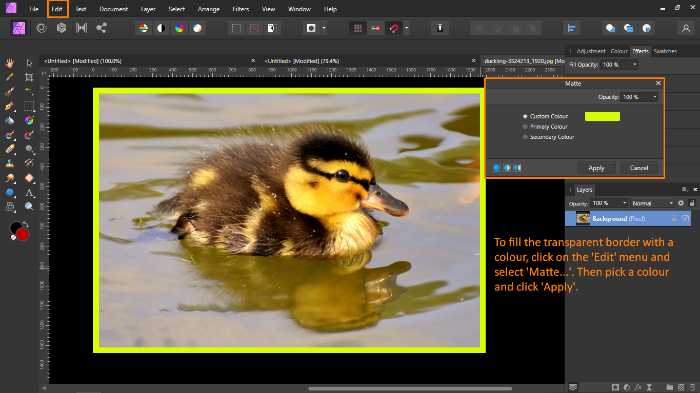
To fill the border with a particular colour, simply click on the ‘Edit’ menu and select ‘Matte’. Matte will fill any transparent areas in the image with a selected colour. A window where you can select the desired colour will appear.
You can pick either a custom colour, the primary colour or the secondary colour. When you are happy with the border colour, click on ‘Apply’. Affinity Photo will automatically fill the border with the chosen colour. See the image below for a better understanding of this procedure.
Filling in transparent Background (Version 2)
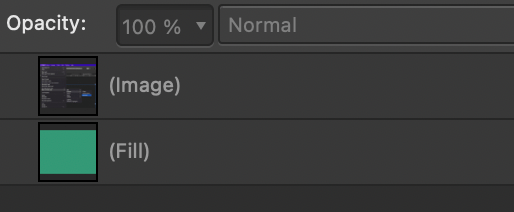
Affinity Photo also allows you to add borders without permanently altering the image.
This is done by adding a ‘New Fill layer’ from the ‘Layer’ menu and then dragging it underneath the image layer with the transparent border.
This gives you more control. You can even add effects or add a pattern behind the image.
Converting shapes into frames in Affinity Photo
Affinity Photo also allows you to convert shapes into frames. You can fit an image within any shape imaginable by clipping it to the shape (Clipping Mask).
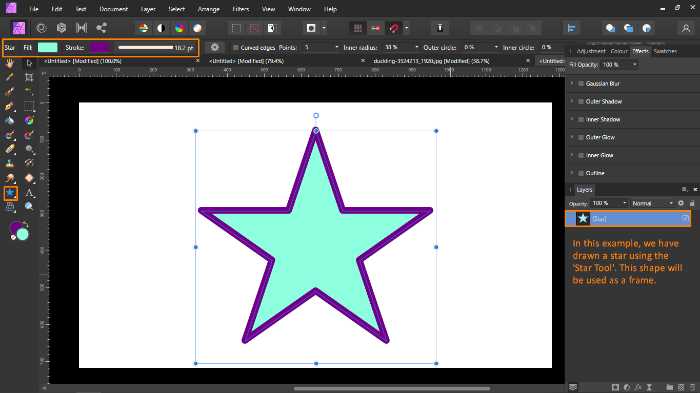
To do this, select the ‘Shape’ tool from the toolbar and then click and drag on the canvas to create the desired shape. You can set the width, colours, and other details of the shape in the context toolbar.
Use the Move tool to reposition and resize the shape if needed.
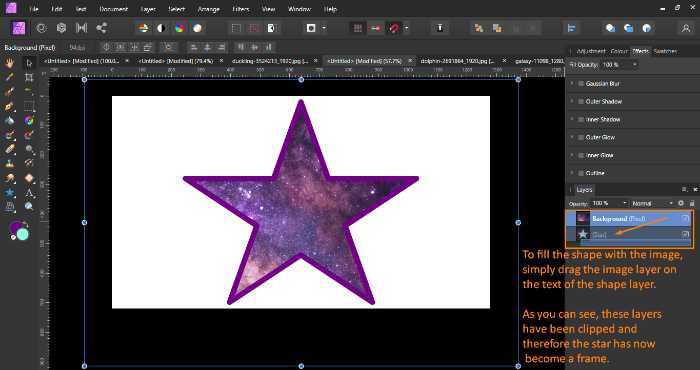
When you are happy with your shape, open up the image you wish to set within the frame. Now, you can select your photo and then drag it onto the shape within the layers panel. (Blue line will show up)
Affinity Photo will automatically clip the image to the shape. You can once again resize and reposition the photo within the frame or the clipped layers together using the Move tool.
This method is great for creating unique frames that are specific to your photo. You can also experiment with different shapes and sizes to create interesting borders. Affinity Photo makes it easy to add borders and frames to your photos, so you can have creative control over the final outcome.
Creating custom frames in Affinity Photo
All you need to do is to draw a custom shape using the Pen tool. The Pen tool can be found in the toolbar and it looks like a pen nib.
To create a custom shape, simply click and drag on the canvas to draw your desired shape. Affinity Photo will automatically create a path based on your drawing.

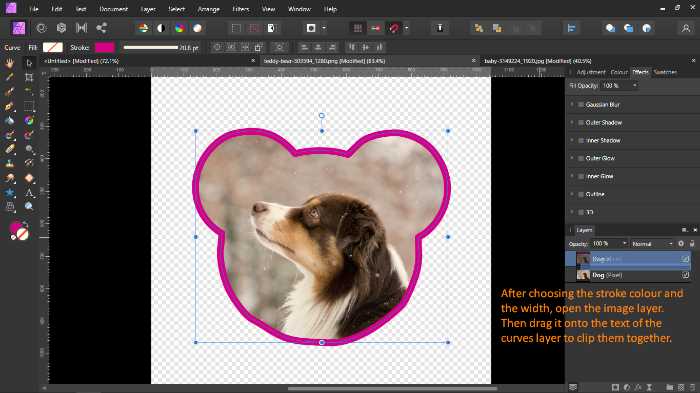
You can also trace the outline of a particular object in your photo. When you are happy with the shape, open up the ‘Stroke’ panel from the ‘Window’ menu. In the Stroke panel, you can select the desired width, colour, and other details of the frame.
Once you are happy with your custom frame, drag the image layer onto the text of the frame layer. Affinity Photo will automatically clip the image to the frame. You can then use the Move tool to reposition and resize the frame if needed. Feel free to experiment with different shapes, sizes, and colours to create interesting borders.
Applying Effects to borders
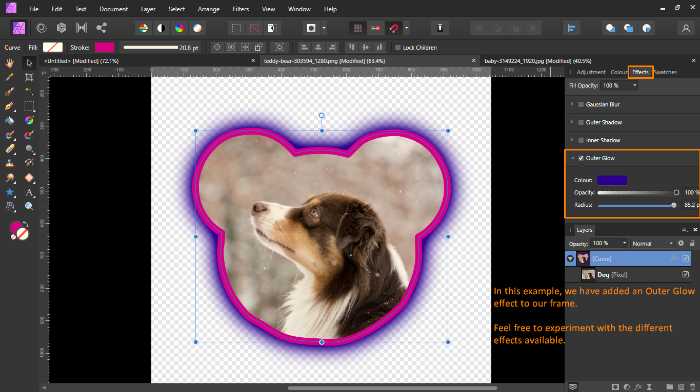
In Affinity Photo, you can also apply effects to borders. To do this, simply select the frame layer and tick the desired effect from the ‘Effects’ panel. You can also apply multiple effects to the same layer.

There is a wide range of effects that can be applied to borders. For example, you can add a drop shadow, inner glow, or outer glow to the border. You can also add a bevel and emboss effect or apply a gradient overlay. Experiment with different effects to see what looks best with your photo.
Expert Rating
Summary
Even-though this is not a difficult technique (generally), it incorporates multiple advanced techniques to go with it. Takes average practice time with decent scale & functionality for the future.
Conclusion
As we have discussed in this blog post, there are many different ways to add borders and frames to your photos. With a little bit of experimentation, you can come up with some really unique looks for your photos.
So have fun and get creative!


