
Learning how to use shadows and highlights is a must. They add depth and dimension to photos, making them look more realistic than ever before.
In this tutorial, we will show you how to use shadows and highlights in Affinity Photo, so that you can create amazing compositions & images that stand out from the crowd!
What are shadows and highlights in Affinity Photo?
For there to be a shadow, there needs to be a light source. If there is a light source, there will be a highlight.
Shadows and highlights are simply the dark and light areas in an image, respectively. By manipulating these areas, you can change the overall tone and mood of a photo. Shadows and highlights add depth, create contrast, or even make an object appear larger or smaller.
Simply speaking, Shadows are the dark areas of an image. Highlights are the light areas of an image. However, there is much more to it.
Having said that, we’ll be going on multiple ways on how to create a shadow.
How to create a shadow in Affinity Photo?
Let’s say we’re doing some photo-manipulation & you need to add a shadow. We’ll be going over 2 versions. 1st one will be an easy version & 2nd one will be more advanced.
A quick tip: When using blending modes on shadows we usually use the darken blending modes or an overlay blending mode. Learn more about blending modes.
To create a realistic shadow, you need to establish the direction of the light.
If the light comes from behind, the shadow will be in front. & vice-versa.
How shadows work.
To establish the sharpness of the shadow, you need to factor in the strength & size of the light.
Creating a Shadow (Easy Version) – Outer Shadow (Drop shadow)
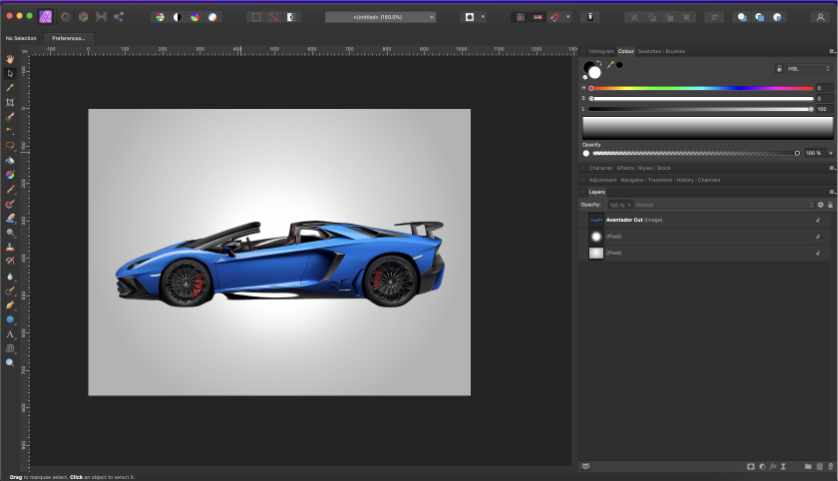
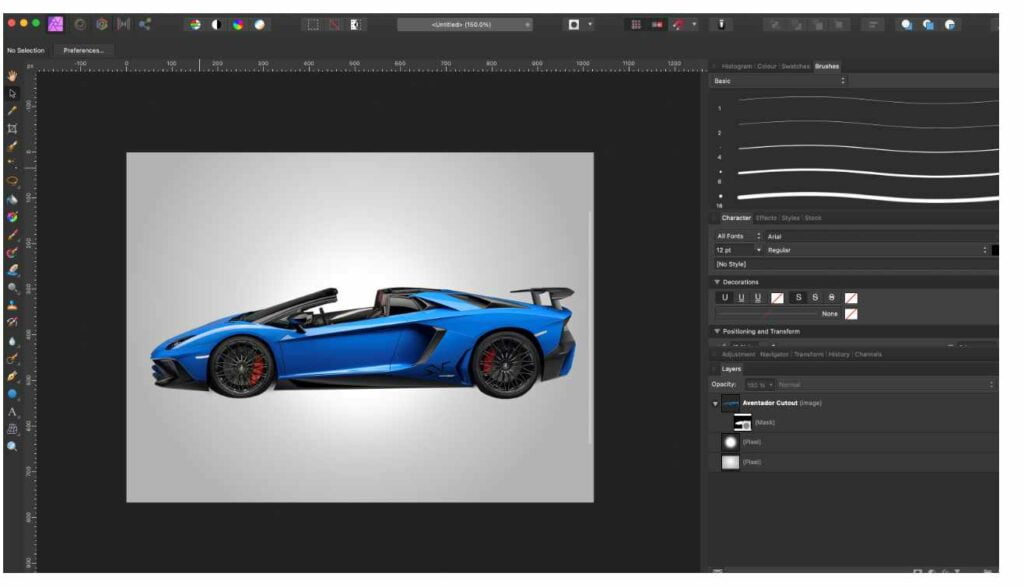
Let’s start by setting the scene. We’ll be using a car example through out this tutorial. First, we need to have the subject cut-out. If you need a tutorial on how to cut out any thing, check out this tutorial.
If you’d like to follow with this example you can find the assets from here:
Within this example, we’ll be structuring the document by having the cut-out in the front and the background in the back. That means that within the layers panel we need to have the cut-out as the first object/layer.
Now, we’ll need to add an effect on the cut-out. Click on the “FX” icon at the bottom of the layers panel.
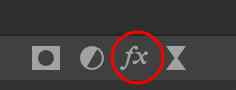
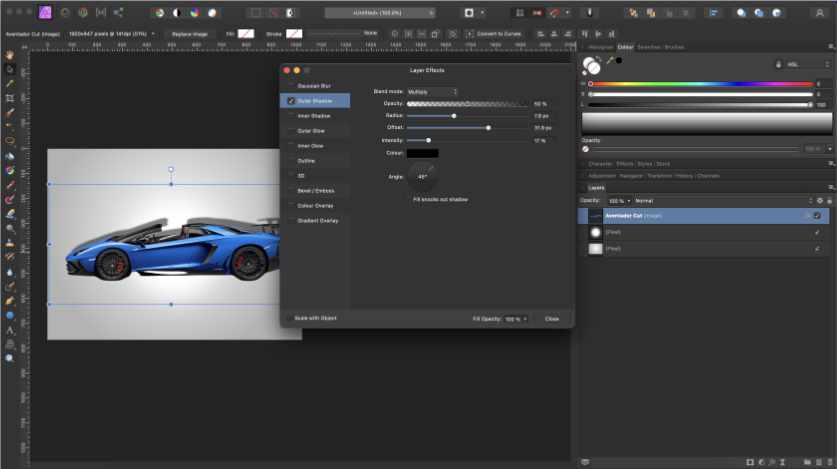
We’ll now select “Outer Shadow”. This will add a shadow to the selected layer; in this case the cut-out layer. Affinity photo’s equivalent of “photoshop’s drop shadow'” is outer shadow.
Play around with the different settings and select close. You could always go back and change the settings as it is a non-destructive filter.
- Color – try different colors to see what works best with your photo
- Opacity – play around with the opacity until you find the perfect transparency balance
- Blend Mode – experiment with different blend modes to see what effect it has on your photo.
- Radius- the radius determines the size of the shadow. A larger radius will create a larger shadow, while a smaller radius will create a smaller shadow.
- Intensity – the radius determines the spread of the shadow. A larger radius will create a softer shadow, while a smaller radius will create a sharper shadow.
- Angle – the angle determines the direction of the shadow.
- Offset – the offset determines the distance of the shadow from the object.
- Fill knocks out shadow – In the case that the object’s fill is semi-transparent, choosing this option would prevent the effect from showing through the fill.
Creating a Shadow (Advanced Version) – Style 1
As discussed we’ll be using a car example through out this tutorial. We’ll start by having the subject cut-out, check out this tutorial.
As previously discussed, to understand how the shadow would need to look, you need to establish where & what the light is.
For this example, the light is a medium to soft spot light. It is illuminating from the direction of the camera(a bit higher up).
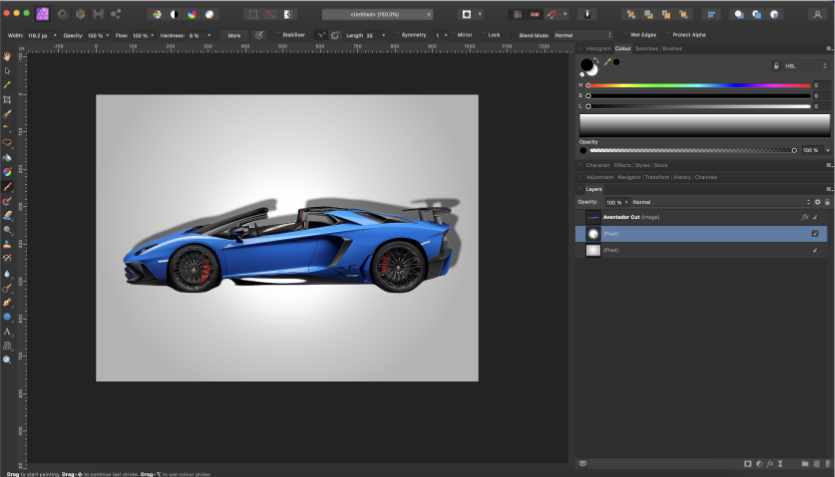
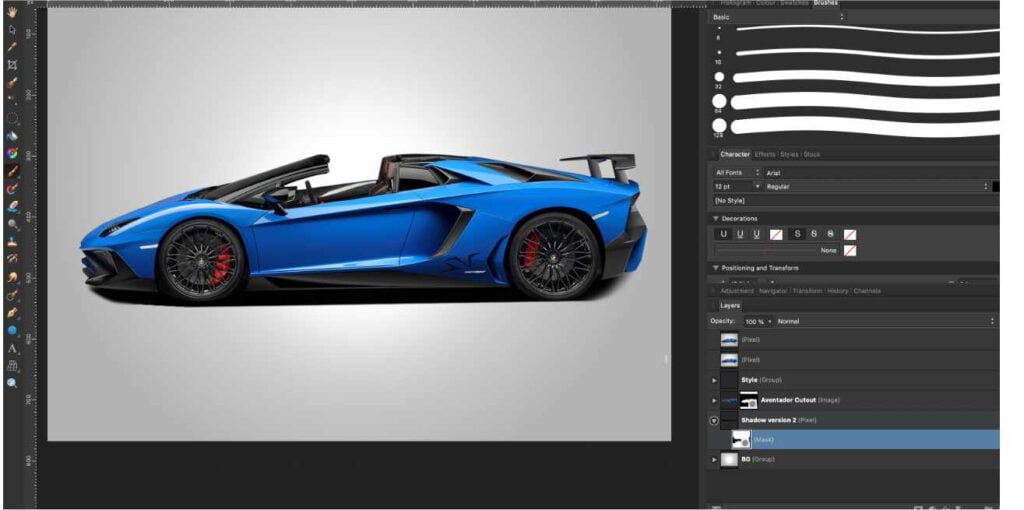
Once we have established the direction of the light, let’s start by painting in the shadow. Go ahead and add a new blank layer below the cut-out.
Paint in with a very dark colour (or black) shaping below the car/object/cutout on the new shadow layer.
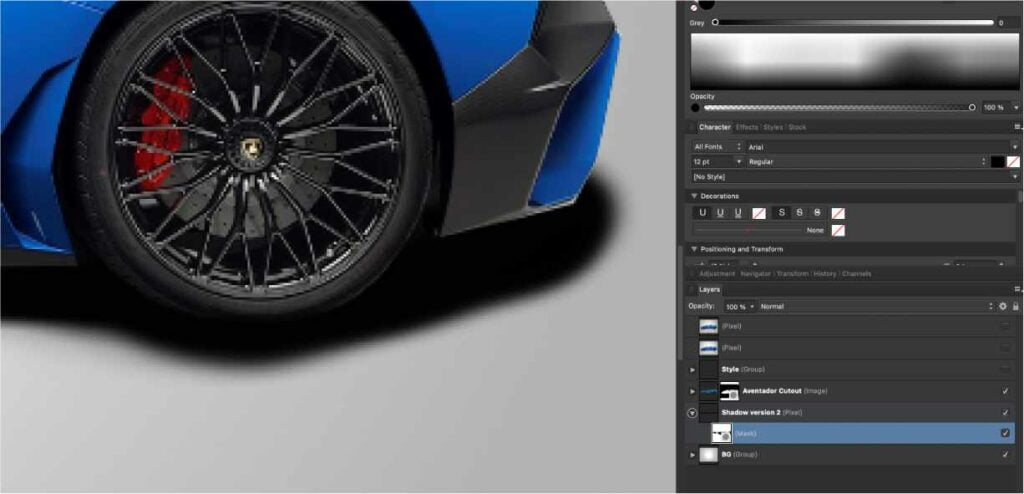
Add a mask layer on the shadow layer. Paint in and refine around the area. To paint over the mask you need to have the paint brush tool (b) selected – Make sure it is the paint brush tool (and not the others) as the mask might not come out good. Paint with black to hide.
To adjust the hardness & properties of the brush, select “more” from the top tool bar.
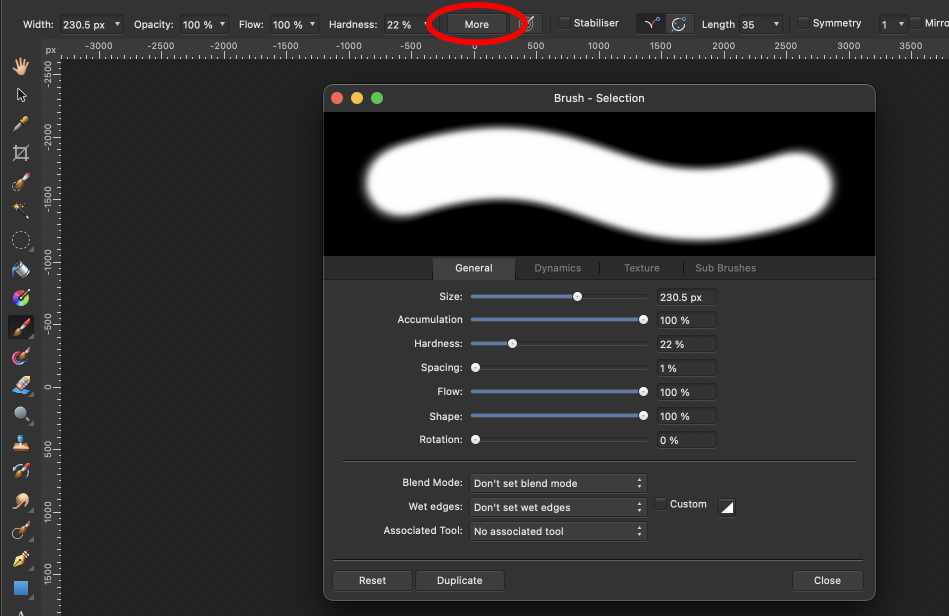
Take your time to mask in & adjust accordingly. This is what makes your image looks more realistic.
We’ll finish it up by adding some effects to the image.

Creating a Shadow (Advanced Version) – Style 2
For this example, we will be adding a different light to the image.
The light will be a medium to soft spot light. It is illuminating from behind the subject (on the right side of the car).
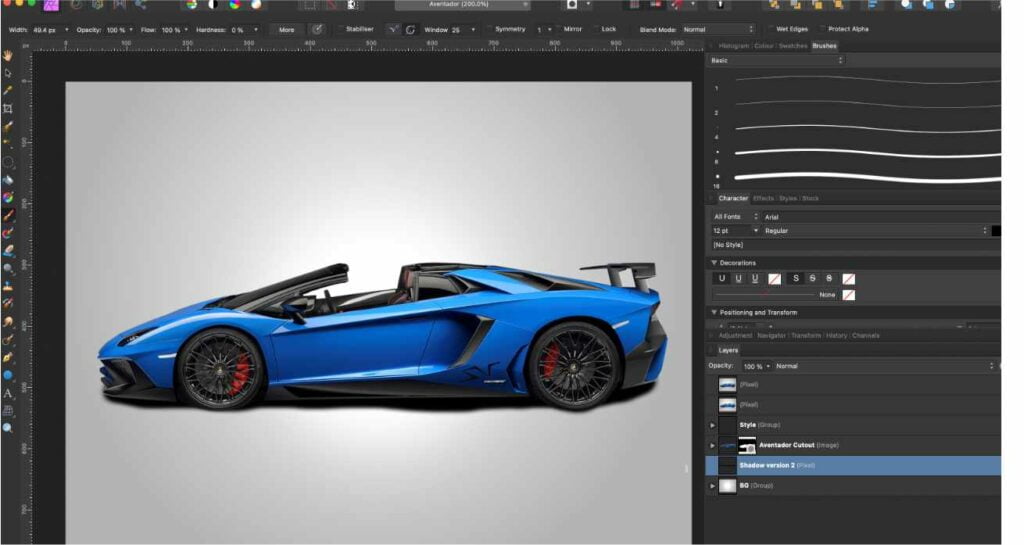
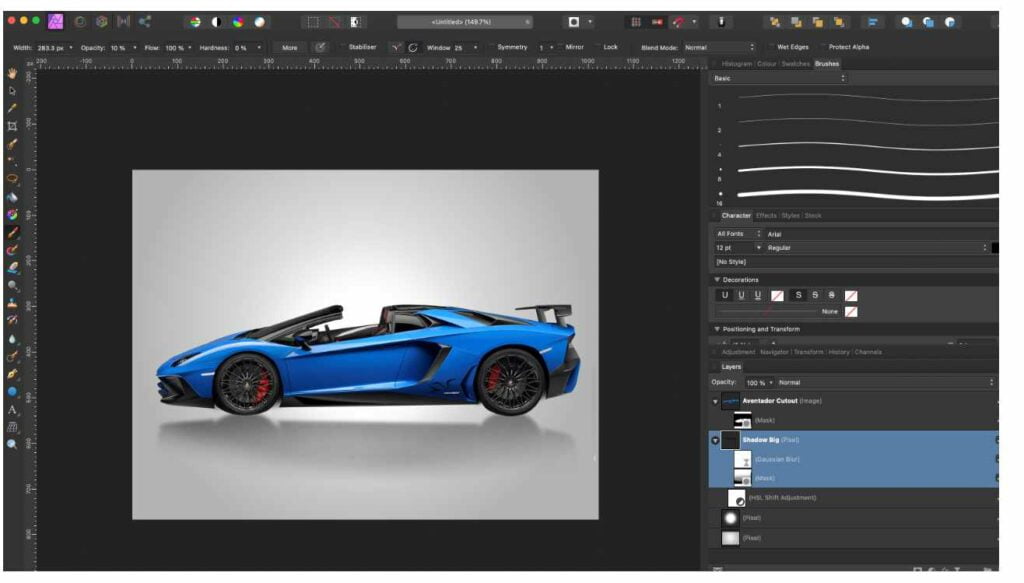
We will be adding 2 types of shadows for this version. One close to the object & the other would be a bigger shadow. Doing so would add more control overall to achieving a more realistic look.
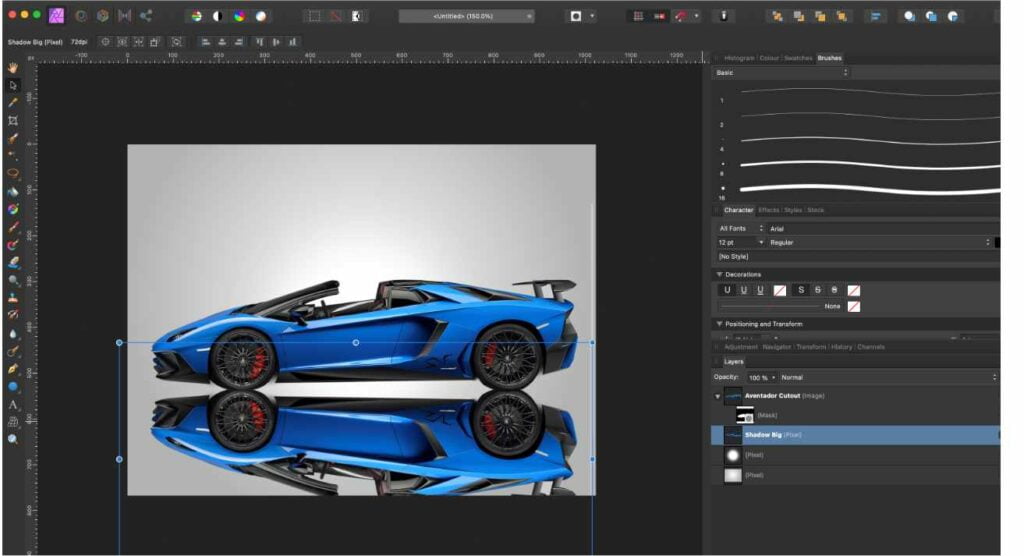
Let’s start with the bigger shadow.
- Duplicate the main cut-out layer & Drag the new layer below the cut-out. (Layer > Duplicate ; Make sure the layer is selected. Shortcut CMD/CTRL+J)
- Add a Live HSL Filter & drag it on the cutout. (Go on the bottom of the layers panel & select the semi-circle)
- Drag the “lightness” in the HSL filter all the way to black.
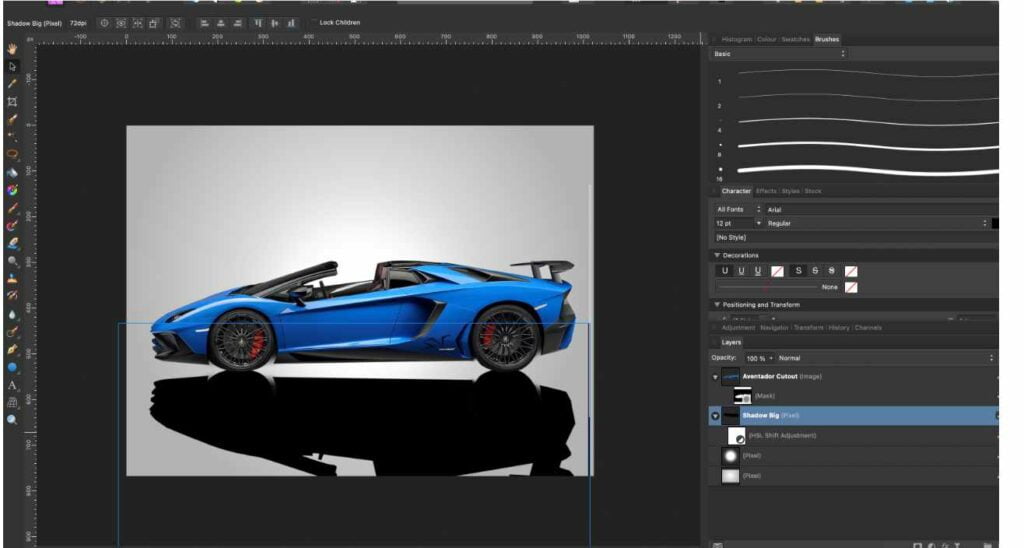
- Add a mask layer to the duplicate layer. & Mask in the areas. Use the paint brush tool (B) to mask out & paint with black – icon like a paint brush.
- Add a Gaussian blur to soften the edges. (Bottom of the layers panel & select the hourglass or layer > new live filter layer)
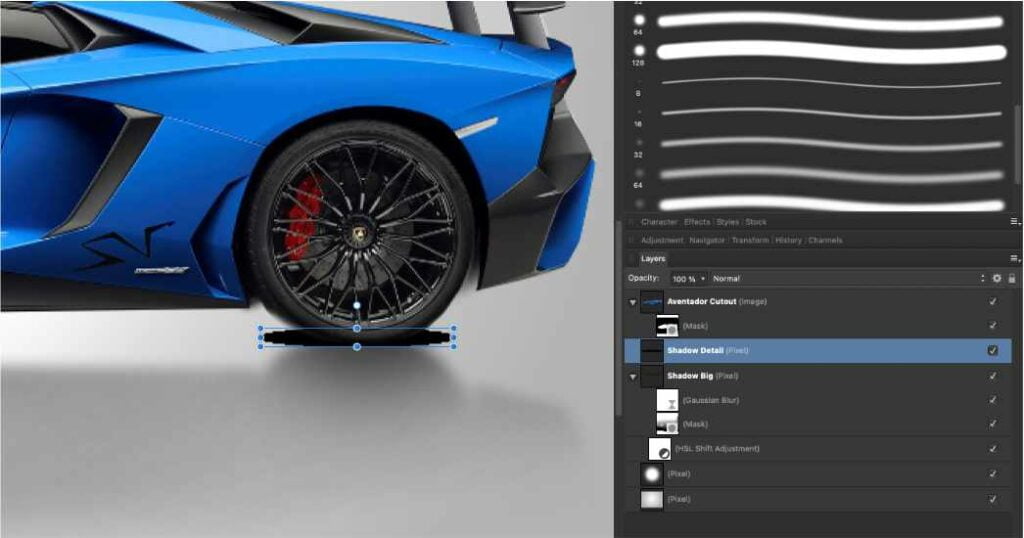
Now on to the smaller & sharper shadow.
The sharper shadow is important because it is the closest to the ground, thus why it would need a dedicated shadow.
This could be done in multiple ways, however for this case we’ll use a more direct approach.
- Create a new layer & Drag the new layer below the cut-out. (Layer > new ; Shortcut CMD/CTRL+Shift+N)
- Paint with the brush tool underneath the area closest to the ground. In our example we used a selection tool to make a more accurate shadow.
- Add a gaussian blur to the shadow (Bottom of the layers panel & select the hourglass or layer > new live filter layer)
- Add a mask layer to the shadow. & Mask in the areas. Use the paint brush tool (B) to mask out & paint with black – icon like a paint brush.
- Duplicate the Shadow and add it where needed. (CMD/CRTL+J)
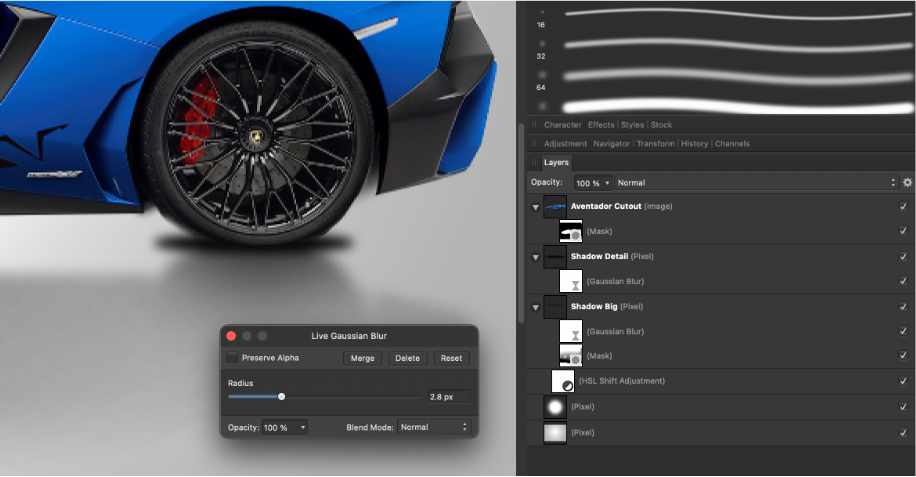
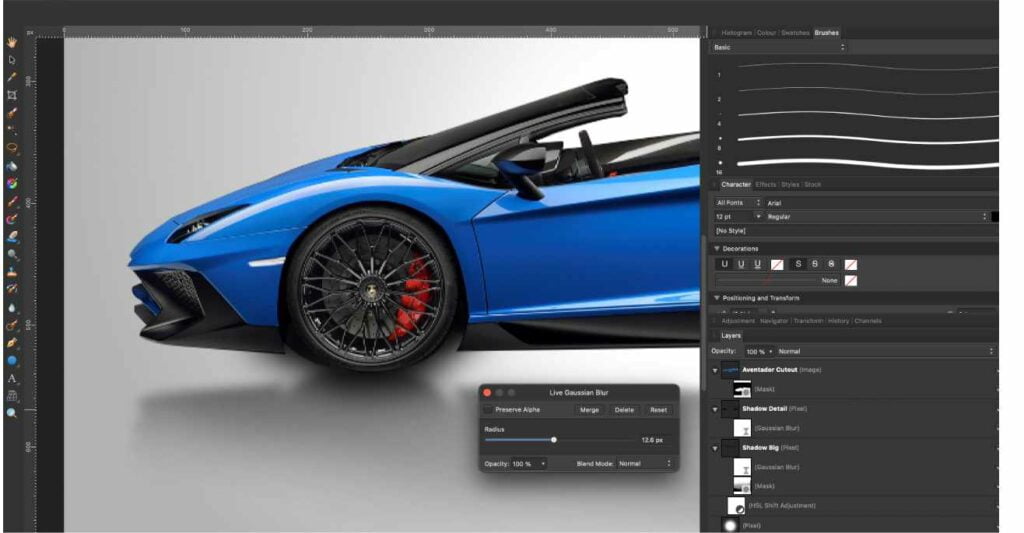
We’ll finish it up by adding some effects to the image.

This brings us perfectly on to the next part. How do you add highlights?
How to create a Highlights in Affinity Photo?
Highlights are the lightest areas within an image/composition. Every image has highlights & shadows. However, let’s say your image lacks something to make it more in place. That something might be highlights.
A quick tip: When using blending modes on highlights we usually use the lightening blending modes or an overlay blending mode. Learn more about blending modes.
Usually beginners forget to add highlights on the subject. There are different types of highlights, however, the most common one is pin highlight. Pin highlight is the edge of light around the subject. It is how the light interacts with the subject.
To create a realistic pin highlight, you need to establish the direction of the light.
If the light comes from behind, the highlight will be on the edge. The subject will be less lit up & the highlight creates the silhouette.
How highlights work.
To establish the sharpness of the highlight, you need to factor in the strength & size of the light. (& even how many light sources)
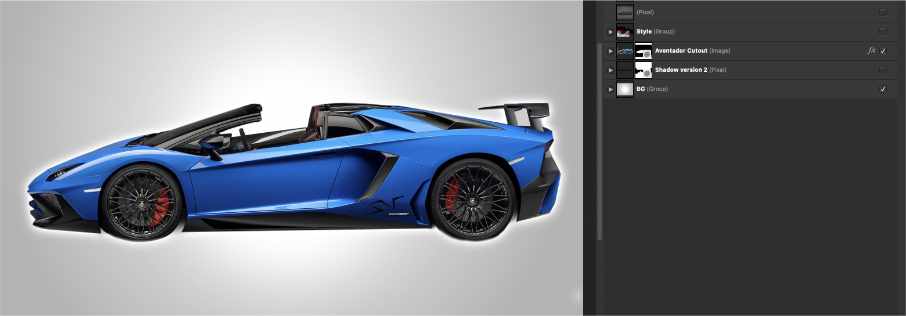
Creating a highlight (Easy Version) – Outer Glow
Let’s start by adding having the cut-out in right place within the layer panel. This process is the same as adding the outer shadow (as explained above).
Now, we’ll need to add an effect on the cut-out. Click on the “FX” icon at the bottom of the layers panel.
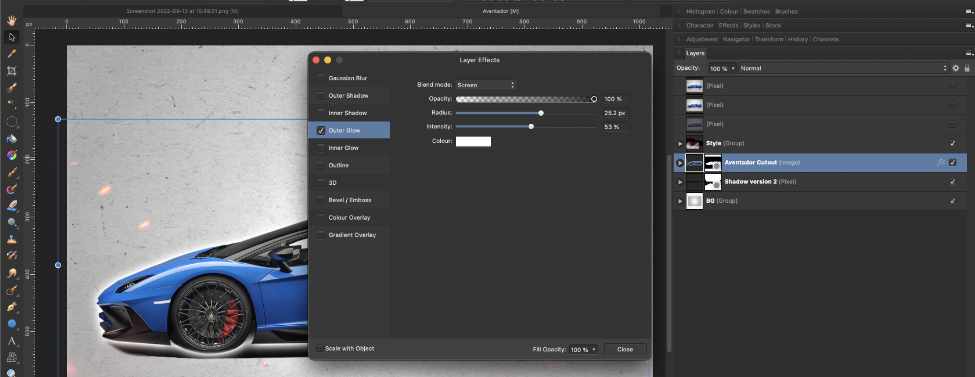
We’ll now select “Outer Glow”. This will add a glow/”highlight” to the selected layer; in this case the cut-out layer.
Play around with the different settings and select close. You could always go back and change the settings as it is a non-destructive filter.
- Color- try different colors to see what works best with your photo
- Opacity- play around with the opacity until you find the perfect transparency balance
- Blend Mode- experiment with different blend modes to see what effect it has on your photo.
- Radius- the radius determines the spread of the glow. A larger radius will create a bigger glow, while a smaller radius will create a smaller glow.
- Intensity – This determines the sharpness of the glow.
Creating highlights (Advanced Version)
As previously discussed, to understand how the highlight would need to look, you need to establish where & what the light is.
The light will be a medium to soft spot light. It is illuminating from behind the subject (on the right side of the car).
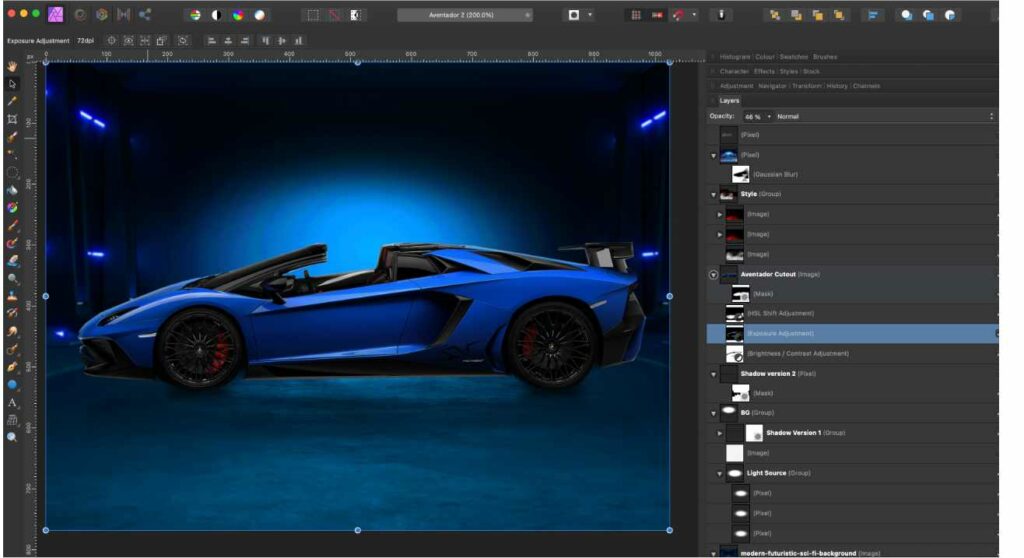
We’ll be changing the background & the composition for this example, so we emphasise the use of highlights.
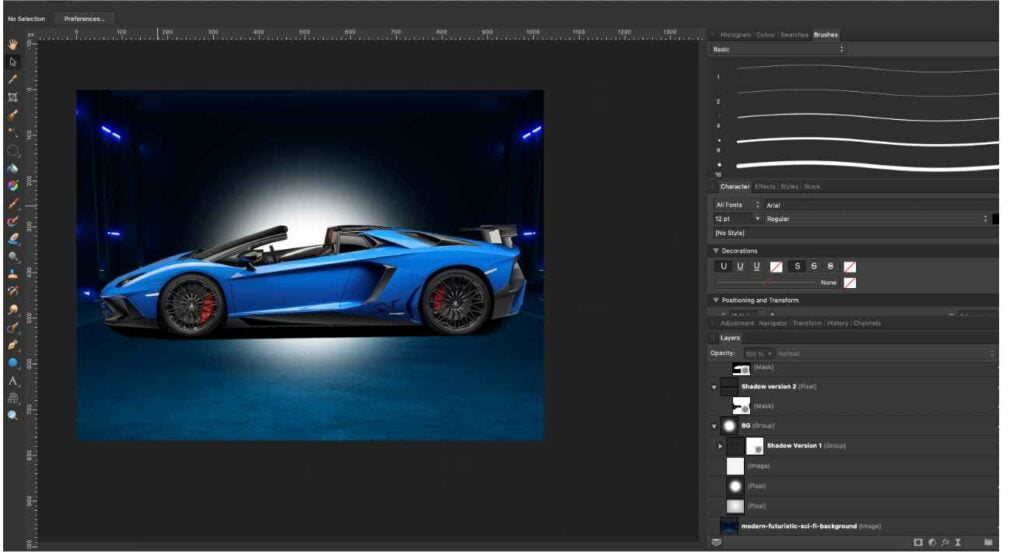
Once we have everything in place, we’ll go ahead and add a light. The light is a simple white brush point set to overlay behind the car.
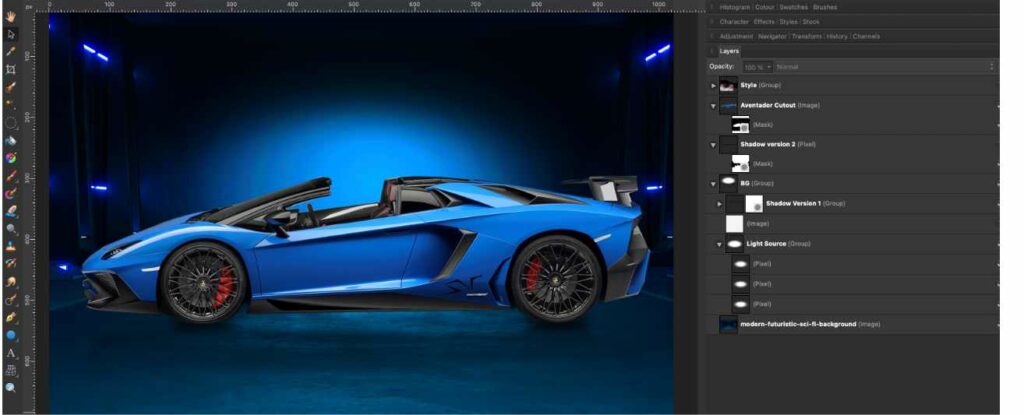
Let’s darken the subject(car) & use the shadow from version 2 (section: adding a shadow). Why do we darken the subject?
- Since the light is behind the subject, it creates a silhouette effect. The subject gets darker as it is obstructing the main light.
- We use shadow from version 2 because the light is from the opposite side of the camera view. So the shadow appears beneath the car & projected towards the camera.
What do we do to darken the image?
- Brightness & contrast Adjustment – We use this adjustment to darken the subject. (go to adjustments panel or down within the layers panel – semi-circle icon).
- Once darkened, use the paint brush tool (b) & select the mask of the newly created B&C Adjustment. Go gently around the edges to mask out the adjustment. This will leave a small bright line around the subject, indicating a highlight.

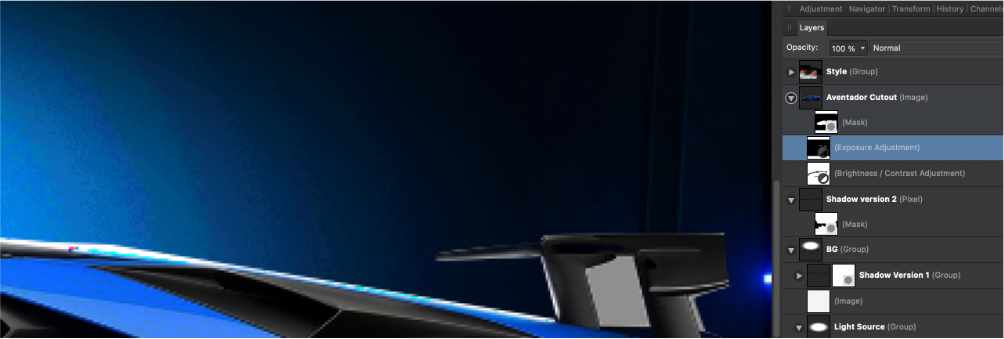
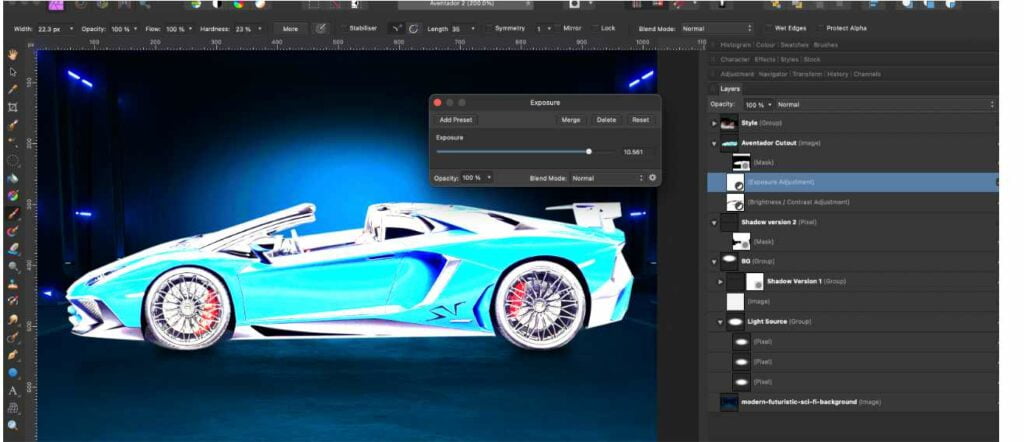
Following we’ll be enhancing this new highlight by going around the subject one again. However, we’ll now be using an “exposure” live filter.
To use this filter we need to do the following:
- Add the “Exposure adjustment” & push the slider up. Make sure that the adjustment is clipped within the subject cut-out (drag the adjustment layer over the cut-out).
- Select & Invert the mask layer on the newly created adjustment. (CTRL/CMD+I)
- Use the “paint brush tool” (b) to paint around the edges – Paint in white to reveal.
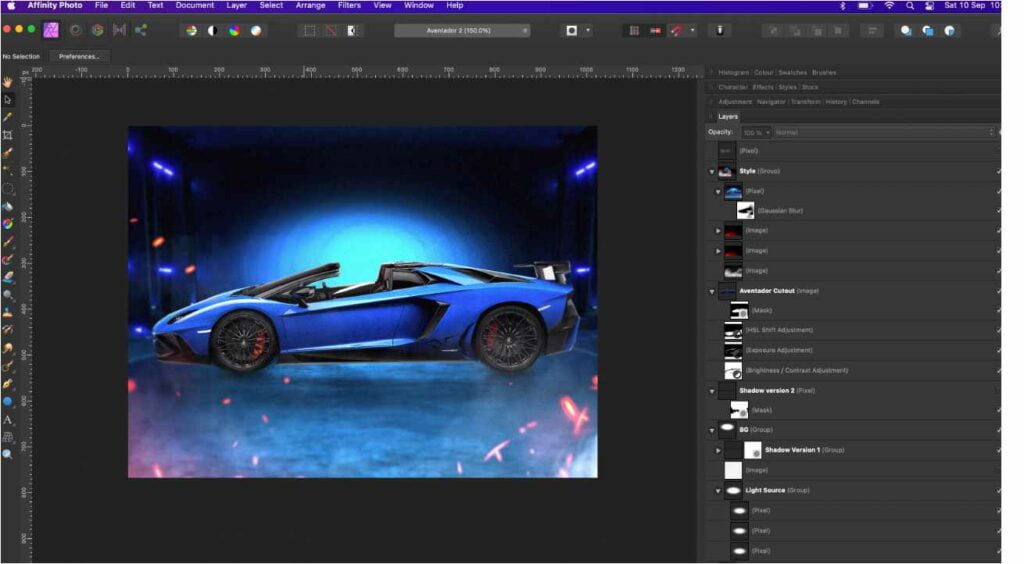
We’ll finish it up by adding some effects to the image.

How to remove shadows in Affinity Photo?
Shadows can be removed using a couple of steps listed below,
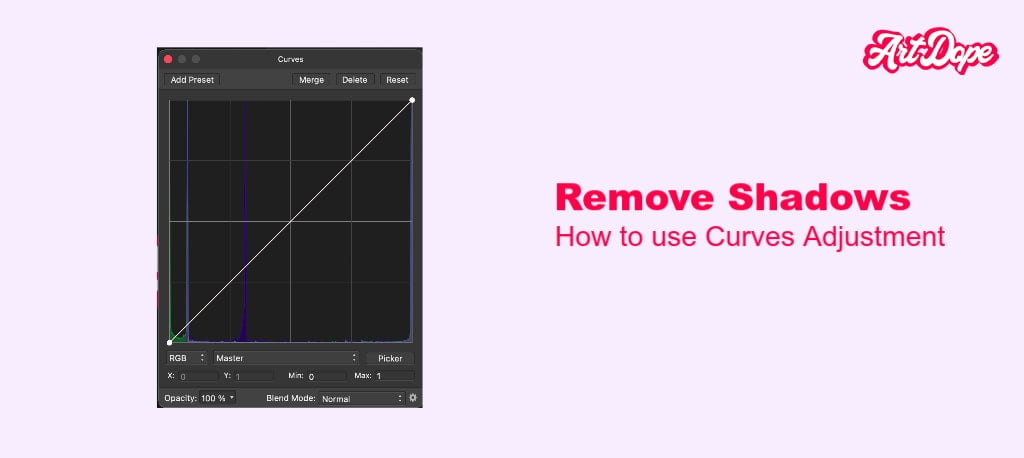
Initially, we need to adjust the Curves of the image in order to brighten up the image.
- First, select the Adjustment icon to apply the Curves adjustment. Alternatively, it can be done by the short Command + M(Mac) or Control + M(Windows).
- Click and drag the white line appearing in the middle of the window which is termed the “Spline“. Increasing the spine will brighten up the image and decreasing it would darken the image.
To make the adjustment more targeted to the selected shadow, we should apply a mask & adjust it.
- Select & invert the adjustment by selecting Command I (Mac) or Control I (Windows).
- Select the Paint Brush Tool (b) and adjust the size based on your requirement.
- Remember to check whether the Hardness on the top of the toolbar appears 0% and and color of the color palette is white.
- You can mask the adjustment as per your requirement to enhance the picture to a better look.
Furthermore, if you’d like to fix the image & remove the subject completely, you could check our in-depth tutorial here.
How to enhance the shadows and highlights in Affinity Photo
The use of a “Shadows and highlight” filter enhances the shadows and highlights in an image. It’s a good idea to use this filter when you want to bring out details in both the shadows and highlights of an image.
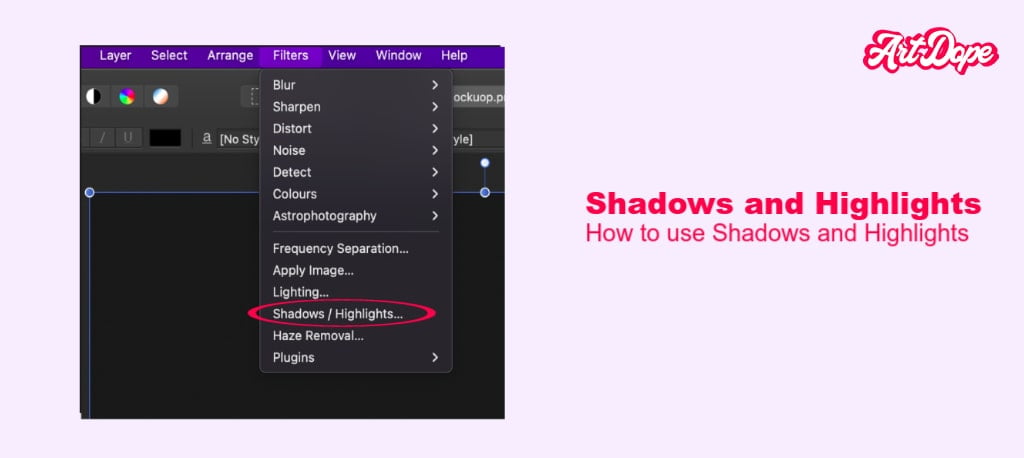
To apply the Shadows/Highlights filter:
- Go to Filter > Adjustments > Shadows/Highlights.
- In the Shadows/Highlights dialog box, adjust the Shadows and Highlights settings to taste.
- Click OK after completion.
However, this filter provides various other options embedded in the filter dialog as discussed below,
- Version – Affinity Photo provides you with the option to choose the version of this filter. The default version is 1.7 but 1.6 is the classic version of this filter.
- Shadows Strength – The shadow’s strength corresponds to the amount of darkness that will be added to the shadows.
- Highlights Strength – The highlight’s strength corresponds to the amount of lightness that will be added to the highlights.
- Shadows Range – The shadow range defines the tones in the image that will be affected by the strength of the shadows.
- Highlights Range – The highlights range defines the tones in the image that will be affected by the strength of the highlights.
Expert Rating
Summary
Highlights & shadows give life to the whole composition. It is not an easy concept to grasp at first, however, with time this becomes second nature. It is suggested to prioritise lighting in each artwork. If light comes from one-side a shadow should be present.
Conclusion
In conclusion, we discussed Affinity Photo’s Shadows, Highlights, the ways to create a shadow, create a outer shadow(drop shadow), remove the shadow, create highlights, and some tips to enhance the shadows and highlights.
There are multiple ways in creating both shadows & highlights. We have shared our in-depth technique on how to add them in various different ways.
Thank you for sticking through & hope you’ve found this interesting!


