
Live filter layers are a great way to add some creativity and interest to your photos. They are a great way to add effects in a non-destructive manner.
In Affinity Photo, they can be easily applied to any photo with just a few clicks, or they can be added as post-processing effects after the photo has been developed.
In this blog post, we will explain what live filters are, what they are used for and provide examples of the different types of live filters available within Affinity Photo!
What is live filter in Affinity Photo?
Live filters are equivalent to smart filters in Adobe Photoshop that can be applied to any photo. Such filters are non-destructive as they can be easily adjusted and removed without modifying the original image.
They allow you to apply creative effects to your pictures while at the same time permitting you to modify the effect settings or remove the effect entirely. The filter is applied to a selected layer, just as if you were applying an Adjustment Layer.
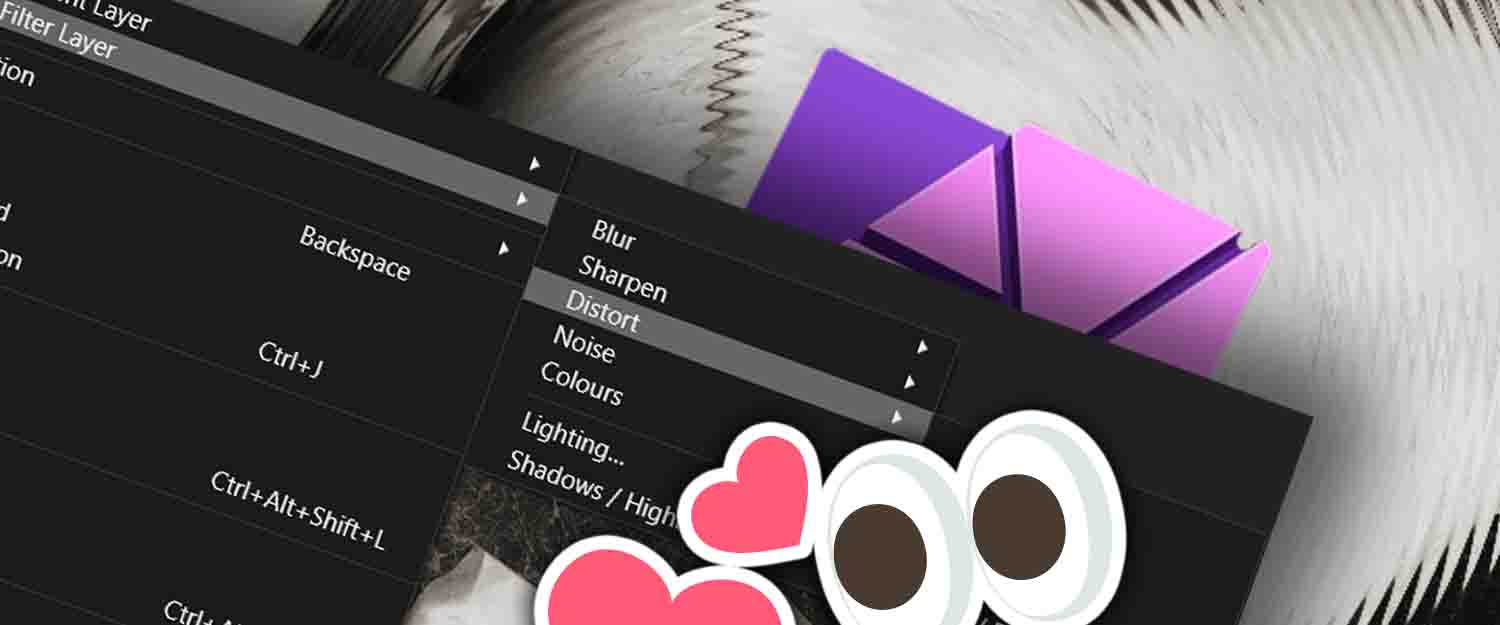
There are many different live filters that produce unique effects and give you control over the final product. The live filters include sharpening, blurring, distortion, and more!
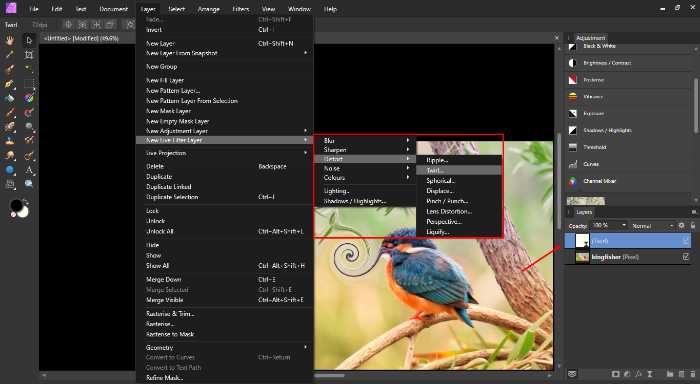
There is no limit to the number of filter layers and diverse effects you can apply to a photo. This is how you can access them:
- Go to the ‘Layers’ panel in the Toolbar
- ‘New Live Filter Layer’ and finally choosing which filter you would like to apply (see image below).
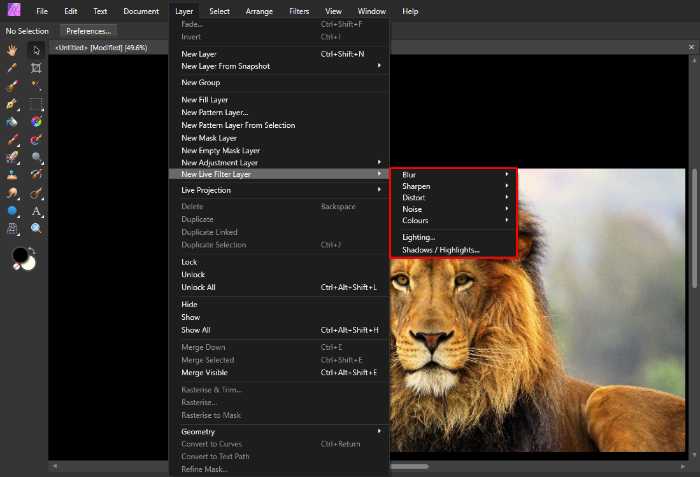
In Affinity Photo, live filter layers can be moved over any layer as preferred, as well as above different layers such as vector layers and pixel layers. You may also apply a live filter effect to a particular layer, so only that layer will be affected.
In the filter panel, you may use blending modes on live filter layers as well as change the opacity of live filter layers.
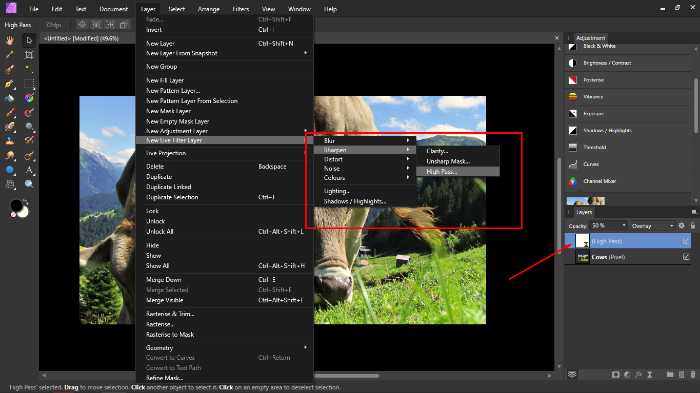
Sharpening live filter in Affinity Photo
Sharpening increases the contrast between pixels, making them more distinct from each other. This makes details in your photo appear sharper and clearer than before! The sharpness filter adjusts pixel values around edges (edges are defined by local brightness changes).
The three options for Affinity Photo’s sharpening live filter include:
– Clarity– This setting enhances the local contrast and makes the image look more intense and therefore sharper.
– High Pass – While retaining details in the image, this live filter reduces any colored noise, particularly at the corners, to achieve a sharpening effect.
– Unsharp Mask – This filter is used to increase the apparent sharpness of an image by using a radius to determine how much sharpening should be applied to each area of contrast in your photo.
See an example of this Live Filter Layer below.
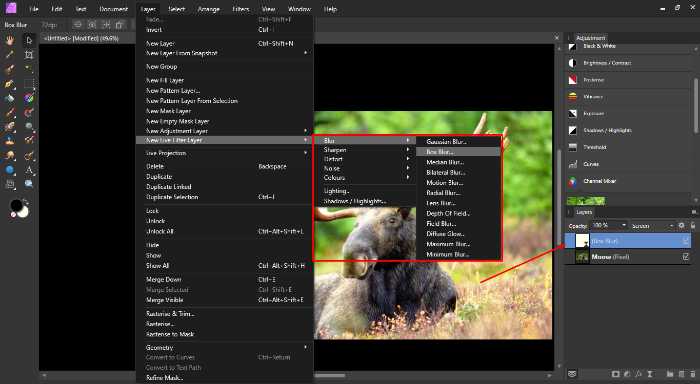
Blur live filter in Affinity Photo
Blurring is another Affinity Photo live filter that can be used to control the strength of a blur effect. The most popular options for Affinity Photo’s blurring Live Filter Layers include the following:
– Gaussian Blur – This setting allows you to blur and feather a defined area/image where “detail” and colour will not be altered, but will smoothen & blur the image in accordance to the strength you give it.
– Motion Blur – This filter is used to create the effect of motion by simulating a motion and direction, which blurs objects in different directions based on their distance from the focal point.
– Box Blur – This filter gives you more precise control over the amount and distribution of blurring that is applied to your photo. It is especially useful for blurring out logos and unwanted details. See an example of this Live Filter Layer below.
– Radial Blur – This live filter is used to create the effect of a circular or elliptical motion. This type of blur is often used to give an impression of circular movement or depth.
Distort live filter in Affinity Photo
Distortion is Affinity Photo’s live filter that can be used to create a wide range of deformations and weird effects. Affinity Photo offers eight distortion filters in total. Here is a list of four:
– Pinch/Punch – Pinching effect along the horizontal axis of your image. Pinch generates a concave spherical distortion (squeezes an area) while Punch creates a convex spherical distortion (bulges an area).
– Spherical – Distorts and expands an image by wrapping it around a spherical form.
– Twirl – To distort an image by evoking a circular motion. The distortion can be in a clockwise or an anti-clockwise manner. See an example of this Live Filter Layer below.
– Ripple – Allows you to create waves of distortion that propagate outwards from an anchor point similar to when throwing something into water.
Noise live filter in Affinity Photo
Sometimes an image looks “too clean”. A noise filter is used to introduce turbulence into your image. You can control the amount of noise applied by adjusting its opacity and choosing one of four types:
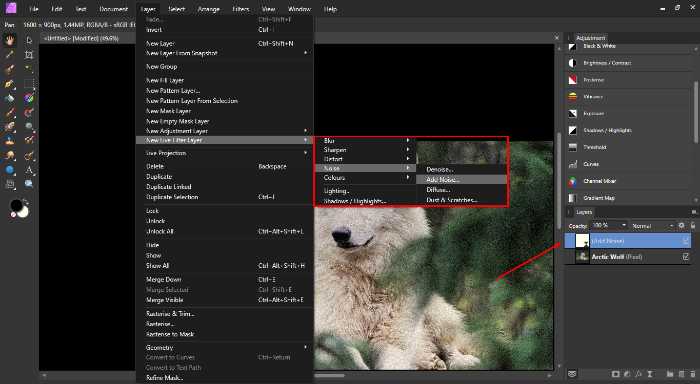
– Add Noise – allows you to add random noise to your image, which can be used to create a more interesting or grungy look. See an example of this Live Filter Layer below.
– Diffuse Noise – gives you more control over the distribution of noise in your image. This can be used to add a more organic feel to your photos or to simulate film grain.
– Dust & Scratches – simulates the effect of physical damage to an image, such as that caused by dust or scratches.
Removing Noise?
– Denoise – is used to reduce the appearance of noise in an image. This can be helpful when you have a photo that contains a lot of grain or speckles and you want to clean it up.
Checkout our full article here!
Colours live filter in Affinity Photo
Affinity Photo’s colour live filters give you the ability to add colour and vibrancy to an image. Affinity Photo offers these five types of Colour Live Filters:
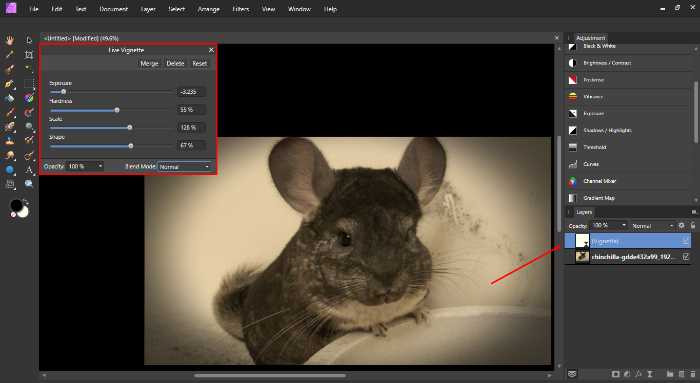
– Vignette – is used to add a soft tinted border around the edges of your image. See an example of this Live Filter below.
– Defringe – is used to remove color fringes from an image. These are usually found around the edges of high contrast areas.
– Halftone – is used to create a halftone screen pattern in your image. This can be used to give your photo a more retro look.
– Procedural Texture – is used to add texture and pattern in your image. This can be useful for creating backgrounds or patterns that are unique to you!
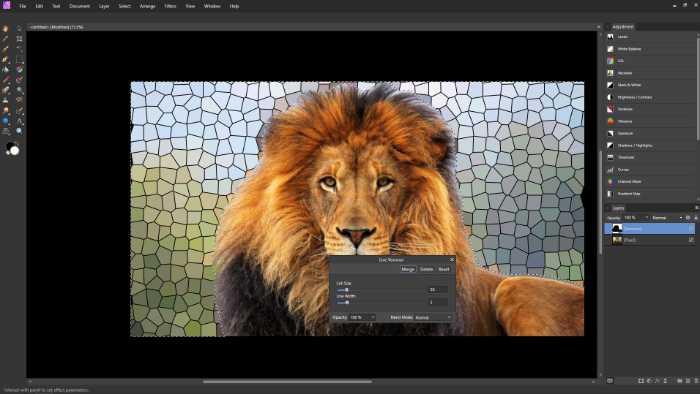
–Vonoroi – will create a distorted random pattern that can be used to add texture and interest in your image.
Lighting live filter in Affinity Photo
Affinity Photo’s lighting live filters are used to create the effect of light sources in your photo. They can be used to enhance the mood or atmosphere of your photo. Affinity Photo provides three source types such as :
– Point – This type of source emits light from a single point in space, similar to a lightbulb.
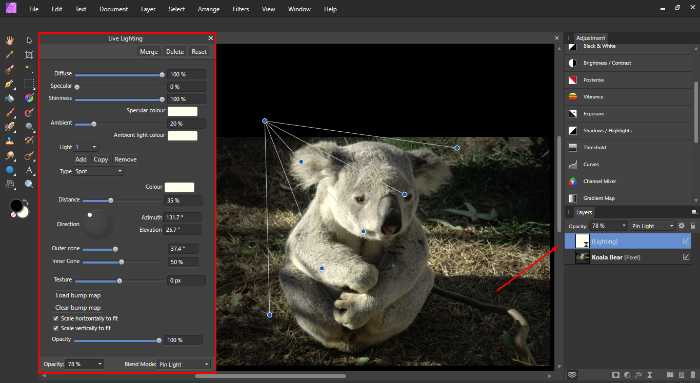
– Spot – Affinity Photo’s Spot light source is used to generate an elliptical beam of light that has an adjustable hot spot. See an example of this source type below.
– Directional – Affinity Photo’s Directional light source emits light in a specific direction from an infinite source, which can be useful for simulating sunlight or other natural light sources.
Various settings such as Diffuse, Ambient, Light & more allow you to control the color, intensity and shadows of your light sources.
Shadows/Highlights live filter in Affinity Photo
The Shadows/highlights Live filter is used to lighten or darken the shadows and highlights of your photo.
This can be used to create more contrast in your image or to adjust the brightness of specific areas. See an example of this Live Filter Layer below.

Should you add masks to a Live Filter layer?
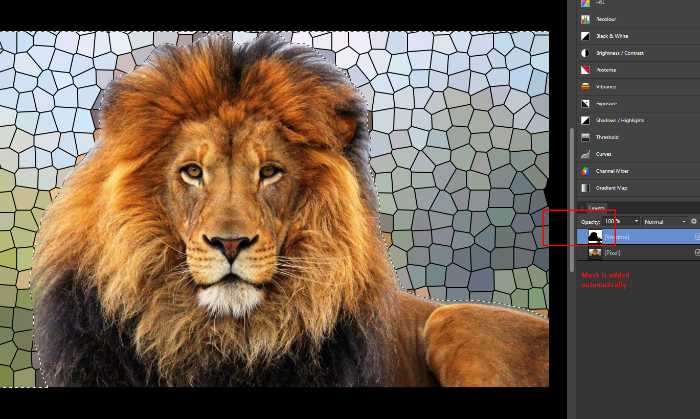
There is no need to add masks manually, because masks are applied to Live Filter Layers automatically.
Affinity Photo allows you to apply a mask to control the area of an image that is effected by the live filter. This can be used to restrict the filter to a specific area of your photo or to create interesting effects by using multiple filters on different parts of an image.
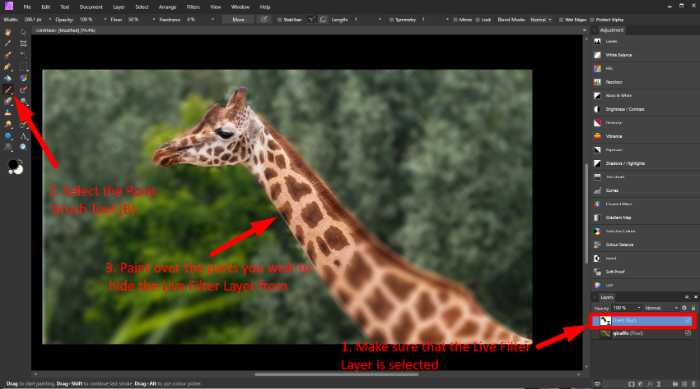
Applying live filters to selected areas
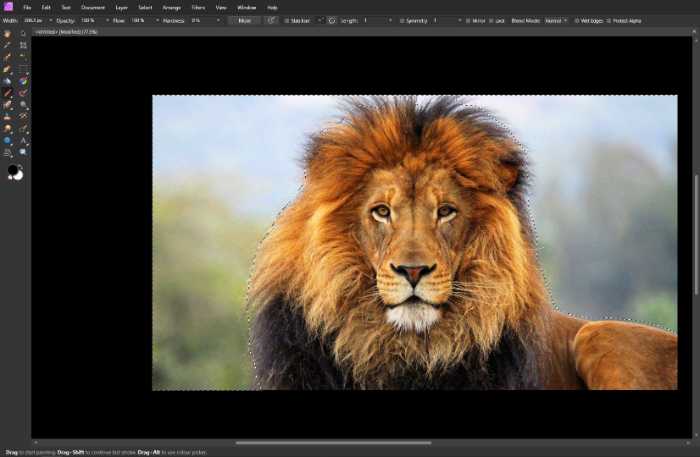
Live filter layers can be applied selectively, which can be useful for enhancing specific areas of an image. To apply a live filter layer only to a particular selection, make a selection and add a new live filter layer.
As stated before, when adding a new live filter layer, a mask is added automatically to the layer. You could paint in the areas you’d like to be visible or hidden using the brush tool.
Just remember, black hides & white reveals. The following images explain this procedure in a step-by-step manner.
Expert Rating
Summary
This tutorial is an in-depth tutorial of what live filters are & how to use them. Applying filters in a non-destructive way has never been easier.
Conclusion
Now you can be even more creative with your pictures by using Live Filters in Affinity Photo. Live Filters allow you to apply creative effects like the ones discussed throughout this article. Add live effects easily in a non-destructive manner!
Whether it’s an Instagram filter, or a professional photograph, these filters are perfect for turning a regular picture into something extraordinary. As Always, thank you for taking your time in checking out our article – We really do appreciate it!
Thanks for reading & feel free to check out more of our articles!


