
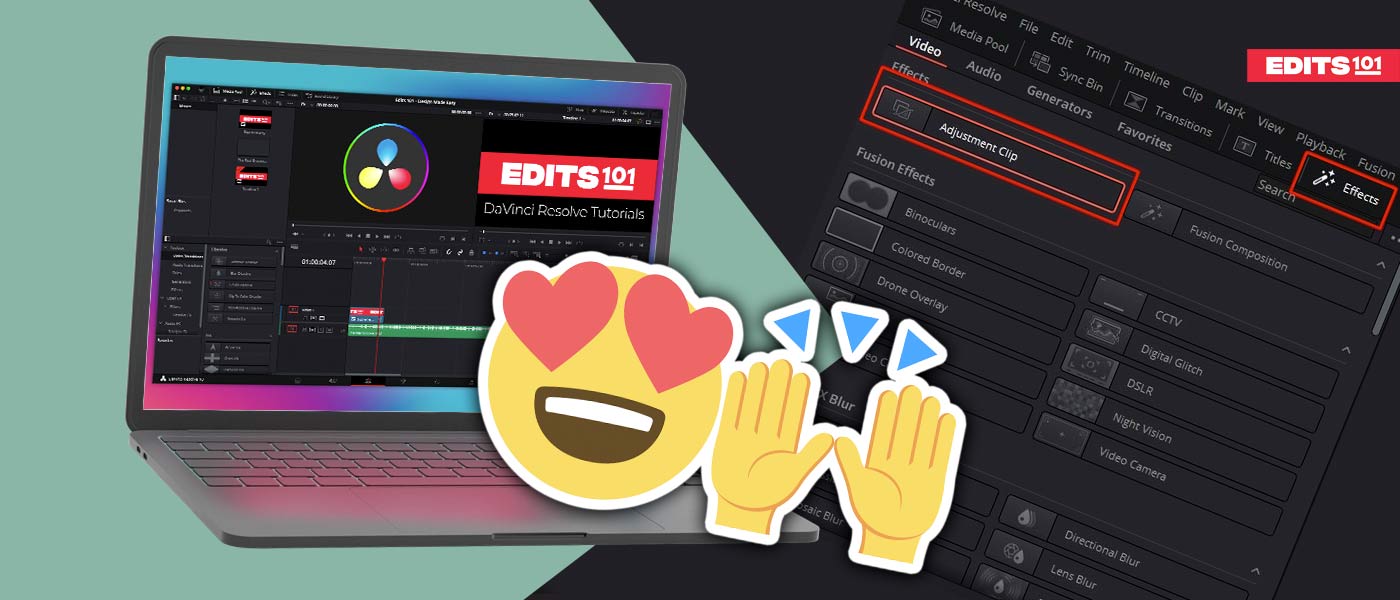
DaVinci Resolve 18 allows you to use adjustment clips for a variety of purposes, from adding effects such as a Gaussian blur to adding keyframes, transitions, color corrections, and much more!
In this tutorial, we will explore what adjustment clips are, what they are used for, and how to add adjustment clips in DaVinci Resolve 18. Adding adjustment clips allows you to change multiple clips at once or limit adjustments to only a portion of a clip.
What’s an Adjustment Clip?
An adjustment clip is basically a video clip that can be dragged from the ‘Effects Library’ and placed on the timeline. An adjustment clip works as a parent video clip, affecting all the clips underneath, in the timeline. With these clips, you will be able to add effects, animations, and transitions.
How To Add an Adjustment Clip in DaVinci Resolve?
In this section, we will discuss how to add an adjustment clip step-by-step and add how to change different settings in the Inspector panel.
Step 01: Setting up the Project
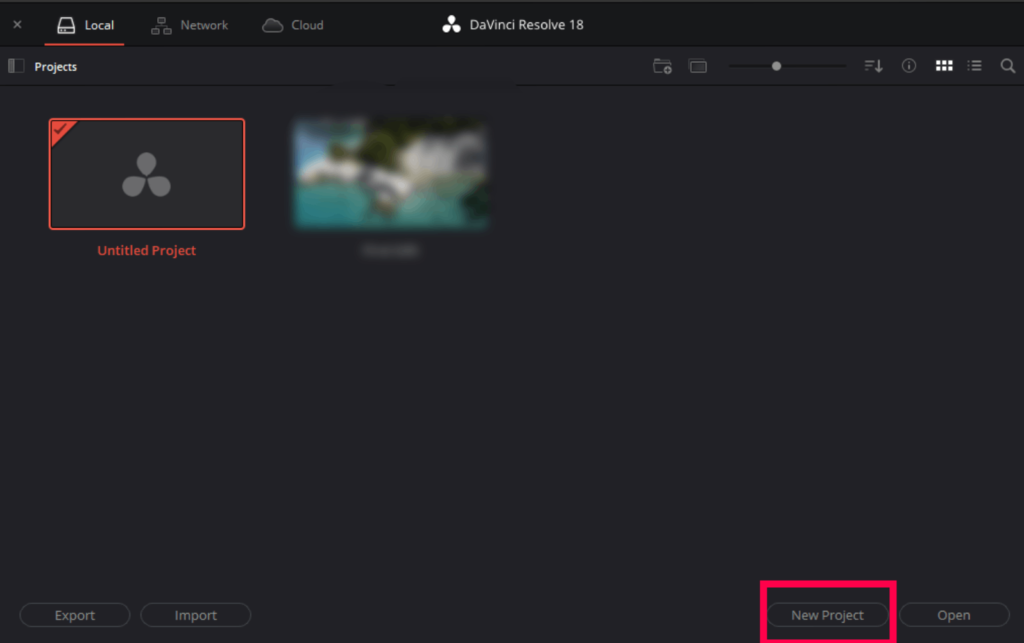
Initially, you need to open or create a new project,
- Open the DaVinci Resolve 18 application.
- Create a new project or open an already present project.
- Go to the edit page.
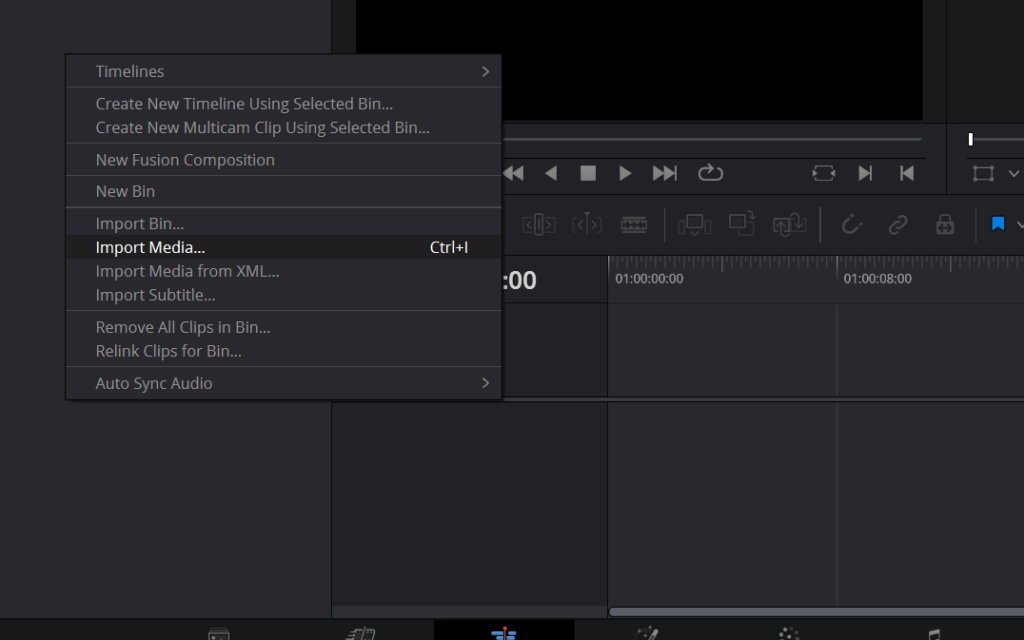
- Right-click on the Media Pool section.
- Choose the option Import Media as displayed below.
- Alternatively, use the keyboard shortcut Ctrl/Cmd+I to open the media.
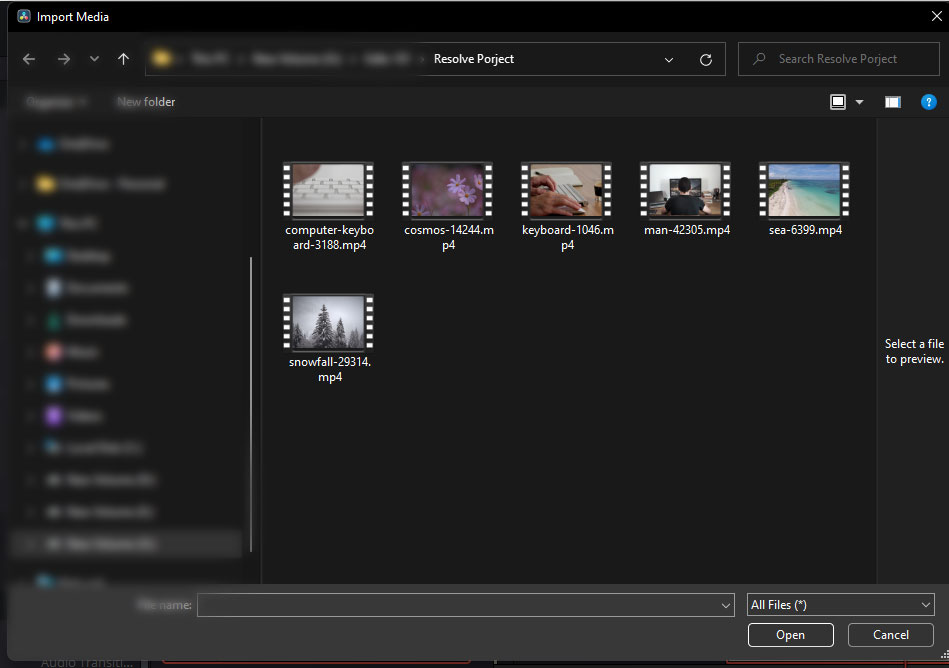
Go to the location where the media is placed on your computer or PC. Choose the media and click Open to display it on the DaVinci Resolve 18 application.
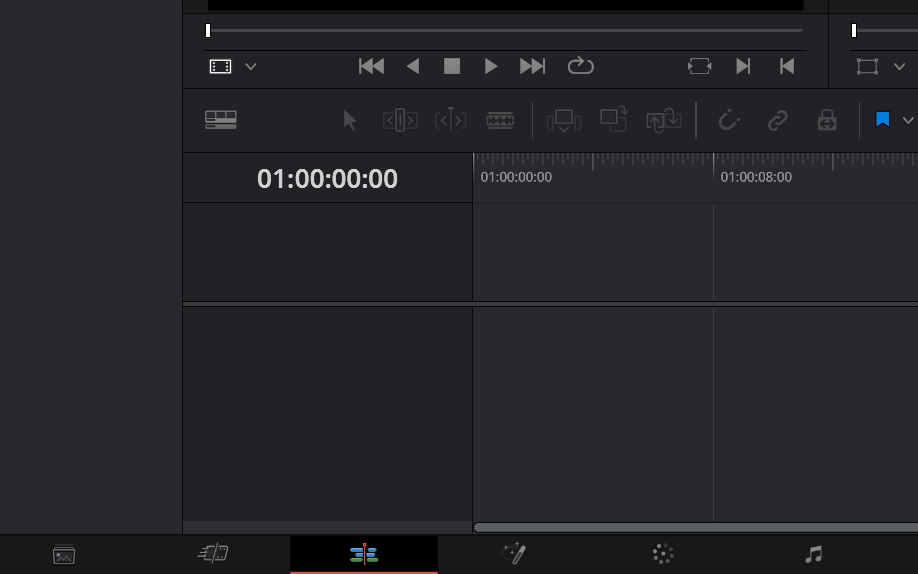
Step 02: Edit page > Set the Timeline
To go to the Edit page,
- Go to the bottom of the canvas.
- Click on the ‘Edit page’ icon.
Click and drag the clips from the ‘Media Pool’ to the timeline. Then, adjust the clips and the duration of each clip as per your requirement.
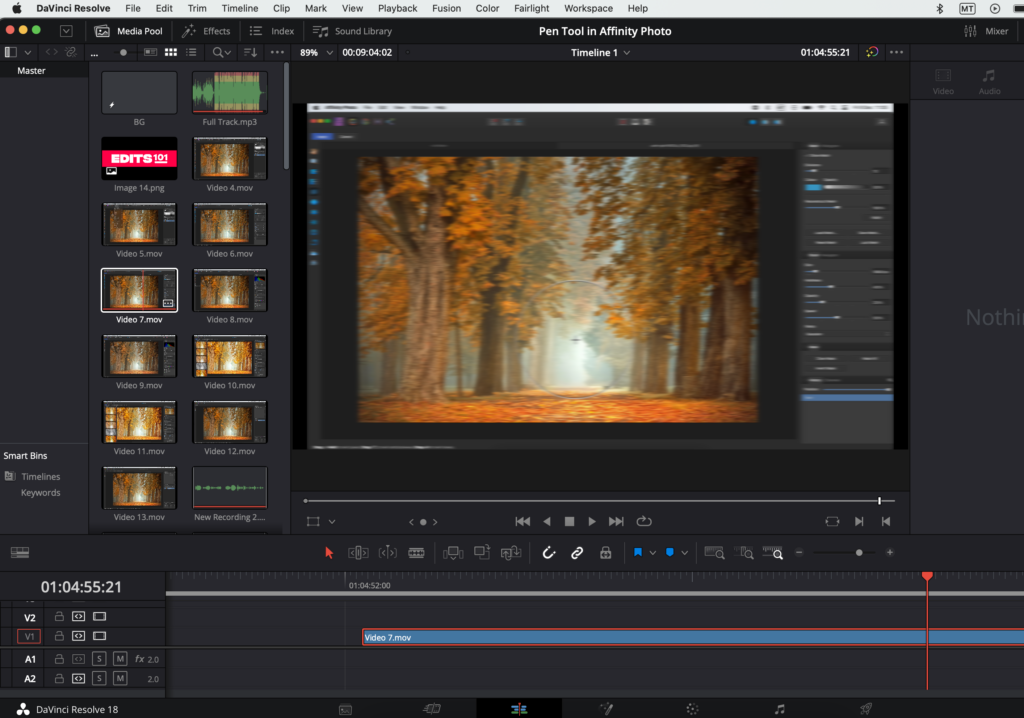
Step 03: Choose the Adjustment clip
Go to the Effects Library to add an adjustment clip,
Choose the Adjustment clip:
- Click on the Effects Library in the Interface toolbar.
- Click on ‘Effects’ from the list located to the left of the library. Then click on ‘Adjustment clip ‘under the ‘Effects’ panel.
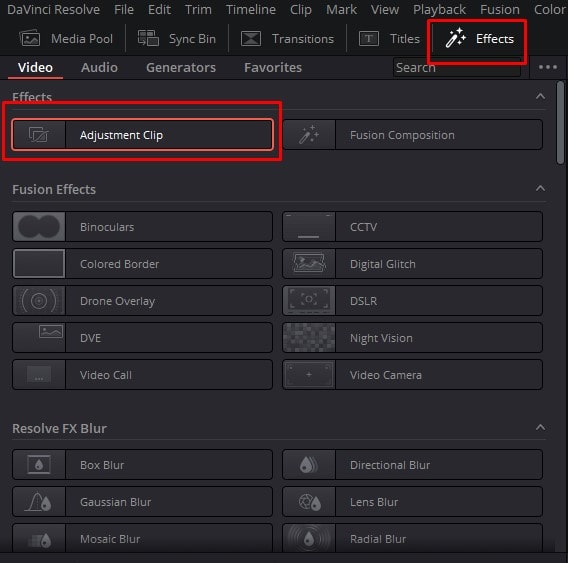
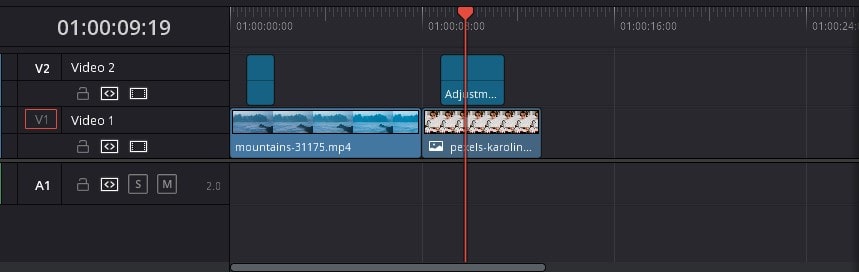
- Drag the ‘Adjustment Clip’ to the timeline and place it over the clip you want to adjust.
- You can place multiple clips under an adjustment clip, which will all be affected by the changes you make to the adjustment clip.
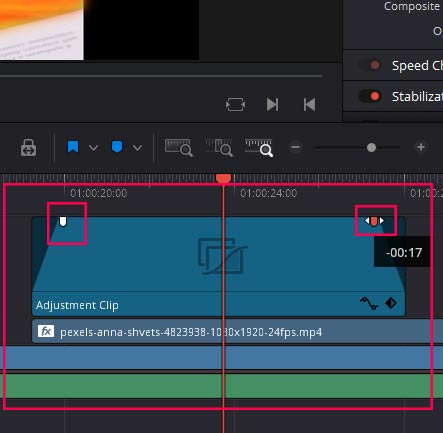
Step 04: Setting the Duration of the Adjustment clip
- Adjust the duration of the adjustment clip according to the preferred duration of the adjustment.
- For example, if you want the adjustment to affect the entire duration of a clip, drag the corners of the adjustment clip to match the duration of the video underneath.
- On the other hand, if you want the adjustment to be limited to a portion of the video clip’s duration, adjust the duration of the adjustment clip as necessary.
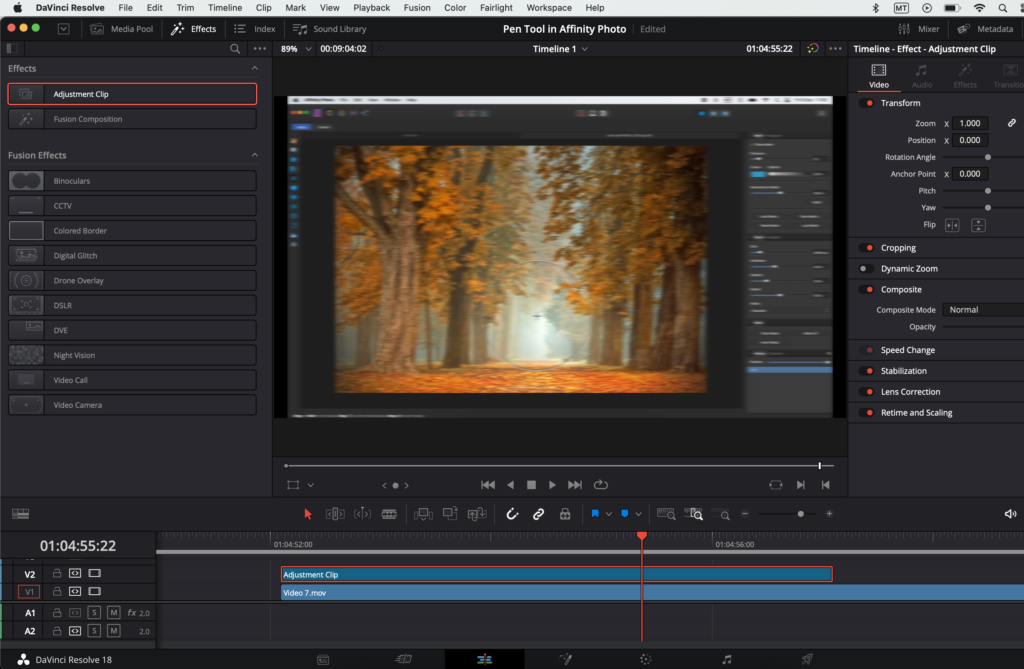
Step 05: Transform the clip
In our example, we will limit the adjustment to a portion of the video clip. In this section, we will show you how to transform a clip using the Adjustment clip.
To transform the clip:
- Click on the Adjustment Clip in the timeline.
- Go to the Inspector.
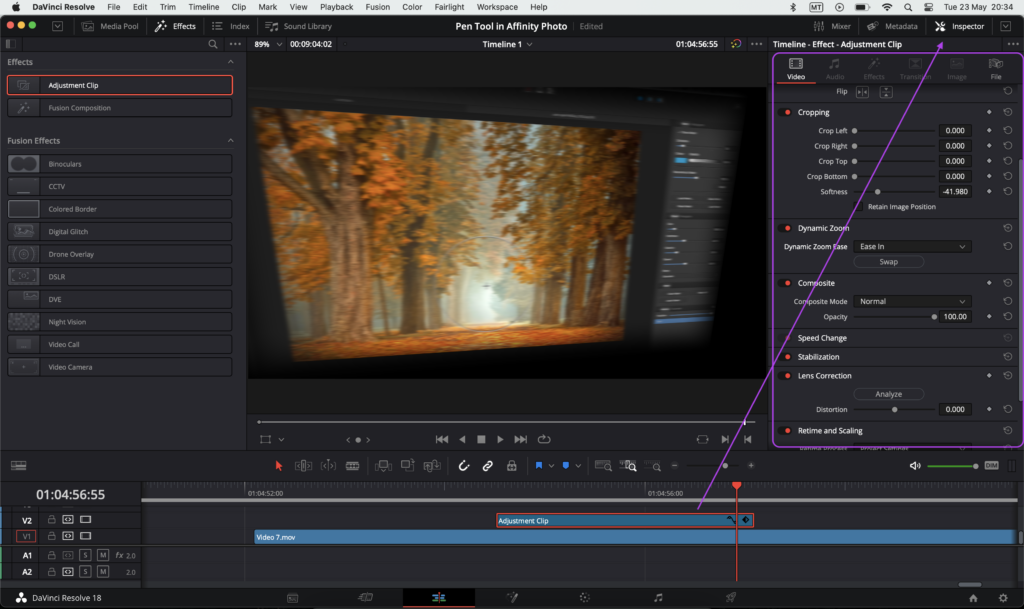
- Adjust the settings available as preferred.
- The adjustment clip can be dragged and extended at any point during the video editing process.
- You can also make the adjustment clip fade in or fade out by dragging the side handles.
Adding Effects to an Adjustment Clip
Any effect available in DaVinci Resolve can be added to an Adjustment Clip. In this example, we will add a Gaussian blur to the adjustment clip.
To add a Gaussian blur,
- Go to the ‘Effects Library’.
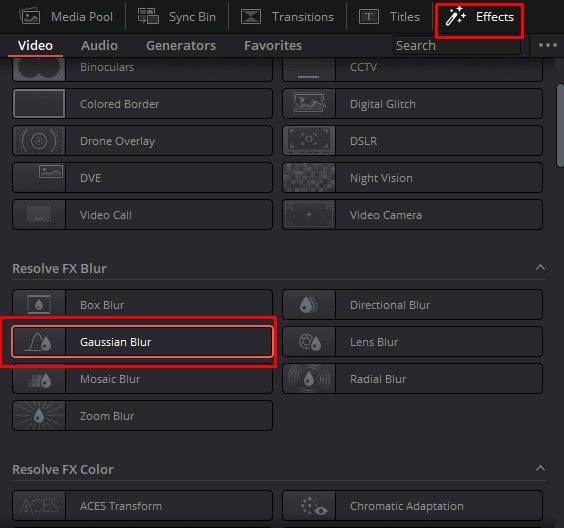
- Choose the Gaussian blur effect and click and drag it on the Adjustment clip.
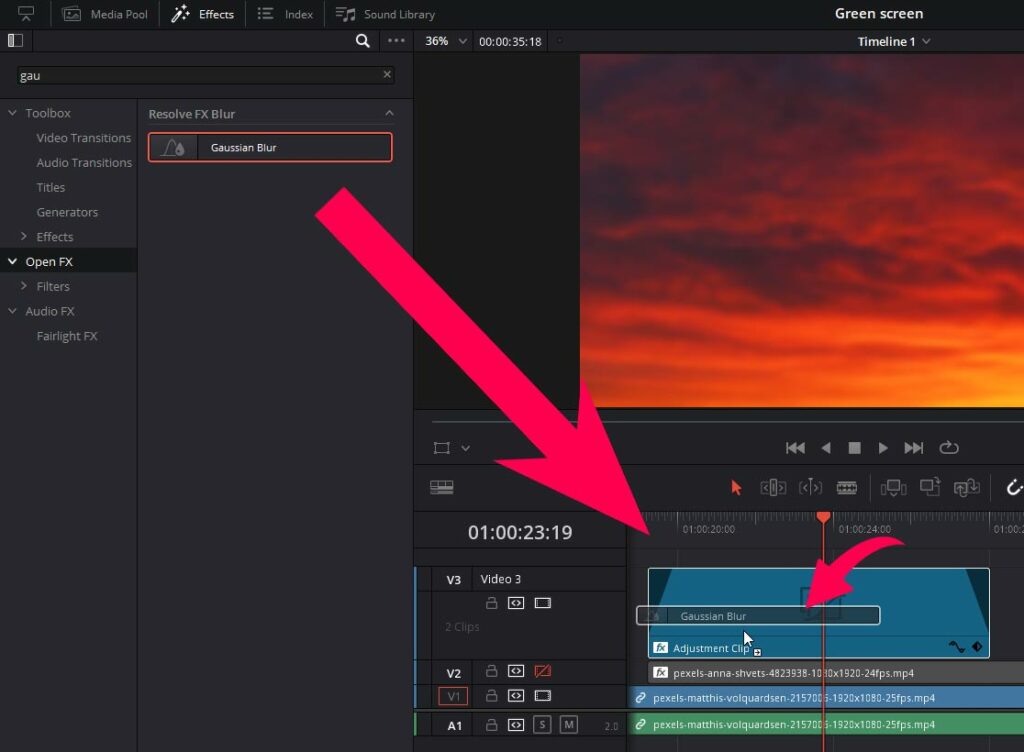
- You can start adjusting the Gaussian Blur in the inspector panel once you apply it to the adjustment clip in Davinci resolve.
- Go to the Inspector and click on the Effects button.
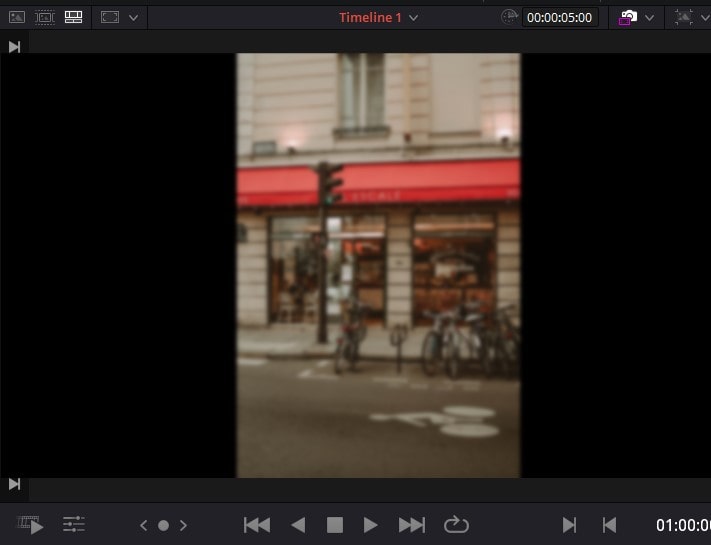
- Adjust the blur strength and other Gaussian blur settings.
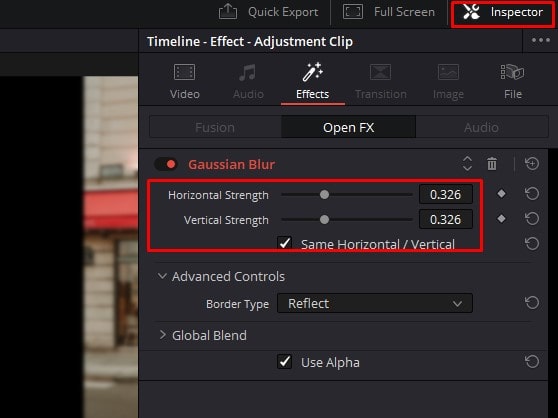
- You will notice that the changes will appear on the Viewer.
Once you have adjusted the Inspector settings, you may copy the adjustment clip and its settings to add the same effect to the other clip. To do so, follow the below steps:
- Copy the adjustment clip by using the shortcut ‘Ctrl/Cmd+C’ or by right-clicking on the adjustment clip and selecting Copy.
- Click on the timeline where you want to place the adjustment clip with the same Gaussian blur settings. Press ‘Ctrl/Cmd+V’ or right-click and select Paste.
- This causes you to paste the adjustment clip, and now you need to adjust its duration on the timeline.
- You can make as many copies of the adjustment clip as you want.
You can also press the alt or Option key, then click and drag the adjustment clip. First, let go of the click and then let go of the Alt or option key. This will make a copy, and you can make as many copies as you want and place these above other clips to apply the same settings to each clip.
How to add Animation using Adjustment Clip
In this section, you will learn how to add animation with an adjustment clip in DaVinci Resolve 18.
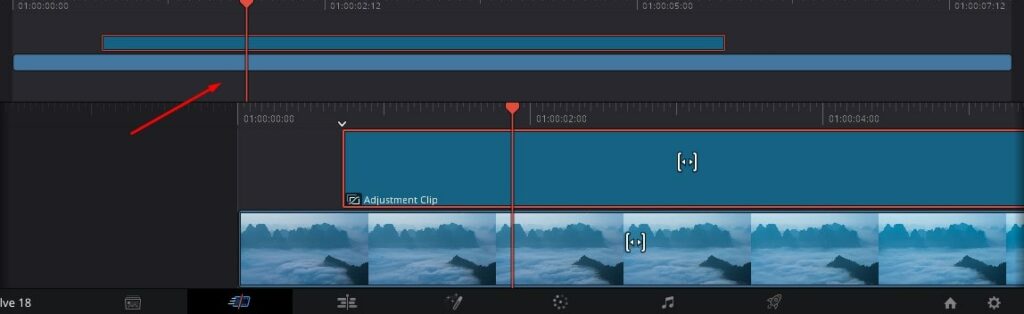
Step 01: Add an Adjustment Clip
To add an adjustment clip,
- Click on the Effects Library in the interface toolbar.
- Click and drag the Adjustment Clip to the timeline.
- Set the duration of the adjustment clip as desired.

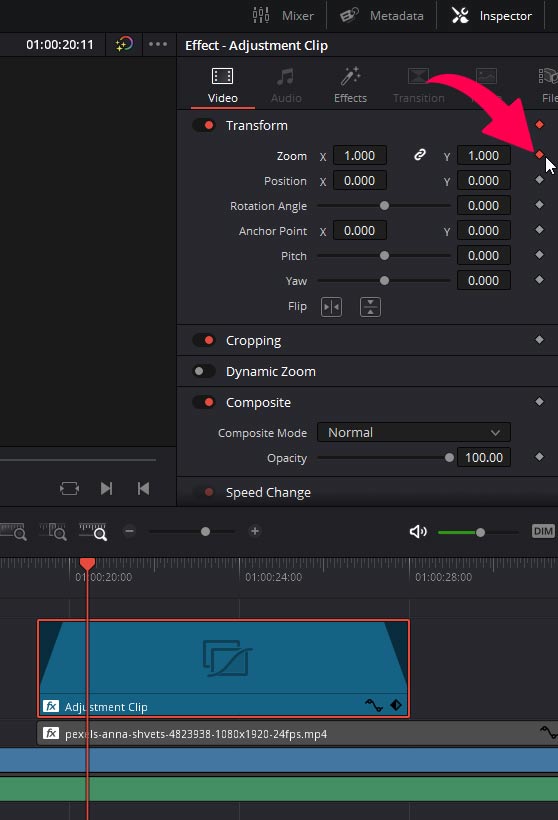
To add the animation with keyframes,
- Go to the Inspector on the Interface toolbar.
- Then, place the play head where you want the animation to begin.
- Click on the diamond next to the property you want to animate. This will add and activate the keyframe, and you will see that the diamond has become orange.
To add the next keyframe,
- Move the play head to the frame where you want the animation to end.
- Change the zoom value, and the second keyframe will be created automatically.

Repeat this process to add multiple keyframes.
Now, If you place the play head at the beginning of the timeline and play the video, you will be able to see the animation.
If you choose to animate the zoom property and set a lower zoom level as the first keyframe and a higher zoom level as the second keyframe, you will see the video zooming in when you play.
If you want to apply the same animation to other clips as well, then follow the below steps:
- Press the alt or the option key, click and drag the adjustment clip and place it over the other clips you want to animate.
- First, let go of the click and then let go of the alt or option key.
Adjustment Clips on the Color Page
In this section, we will teach you how to add adjustment clips and use them on the Color page to add color grading.
Step 01: Add and Adjustment Clip for color grading
To add an adjustment clip,
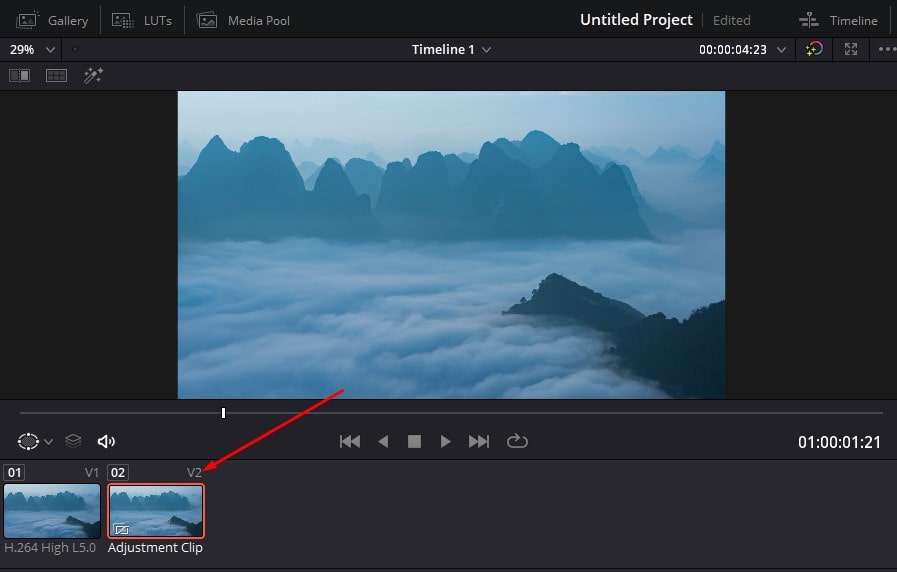
- Click and drag the Adjustment Clip to the timeline from the Effects Library.
- Drag the adjustment clip, and set the duration according to the length of the underlying clips. Or set the duration according to the effect you are trying to apply.
Step 02: Apply Color Grade
Once you have placed the adjustment clip on the timeline, make sure that it is selected by clicking on it in the Timeline.
Now, go to the Color page by clicking on the fifth icon at the bottom of your screen.
On the Color page, you will notice that the adjustment clip frame will appear under the Viewer. In this section, we will edit the color of the adjustment clip.
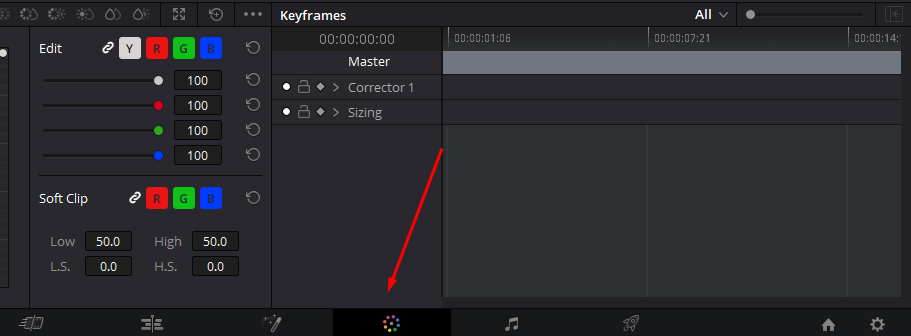
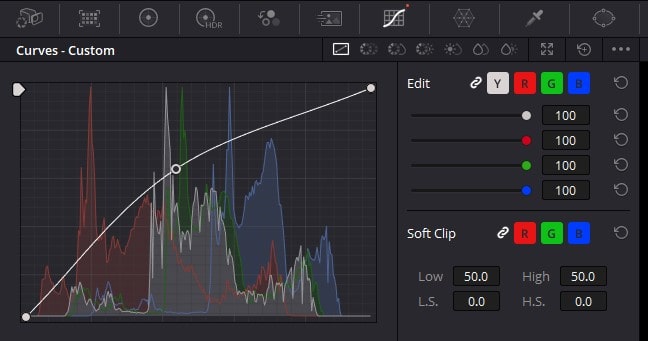
Go to the Curves Panel and adjust the spline of the graph as necessary:
- You can increase or decrease the contrast and play with the shadows and highlights.
- Once you are set with adjusting the colors, go back to the Edit page.
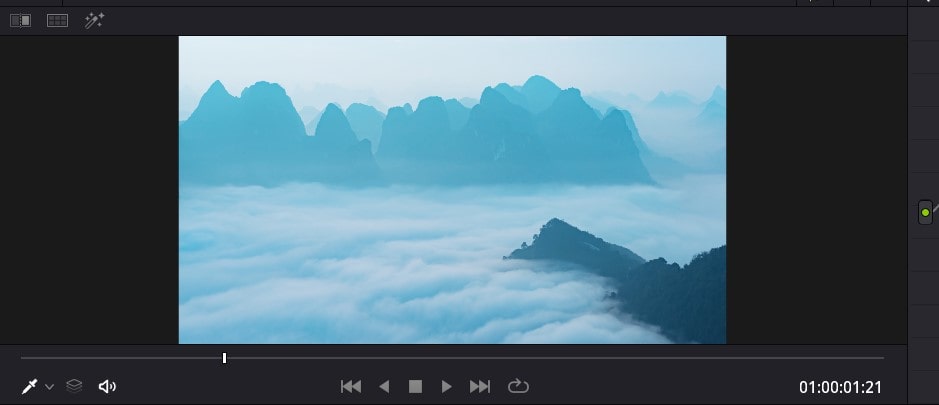
When you play the video clip, you will see the changes made in the Color page from the Viewer.
Next, if you want to apply the same color adjustment clip, simply copy and paste the adjustment clip where you want to place it on the timeline. You will notice that the same color effect will be applied to the underlying video clips.
Conclusion
Adjustment clip gives you a lot of flexibility when working to manipulate multiple clips at once or If you want to add effects to the clip but don’t want to edit the original clip.
Add the adjustment clip from the effects panel and place it above the clip or clips you want to affect. You can apply Gaussian blur, camera shake, and more. Drag and drop the effect and then change it in the inspector panel.
You can also use the adjustment clip to create animations. Place the adjustment clip over the video clip. Then create the keyframes using the method we have mentioned in the guide.
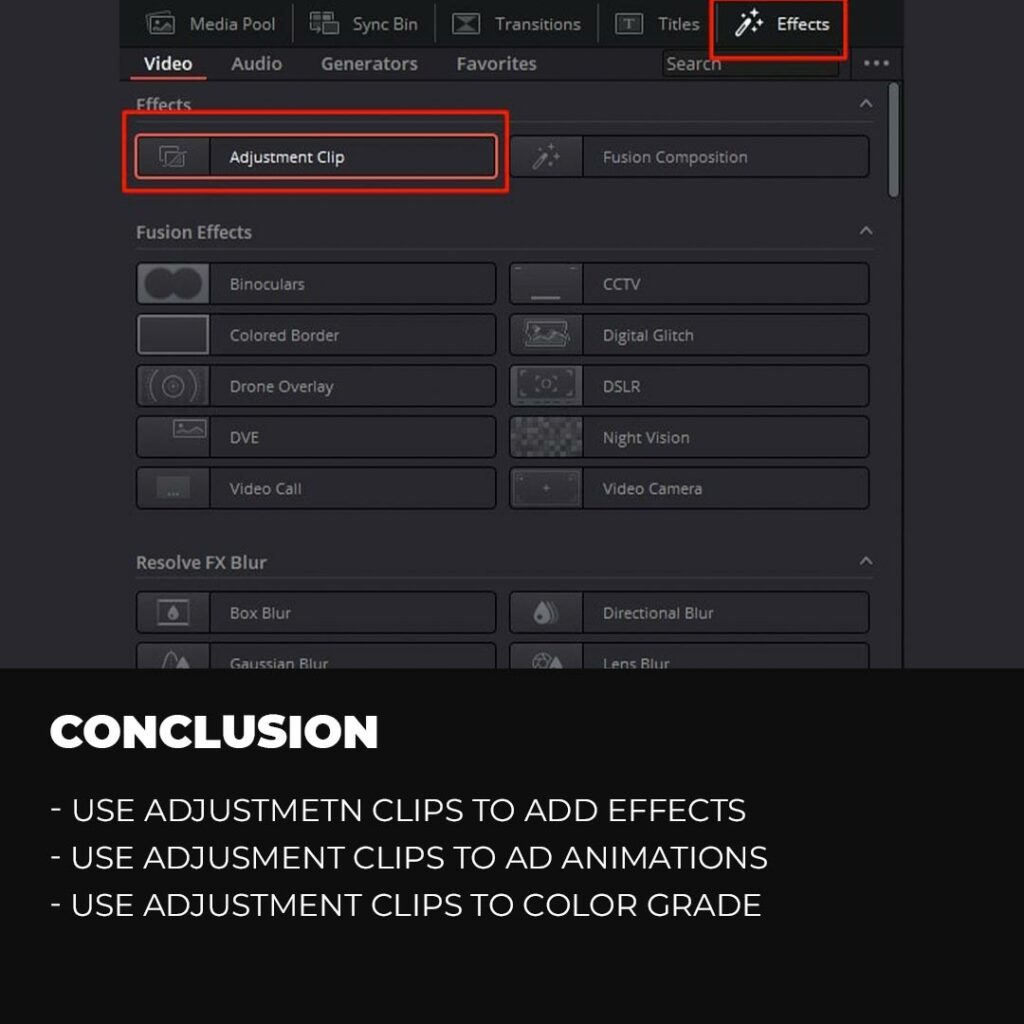
To color grade with the adjustment clip, Place the adjustment clip over the video clip, select the adjustment clip, and go to the color page to color-grade your videos
You can copy the adjustment clips as many times as you want and place them over the other clips to apply the same effect to each clip.
Thanks for reading & feel free to check out more of our articles!
Expert Rating
Summary
Learning to add adjustment clips in DaVinci Resolve can streamline your video editing process and ensure consistent effects and adjustments across multiple clips, making it a highly functional and scalable feature.


