
Adding a camera shake effect can give your boring videos a cinematic feel, and they will look like big-budget videos shot on high-end cameras. There are multiple ways to add this effect in DaVinci Resolve 18.
In this step-by-step guide, we will discuss how to add a realistic camera shake effect to your videos without using the Fusion page. We will also discuss how you can apply this effect to multiple clips efficiently. The method we are going to discuss works on the free version of DaVinci Resolve as well.
How Much Camera Shake Should You Apply?
How do you decide how much shake you should add to your clips? This depends on different factors:
- Well, you could let the focal length of the lens you shot the footage with guide you.
- This is because a footage shot with a long focal length will usually shake more than a footage taken with a wide focal length.
- So, for example, a 100 millimeter lens will shake more than when you shoot with a 24 millimeter lens.
- Also, an action scene or a very dynamic scene could do with a little bit more shake than a mundane, serious scene.
How To Add a Camera Shake effect In DaVinci Resolve?
The method we are going to use to add a camera shake effect to your videos in DaVinci Resolve is by applying a Camera Shake Effect from the Effects Library.
Camera Shake Effect
This method is very simple and straightforward. Let’s take at how to add a camera shake effect named camera shake in DaVinci Resolve step by step.
Project Setup
These are the basic steps you should follow in order to create a project:
- Create a new project.
- Go to the Edit page and access the Media Pool.
- Import the clips using the shortcut Ctrl+I (Windows) or Cmd+I (Mac).
- Create a timeline: right click on the Media Pool and choose Timeline and then click on Create a new timeline.
- Drag your footage from the Media Pool to the timeline.
Apply Camera Shake Effect
Now the project is set up and we can start applying the Camera Shake effect.
- First of all, you need to select the clip to which you want to apply the Camera Shake Effect. This step is extremely important, so make sure to do it.
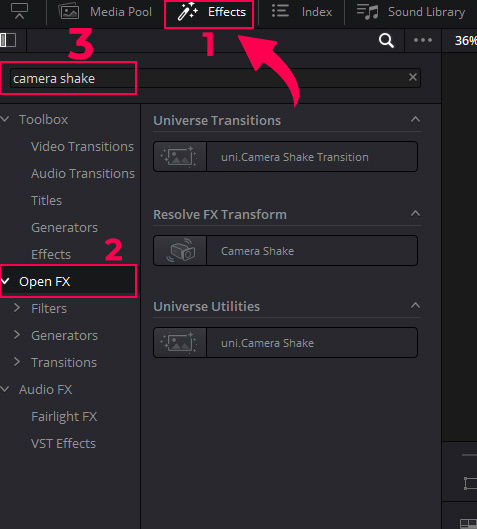
- Now you have to apply the Camera Shake Effect. To do this, click on the Effect Library. Click on Open Fx and then type “Camera Shake” in the search bar.
- You will see the Camera Shake Effect with a camera icon.
- Drag and drop this effect on the selected clip in the Timeline.
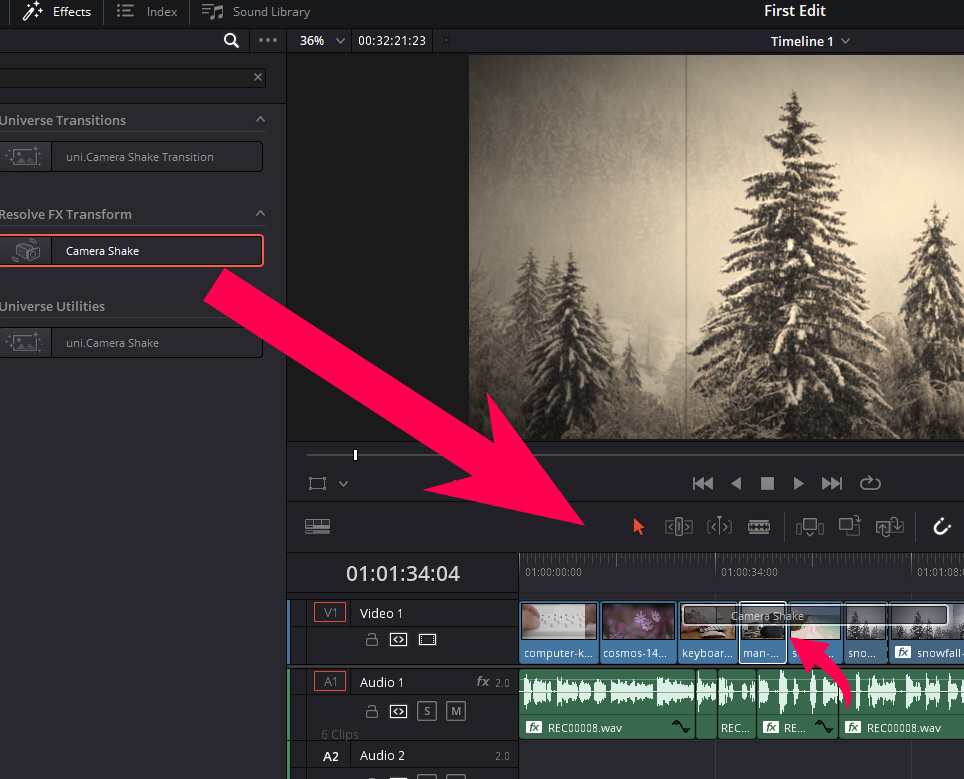
- Now the effect will be applied and if you play back your video, you will get an exaggerated camera movement.
- Next, we will make it look smoother and more professional.
Adjusting The Shake Settings
Now, go to the Inspector and select it.
- Click on the Effects button, then go to Open Fx and you will see the Camera Shake effect that we applied earlier.
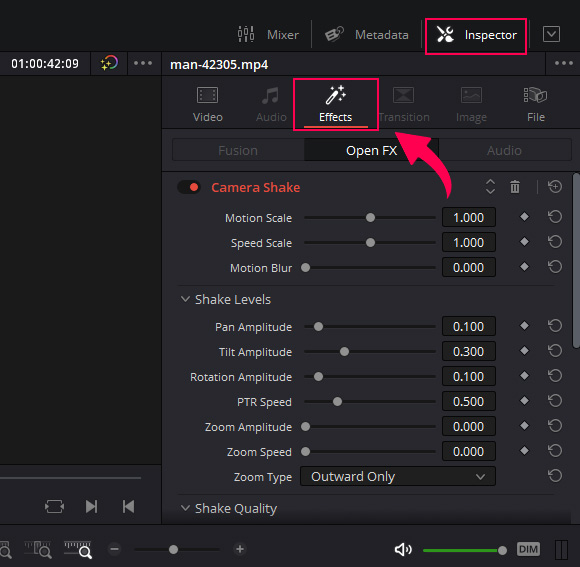
- Now we will tweak some settings to make the shake more subtle and professional-looking.
The following are the most important settings to adjust when creating the shake effect:
- Motions Scale
- Speed Scale
- Motion Blur
- Rotation Amplitude
- Zoom Type
- Blanking Handling
In this example, we will make set the following settings. Feel free to input any preferred value and experiment with the sliders.
- Motion scale = 0.200
- Speed scale = 0.250
- Motion Blur = 1 (move the slider all the way)

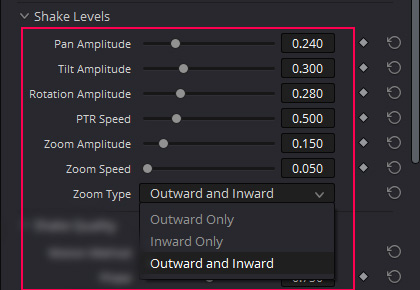
Shake levels
- Pan amplitude = 0.240
- Tilt Amplitude = 0.300
- Rotation amplitude = 0.280
- PTR speed = 0.500
- Zoom amplitude = 0.150
- Zoom speed = 0.050
- Zoom type = Outward and inward
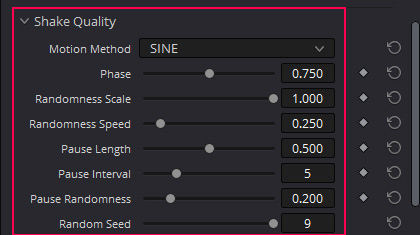
Shake Quality
- Randomness scale = 1.00
- Randomness speed = 0.250
- Random Seed = 9
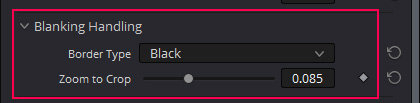
Blanking Handling
- Zoom to crop = 0.085
If you want to create a lot of shake then you need to choose the “Reflect” option under the border type in blanking handling.
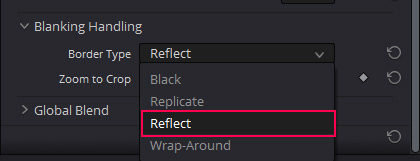
Otherwise, your shake effect will zoom in on the footage a lot, so you may lose a few important details. These settings will give you a subtle and professional handheld look, but these settings are not a rule of thumb. You can tweak these to your liking but make sure you don’t go too far unless you are going for a specific effect.
How to Apply Camera Shake To Multiple Clips In DaVinci Resolve?
Now, we have discussed the Camera Shake Effect in detail and applied it to one of the clips. What if you want to apply the same effect to multiple clips without having to manually apply the same settings to each one?
These are the two methods to follow:
- Copy and paste the effect
- Create an Adjustment Clip
Copy and Paste The Camera Shake Effect
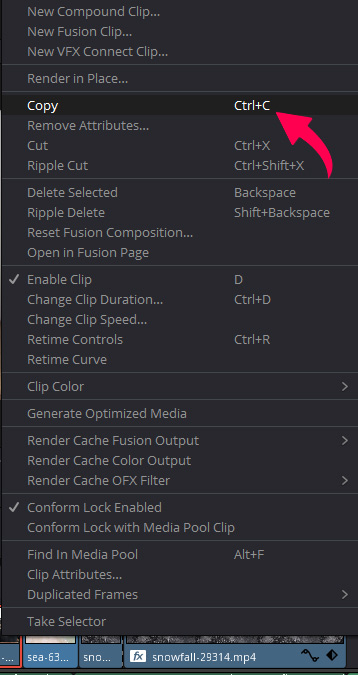
To apply the same camera shake effect that you have applied to a clip to other clips, all you have to do is right click on it and choose copy.
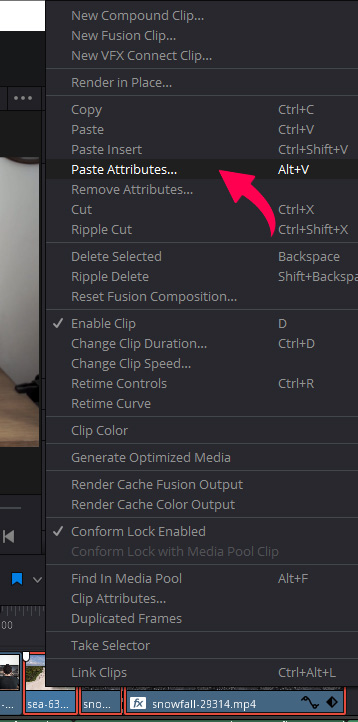
Now select all the clips you want to apply the shake effect to. Right click and choose Paste Attributes.
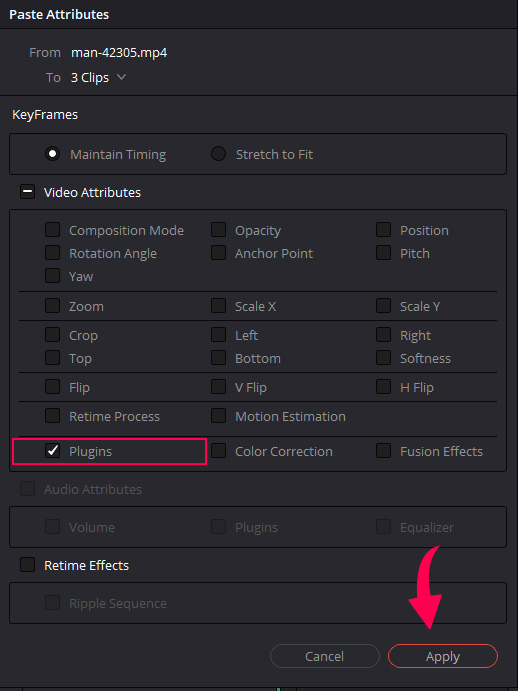
A new window will pop up, checkmark the Plugins box and click Apply.
And boom, the same settings of the Camera Shake Effect will be applied to all the selected clips.
Create an Adjustment Clip
First, we will discuss how to use an adjustment clip to apply the Camera Shake Effect. Then, we will explain why this is the best way to add the Camera Shake Effect to multiple clips at once.
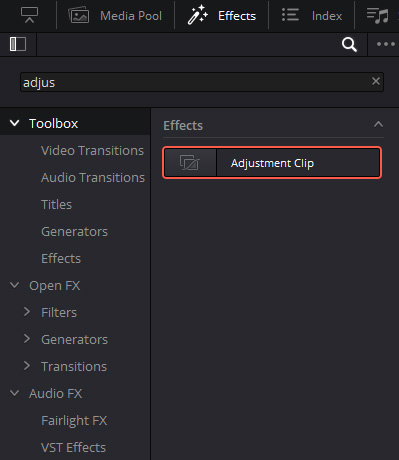
- To add an Adjustment clip, you need to go to the Effects Library, click on Toolbox and search for an Adjustment clip.
- Drag and drop it into the timeline.
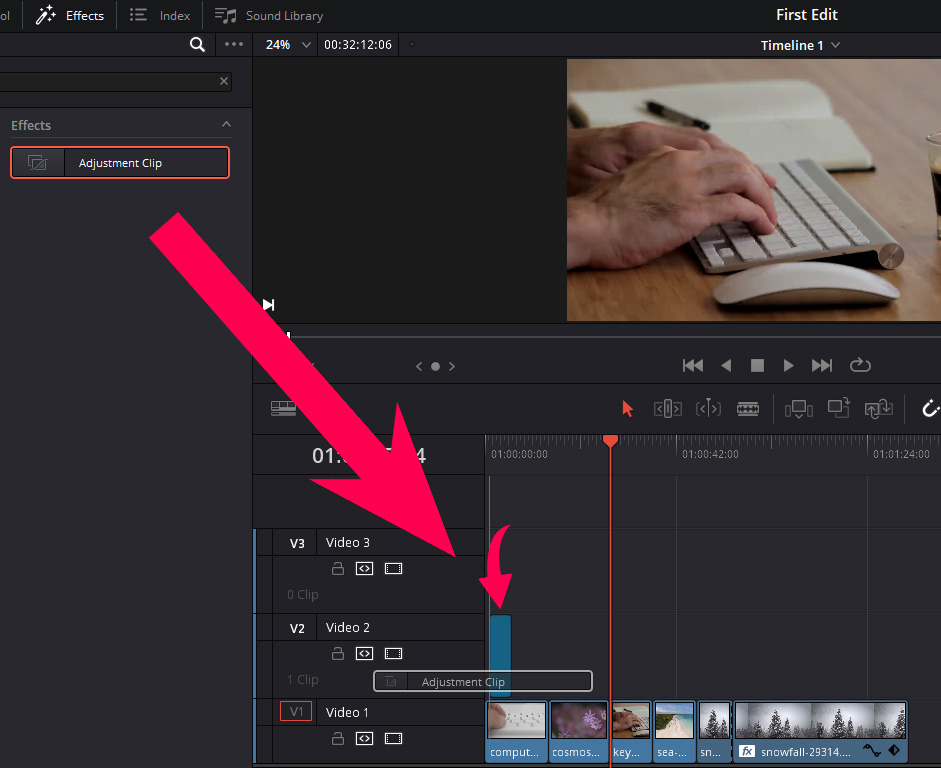
- Now copy and paste the Camera Shake Effect from the clip and apply it to the adjustment clip.
- Right click and choose Paste attributes, tick the Plugins box and click on Apply.
Now, hover over the end of the adjustment clip and your cursor will change as shown below. Click and drag the adjustment clip over all the clips you want to apply the Camera Shake Effect to.
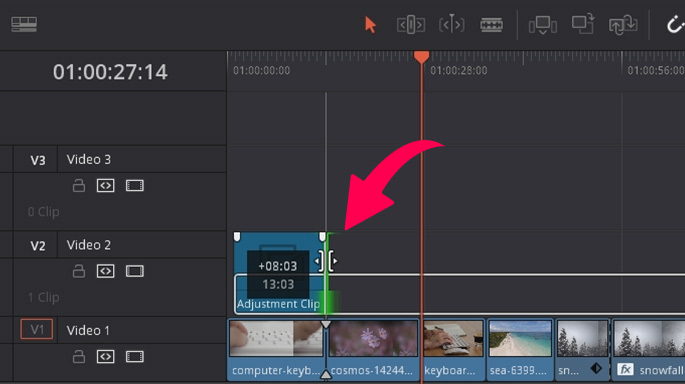
Whichever clip is under the Adjustment clip will have the Camera Shake Effect. This is the best way to apply the Camera Shake Effect because it will save you a lot of time, as you don’t have to copy and paste the effect from one clip to another.
How is it future-proof?
- There is a feature in DaVinci Resolve called “Power Bins.”
- Power Bins allow you to save effects with the settings you chose, and you can use these again and again without having to apply the same effect and adjust the settings.
- The effect will be available to apply in all future projects you create through power bins.
That is what makes it future-proof.
How to Save Effects In Power Bins in DaVinci Resolve?
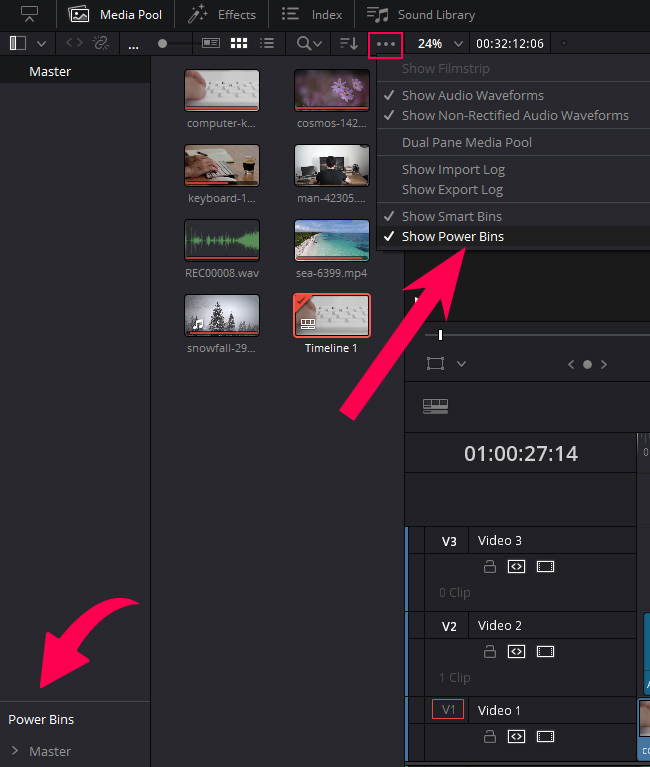
You have to activate Power Bins first and make sure that the Media Pool is open because that’s where the power bins will show up. If Power bins are not visible, then click on the 3 dots next to the Zoom Level and choose “Show Power Bins.”
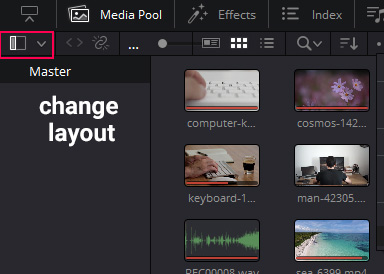
If Power Bins are still not showing, then you need to change the layout of the Media Pool and click on the button in the top left corner.
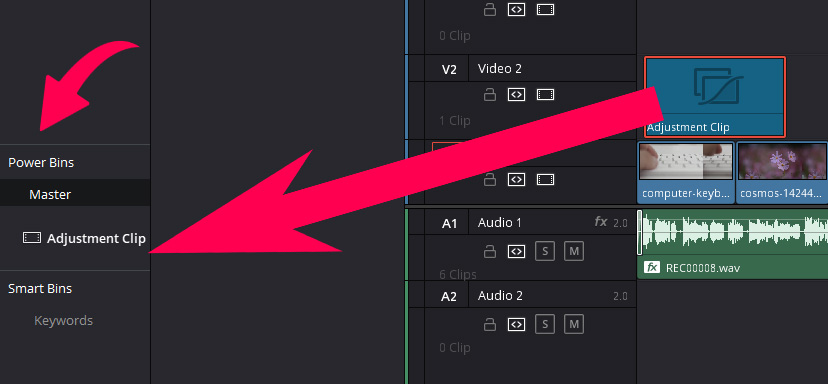
Click and drag the adjustment clip in the Power Bins Master.
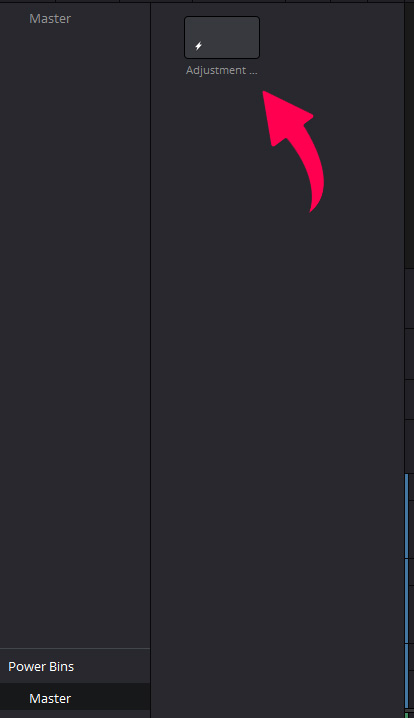
Now, the effect will be saved and will become accessible in all the projects in the same database. Feel free to rename it by double clicking on the name and typing it in.
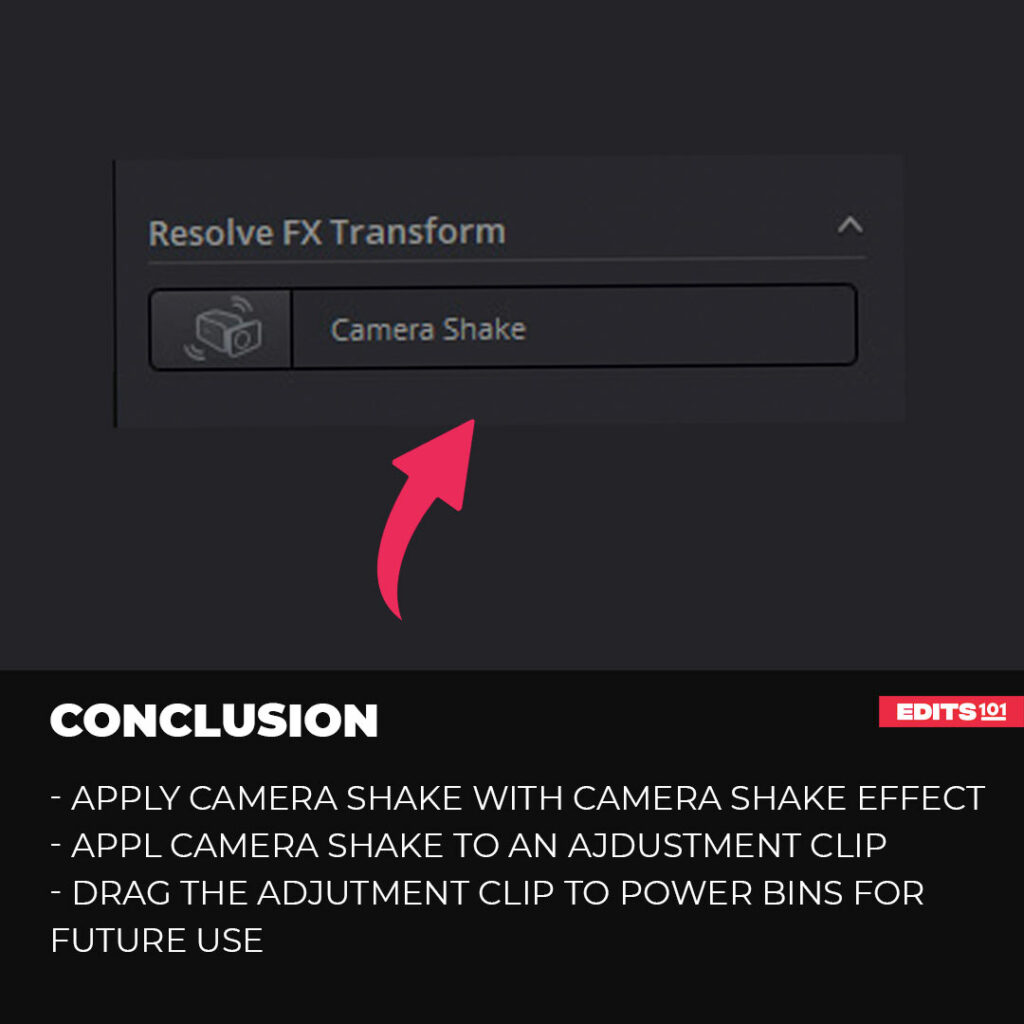
Conclusion
We have discussed how to apply the animated Camera Shake Effect and how to adjust the settings. You can apply them to a single clip and then copy and paste them to other clips, but we have also discussed how to take advantage of the adjustment clip and apply the Camera Shake Effect to multiple clips at once.
We have also discussed how to save the adjustment clip for future use, and it will be available in all the projects you create in the same database. The adjustment clip will be available inside the Power Bins Master, just drag and drop it into your timeline and it will be applied to the underneath clip.
Play with the Camera Shake Effect and to give your videos that extra touch!
Thanks for reading & feel free to check out more of our articles!
Expert Rating
Summary
Learning how to add the Camera Shake Effect in DaVinci Resolve 18 can be helpful for beginners who want to add an extra level of realism and intensity to their video projects. With the ability to simulate the camera shake, beginners can make their footage look like it was captured by a handheld camera, or add dramatic effects to simulate intense moments such as explosions or earthquakes. By mastering this skill, beginners can add a professional touch to their videos without the need of expensive equipment.


