
Do you want to remove a background? In this tutorial, we’ll teach you how to remove a background from an image easily, using GIMP.
Let’s get started!
Removing Background: How does it work?
Removing the background means making it transparent and isolating the subject in a photo. These are used to create different composite images based on whatever you need.
In GIMP, this can be accomplished in different ways. To remove a background from an image, you can use any of these tools:
- Paths & Masks
- Fuzzy Select Tool (also known as the Magic Wand)
- Select by Color Tool
- Foreground Select Tool
Let’s go through each one and understand their different uses. At the end of this guide, you’ll be able to figure out when is the best time to use each tool.
How to Use Paths (& Masks) in Removing Background – Non-destructive
What are Paths?
Paths are used in a similar way as the Fuzzy Select Tool or the Lasso tool to create selections in an image. What makes the Paths Tool different is its ability to create smoother and more complex selections using vectorial curves.
Best time to use: when you have more time and want more accurate and smoother selections for your subject from your background.
Step 01: Choose the Paths Tool (B).
- From the Tools menu, select Paths from the drop-down options.
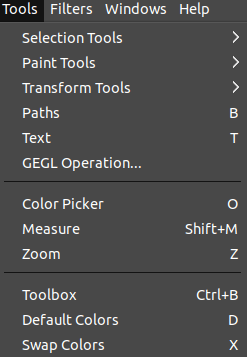
- Alternatively, you can use the Paths Tool keyboard shortcut (B).
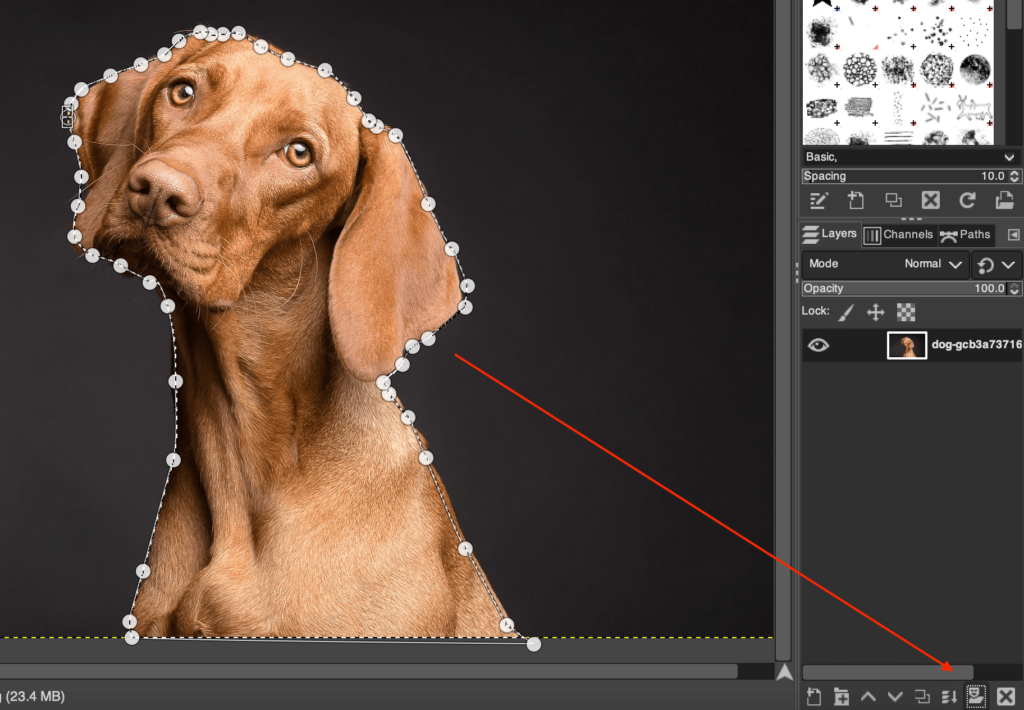
Step 02: Start your Path and selection.
- Click on the different parts of your subject to place different points.
- Click and drag your lines to create curves and align the selection on the edges of your subject.
- Click and drag the handles on your points to adjust the position of your selection.
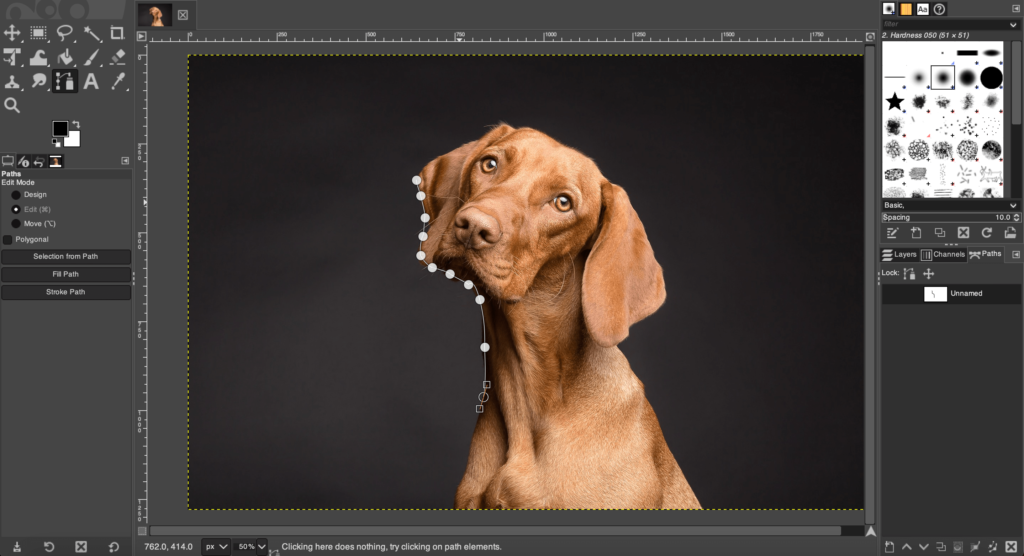
Pro tip: To continue working on your selection, make sure to select your last created point before clicking and creating another point on your subject.
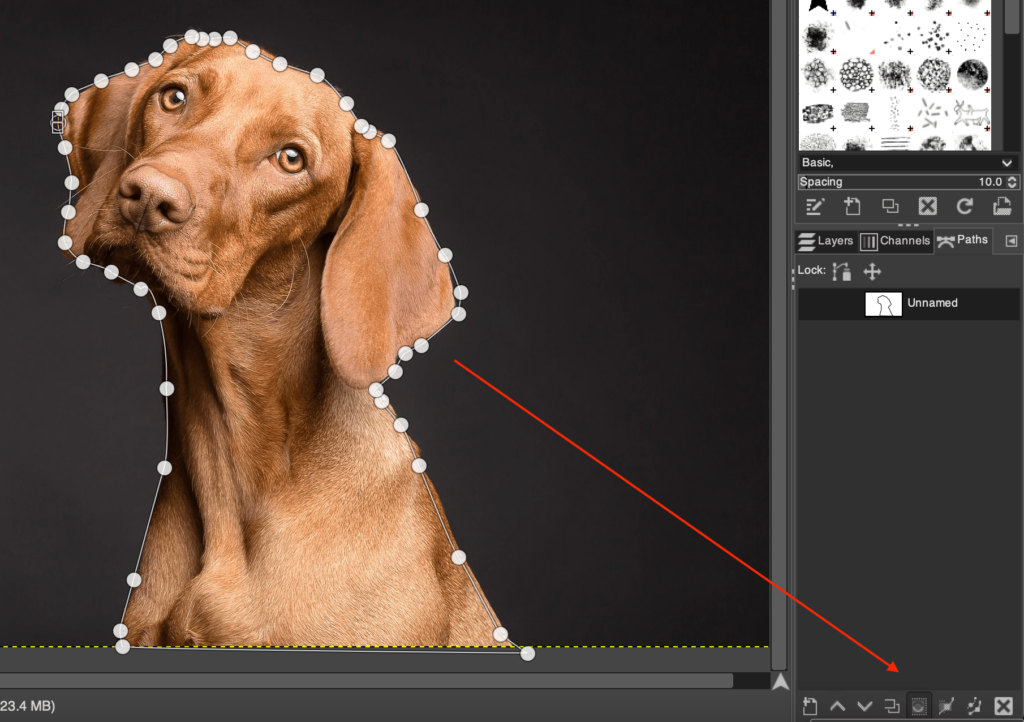
Step 03: Close your path and selection.
- To close your path, click on your original point (first point).
- Go to the paths panel.
- Click on make selection at the bottom.
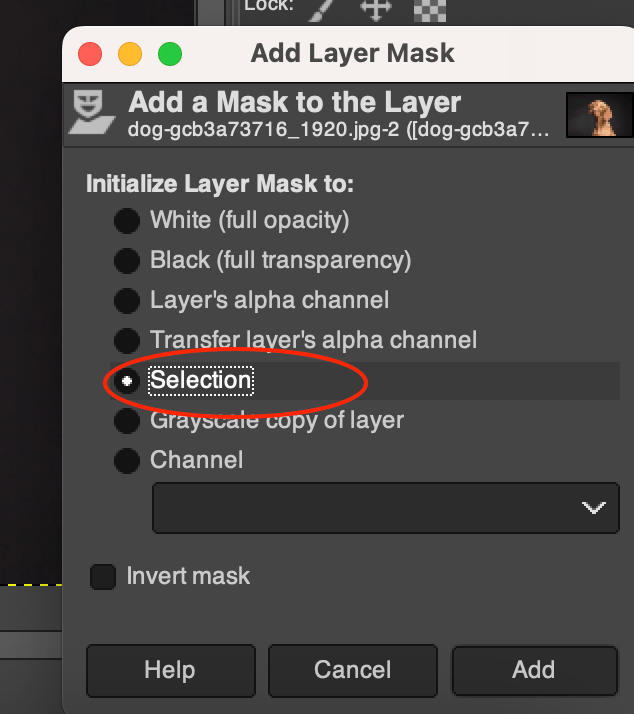
Step 04: Turn the selection Into a mask to remove background.
What are Layer Masks?
Layer Masks allow you to modify transparency in layers, selecting which parts of an image you want to be seen and hidden. It’s a non-destructive and flexible tool for editing parts images and even specific objects in layers.
Layer masks can be used to add a transparent background to your images. Do take note that this is a more advanced method of removing backgrounds in images. The main idea of adding layer masks is to create a black-and-white image to separate the background from the foreground.
Best time to use: If you’d like to have the flexibility to access the background in the future
- Go to the layers menu.
- Choose the Mask option.
- A dialogue box will show up: Select “Selection”
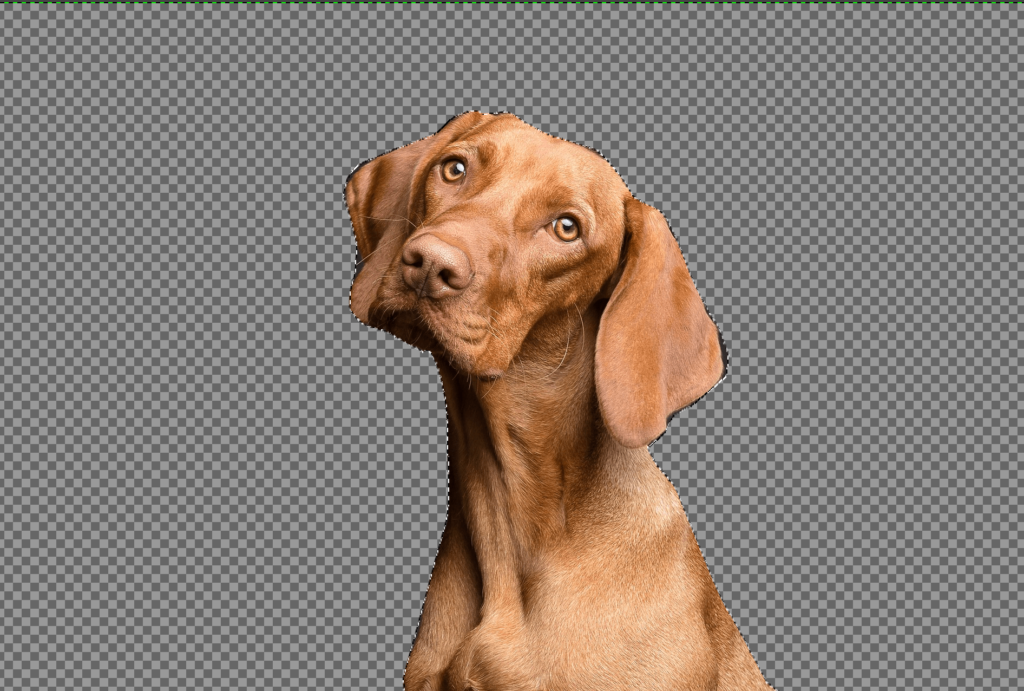
Step 05: Deselect Selection
- Go to the Select menu.
- Choose the None option.
How to Use the Fuzzy Select Tool in GIMP (U)?
What is the Fuzzy Select Tool?
The Fuzzy Select Tool automatically selects areas with similar colors within proximity or in a continuous area.
It’s also known as the Magic Wand for its capability to detect and select colors at once. For example, if a background has one solid color, the Fuzzy Select tool can be used to select it in a few clicks.
Best time to use: this tool is ideal for removing consistent backgrounds or images with a subject that pops out of the background with distinct colors.
Step 01: Choose the Fuzzy Select tool.
Access the Fuzzy Select Tool in different ways:
- Open your image in GIMP and click the Fuzzy Select Tool from the Toolbox.
The icon of the Fuzzy Select tool looks like a magic wand to signify its functionality.

- Go to the Tools menu, choose Selection Tools, and select the Fuzzy Select Tool.
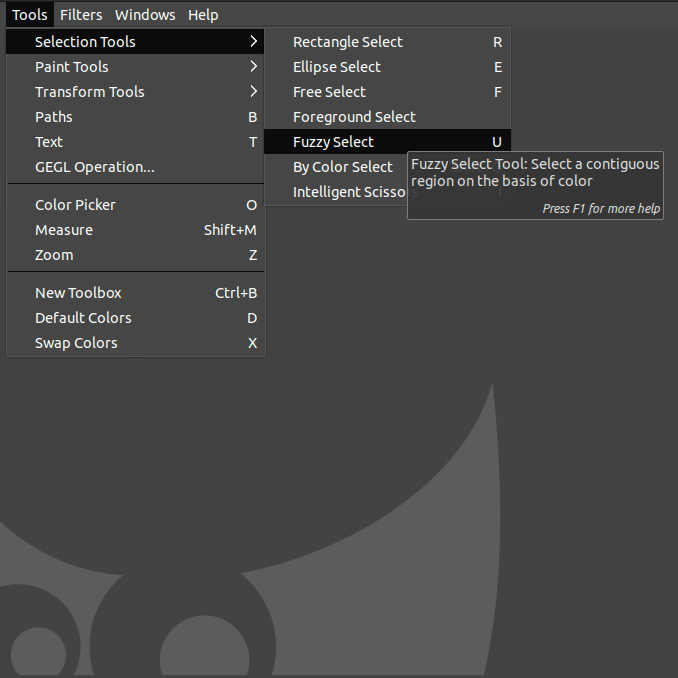
- Use the Fuzzy Select Tool keyboard shortcut (U).
Non-Destructive Method
Step 01: Make A Selection & Add A Mask
- Click on random points on the image.
- Play around with threshold in the Fuzzy Select Menu to adjust how much similar pixels you select.
- Click on the mask icon.
- Select Selection.

Step 02: Invert Mask
Since we’ve selected the background we need to invert the selection. (This could be avoided by activating “Invert Mask” in the mask popup panel)
- First deselect mask – Selection menu > None
- Select the mask layer in the layers panel.
- Go to “Colors” Menu > Invert
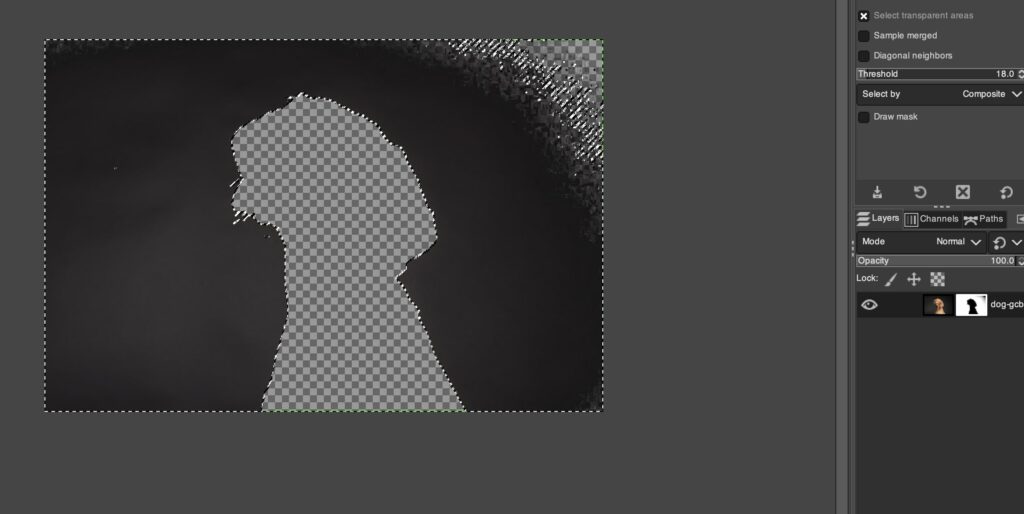

Step 03: Clean Up Mask
As you might notice the mask cut-out is not as clean. So we need to clean it out.
- Select the brush tool (P) & adjust the brush size from the brush panel.
- Paint with black over the extra edges.

Destructive Method
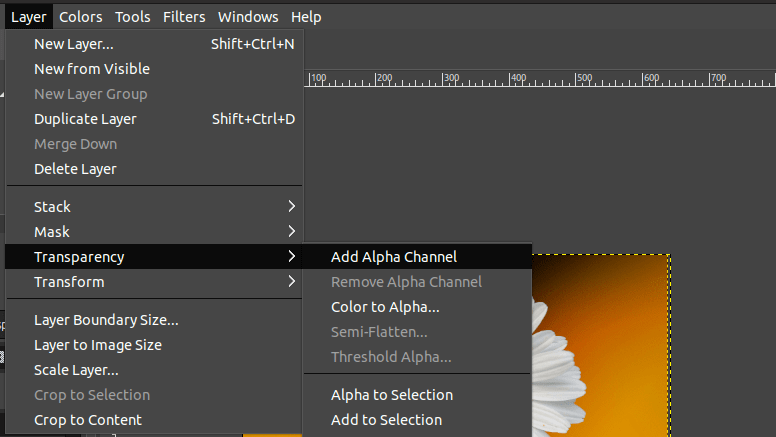
Step 01: Add a transparency layer.
Next, add a transparency layer over the selected image. The function of the transparency layer is to separate the subject and the background of the image.
If your image only has one layer, then you need to add an Alpha Channel. You can check this from the Layers Dialog.
- Go to Layers Dialog.
- Choose Transparency from the drop-down menu.
- Click Add Alpha Channel.
Step 03: Select and remove the background.
Now, we can proceed to select and remove the unwanted background.
- Click anywhere on the background based on your unwanted area.
- Wait for a dotted line to appear and show you the selection.
- To remove the selected background, press the “Delete” key on your keyboard.
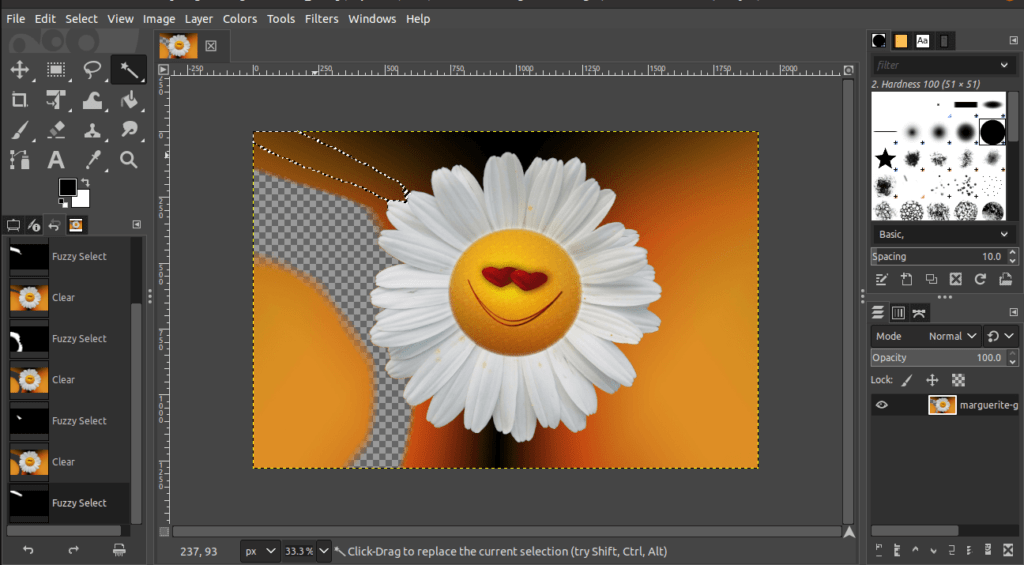
You can repeat this step as much as you need to remove more portions of the background.
Pro tip: When you click on multiple areas of your image, you can continue to create and delete new selections. The selection will automatically expand to include similar colors.
Step 04: Export the image.
Finally, you can export the image with a transparent background.
- To export the image, go to the File menu.
- Choose Export As from the drop-down options.
If you click on Export As as an option, choose the desired format and press Export after determining the required settings.
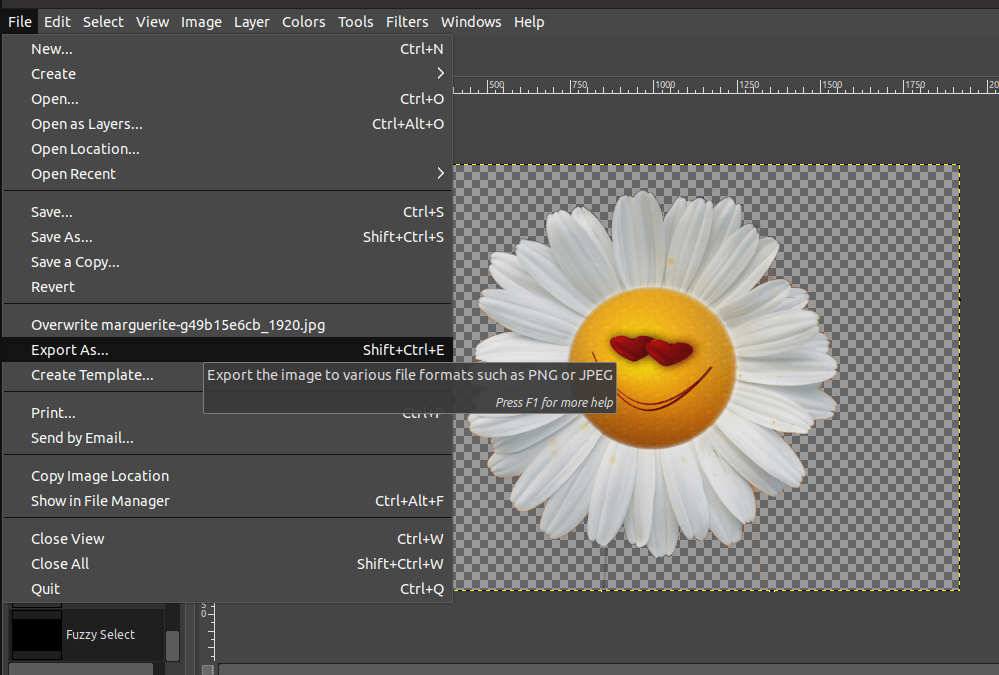
Alternatively, you can use the keyboard shortcut for Export As (Shift+Ctrl/Cmd+E).
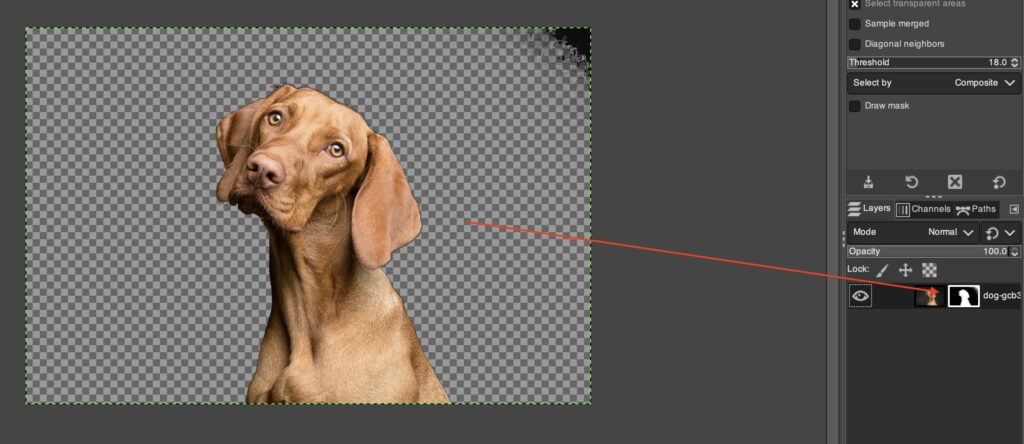
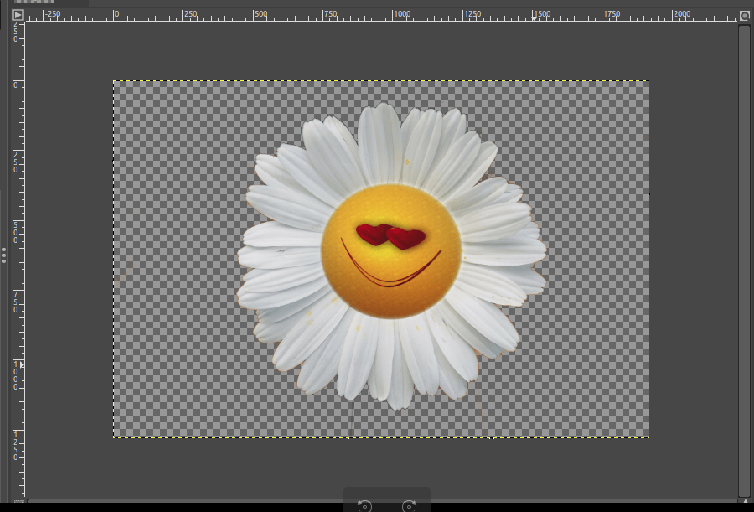
Your resulting image after completing the steps should look like this:
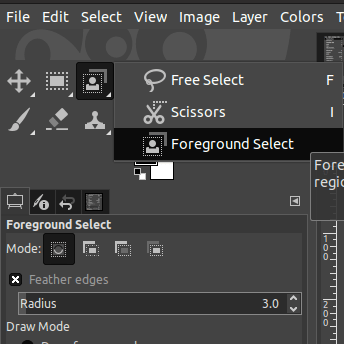
How to use the Foreground Select Tool
What is The Foreground Select Tool?
The Foreground Select tool allows you to select the foreground of the current working layer.
This tool separates the subject from its background, which is another method to extract the foreground from the layer or the subject we want to preserve.
When this tool is used, the subject and identical regions are selected while the rest of the layer remains excluded. The selection made can always be inverted to select the background and remove it with the click of a button.
Best time to use: when selecting subjects with a rough outline. This is also very useful for removing backgrounds with complex and/or various colours.
Step 01: Choose the Foreground Select Tool.
- From the Tools menu, select Selections Tools, and click Foreground Select.
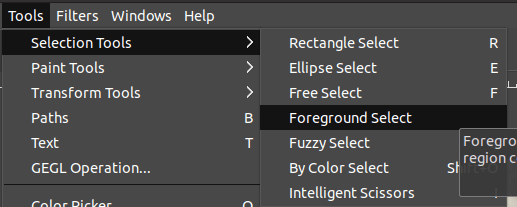
- Alternatively, click the Foreground Select tool from the Toolbox:
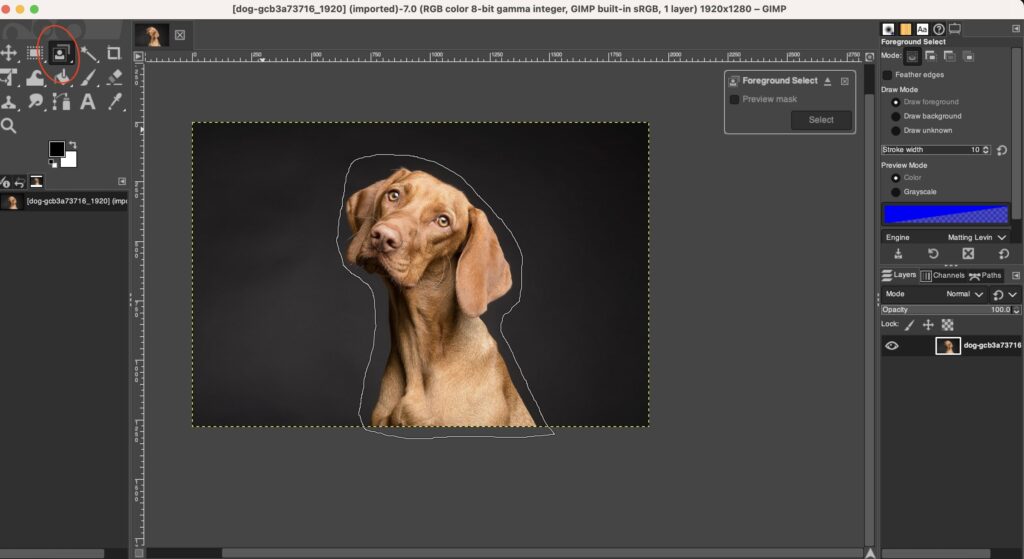
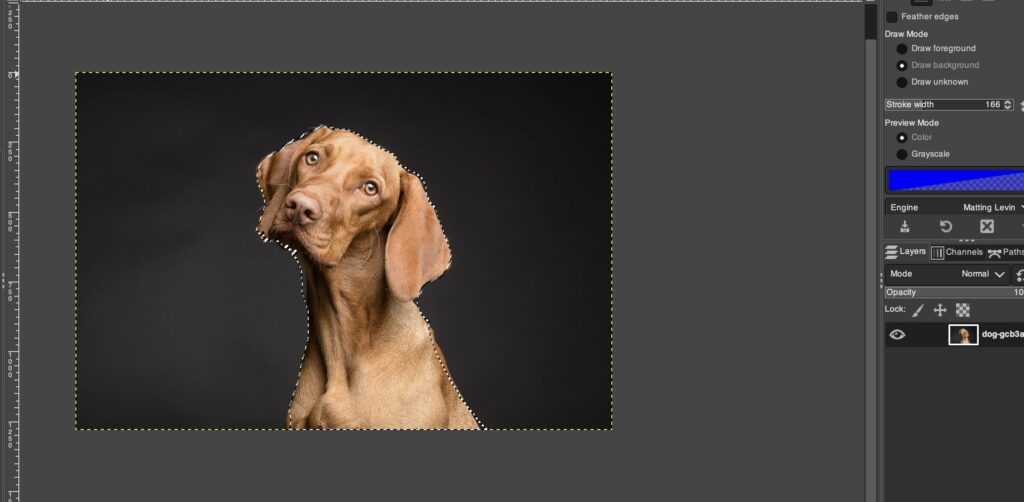
Step 02: Draw an outline.
Then, draw an outline around the subject. The outline does not need to be precise, just like the example below.
IMPORTANT: Make sure to connect the start and end nodes when you finish drawing.
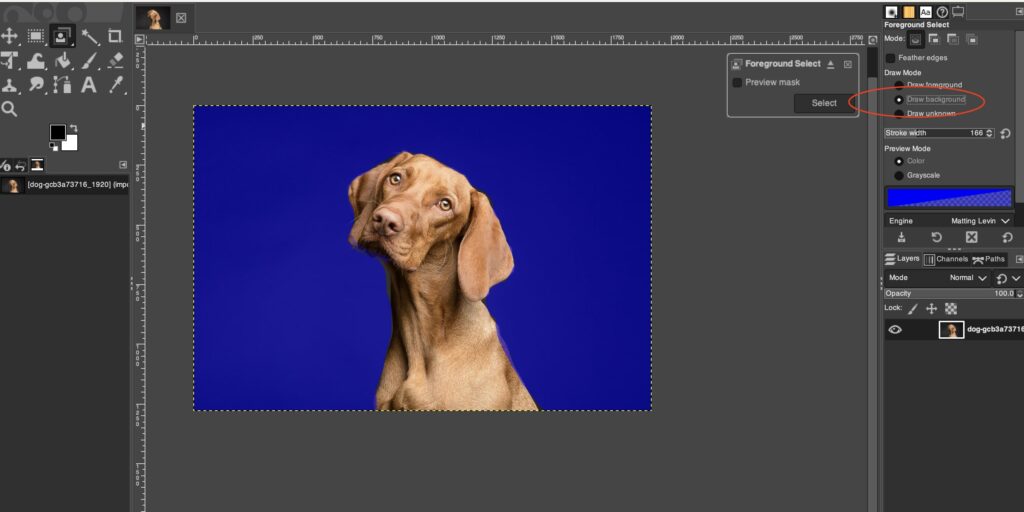
Step 03: Select using the brush.
- Press the Enter key to view your selection. Your background should be in solid blue and your selection should be overlayed with a translucent blue.
- Ensure that Draw Mode is in Draw Foreground.
- Brush over your subject, making sure to avoid being too close to the subject’s edges.
- Pro tip: Use the squarebracket keys[] on your keyboard to adjust the brush size or stroke width.
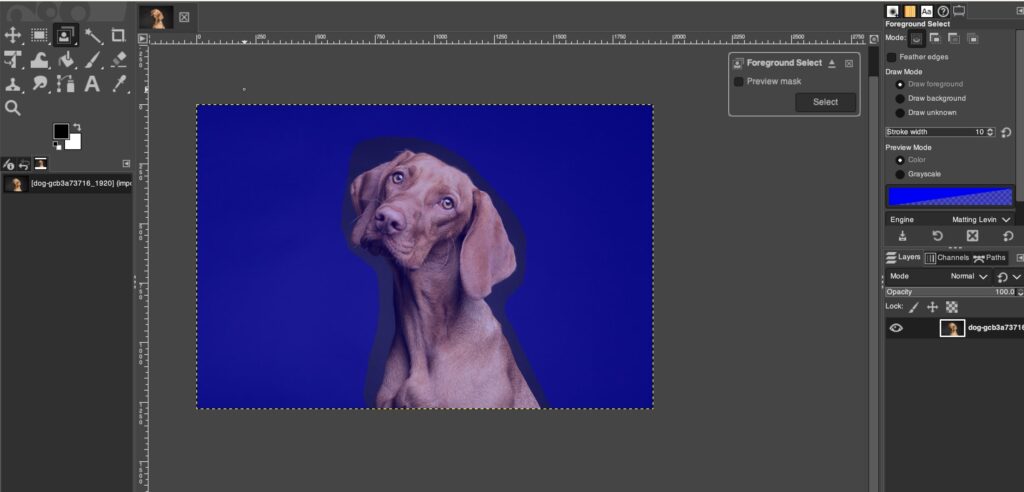

Draw Foreground = Draw on what you want to select.
Draw Background = Draw on what you want to remove.

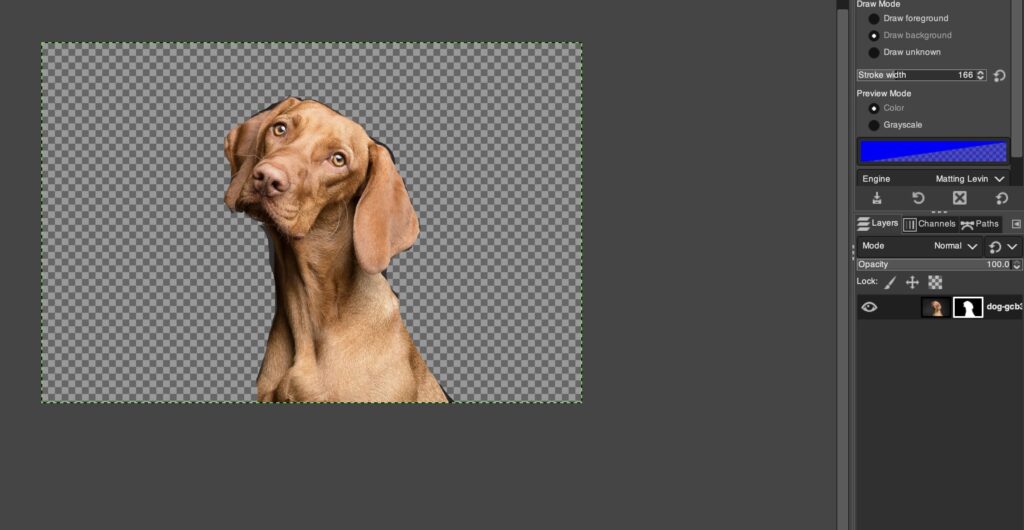
Step 04: Select and Add Mask To Remove Background
- Once you’re happy with your selection, select “select” in the “Foreground Select” Menu – Top right.
- Select Mask Icon Bottom Right & Select “Selection”.

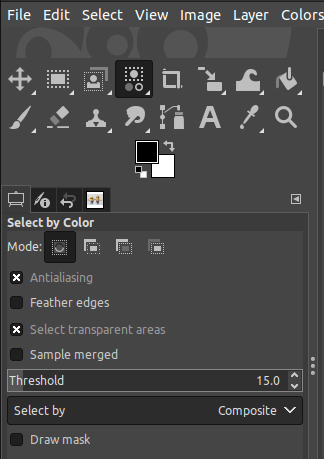
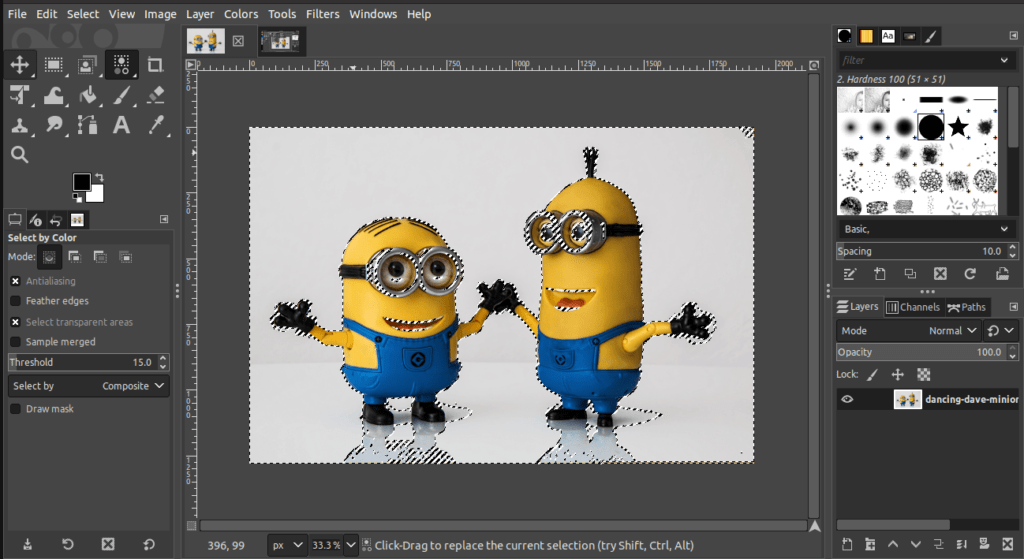
How to use the Select by Color Tool?
What is the Select by Color Tool?
The Select by Color Tool is used to select different regions with identical colors, which is a similar function to the Fuzzy Select Tool.
The main difference is that this tool selects pixels that are identical or of the same shade, regardless of where it is in the image. This makes selection quicker, as fast as a single click!
Best time to use: this tool is ideal for removing monochromatic backgrounds from an image with multiple subjects.
Step 01: Choose the Select by Color Tool.
Access the Select by Color Tool in different ways:
- Click the Select by Color Tool in the Toolbox. The following is the icon for the Select By Color Tool:
- Go to the Tools menu and choose Selection Tools from the drop-down options, and click By Color Select.
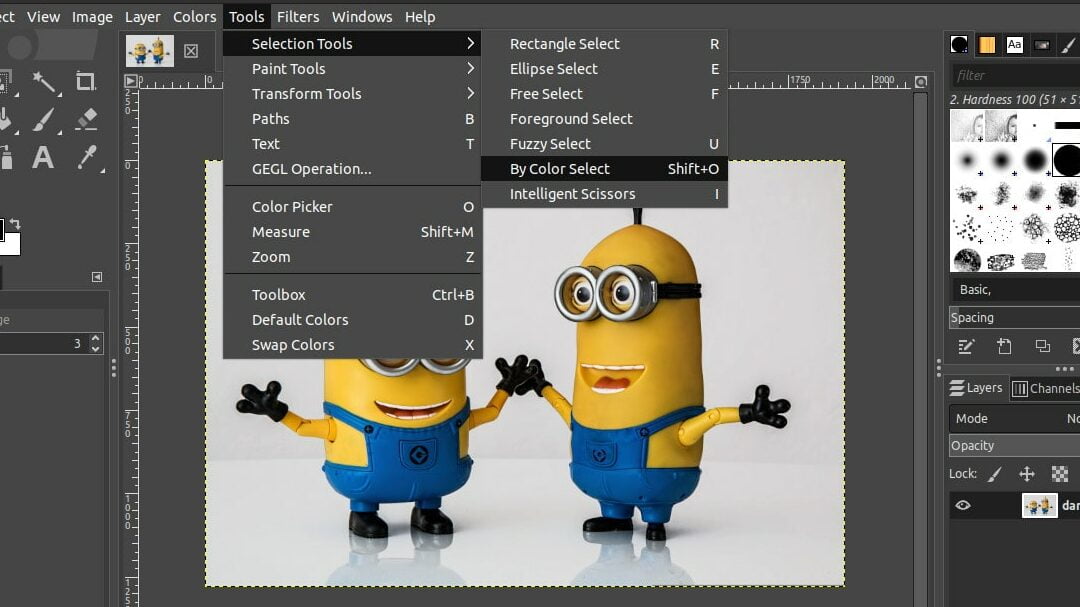
- Use the Select by Tool keyboard shortcut (Shift+O).
Step 02: Select and remove the background.
- Next, click anywhere on the background to select what you want to remove. Adjust the selection as needed as parts you wish to retain may become selected.
- Wait for the Selection(dotted lines) to appear and show the selections
- To delete the background, press “Delete” on your keyboard.
Alternatively, if you are a Mac user, go to the Edit menu and choose Clear from the drop-down options. This would also delete the selected areas.
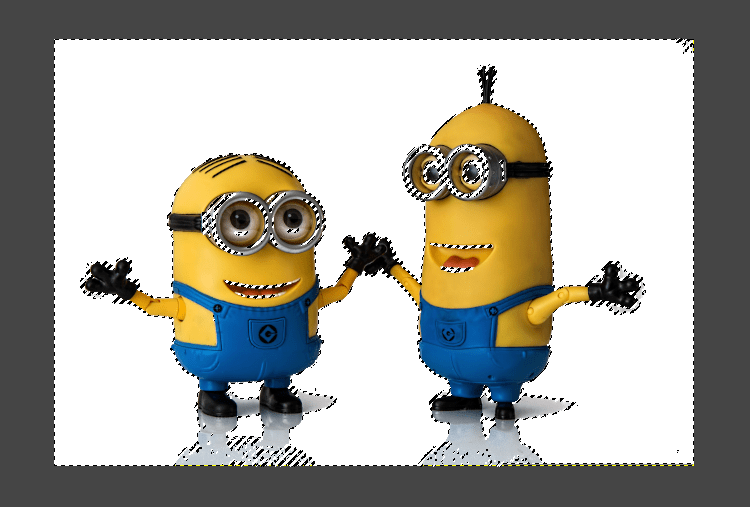
Once you remove the selection, the background would be in white color or transparent as you can see below:
Conclusion
In conclusion, the Fuzzy Select Tool, Select by Color Tool, Foreground Select Tool, Layer Masks, and Paths tool are all great ways to remove the background of an image and make it transparent.
These tools are easy to use and only require a couple of steps to get the job done.
Thanks for reading & feel free to check out more of our articles!
Expert Rating
Summary
Removing the background is a useful skill to master as a graphic designer. However, there is a slight learning curve to executing this and thus requires consistent practise and refining your techniques to achieve a high quality result. This skill is very scalable, but isn’t required in all projects. However, it’s functionality is high, as learning all these techniques would really boost your editing workflow.


