How to Move Layers in GIMP | All you need to know
Learning how to move layers is critical for mastering photo editing in GIMP, and there are three primary ways to do it. This article will guide you on the three techniques used to move layers, using the Move tool, linking layers, and selecting the Stack option.
Moving Layers in GIMP: an overview
- The Move Tool is the easiest way to move objects and layers in GIMP.
- Linking layers allows you to connect two or more layers together. This is useful if you want to move multiple layers at the same time.
- The Stack option allows you to move layers to the top or bottom in the Layers Dialog. This is useful if you want to keep your project organized.
How to use the Move Tool
GIMP’s Move Tool allows you to quickly and easily reposition layers in the Layers Dialog. It’s as simple as clicking and dragging the layer you want to move into place.

Step 01: Select the Move tool (M)
Follow any of the steps below to pick the Move Tool.
- Go to the Toolbox on the left-hand side and click Move Tool.
- Alternatively, go to the Tools menu >> Transform tools >> Move Tool.
- After opening the Tools menu, use the keyboard shortcut (M).

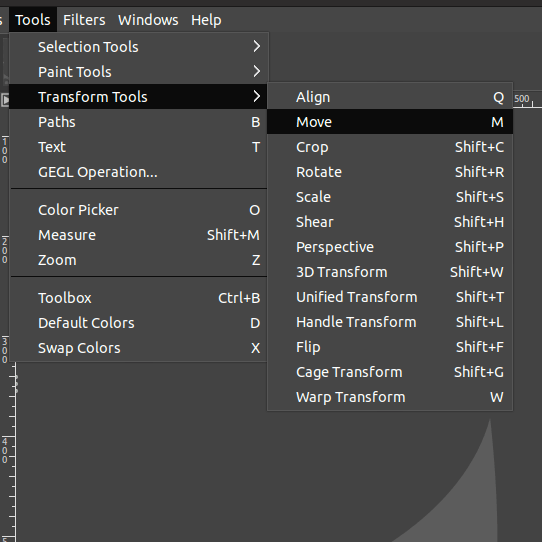
Step 02: Choose the active layer
- Go to the Move Tool dialog on the left-hand side.
- Choose the Move the active layer option from the Tool Toggle selection.
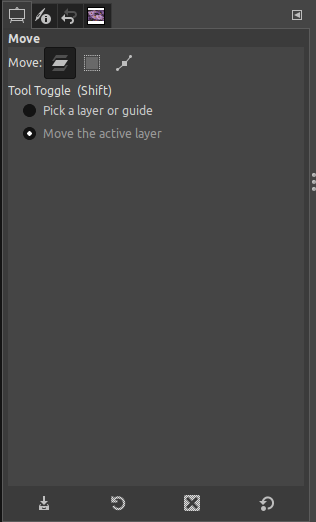
To view the active layer, check the Layers Dialog on the right-hand side of your screen.
Step 03: Move the Layer
You can choose between two methods to move the layer.
- Method 01: Drag and drop
- Method 02: Use the arrow buttons at the bottom of the Layers Dialog
Method 01: Drag and drop
Click and drag the image on the workspace. As you can see below, the image is moved from the original position with the aid of the Move Tool.
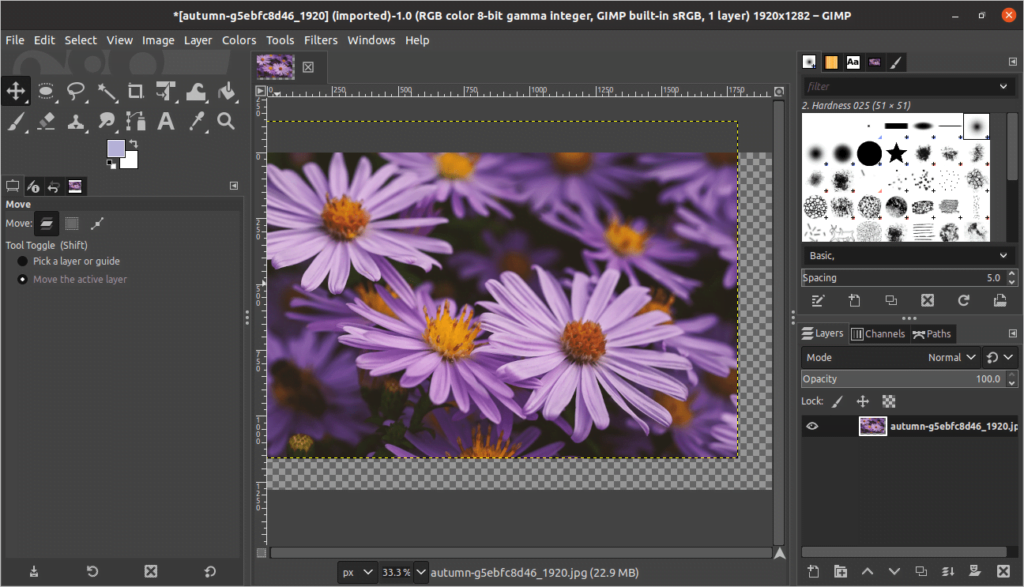
That’s it! This is how you move a layer by clicking and dragging.
- Go to the Layers Dialog on the right-hand side.
- Click on the layer you wish to move.
- Use the arrow buttons at the bottom of the Layers Dialog to move the layer.
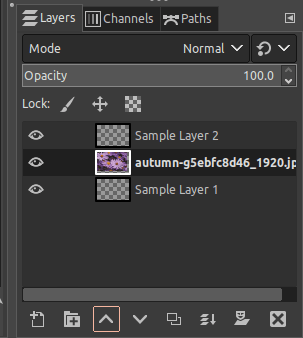
How to move multiple layers: Group Layers
You can move multiple layers at once by grouping the layers.
Step 1: Group the layers
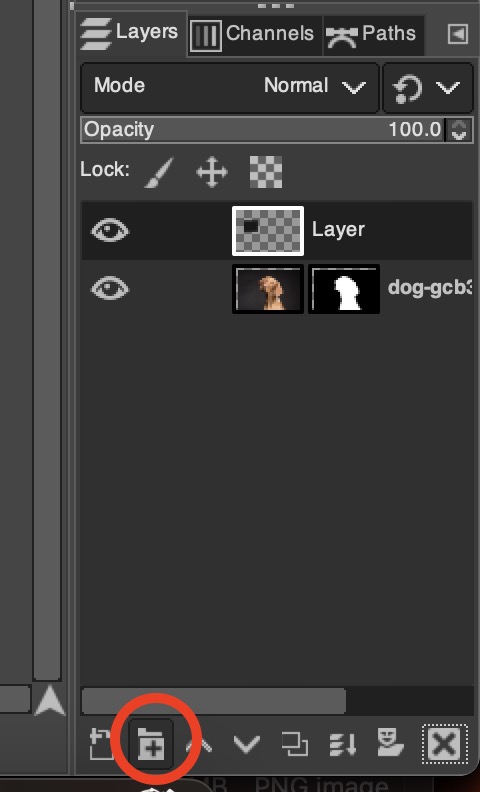
- Create Group by clicking the “Folder (with a plus)” icon in the layers panel.
- Drag the layers into the group in the layers panel.

Step 2: How do you move Layer Group content together ? (without messing the layers)
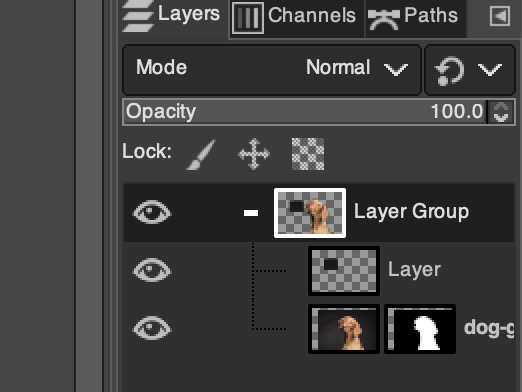
- First of all, make sure that all the layers you need are grouped.
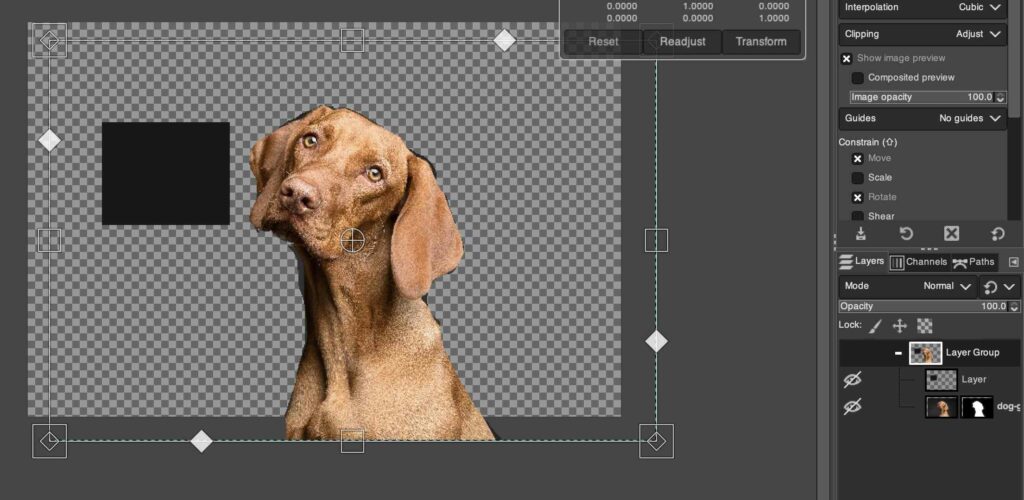
- Select the move tool.
- Select the Layer Group in the layers panel.
- Hold Shift and Move the layers (in the viewport) where needed. – You can even scale the group by clicking =Shift+T)
How to move multiple layers: Linked Layers
Moving each layer at a time can be a tedious task, especially if you have a lot of layers to move. Selecting multiple layers will help to make this task easier and faster.
- To link layers, select the layers you want to move in the Layers Dialog and click on the Link icon. This will link the selected layer to the layer below it.
- To unlink layers, simply click the Unlink icon.
It’s also helpful if you need to keep your layers in order while moving them around.
Step 01: Select the Move tool
Next, choose the Move tool. Follow any of the below steps:
- Go to the Toolbox on the left-hand side. Select the Move Tool.
- Alternatively, go to the Tools menu. Click on Transform Tools and select Move Tool.
- You can also use the tool keyboard shortcut (M) to access the Move Tool.
Step 02: Enable Layers from the “dockable dialogs” (if Needed)
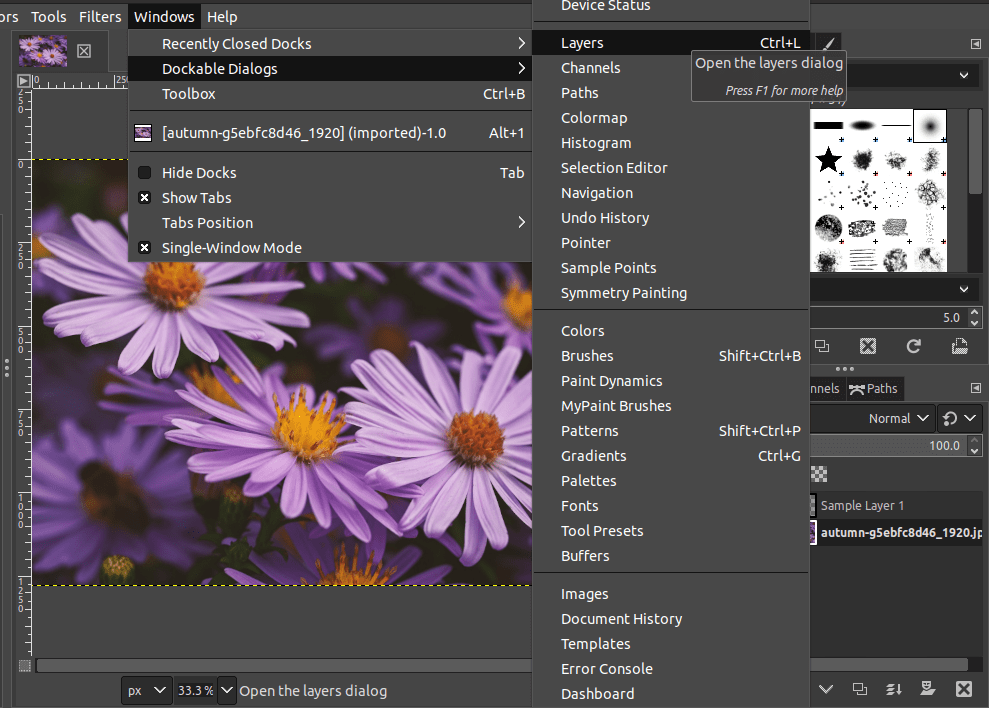
If the Layers Dialog is visible, proceed to Step 03. If it’s not visible, follow one of the following steps:
- Go to the Windows menu and click on Dockable Dialogs. Then, choose Layers.
- Alternatively, you can use the keyboard shortcut Ctrl+L on Windows or Cmd+L on Mac.
Step 03: Link the Layers
It’s time to link the layers. Once you link layers, you can move the layers as a group.
- Click on an empty space beside the eye icon of a layer in the Layers Dialog.
- Wait for the link icon to appear and click it. This also indicates if the layer is linked to another.
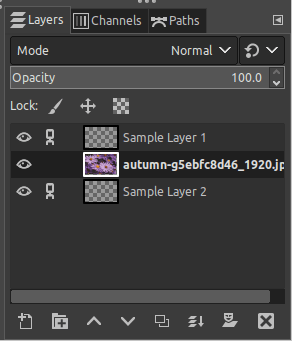
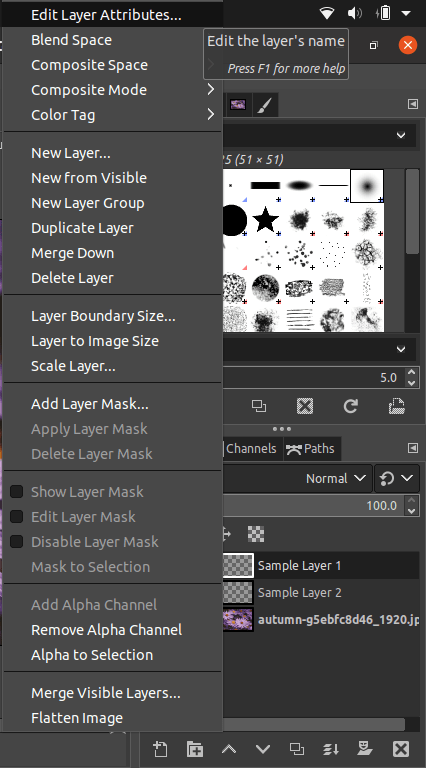
Alternatively, to link the layers,
- Click on the layer you wish to apply the linking to.
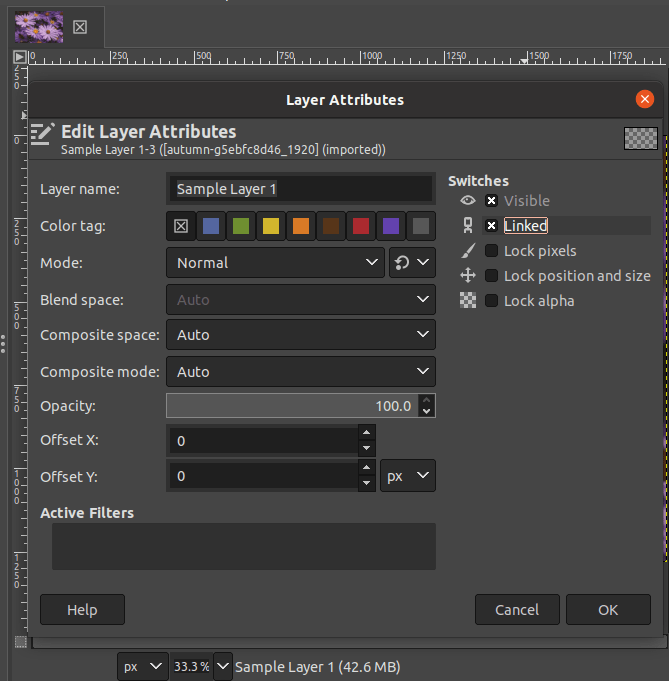
- Right-click and choose Edit Layer Attributes.
After the Edit Layer Attribute dialog is displayed, check the Linked box as follows. This enables linking between the layers and moving the layers together.
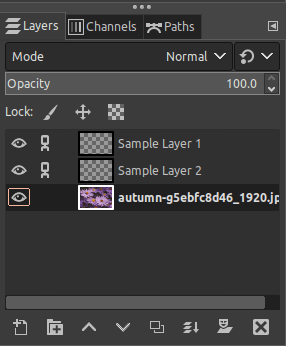
You just need to use the Move tool to click and drag multiple layers in the Layers Dialog. The final result after moving the desired layers is displayed below:
How to move a text layer
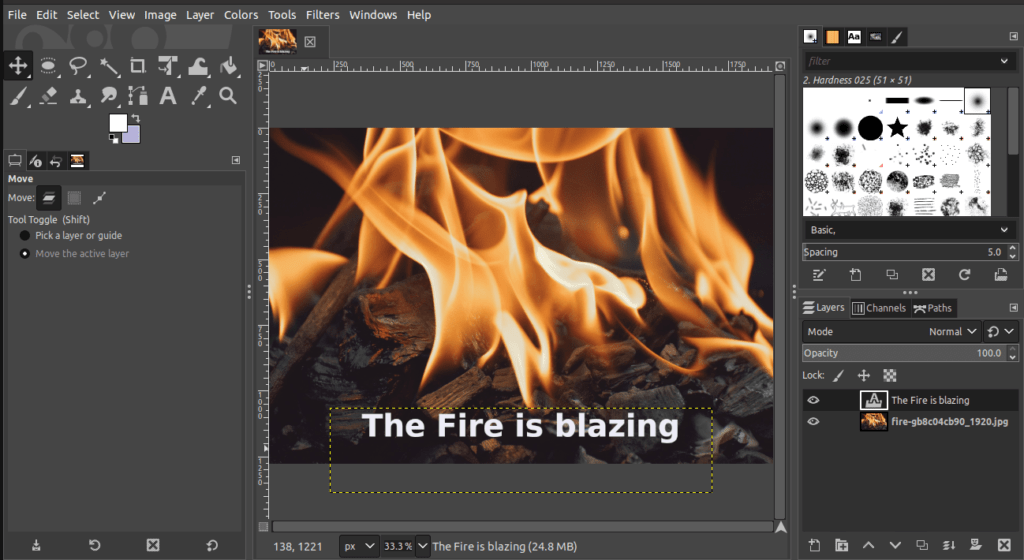
If you’re looking to move text layers around in GIMP without using the Move Tool, it’s completely possible! The hack is to use a keyboard shortcut.
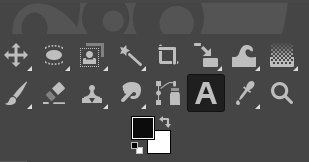
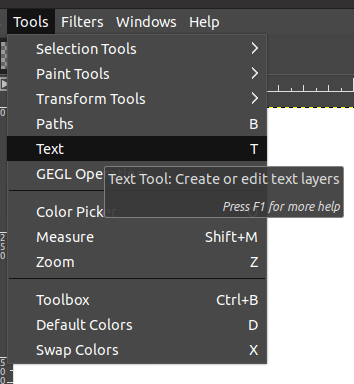
Step 01: Choose The Text Tool
Select the Text tool using one of the following methods:
- Go to the Tools menu and choose the Text option.
- Alternatively, click the Text tool in the Toolbox.
- Use the tool keyboard shortcut (T).
Step 02: Move the text layer
Once you enter the text, you can place the text where you want on the canvas. There are two methods to move this text layer as follows:
- Method 01: Use a keyboard shortcut.
- Method 02: Use the Move tool.
Method 01: Use a keyboard shortcut.
- Click on the text box to make sure the text layer is selected.
- Press the Alt key on Windows or the Option key on Mac and drag your layer to move.
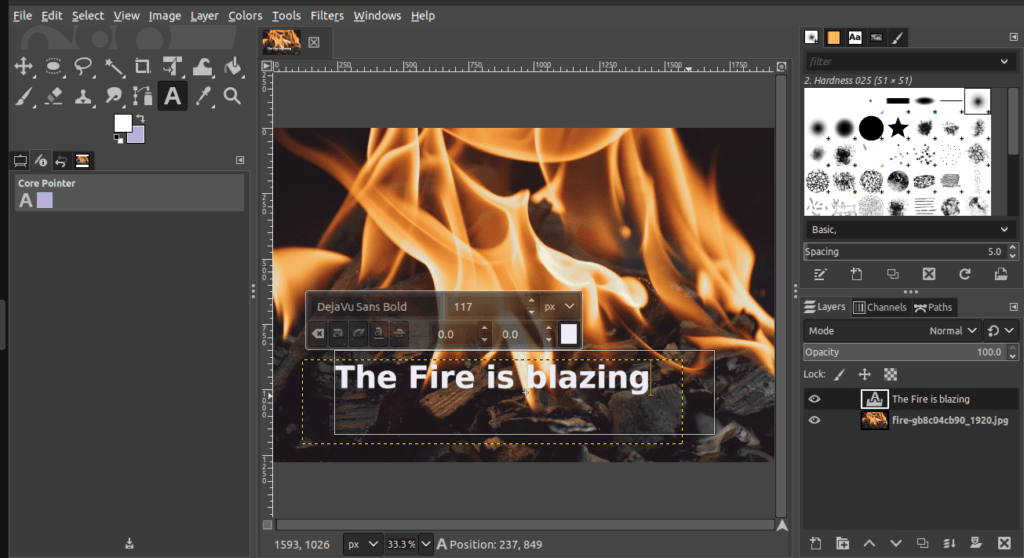
This way you can move the text layer to the desired place in the Layers Dialog.
Method 02: Use the Move tool
First, select the Move tool. Follow any of the below steps to select the Move tool:
- Go to the Toolbox on the left-hand side. Select the Move tool.
- Alternatively, go to the Tools menu, click on Transform tools, and select the Move tool.
- You can also simply use the shortcut “M” to access the Move tool.


Once you choose the Move tool, make sure that the text layer is selected. Go to the Layers Dialog on the left-hand side and click on the text layer to activate it.
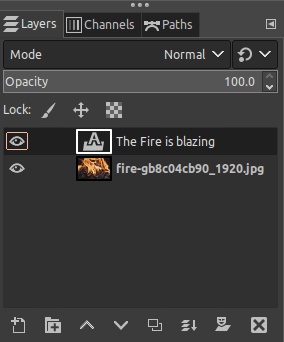
Now, you can click and drag the text layer on the image as per your requirement.
How to use Stacking to move layers
If you’re looking for another way to rearrange your layers in GIMP, without clicking and dragging, stacking is a great way to do it. With the Stack option, you can easily move your layers up or down in the Layers Dialog.
Step 01: Select your layer
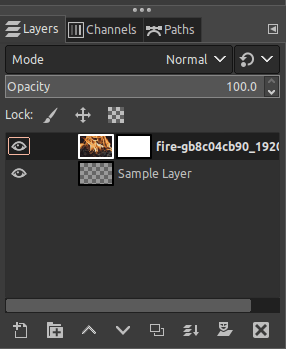
Start by selecting the layer you wish to move.
- Go to the Layers Dialog on the right-hand side and click the layer you wish to move.
- As soon as you click, the specific layer should be darkened as shown below:
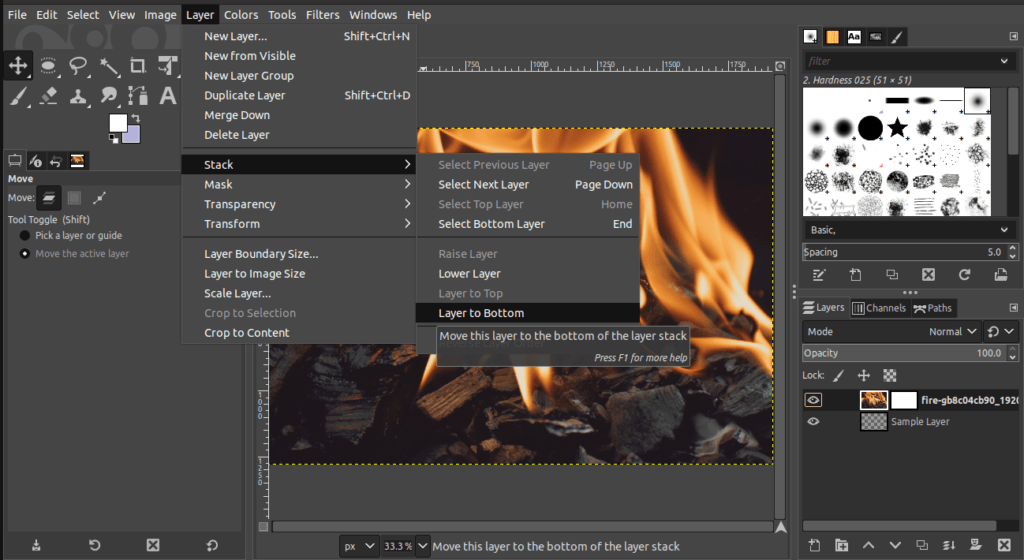
Step 02: Choose the Stack option to move the layer
While your layer is still selected,
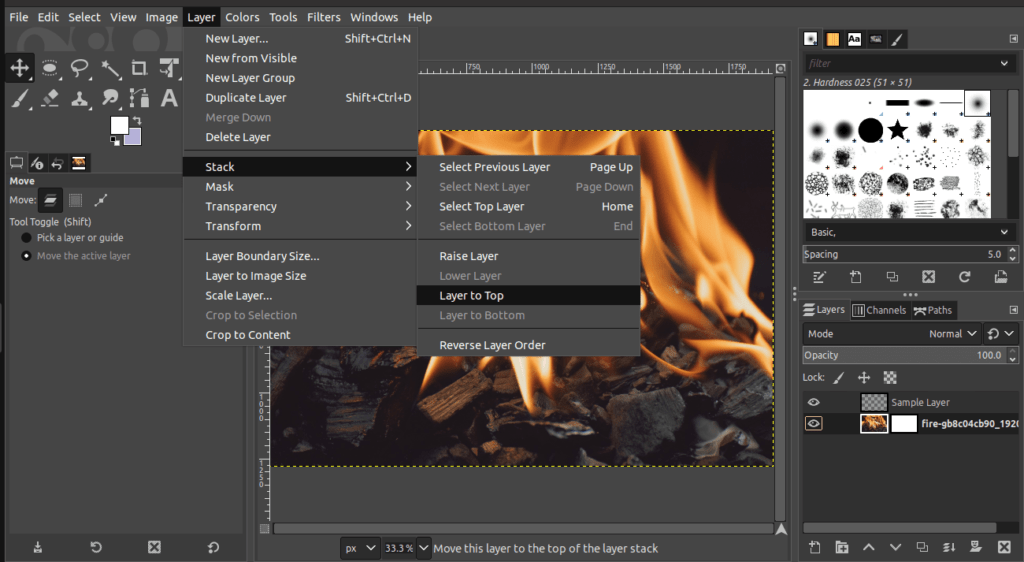
- Go to the Layer menu in the Menu Bar.
- Choose the Stack option from the drop-down.
- Select either Layer to Top or Layer to Bottom to bring the layers to the front-most area or background. Select Raise Layer or Lower Layer to move the selected layer one level up or down your Layers Dialog.
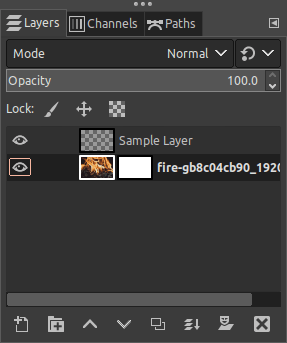
If you choose Layer to Top, the selected layer will be moved to the top of the stack (front-most layer). You’ll notice that the position is changed in the Layers Dialog.
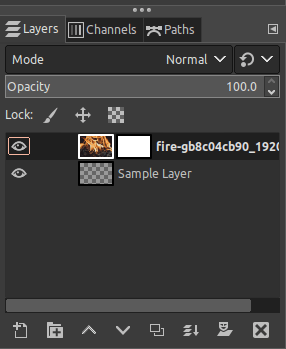
If you choose Layer to Bottom, the selected layer will be moved to the bottom of the stack.
Conclusion
Moving layers in GIMP is simple and easy to do, with a lot of options to choose from. There are three ways to move them and each one has its own benefits.
Linking layers is great for keeping them together, while the Stack option is perfect for organizing layers without having to click and drag layers into position. The Move Tool, by far, is the quickest and easiest way to move a layer around.
Thanks for reading & feel free to check out more of our articles!
Author Rating
Overall Rating
Summary
Acquiring the knowledge and skill to control and relocate layers is an essential requirement for anyone using GIMP. Working with layers is generally uncomplicated, and manipulating them is a fundamental aspect of virtually every project in GIMP. Therefore, mastering this ability is considered to be highly significant.

