
Pixel art is a type of digital art where images are made up of small pixels. To create pixel art in GIMP, start by creating a new image. Set the width and height to the number of pixels you want your final image to be. Then, set the grid layout and start drawing your pixel art.
Pixel art can be created in any image editing program, but GIMP is a free program that is particularly well suited for pixel art.
What is Pixel art?
In a world where digital art is becoming more and more prevalent, it’s important to remember the humble beginnings of pixel art.
Pixel art is a type of digital art where images are created using pixels, or individual blocks of color. The earliest examples of pixel art date back to the early days of video games, when limited hardware and software meant that artists had to get creative with how they used pixels.

Pixel art, however, has come a long way in recent years. Today, there is a growing community of pixel artists who create beautiful works of art using nothing but pixels. If you’re looking for a unique and stylish way to create digital art, then pixel art is definitely worth checking out!
How to Create easy Pixel Art in GIMP
Step 01: Open an image
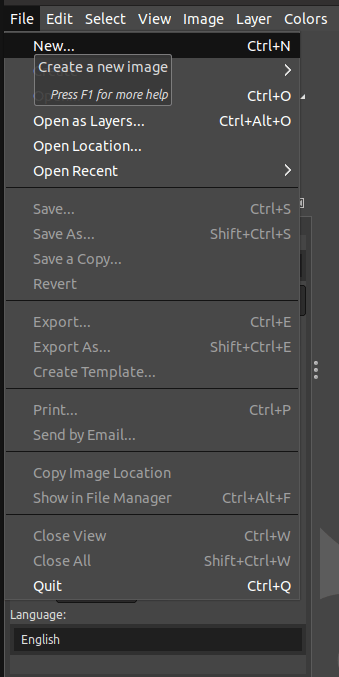
First, you need to create a small and simple template to activate the grids to draw the pixel art. To open an image in GIMP,
- Simply go to the File menu. Choose the New option.
- Alternatively, press Ctrl/Cmd+N.
Step 02: Adjust the New Image Template
A dialog box appears as soon as you create a new template. You can choose the appropriate height, width, and measurement unit in this dialog. Generally, pixel arts are small in size, but you can also choose the desired measurements. For this pixel art, I have chosen the width and height as 32 pixels to make it simple and convenient.
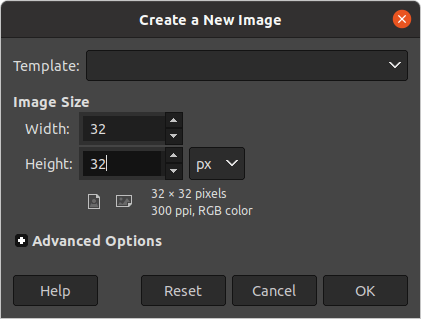
Once you have adjusted the measurements simply click OK.
Step 03: Zoom In on the canvas
Once you finalize the measurements, you would notice that the canvas will transform into a tiny white-colored background. This would be based on the measurements inputted in the dialog.
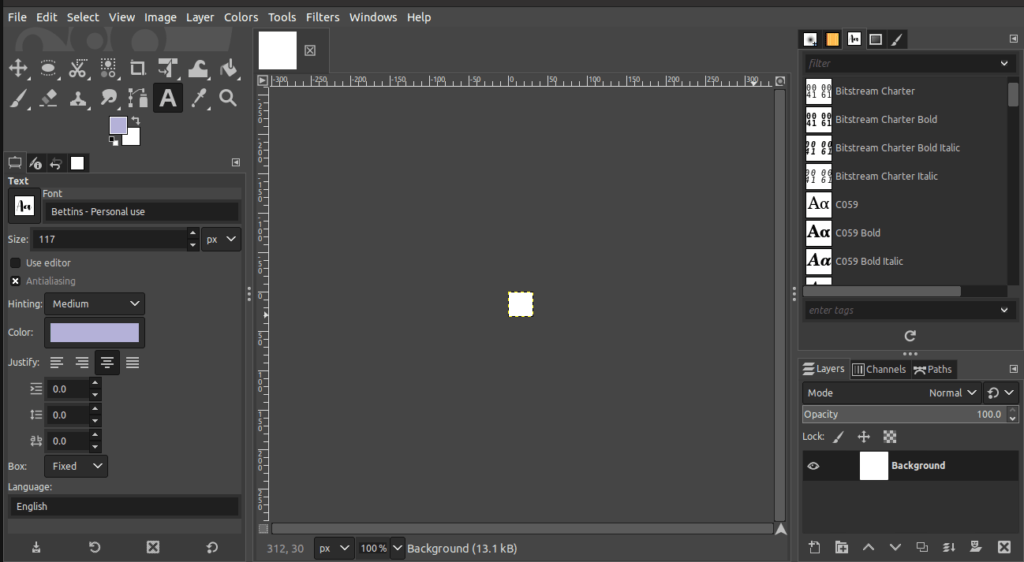
Now, you can simply zoom in on the canvas to start working on the pixel art. To zoom in,
- Press the Ctrl/Cmd + scroll from your mouse to zoom in.
- Alternatively, click on the zoom button at the bottom of the screen and choose the desired zoom level.
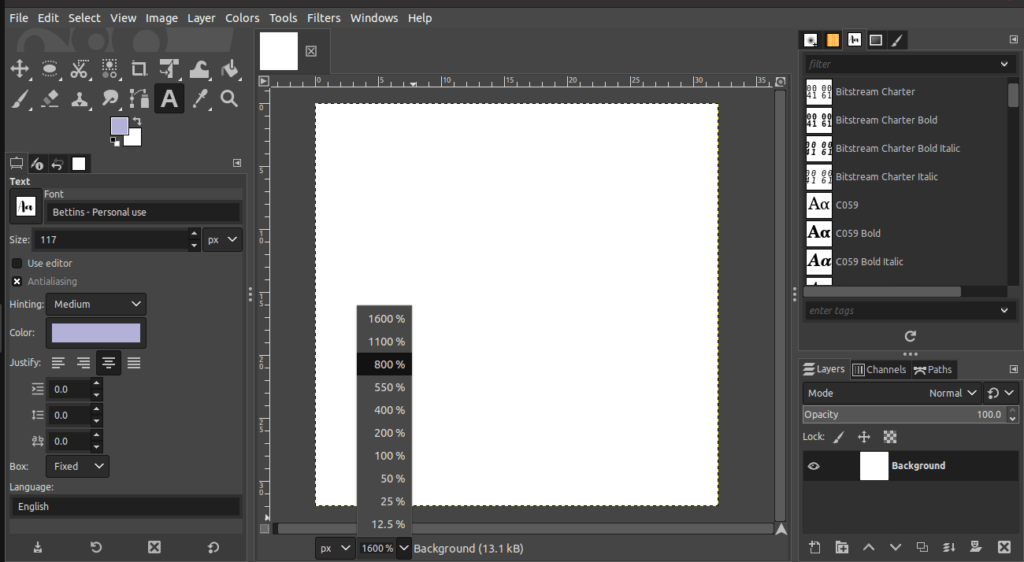
In this case, a zoom level of at least 800 to 1600 is required to get a clear sight.
Step 04: Add the grid layout
Even after zooming, you would notice that the working canvas remains empty. It is not recommended to paint the image on a white canvas. We will use the Grid layout to customize the pixel art. To activate the Grid Layout,
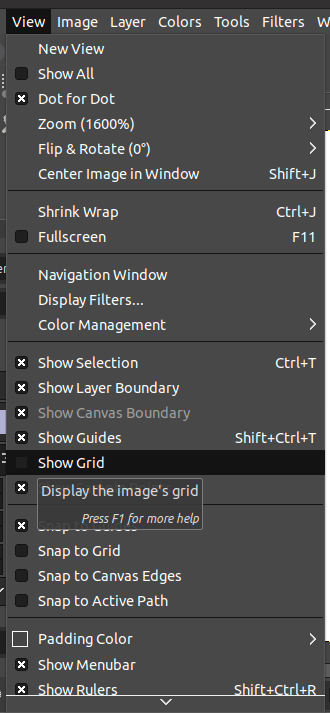
- Go to the View menu.
- Then, enable the Show Grid option
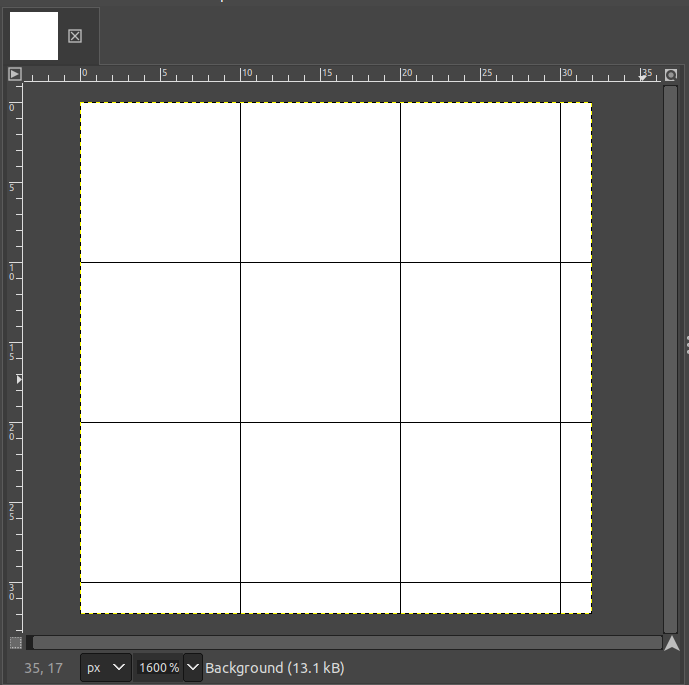
A Grid will appear, but it is recommended to have a large grid to create pixel art. As the default pixel grid is 10 x 10, let’s enlarge the grids a bit.
To customize the grid as per your requirement,
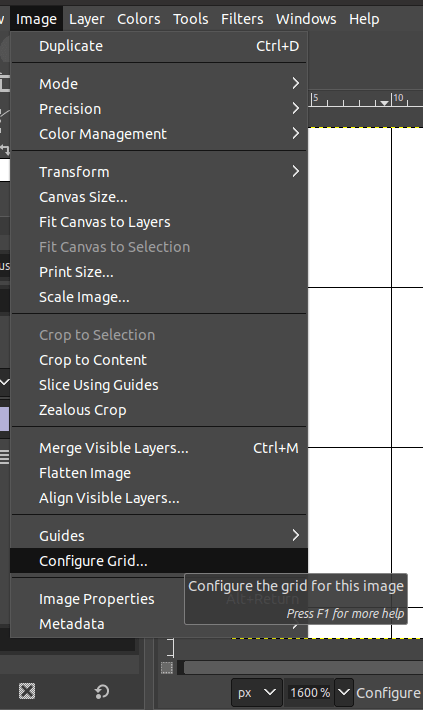
- Go to the Image menu.
- Click Configure Grid.
You can change a few settings here in the Configure Grid dialog,
- Change the horizontal pixel settings to 1.
- Change the vertical pixel settings to 1.
- You can change the color of the pixel line that appears in the grid pattern in the dialog.
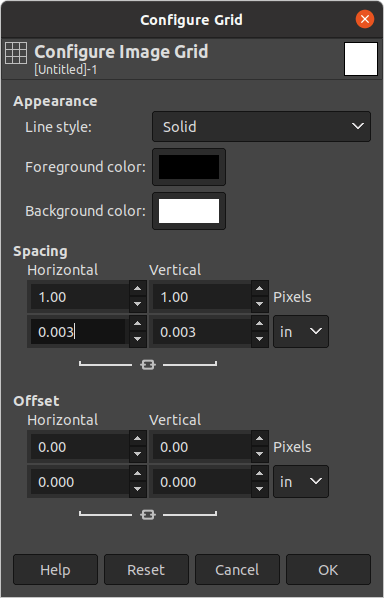
Once you are happy with the changes, simply click OK.
Step 05: Choose the pencil tool & draw the pixel art
To start drawing pixel art, you can use a specific tool. In this tutorial, we will use the Pencil tool to create pixel art. To select the Pencil tool,
- Simply right-click on the Paintbrush icon in the Toolbox.
- Among the drop-down options, choose the Pencil tool.
- Alternatively, use the keyboard shortcut “N”.

Another way to select the Pencil tool is,
- Go to the Tools menu.
- Click on Paint tools.
- Next, choose the Pencil tool.

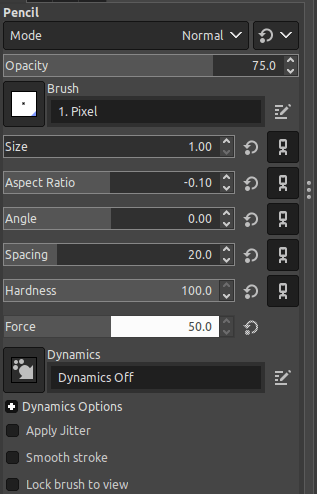
Also, make sure to change the brush size of the Pencil tool to “1 pixel”.
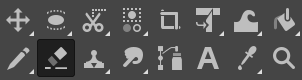
Now, you can start painting using the Pencil tool by filling the squares with the preferred colours. If you need to erase a drawing,
- Use the Eraser tool which is located in the Toolbox.
- Alternatively, undo the painting by pressing, Ctrl/Cmd+Z.
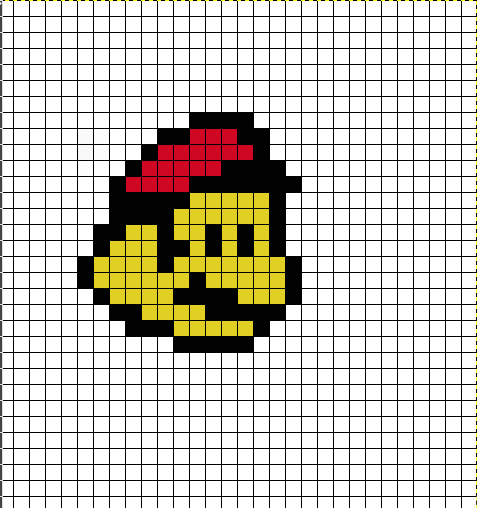
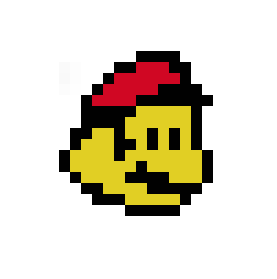
In this example, we have drawn a Mario cartoon character in pixels.
Step 06: Disable the grids
Once you have painted the image completely, it’s time to remove the grid and check out the final image. To remove the grid on the canvas,
- Go to the View menu.
- Then, disable the Show Grid option.
Once you remove the grid, the pixel art on the canvas will be displayed as follows.
This is a very simple pixel art tutorial for beginners. You can create a lot of complex and creative pixel art with some practice.
Step 07: Export the image
To export the file,
- Click on the File menu.
- Click Export As.
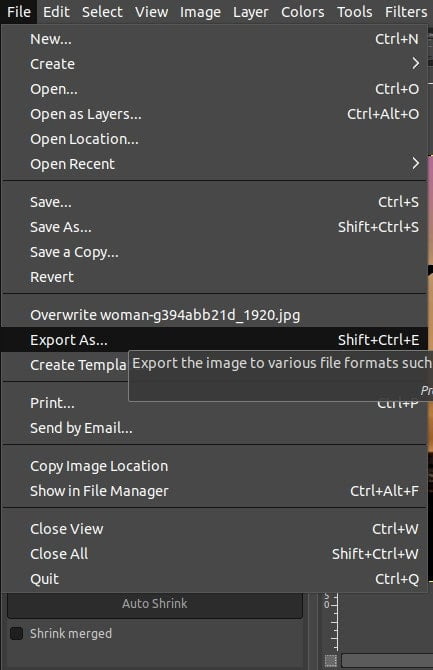
Then, a dialog as displayed below appears.
- Type in a suitable name and choose an appropriate location to save the image.
- Save the file in either the XCF, PNG or GIF formats.
- Finally, click on Export.

That’s it! This is how you create simple pixel art and save it accordingly.
It is easy to create pixel art with some practice as well.
Conclusion
In conclusion, anyone can create pixel art in a few simple steps. All you need is some patience, creativity, and imagination.
With a little practice, you’ll be able to create your own pixel art in no time. So what are you waiting for? Get started today and see what you can create!
Thanks for reading & feel free to check out more of our articles!
Expert Rating
Summary
Pixel art creation is one of the many forms of art that can be created using GIF. Pixel art specifically found its own with the advent of internet culture as well as online chatting. While not an absolutely essential skill to learn, it is a useful to have at least basic knowledge in the process, to enhance the repertoire of a graphic artist. Pixel art isn’t difficult to create but it is limited by the technical skill and knowledge of the graphic artist.


