

If you’re someone who likes to personalize their work, one way to do that is by installing preferred fonts. In this article, we’ll show you how to install fonts in Windows, Mac, and Linux in GIMP. We’ll also provide recommendations for websites where you can download free and paid fonts.
How to Install fonts in Windows for GIMP
Downloading fonts on Windows and installing them in GIMP is very easy. You don’t even need to locate the Windows Font folder! Let us walk you through the easy steps.
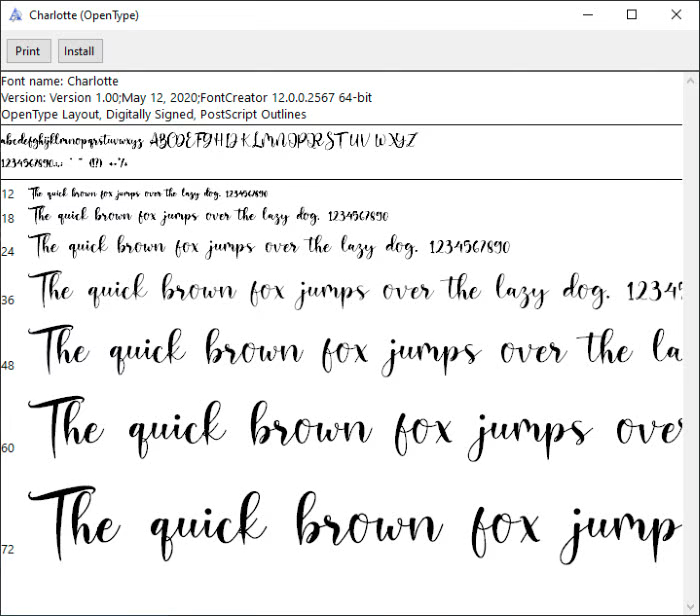
Step 01: Download the font
Of course, you can use other websites to download the desired fonts apart from the ones mentioned above. Once you have downloaded the fonts, locate the destination where you want your fonts to be stored. Then, extract the font file.
Step 02: Extract the font file
It is important to extract the font you downloaded, as you cannot use a ZIP file as a font in GIMP. To extract the font,
- Select and Right click on the specific font folder.
- Click Extract All.
- Choose a file location to save the extracted font file.
- Finally, click Extract to extract the font file.
Step 03: Install the font
Now, from your extracted folder, we need to install the font.
- Double-click and open your font file.
- Click on the Install button.
- This automatically installs the font to the GIMP font folder.
Step 04: Open GIMP & locate the font
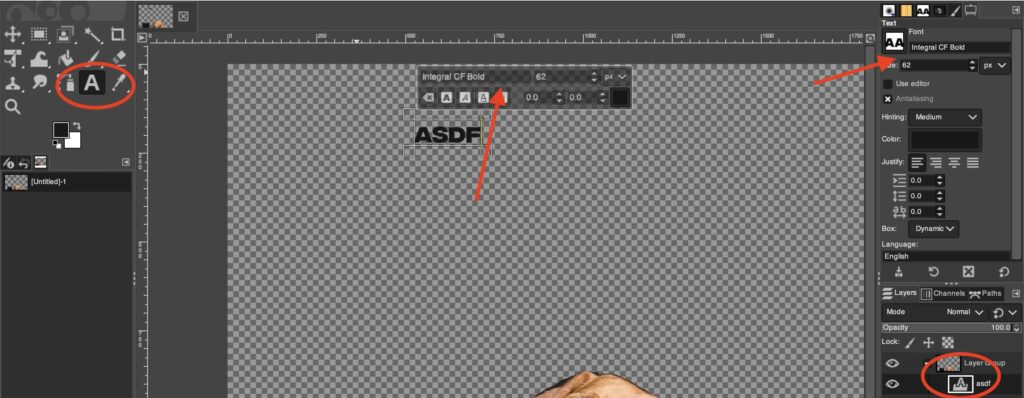
To check that the font is successfully installed, you need to open GIMP. Check the Font Dockable Dialog.
- Activate the text tool
- Enter the name of the font the the text areas (as shown below)
- Once you found the font, start typing.
- Troubleshoot: If you’ve already got text, & you cannot adjust the text (even though you are selecting your font) do the following:
1. Use the text tool and highlight all the text.
2. Make sure to click the “up down” buttons to adjust size of text prior to changing font.
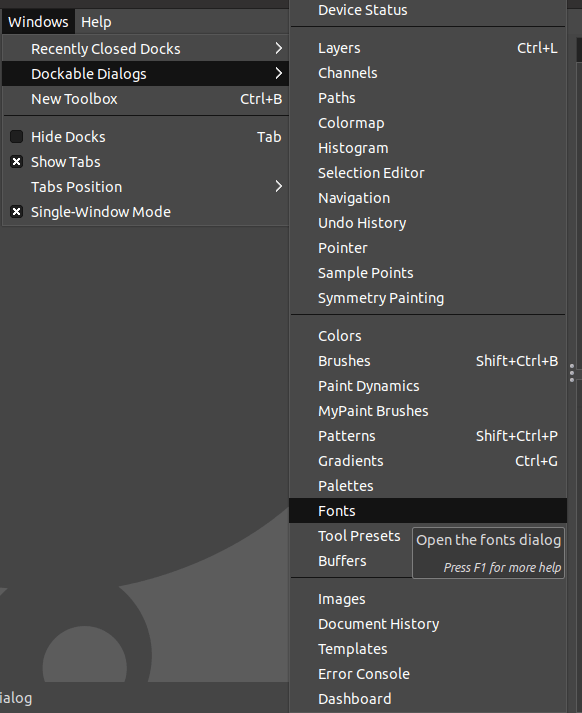
If it is not activated on the right-hand side of the screen, follow these steps to make it visible (the same process goes with all operating systems).
- Go to the Windows menu.
- Click Dockable Dialogs.
- Choose Fonts.
How to Install fonts in Linux for GIMP
After you’ve downloaded your desired fonts, there are a few more steps to install the fonts in GIMP when you’re using Linux. But, no worries. They are straightforward!
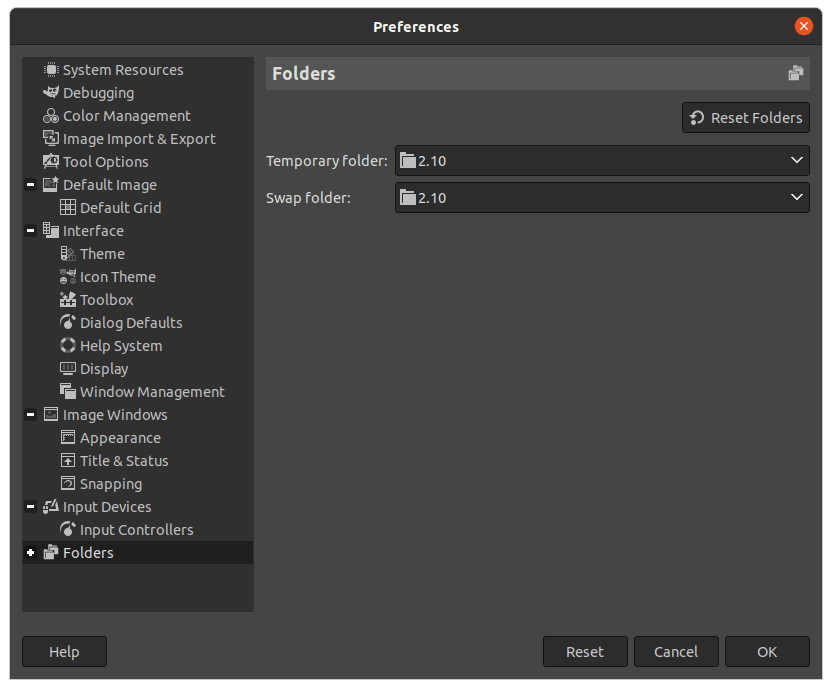
Step 01: Open the Preferences menu
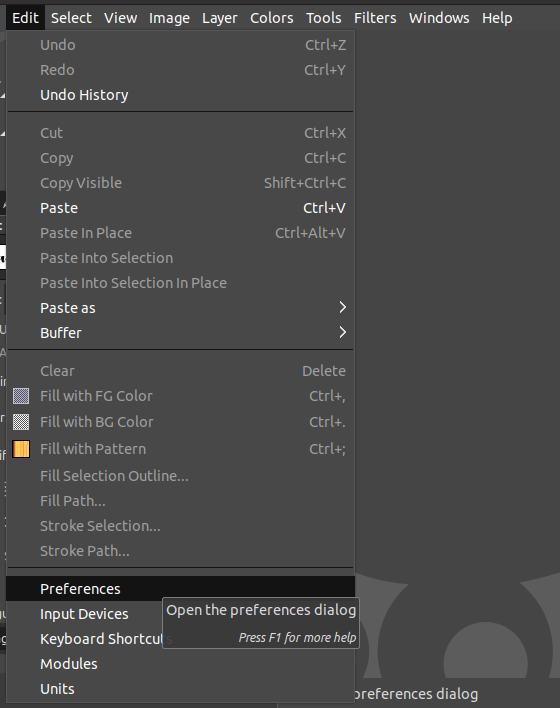
Initially, you need to go to Preferences in GIMP to start up the process.
- Go to the Edit menu.
- Click Preferences.
A dialog displaying a number of options would appear on the left-hand side.
Step 02: Find the Font folder
From the options on the left-hand side of the dialog,
- Click the “+” icon beside the Folders option.
- Then, wait for a drop-down list to appear.
- Now, click on the Fonts option.
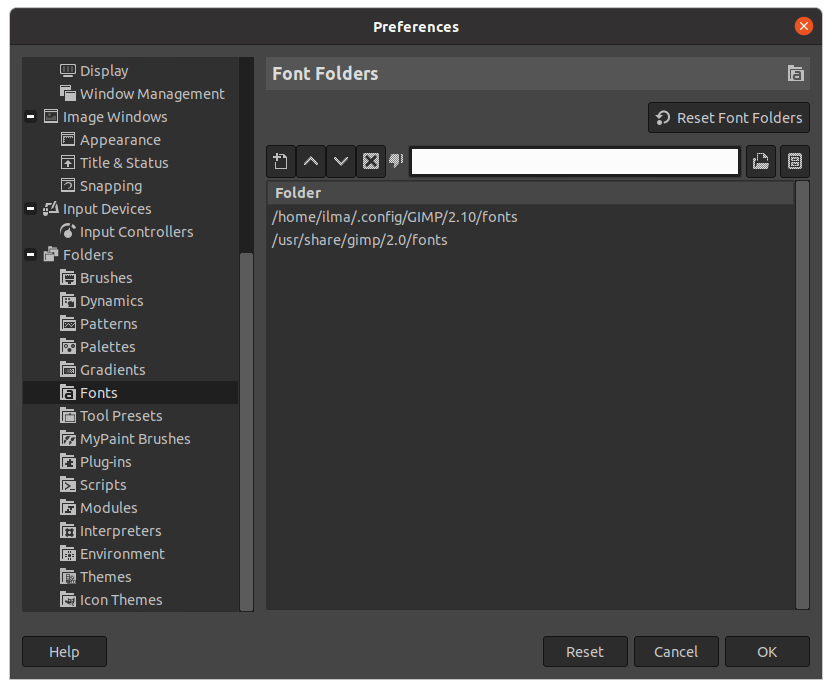
Step 03: Find the font folder location
As soon as you click on Fonts, the locations where GIMP stores the font folders are displayed. You can click on any of the locations and click on the “Show file location in the File Manager “ icon on the far right of the dialog box (outlined in the image below).
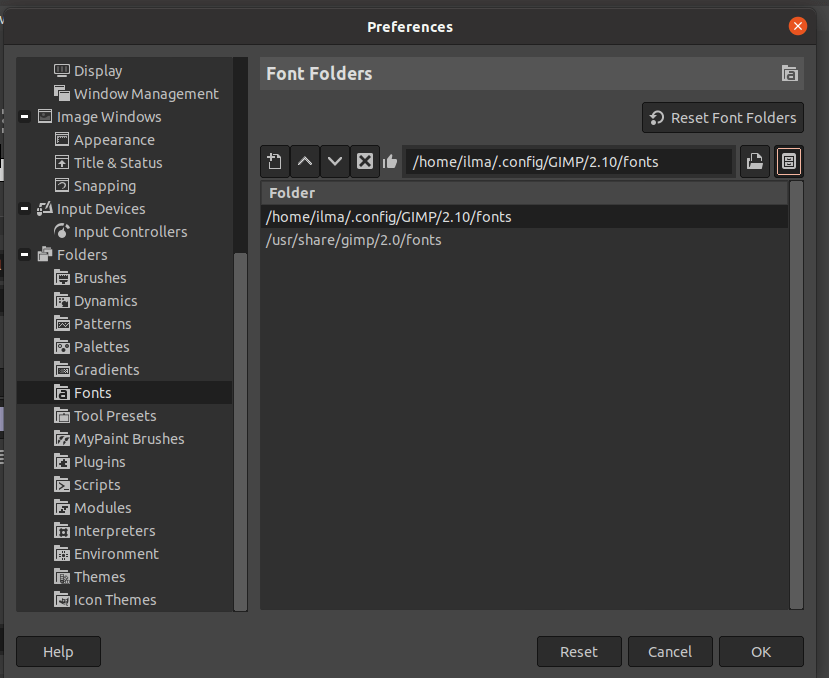
As soon as you click, this would open the location of the Fonts folder as displayed below. This is an easy way to locate the specific font folder in Linux.
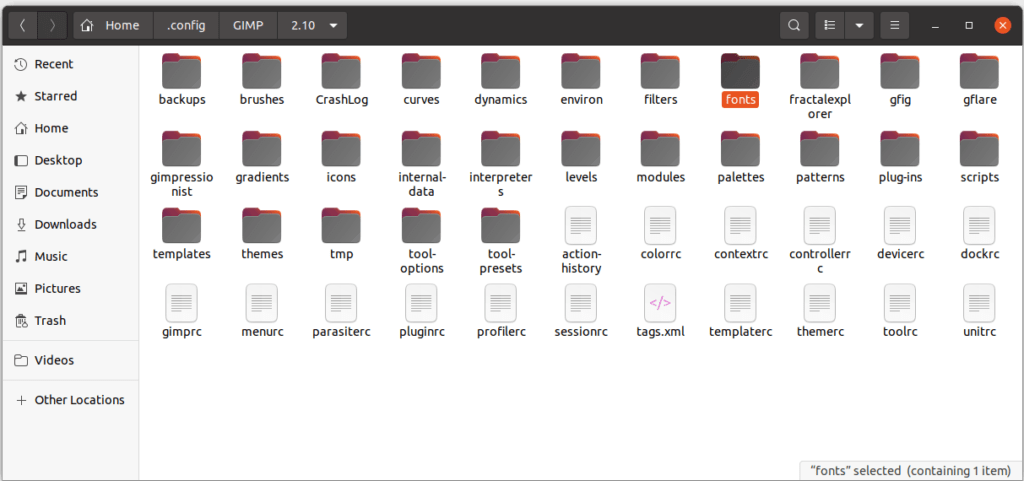
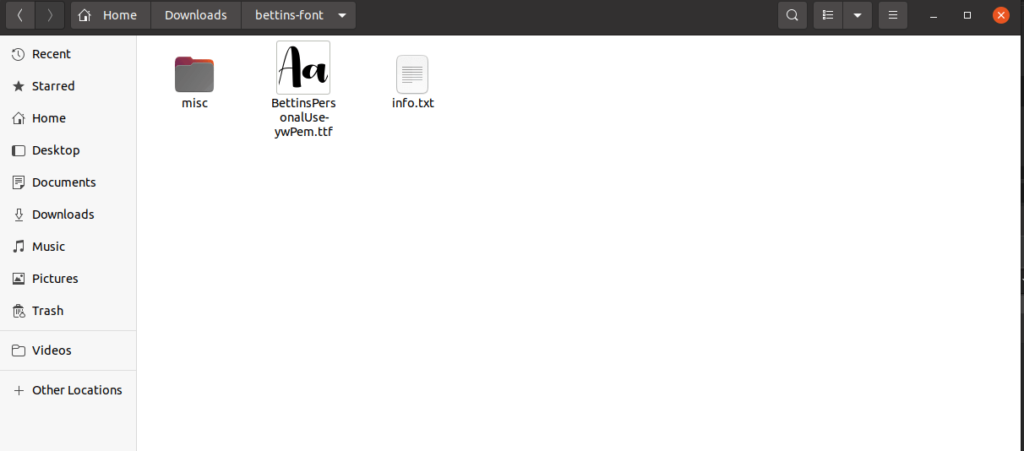
Simply go to the specific folder where you downloaded your font. Generally, all the downloads are stored in the Downloads folder as displayed below.
Once you open the specific downloaded font, several files are displayed related to the fonts displayed below. Then, copy the font file with the TTF extension. Then, paste the TTF file onto the Fonts folder which we located previously.
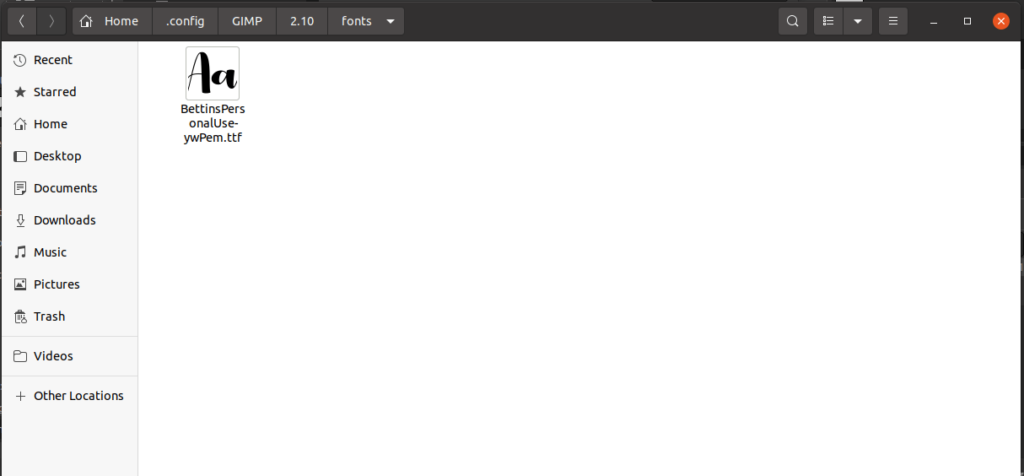
The image below is what it would look like after pasting the specific font inside the Fonts folder. Now, you can simply close all these folders and get back to GIMP.
Step 04: locate the font
To check that the font is successfully installed, you need to open GIMP. Check the Font Dockable Dialog.
- Activate the text tool
- Enter the name of the font the the text areas (as shown below)
- Once you found the font, start typing.
- Troubleshoot: If you’ve already got text, & you cannot adjust the text (even though you are selecting your font) do the following:
1. Use the text tool and highlight all the text.
2. Make sure to click the “up down” buttons to adjust size of text prior to changing font.
Alternatively, if you cannot locate the font panel:
- Go to the Windows menu.
- Click Dockable Dialogs.
- Choose Fonts.
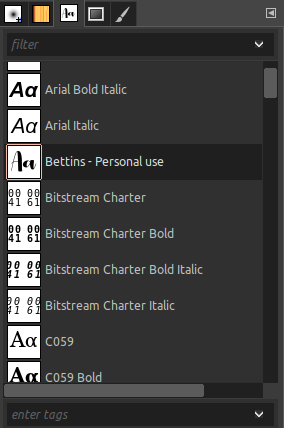
The font dialog appears on the right side of the GIMP window. Simply scroll down and locate the font you added to the Font folder.
That’s it! This is how you install fonts to GIMP using Linux.
How to Install fonts in Mac for GIMP
Installing fonts in Mac for GIMP is similar to how we install fonts in Windows. It’s easy and would require a few steps!
Step 01: Download and locate your font
Open Finder and find the location where your font is installed.
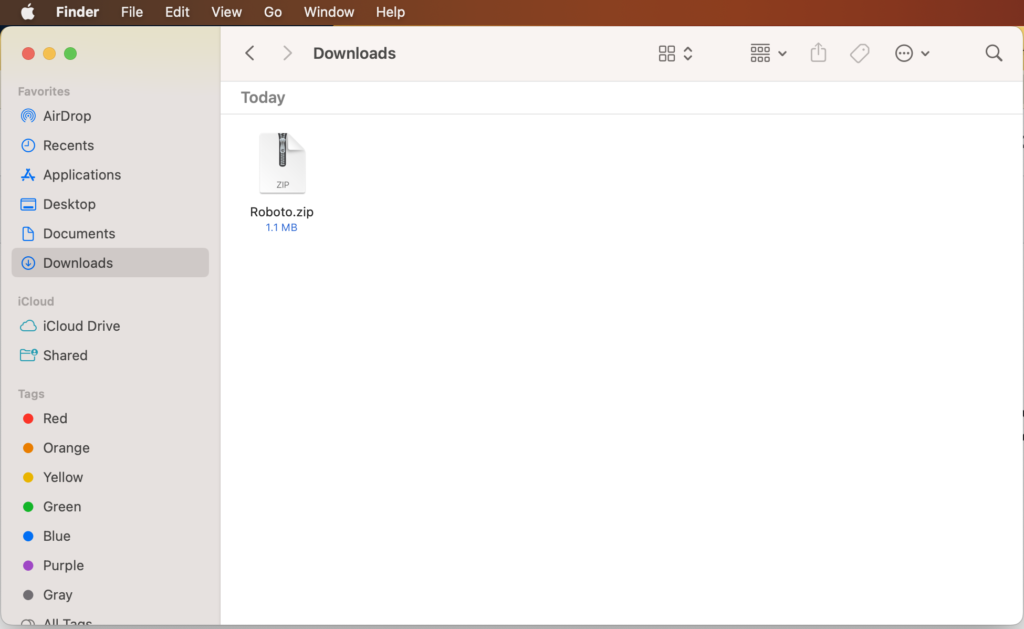
Next, double-click on the specific file and open it. As soon as you open it, you would notice a few files within the folder.
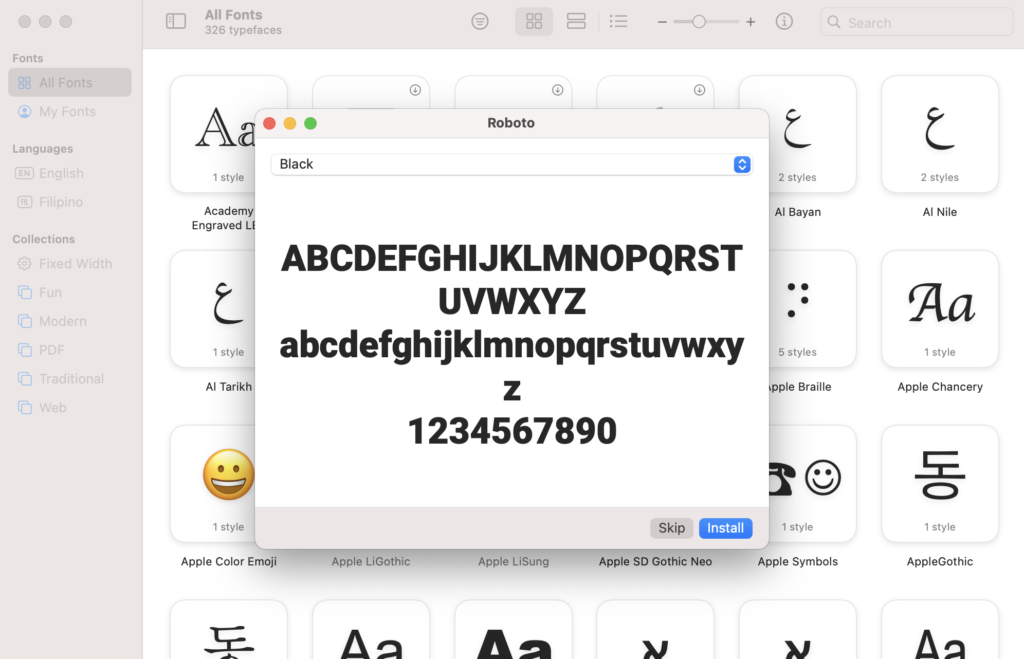
Step 02: Install the font
Once you click on your chosen font, the Font Book would open and process the necessary requirements. The Font Book is the default application for Mac users to handle font-related files.
At the bottom right corner of this dialog, you would see an option named “Install.” Simply click on it and install the font.
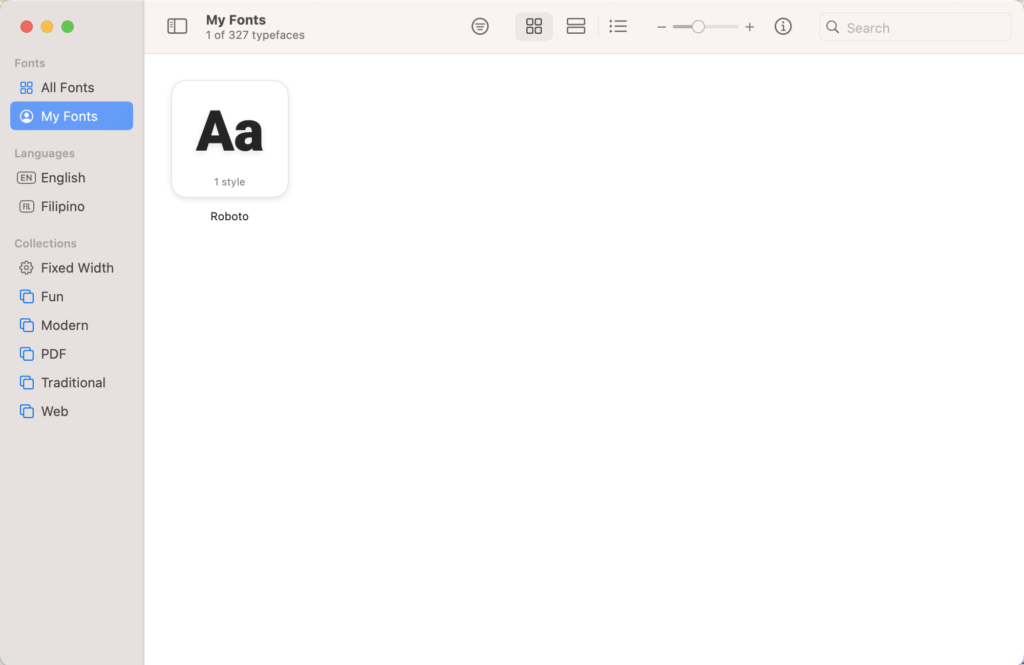
Once the installation is complete, the specific font should appear under My Fonts on the left-hand side of the dialog. Here, the user-installed fonts are stored.
It’s time to check whether the font is installed in GIMP.
Step 03: Open GIMP & locate the font
To check that the font is successfully installed, you need to open GIMP. Check the Font Dockable Dialog.
- Activate the text tool
- Enter the name of the font the the text areas (as shown below)
- Once you found the font, start typing.
- Troubleshoot: If you’ve already got text, & you cannot adjust the text (even though you are selecting your font) do the following:
1. Use the text tool and highlight all the text.
2. Make sure to click the “up down” buttons to adjust size of text prior to changing font.
Alternatively, if you cannot locate the font panel:
- Go to the Windows option.
- Click Dockable Dialogues.
- Choose Fonts.
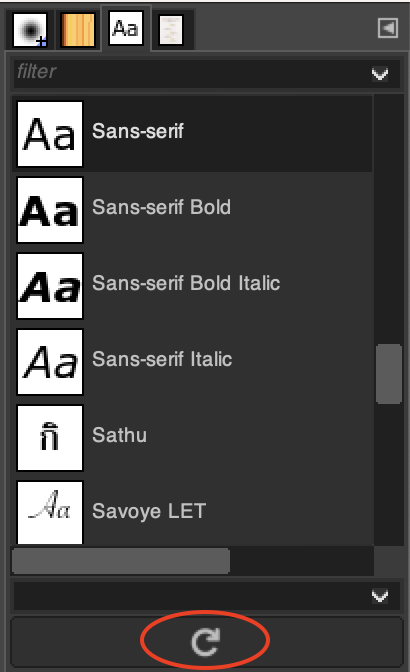
You would notice the font dialogue that appears on the right side of the canvas. Simply click on the Refresh icon which is placed at the bottom of the font dialogue.
Now, go through the fonts and search for the installed font. That’s it!
Where to download fonts for GIMP?
In this section, we’ll show you some of the best sites to download free fonts, which you can swiftly install and use with GIMP. Before downloading any font to install in GIMP, there are a couple of things to keep in mind:
- First, make sure that the font is compatible with GIMP. Most fonts will work fine, but there are a few that won’t.
- Second, check the license agreement before downloading. Some fonts are free for personal use only, while others can be used commercially.
With that said, let’s take a look at some of the best places to find free fonts for GIMP:
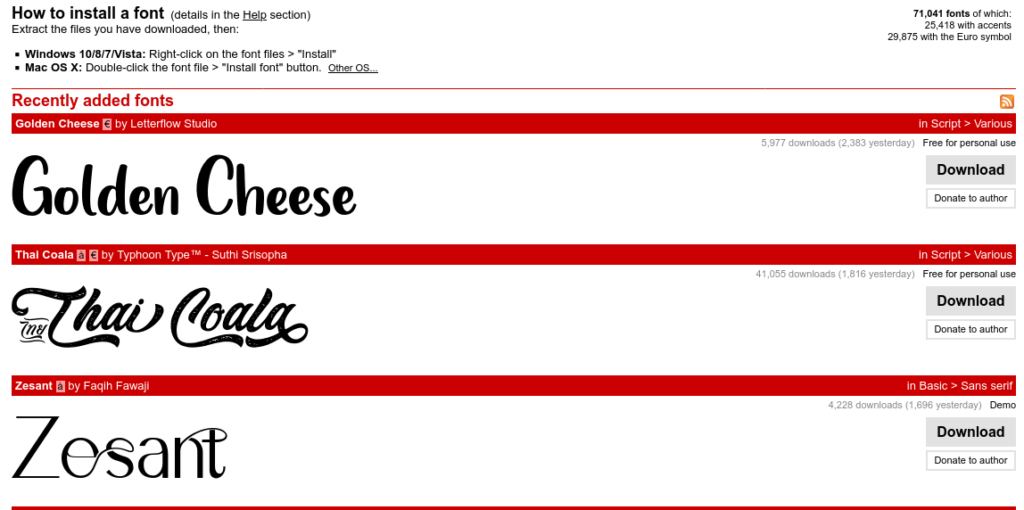
FontSpace
FontSpace has over 77,000+ free fonts for users to download. It also facilitates the upload of new fonts for users as well.
The fonts in FontSpace are legally licensed as well.
Simply click on the download button and get your free font right away to add to GIMP.
DaFont
DaFont is another large and free store where you can download essential fonts on the internet. You can simply use the search to navigate into the desired font to download them right away.
The only important note about using DaFont is that you can only use these fonts for personal purposes.
Make sure to thoroughly read the license agreement to make sure you use the fonts right away. You can simply download a font by clicking the button next to it and get them handy!
Font Squirrel
Font Squirrel is another exciting website where you can download fonts for free. It has smooth navigation and you can access several fonts through tags and search.
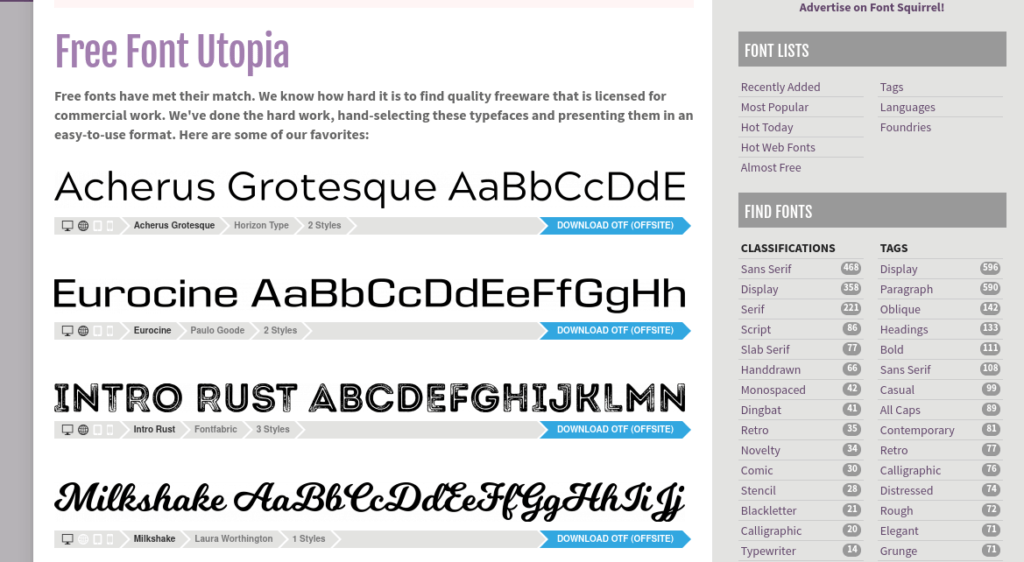
Explore its many categories of fonts, such as Sans Serif, Display, Serif, Oblique, Script, Retro, Casual, Dingbat, and more!
You can simply click the Download OTF or TIF button and download your favorite font.
Adobe fonts
Adobe Fonts has many typefaces for you to make the right choice for your needs. You can easily search for the right font and download them easily for GIMP.
The fonts in Adobe are licensed and may fulfill commercial purposes as well.

Before you download fonts,
- You’ll need to sign up on the website to download the fonts.
- Then, you need to enroll in any subscription to download the essential fonts. You can also gain Cloud Storage or Cloud Subscription if you enroll in any plans.
These plans are also affordable and worth the price.
PixelPlus
PixelPlus is another site for you to download various types of fonts. There are fonts specialized for various areas, such as Eclectic fonts, Logo Designer Dream Bundle. Luxury fonts, Retro fonts, Free fonts, and many more!
They also provide different licenses for various options.
- Personal use
- Desktop Commercial Use (which includes Free and Premium packages)
- Personal and Commercial Use Licenses
Like the previously featured website, you can download fonts for free or for purchase from PixelPlus.
Frequently Asked Questions: installing fonts in gimp
Q: GIMP is not showing my new font. What to do?
A: There are a couple of ways to find missing fonts in GIMP.
- Rescan your fonts and refresh your list in GIMP. You can do this by clicking the refresh icon in the font list.
- Restart GIMP — or even your PC. Maybe your system needs a reboot to catch up with the new changes you’ve done.
- Check GIMP’s font folder through the Edit menu. If your fonts are not present there, make sure you add them manually.
- Double-check your font format. GIMP supports multiple font formats but not all. Check our list below to find out if your font matches the requirements of GIMP.
- Update GIMP and make sure you have the latest version of the program.
- Clear your system cache and retsart your PC.
Q: What font formats does GIMP support?
A: GIMP is able to support many font formats based on the FreeType 2 font engine. These font formats are acceptable and can be installed in GIMP:
- TrueType fonts (and collections)
- Type 1 fonts
- CID-keyed Type 1 fonts
- CFF fonts
- OpenType fonts (both TrueType and CFF variants)
- SFNT-based bitmap fonts
- X11 PCF fonts
- Windows FNT fonts
- BDF fonts (including anti-aliased ones)
- PFR fonts
- Type42 fonts (limited support)
Q: Where is the GIMP Font Folder Location?
A: The GIMP Font Folder is different from your OS font location. To access and check your fonts in GIMP,
- Click Edit in the menu.
- Choose Preferences.
- Go to Folders.
- Click Fonts.
Conclusion
There are many great websites that offer both free and paid fonts, so finding the perfect font for any project is easier than ever.
Meanwhile, learning how to install fonts is a valuable skill for anyone who wants to use them in their personal or professional projects. With a little practice, it’s easy to install fonts on any operating system.
Thanks for reading & feel free to check out more of our articles!
Expert Rating
Summary
Fonts are a great way to personalize and add flair to your project. The fact that there are an almost unlimited variety of different fonts available to the end user means that scalability and functionality of fonts is very high. The process of installation of fonts is also fairly straightforward and shouldn’t pose much of an issue to most end users.


