
If you have seen a cool neon effect and wanted to create that in Davinci Resolve and found that too complicated, then this guide is for you!
In this step-by-step guide, we will explain how to create an eye-catching neon effect in DaVinci Resolve. We will provide you with step-by-step instructions that are simple and easy to follow.
We will cover everything you need to know, from importing your footage to adding and customizing the neon effect to make it look amazing.
Let’s get started.
Things You Need To Create Neon Effect inside Davinci Resolve
There are a few things that you need to make the neon effect. You can make the neon effect without any of the following things, but we recommend you have these to create a great looking neon effect.
Neon Font
You need a neon font; there are a lot of free neon fonts that you can download from the internet. Here are some free ones you can use to create the neon effect.
- Marquee moon
- Beon
A background
You need a background for the neon effect. You can use a photo or a video, but we will use a video as a background.
Neon Effect In Davinci Resolve
There are multiple ways to create a neon effect in Davinci’s resolve.
Import your Clip in Davinci Resolve
Import the video clip you want to use as the background for the neon effect. Making neon effects without a background is not recommended.
The background you want to use must be slightly dark as the glow will look more realistic. To import the clip into Davinci Resolve:
- Go to the media pool and press Ctrl + I or Cmd + I. Or right-click and choose import media.
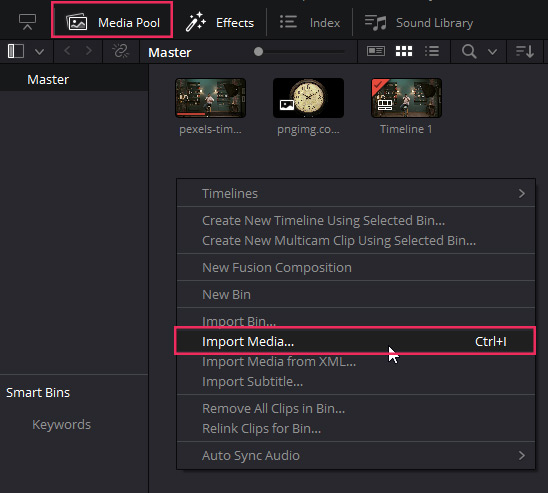
- A new window will open up, find and select your video clip.
- Click the open button, and the clip will be imported.
Create Fusion Composition In Davinci Resolve
Now bring the clip to the timeline by dragging and dropping.
To Open the video clip in the fusion Page:
- Right click on the video clip on the timeline.
- Click on the option “Open in Fusion Page” from the menu.
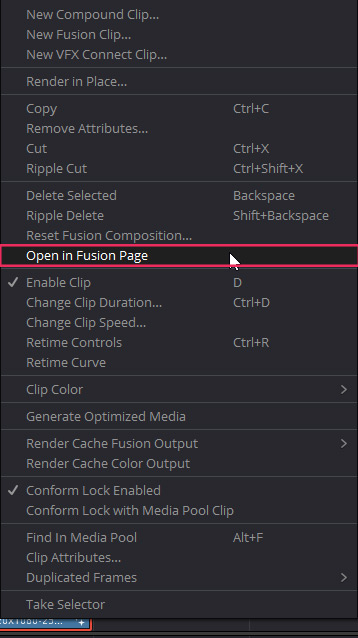
This will take you to the fusion page, and now it’s time to start working on the neon effect.
Neon Effect On The Fusion Page
After going to the fusion page, we will work with the nodes; you may get confused when you hear the word nodes. But don’t worry; we will try to make it as simple and easy as possible.
Add Text
Now we will add the text, and we will be applying the neon effect to the text. To add the text, we need a text node.
- Select the Mediain node by clicking on it and then click on the text icon. Or Drag the text node onto the yellow line, and let it go when half of the line truns blue to create the text node.

- This will create a text node as well as a merge node.
- Adjust the node tree as you see in the reference image.
Now we will edit the text node.
- Click on the text node.
- Open up the inspector panel in the top right-hand corner.
- Make sure you’re on the text tab.
- You will see a text box; write whatever you want your neon to say.
- We will use the text “EDITS101.”
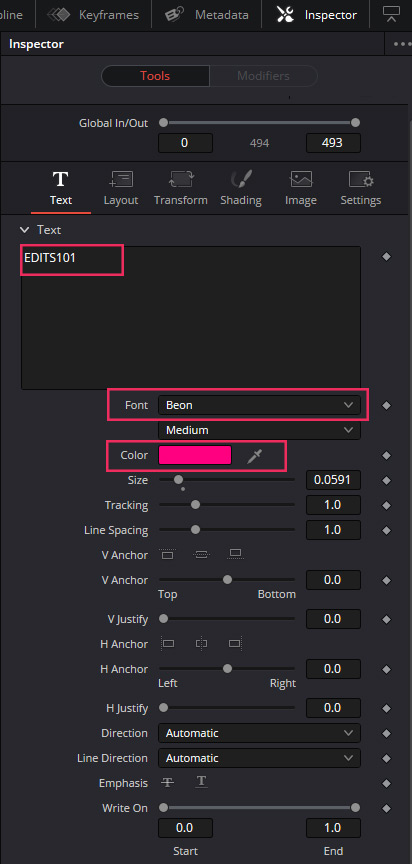
Now change the font of the text to Neon looking font. You can use whatever font you want, but we will use the Beon font.
- Click on the font dropdown and select the font.
You can adjust all the settings in the inspector panel including the color, size, and much more.
- After changing the font, click on the color box to select the color for the neon effect.
Add Drop Shadow
We will now add a drop shadow to make it more realistic.
- Press shift + space and search for the drop shadow node; click on the add button, and the node will be automatically connected to the text node.
- If the node is not connected automatically, then press shift and Drag it on the yellow line below the text; let it go when the line turns blue.

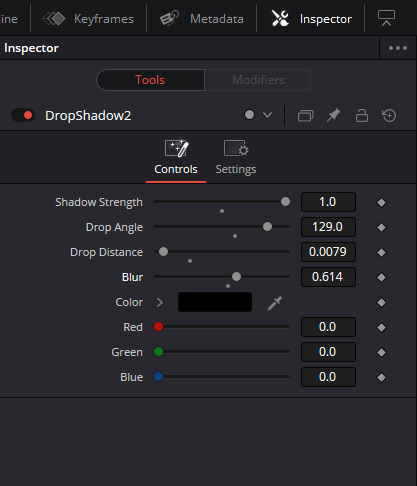
Click on the drop shadow node and go to the inspector panel in the top right corner. You need to play with the following settings:
- Shadow strength
- Drop Angle
- Drop Distance
- Blur
- Color
Adjust the settings until you have achieved the desired result.
Add Glow
This is the fun part because, in the section, we actually give our text a neon look. To create a neon effect in Davinci Resolve:
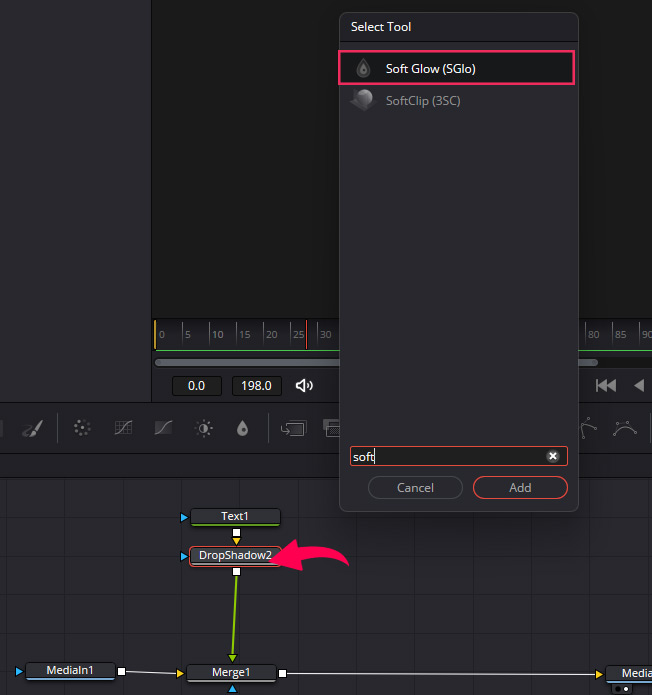
- Select the drop shadow layer and then press Shift + Space or Ctrl + Space and search for the soft glow node.
- Click on add, and it will be added under the drop shadow node if it is not connected to the line, press shift and drag the node on the yellow line; drop it when the line turns blue.
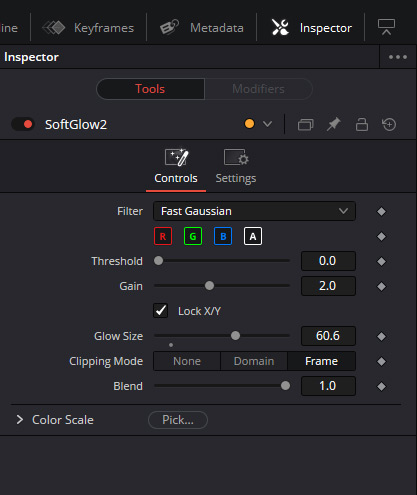
Adjust the following settings until you have something you like for your text.
- Threshold
- Gain (it will adjust the brightness)
- Glow Size (it will help spill the light on the background, it will make it look more realistic)
You can duplicate the glow node to add more glow to the text but make sure you don’t go too far.
Track the Motion
Now we need to track the motion of the video and apply it to the text so it moves with the movement of the video.
- Select the first node, which is MediaIn, and press shift + Space.
- Search for the planar tracker node and click add. The node will be linked next to mediaIn.

Select the planar tracker node and find a part of the video that is clear and different in the video. Draw a path around that part.
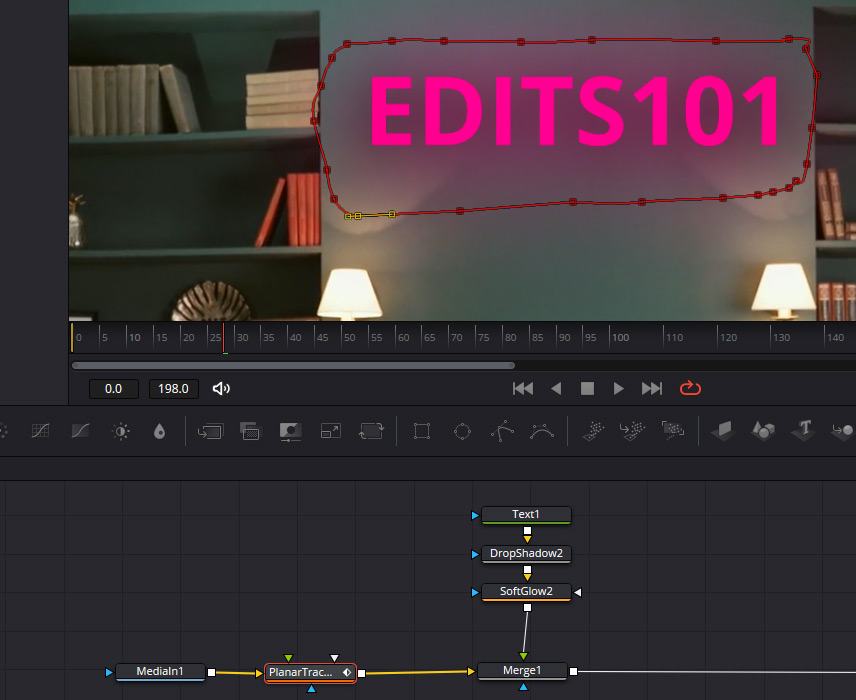
To track the motion effectively, the selected part should stay on the screen during the whole clip.
- Go to the inspector panel and click on the track forward button.
- Make sure the track stays on the part of the video where you have drawn your path.
Now click on “Create tracking Data,” and a new node will be created.
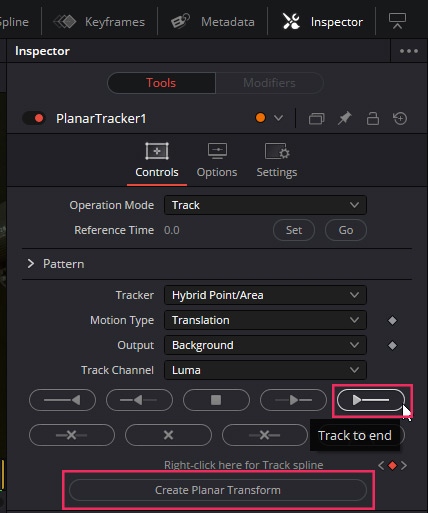
- Delete the already present planar tracking node.
- Press shift and grab the newly created tracking node; bring it on the yellow line under the glow layer and let it go when the line turns blue.
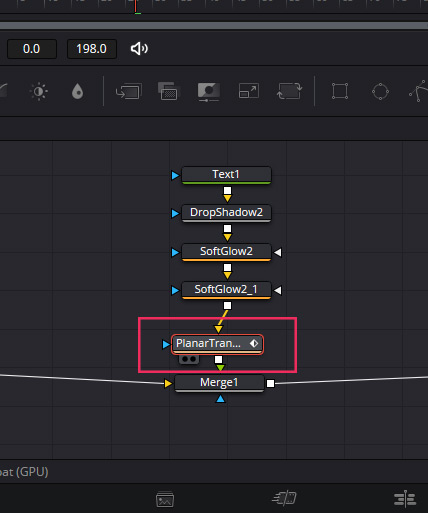
And now, you will see that the text is attached to the video and will move with the movement of the video.
Note: you can skip the “tracking the motion” section if your video has no movement or you are working on a Picture.
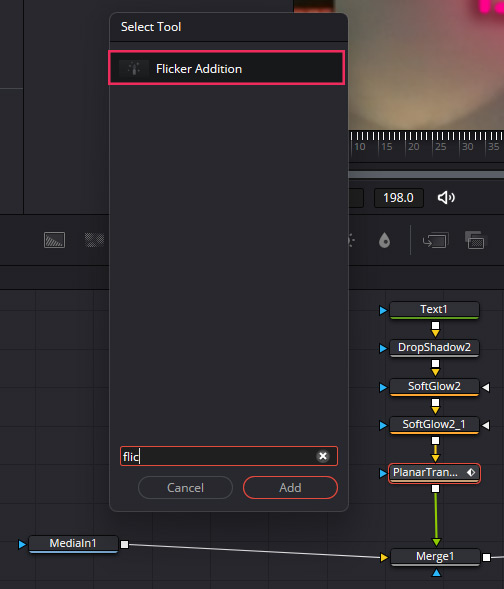
Add Flicker
The flicker effect will make the neon effect more realistic. Select the tracker node and press Ctrl + Space and search for flicker and add the flicker addition node.
There are a few settings that you need to change:
- Set the flicker type to gain.
- Set the range to a number that looks good for your text and background.
Play with other settings like flicker quality, and make sure you don’t go too far.

Add Sound Effects
Now add a few sound effects to enhance the visual experience of the viewer.
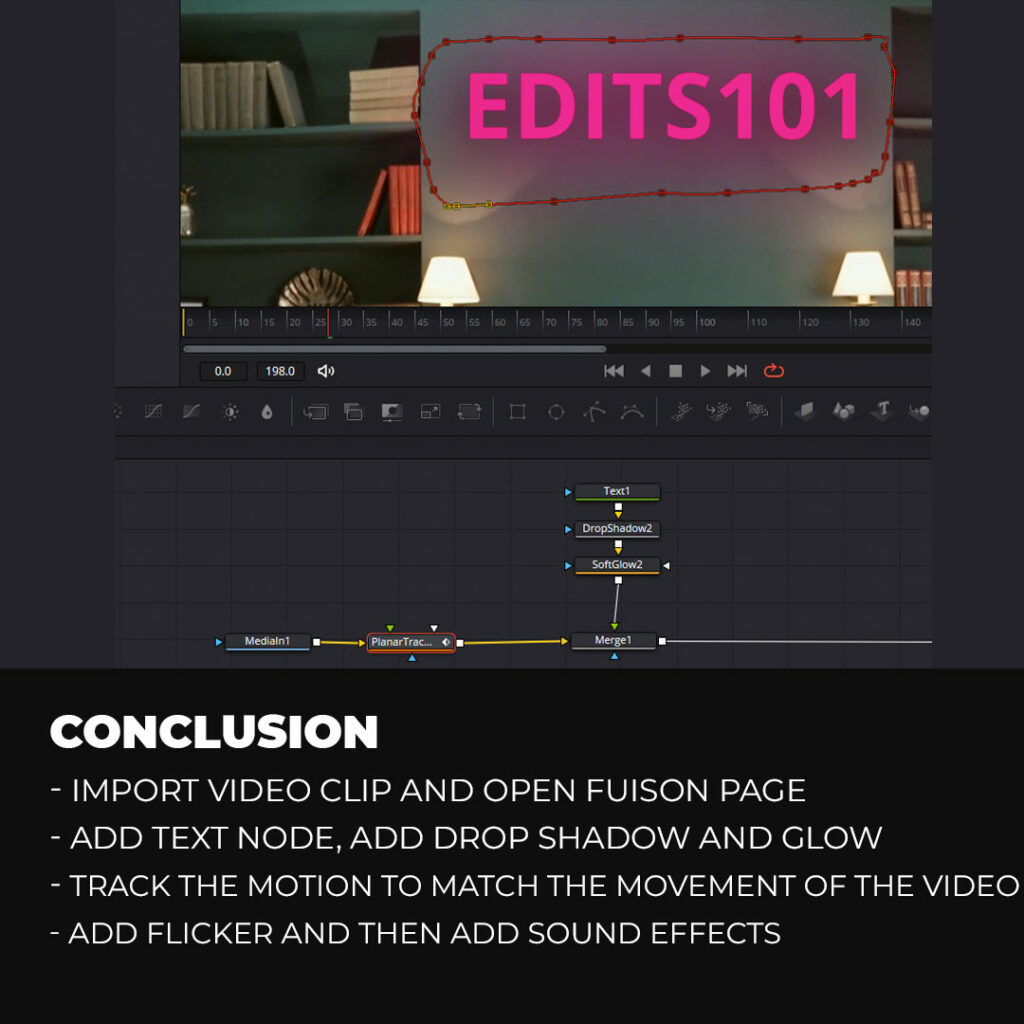
Conclusion
As you have seen in the above guide, we can create the neon effect on the fusion page by using a few nodes.
First of all, import your video clip and convert the new video clip into a new fusion clip. Add a text node, write your text, and choose a neon font like Beon or marquee moon.
Add a drop shadow node and adjust the shadow until it looks good. Then the main thing is to add the glow, adjust the glow settings, and then move on to the tracking part.
Track the motion of the video and apply it to the text; now, the text will move with the movement of the video. Add a flicker effect at the end to make it more realistic; add the flicker node and adjust the settings until you are happy.
Thanks for reading & feel free to check out more of our articles!
Expert Rating
Summary
Creating a neon effect in Davinci Resolve may be moderately challenging, with practice, it becomes functional and scalable, enabling the addition of vibrant and eye-catching neon elements to enhance visual appeal in video editing projects.


