

DaVinci Resolve is a powerful video editing software, and one of the standout features of this software is its complete Digital Audio Workstation (DAW), known as the Fairlight Audio page. The Fairlight page allows you to create, edit, and mix audio tracks for video projects. This page provides a whole suite of audio effects, including EQ, compression, reverb, and many more. These effects can be applied to individual audio tracks or to the entire audio mix.
If you are a beginner and don’t know how to navigate through and use the Fairlight page in DaVinci Resolve, don’t worry we’ve got you covered. In this tutorial, we’ll go over the basics of the Fairlight page, including navigating the different tools and panels available and applying effects to your audio tracks.
Interface of the Fairlight Page
Let’s have a look at the interface first so that you can familiarise yourself with the page. These are the main panels you can find in the Fairlight page.
- Monitoring
- Audio Timeline
- Mixer
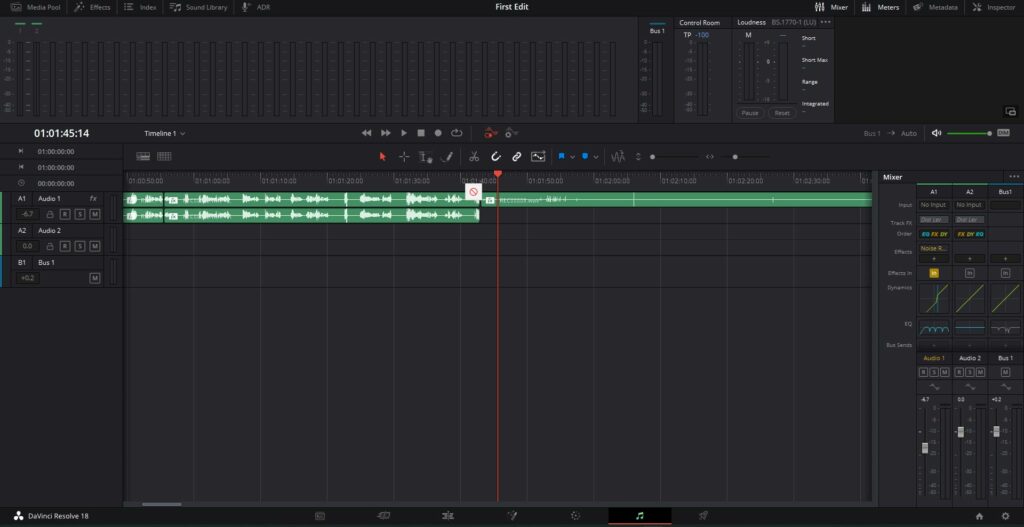
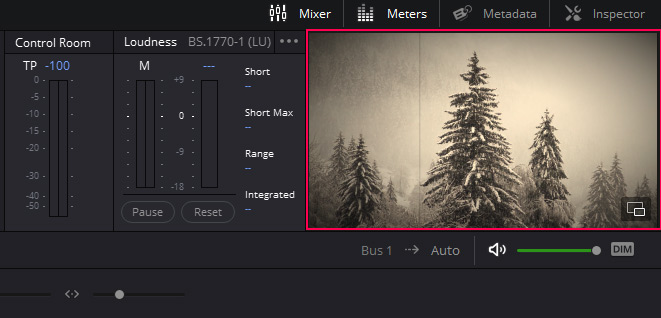
Monitoring
In the Monitoring Panel which is located at the top of the Fairlight page, you can find the audio meters, the Master Output meter, the control room meters, and the viewer. These all correspond to the audio clips within the timeline.
The Meters allow you to monitor the loudness of each audio track in the timeline.

To the right of the meters, you can find the Viewer which provides a small preview of your video. It can help you in making sure that the audio clip you are editing is the right one.
Audio Timeline
Then timeline will show all the audio clips of the timeline you have selected. The video tracks are hidden by default when you come to the Fairlight page. You can turn them on from the Timeline View Options.

Mixer
The Mixer is the main panel where you will do most of the adjustments to you audio. It allows you to add effects, modify the EQ, change the audio dynamics, control the levels and pan the audio, amongst others.
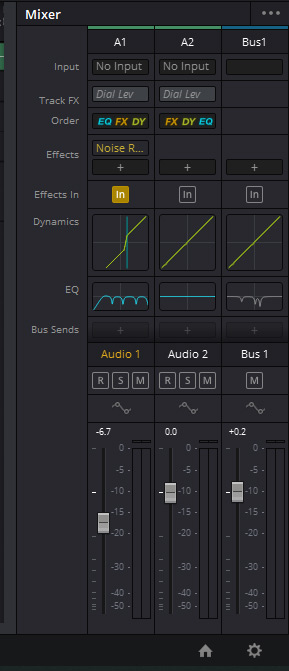
Fairlight Mixer Panel In Detail
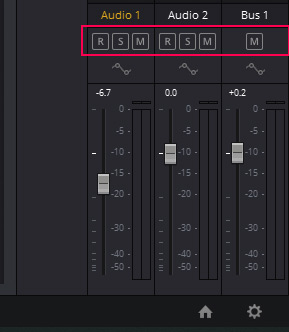
The Mixer has two sets of channel strips for each track in your timeline and buses. Each track has the exact same graphical controls and these can be adjusted according to your preferences.Next, let’s go through each of these controls.
Fader
The Fader allows you to control the volume of each audio track. All you have to do is click and push the fader up or down accordingly.
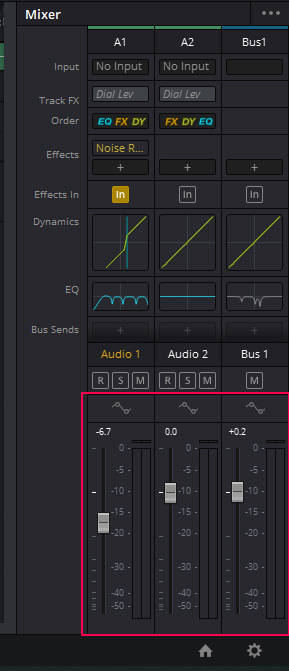
Record, Solo and Mute
Above the Fader we have our Record, Solo and Mute buttons. The Record button allows you to activate a track for recording. Solo mutes everything except for that track so you will be able to listen only to it. The Mute button will mute the track.
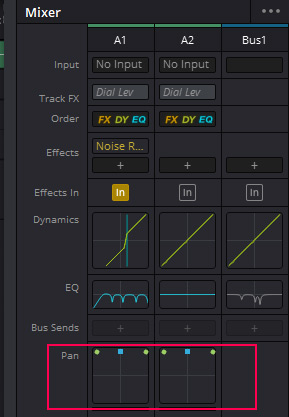
Pan
The next control is the Pan, which allows you to change the positioning of the audio. This is the panel where you can give your audio a surround sound effect. You can click and drag the little dot and move it left or right you can even move it around.
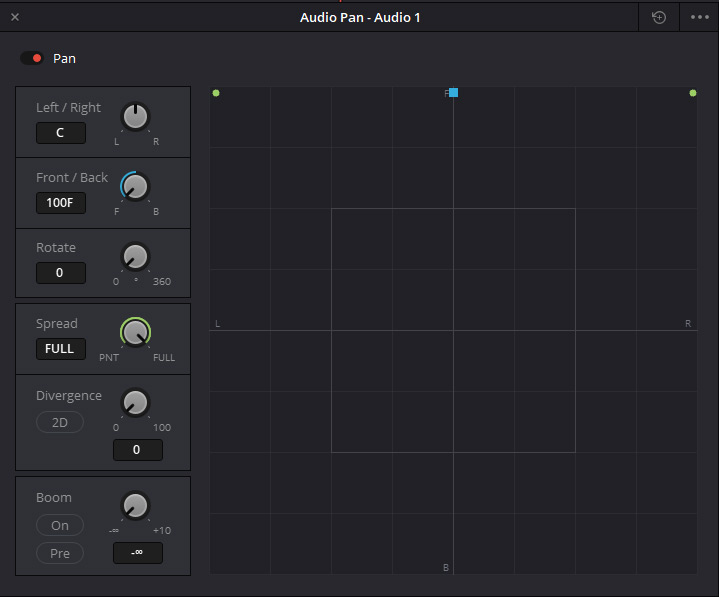
You can also double-click on the control of any track to open the 3D Audio
Pan window. The controls available in the pan window will be based on the audio track mapping. Note that both stereo and surround painting controls are available with corresponding numeric controls. Panning can be adjusted using the graphical pan control or target specific panner characteristics using the controls on the left of the window.
Equalizer
This is the big boy panel, as a whole guide can be written on this control alone. Nevertheless, we will try to cover it in a concise manner. EQ is where most of the audio enhancements take place. You will be spending most of your time in the EQ panel when targeting particular frequencies and tonal ranges.
You will need to double-click on a graph to open the four-band parametric equalizer. At first glance, this may look extremely complicated but it is actually very simple. Let’s have a look at the features and controls available.
On and Off button
At the top left next to the title Equalizer, you can toggle the switch to turn it on and off so you can easily compare the original with the modified audio.
Equalizer type
If you click on the little drop down of the Equalizer type you will notice that you have these four options:
- Earth
- Air
- Ice
- Fire
These different EQ filters emulate the features of different EQ mixing consoles, but the default in DaVinci resolve is Earth. Air emulates SSL 4K, Ice mirrors Neve V and Fire is based on Focusrite. Generally, Earth is the filter that one should maintain.
Reset Button
Now up in the top right corner, we have this little icon that is a reset button, so if you make a bunch of changes you don’t like and you want to reset your EQ, just go ahead and click on this icon to go back to the default EQ control.

EQ Graph
The EQ Graph is our graphic equalizer displaye as a curve with adjustable handles. This is where you’re going to see the changes that you’re making to your audio tracks. You will be able to identify what frequency is being targeted and what the changes look like.
Simple click and drag any numbered handle to increase or decrease the frequency range of that specific band. The parameters of the band which has been moved will be affected and you will be able to visualize the EQ effect applied in real time.
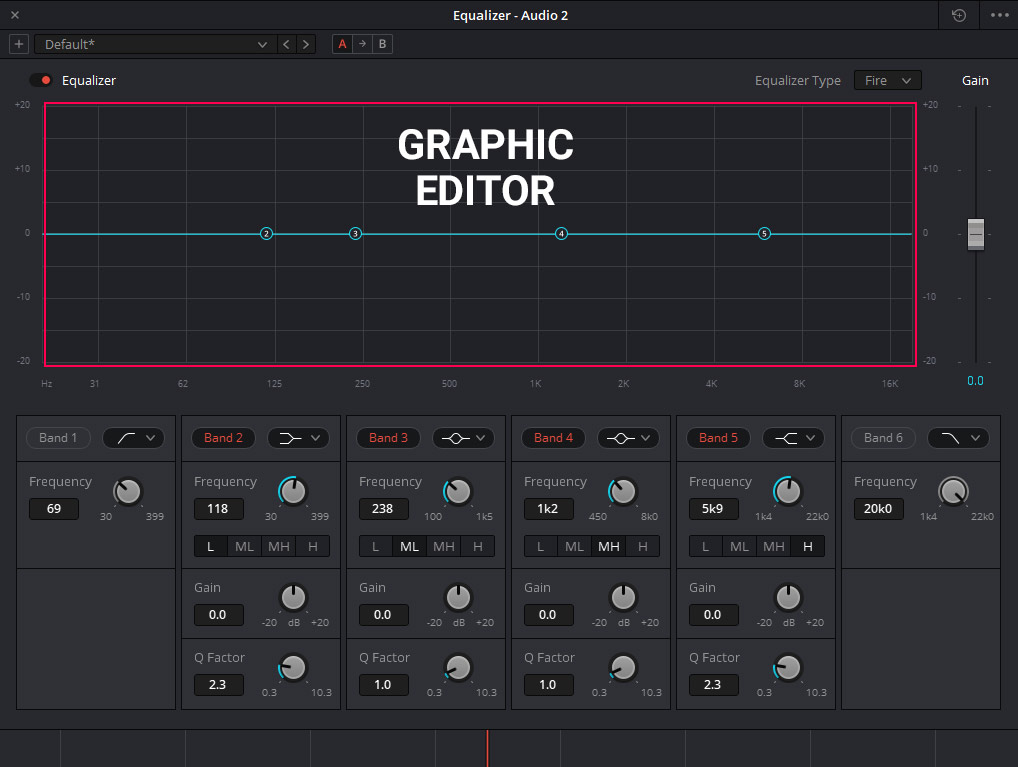
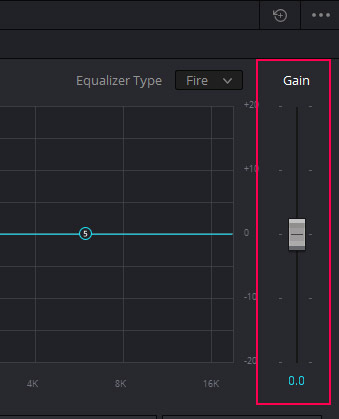
Gain
Moving to the right hand side of the Equalizer window, we have the Gain slider. This allows you to control how much the affected frequencies are affected. By lowering the values, the frequencies will be diminished while higher values will boost the frequencies.
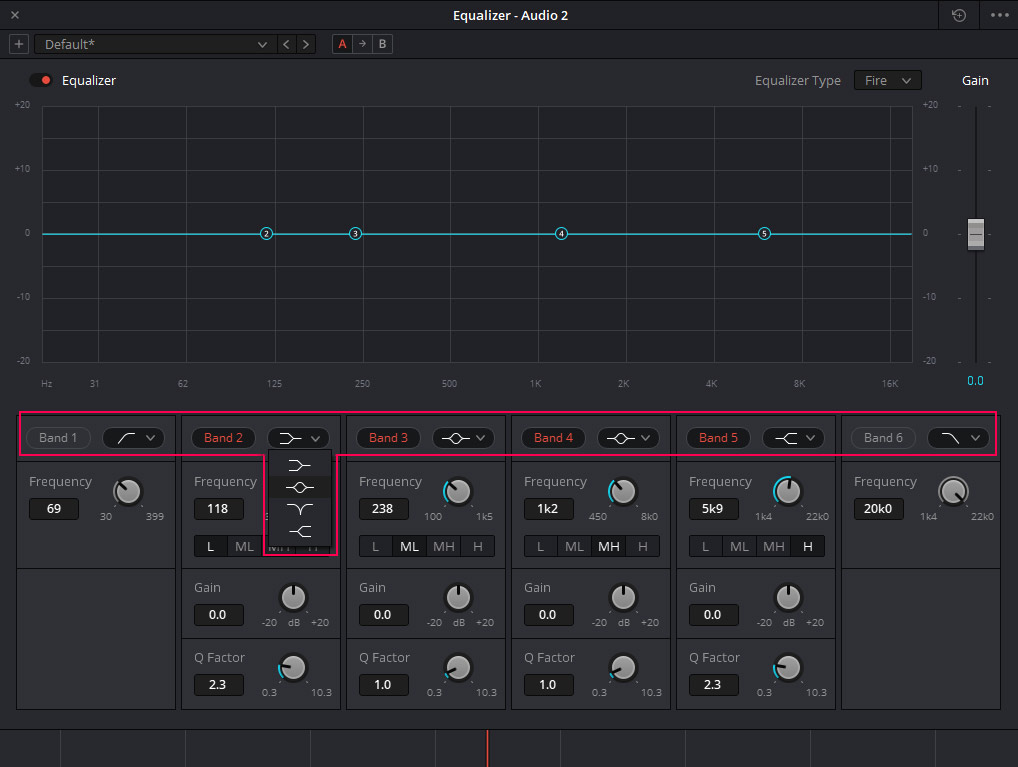
Bands
So coming down to the bottom section here, we have six different bands of equalization that we can adjust. Each one of these bands has some similar qualities to it. You can turn each one on and off by clicking on the band name. Each band is used to target different frequency ranges. Bands make it easy to remove problematic frequencies from your audio.
Bands 1 and 6 which are turned off by default allow you to add a High-Pass and Low-Pass adjustments to your audio tracks.
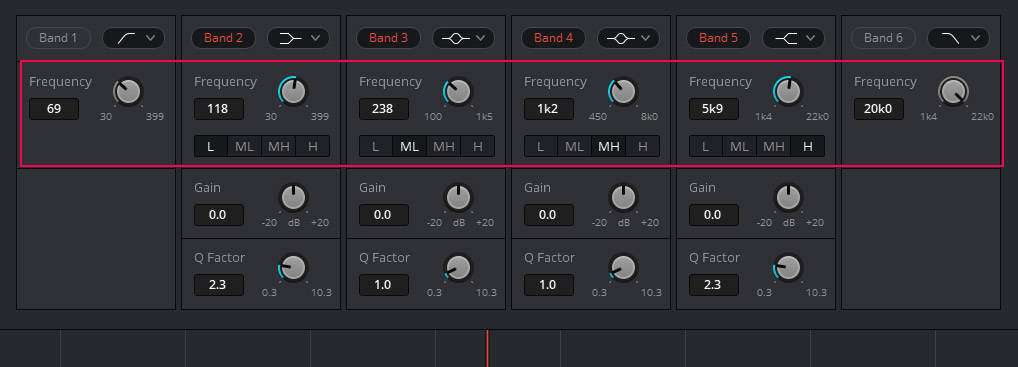
Band Filter Type
The Band Filter Type drop-down menu provides four filtering options to control control the lowest or highest frequencies in the signal.
Frequency
The Frequency oscillator allows you to adjust the center frequency of the EQ adjustment. If you want to affect human voices, for most vocal tracks you should set this around 100 to 120 because any frequency that is below 100 is not something you want to hear.
This is the overview of the EQ filter. Play around with the EQ a little bit so you will get the hang of it in no time.
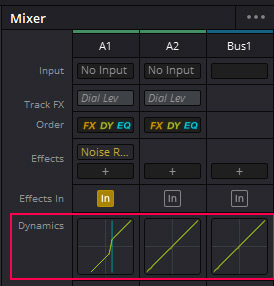
Dynamics
Above EQ, we have our Dynamics which offers three sets of dynamic controls to adjust the audio dynamics of each audio track. The three controls consist of the Expander/Gate, a Compressor and a Limiter.
Double click on any graph to open the Dynamics Control Window. Each dynamic control has various controls which can be adjusted to improve the dynamics of each audio track.
The Expander controller increases the dynamic range of a signal by reducing the levels of soft parts proportionately to the level of loud parts. The Gate controller lowers or eliminates quiet parts of an audio by reducing or silencing parts of the signal below a particular level threshold. The Compressor controller automatically changes an audio signal’s volume by detecting its envelope. This is mainly used to give human voices a boost and to smoothen changes in the levels. The Limiter controller sets a strict upper bound on the maximum level permitted for a particular signal.

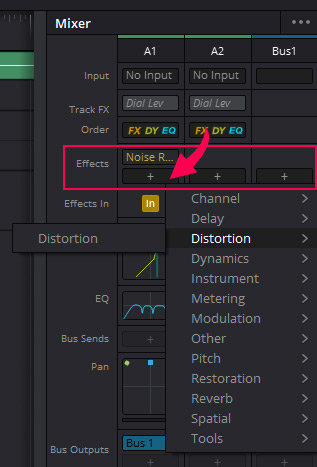
Effects Panel
Effects allows you to add effects to a specific track. From here, you can also view effects which were added from the Effects Library. By clicking on the plus icon, you can add effects like echo, reverb, and many more. There are other effects like noise reduction, changing the audio pitch, De-esser, De-Hummer, etc.
You can hover any effect added and choose to enable or disable the effect, adjust its controls or delete it.
Conclusion
We have covered the most important panels of the Fairlight page in DaVinci Resolve. You can start with Meters to analyze your audio’s loudness and preview the video from the Viewer as you playback the audio to make sure everything is in sync.
The Mixer provides you with various graphical controls to enhance your audio. We have looked at the Fader, Pan, the Equalizer, Dynamics, Effects and others.
We hope that this overview of the Fairlight page has helped you familiarise yourself with this software which allows you to edit your audio and your footage simultaneously.
Thanks for reading & feel free to check out more of our articles!
Expert Rating
Summary
Mastering the Fairlight page in DaVinci Resolve can be highly beneficial for beginners as it enables them to master audio editing and post-production techniques. With a wide range of audio tools and features available in the Fairlight page, beginners can create professional-level audio mixes for their video projects. Moreover, it allows them to have greater control over audio elements such as EQ, dynamics, and effects, resulting in a more polished final product.


