
Audio transitions are a key aspect of video editing that can often be overlooked. If you use them correctly, audio transitions will help you create interesting videos with engaging sound effects!
In this guide, we will focus on audio transitions in DaVinci Resolve 18. We will also discuss the different types of transitions DaVinci Resolve has to offer and provide step-by-step instructions on how to add and customize these transitions.
We will also cover how you can save your own audio transition presets for future use and how you can use keyboard shortcuts to make the process a lot faster.
Where Are Audio Transitions In DaVinci Resolve?
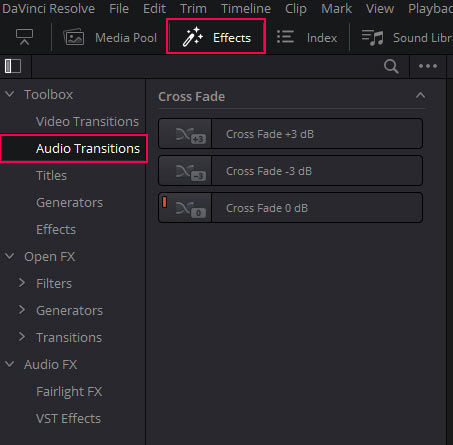
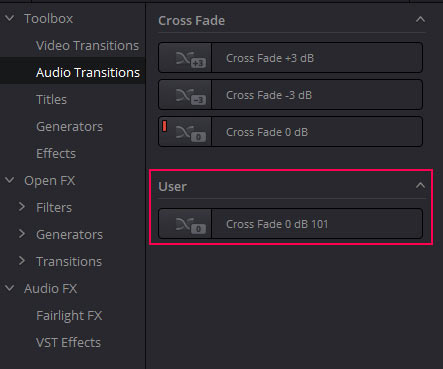
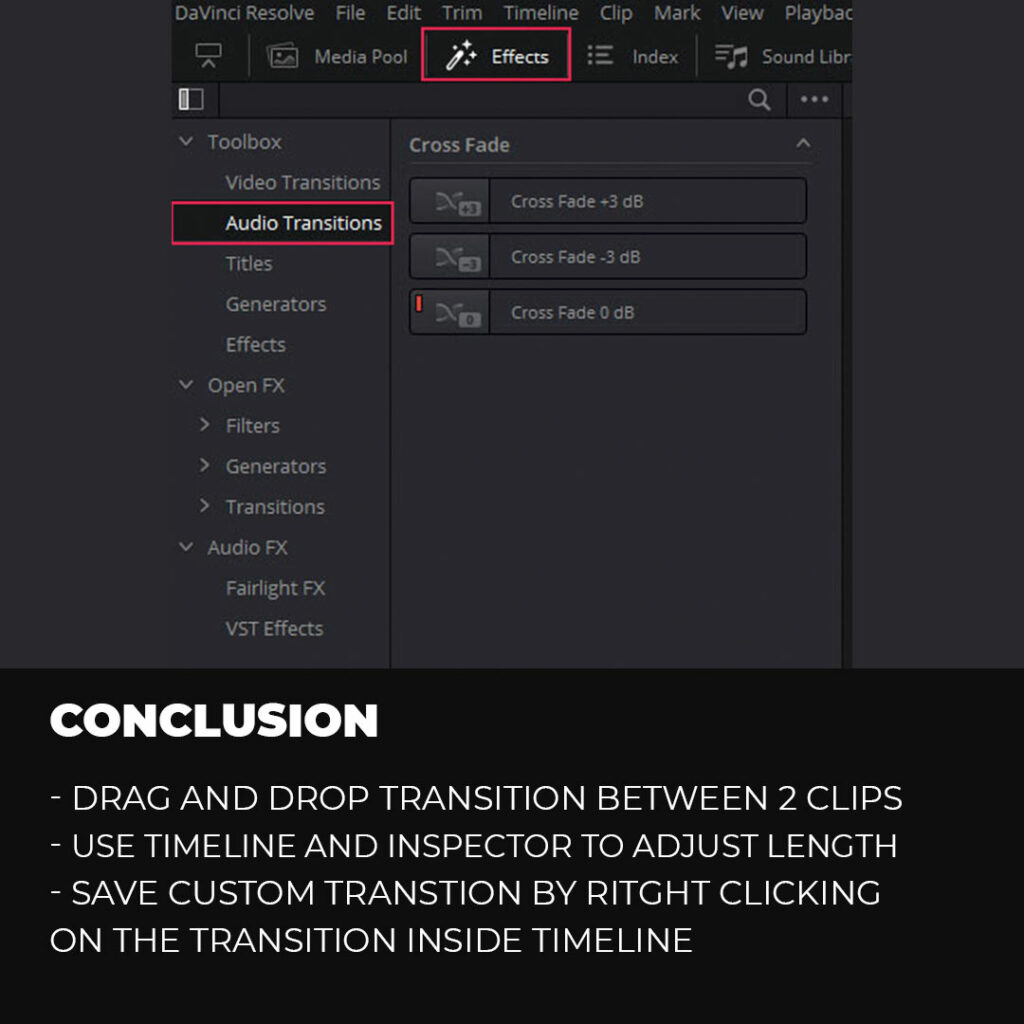
To begin, open the Edit page of Resolve. Then, make sure that the Effects Library is visible by clicking on it if it’s not already visible. To find your audio transitions, go to the left-hand side and click on “Audio Transitions” from the Toolbox list. All of your audio transitions will appear here.
Types of Audio Transitions
Resolve only offers one category of transitions and it is called Cross Fade. It has 3 presets in total:
- +3 decibels
- 0 decibels
- and -3 decibels.
Crossfade
A Crossfade transition blends two clips together by fading out the audio from the first clip as the audio from the second clip fades in.
This type of transition is perfect for creating a smooth and gradual change between two different audio clips.
How To Add Audio Transitions in DaVinci Resolve?
Let’s discuss how you can add and customize audio transitions in DaVinci Resolve.
Adding Transitions Between Audio Clips
There are 3 ways to add transitions between audio clips.
- Drag and drop the transition from the Effects Library.
- Use Keyboard shortcuts.
- Right-click on the timeline after placing the playhead between two audio clips.
Let’s discuss all 3 methods in detail.
Drag and Drop Transition
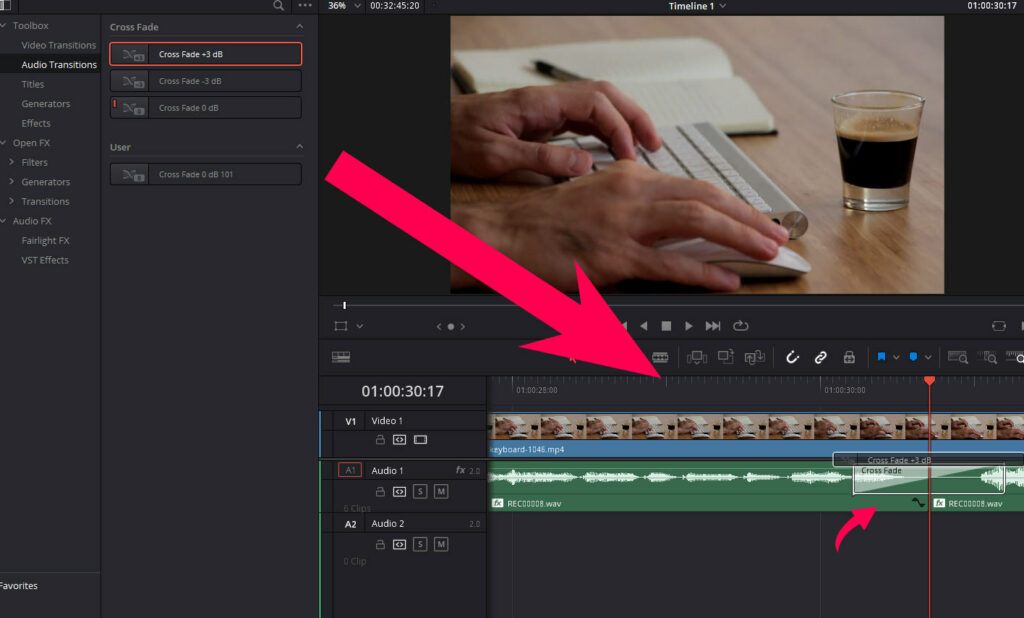
Go to the Effects Library, and drag and drop the transition between two audio clips. Now listen to the audio to see if you’re satisfied with the transition.
Keyboard Shortcut
The keyboard shortcut to add audio transitions is Shift + T. Simply, select the clips you want to add the transition to and press Shift + T.
Note: This shortcut will add the transition at the beginning and the end of a selected clip.
Use the other two methods if you want to apply the audio transition between two clips.
Right-Click
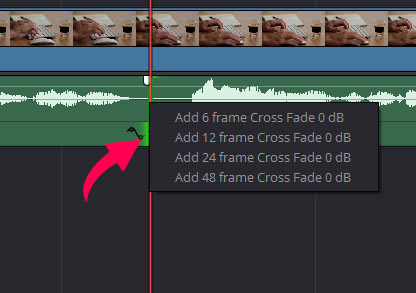
You need to place the playhead between two clips to add an audio transition with a right click. Right-click between the two clips, and you will be able to choose from four different Cross Fade transitions.
Play through to determine whether you are happy with the transition. You can adjust the transition in the timeline or from the Inspector.
Adjusting the Transition
You can adjust an audio transition in two ways:
- In the Timeline
- In the Inspector
Adjust the Transition in The Timeline
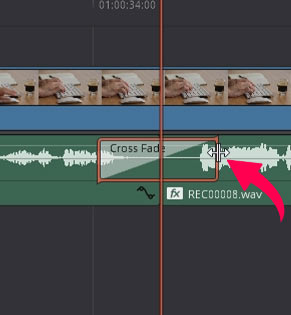
The easiest and fastest way to adjust the length of your audio transitions is to go to the timeline and hover over the edge of the transition. The cursor will change into a double-sided arrow icon. You can click and drag left or right to make it longer or shorter, depending on your needs.
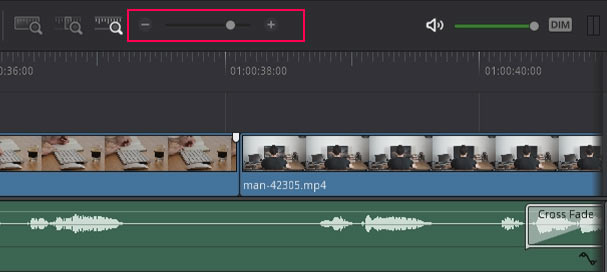
If your cursor shape is not changing after hovering over it, then you need to zoom in on the timeline using the Alt or Option + Mouse wheel, you can also use the slider from the Toolbar.
Adjust Transition in the Inspector
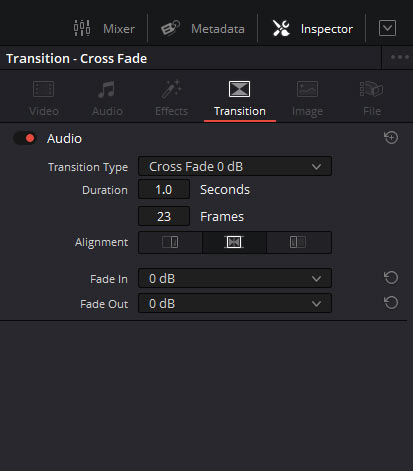
This is where you will get most flexibility in terms of adjusting a transition. Click on the Inspector from the Interface toolbar to open it. Click on the Transition button to reveal all the settings related to the transition.
You will get the following settings:
- Transition Type
- Duration
- Alignment
- Fade in
- Fade out
Transition Type
In this setting, you will find 3 options ranging from -3 dB to +3 dB. Choose the preferred option.
Duration
You can adjust the duration in two ways:
- In seconds
- In frames
Setting the duration in seconds is easy. Simply hover over the value, click and drag towards the left or right to change the value. You can also click on the value box and type in the number of seconds you want.
When setting the transition duration in frames, you need to know the frame rate of your project and then set the transition duration accordingly.
The frames option will let you reduce the duration of the transition to even less than a second. This is helpful if you want a really quick transition between audio clips.
Alignment
The alignment option will let you choose the position of the audio transition. With this setting, you can add the transition between two clips, at the end of the first clip and the beginning of the second clip. Try all these transition positions and see what works best for your audio.
Fade In and Fade Out
You can select fade-in and fade-out values for your transition in this setting.
How to Save Custom Transition?
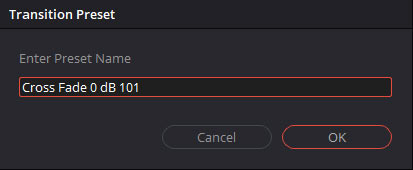
If you have made changes to a transition and want to use the same settings in the future, then you can save the transition with the settings you have adjusted. To save the custom transition, right-click on the transition in the timeline and choose Create Transition Preset option.
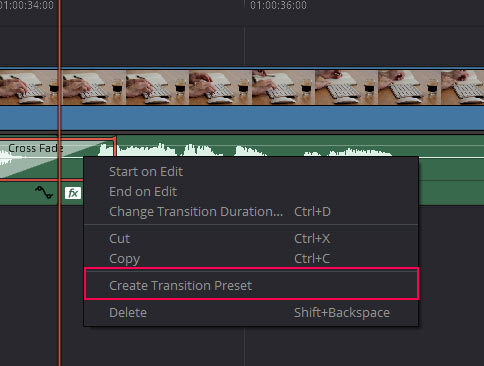
If you are unable to click, then zoom in on the timeline. You will be asked to name the custom transition, choose a name and click OK. Your custom transition will be saved.
Where are Custom Transitions in DaVinci resolve?
You can find the custom audio transitions you have saved in the Effects Library. Click on Audio Transitions, and you will see a User tab. All your saved custom transitions will be displayed here.
Default Transition In daVinci resolve
How To Set A Default Transition in daVinci resolve?
When you open Resolve, the default transition is set to Cross Fade 0 dB. You are free to set any transition as the default transition in DaVinci Resolve.
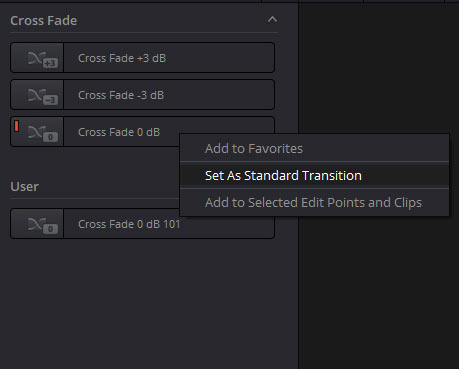
Go to the Effects Library and then go to Audio Transitions. Right-click on any transition, and choose the option “Set As A Standard Transition.” A small red line will appear to indicate that this is the default transition.
How To Change The Default Duration?
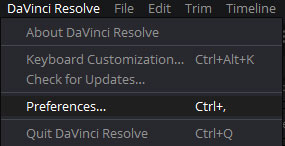
By default, the transition duration is set to one second. If you want to make it shorter or longer, it is very easy to do so. Go to the DaVinci Resolve menu in the top left corner, then click on the Preferences.
Go to the User tab and then click on “Editing”. Go to the General Settings section, and you will see the default transition duration setting.
Click on the box where it says 1 and enter your desired duration in seconds.
You can also set the duration in frames. This is especially helpful if you want to set the duration of the transition to less than a second.

Conclusion
Audio transitions can make your audio sound more professional and dramatic. In this tutorial, we have covered all you need to know about audio transitions.
You can add audio transitions between your audio clips in three different ways. To adjust the duration of the transition, you can do so from the Timeline as well as from the Inspector.
To save a custom audio transition with specific settings, right-click on the transition in the Timeline and choose the option Create transition preset. You can find your custom transitions in the Effects Library. You can also change the default duration of the transition from the DaVinci Resolve menu.
Thanks for reading & feel free to check out more of our articles!
Expert Rating
Summary
Learning how to add audio transitions in DaVinci Resolve 18 can be very helpful if you want to take your video editing skills to the next level. While it may take some practice to master, the skill is scalable and can be applied to any project, no matter how simple or complex. By using audio transitions, you can improve the overall quality of your video projects, making them more engaging and professional for their audience.


