
In DaVinci Resolve, you can easily change the mode and appearance of your videos by adding textures. Textures allow you to add images with a specific pattern or design to your videos.
In this guide, we will discuss the process of adding texture to your videos using DaVinci Resolve. We will provide you with step by step instructions that will help you understand how textures work and what they can be used for.
We will cover all the required topics, including importing your footage, selecting the perfect texture overlay, and combining it into your video using blending modes. You’ll also discover how to adjust the texture’s opacity, scale, and blending modes to achieve the desired effect.
As you will see in the guide, the process of adding textures in DaVinci Resolve is very simple!
Blending Modes In DaVinci Resolve
Before adding textures, you need to understand how blending modes work in DaVinci Resolve and why they are important.
What are Blending Modes?
Composite or blending modes take the pixels of one layer and blend them with the pixels of another layer to create a completely new effect depending on the composite mode that you’ve chosen.
Blend or composite modes allow you to do much more than just adjust the opacity. They allow you to blend layers based on their luminance value, hue, or saturation.
Which Blending Mode To Use While Adding Textures In DaVinci Resolve?
There are a total of 32 blending modes in DaVinci Resolve, but you do not need to use all of them while adding textures.
There are a few blending modes that are mainly applied when adding textures.
- Multiply
- Darken
- Screen
- Lighten
- Overlay
- Softlight
Note: The blending modes we have mentioned above are the ones that are mostly used, but it doesn’t mean that you should only use these when adding textures. Experiment with the other blending modes to find out what works best for your video or project needs.
These are the rules you should follow while choosing blending modes.
- Choose “Multiply or Darken” if the texture has a white background because it will make the white transparent.
- Choose “Screen or Lighten” when the texture has a Black background. These blending modes make the blacks transparent.
- Use “Overlay or Softlight” blending modes if the texture has a grey background. These blending modes will make the grey color transparent.
How to Change The Blending Mode in DaVinci Resolve?
To change the blending mode:
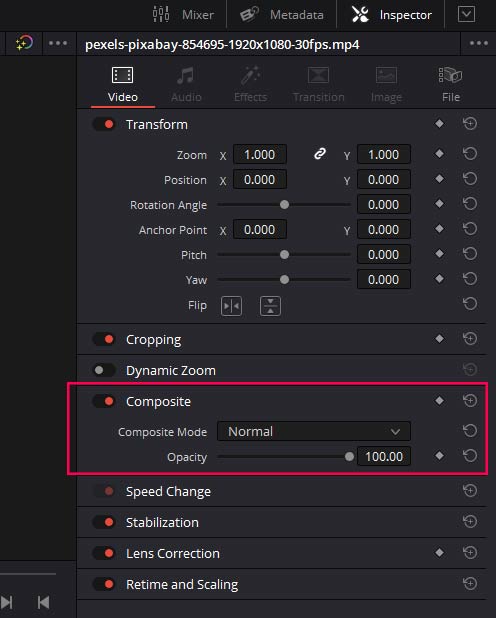
- Select the texture overlay or video clip and go to the Inspector at the top right corner.
- Look for the Composite section and change the blending mode from the “Composite mode” drop down menu.

Adding Texture in DaVinci Resolve
There are a lot of ways to add a texture overlay in DaVinci Resolve, but we will discuss the most common and simple ones.
- Add texture With Video Overlays
- Add texture With Image Overlays
- Add texture With Curves
Add Texture In DaVinci Resolve With Video Overlays
There are video overlays of all kinds out there. These videos are used to add effects to video clips, like lens flare, light leaks, and much more.
But the most interesting ones are video texture overlays because they can be used to give your videos a modern or vintage look.
There are a lot of video textures that can be used in your video clip, but the most common ones are:
- Paper Textures
- Dust Texture
- Grunge Texture
- Wood textures, and many more.
These all are animated textures that add a dynamic and cool effect to your video.
Download Texture
Now you need the texture; there are alot of resources online where you can download video texture overlays.
You can also find video texture overlays on youtube but make sure they are copyright and royalty-free to avoid any copyright issues.
Import Texture Overlays
To import the textures in Davinci Resolve:
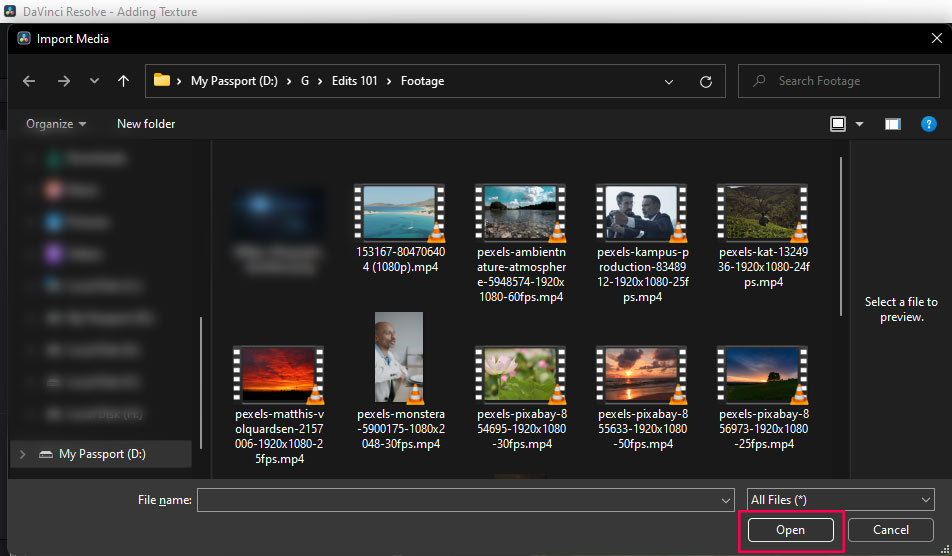
- Go to the media pool and press Ctrl + I or Cmd + I, a new window will open up.

- Find and select the textures and then click open.
Bring them to the timeline
Now drag and drop the texture on the timeline from the media pool and put it over the clip to which you want to apply the texture.

Change Opcaity And Blending Mode
Go to the inspector panel and then go to the composite section. Change the blending mode and reduce the opacity if you want to.
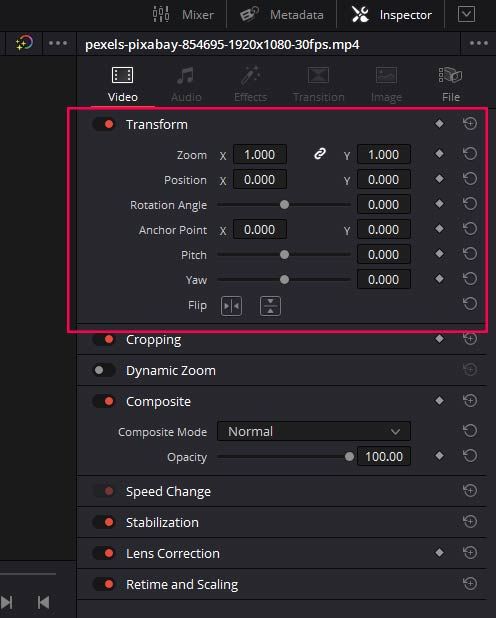
Change the scale, position, and rotation
You may need to adjust the other parameters of the texture in Davinci Resolve, like position, scale, and rotation.
To adjust the transform properties of the video overlays:
- Select your video overlay and go to the inspector panel.
- The first section in the inspector tab is the transform tab.
- You will find all 3 settings in the transform tab.
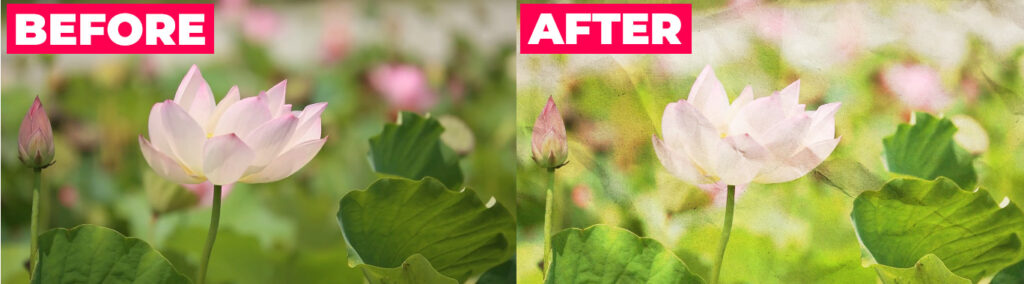
Before and After
Add Texture In Davinci Resolve With Image Overlays
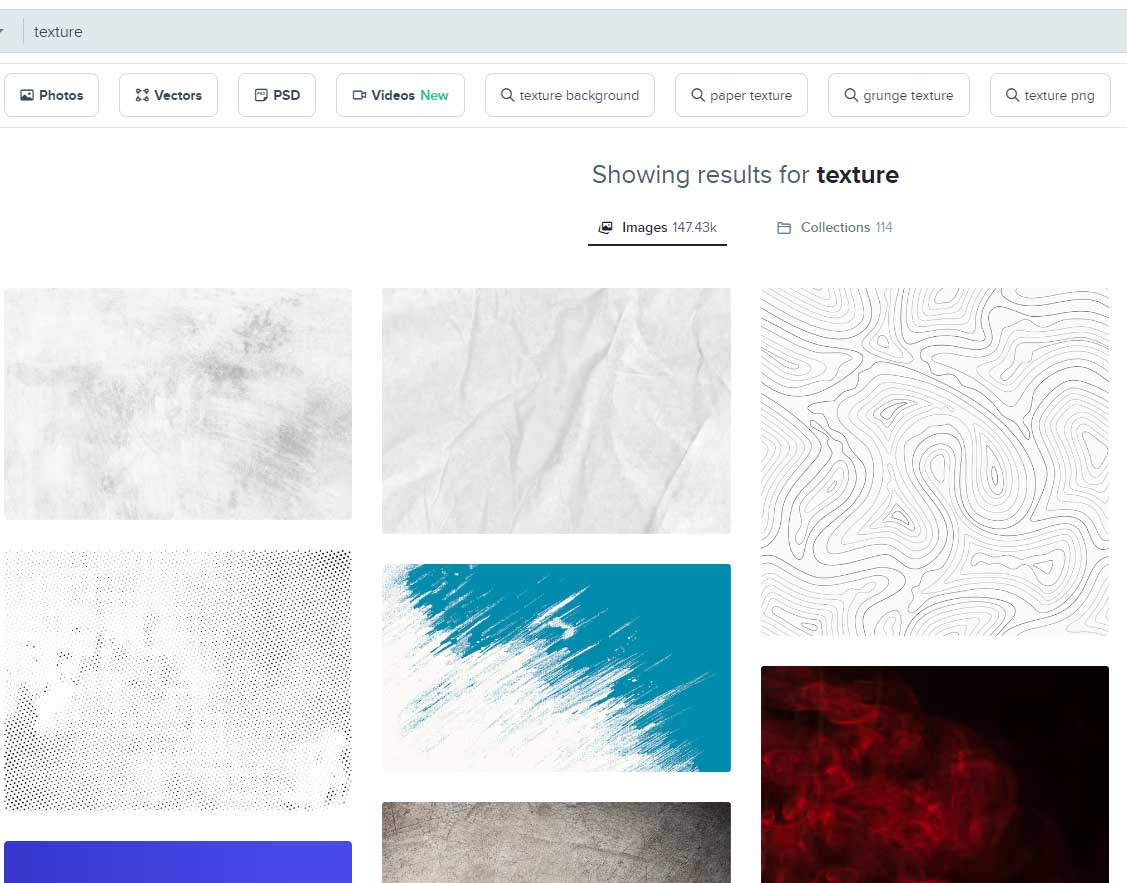
A huge variety of image textures is available on the internet, including paper, marble, cloth, grunge, glass, and many more.
The process of adding textures with image overlays is similar to the video overlays.
- Download the texture from the internet or websites like Freepik.
- Import those textures to the media pool and then to the timeline.
- Select the overlay and go to the composite section in the inspector tab.
- Change the blend mode according to the overlay and reduce the opacity if you want a subtle effect; keep it at 100% if you are looking for a stronger effect.
- You can adjust the scale, potions, and rotation of the texture using the transform section within the inspector panel in Davinci Resolve.
Add Texture In Davinci Resolve With Curves
You can also add texture to your video through the curves tool on the color page of Davinci Resolve.
This method is very effective and easy because you don’t need to download anything from the internet, but it will only enhance the present texture in your video and won’t add any new textures.
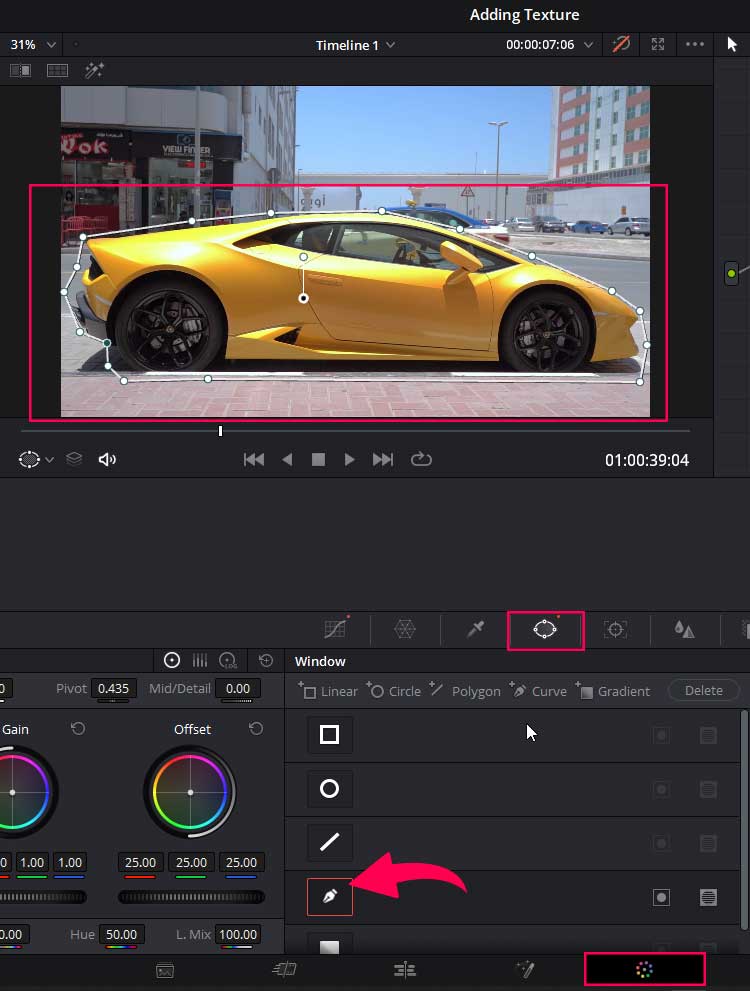
- Select your clip and go to the color page.
- Head over to the Power Windows section and draw a power window, using the curve tool, on the part of the video where you want to enhance the texture.
If the part of the video where you have drawn a power window is moving, then you need to track the power window.
- Go to the tracker panel and click the track forward and reverse button.

Now go to the curves tab. Create an S curve to enhance the texture of the selected part of the video clip.
- To create an S curve, you need to make 2 points. 1 in the highlights section and 1 in the shadows section (See the image for reference).
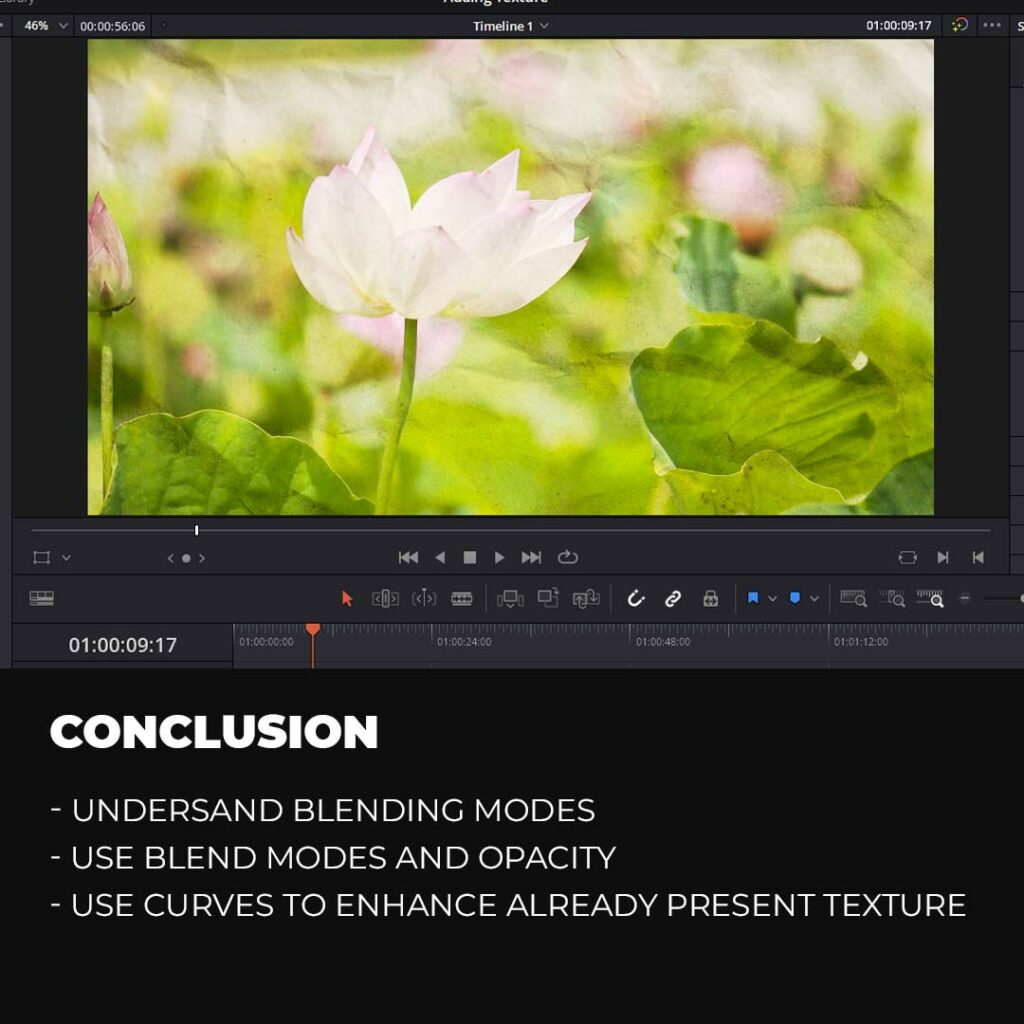
- Bring the points in the highlights section up and bring the point in the shadows section down. You will notice that the texture of the selected area will start to pop.

Keep things subtle and dont go too far with the effect; otherwise, it will look fake and unprofessional. We have slightly exaggerated the texture to show you the changes clearly.
before and after

Conclusion
There are many ways to add texture in Davinci Resolve, and we have discussed the most simple and easy ones. You can use video overlays, image overlays, and curves to add texture to your video. First, we have discussed what are blending modes and how they work. We elaborated on how different blending modes work with different textures and what blending modes will be more suitable for certain textures.
Import the textures with the keyboard shortcut Ctrl + I or Cmd + I, then bring them to the timeline. Change the blending mode and reduce the opacity to your liking.
The process of adding the image overlays is similar to the video overlays.
To add, or we would say to enhance already present texture, you can use the curves tool on the color page of Davinci Resolve and create an S curve to make the texture pop.
Thanks for reading & feel free to check out more of our articles!
Expert Rating
Summary
By adding textures, such as grunge, film grain, or light leaks, you can create unique moods, or add artistic flair to your footage. DaVinci Resolve offers a functional and scalable platform for adding textures, providing a wide variety of options and customizable parameters to achieve your desired visual effects.


