
In this tutorial we will explain you how to create shapes such as rectangles, circles, and polygons using the Fusion Page. The Fusion Page in DaVinci Resolve 18 offers a wide range of tools and features that allow you to retouch clips, add interesting visual effects and motion graphics. This page is where you can add any shape imaginable to your video. By the end of this tutorial, you’ll have a solid understanding of how to create shapes in DaVinci Resolve 18.
Step 01: Importing Media
To do this task,
- Open the DaVinci Resolve 18 application.
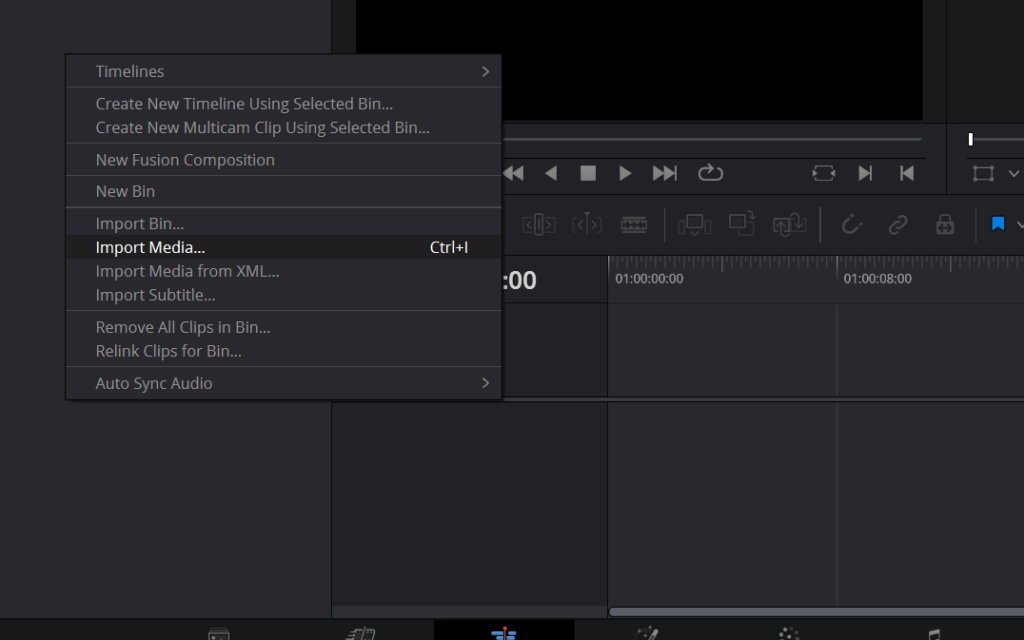
- Right-click on the Media Pool section.
- Choose the option Import Media as displayed below.
- Alternatively, use the keyboard shortcut Ctrl/Cmd+I to open the media.
Go to the location where the media is placed on your computer or PC. Choose the media and click Open to display it on the DaVinci Resolve 18 application. Now you are set to add the shape to the clip as per your requirement.
Step 02: Go to the Edit page > Fusion page
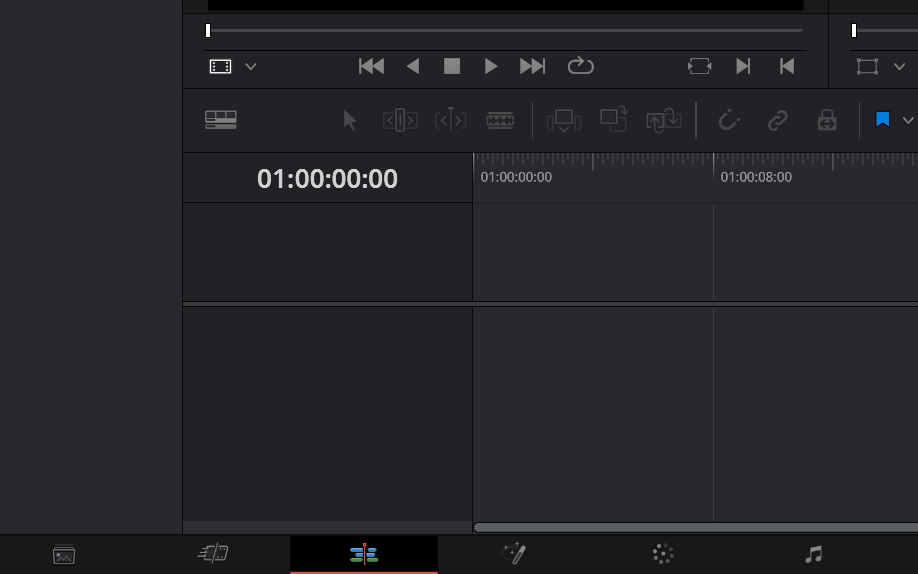
To set the timeline, go to the Edit Page,
- Go to the bottom of the page.
- Click on the Edit Page icon (displayed below).
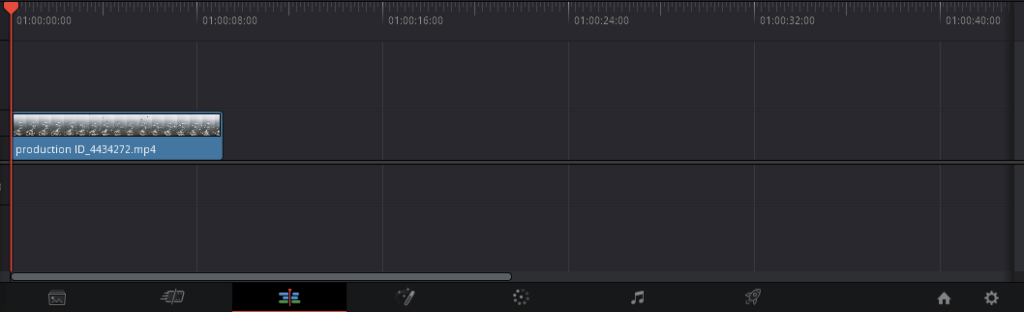
Once you are on the Edit Page, drag your clips to the timeline to set your timeline. To add a shape, we will use the Fusion Page specifically. Click on the clip you want to add the shape to to select it. Next, go to the Fusion Page.
- Go to the bottom of the page.
- Click on the Fusion Page icon (displayed below).
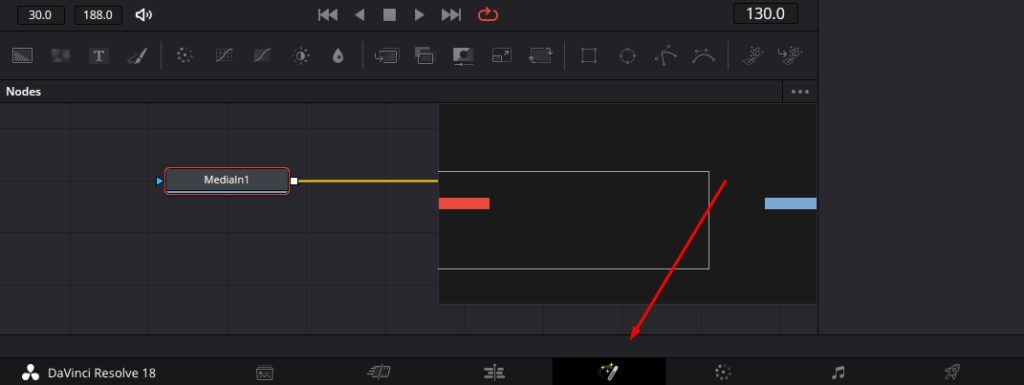
Step 03: How to Detach existing nodes
On the Fusion Page, you will be working with nodes. Nodes work like flowcharts in DaVinci Resolve 18. This approach known as the ‘Node’ approach is relatively difficult to grasp, but once you get the hang of it, it allows you to create complex shapes.
When you switch to the Fusion page, you will see two nodes: MediaIn and Media Out. The first one is the original video clip while the second one is the output clip. The MediaIn and MediaOut will be connected to each other.
Under each node, you will notice a toggle-like option (displayed in the below image),
- If you click on the left of the toggle, the video will be shown on the left screen.
- If you click on the right of the toggle, the video will be shown on the right screen.
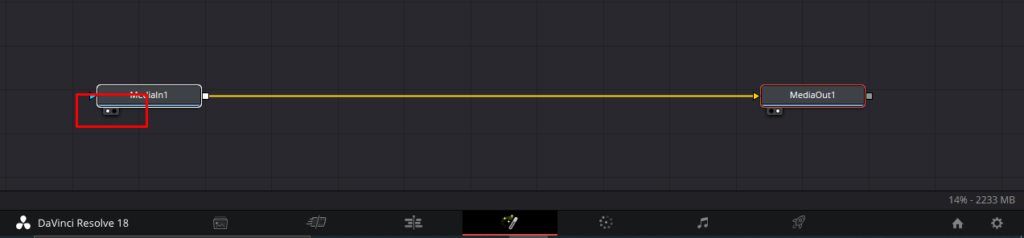
Before adding the rectangle, you need to disconnect MediaIn and MediaOut:
- Double-click on the line connecting both the MediaIn and MediaOut.
- As soon as you click, the nodes will be detached.
Once you disconnect them, you will no longer see an output clip on your screen.
Step 04: How to Add A Shape in DaVinci Resolve 18
Adding shapes to your video can help you highlight specific parts or draw attention to certain details. In this section, you can learn how to add any shape such as a rectangle, circle, triangle or polygon to your video in just a few simple steps.
You’ll also learn how to customize a shape, including changing its size, colour, and position. With the help of this step, you’ll be able to add shapes to your video and make it look more professional and engaging.
In this guide, you will learn how to draw these 3 main shapes:
- Rectangle
- Circle
- Polygon
How do I add a Rectangle to DaVinci Resolve?
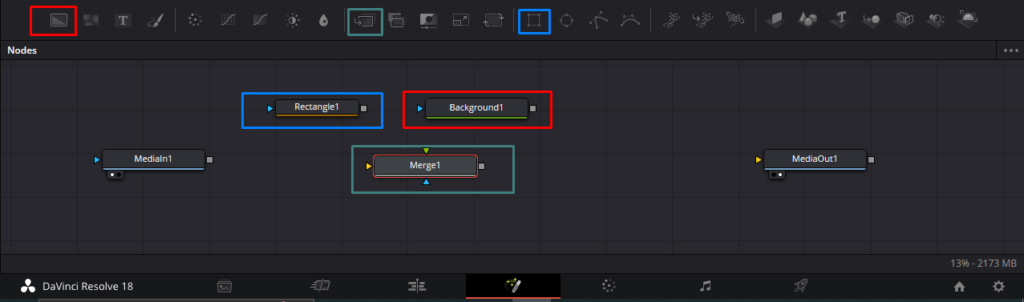
Rectangles can be used for a variety of purposes in video editing, such as highlighting specific areas or framing text. In DaVinci Resolve, you have a range of customization options available to you, so you can create the perfect rectangle for your project. To draw a rectangle, you will use the merge node, background node, and the rectangle node. Let’s get down to the details.
Assemble the nodes
To add the background node,
- Go to the Toolbar of the Fusion Page
- Click and drag the Background node to the Node Editor.
Next, let’s bring down the rectangle node,
- Go to the Toolbar of the Fusion Page
- Click and drag the Rectangle node to the Node Editor.
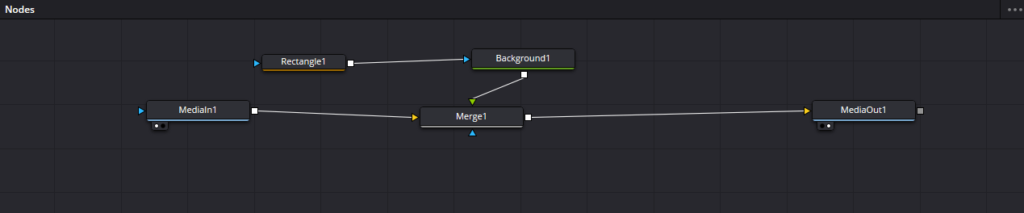
In order to connect the background node to the clip, we will add a new node called Merge. Consequently,
- Go to the Toolbar of the Fusion page.
- Click and drag the Merge node to the Node Editor.
At this stage, you may want to show the rectangle and the background on the two screens separately in order to edit them according to your preference. You can toggle the rectangle to the left and the background to the right to preview them in the Viewers.
Alongside, you can change the rectangle size on the left by dragging the corner handles as displayed below. But before that, you need to click on the Rectangle node and choose the view it should appear as follows:

Connect the nodes
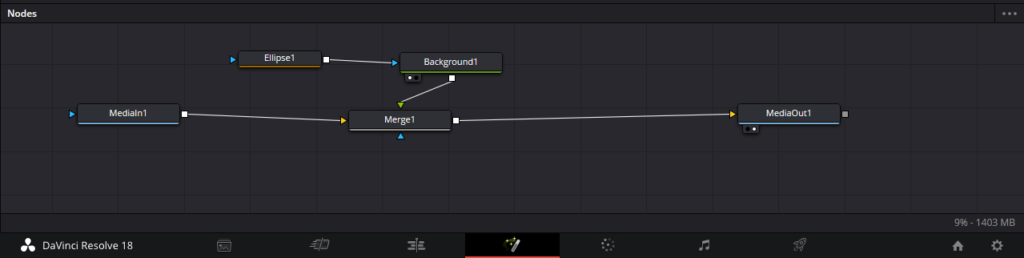
Connect the MediaIn node to the Merge node by clicking and dragging. Next, connect the Merge node to the MediaOut by clicking and dragging as well.
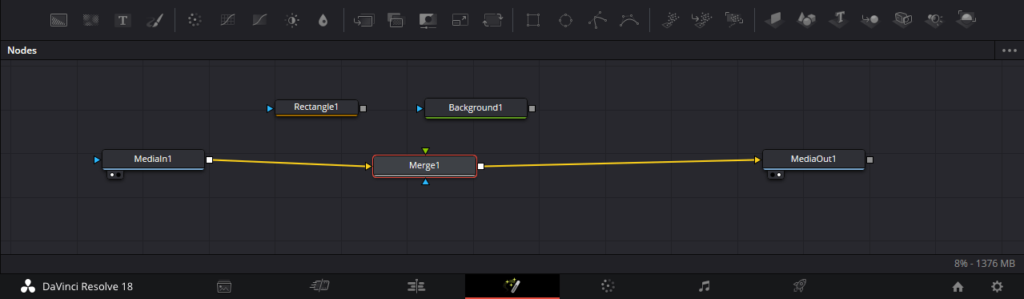
Then, connect the Background node to the top of the Merge node:

Finally, connect the rectangle node to the background node. Make sure that the Node Editor looks like this in the end:
Adjust the shape settings
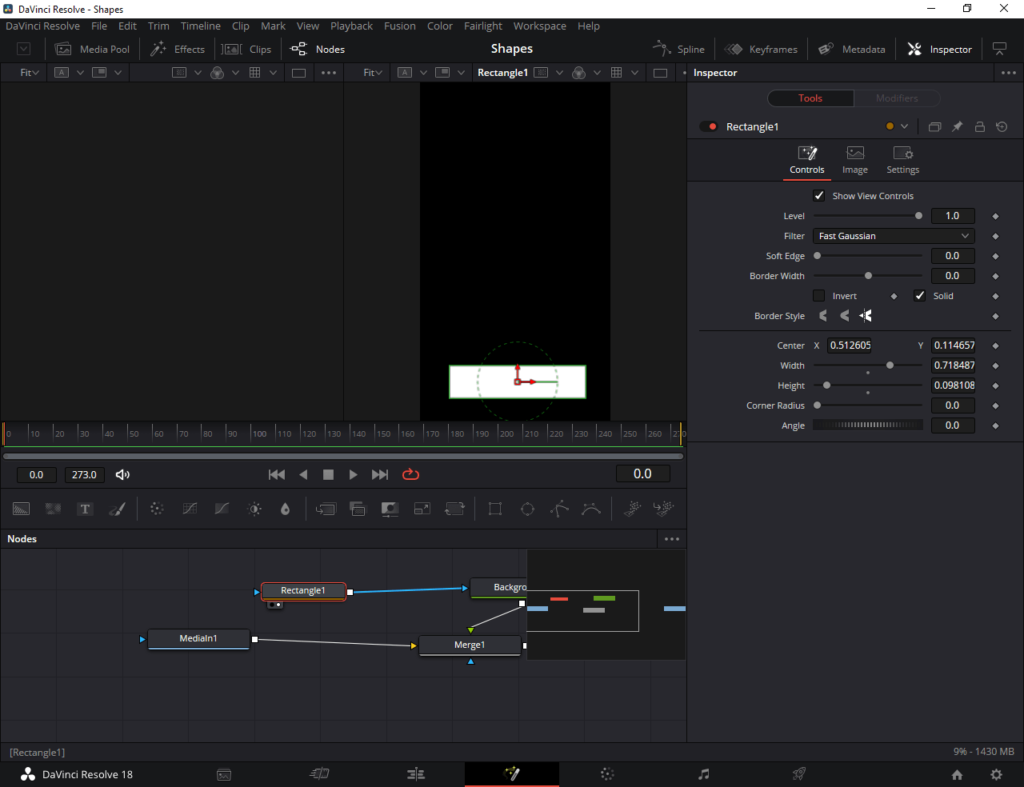
Now, you can click on the rectangle node which is displayed in the Viewers. You can relocate the rectangle by clicking and dragging it on the Viewer. If you want to edit the rectangle further,
- Select the Rectangle node.
- Go to the Inspector to change the rectangle settings.
- Settings include such as border width, border style, corner, width, height, and many other as you can see below:
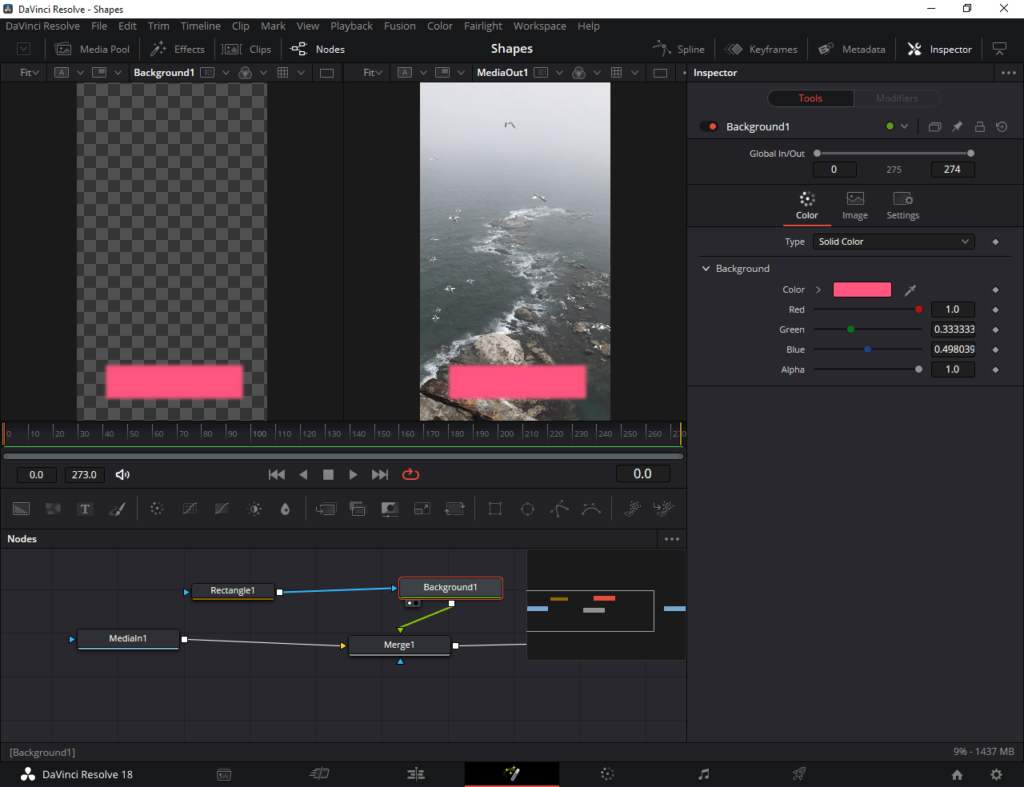
Apart from that, you can also change the rectangle’s color. To change the rectangle color or any other background setting,
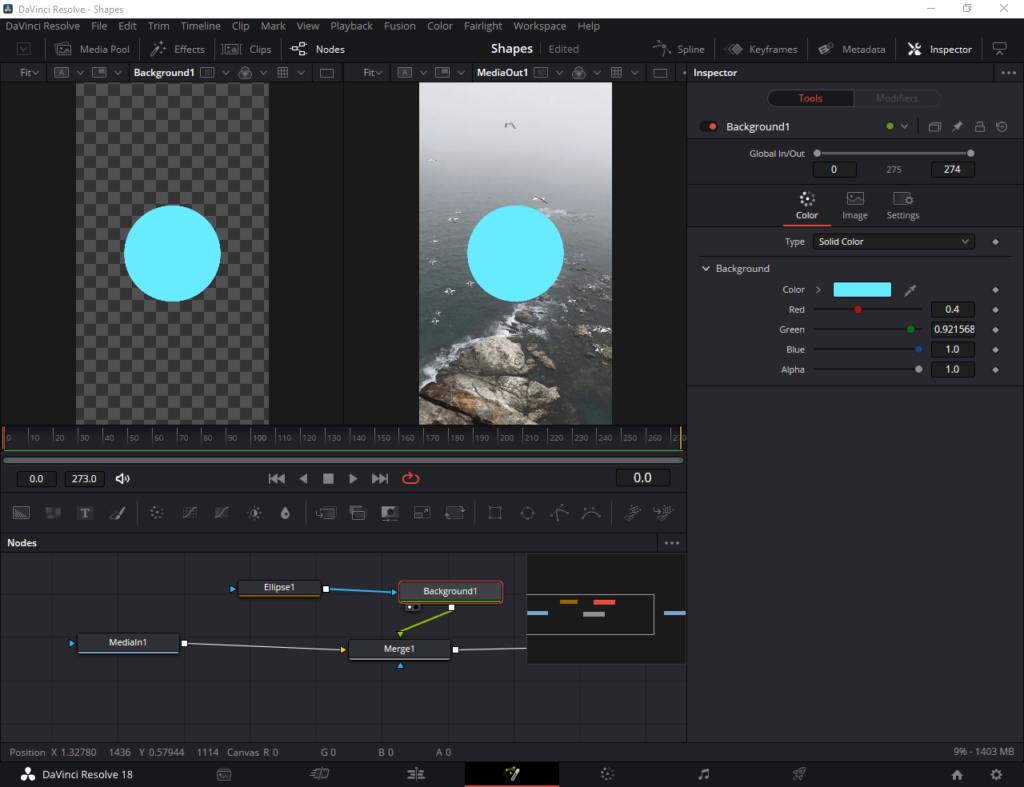
- Click on the Background node.
- Go to the Inspector.
- Here, you can choose Background > Color. Then pick a color.
- Once you choose the color from the color window, click OK.
How do I add a circle to DaVinci Resolve?
Circles can be used to draw attention to specific areas or elements of your video and add visual interest to your project. In DaVinci Resolve, you have a range of customization options available to you, allowing you to adjust the circle’s size, colour, and position to fit your project’s style and aesthetic.
Apart from the shape, the process is identical to the method described above. To draw a circle, you will use the merge node, background node, and circle node. Let’s get down in detail.
Assemble the nodes
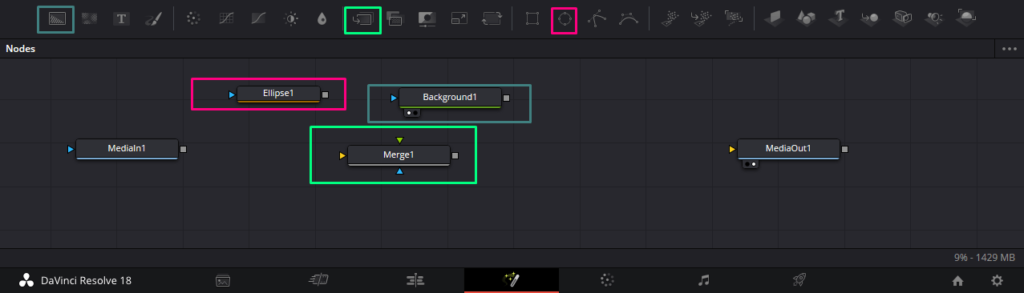
Before you add the circle node, you require a background node. To add the background node,
- Go to the Toolbar of the Fusion Page
- Click and drag the Background node to the Node Editor.
Next, let’s get the circle node,
- Go to the Toolbar on the Fusion Page
- Click and drag the Ellipse node to the Node Editor.
Next,
- Go to the Toolbar of the Fusion Page
- Click and drag the Merge node to the Node Editor.
Then, you can choose to view the Background and the Circle by using the toggle switches. Then, adjust the size and color of the circle as per your requirement.
Connect the nodes
To combine the nodes,
- Connect the MediaIn node to the Merge node.
- Connect the Merge node output to the MediaOut.

- Next, connect the Background node to the Merge node.
- Connect the Ellipse node and the Background node to one another.
- Now, you can see the Circle node on the Viewer.
Adjust the shape settings
Click on the Ellipse node and change the color or any other background settings by following the below steps,
- Initially, click on the Background node.
- Go to the Inspector.
- Go to Background > Color, and click on the color option.
- Once you choose the color, click OK to finalize the changes.
To edit the circle further,
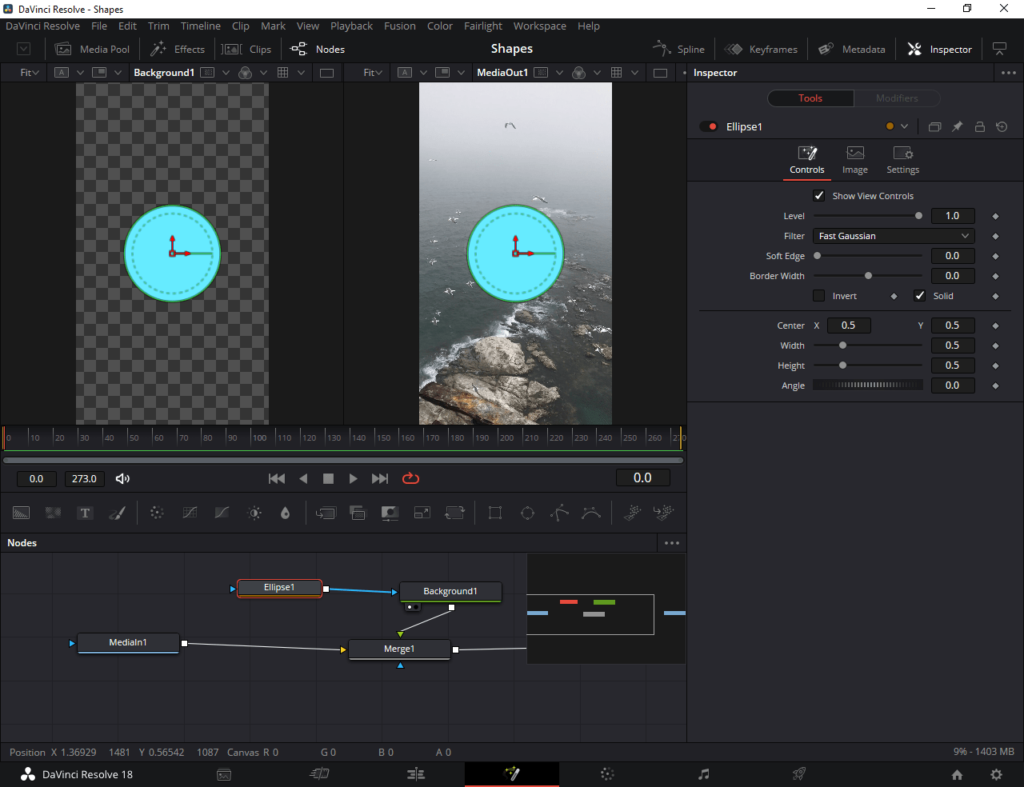
- Click to select the Ellipse node from the nodes.
- Go to the Inspector.
- Settings such as Level, filter, soft edge, border width, corner x & y, width, height, and angle can be changed as shown below.
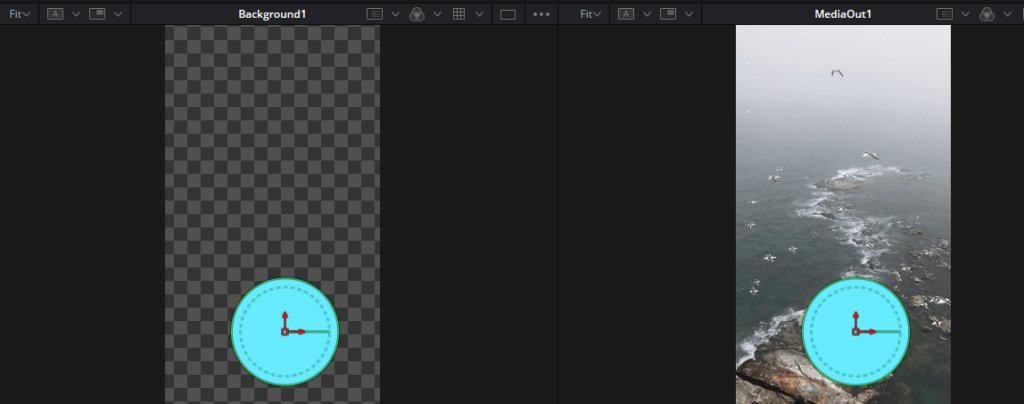
Alongside this, you can move the circle by clicking and dragging its from the Viewer itself as shown below. It is very simple to make an ellipse or circle if you follow the above steps. The output would look like this:
How do I add a Polygon to DaVinci Resolve?
If you’re looking to add a polygon, such as a triangle or a hexagon, to your video project in DaVinci Resolve, the software makes it easy to add a polygon to your project and customize it to your liking.
In DaVinci Resolve, you can choose from a variety of polygon shapes and adjust the size, colour, and position of your polygon to fit your project’s needs. To draw a polygon, you will use the Merge node, Background node, and Polygon node. Here we go in detail!
Assemble The Nodes
Before you add the polygon node, let’s assemble all the required nodes. To add the Background node,
- Go to the Toolbar of the Fusion Page.
- Click and drag the Background node to the Node Editor.
Next, choose the Polygon node,
- Go to the Toolbar of the Fusion Page.
- Click and drag the Polygon node to the Node Editor.
Accordingly,
- Go to the Toolbar of the Fusion Page
- Click and drag the Merge node to the Node Editor.
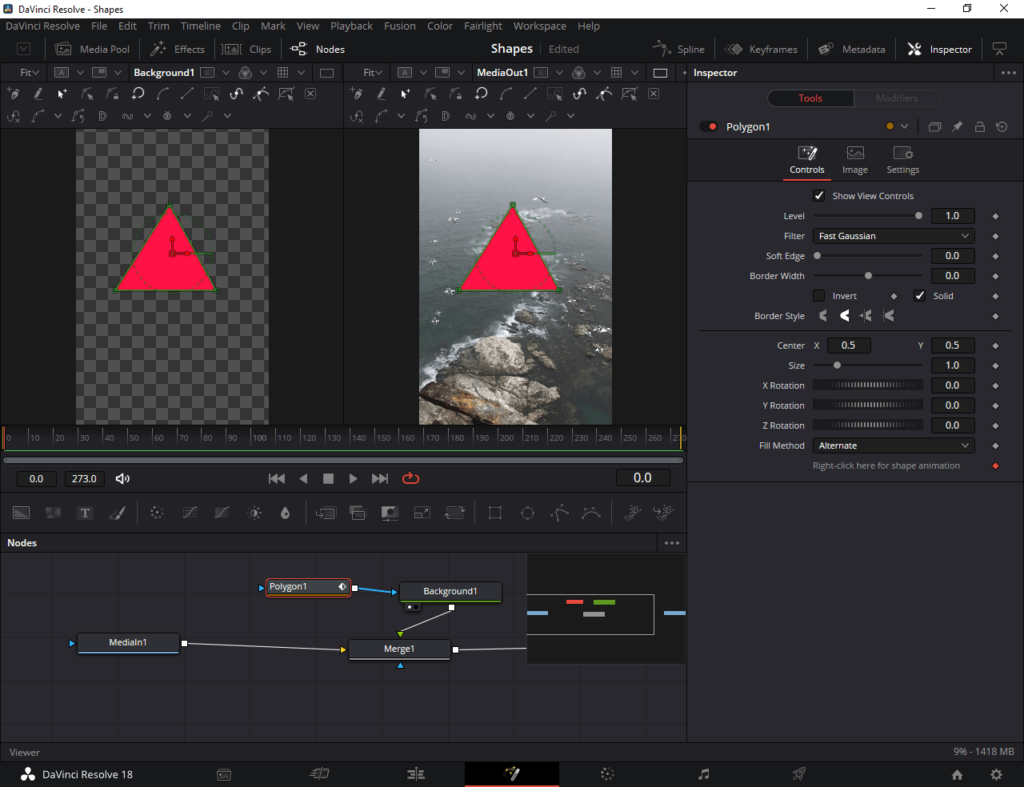
Now, click on the Polygon node and move the toggle switch to the left. This allows you to draw the shape on the Left Viewer.
Next, click on the Viewer and keep clicking to join nodes and create any desired shape. Make sure to join the last point with the first point to intersect and fill the shape. Apart from that, you can use the handle of the points to alter the shape. Then, choose the size and color of the polygon as per your necessity.
Connect the nodes
To combine,
- First, connect the MediaIn node to the Merge node.
- Connect the Merge node output to the MediaOut.
- Next, connect the Background node to the Merge node.
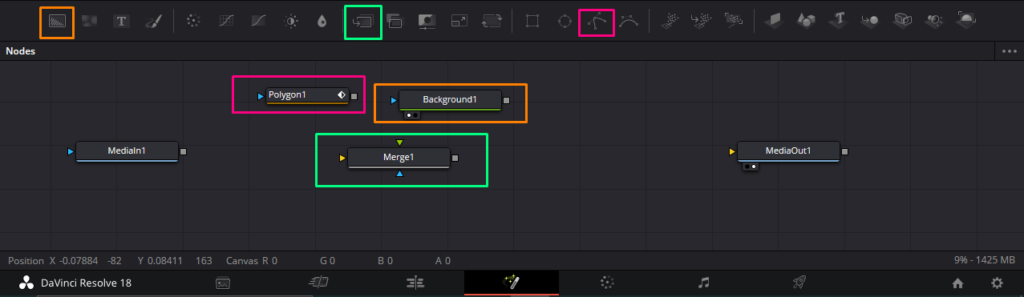
- Connect the polygon node and the background node to one another to complete the shape flowchart as shown below:

Adjust the shape settings
Now, you can see the Polygon node on the clip. Move your polygon in the Viewer as necessary. To edit further,
- Click on the Polygon node from the Node Editor.
- Use the Inspector to change the polygon settings.
- These settings include level, filter, soft edge, border width, invert, border style, center x & y, size, and others.
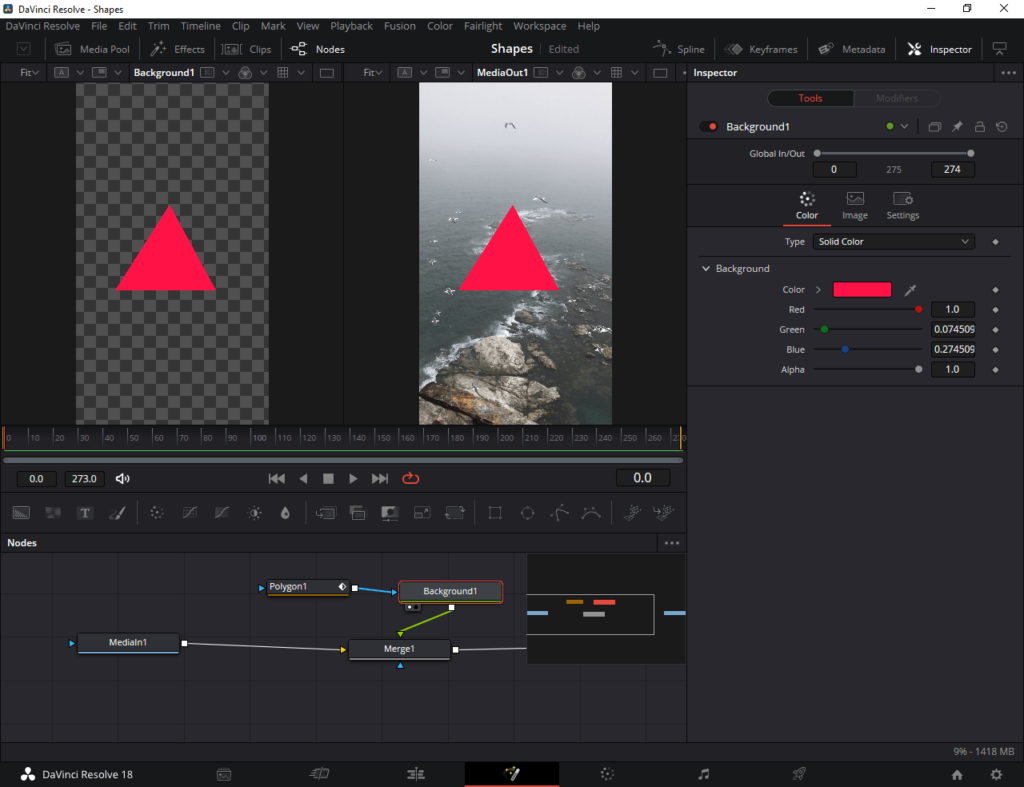
Then, change the polygon color or any background settings by following the below steps,
- Click on the Background node.
- Go to the Inspector.
- Go to Background > Color, and click on the color option.
- Once you choose the color from the color window, click OK to finalise the changes.
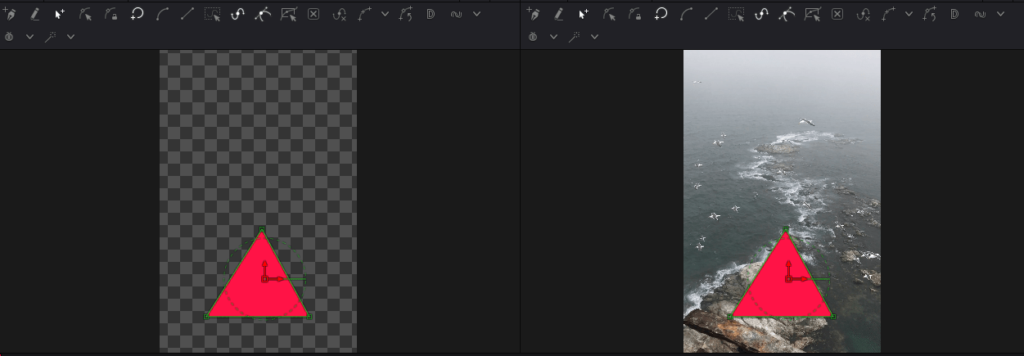
When you finish adjust the polygon, the output will look like the below image. Remember that you can change the position, size, color, and much more according to your preferences.
Conclusion

In conclusion, creating shapes in DaVinci Resolve 18 is a simple and fun process once you understand the basics. By following the step-by-step guide in this tutorial, you’ll be able to add unique and creative shapes to your projects in no time.
The Fusion Page in DaVinci Resolve 18 offers a wide range of properties that allow you to customize your shapes to your liking, making it a powerful tool for adding design elements to your videos.
So, go forth and create some amazing shapes in DaVinci Resolve 18!
Thanks for reading & feel free to check out more of our articles!
Expert Rating
Summary
In summary, you can add shapes using the Fusion page. Use the nodes namely ellipse node, rectangle node or polygon node to add shapes and experiment with the settings for amazing outlook.


