
Are you looking to enhance your videos with solid or colourful backgrounds on Davinci Resolve 18? In this article, we will guide you through the process of adding both blank and solid-coloured backgrounds, to your projects.
We will also explain how how to create a white background and adding an image (ex. a logo) over it. Without further ado, let’s dive into how to add a background in DaVinci Resolve!
How Do You Add A Solid Background In Davinci Resolve 18?
Adding a solid background in Da Vinci Resolve 18 is very easy. By default, there is a black background behind the clips in this programme. Thus, when a clip is cropped or left out, the background will be automatically black.
Step 01: Importing media
To do this task,
- Open the DaVinci Resolve 18 application.
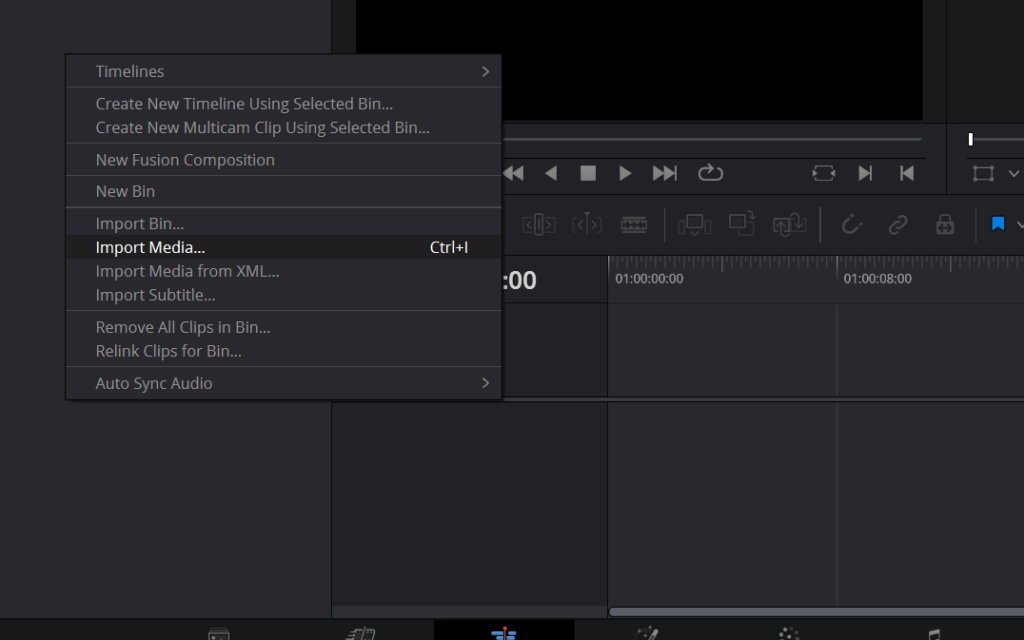
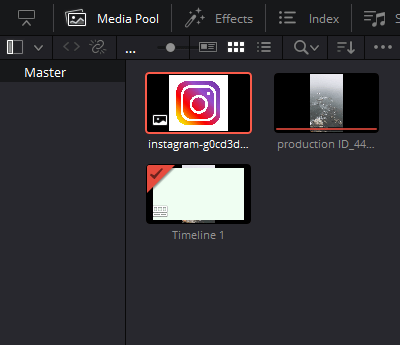
- Right-click on the Media Pool section.
- Choose the option Import Media as displayed below.
- Alternatively, use the keyboard shortcut Ctrl/Cmd+I to open the media.
Go to the location where the media is placed on your computer or PC. Choose the media and click ‘Open‘ to find it in the Media Pool.
Step 02: Go to the Edit page
To get started, go to the Edit page,
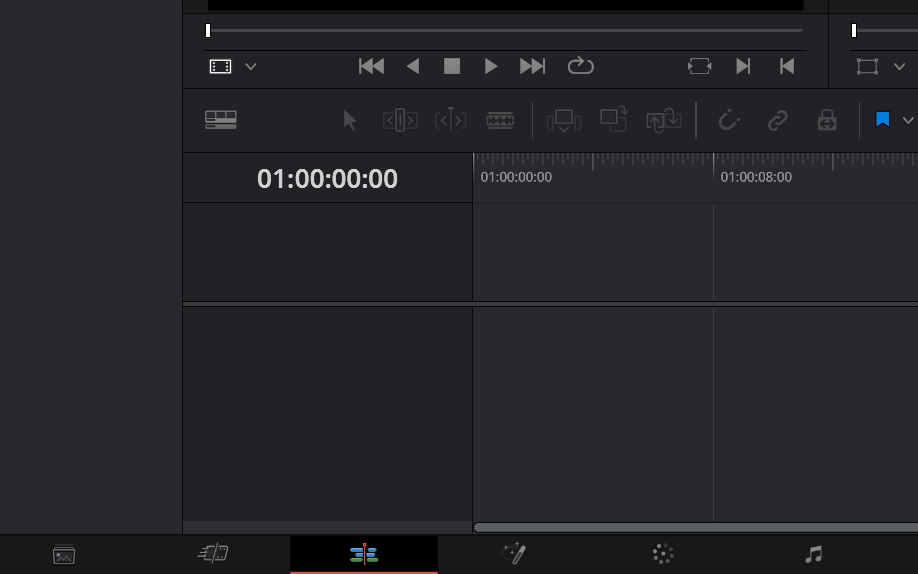
- Go to the bottom of the page.
- Click on the Edit page icon (displayed below).
Once you are on the Edit page,
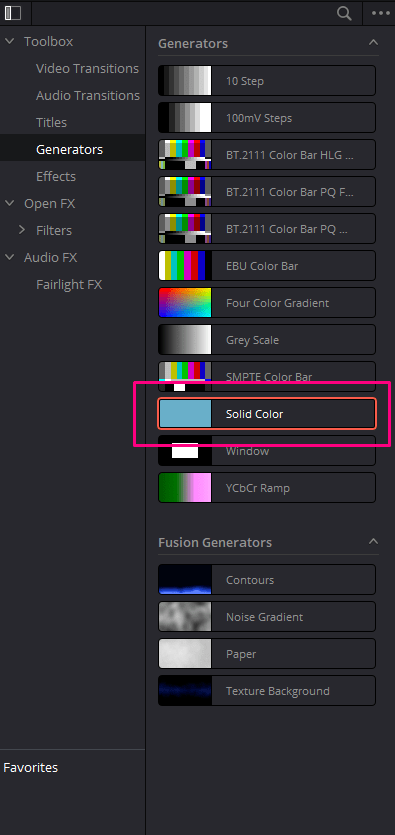
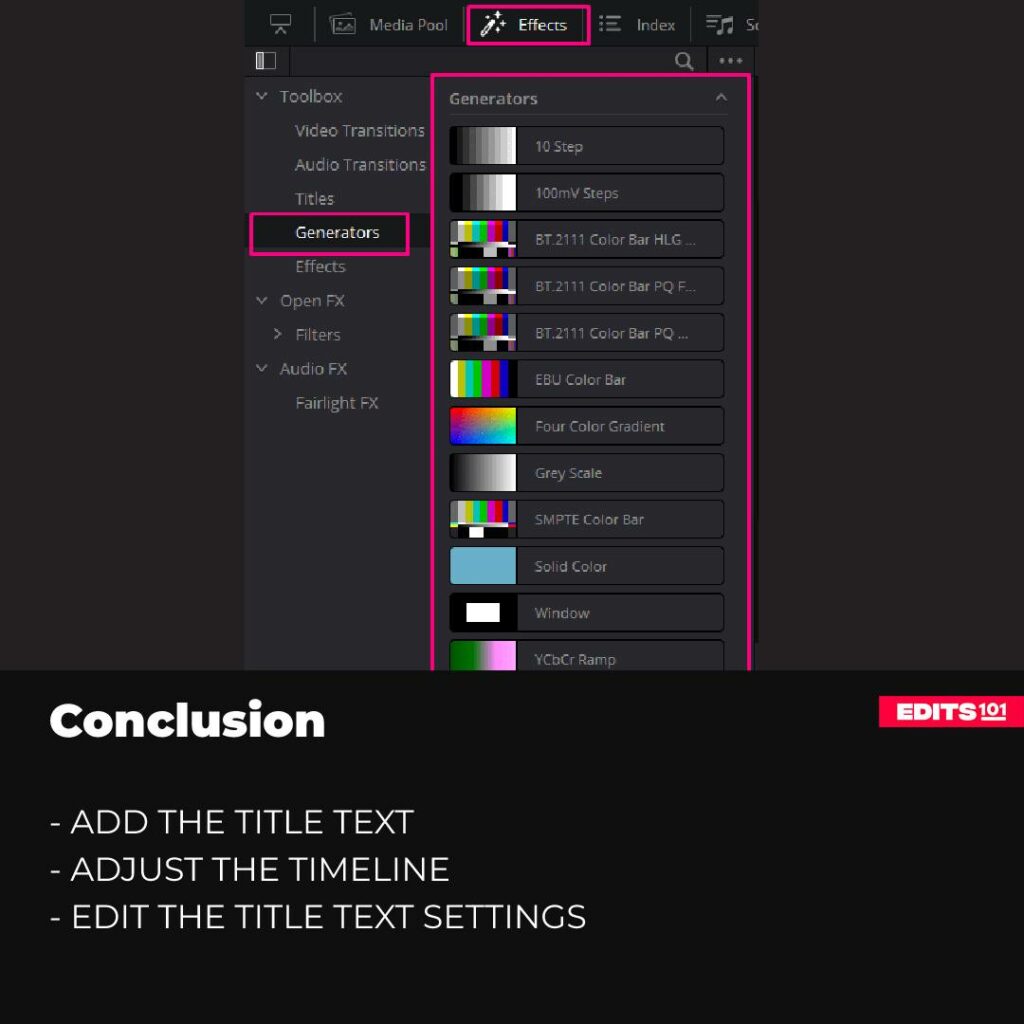
- Go to the ‘Effects library‘ located in the Interface Toolbar.
- Next, click on the ‘Generators‘ option.
- You’ll see various templates on the right.
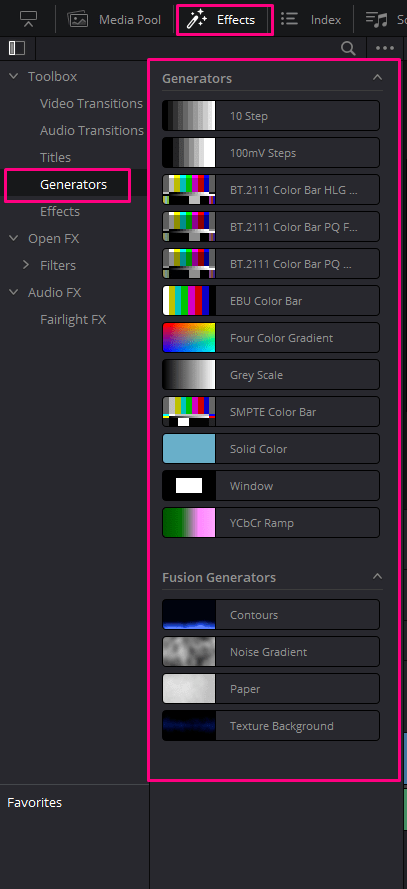
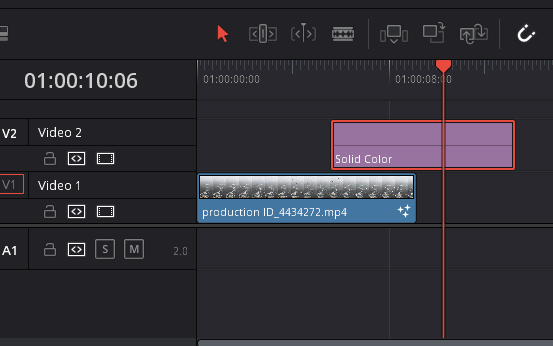
- Click and drag the ‘Solid colour’ option to the timeline to add a solid coloured clip.
Once you drag it to the timeline, it’s time to change it’s length and decide where to place the solid colour clip,
- You can place the solid colour clip on top of existing clips by dragging it onto another track.
- Alternatively, you can place the solid colour clip instead of a video clip according to your preferences.
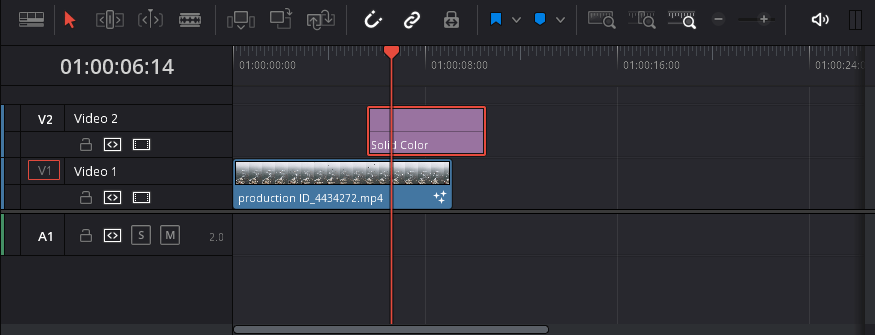
As soon as you position it as desired in the timeline, you can choose to change the colour now. By default, the solid colour will be black. That is the reason behind the black colour as soon as you add the solid colour clip to the timeline.

Step 03: How To change the background on DaVinci Resolve 18
To change the background colour,
- Go to the ‘Inspector‘.
- Choose the section ‘Generator‘ under the Video page and click the Colour option.
- Then, a new window for the colour selection will appear. The colour you choose can be previewed in real time on the Viewer.
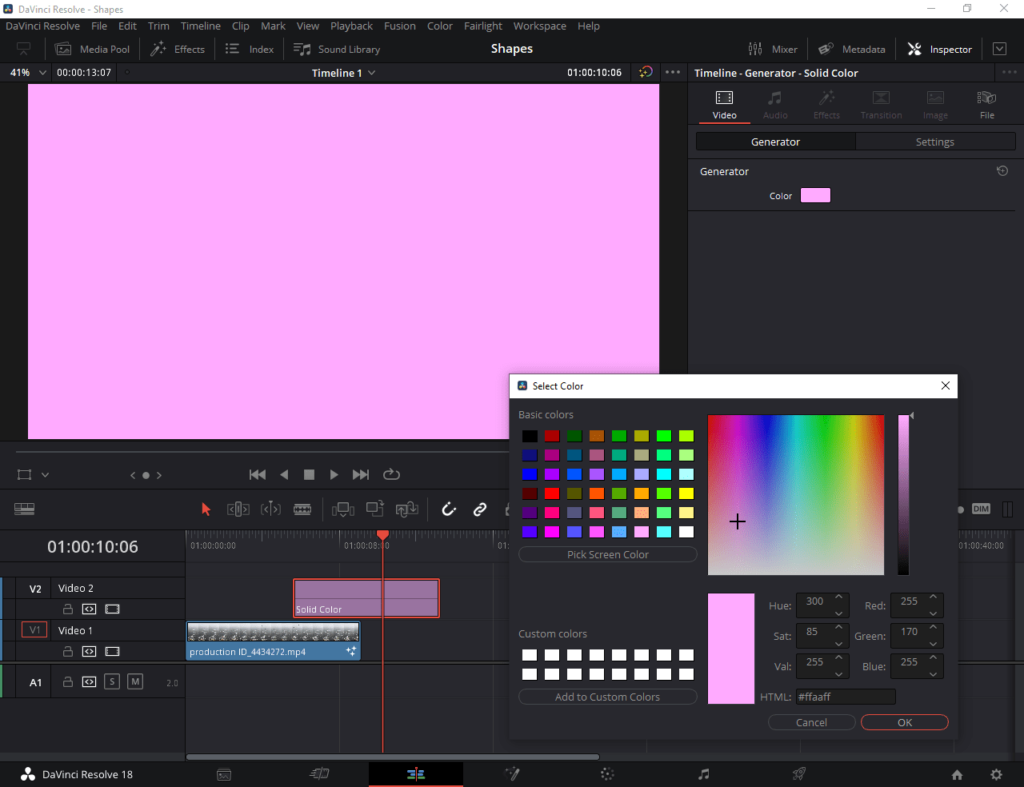
It’s in your hands whether you choose a color from the Color Wheel, Color Palettes, Hex Colors and others. Once you have picked the color, simply click OK. This affirms your selection and previews the colour on the preview window.
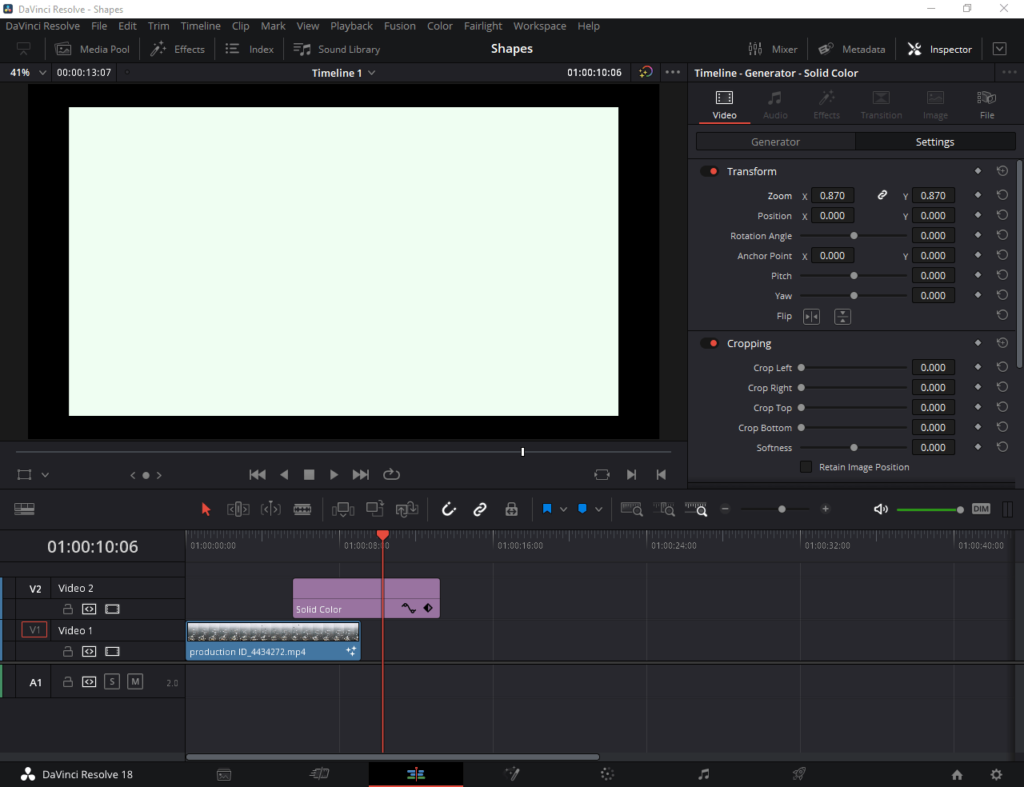
If you prefer to decrease the size of the background,
- Go to the ‘Transform‘ option in the ‘Inspector‘.
- Change the Zoom and Position as per your requirement.

If you want to change the zoom level, click and drag on the X or Y values to decrease the size and to the left to increase the size.
How do you add a white background and an image on Davinci Resolve 18?
In this section, you will learn how to add a white background and place a transparent image over it. This comes in very handy when you want to place a logo or any other object as part of your video.
Step 01: Setting up the document
To open the media content,
- Open the Da Vinci Resolve 18 application.
- Right-click on the media pool section.
- Choose the option Import Media as displayed below.
- Alternatively, use the keyboard shortcut Ctrl/Cmd+I to open the media.
Go to the location where the media is placed on your computer or PC. Choose the media and click ‘Open‘ to display it on the Davinci Resolve 18. Next, go to the edits page, to get into the option to add the background.
Step 02: Go to the Edit page
To get started, go to the Edit page,
- Go to the bottom of the page.
- Click on the Edit page option.
To choose the background clip,
- Go to the Effects library in the Interface Toolbar.
- Click on ‘Generators‘.
- Click and drag the Solid colour option to the timeline as displayed below.
Place the solid colour clip as preferred and drag the corner handles of the clip to fix the duration in the timeline.
Step 03: How to change the Background Color to White
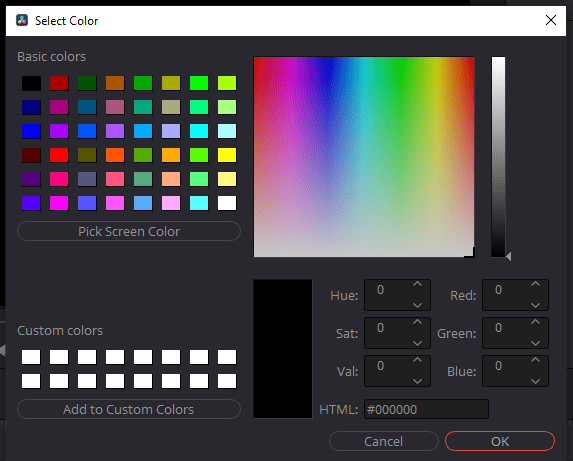
To change the background colour to white,
- Go to the ‘Inspector’.
- Choose the section ‘Generator‘ and choose the white colour.
Once you choose the colour and click ‘OK‘ in the above window, the result will be as follows:
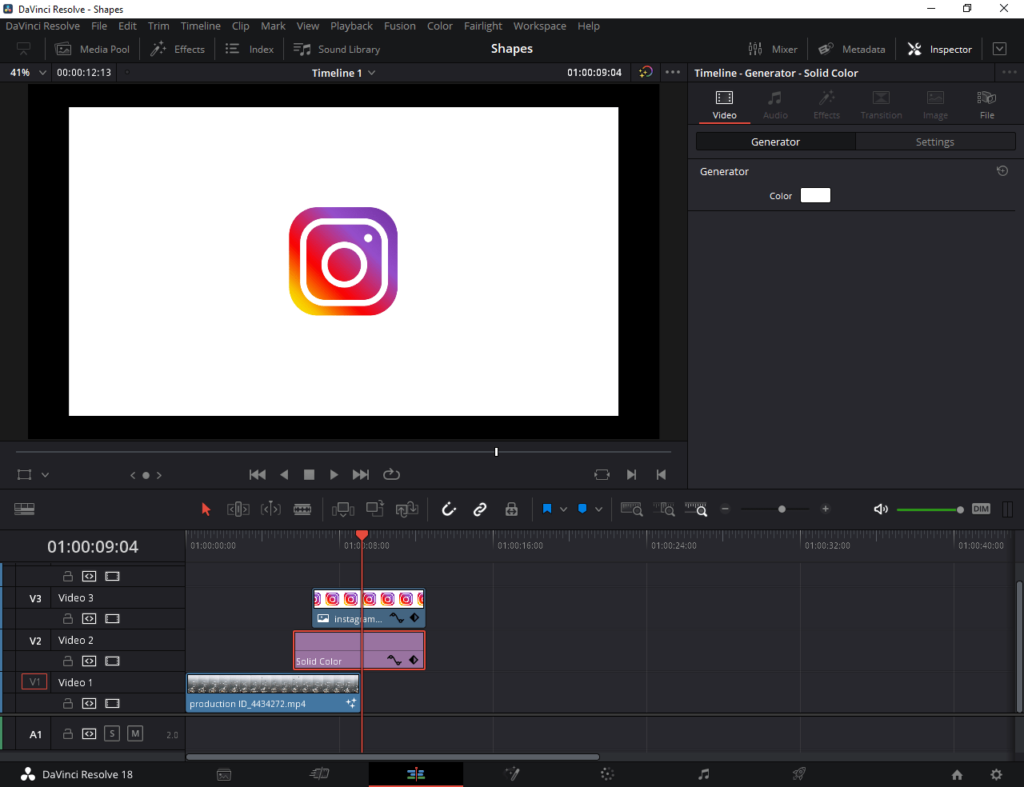
Once you have picked the colour white, drag the image from the Media pool to the Timeline. The image clip should be placed above the white colored clip.
Step 04: How to Place the Image over the background
In this example, the Instagram logo will be placed on top of the white background.
Click and drag the image clip by clicking and dragging it on the Viewer.
To edit the image clip further,
- Click on the image clip in the Timeline to select it.
- Next, go to the ‘Inspector’ adjust the transform settings such as zoom, rotation angle, and position as per your requirement.
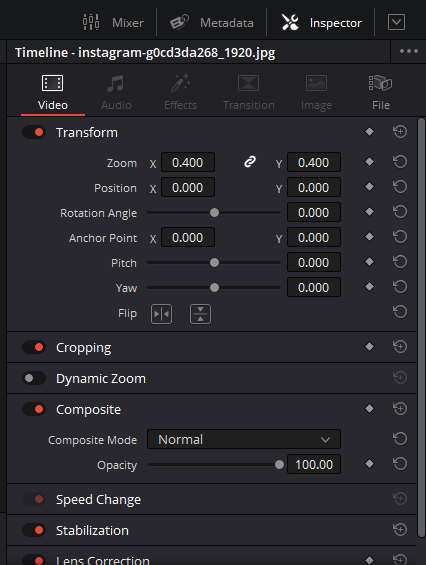
The zoom setting would change the size of the image. The position setting changes the location of the image based on the x and y-axis values. The rotation setting changes the angle of the image clip based on the slider.
Alongside this, you can experiment with other transform settings to get the best output. That’s it! Now you can notice that the image appears beautifully and in the right place on a white background as displayed below.

How to Add Gradient Background in DaVinci Resolve 18
In this section, you will learn how to add gradient backgrounds to your clips. These backgrounds can be created using mainly the Fusion page. Let’s get down to it!
Step 01: Go to the Edit page > Fusion Composition
To get started, go to the Edit page,
- Go to the bottom.
- Click on the Edit page icon.
To add gradients, you need to add a fusion composition generator.
To add Fusion composition generator,
- Go to Effects.
- Choose Effects and click on Fusion composition.
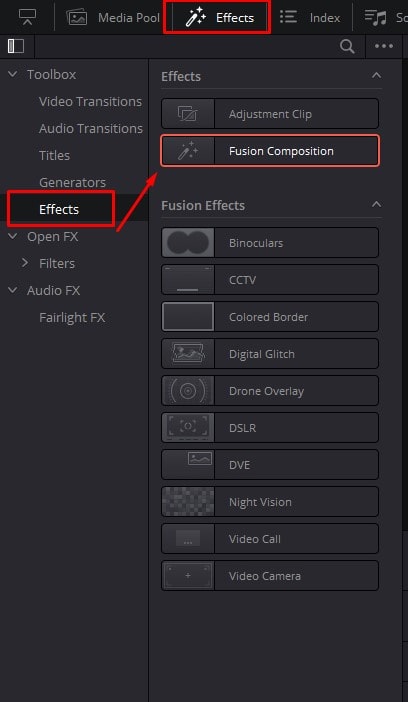
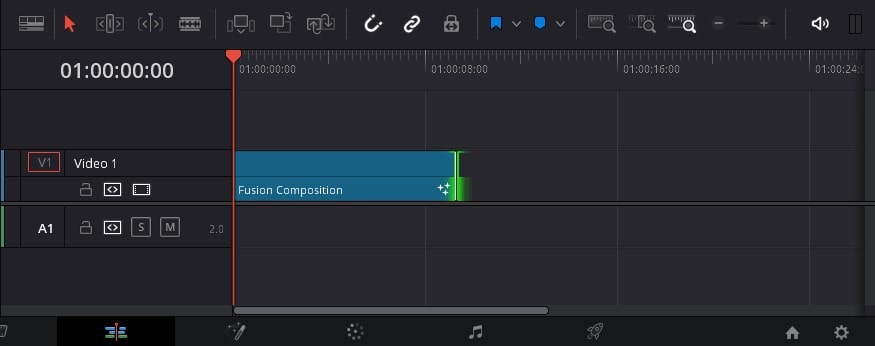
- Click and drag the Fusion composition clip to your canvas.
- Adjust the duration of the Fusion composition clip as required.
Step 02: Go to the Fusion page
To get started, go to the Fusion page,
- Go to the bottom.
- Click on the Fusion page icon (displayed below).
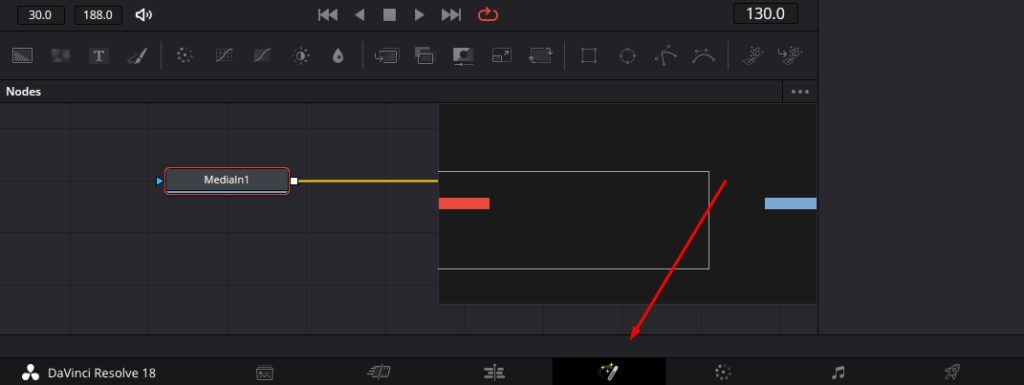
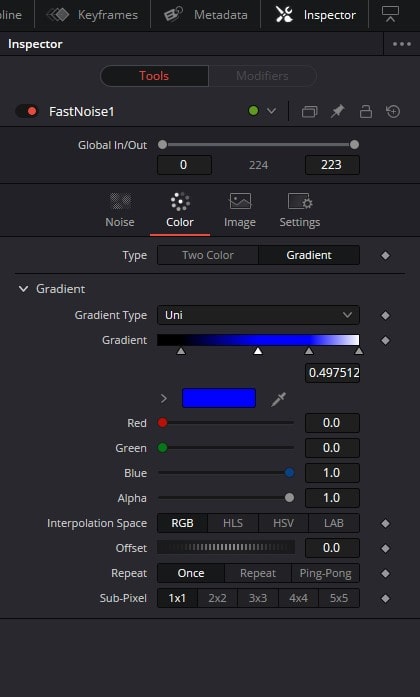
Choose FastNoise node from the Fusion page toolbar and drag it onto the workstation. Next, select the FastNoise node and go to the Inspector > Color tab.
Step 03: Add Gradient
You will have two colors by default and more colors can be added by changing the Color Type to Gradient. Choose any preferred color and keep clicking on the Gradient slider to add new colors. Reposition them as necessary and edit the gradient from the Noise tab.
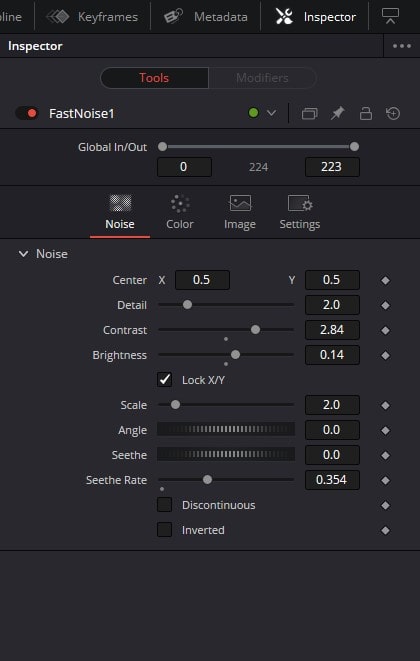
These are some of the change you can make from the Noise tab:
- Increase/decrease the brightness
- Increase/decrease the contrast
- Adjust the angle
- Increase the seethe rate to display how fast the gradient changes are reflected
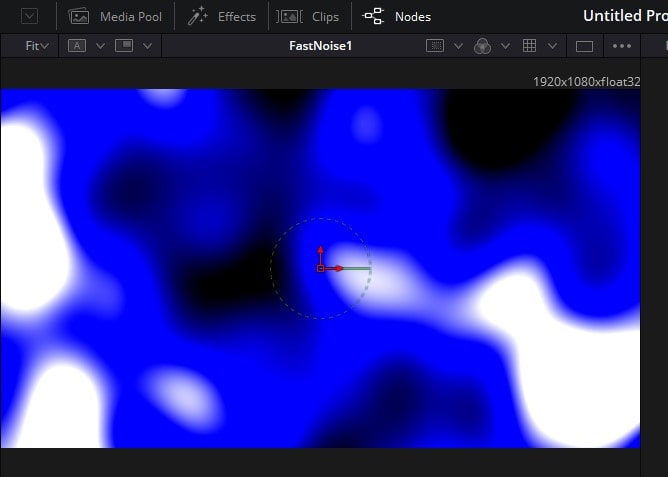
By pressing ‘Shift + Space’, you will be able to open the Select Tool dialog. From here, you can add any node you may require to further adjust your gradient to your liking.
Then, add a Merge Node and connect it to the FastNoise node. Eventually, connect the Mediaout node with the Merge node to fuse everything together.
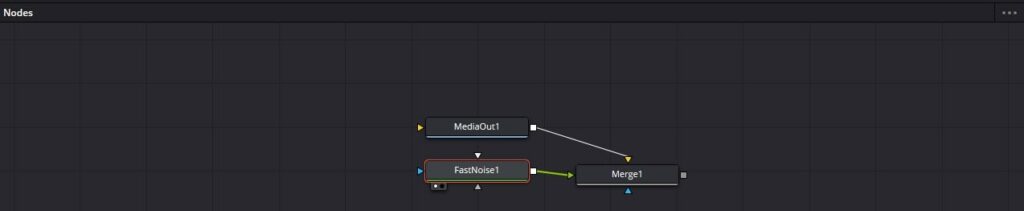
Now you can test the effect by playing the clip to display the colourful gradient clip playing in the background.
How to Add an Animated Background for Titles in DaVinci Resolve 18
In this section, you will learn how to add titles and pair them up with an animated background.
Step 01: Go to the Edit page
As you know, there are several pages in DaVinci Resolve specialized for each task. To add text, we will use the Edit Page.
To go to the Edit Page,
- Click on the Edit Page icon.
Step 02: Adding a title
To add a title,
- Click on Effects.
- Click on the Titles to add the text.
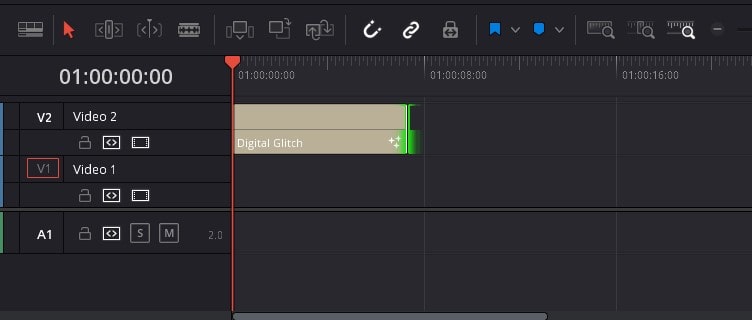
- Click and drag the specific title onto the timeline.
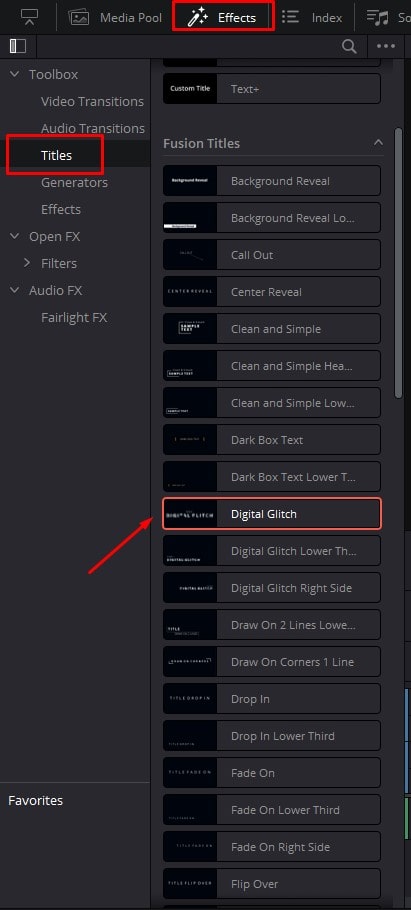
Make sure to place the title clip on the second video track as the animated background has not yet been created.
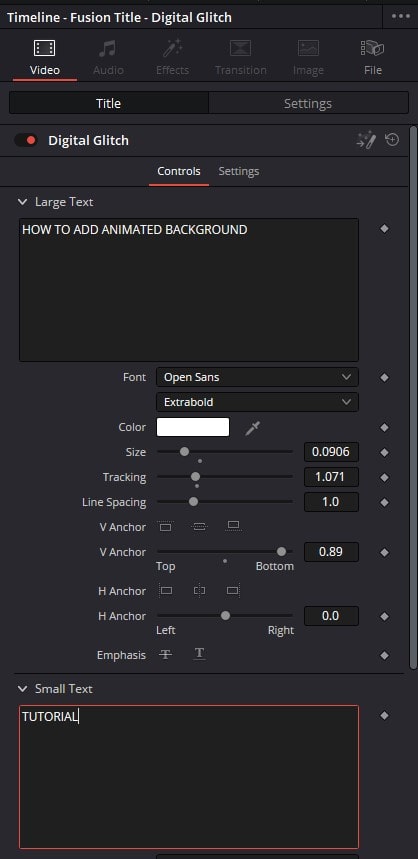
Click on the title clip and go to the Inspector. Under the Inspector you can adjust the title settings such as the text, colour, size, and much more!
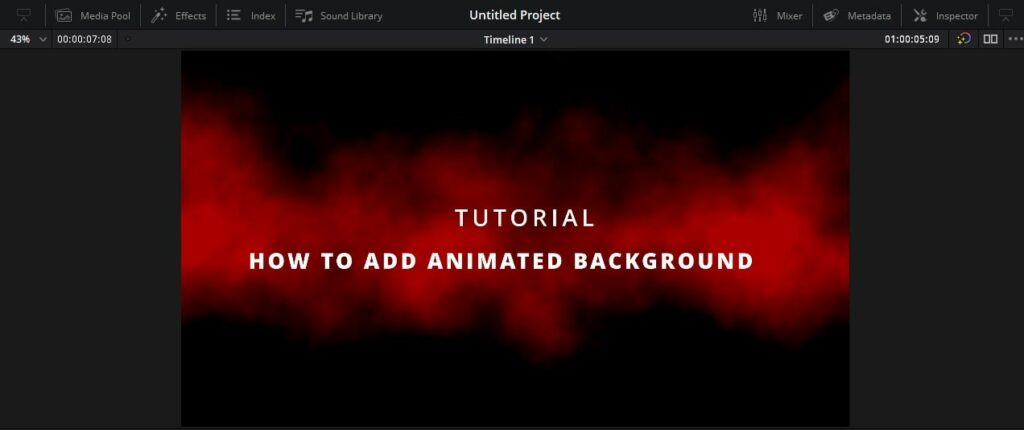
Step 03: Add texture background
Next, you need to add the background for the title.
To add the background for the title,
- Go to the Effects library.
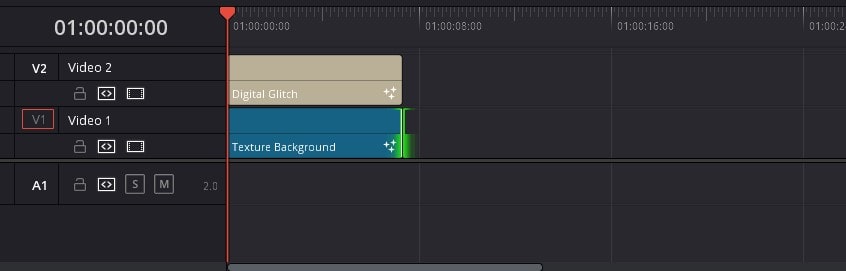
- Choose the Generators option from the left side and choose the Texture background option.

- Click and drag the Texture background to the timeline and place it in the track below the title.
- Then, the title will appear on top of the textured background.
Step 04: Add animations
As the final step, you can edit the settings from the Inspector to animate the clip.
To add animations,
- Make sure that the Texture Background clip is selected.
- Place the playhead on the timeline at the timeframe you want to add the animation.
- Go to the Inspector.
- Adjust the different settings as preferred.
- Finally, click on the diamond icons to create the animation.
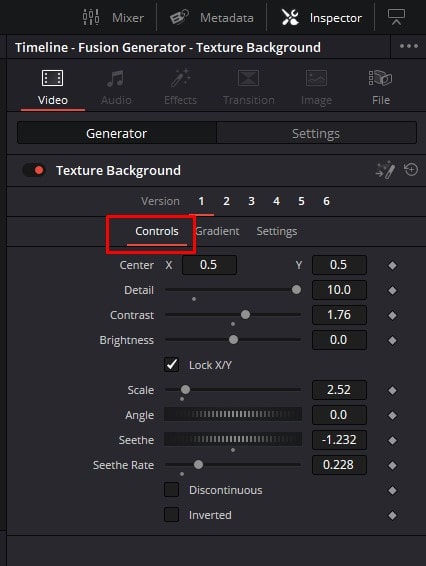
- The Seath setting helps to play around with the animations as per your requirement.
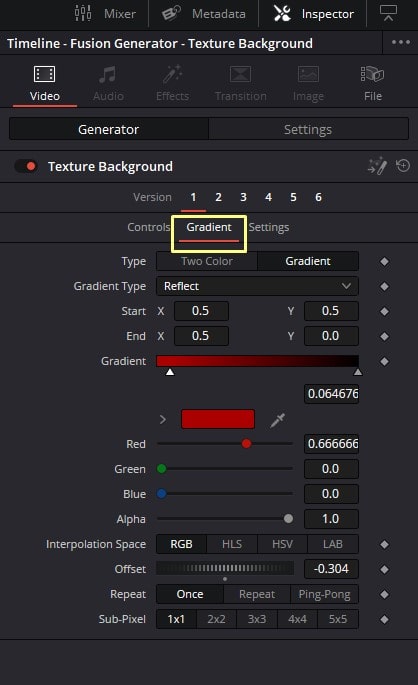
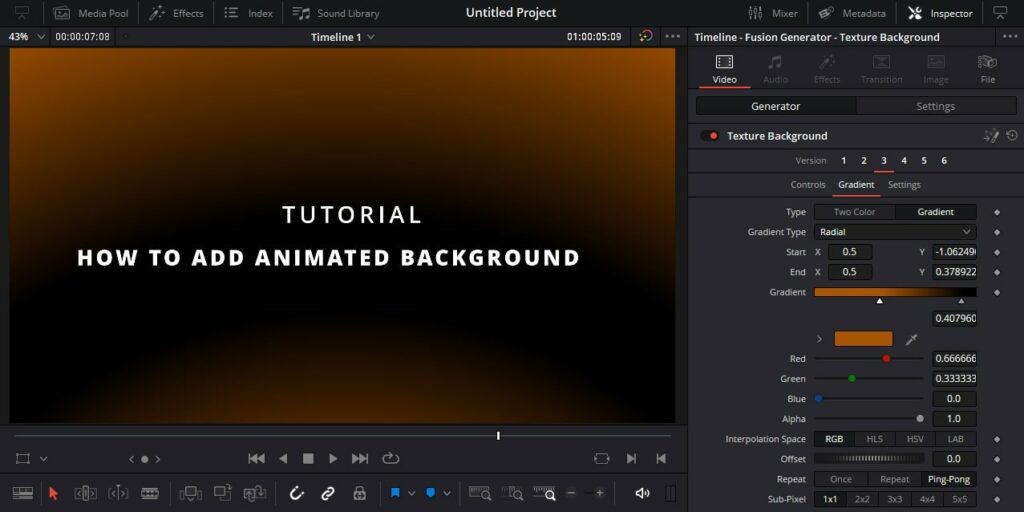
Also, under the gradient option, you can pick the colour combinations and gradients you prefer to apply. If you want to change the gradient colour, click on the little triangle on the colours. Then, pick a colour as per your requirement.
Repeat the above steps by changing the frame using the play head on the timeline as many times as you require. This adds various animations to your clips.
Versions 1,2,3,4 and 5 represent different types of texture backgrounds you can apply.
Conclusion
In conclusion, adding backgrounds in Davinci Resolve 18 is a simple and straightforward process that can greatly enhance the overall look and feel of your videos.
With the help of this article, you now know how to add a solid-coloured background, a white background with an image, a gradient background and an animated background to your projects with ease. So, go ahead and experiment with different backgrounds to find the perfect one for your next video project. Happy editing!
Thanks for reading & feel free to check out more of our articles!
Expert Rating
Summary
In summary, adding backgrounds to images is a quick and fast task in Da Vinci Resolve 18. You can use the solid color option to add backgrounds easily.


