
Lens distortion can give your videos a unique look according to the requirement of the scene, but sometimes it can be annoying to have lens distortion in your videos.
In this guide, we’ll cover everything there is to know about lens distortion and explore how to add and remove the lens distortion using the lens distortion effect in DaVinci Resolve 18.
We’ll take you through the ins and outs of using lens distortion/fisheye effect in DaVinci Resolve 18. Everything will be covered, from understanding the concept of lens distortion to practical techniques and tips for achieving great results.
Things to Keep In Mind While Applying Lens Distortion in Davinci Resolve
- Purpose: Understand why you’re applying lens distortion.
- Reference material: Analyze reference images if you want to achieve a certain look.
- Adjust intensity: Find the right balance for distorting or undistorting the image.
- Image context: Align distortion with composition and content.
- Preserve realism: Maintain a natural look.
- Avoid excessive distortion: Prevent unrealistic or distracting effects.
- Quality control: Review and fine-tune.
Lens Distortion Effect In Davinci Resolve
You can use Lens Distortion Effect in Davinci Resolve to either add or remove lens distortion from your videos.
Davinci Resolve offers multiple ways to add or remove lens distortion, some are paid, and some are free.
- Lens Distortion Effect on the Fusion Page (free)
- Lens distortion In the Inspector Panel (studio)
- Lens Distortion Effect on the Edit Page (studio)
On the Fusion Page
If you want to remove or add lens distortion to your videos in Davinci Resolve for free, then you have to use the Fusion page. All the other methods to add or remove lens distortion will require you to have the studio version of Davinci Resolve.
To add the Distortion effect on the fusion page:
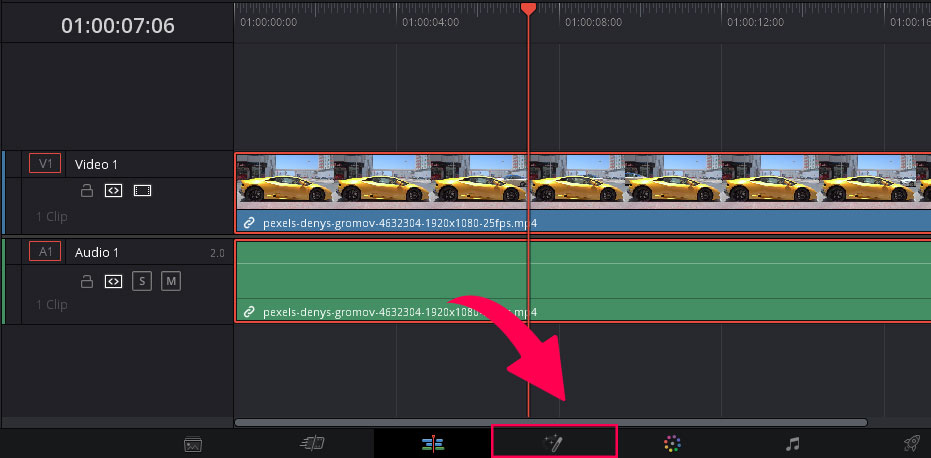
- First of all, select your video clip on the edit page.
- With the clip selected, go to the fusion page.
- You will see two nodes, media in and media out.
To add or remove the lens distortion effect, we need to add one more node: the lens distort node.
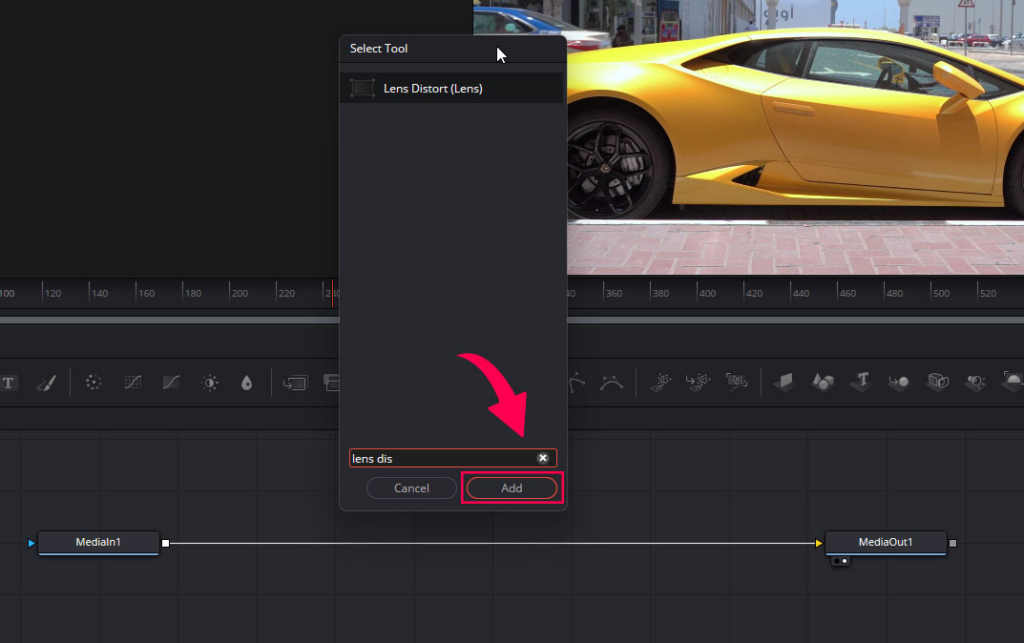
- Press Ctrl + space or Cmd + space to add a new node.
- The search box will open up, type in lens distort, and you will see the lens distortion effect.
- Select the effect and click on the add button.
To add the node between the two already existing nodes:
- Press shift, then click and drag the node onto the yellow line, and let it go when half the yellow line becomes blue.
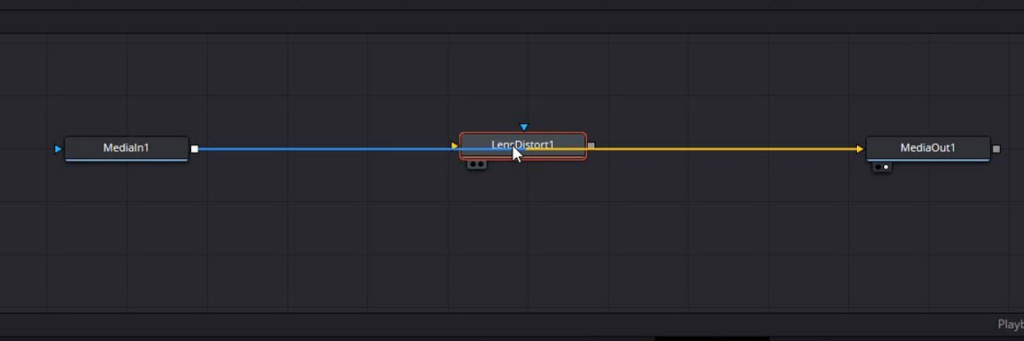
- And the node is now connected to media in and media out.
Select the lens distort node and go to the Inspector panel on the right side. If you don’t see the Inspector panel, just click on the word Inspector in the top right corner of Davinci Resolve.
Lens Distortion Effect Settings
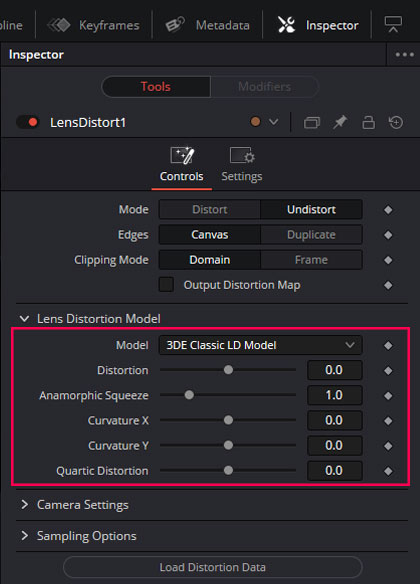
The lens distortion effect on the fusion page offers the following settings, which you can customize:
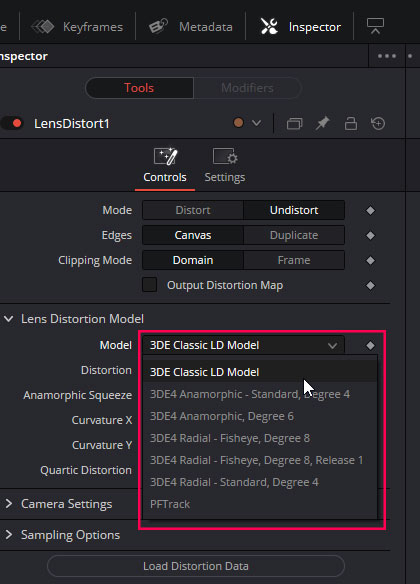
Model
You can choose from different models, and every model will distort or undistort your footage differently. We recommend you stick to the default one “3DE Classic LCD Model”.
Distortion
the distortion slider will add or remove the lens distortion depending on whether you move it toward the left or right.
- To remove the lens distortion, move the slider towards the right.
- To add the lens distortion, move the slider towards the left.
Anamorphic Squeeze
This will stretch or squeeze your video from left to right. This will only work if you apply the distortion from the distortion slider. It won’t work if the distortion value is at 0.
- If you drag it toward the left, it will squeeze the video.
- If you drag it toward the right, it will stretch the video.
Curvature X and Curvature Y
The curvature option will stretch or round the edges depending on how you move the sliders.
Quartic distortion
If you drag it toward the left, quartic distortion will give the video a fish-eye effect.
And the edges will be stretched outwards if dragged on the right side.
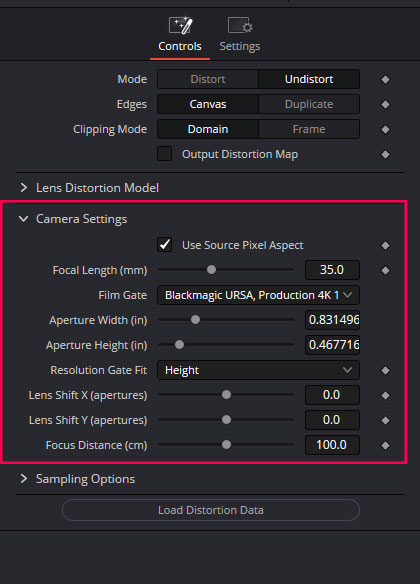
Camera Settings
In the camera settings option, you can select the lens’s focal length and the camera model you recorded your video on.
And you can further customize the lens distortion effect in Davinci Resolve by using the Camera Settings.
Sampling Options
Leave it to default.
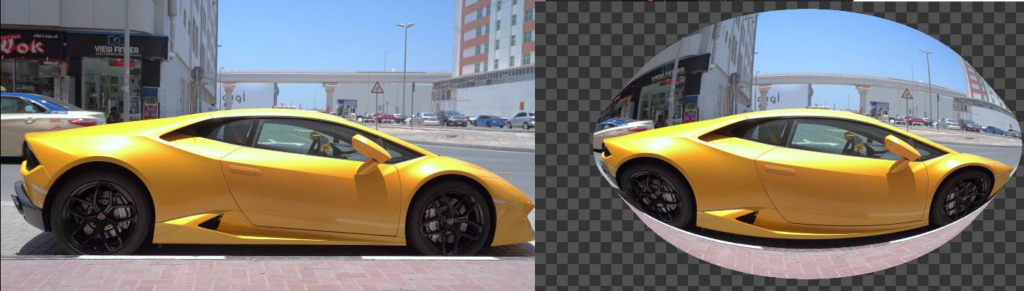
Before and After
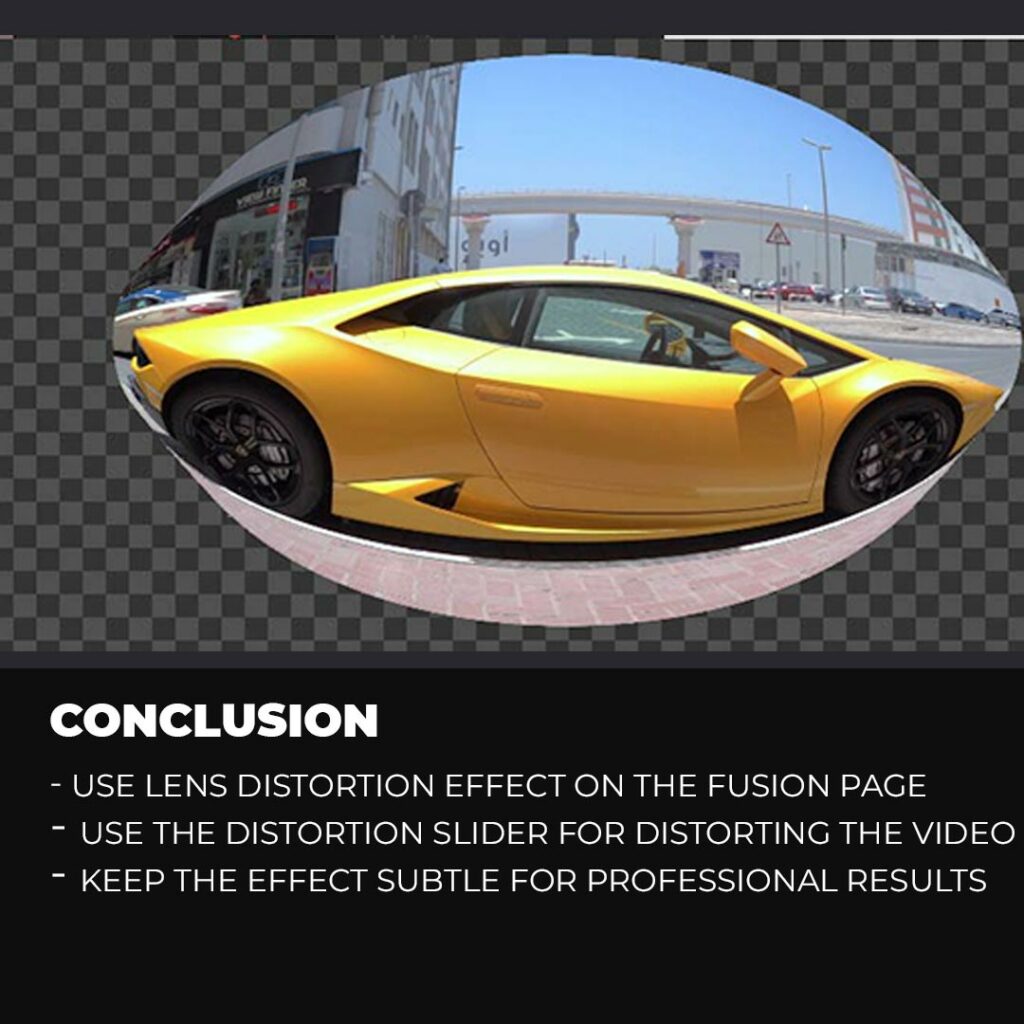
We have added lens distortion to the car video to achieve the fish eye effect.
Lens Distortion or fish eye effect in Davinci Resolve through inspector panel
To remove the lens distortion in the inspector panel, you need to have the studio version of Davinci Resolve (we have covered the free method in the previous section).
- Select your video clip from the timeline.
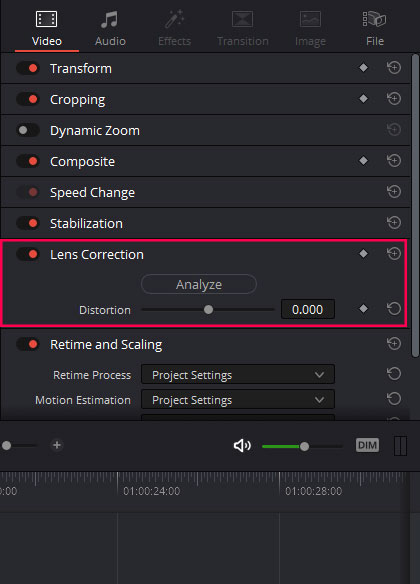
- Go to the inspector panel and scroll down until you find the lens distortion.
- You can click on analyze, and Davinci Resolve will automatically remove the lens distortion.
- But if you want to add the lens distortion, you need to use the Distortion slider just below the analyze button.
- Drag it toward the right to remove the distortion and toward the left to add the lens distortion to your video.
Lens Distortion or fish eye Effect on the Edit Page of Davinci Resolve
You can apply the lens distortion effect to your video from the effect panel in Davinci Resolve. This also requires you to have the studio version of the Davinci Resolve.
- Select your video clip.
- Go to the effects panel and click on the open fx group.
- Search for the lens distortion effect and drag and drop it on your clip.

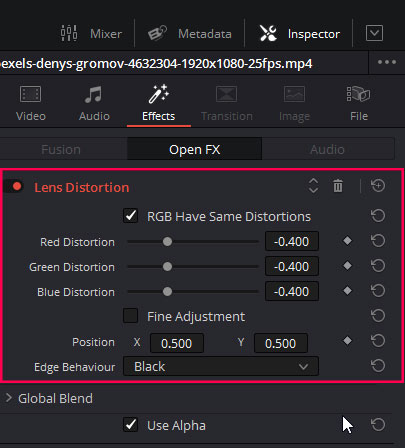
- Go to the inspector panel and then go to the effects tab. You will find the lens distortion effect there, and now you just have to adjust the settings.
- If you want to remove the lens distortion, move the sliders toward the far right, and if you want to add more lens distortion, move the sliders toward the left.
- There is only one important option. “RGB have same Distortions”
- If you check this option, the 3 sliders will work as one.
- If you uncheck this option, you can modify the distortion of these 3 colors individually.
- You can also make adjustments to x and y perimeters to add lens distortion.
Conclusion
Lens distortion can add a unique effect to your videos. But at the same time, it can cause weird distortions you dont want to have in your videos. We have discussed multiple methods to remove and add lens distortion in Davinci Resolve. Some require a studio version, and some work on the free version.
If you dont have the studio version, then you can use the lens distortion effect on the fusion page. You can either remove or add the lens distortion on the fusion page. Drag the distortion slider toward the left to add and drag toward the right to remove the lens distortion.
You can also use the Lens distortion effect within the inspector panel or apply the lens distortion effect from the effects panel on the edit page. These methods require you to have the studio version of Davinci Resolve.
We recommend you stick with the fusion page method if you are using the free version of Davinci Resolve.
Expert Rating
Summary
Learning to add and use the Lens Distortion effect in DaVinci Resolve can help enhance the visual quality of your videos by correcting lens distortions and creating specific creative effects. It is a highly functional and scalable feature that allows for precise control over distortion parameters, making it a valuable tool for professional video editing and post-production workflows.


