
The zoom-in effect is a powerful technique to add focus and impact to a certain part of the video.
In this simple and straightforward tutorial, we will guide you step by step through the process of creating the zoom in effect in DaVinci Resolve 18. No prior experience is required, so let’s get started and unlock the secrets behind this impressive technique!
Understanding Keyframes In Davinci Resolve
To create the zoom in Effect in Davinci Resolve, you need to understand how to create keyframes and how they work in Davinci Resolve.
What Are Keyframes?
What is a keyframe? It’s basically a point that you set on your clip that says, at this point, some parameter is going to change.
And what do we mean by parameter? It could be zooming in. It could be moving a clip left to right or animating a piece of text or other objects on your screen.
You can use keyframes in DaVinci Resolve in many ways, but we will just go with the basics.
For example, if you want your video to move from left to right or right to left in a specific timeframe, you need to use the keyframes to animate the position property.
Where Are Keyframes In Davinci Resolve?
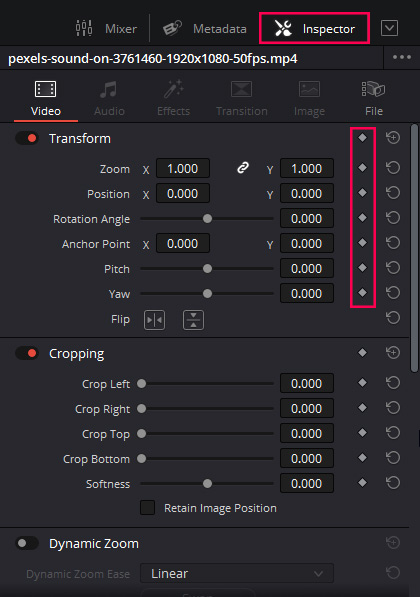
To find the keyframes, you need to go to the edit page.
You want to have your clip selected to come up to the inspector, and when you look at the inspector here, you will notice the diamonds on the right-hand side of properties in the inspector panel; those diamonds are used to create keyframes in Davinci Resolve.
How To Add Key Frames In Davinci Resolve?
Let’s have a quick overview of how to add keyframes in Davinci Resolve using the edit page.
Decide What Property You Want To Animate
You have to decide what property you want to animate, and it could be position, scale, rotation, or any other property.
Place your Playhead
Move the play head where you want the animation to begin; it is important to pay attention to the play head.
Open Inspector Panel
Select Your Clip, and go to the inspector panel. You will see all the properties of the selected clip.
Click on the Diamond Icon Next To the Property
You will see the diamond icon and then click on it; it will turn orange, which means that the keyframe is now active.
Move The Playhead And Change The Property
Move the play head where you want the animation to end, and then change the property without clicking on the diamond icon. Davinci Resolve will automatically create the second keyframe.
Now you will have a simple animation, and this was the basic concept of how the keyframes work inside Davinci Resolve.
Now let’s take a look at the step-by-step process of creating the zoom in effect in Davinci Resolve.
Zoom In Effect In Davinci Resolve
We will use the same keyframe techniques discussed above to create a zoom-in animation. Follow the steps below.
- Go to the media pool and press Ctrl + I or Cmd + I, and a new window will open up.
- Find and select your video clip and click open.
Decide the area where you want to create the zoom-in effect. We will create the zoom-in Effect at the beginning of the clip.
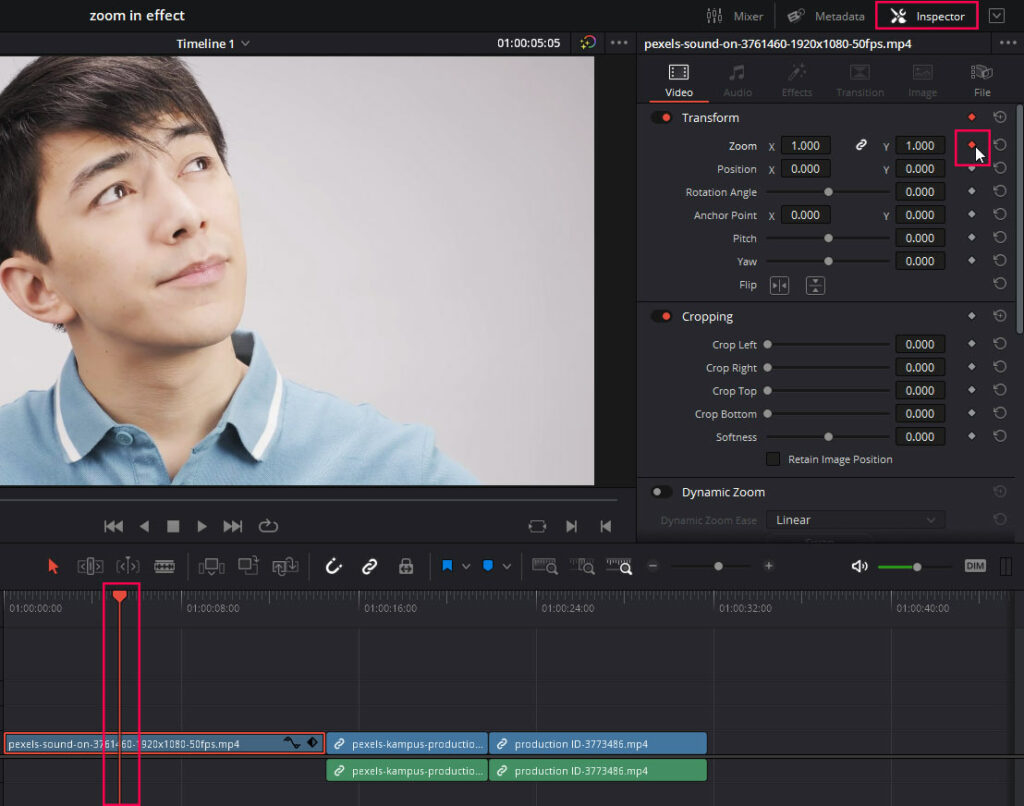
- Select the clip and take the play head to the beginning.
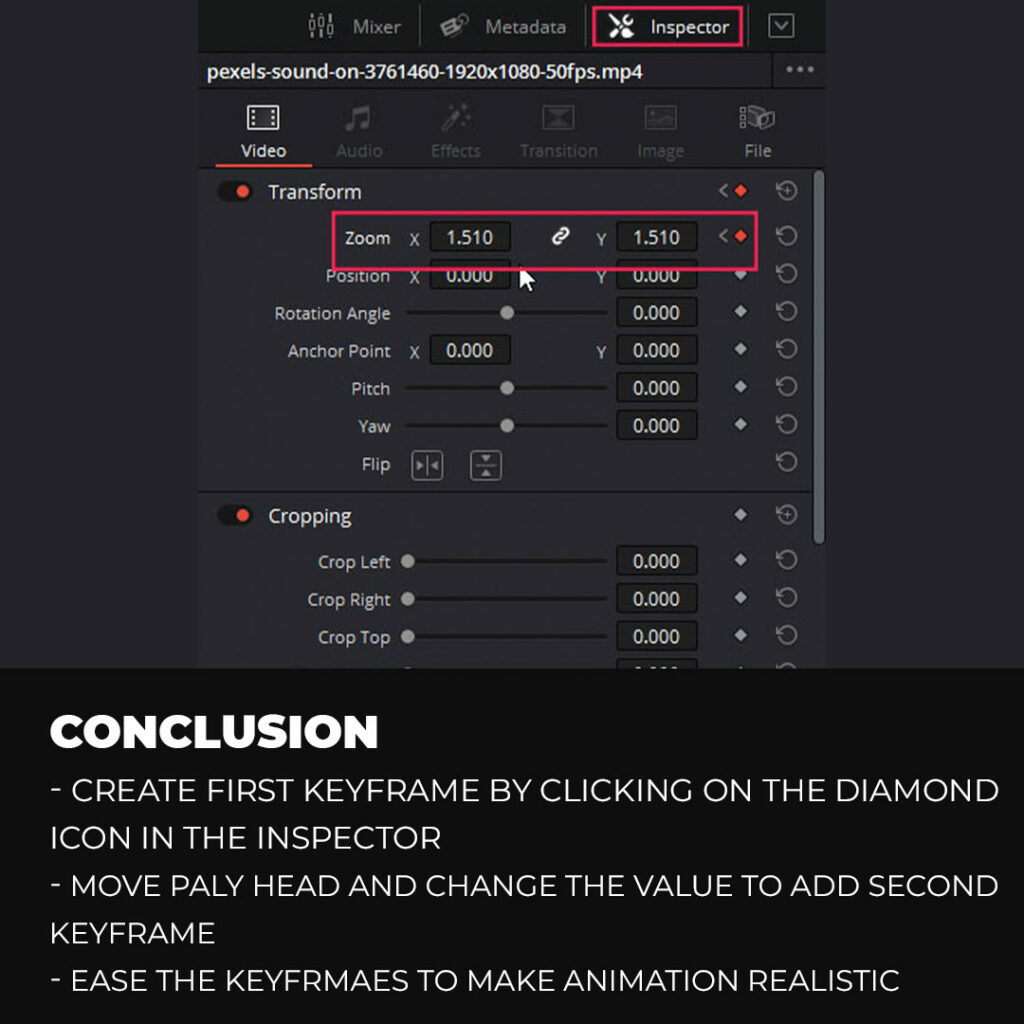
- Go to the inspector panel and click the diamond icon in front of the zoom property.
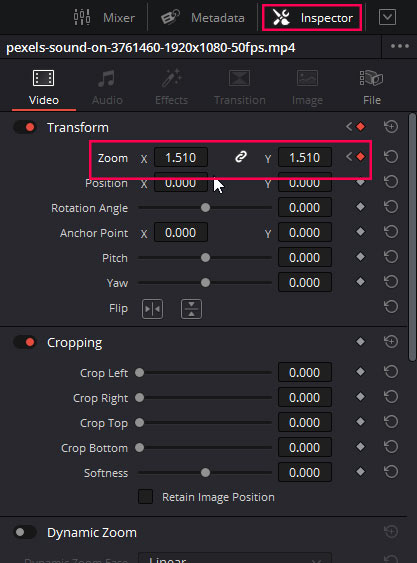
- Now move the play head where you want your zoom-in animation to end, and change the zoom value to 1.5 or whatever you want for your video.
Now if we playback, we have a simple zoom-in animation in Davinci Resolve.
Adjust the position of the Video
Now that we have a zoom-in Effect, maybe the video is zoomed in, and you dont like the position of the zoom.
There are two ways to adjust the position of the video:
- Use position property (need to create keyframes)
- Use the anchor point
Position Property
You need to create position keyframes and the zoom keyframes we created. But this will create many problems, so instead of creating position keyframes, we will use the anchor point method.
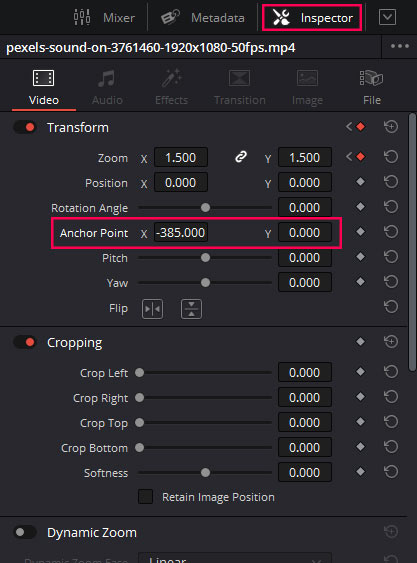
The Anchor Point
Go to the point in the clip where the zoom animation ends, and then go to the inspector panel. Change the anchor point values and change the position to your liking. And now, if you playback from the beginning, the video will zoom in at the right position.
Smooth Out the animation
We have a basic zoom-in animation, but it looks boring; now, we need to add a bit of realism and spice by easing the keyframes we have created. The animation becomes more realistic and feels like the real world when we add ease to it.
There are two ways of easing the keyframes in Davinci Resolve:
- Using the graph in the timeline
- Use the inspector panel
Use the graph in the timeline
Adjusting the easing in the timeline is not very easy, but it’s where you have the most amount of control over the easing.
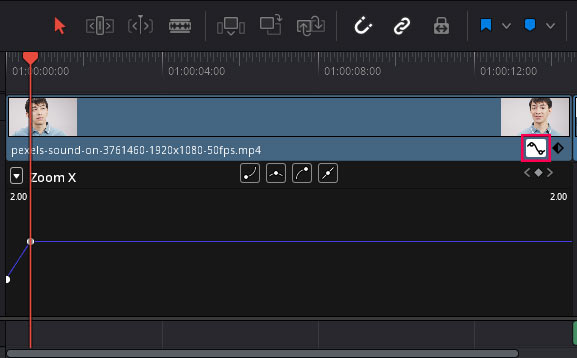
- Go to the timeline and head over to the end of the video clip.
- Click on the curve icon to open the graph below the video clip.
Click on the first keyframe and then click on the ease out button.

Now click on the second keyframe and then click on the ease in button.
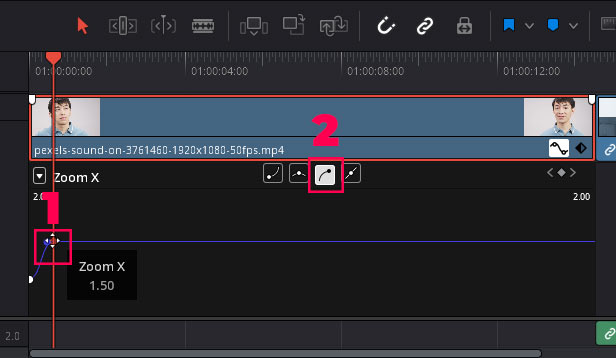
And now you will see that you have a curve instead of a flat line. You can move the points to change the shape of the curve, and the animation will also be changed.
Use the Inspector panel
Easing the keyframes using the inspector panel in Davinci Resolve is very simple. We recommend using the inspector to ease the keyframes if you are a beginner.
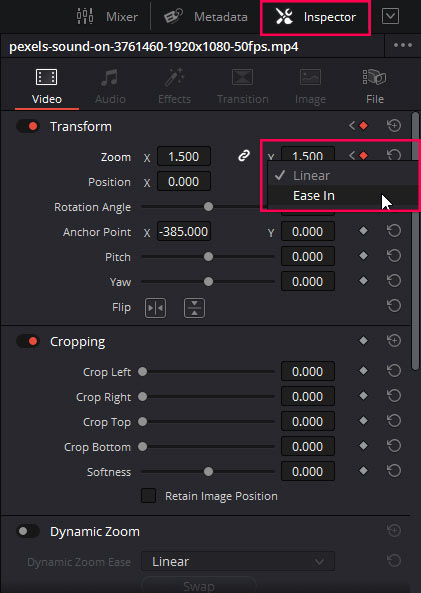
- Go to the inspector panel and then go to the Zoom property.
- Use the arrow key to go to the next or previous keyframe.
- Right click and ease out if you are on the first keyframe.
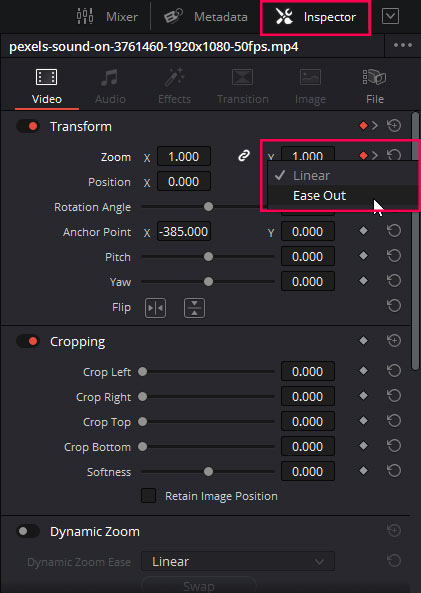
- Choose ease in if you are on the last keyframe.
And now you will have a pretty nice and smooth looking zoom in effect in Davinci Resolve.
Add Sound Effects
Now if you can add a sound effect like Whoosh or something like that, it will really help in enhancing the effect.
Conclusion
We have discussed how to create the keyframes and how they work in Davinci Resolve, and then we have discussed how to create the zoom-in effect. We need to create 2 keyframes: one at the beginning of the zoom effect and the other one where we want to end the zoom-in animation. Then we need to ease the keyframes through the graph on the timeline or from the inspector panel.
Thanks for reading & feel free to check out more of our articles!
Expert Rating
Summary
Creating the Zoom In effect in DaVinci Resolve requires practice to master, but with consistent effort, it becomes easier. While it may initially be moderately difficult, the functionality and scalability of the effect are excellent, allowing for customization and adjustments to create visually appealing and dynamic shots in videos.


