

If you need to modify the background color of your product photo or change the color of your image, Photopea makes it a simple task.
In this article, we will guide you through the process of changing or adding color to the background of your images in Photopea. We will provide you with a step-by-step guide on how to apply the color to your background.
Open Your Image in photopea
- Open Photopea.com in a new tab of the bowser
- Go to File, Open and select the image you want to work on
- Once you select your image, click Open.
Step 1: Make a Selection of the Subject
In order to change the background of an image, the first step is to select the subject. The selection tool you will use to select the subject will totally depend on the image.
There are several ways of selecting a subject.
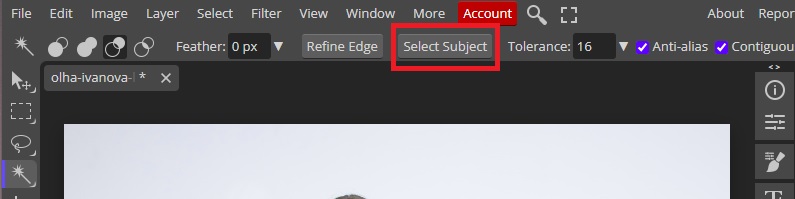
Select Subject
We will use the automatic selection tools to save time. Simply select the Magic Wand, Quick Selection, or Object Selection.
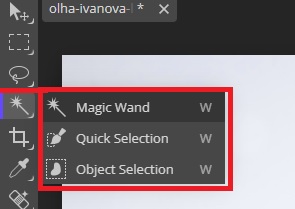
When you select any of the above available tools for selection, a new Options Bar will appear. Simply click on the ‘Select Subject’ option from the bar.

When you click on the Select Subject tool in Photopea, the subject will automatically be selected.
Using a Selection Tool
Artificial Intelligence can be a great time-saver, but there are instances when it doesn’t function as expected. If the Select Subject option fails to make a good selection, it’s necessary to use other selection tools to refine the selection.
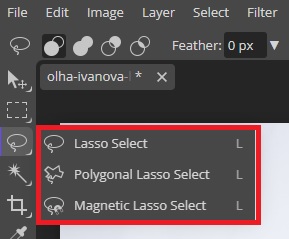
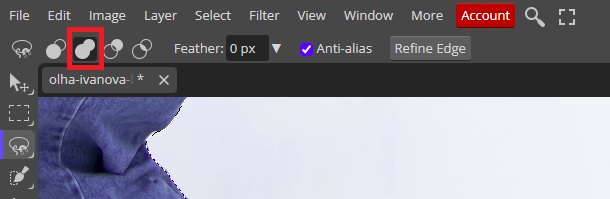
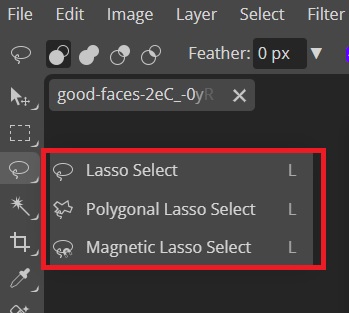
Photopea offers several selection tools. In addition to the Magic Wand, Quick Selection, and Object Selection, you can have more control with the Lasso tools.
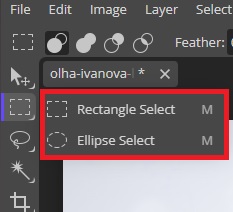
In addition, two selection tools – Rectangle Select and Eclipse Select – are particularly effective for selecting shapes or making selections in the shape of a rectangle or an ellipse.
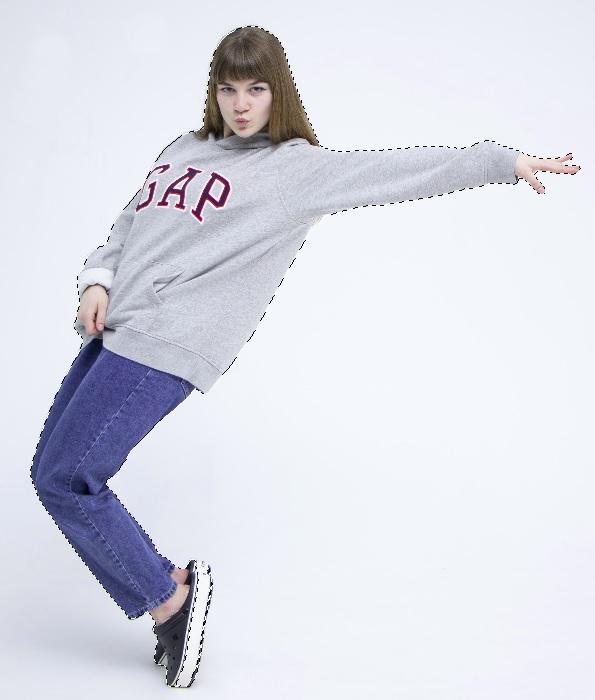
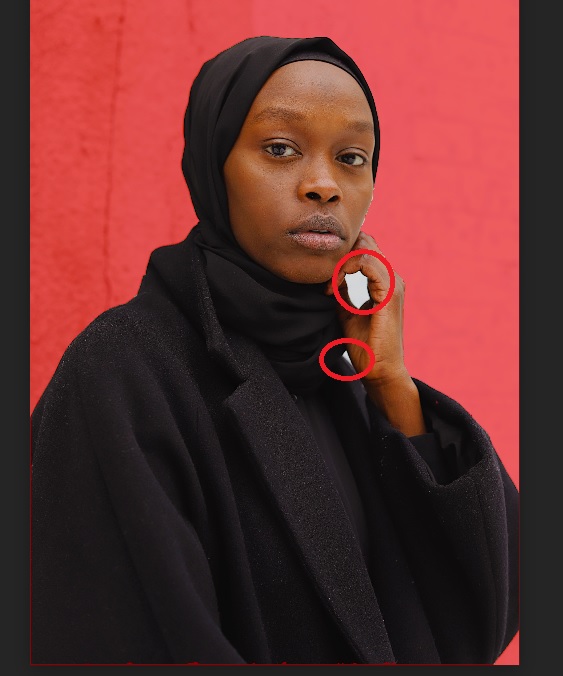
For our image, the Select Subject option will work great. However, if you have trouble making selections in areas where the colors are blending, for example, the whites on our model’s shoes, you may want to use the Lasso Select tool for more precise selection.
We will then select the Magnetic Lasso Select and use it to cover the whites of the shoes. With the image still selected, go to the Options Bar and select Unite.
Unlike when using the selection tool in other cases, with the Unite feature turned on, we don’t need to join the first and last point to complete a selection.
Once the target areas are covered, simply hit Enter on your keyboard, and the new selection will be merged with the previous one.
Alternatively, you can use the quick mask. To make sure you never miss an area, press the Q on your keyboard to enter the quick mask mode.
With the Quick Mask Mode, any area that is not highlighted in red has been selected.
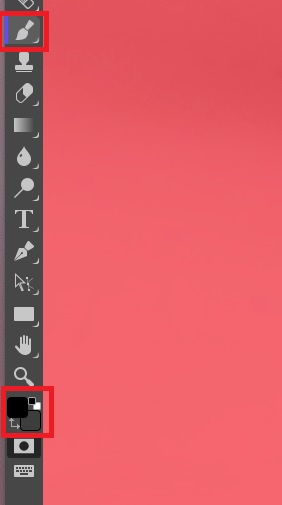
Using the brush tool, you can add more areas to the selection or exclude some areas. To do so, select the Black from the Color Picker before you start painting.


Anything you paint in black will turn red and will be hidden. Once you are satisfied, press Q again to exit the mask.
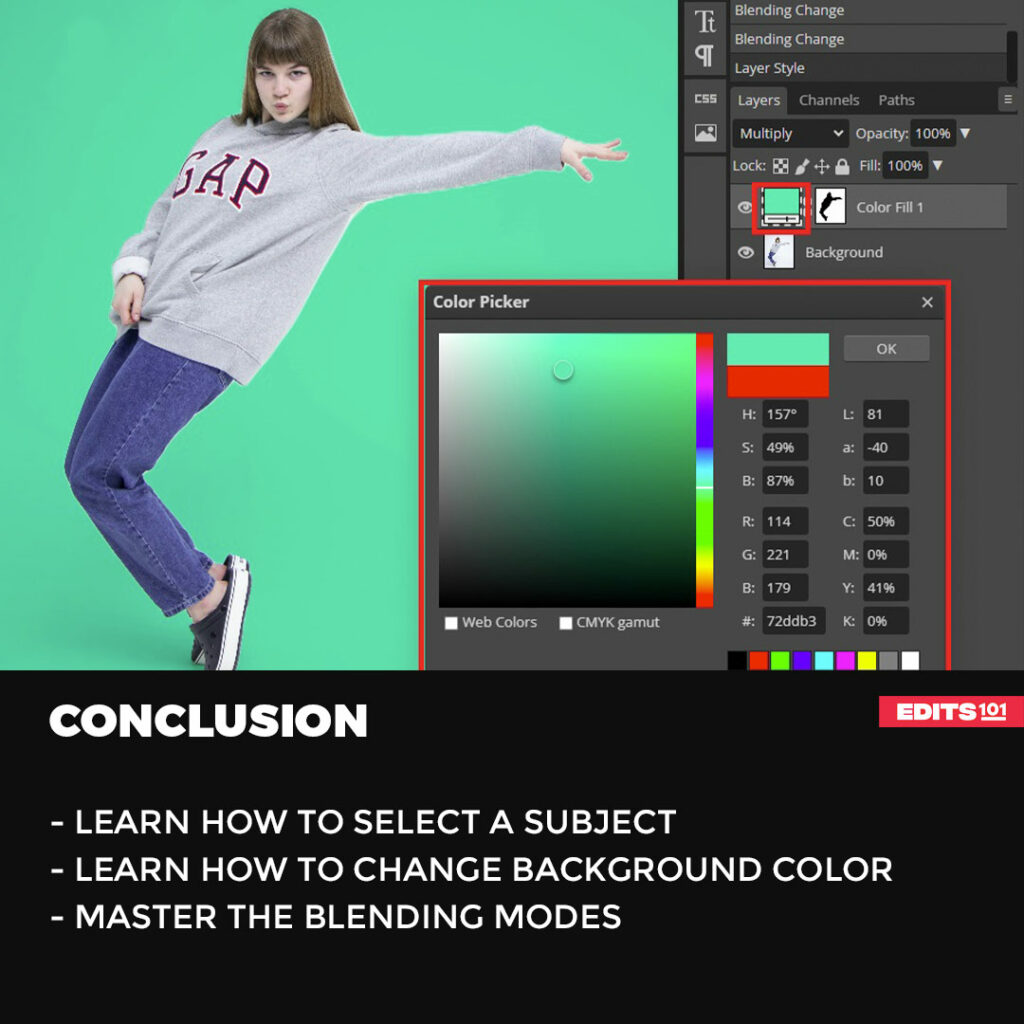
Step 2: Change the Background Color
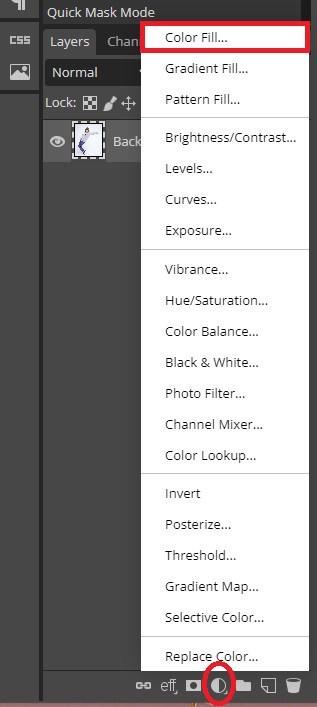
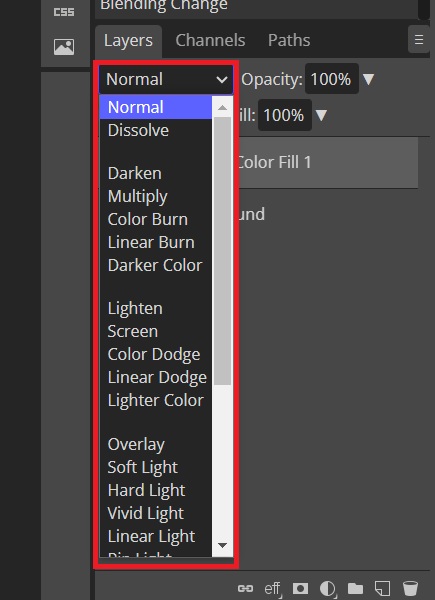
Now that the subject is selected, the next step is to change the background color. Go to the New Adjustment Layer at the bottom of the Layers Palette and select Color Fill.
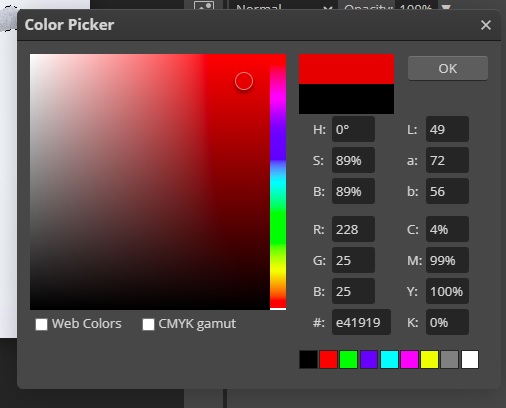
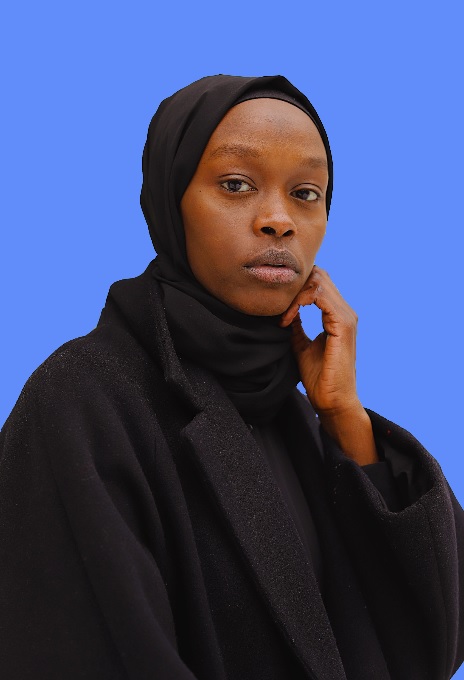
The Color Picker will pop up. From there, select the color that you want and Click OK. In our case, we have selected the color Red.
You will notice that the color will be applied to your selection. The color is inside our model and not as a background.

To correct that, we need to click on the layer mask icon and click on invert from the properties panel.
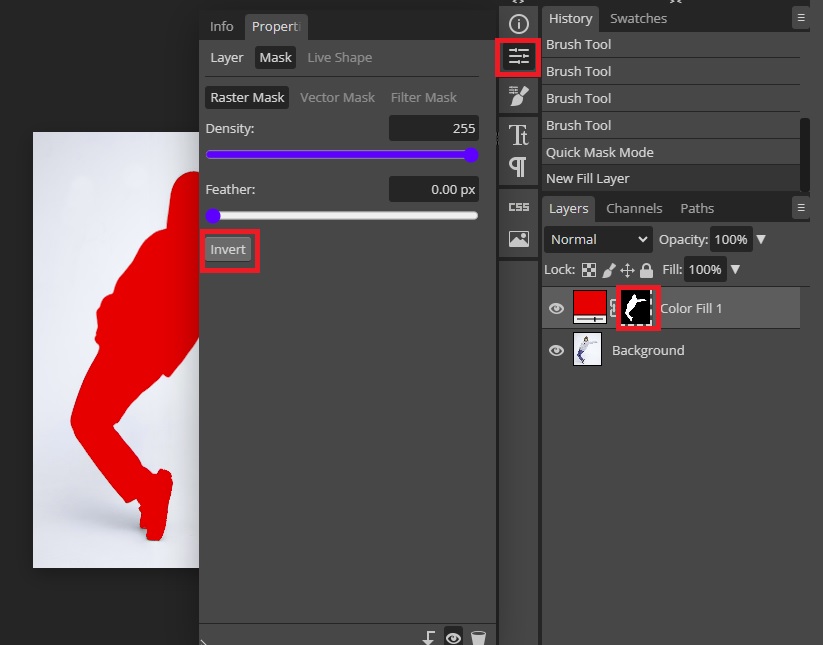
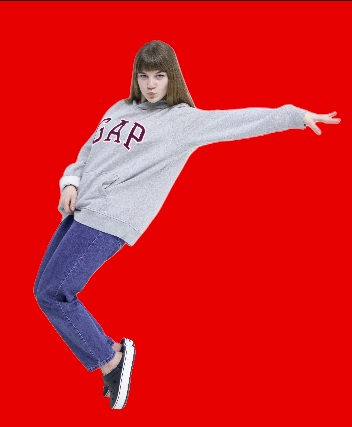
With that, the Red will now be around the model.
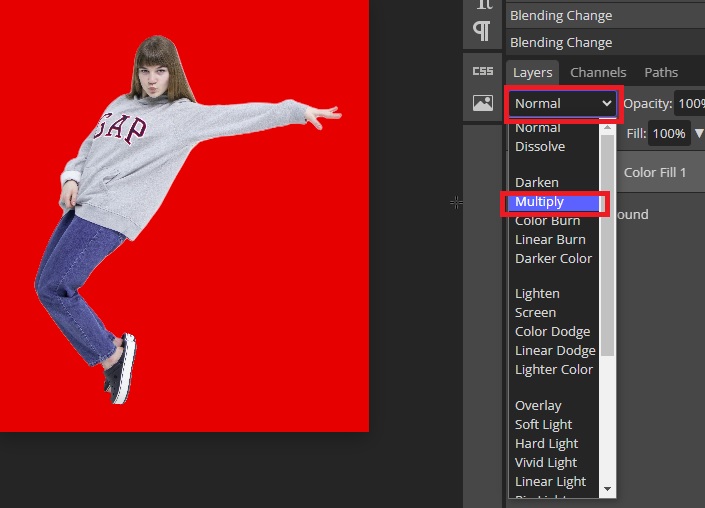
Step 3: Add the Shadow Back
As you can see from the image above, there is no shadow. The lack of a shadow makes the image less realistic.
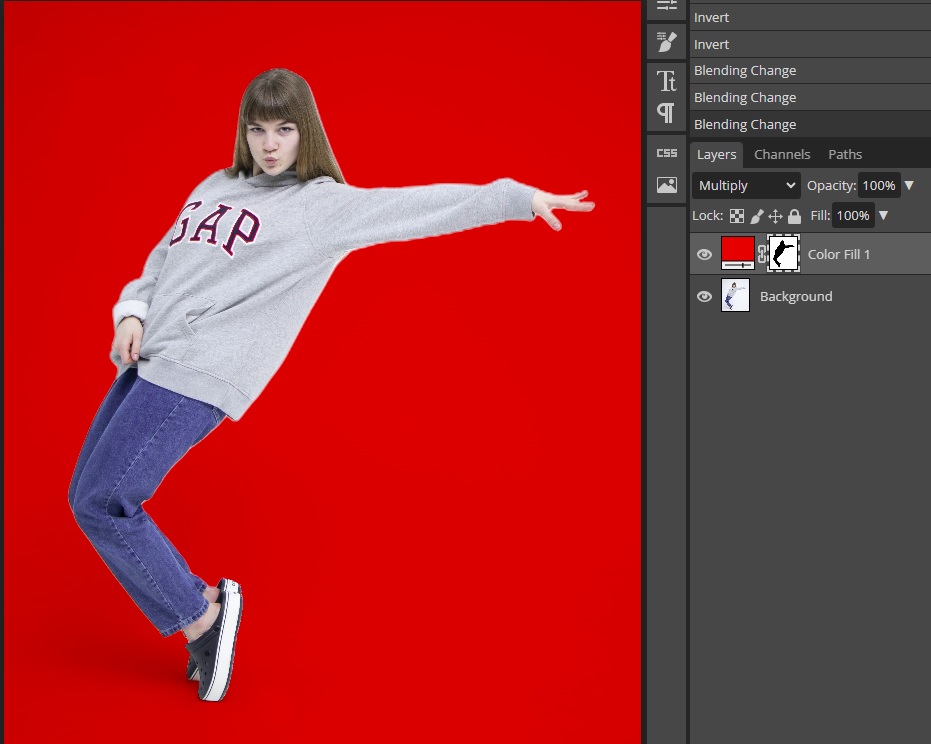
To add the shadow back, we need to use a blending mode. For this image, we will use Multiply.
Now the shadows are back and the image look more realistic.
Step 4: Change the Colors
If you are satisfied with the results, you can go ahead and click File, Export As and save your image in any desired file format.
If you wish to change the background color again, simply click on the Select Color thumbnail and select any color you want.

Once you are done, save your project. You can Save As PSD so that you can work on your project later.
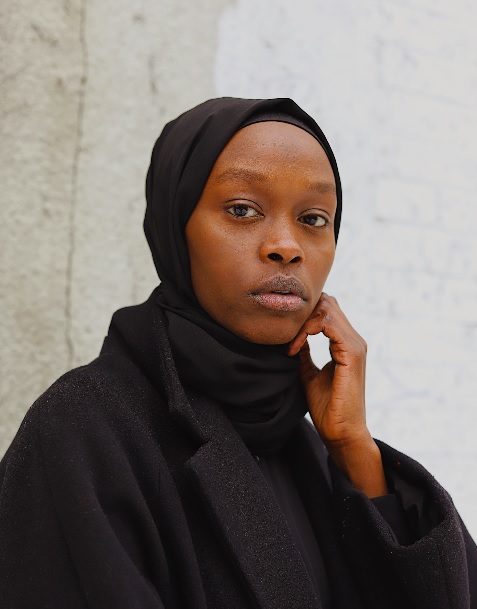
Changing the Color of a Textured Background
Step 1: Select the Subject
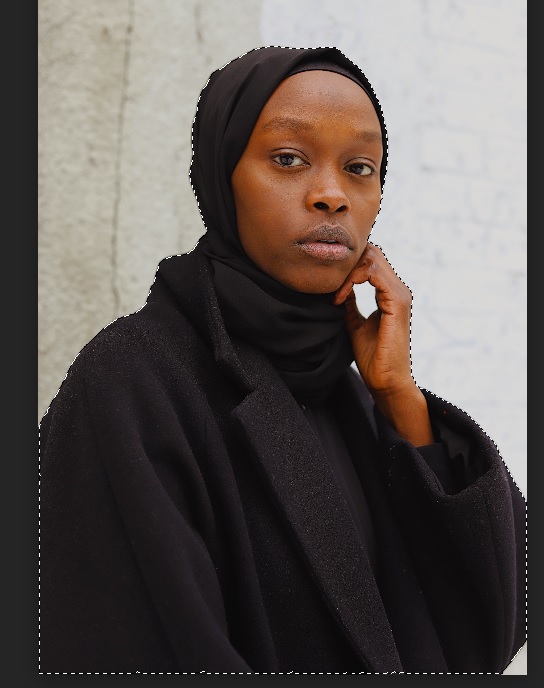
Not every photo you work on will have a solid color background. If you are working on an image similar to the one below, you first have to select the subject.
Photopea offers several tools for selecting a subject. The quickest method is to select the Magic Wand, Quick Selection, or Object Selection tools. That will bring up the Select Subject option in the Options Bar.
Click on the Select Subject, and Photopea will automatically select the subject.
If the results from the Select Subject feature are not too great, you can use another selection tool to select the subject. The Magnetic Lasso Select will work great on this image.
After selecting the Magnetic Lasso Select tool, simply click on the edge of the subject, then move the cursor around the edges of the subject. The Magnetic Lasso Select tool will snap around the edges.
To make sure you made a complete selection, press the Q on your keyboard to switch to Quick Mask Mode. As we covered earlier, select the brush and paint out the areas you wish to remove.
Once you are done, press Q again to exit the quick mask mode.
Next, you need to follow the steps we discussed earlier.
- Click on New Adjustment Layer
- Select Color Fill
- Choose the color you want and click okay
- Click on the layer mask icon
- Go to the properties panel and click on Invert
- You are done
If you want the original background to be visible but with different colors, you will need to play around with the blending modes.
For example, with blue as the solid fill, we can add some blue to the background if we select the Overlay blending mode.
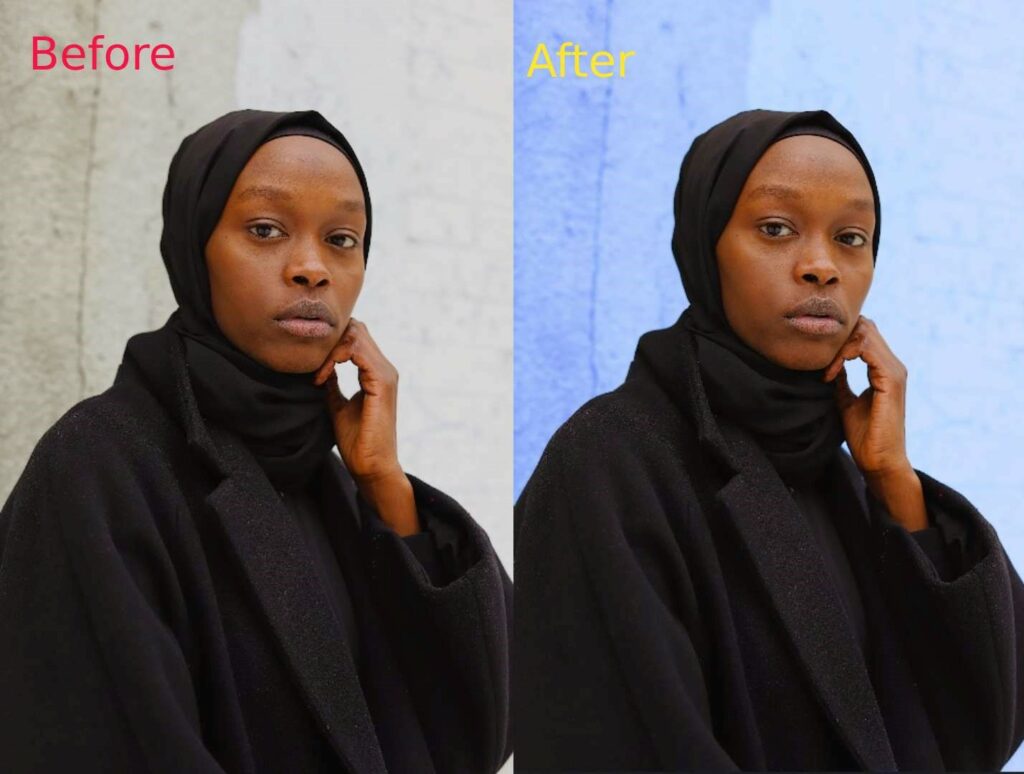
The key is to play around with the colors and blending modes until you find the effect that appeals to you.
Conclusion
In this post, we have covered every step required to add a colored background in Photopea. We started with learning how to make a selection of the subject and later learned how to change the background color. We also covered how to refine the details.
Later, we looked at how to change the background color of an image with a textured background. We started by adding a solid color background and later looked at how to change the color of a textured background.
Thanks for reading & feel free to check out more of our articles!
Expert Rating
Summary
Learn how to change the background color of an image. The post looks at how to change a solid background color and how to change the color of a textured background. It needs slight bit of practice and once you get the hang of it then sky is the limit.


