
An easy way to edit non-destructively is by utilizing layer masks. In this tutorial, we’ll explore how to use masks in Photope.
Masks are used to conceal a part of a layer, retaining all of the pixel data on the layer and being able to be displayed again if the mask is utilized again.
Introduction to Layer Masks in Photopea?
Let’s start by understanding what layer masks are. Layer Masks are used to edit images non-destructively. When using masks, another layer is added to the main layer.
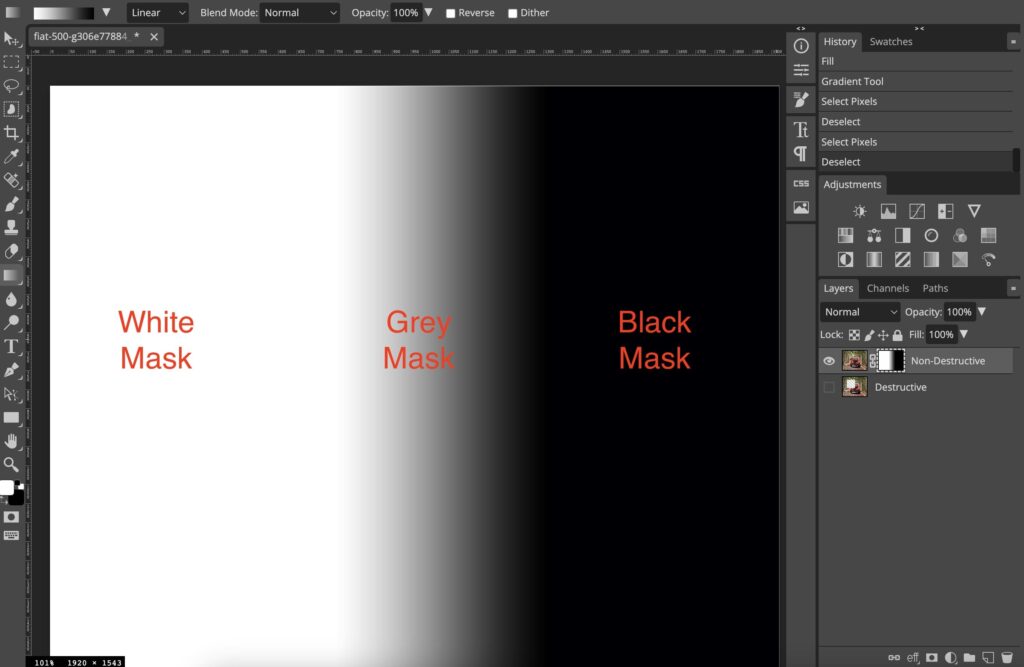
The most important thing to learn is – The colour white reveals & black hides. When you add a mask to the main layer with out a selection, it is added fully white by default (that means you can still see all the image/adjustment) – check the layers panel.
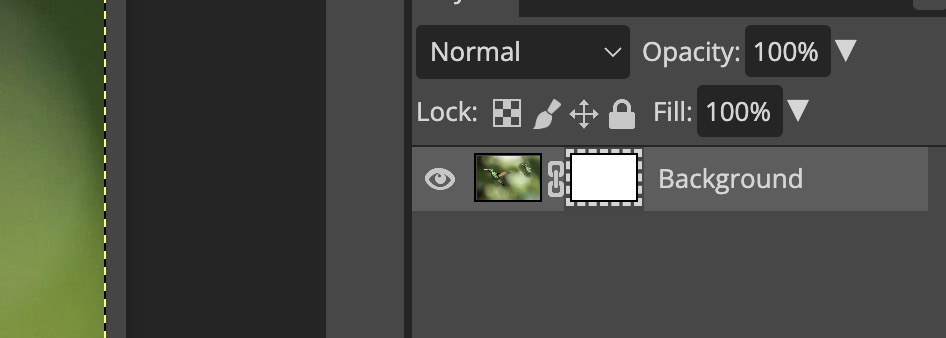
If you’ve got a selection and you add a mask, you’ll notice that the mask will hide everything & leave the selected part visible.
Black hides & white reveals
Let’s dive a little bit deeper in what & how are layer masks used in Photopea.
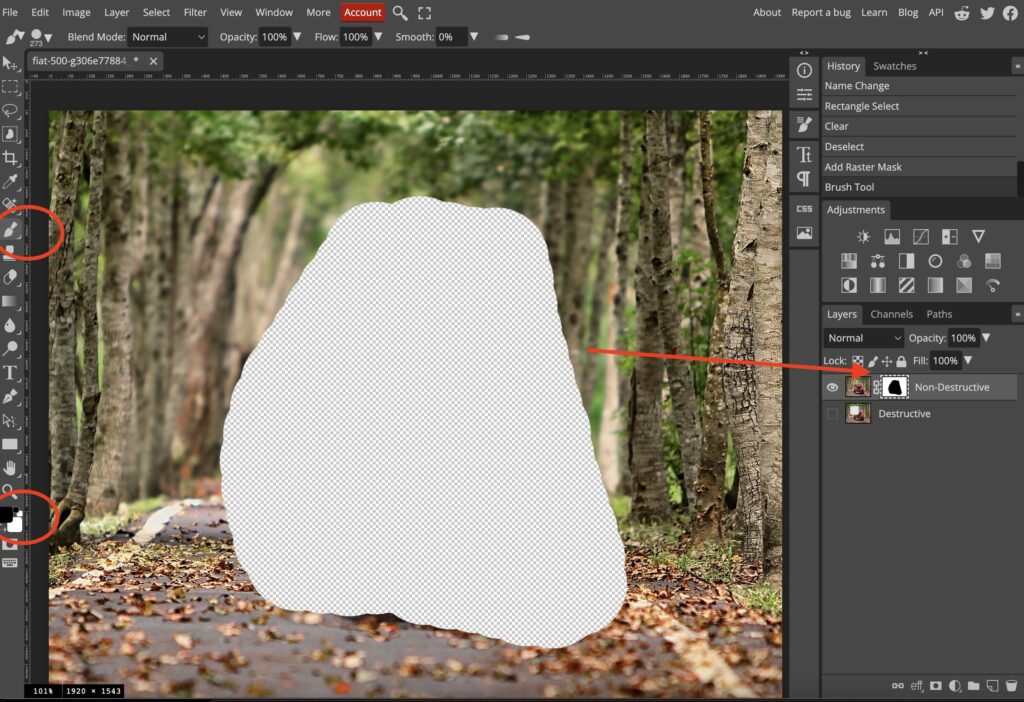
Step 1: Destructive vs Non-destructive
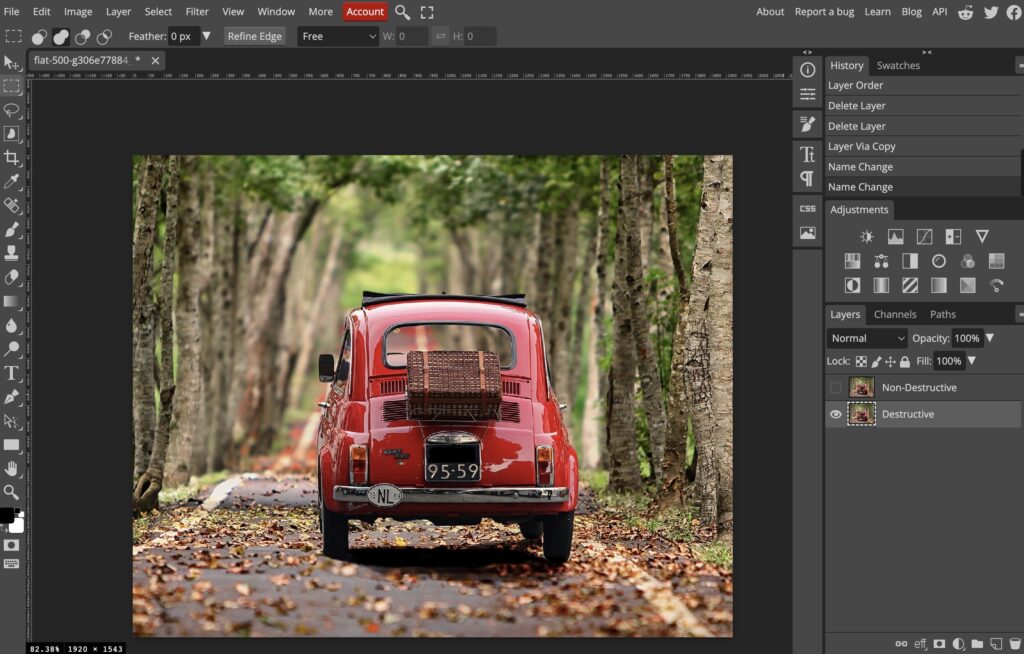
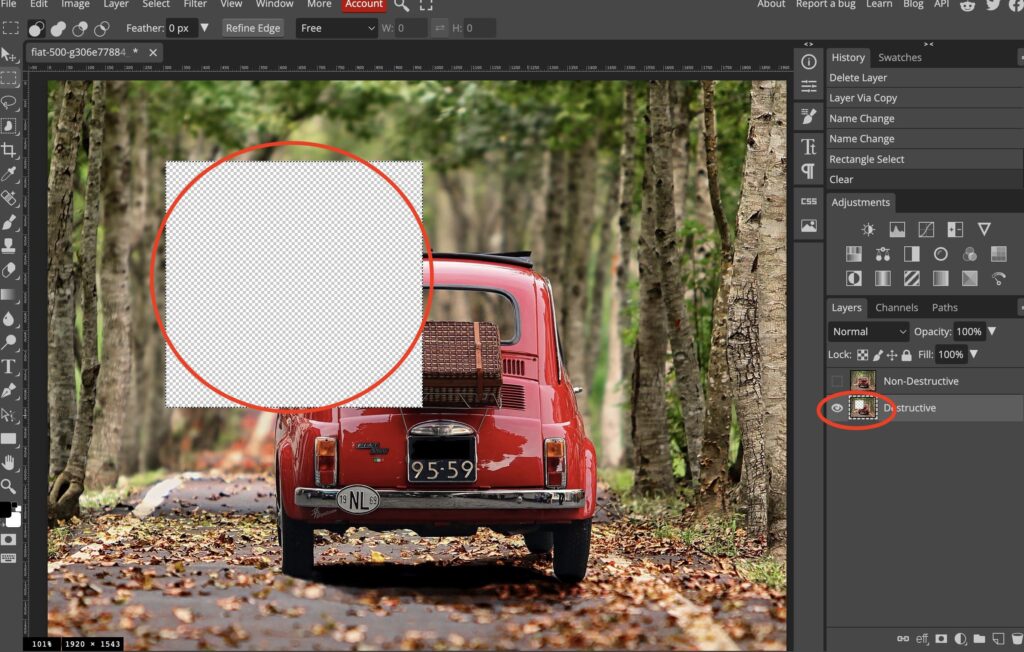
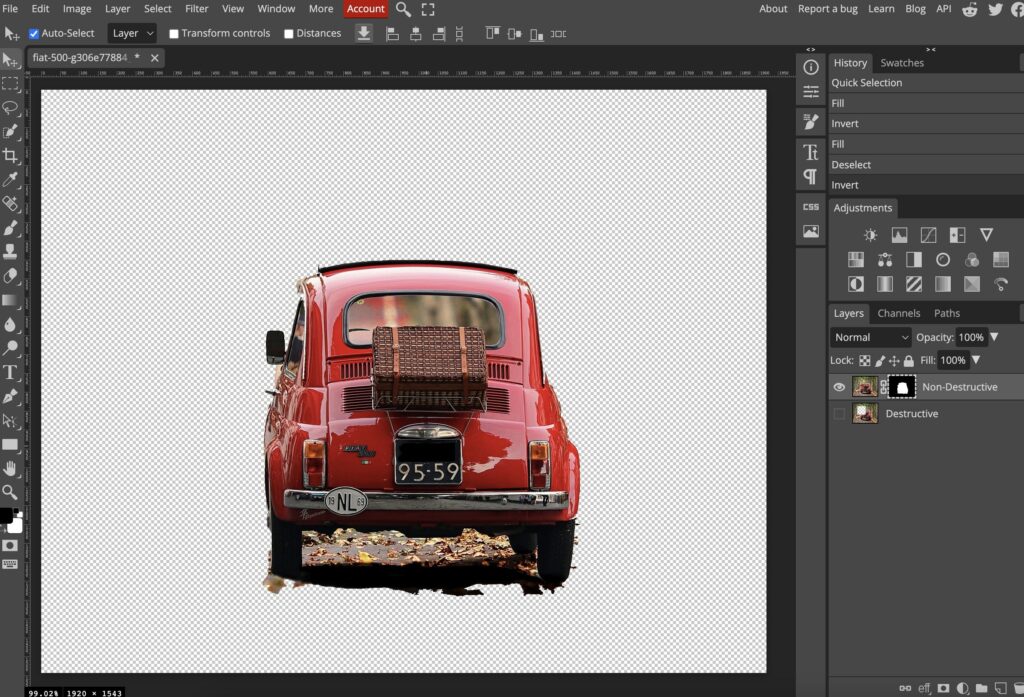
The first step is to import the image into Photopea. The image contains a man walking on the beach with a blue sky in the background. We will create a duplicate of the layer, rename the background layer to Destructive, and layer 1 to Non-Destructive, and hide the non-destructive layer for now. It can be seen in the screenshot below,
Step 2: To work Non-destructively
Let’s say we wanted to eliminate some portions of the image. I’ll make use of the Rectangle Select tool, select a portion of the image, and just select Delete. The area that had been included in our selection had been delete forever, and cannot be recalled if needed in the future.
All we were able to accomplish was press Ctrl+Z and reset, but what if we’d created a number of edits? We would then have to undo the edits up until now, which is quite hectic.
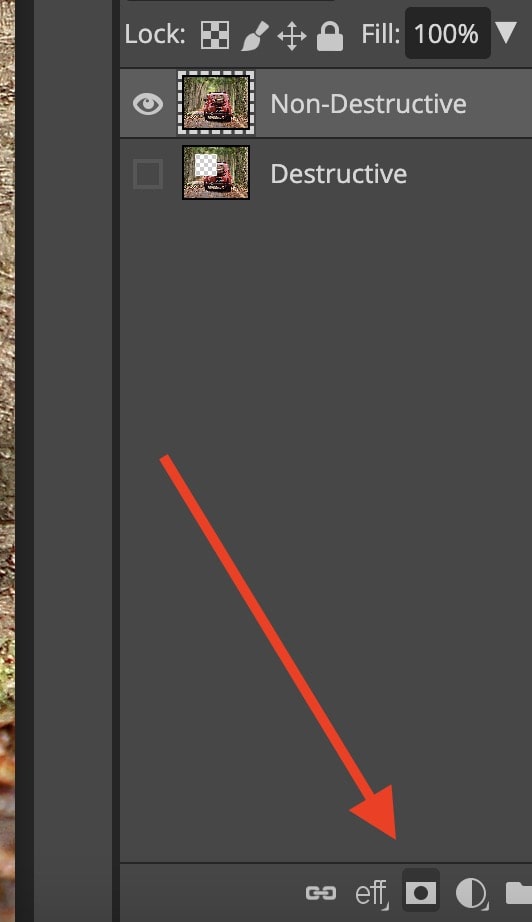
To work non-destructively, we can use layer masks, which allow us to hide a portion of the layer, without permanently erasing that pixel data. I’ll hide the Destructive layer, and unhide and select the non-destructive layer.
Step 3: Selecting the type of Layer Masks
We have two types of masks that we can use,
- Raster mask,
- Vector mask
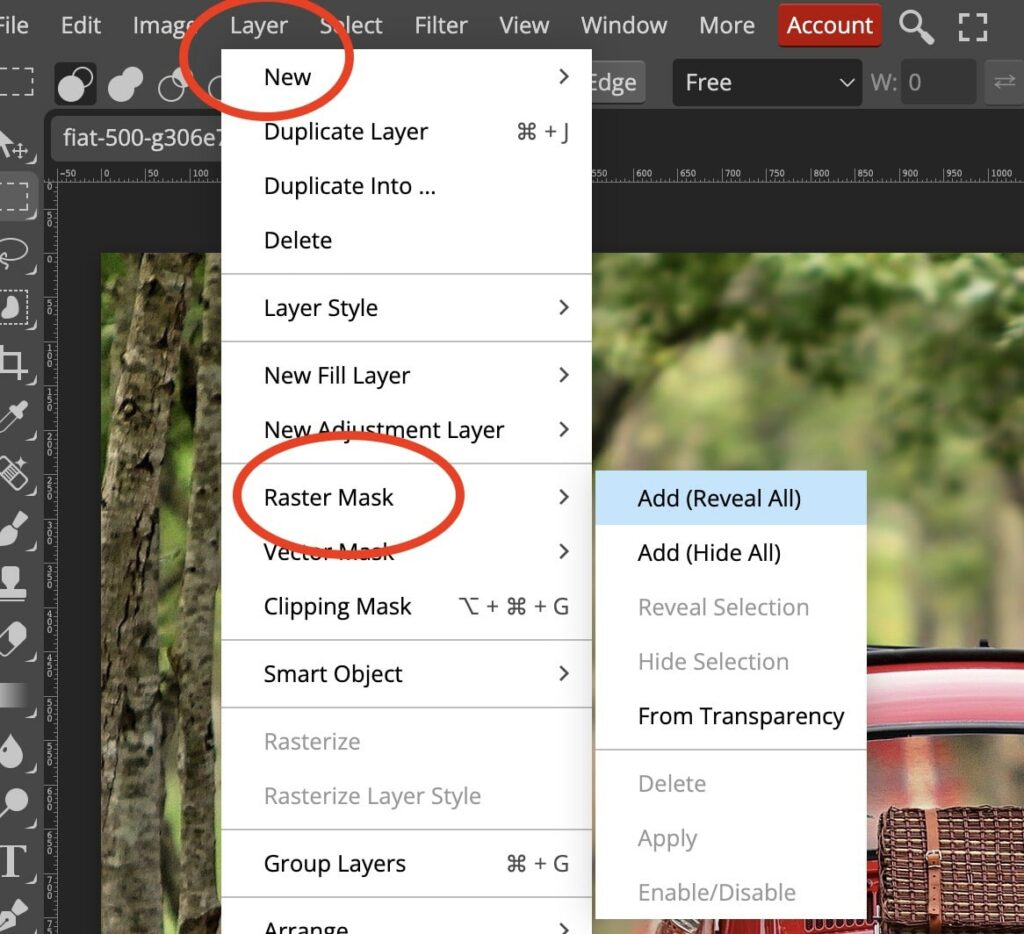
In this tutorial, we’ll be examining the Raster Mask choice, but Vector Masks operate similarly. To add a raster mask, you can click on Add Raster Mask, under the Layers panel. Below is an example of how you can select Raster Mask from the Layers panel.
Or you can go to the Layer menu, to Raster Mask, and add from there. We’ll take a look at those options shortly, but for right now, let s click on Add Raster Mask under the Layers panel. Here is how you will do in Photopea,
Step 4: How to hide and un-hide the mask
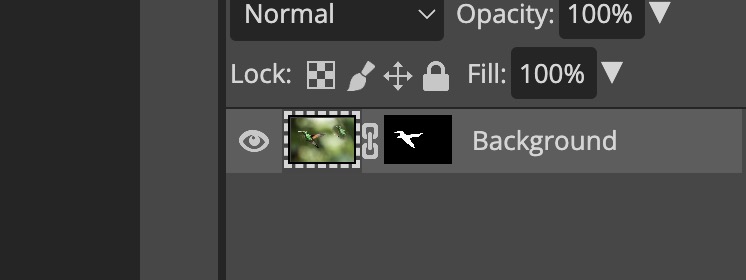
Next to the base layer, we added another mask, and now we have a little thumbnail, showing us the mask. If you hold Alt and click on the mask thumbnail, the mask will be displayed on the canvas.
A raster mask functions by permitting the underlying photo through any sections colored white in the mask, and by not permitting any areas that are darkened.
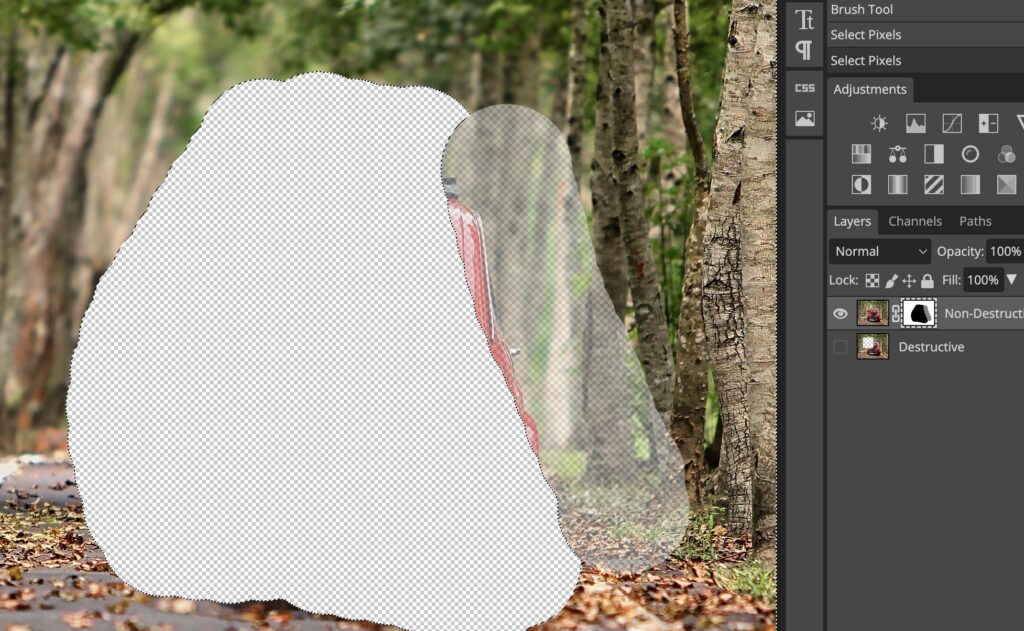
Step 5: Applying the Mask
I’ll Alt+Click the mask to hide it, and switch to the brush tool. Set the foreground color to black, so we can hide parts of the image in it, and with the mask selected, start painting on the canvas.
Anywhere we paint black, the image is hidden behind the mask, but if you’d like to bring some of the image back, you can enable the brush tool and set the foreground color to white. Start painting with the mask you selected in place to reveal. You can see the process in the screenshot below.
So we can work non-destructively, hiding or revealing anything you went through, at any time. If I Alt-Click the mask once again, you’ll be able to see what the mask looks like. Black areas to hide pixels and white to reveal pixels.
Step 6: Semi-Transparent Mask
Painting in grey would mean adding a semi-transparent mask.
- The lighter the grey is the more it will reveal.
- The darker the grey, the more it will hide.
When I Alt-click on the mask, that area becomes shows a mask map – this means where the mask is being applied.

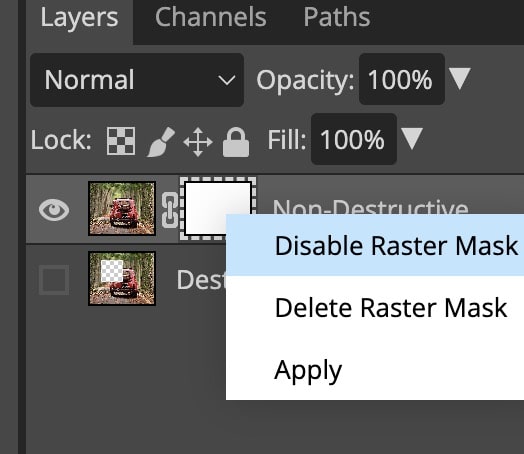
If you want to hide the mask, you can shift-click on the mask thumbnail to enable or disable it, or just right-click the thumbnail and choose Disable, or Enable.
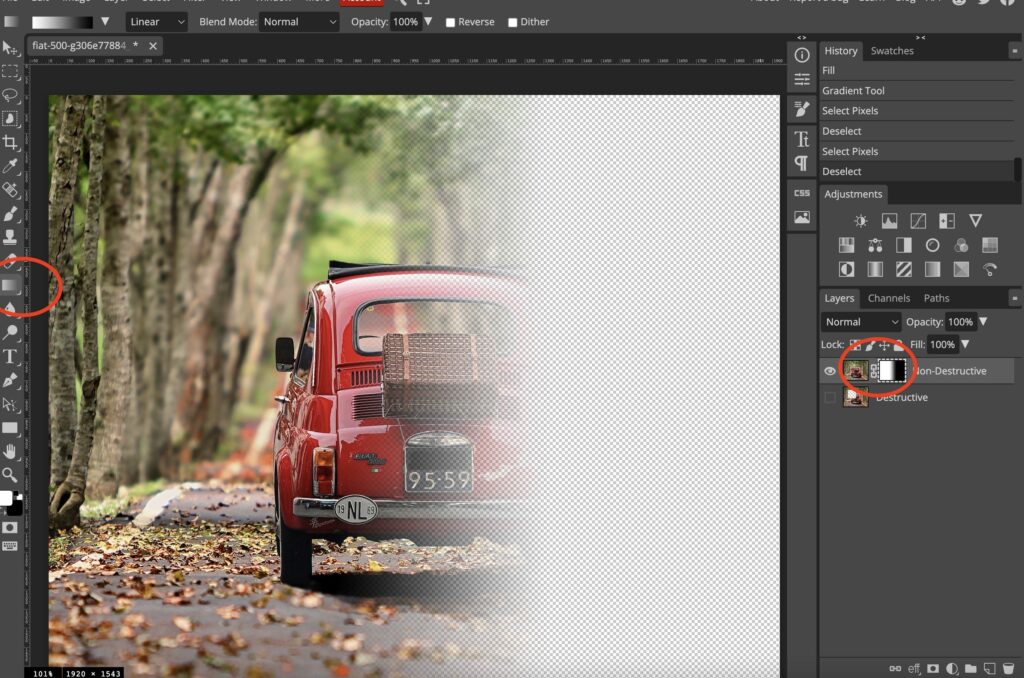
You can also use a gradient from black to white, to fade in over an area.
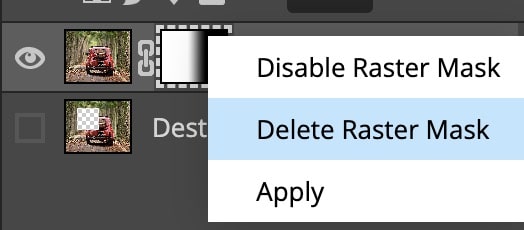
You can also delete a mask by choosing Alt+Click it. See the screenshot below.
Step 7: Adjusting the opacity of the Mask
There are two ways that exist to adjust the opacity of the mask.
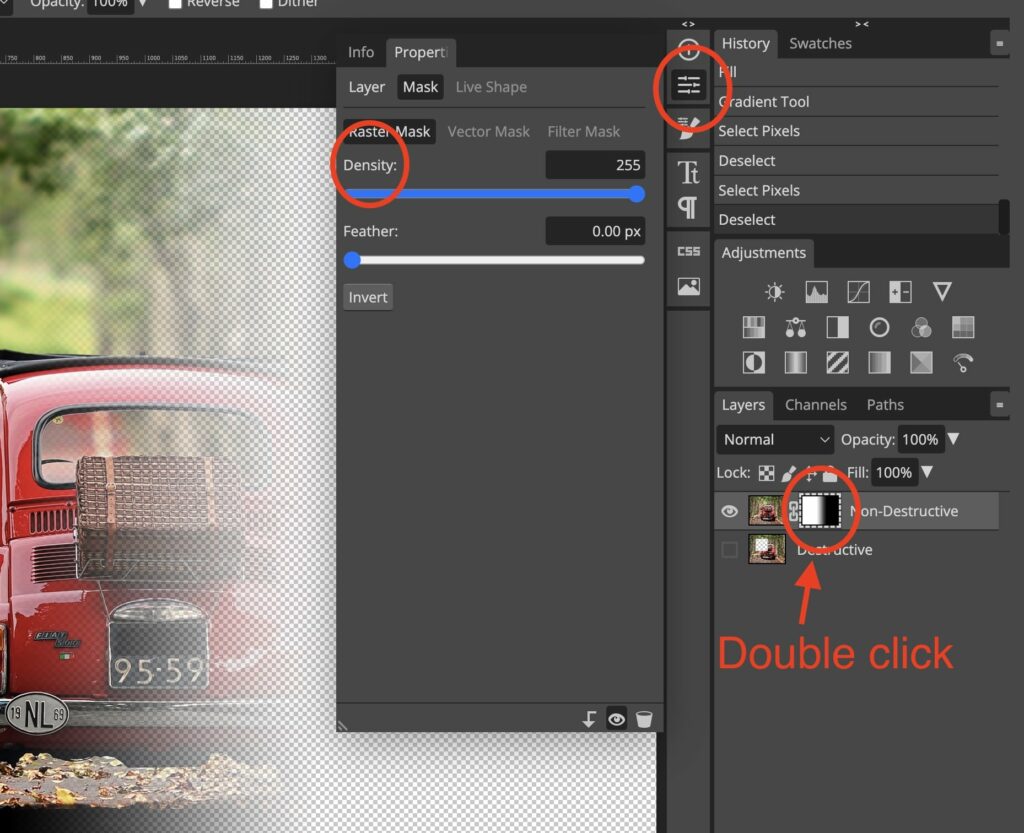
- Density Slider
- Feather
The opacity of the mask can be modified through the Density slider, which you can set up to a maximum of 255. After this, the mask will appear with all the opacity you have set, similar to how it is if you paint it on the primary mask layer.
Next, we have Feather. Feather slightly blurs the outer edges of any masked regions, which can result in a natural-looking transition from masked to unmasked areas. See the below example.
Step 8: Adding mask from Selection
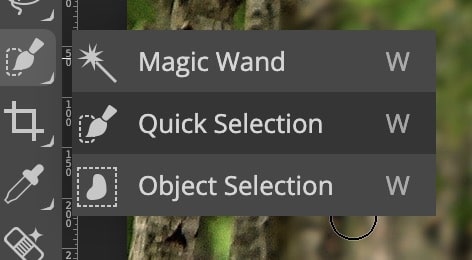
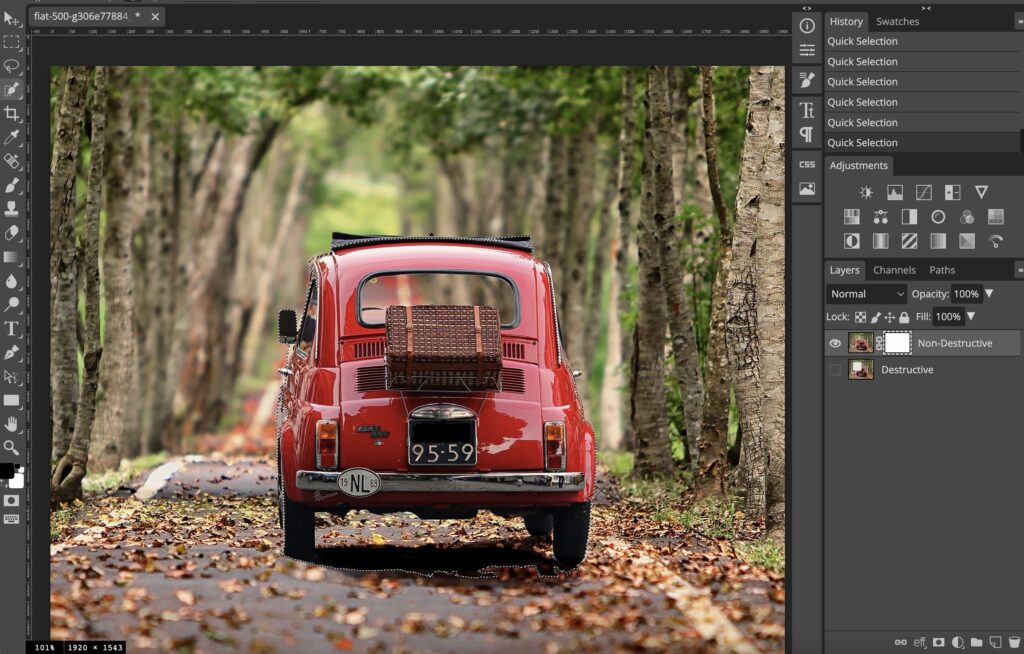
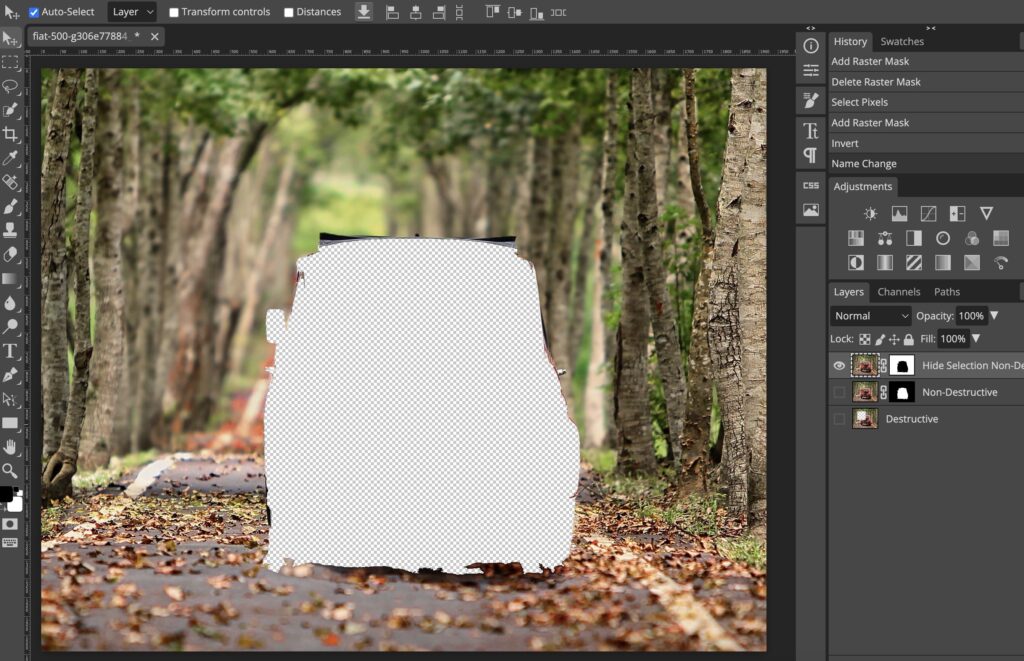
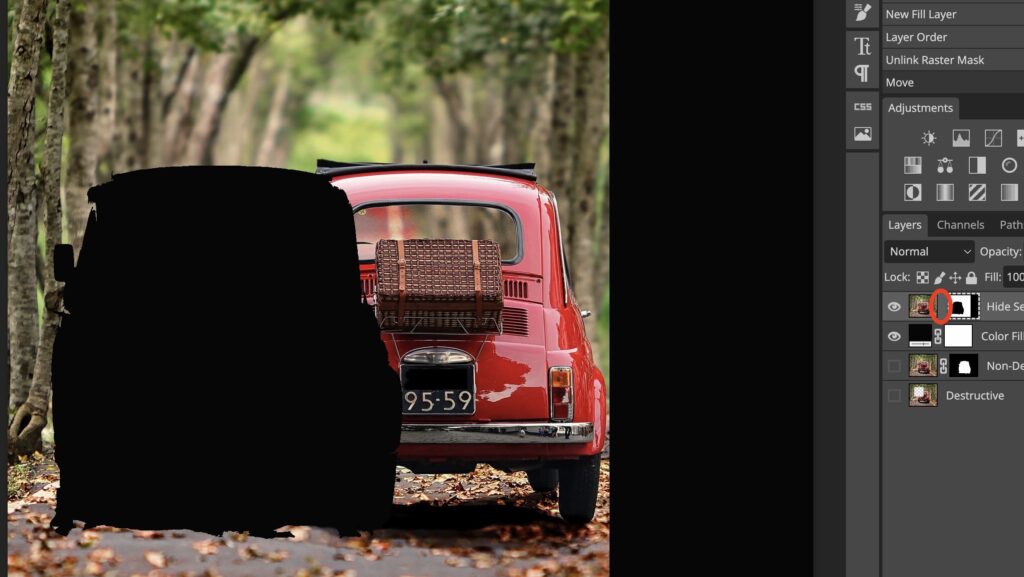
We can even add a mask from/to a selection. I’ll eliminate the mask that we currently have on this layer, by right-clicking it and selecting delete raster mask. Then, I’ll utilize the quick selection tool to make a selection of the car. It’s not an optimal selection, but it will do for this example. See below,
Once you have your selection, go to Layer, and go to Raster Mask. The options are Add Reveal all and Add Hide All. When we created a mask using the layer panel, it was Add Reveal all. Add Hide all acted the opposite. We used Add Hide All to generate a mask that hides the whole layer, and then you would have to paint white what you want to reveal.
The next two options need you to select between two ways,
- Reveal selection
- Hide selection.
The mask is produced according to your option, either hiding or revealing your selected area.
Reveal Selection Method
Let’s choose to reveal the selection, first. As you can see, it has formed a mask and shown just the portion of our selection, hiding the rest of it. See below,
But, this isn’t what I want. I would like to create a masked shape of the man, in order to hide him, but move the mask so it looks like he’s being trailed by a shadow version of himself.
Hide Selection method
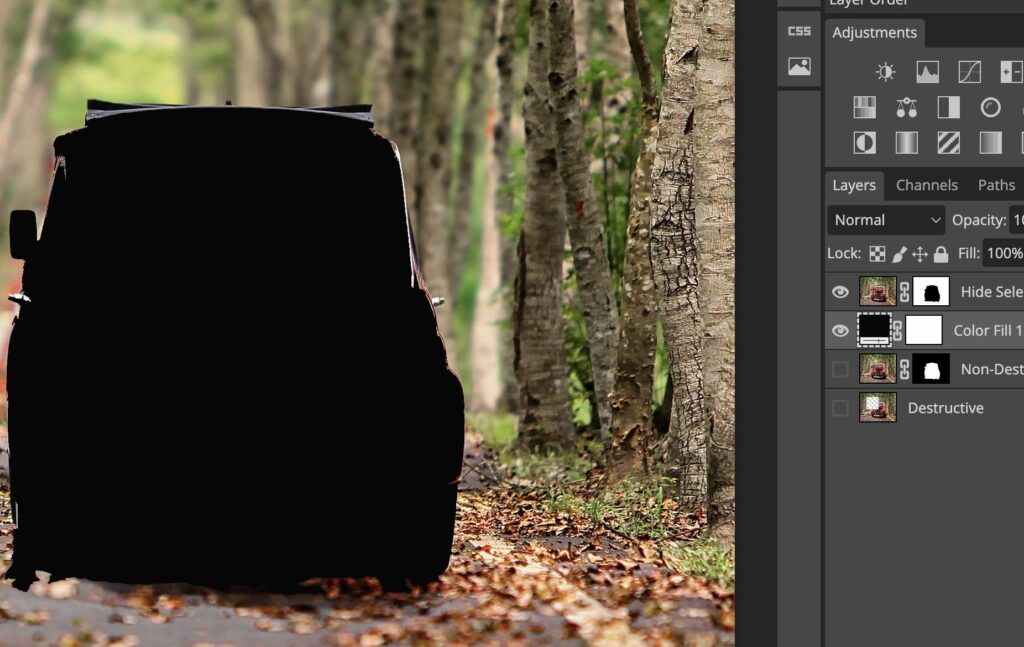
Press Ctrl-Z to undo and we will go down to Layer, Raster Mask, and Hide selection.
Let’s add a black layer under the layer we are working on. The layers panel will list a New Adjustment Layer command. When it comes up, click on the Color Fill button and choose a solid black color. Just like below screenshot.
I want to move the layer mask, but if I choose the mask and move it with the Move tool, it will be moved together with the layer and mask, because they are both linked. If you choose to move only the mask, hang up this icon to the left of the layer, to completely separate them. See below,
Now, we can move freely one from to the other. If you have a mask selected and drag it to the left, we’ll place the mask behind the subject. Once you have the mask left in place, just click the spot where the link was, and we can lift and move them together.
I will copy the layer and then delete the mask. You can drag and drop the mask from one layer to another, or if you want to copy the mask to another layer, hold down the Alt key while dragging and dropping, and the mask will be copied to the other layer.
Step 9: Using Mask on Adjustment Layers
Using a mask on a layer is a great option when you want to hide something non-destructively, but one of the most powerful actions you can take with Masks is to use them on Adjustment Layers. I will switch back to the second image, add a new Adjustment Layer, and choose the Hue Saturation option. See below,
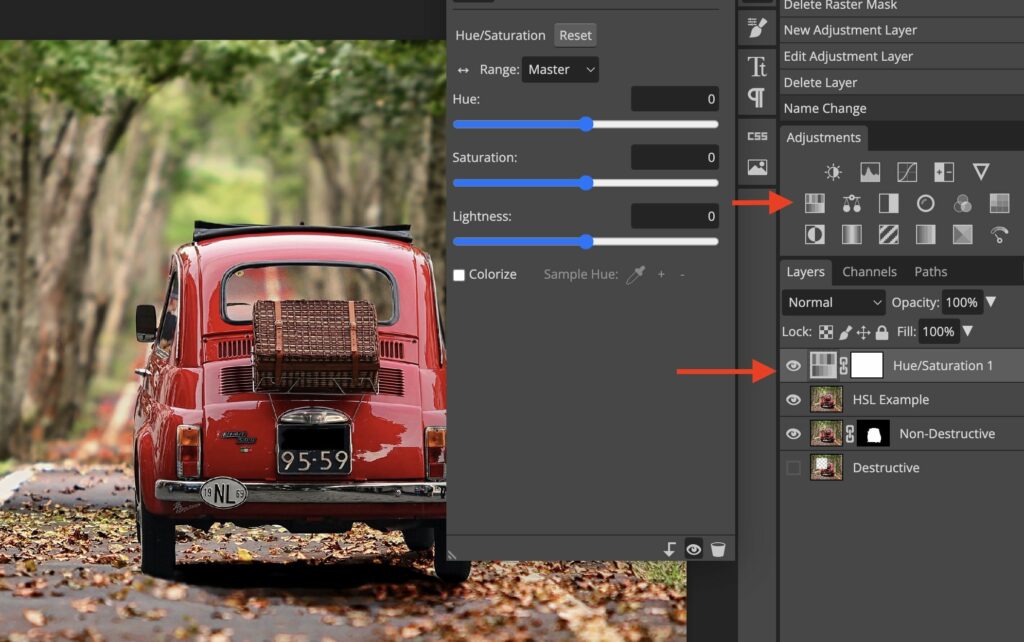
We all have the Hue Saturation Adjustment layer, which automatically has its very own mask layer. At the moment, if we change the intensity of the hue, the whole image shows up here. I’d like to just alter the intensity of the hue and saturation for the upper half of the picture.
I’ll use the same selection as before to change the colour of the background.
- CTRL/CMD+Click on the old mask layer
- Click on the Hue/Saturation Mask & fill it with black. (To fill it use the paint bucket tool ‘G’ or use the brush & paint in the selection)
- If you want to to invert the selection, click on the mask & CTRL/CMD + I.
With the Hue Saturation Mask selected, I will fill the selection with black, masking those areas of the image unaffected by the hue.
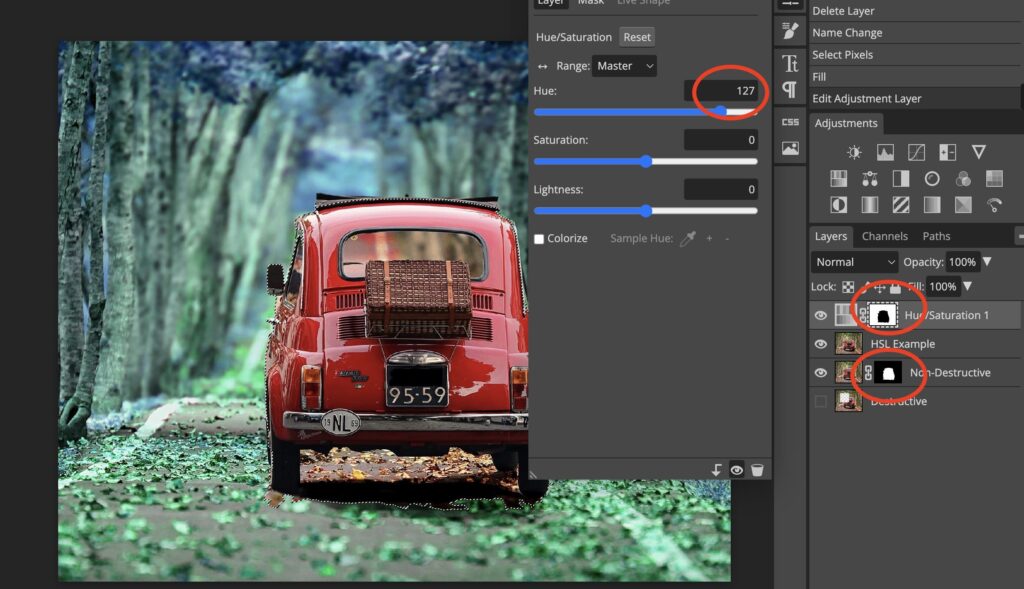
We can now change the hue and saturation without altering all of the image. Move The Hue Slider to change Color.
Conclusion
Masks are a great way to enhance your pictures in Photopea. This tutorial explains different ways you can utilize this amazing tool to get great results in Photopea. I hope this tutorial has helped you in transforming your images according to your desires and expectations.
Thanks for reading & feel free to check out more of our articles!
Expert Rating
Summary
At first, removing a background could be seen as a tedious/difficult process. However, after some practice you’ll quickly notice that the process is not that difficult. In general, this technique is very functional & scalable. Does need some practice to understand the essence of all the tools, however, it is a great technique to learn.


