
You can create any desired thumbnails in GIMP by choosing the correct dimensions, adding images, text boxes, and logos, and adding filters and shadows to enhance the image.
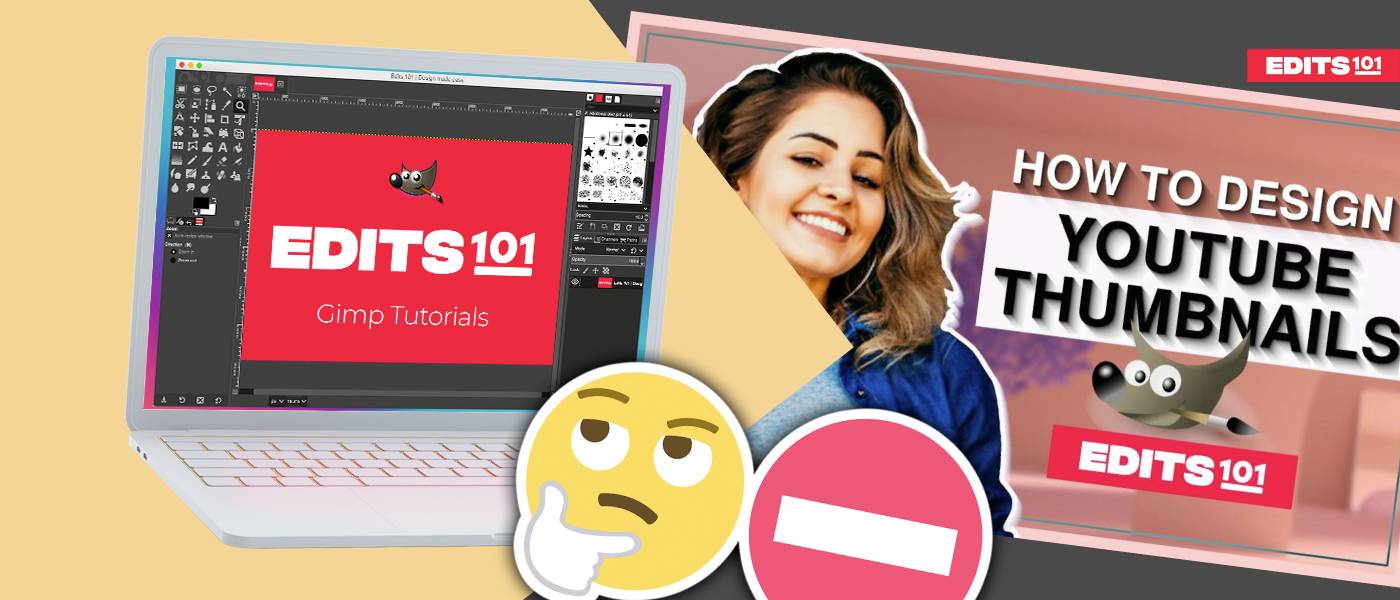
Are you looking to create eye-catching thumbnails for your Youtube videos? Thumbnails are an important part of any successful video and can make be difference-makers when viewed by YouTube users.
Designing creative yet effective thumbnails is an art and this article will provide you with tips on how to design great YouTube thumbnails in GIMP in order to draw in more viewers.
How to Design Youtube Thumbnails
Thumbnails serve as preview of your videos and if they aren’t attractive and compelling, users sometimes won’t even click on them. In this article, we will provide a step-by-step tutorial on how to design thumbnails that maximize the potential of your videos.
It is simple and easy to design Youtube thumbnails in GIMP. For this purpose, you need to have two images to get started with this tutorial,
- Image 1: A subject or person. In this tutorial, a woman is chosen as the subject of the image.

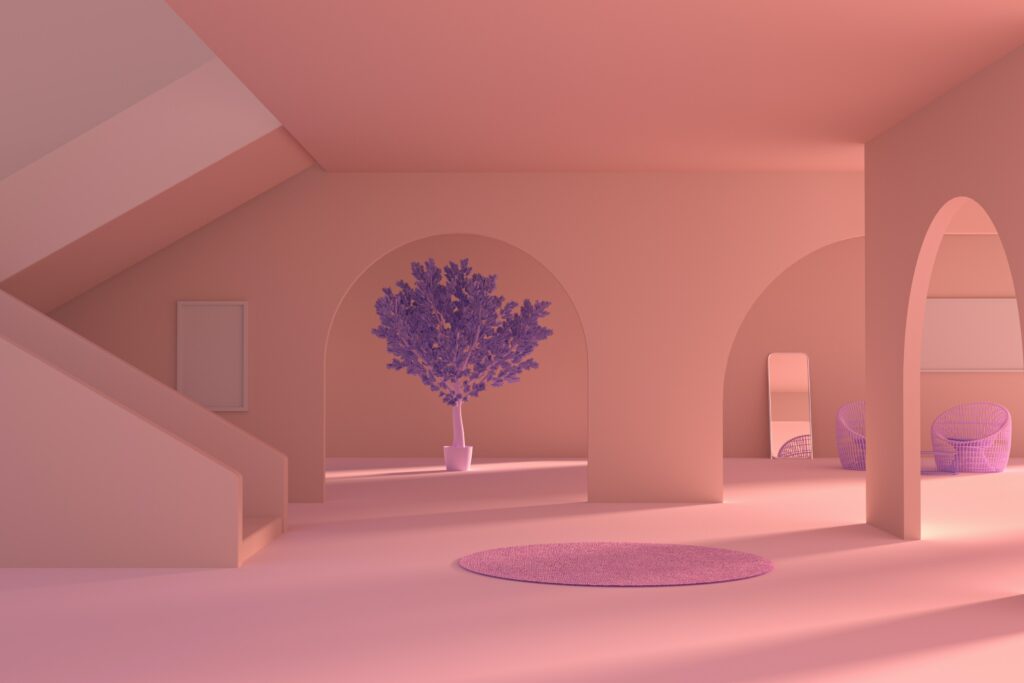
- Image 2: A background for the image. Here, a house interior is picked as the background.
Once you pick these images, you can get started.
Step 01: Create a New Project
Before starting, you need to set the thumbnail’s dimensions before placing the images in GIMP. To set the dimensions,
- Go to the File menu.
- Click New.
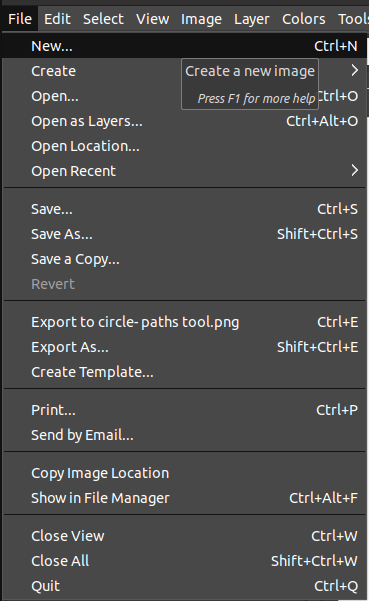
- A new dialog with the default dimensions would appear.
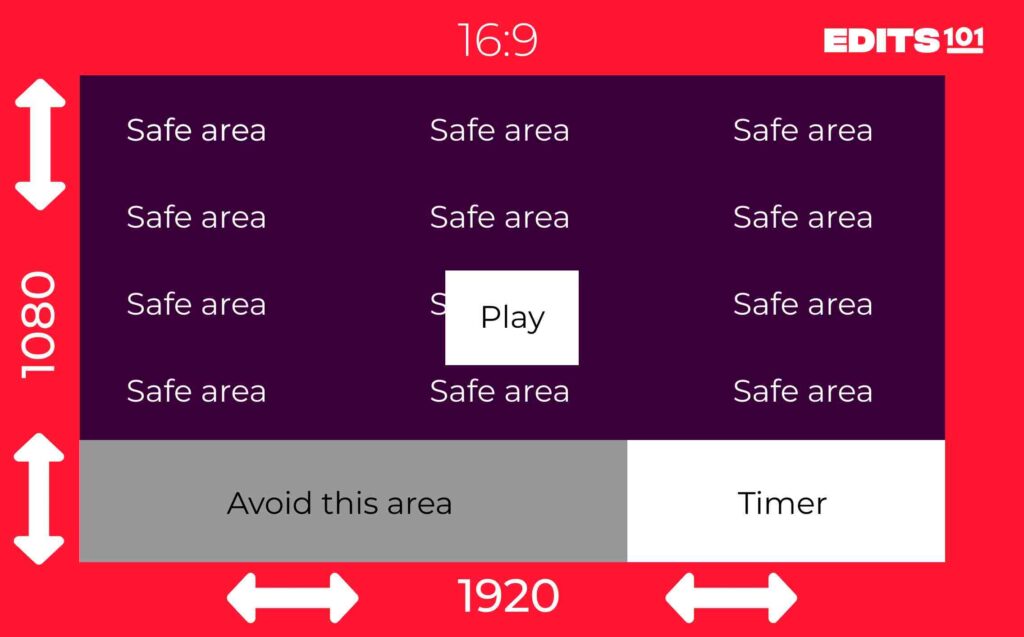
- The YouTube thumbnail dimensions are 1920 x 1080 or 1280 x 720 (16:9). Set the desired dimensions and click OK.
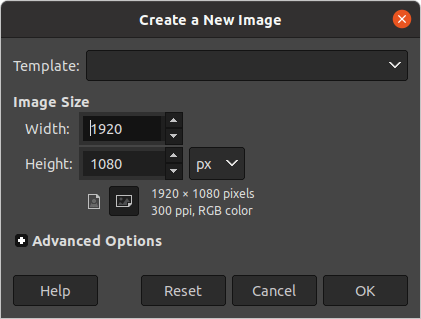
As soon as you click OK , a blank white canvas with standard YouTube thumbnail dimensions will appear.
Use the following guidelines & safe areas to make sure your thumbnail is clear all the time:
Step 02: Open the subject of the thumbnail
Next, you need to open the subject of the thumbnail. If you have the subject of the image with a background, you need to first remove the background. To learn how to remove the background of the image, refer to the tutorial “Remove Background & Make It Transparent in GIMP”. As soon as you remove the background, you can proceed with the next step.
Alternatively, if you have the subject of the thumbnail without the background, proceed with the next step. To open the image,
- Go to the File menu.
- Click Open as Layers.
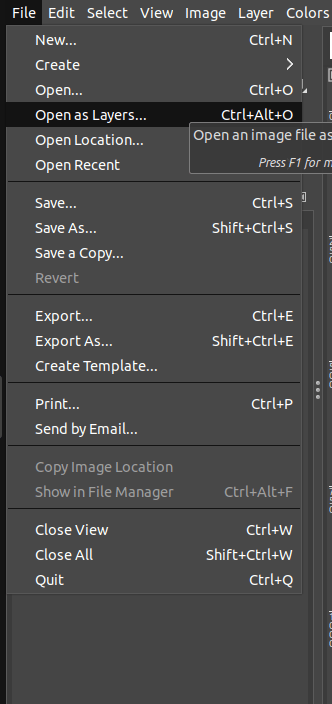
- Choose the saved image.
- Finally, click OK.
As soon as you click OK, the subject of the image appears in the Layers dialog.
Step 03: Scale the image
Now, you need to rescale to fit the subject in the canvas. To scale the image, you can use the Scale tool. To select the Scale tool,
- Go to the Toolbox and click on the Scale tool icon.
- Alternatively, use the keyboard shortcut Shift+S to select the Scale tool.

Alternatively, follow the below methods to select the Scale tool,
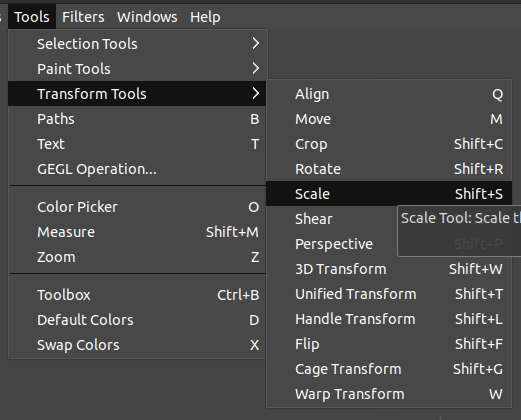
- Go to the Tools menu.
- Choose Transform tools.
- Finally, select the Scale tool.
Once you choose the Scale tool, click and drag the control handles to rescale the image in order to fit within the canvas.
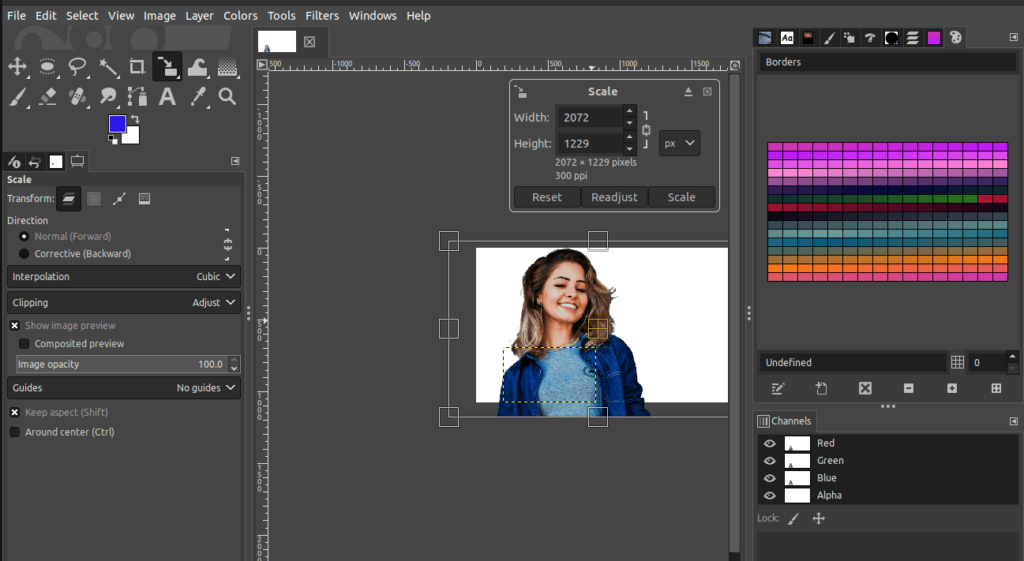
Once you set the desired dimensions, click on Scale.
Step 04: Open the background of the image
To open the background image you want use for the thumbnail,
- Go to the File menu.
- Click Open as Layers.
- Choose the desired image by going to the file where it is saved.
- Finally, click OK.
As soon as you click OK, the background of the image appears in the Layers dialog as well.
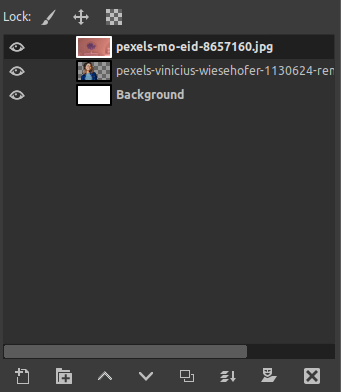
If the background appears on top of the subject of the thumbnail,
- Go to the Layers dialog.
- Click and drag the background below the layer of the subject as shown below.
- Then, you would notice that the subject will appear on top of the background.
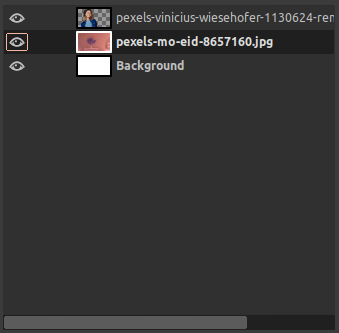
Now, you have set the subject and background in place.
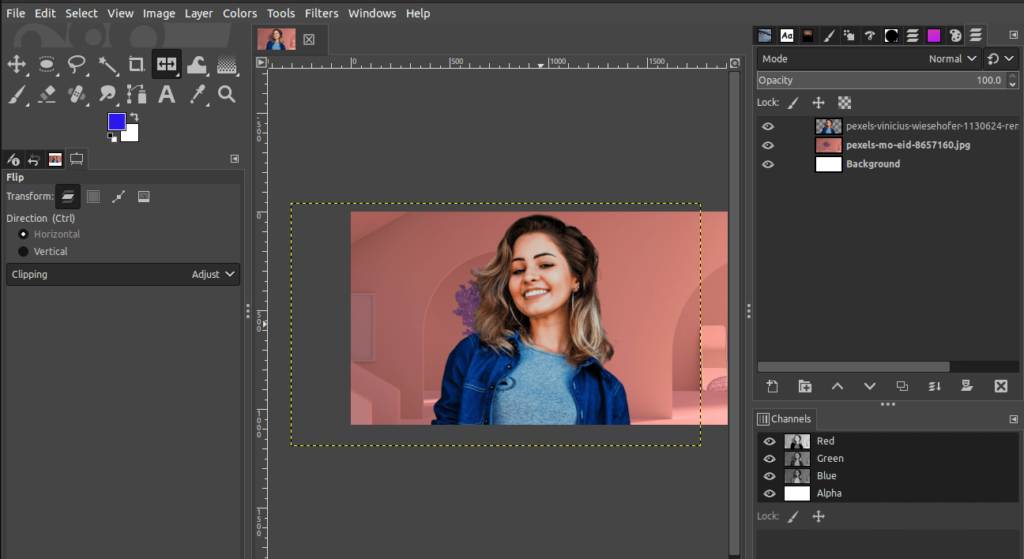
Step 05: Adjust the subject of the thumbnail
After placing the background, you can follow the below steps to better adjust the subject. To do this, you need to select the Move tool,
- Go to the Toolbox and click on the Move tool icon.
- Alternatively, use the keyboard shortcut “M” to select the Move tool.

Alternatively, follow the below method to select the Move tool,
- Go to the Tools menu.
- Choose Transform tools.
- Finally, select the Move tool.
Now, hold the Ctrl/Cmd key and click and drag the subject to the desired location. Once you are happy with the location, release the Ctrl/Cmd key. If you want to flip the image, you can use the Flip tool. To do this, you need to select the Flip tool,
- Go to the Toolbox and click on the Flip tool icon.
- Alternatively, use the keyboard shortcut “Shift+F” to select the Flip tool.
Alternatively, follow the below methods to select the Flip tool,
- Go to the Tools menu.
- Choose Transform tools to display the drop-down options.
- Finally, select the Flip tool.
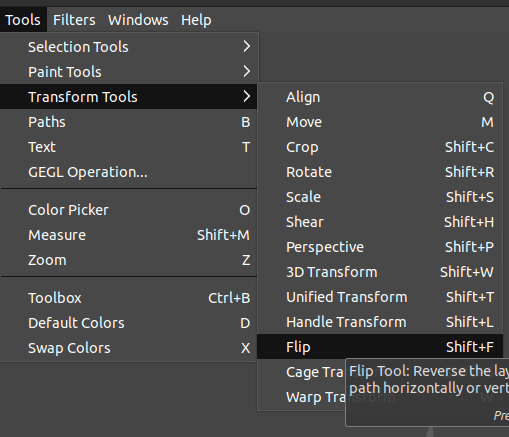
In the Flip tool options dialog, you can choose whether you want to flip the image horizontally or vertically. After choosing which direction you want to flip the subject, click on the image once. You would notice the subject flipping as soon as you click on it.
To rescale the background,
- Choose the Scale tool from the Toolbox once again.
- Now, click and drag the control handles to scale the background image as desired.
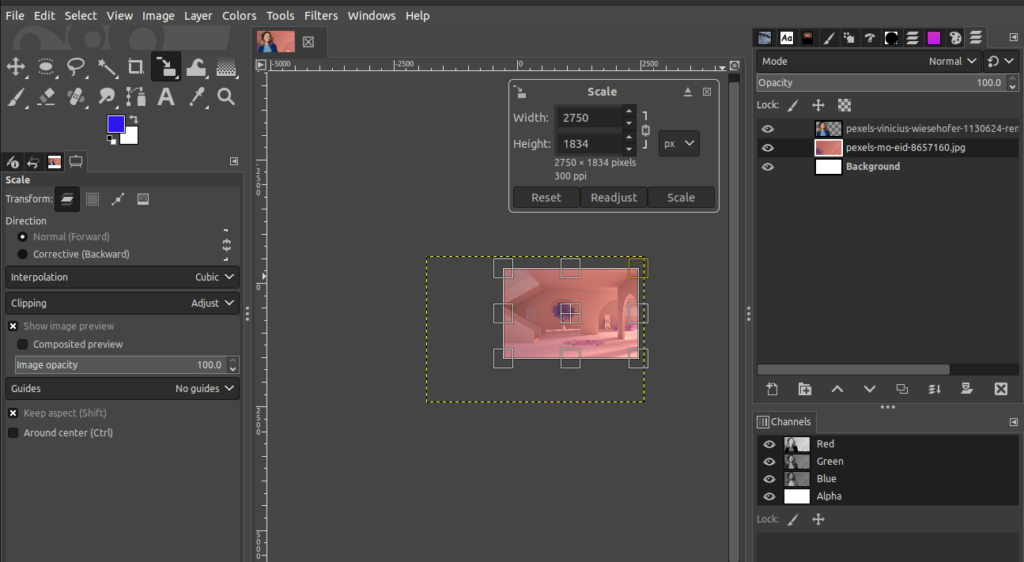
Once you are happy with the result, click on Scale.
Step 06: Stroke the subject
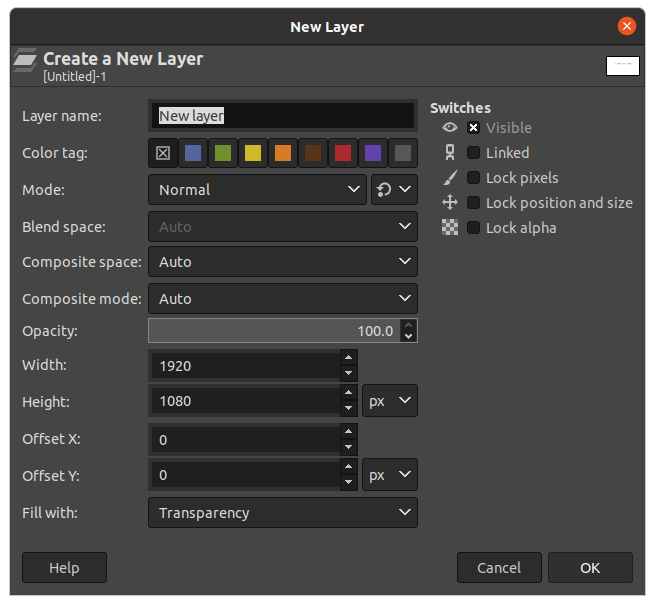
Next, you will learn how to stroke the subject of the image. Stroking helps to highlight the subject to draw more attention to it. Before stroking, you need to add a new layer,
- Go to the Layer menu.
- Click New Layer.
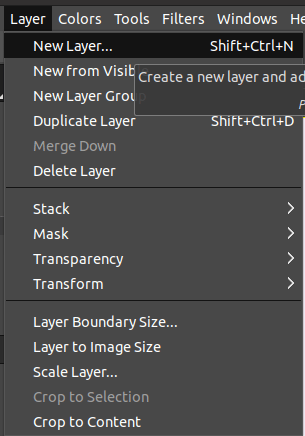
A new dialog would appear,
- Set the name as Stroke.
- Set the Fill with option to Transparency.
- Finally, click OK.
The new layer will be added in the Layers dialog. To create an Alpha channel on the subject,
- Press Alt/Option and click on the subject layer to create an Alpha channel.
- Alternatively, right-click on the subject layer in the Layers dialog and choose Add Alpha Channel.
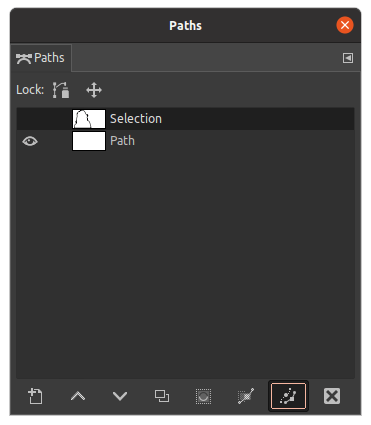
Next, go to the Paths dialog on the right-hand side of the canvas,
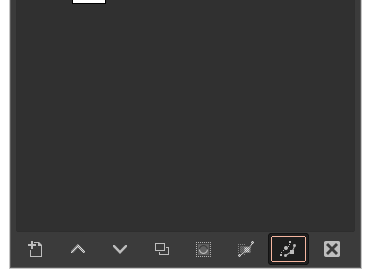
- Click on the Selection to Path icon placed at the bottom of the Paths tab.
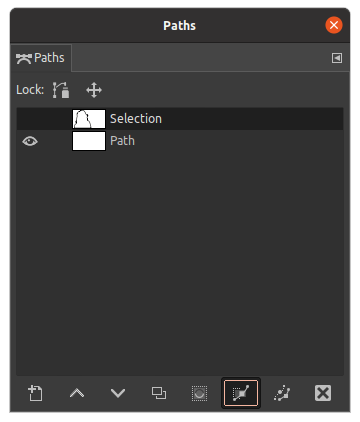
- Dotted lines will automatically outline the subject of the thumbnail.
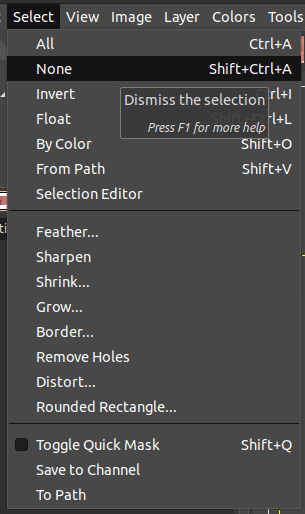
To deselect the selection,
- Go to the Select menu and click None.
- Alternatively, press Ctrl/Cmd+Shift+A to deselect the selection.
Once the selection disappears, you need to paint along the path. To paint along the path,
- Go to the Paths dialog.
- Click on the Paint along the Path icon.
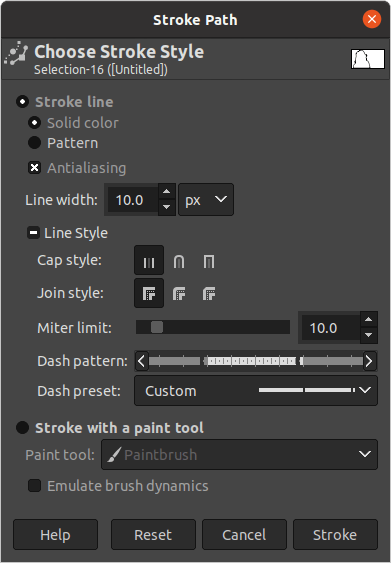
- A new dialog appears to apply the stroke.
In the Stroke Path dialog,
- Set the line width to 10 – 20.
- Choose a desired color from the Toolbox.
- Choose the desired stroke line type.
- Adjust the other options as required.
- Click OK to apply the stroke to the subject.
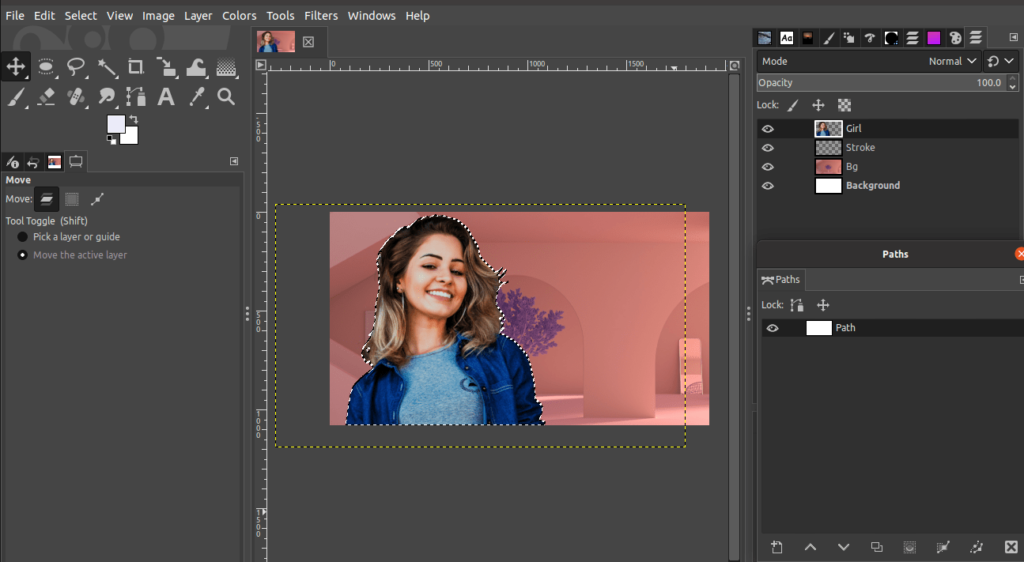
In case you need to adjust the stroke, first select the Move tool, then click and drag the image slightly while holding Ctrl/Cmd until you are satisfied with the result.
You can notice that the stroke is perfectly placed on the subject and the focus of any viewer will be drawn to the subject.
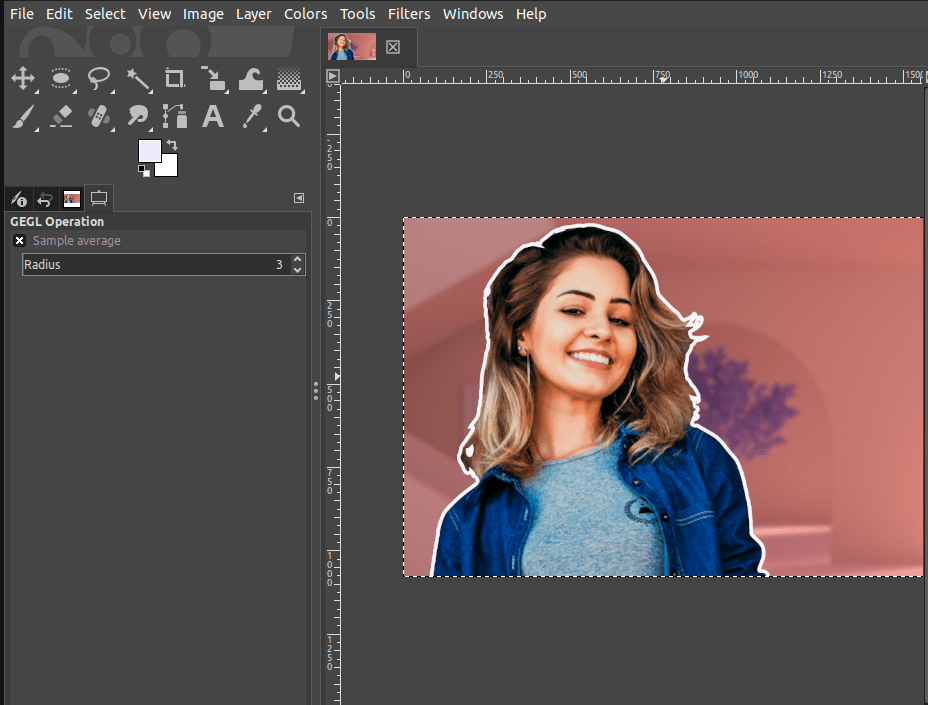
Step 07: Add Contrast to the subject and Blur the background
It’s time to brighten the subject and blur the background slightly to further enhance the YouTube thumbnail. First, click on the subject layer and,
- Go to the Colors menu.
- Click on Levels.
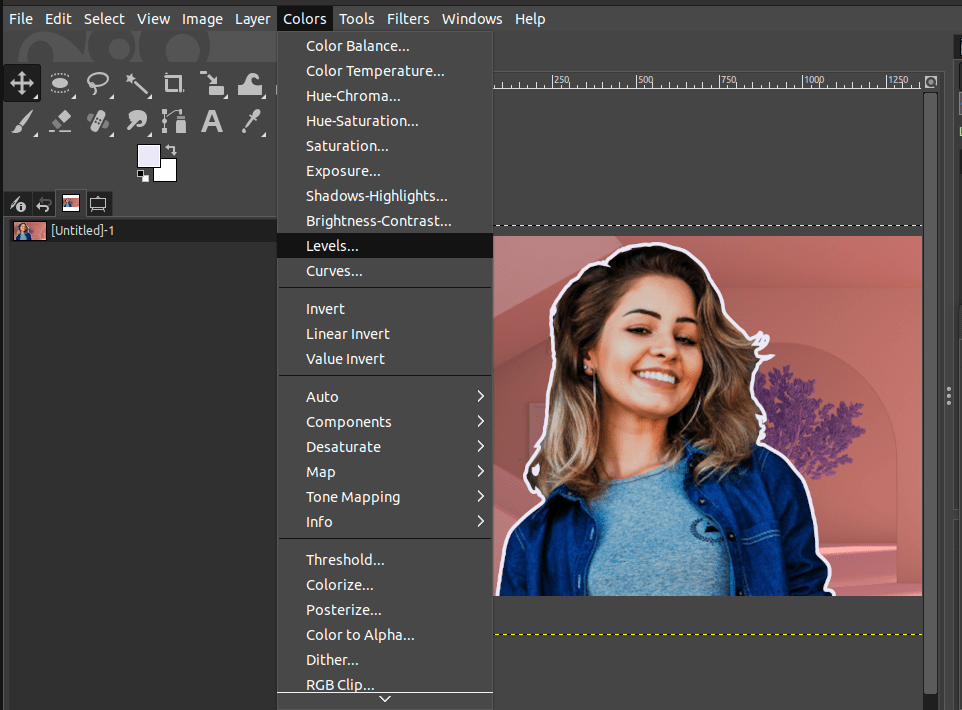
As soon as you click, the Levels dialog will pop up. Adjust the sliders in the dialog to brighten the subject.
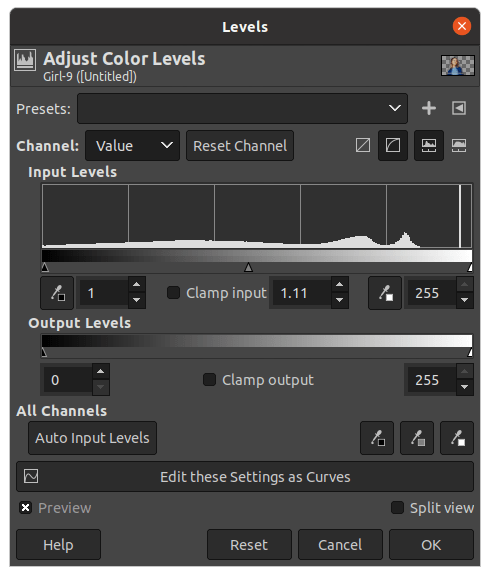
Once you are happy with the changes, click OK. Next, click on the background layer in the Layers dialog. To blur the background,
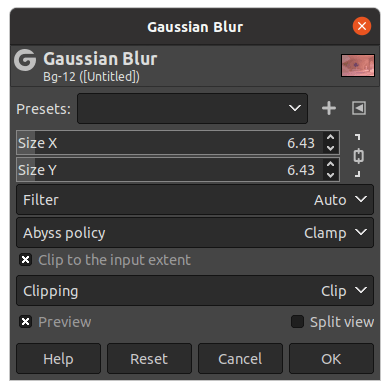
- Go to the Filters menu.
- Choose Blur.
- Select the Gaussian Blur or the Lens Blur.
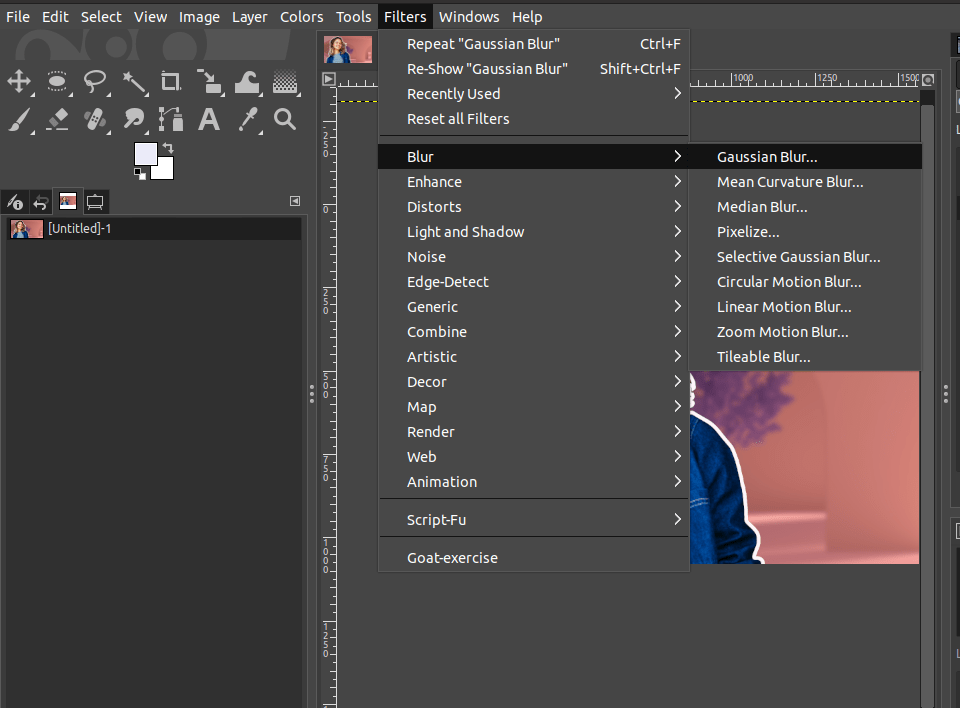
In the chosen blur’s dialog, adjust the sizes and click OK to apply the changes.
Step 08: Add a border to the image
In this step, you will learn how to add a double border to the image. Before adding a border, you need to create a new layer.
- Go to the Layer menu.
- Click on New.
In the New Layer dialog,
- Name the Layer ‘Border’.
- Set the Fill with option toTransparency.
- Finally, click OK.
Make sure that this new layer (Border layer) is above the background layer in the Layers dialog.

Next, to select all the elements of the image,
- Press Ctrl/Cmd + A.
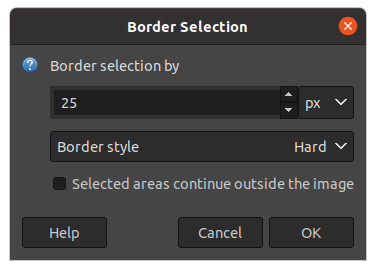
- Go to the Select menu.
- Click Border.
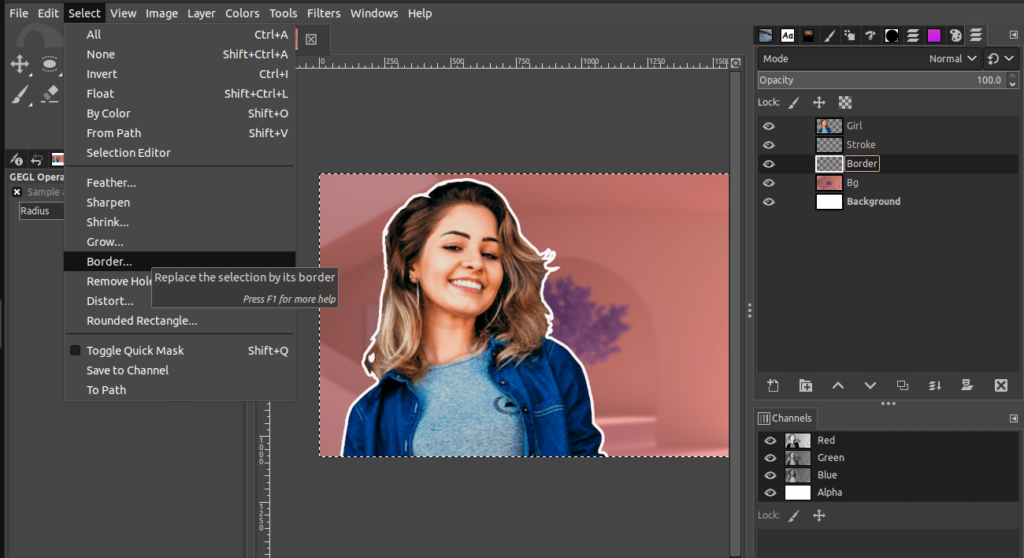
- Set the border size to 25 pixels.
- The Border Style should be hard.
Finally, click ok to add the Border.
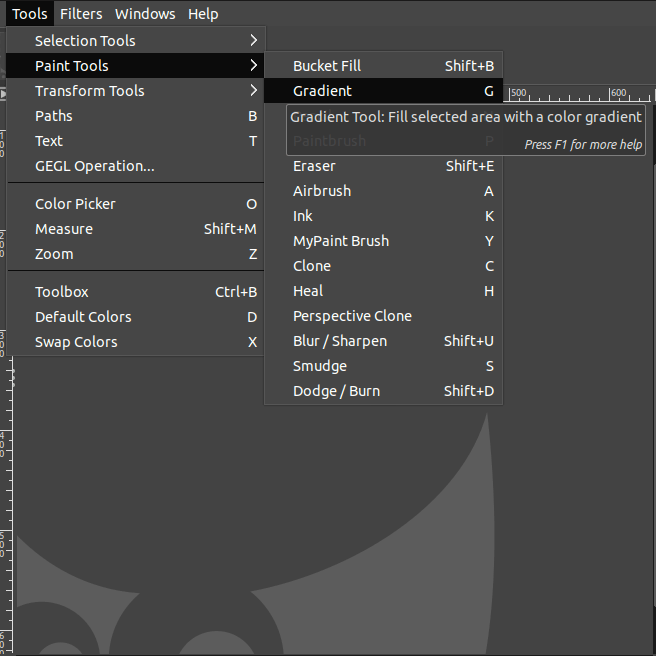
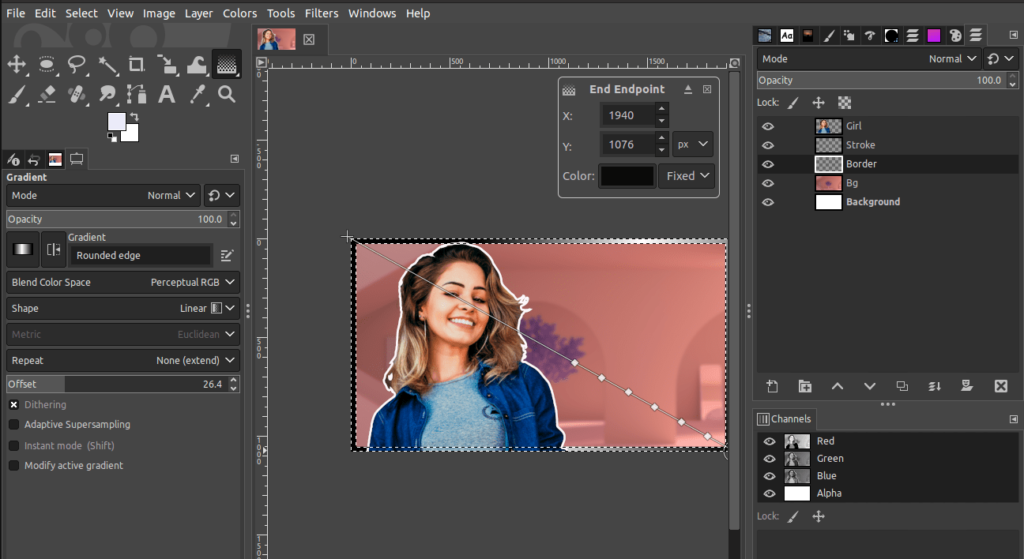
Next, you can fill the border with a solid color or apply a gradient. To add a gradient color, you have to select the Gradient tool,
- Go to the Toolbox and click on the Gradient tool icon.
- Alternatively, use the keyboard shortcut “G” to select the gradient tool.
Alternatively, follow the below steps to select the gradient tool,
- Go to the Tools menu.
- Choose Paint tools.
- Finally, select the Gradient tool.
Choose the desired gradient color from the Gradient tool’s options dialog.
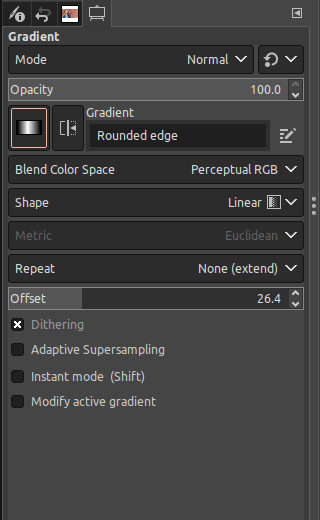
- Click and drag the gradient across the image.
- Once you are happy with the gradient, click on the Endpoint and click OK or press the Enter key to apply the gradient.
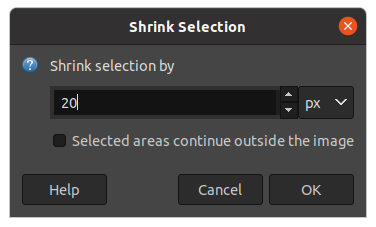
Next, we will add an inside border to this image. To set the inside border,
- Go to the Select menu.
- Click on Shrink.
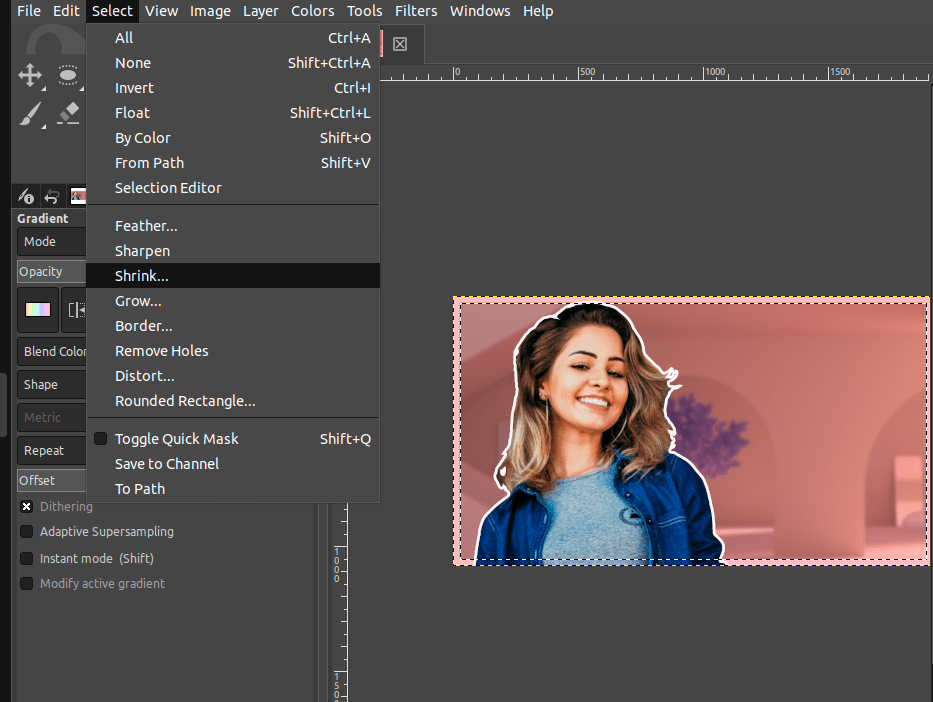
- Insert the number 20 in the Shrink Selection by option.
- Finally, click OK to apply the changes.
As soon as you click ok, the inner border appears in dotted lines as follows:

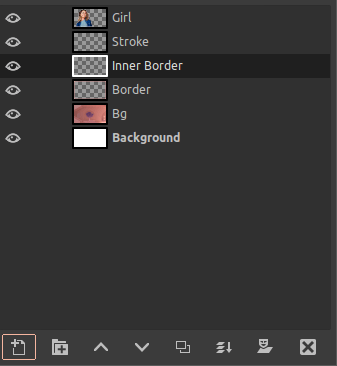
To apply the stroke to the inner border, you need to create a new layer.
- Go to the Layer menu.
- Click New.
A new dialog would appear,
- Set the name as Inner Border.
- Set the Fill with option to Transparency.
- Finally, click OK.
Make sure that the layers in the Layers dialog are in this order before proceeding:
Next, you need to convert this layer to a path,
- Go to the Paths dialog.
- Click on the Selection to Path icon.
- The selection appears on the image.

To deselect the selection,
- Go to the Select menu and click None.
- Alternatively, press Ctrl/Cmd+Shift+A to deselect the selection.

Next,
- Go to the Paths dialog.
- Choose the option Paint along the Path icon.
- A new dialog to apply the stroke appears.
In the new dialog,
- Set the line width to 5.
- Choose a desired color from the Toolbox.
- Choose a desired stroke line type.
- Click OK to apply the stroke to the subject.

See below the result after adding an outer and an inner border.

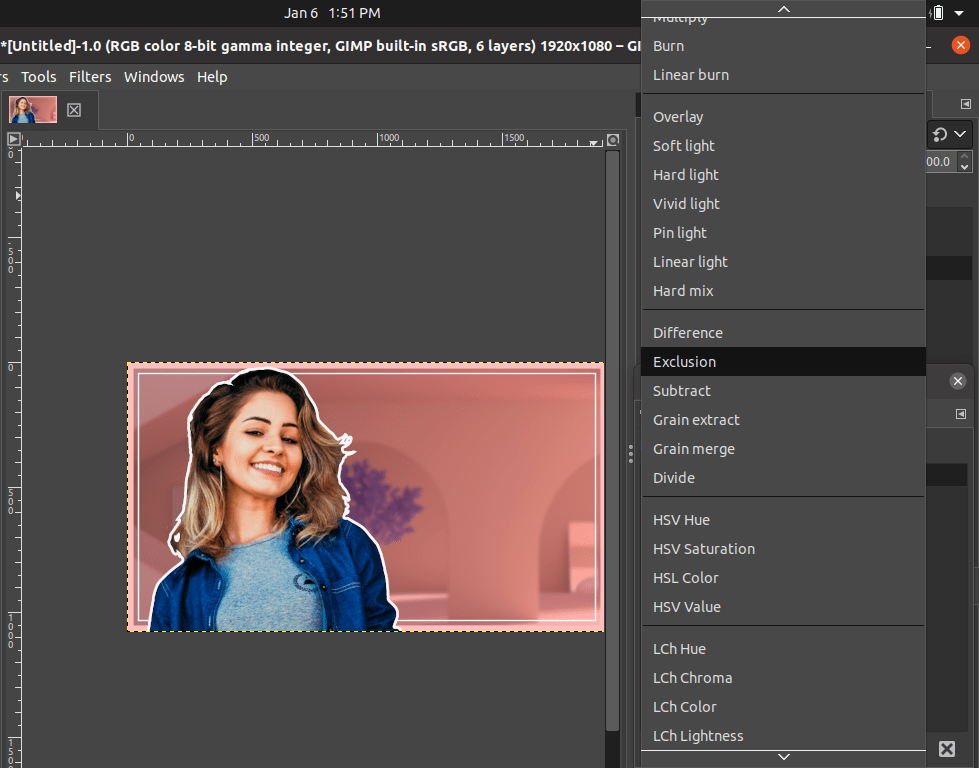
Click on the inner border layer in the Layers dialog and change the Layer mode to Exclusion.

Step 09: Add text to the thumbnail
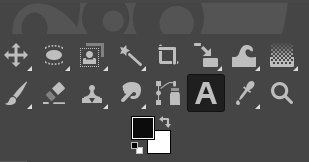
If you want to add text to the thumbnail, select the Text tool,
- Go to the Toolbox and click on the Text tool icon.
- Alternatively, use the keyboard shortcut “T” to select the Text tool.
Alternatively, follow the below methods to select the Text tool,
- Go to the Tools menu.
- Finally, select the Text tool.

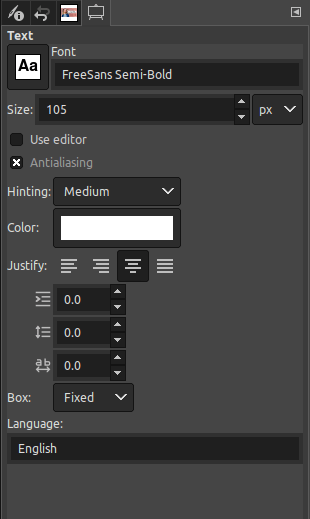
Next, adjust the Text tool settings by;
- Choosing an eye-catching anf clear font.
- Set the font color.
- Set the font size. In the below example, “How to design” is set to 105 pixels and “Youtube thumbnail” is set to 125 pixels.
Now, click on the canvas and type the text. You can click and drag the corner handles of the text box to adjust the text box.
Step 10: Add a rectangle box
Before creating a rectangle box, you need to add a new layer,
- Go to the Layers menu.
- Click on New Layer.
A new dialog would appear,
- We will name this layer ‘Text Box’.
- Set the Fill with option to Transparency.
- Finally, click OK.
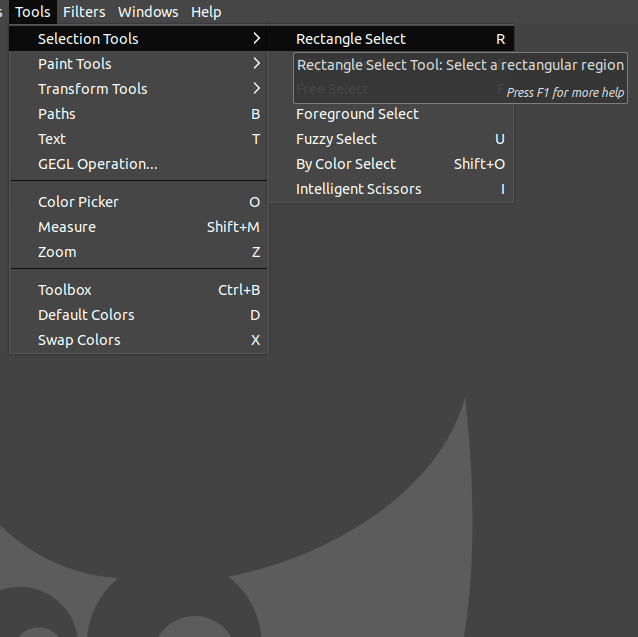
Next, you will add a rectangle box around the second piece of text (Youtube thumbnail) to highlight the main topic of the YouTube video. To select the Rectangle tool,
- Go to the Toolbox and click on the Rectangle tool icon.
- Alternatively, use the keyboard shortcut “R” to select the Rectangle tool.
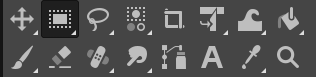
Alternatively,
- Go to the Tools menu.
- Click on Selection Tools.
- Finally, select the Rectangle tool.
Next, click and drag around the text to draw the rectangle.
Step 11: Add the GIMP logo
In order to add the logo, simply drag and drop the logo on the work canvas. Then, use the Move tool to relocate it.
Also, you can add your logo to the thumbnail. To add the brand logo, simply drag and drop it into the canvas as you did above.

Reposition the logo using the Move tool once agian.
Step 12: Add shadow to the text
First, select one layer of text from the Layers dialog. Then,
- Go to the Filters menu.
- Choose Light and shadow.
- Click Long shadow.
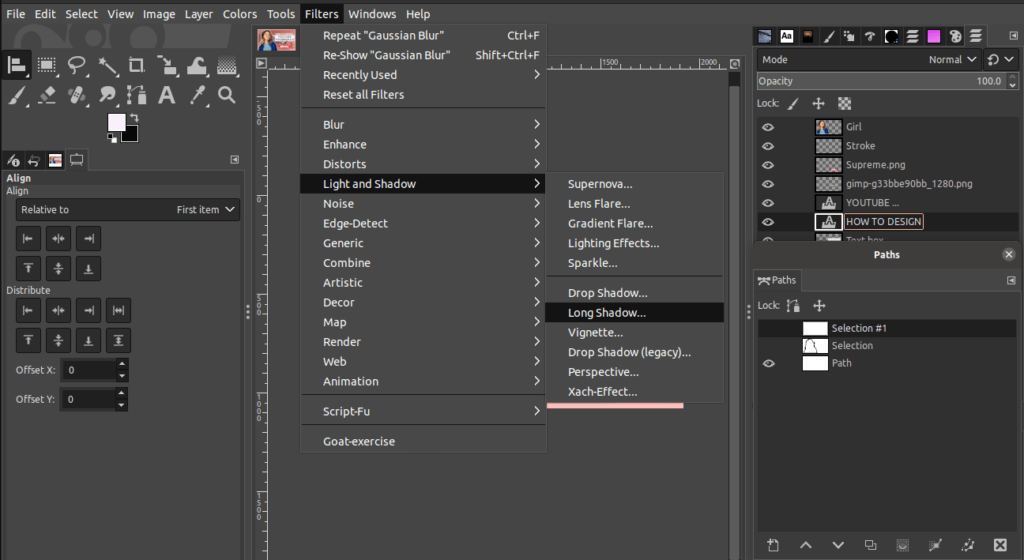
A new dialog would appear to change a few settings,
- Set the shadow style to ‘Fading (fixed length)’.
- Change the color of the shadow.
- Finally, click OK to apply the changes.

Repeat this process to the other text pieces as necessary.
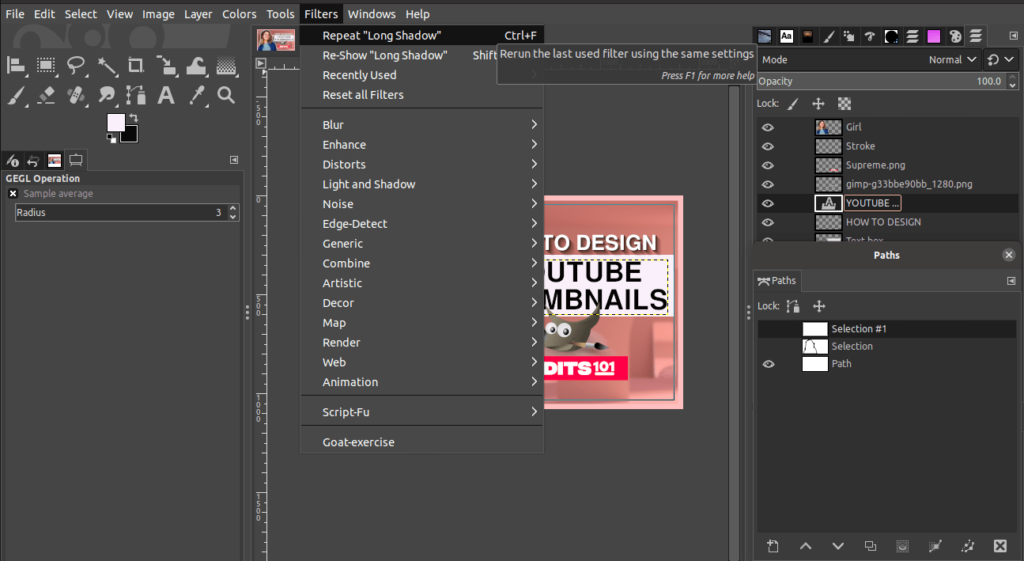
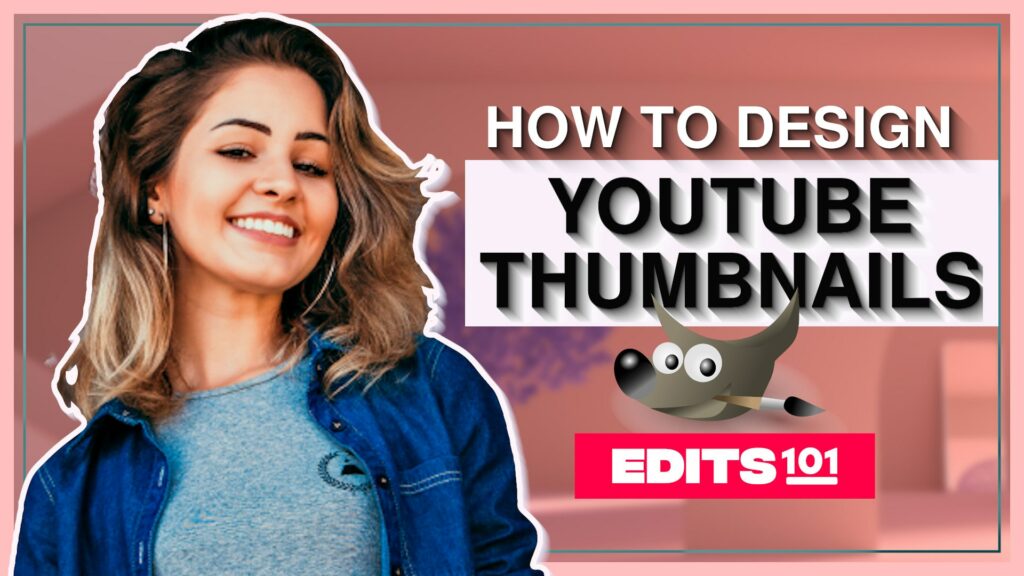
This is the final result!
Step 13: Export the youtube thumbnail
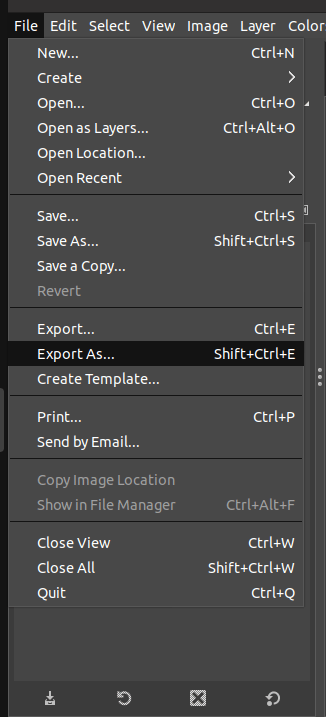
To export the image,
- Go to the File menu.
- Click Export As.
- Alternatively, use the shortcut Shift+Ctrl/Cmd+E.
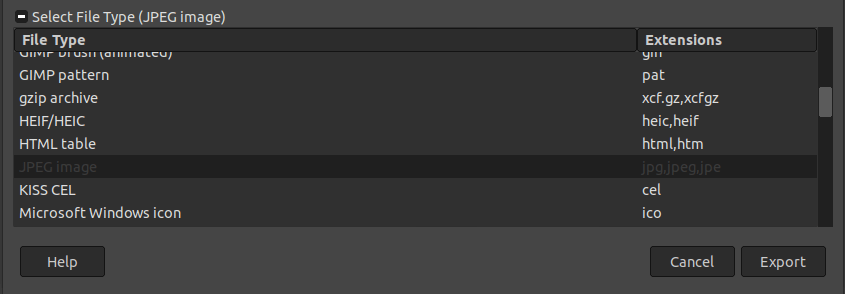
- Choose the image format as JPEG and click on Export.
Conclusion
In conclusion, designing effective YouTube thumbnails is a crucial process when creating video content. The thumbnail is the first thing viewers will see and it can make or break their decision to watch your video.
To be successful, keep your thumbnail simple, use attention-grabbing visuals, and write an eye-catching headline. By following these three rules for designing YouTube thumbnails, you can increase views on your videos and gain more subscribers on your channel.
Thanks for reading & feel free to check out more of our articles!
Expert Rating
Summary
A well designed youtube thumbnail is vital in today’s age of the ‘attention economy’ in order to make sure your video gets the highest amount of clicks and views possible. Not to worry, edits101 and GIMP have you covered. The format is fairly straightforward and is only limited by the skill level and creativity of the graphic artist.


