
This tutorial is about the use of a pen tool in Photopea. The Pen tool in Photopea is designed to help create paths and shapes.
To use the tool, select the Pen tool from the toolbar (shortcut “P”), then click and drag to create a line. You can also click multiple times to create curves, and hold the Shift key to create straight lines. To close a path, simply click the first point you created.
You can also enter and modify the path’s curve after it’s been created with the direct selection tool (shortcut “A”). When you’ve created the path toward the target location of your choosing, you can use the Path Panel to increase the stroke, fill, and other properties.
The use of the pen tool is explained with examples for more clarity with step by step guide below.
How to use the Pen tool in Photopea
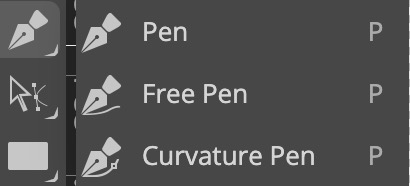
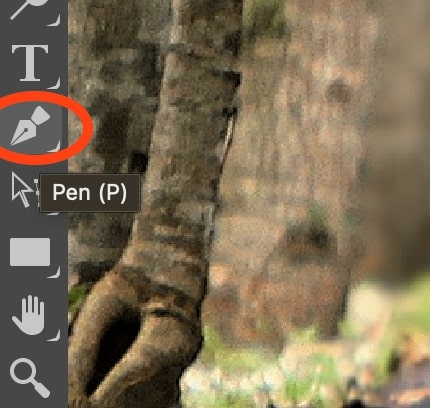
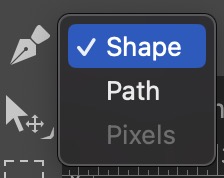
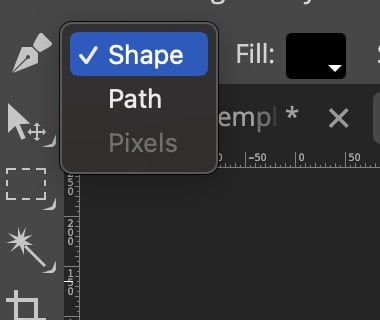
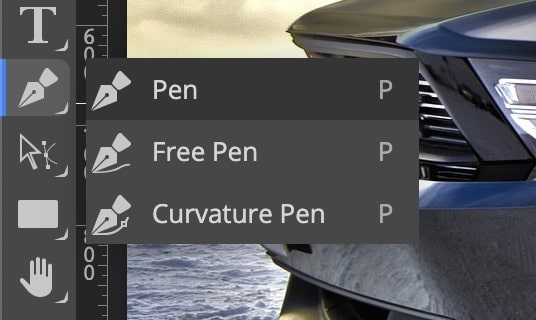
First, go to the toolbar and there you can see a pen-shaped icon. If you right-click you can see the Pen tool, Free pen & Curvature Pen. Select the pen tool and then go to the options on the top where you can see shape and path options.
Understanding the Pen tool
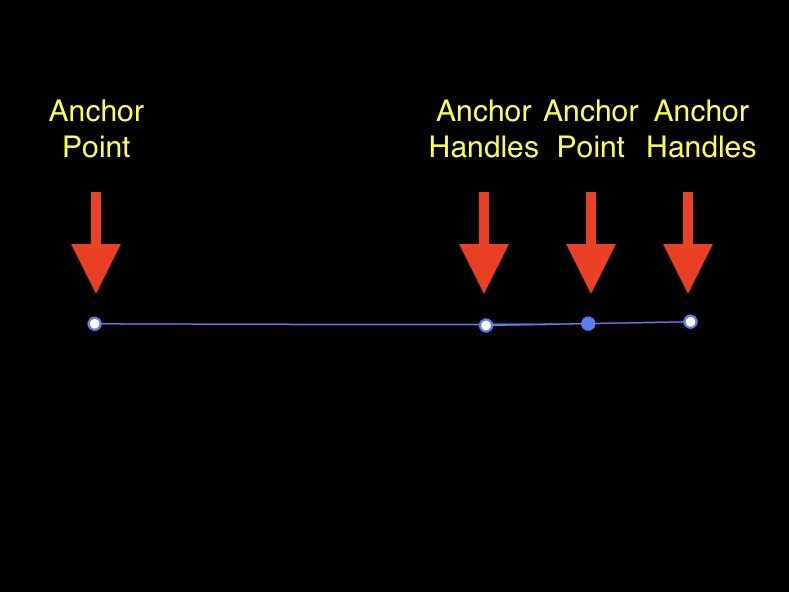
When using the pen tool, it creates something that is called a “Path”. A path is created when 2 points are made. To create these points (with the pen tool activated) simply click any where on the canvas.
If you click & drag you’ll notice anchor handles will appear. This is because when you click & drag you’ll create a curved path.
- Pen tool Creates a path.
- A path is made of anchor points.
- If you click and drag, anchor handles will appear.
How do you use the pen tool?
| Action | Result |
| Click no dragging | Sharp Path |
| Click+Dragging | Curved Path |
| Click+Drag+Alt/Option | Curved Path with Sharp Turn |
| Click+Hold Spacebar | Move Anchor Point |
| Click+Shift | Constrains the angle to 15 Degree Increments |
If you click and no drag you’ll create a sharp path.

If you click and drag you’ll create a curved path.
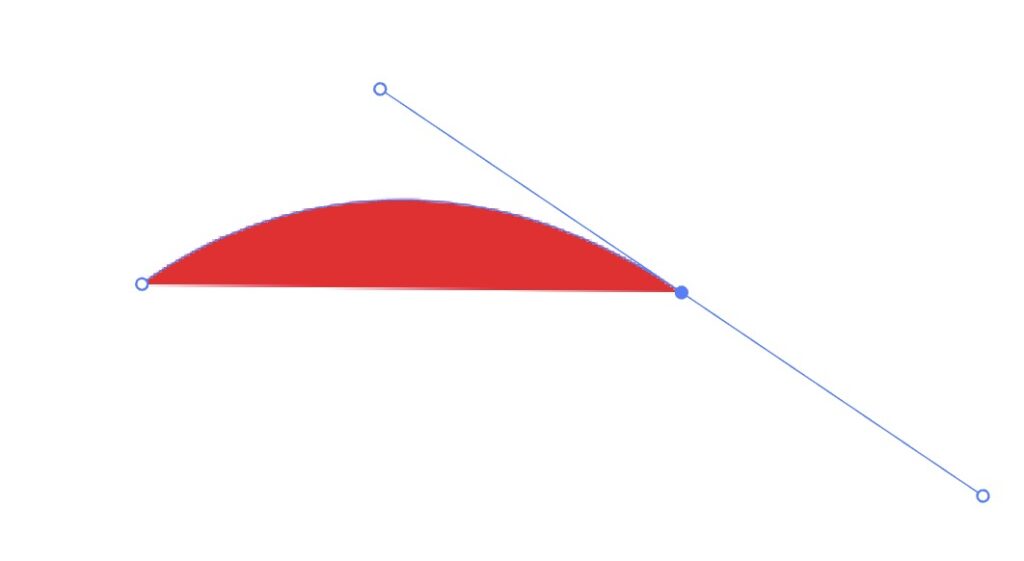
If you click + drag + Alt/Option you’ll snap the anchors to create a sharp turn.

How to Make a shape using the Pen tool
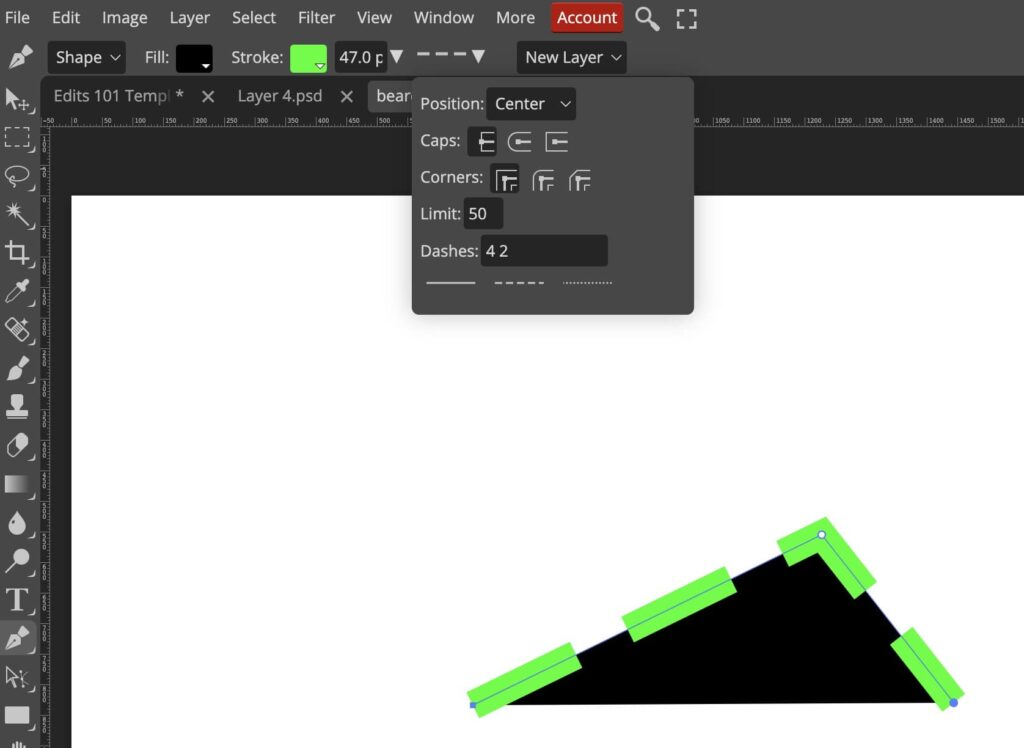
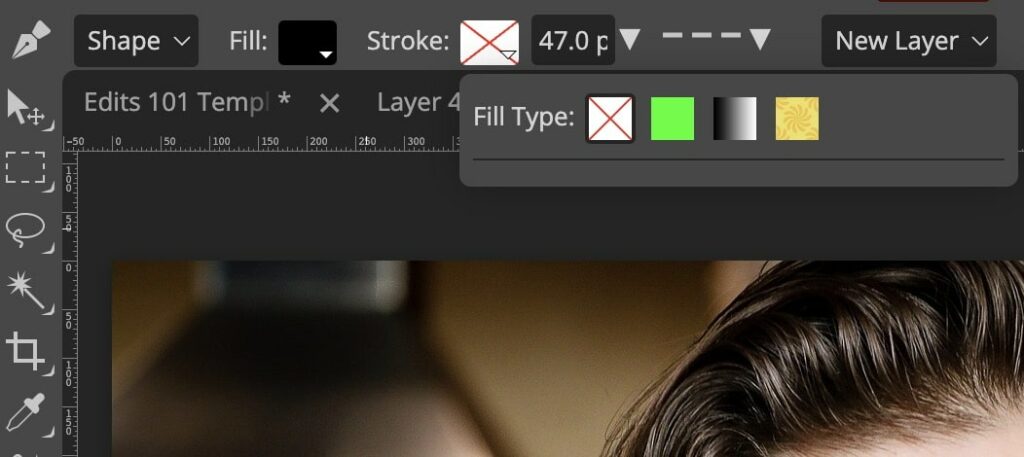
Select the shape option and try to make random shapes by clicking and joining the points. You can see the fill option also. This is what color it’s going to fill in with when you start to draw your stuff and you can change it later on. Here is what you would see on your screen,
There is an option for stroke also on the top. When you click that option you will see a border color of your choice on your selection. There is also an “x” icon and if you select this option, it will add nothing. Similarly, you can select this “x” icon in the fill option which results in no fill in your selected part.
Let’s add a “stroke” by clicking the color box. You can change it to any color you want, or use the preset colors. You can even select the options for one-time use if you want to make it dotted lines or dashes and all that. See the screenshot below,
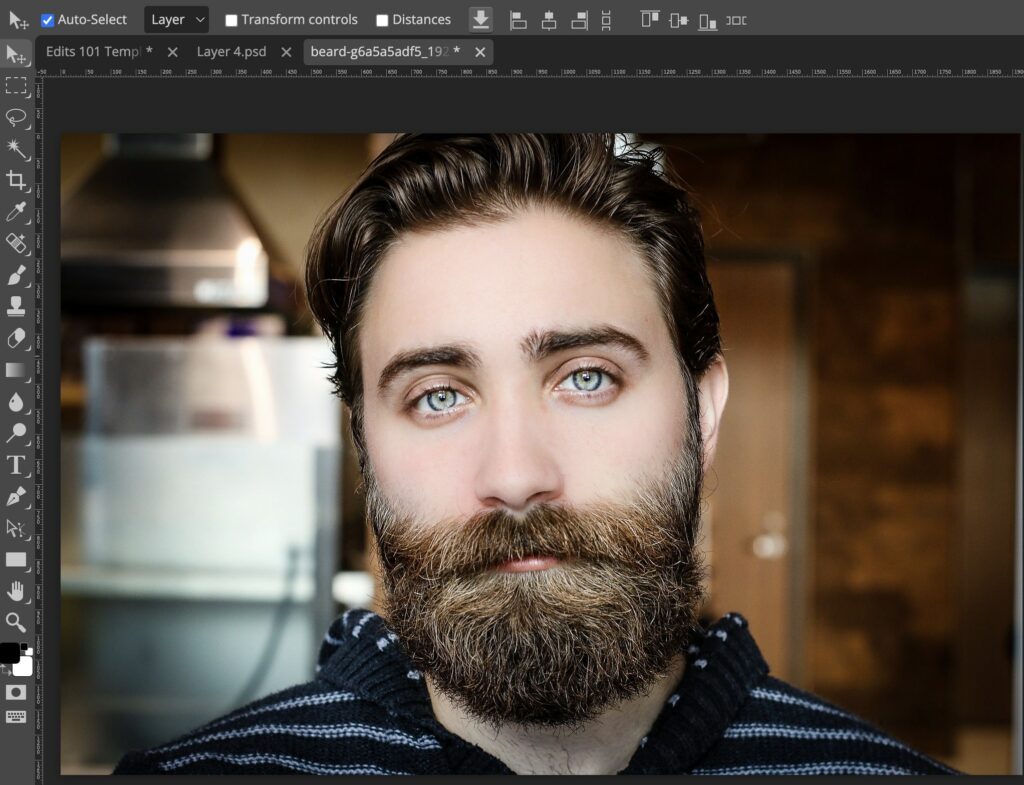
Step 1: Import the image
Import the image in Photopea. Go to the zoom tool and you can click and drag right to zoom in or drag left to zoom out so let’s zoom in on his face and let’s turn to our pen tool for this. We’ll be using shapes to draw a shape around his eyebrow so you can see it as a cartoon.
P.S. Use the Handtool (Shortcut “H/Spacebar”) to pan around the canvas.
Step 2: Using the Shape option in the Pen tool
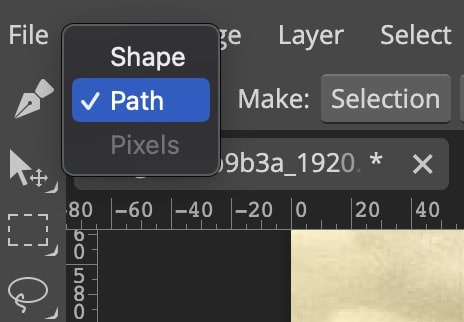
If you’re trying to cut something out, then you want to use path option. However, we’re going to change the mode to shape mode to fill it out .
Start clicking & dragging to trace your subject accurately. If you’d like to create a curve, simply click & drag. To change directions sharply, select Alt/option & move the anchor handles.
Let’s draw an Eyebrow.
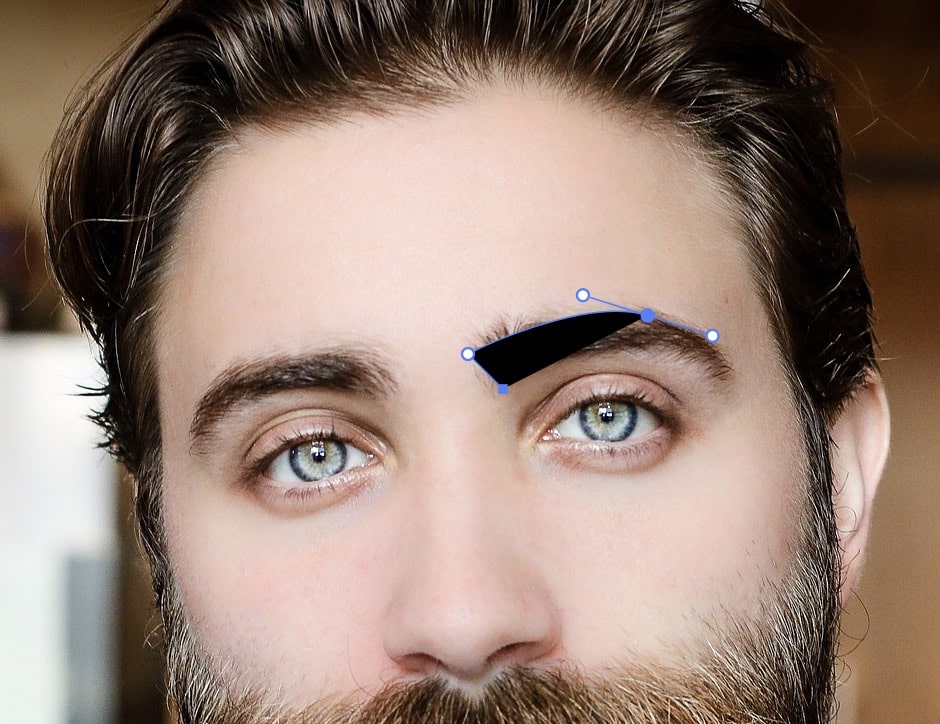
Just to reiterate, if you simply click, the path will be straight. If you click and drag it’ll create a curve.
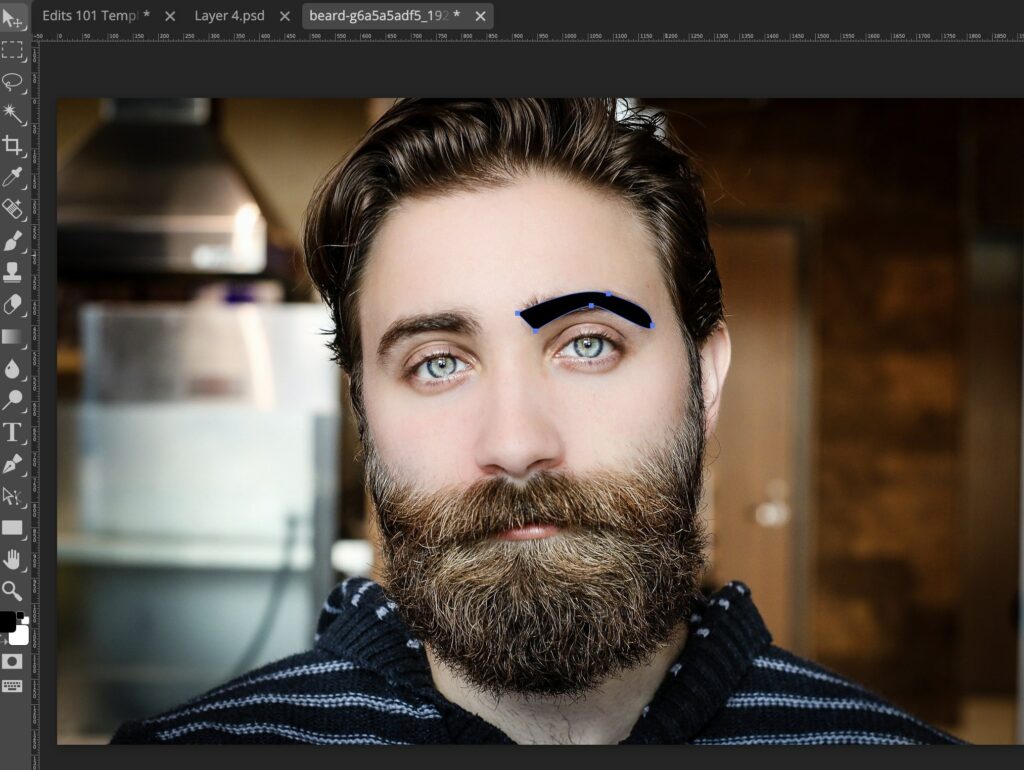
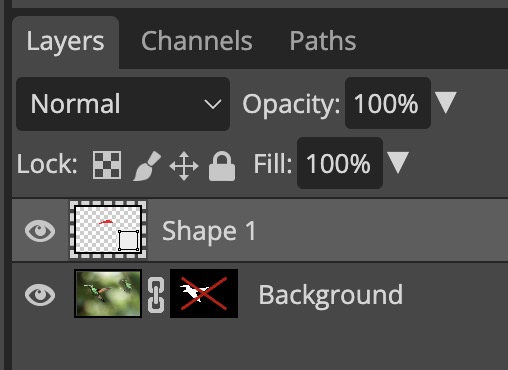
A shape layer will appear in the layers panel once you start creating your path. To change color simply double click on the shape layer.
How to Make accurate selections using the Pen tool
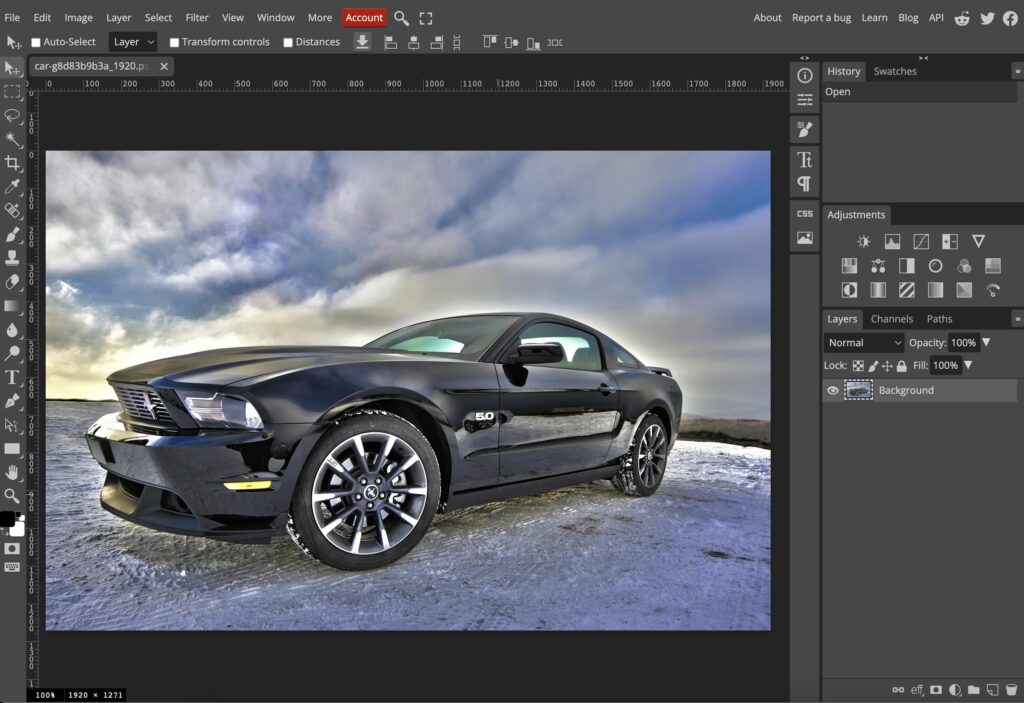
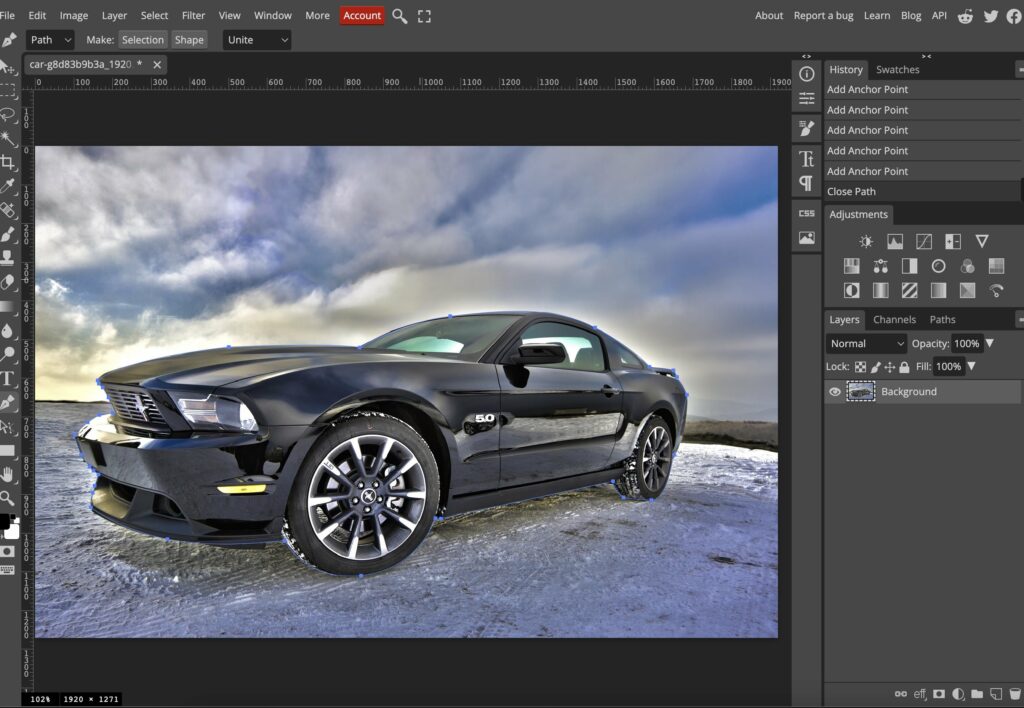
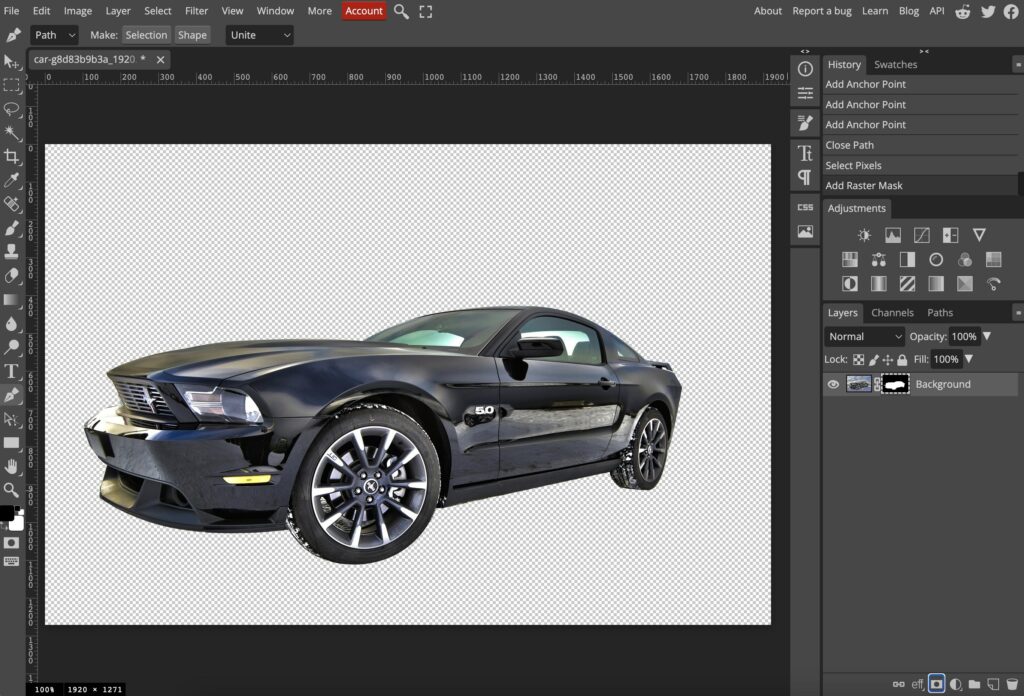
So, let’s move on to how to cut out an image. For this image, we’re going to be cutting out this car.
Step 1: Trace your subject using the Pen tool
Go to the pen tool this time and change it to the path to not shape because, we’re not making a shape. We choose the path option because we’re just going to make a selection.
Step 2: Trace your Subject (Create a Path)
Now start tracing around your subject. Take your time to make sure your selection is accurate.
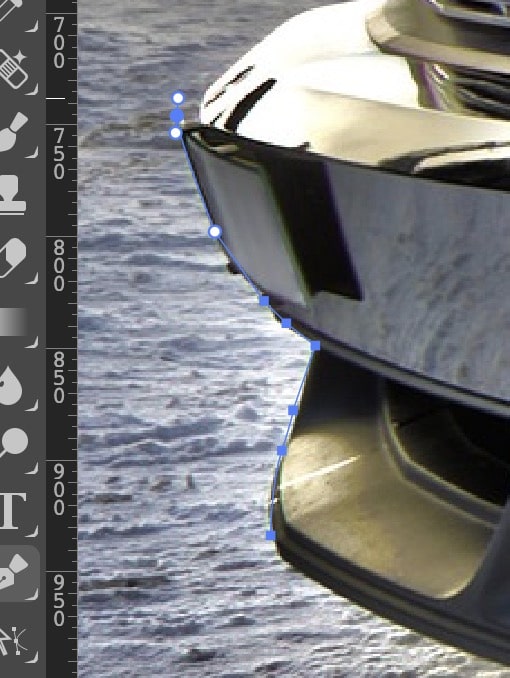
To close up the path, connect the starting point with the last point.
Step 3: Make a Selection From Path
There are 2 ways to make a selection from path:
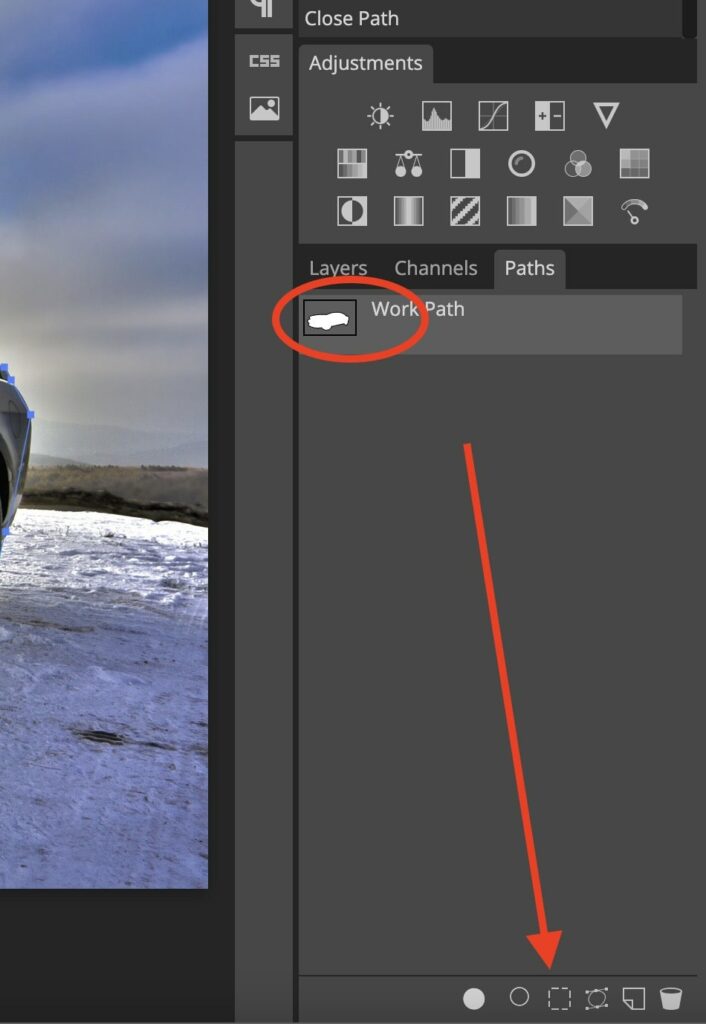
- From the Paths Panel
- From the Pen Tool Menu
From the Paths Menu
From the Paths Panel (on the right), select the “Work Path”. This is the path you have just traced. In the bottom of this panel, select the “Selection” icon (aka – Selection from path icon). This will transform your path to a selection.
From the Pen Tool Menu
With the Pen tool & work path still activated, navigate to the top menu. You’ll see that there is a “Selection” Icon. Simply select it.
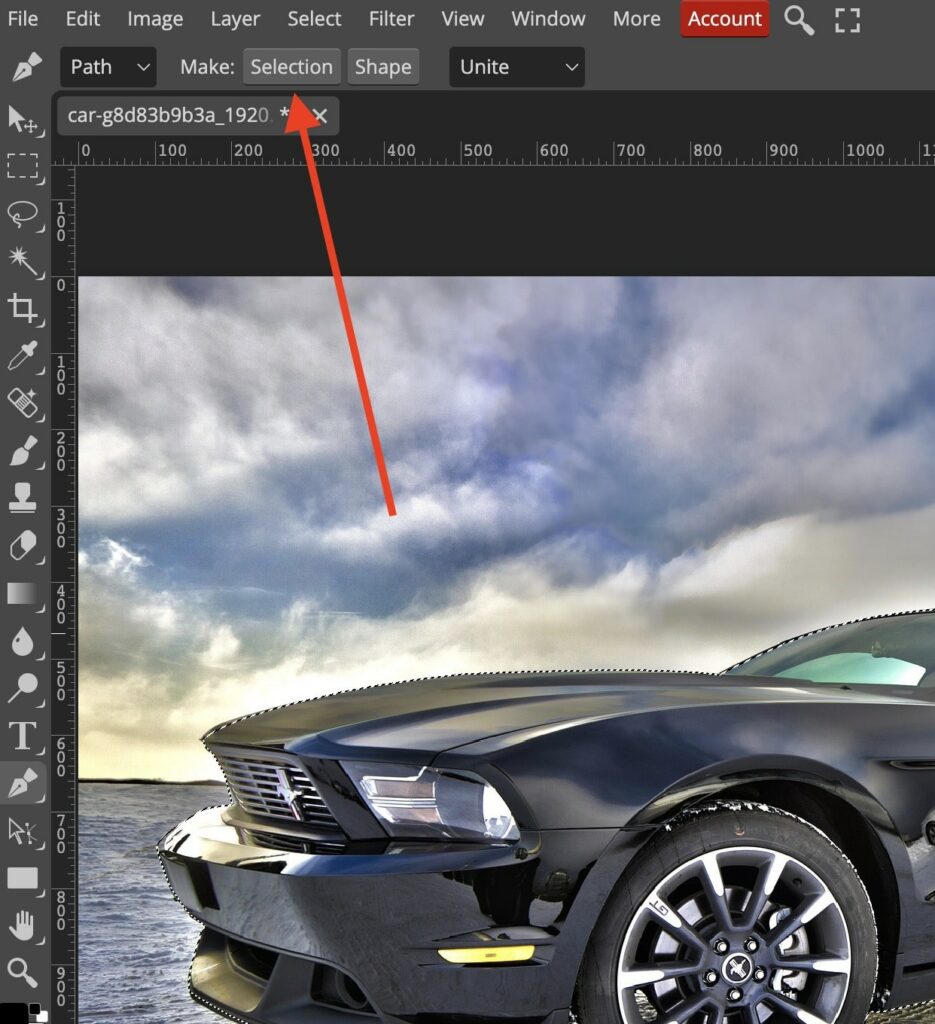
If the “Selection” Icon is greyed out it could mean that you might have clicked off the working path. If so, simply follow our previous example on how to create a selection “From the Paths Panel “.
Step 4: Add Mask To Remove Background
To remove the background, simply click on the icon that looks like a Japanese Flag – Mask Icon – to create a mask. A mask will be created from that selection.

Conclusion
The pen tool is quite useful to edit your pictures and make them according to your requirements by creating paths and shapes.
With time & patience you’ll be up to speed in no time!
Expert Rating
Summary
To become a skilled graphic designer, it’s essential to understand how to use the path/pen tool. Highly functional and scalable, although it takes a lot of experience. It may feel strange at first.
Thanks for reading & feel free to check out more of our articles!


