The Clone tool in GIMP allows users to duplicate portions of an image.

To use the Clone tool, you need to select it from the Toolbox. Then, adjust some settings from the Clone tool’s options before you start cloning. In this article, you will learn how to use the Clone tool in GIMP and the different adjustable settings available with this tool.
What is the Clone Tool in GIMP?
The Clone Tool in GIMP is a powerful and versatile tool that can be used to copy textures, patterns and any part of your image. Eventually, these can be placed anywhere on your image for various purposes. It is ideal for fixing imperfections, creating textures, and seamlessly blending elements within a composition.
So, let’s us show you how to use the Clone tool in GIMP.
How to use the Clone Tool in GIMP?
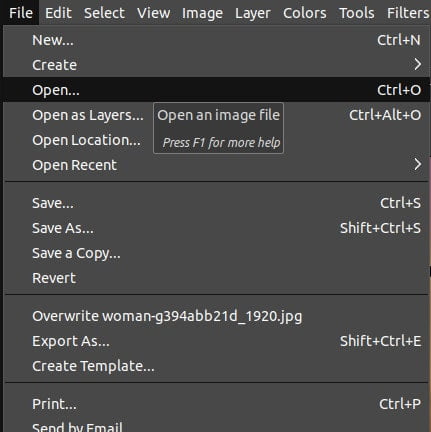
Step 01: Open an image
To open an image in GIMP,
- Simply go to the File menu. Choose the Open option.
- Alternatively, press Ctrl/Cmd+O.
- Also, you can drag and drop the image to the GIMP workspace.

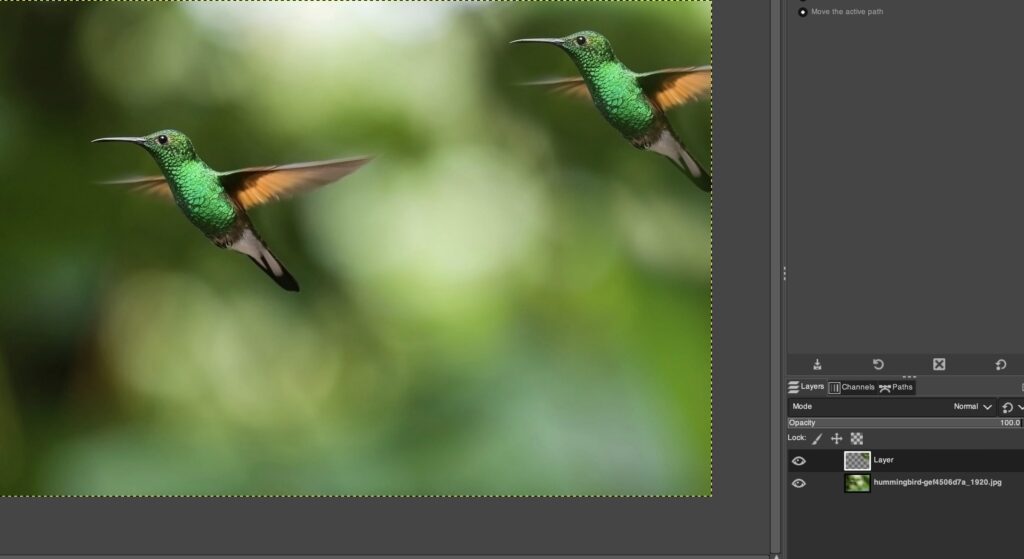
Step 02: Add a new layer (Non-Destructive Editing)
When you are editing an image, make sure that you work non-destructively. You can do this by making a copy of the original image in advance. It saves you time when you make mistakes as you still have the original image preserved.
In order to to do this, create a copy of the source image and work on the copy. Once you have completed the cloning, you can see the before and after for comparison.
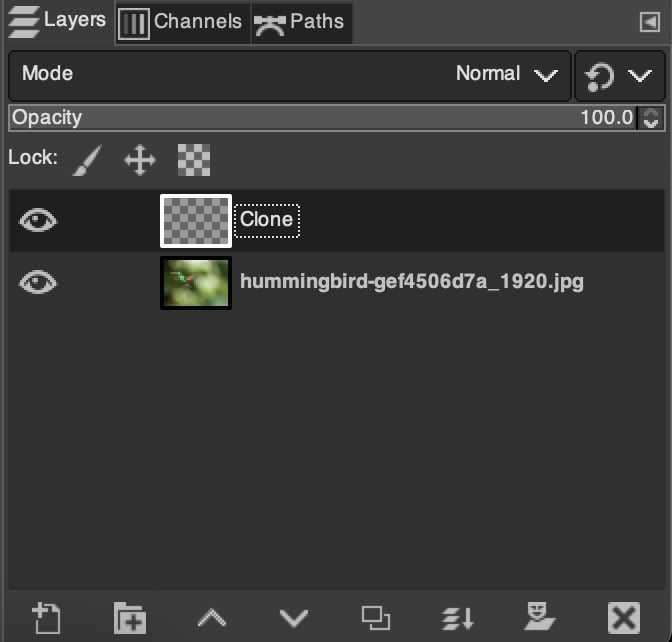
Add a new layer to preserve the original layer. We’ll be adding the clone effects on this new layer.
- In the Layers panel, click on the “page with a +” icon.
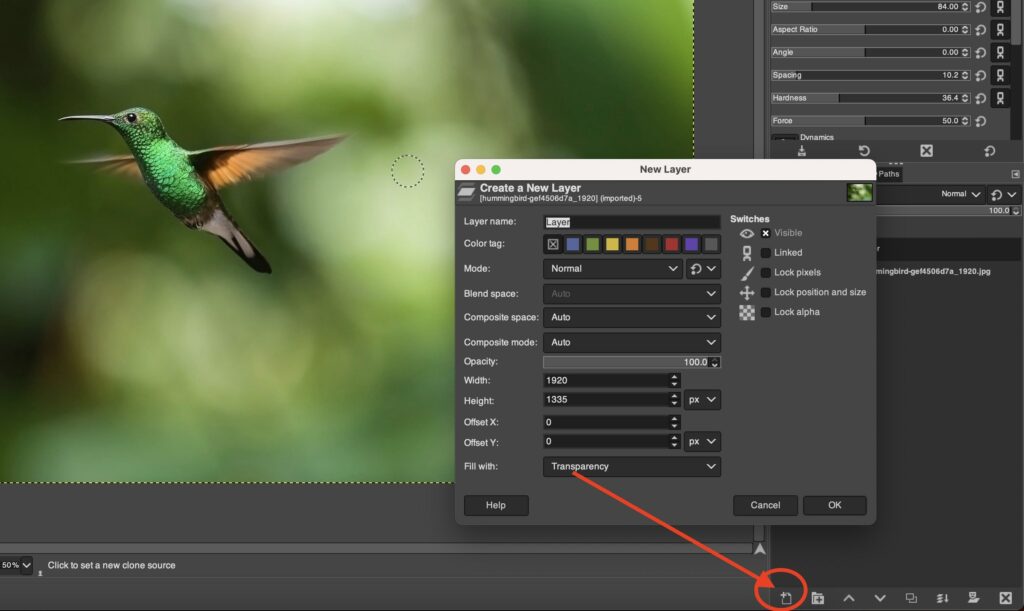
Or else:
- Go to the Layer menu.
- Click on New Layer.
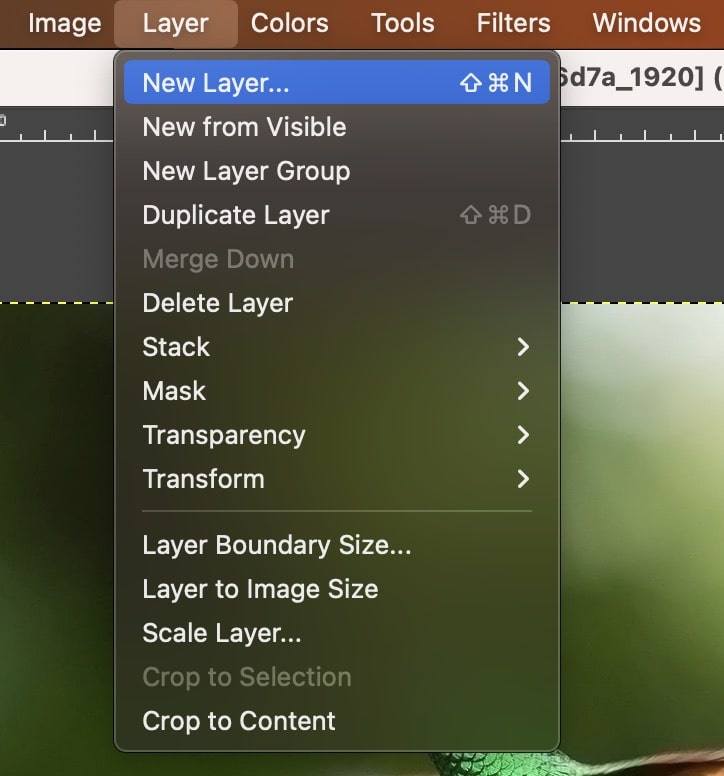
- As soon as you click, a new layer dialog appears. Make sure to set the Fill with option to Transparency.
- Finally, click OK in the new layer dialog.
Then, the new layer would appear in the Layers dialog.
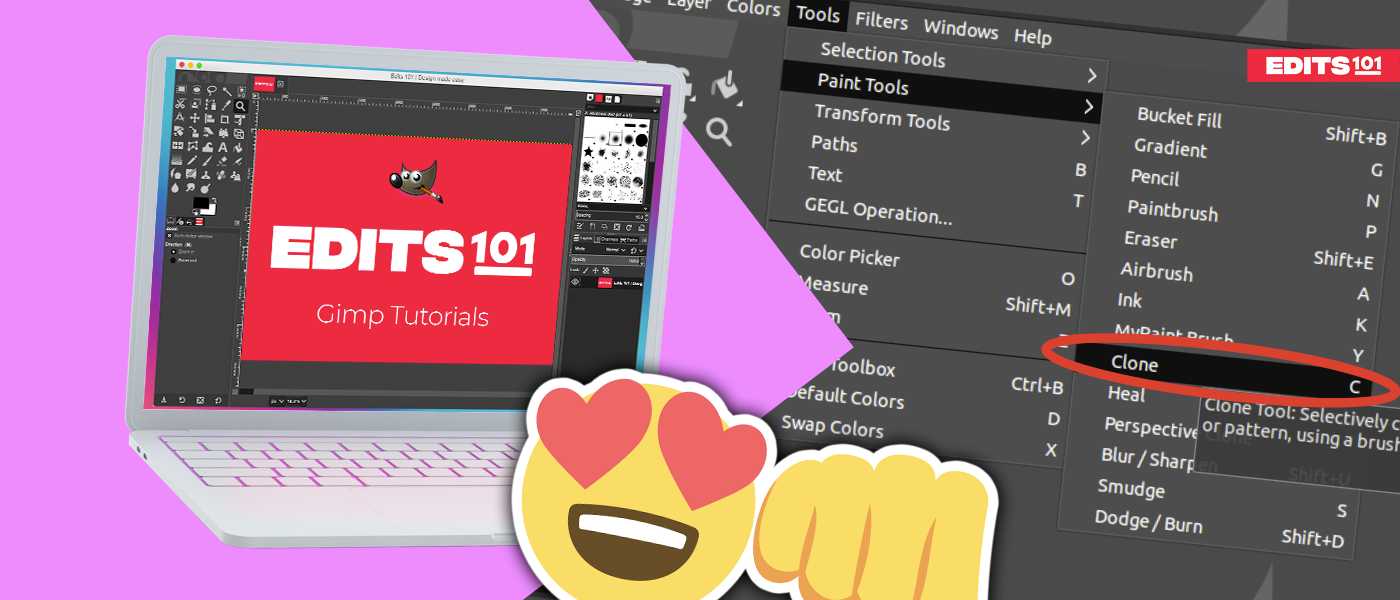
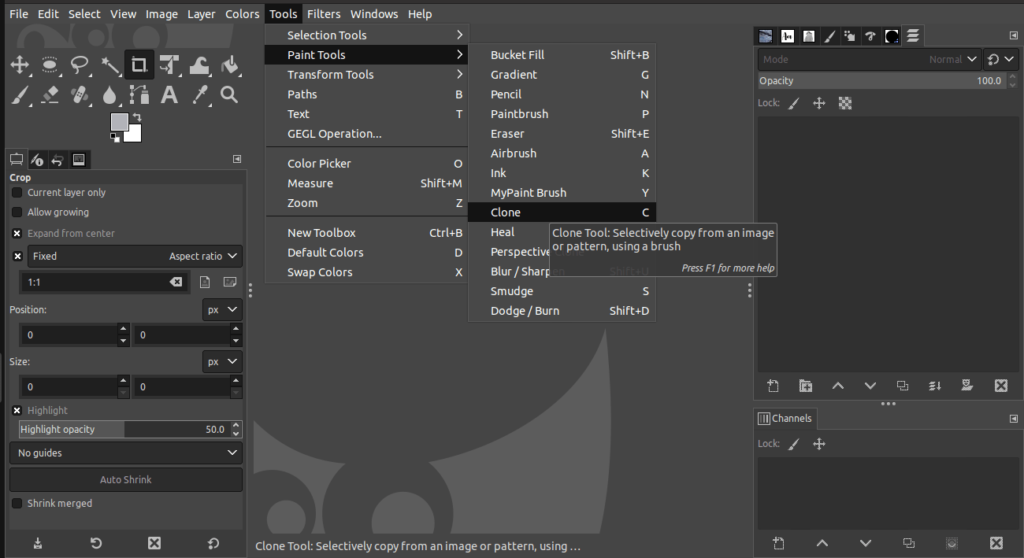
Step 03: Select the clone tool
To select the Clone tool,
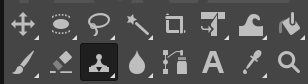
- Click on the Clone tool icon from the Toolbox.
- Alternatively, press the keyboard shortcut “C” to choose the clone tool.
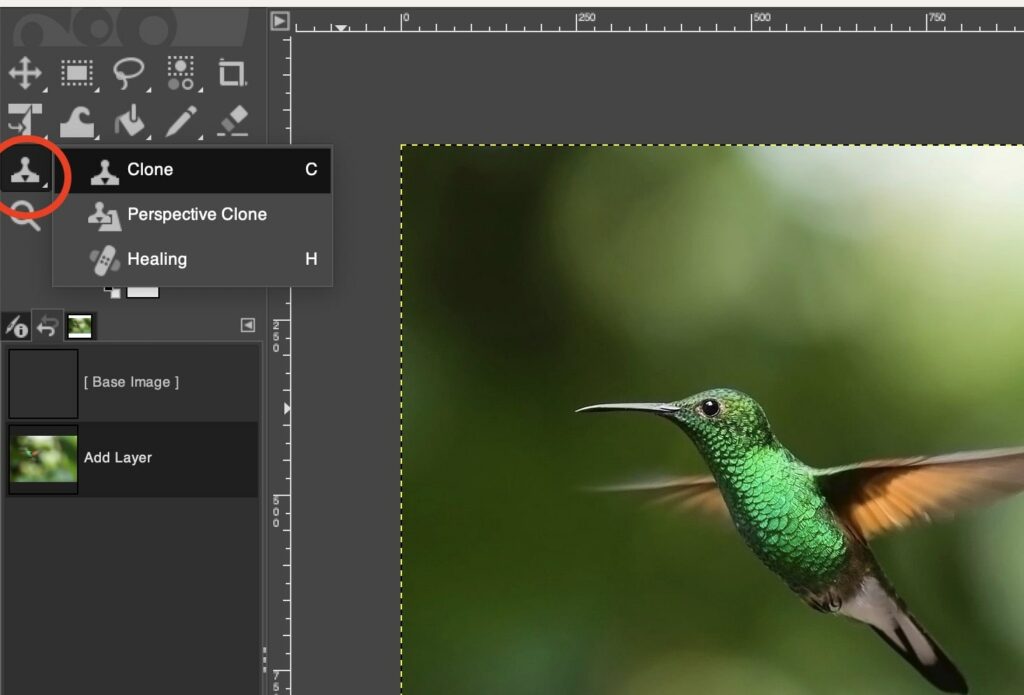
Alternatively, you can use the below method to select the Clone tool,
- Go to the Tools menu.
- Go to Paint tools.
- Next, click on the Clone option.
Before you start using the Clone tool, there are some important settings you need to adjust.
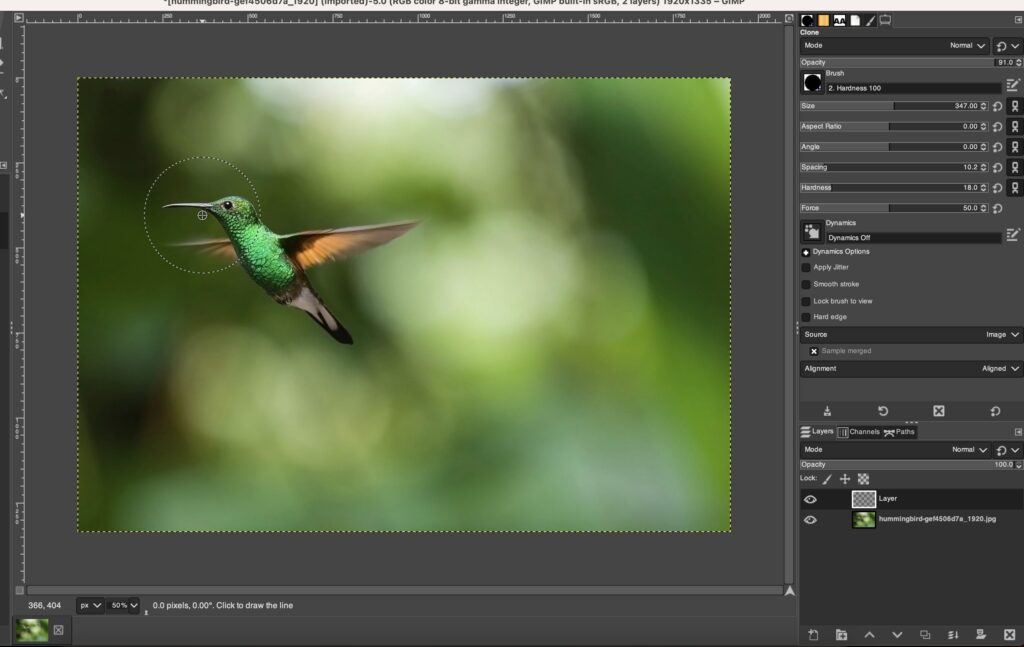
Step 04: Adjust the settings of the clone tool
Choosing the Clone Source
The Clone source is the area you choose as the origin for the cloning. Make sure that the clone source you choose will improve your image and hide any defects or unsightly areas.
Another key point in choosing the clone source is that the texture and colors of the origin point should be similar to the texture and colors of the destination point.
Every image has light and dark shades, so picking the right shade to clone is recommended. The Clone source you pick should blend well with the edges of the area you want to enhance.
Clone Brush Adjustments
To make sure that the Clone tool works as smoothly as possible, you should adjust the brush settings of the Clone tool. Go to the Tool options of the Clone tool to do so.
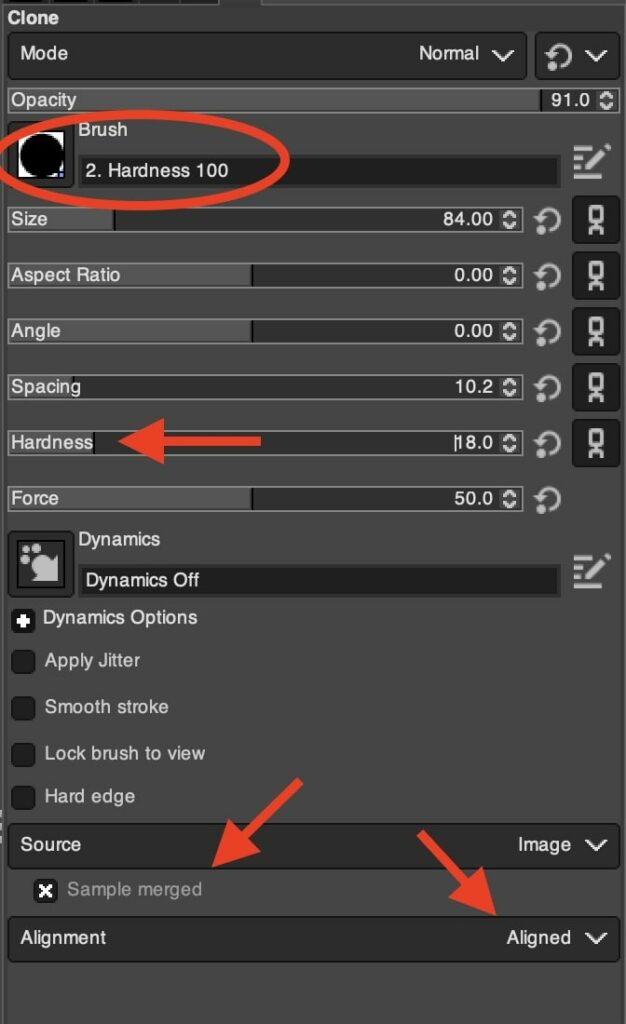
While you know what best suits your needs, these are the settings we set for this example:
- Set the Clone mode as Normal.
- Set the brush hardness as 075.
- Set a suitable clone brush size.
- Define the Aspect ratio as Zero.
- Define the Angle as Zero.
- Set a suitable spacing.
- Retain the Force of the clone brush as 50.0.
- Switch off the Dynamics option.
- Set the source as the Image.
- Sample Merged – On.
- Finally, set the alignment as Aligned.
The most important are the following:
- Set the brush.
- Hardness set it to a low value (this depends on the use case).
- Sample Merged – On : This samples the bottom layers.
- Alignment as aligned : This makes sure that the source moves with the brush movement.
Brush size
Though we have set a preferred brush size above, you need to change it according to your requirements. You can use the keyboard shortcuts “[” or “]” to decrease or increase the brush size.
When you have a small and simple source area, the brush size should be small too. Use a large brush size to save your time if the area you want to clone is very similar to the destination point.
Hardness
The hardness of the brush also plays an important role when cloning. A softer brush would result in a more natural-looking image.
Sample merge & Alignment
The next important setting is the Sample merged option. The Sample merged option allows you to sample the layers in the Layers Dialog in order to ease non-destructive editing.
The final setting is the Alignment setting. The alignment has 4 main options as displayed below:
- Aligned: Align would lock the clone source you pick as soon as you click on the image. The stroke would take the offset which is aligned with one another. The alignment rule works here.
- Fixed: The clone source remains fixed irrespective of how the cursor moves.
- Registered: It also locks the clone source but comes in handy when you are working with pattern edge matching or cloning from one layer to another layer in the same image. It copies the source pixels consisting of the same offset.
- None: Does not apply any type of alignment as the brush stroke are treated separately for each click. For each cloning, the first clone source origin is copied to one another.
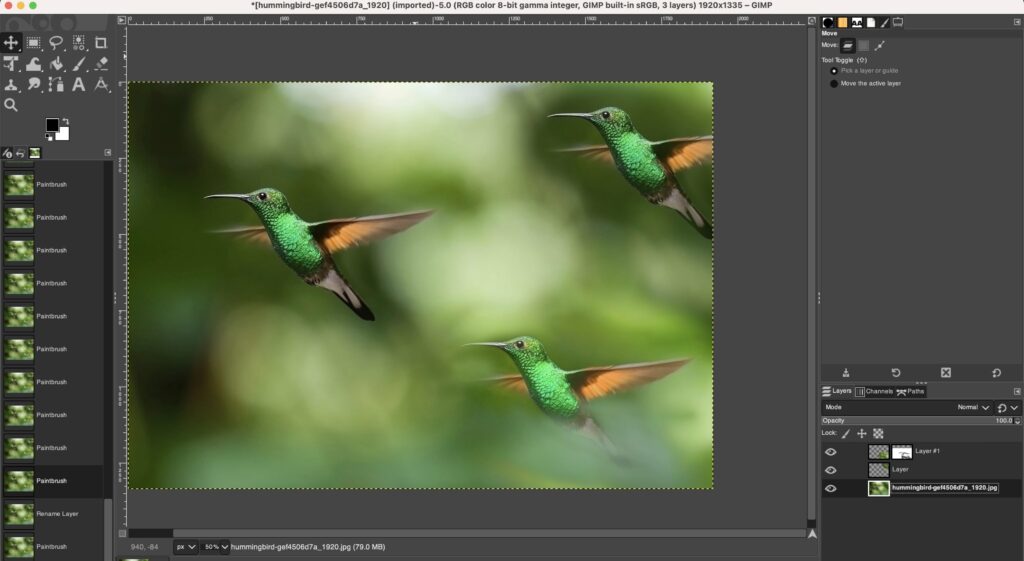
Step 05: Start cloning the image
After you have set your settings as per your requirement, now you can start cloning. First, you need to set the clone source of the image.
- To set the clone source.
- Press the Ctrl /Cmd key and click on the area you chose as the clone source.
- Then, release the Ctrl/Cmd key.
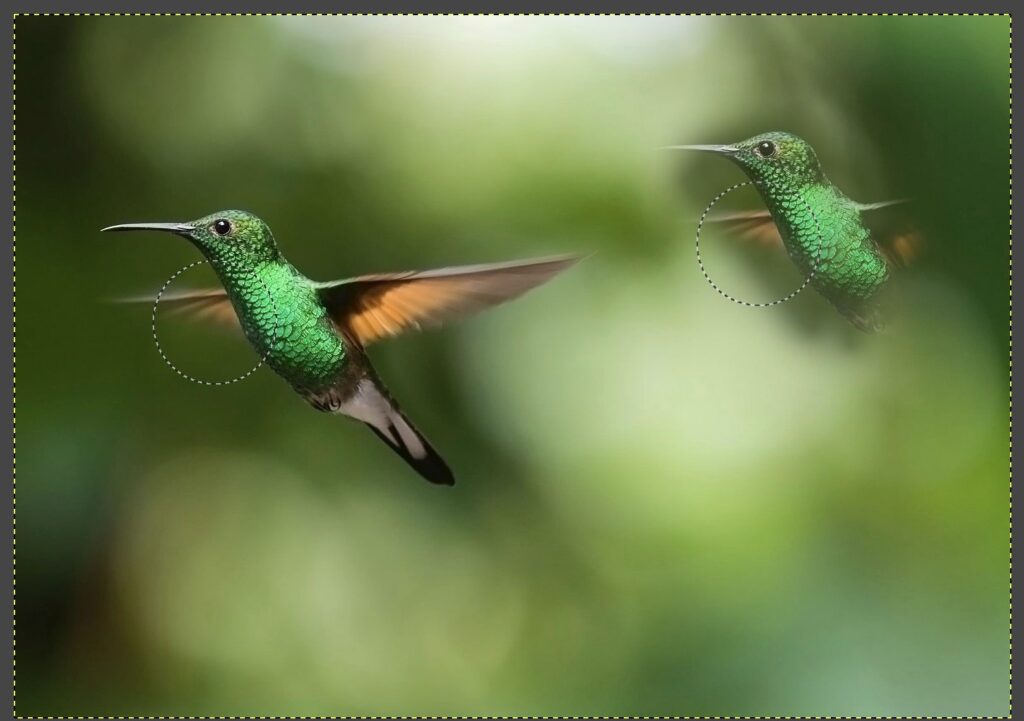
Now, you can draw on the image you prefer to clone. Brushing is like painting across the image.
You can repeat the process and add new clones. Furthermore, you can add masks, transform, crop & recolour. You can check all the tutorials we’ve created!

Conclusion
In conclusion, using the Clone tool in GIMP is a great way to remove/add objects.
It is important to use this tool correctly by understanding the source and destination of cloning, as well as the brush size, opacity, and other options available to you. With practice, this powerful tool can help you create beautiful images that are professional looking.
Thanks for reading & feel free to check out more of our articles!
Expert Rating
Summary
The clone tool in GIMP can be very versatile depending on what you need to use it for. It isn’t the hardest tool to learn, but can take a little bit of practise to use proficiently.