

If you’re tired of the colours in your image, or if you want to change one colour for another, GIMP makes it very easy to do so.
There are 6 ways to change or replace colours in your image. You can use the Select by Colour, Fuzzy Select tool, Hue-Saturation, Bucket Fill tool, Colour Balance, and Colourize. You will also learn how to change the colour of eyes in an image at the end of this tutorial.
By following this tutorial, you will understand the properties and functions of each tool and which one is ideal for the specific image you are working with.
Lets start with examples & we’ll explain the semantics later.
How to change the Car colour in GIMP
Changing a car colour in GIMP can be done by using a combination of tools such as the “Paths Tool” and “Bucket tool”. The process involves selecting the subject you want to change the colour of & adjusting it to a new colour.
Additionally, you can use layer masks to blend the new colour with the surrounding area for a more natural look. It’s also important to adjust the colour balance, saturation, and brightness to make the new colour look as realistic as possible if needed.
Step 01: Open the image/Create New Document
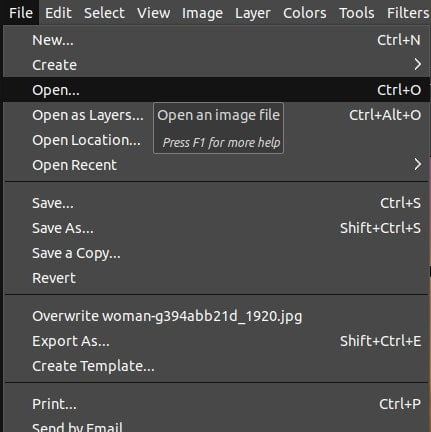
Open the image in GIMP. To open an image in GIMP,
- Simply go to the File menu. Choose the Open option.
- Alternatively, press Ctrl/Cmd+O.
- Also, you can drag and drop the image to the GIMP workspace.

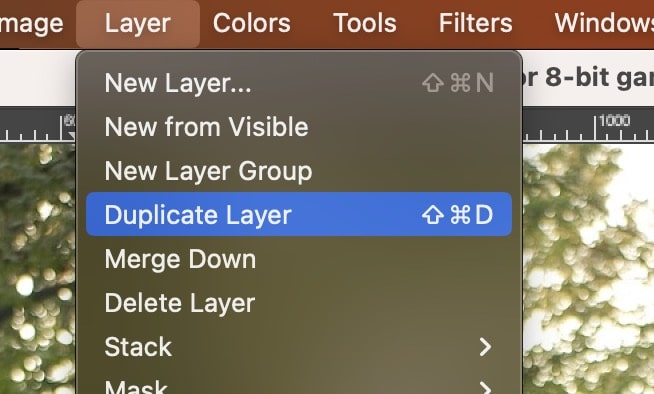
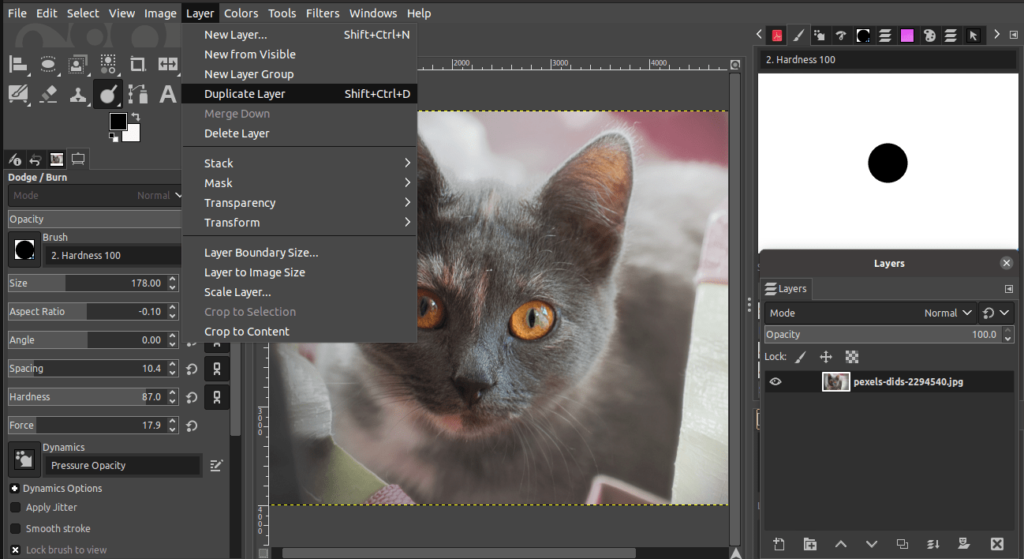
Step 02: Duplicate the background
Next, you need to duplicate the photo to make sure you don’t edit the original image. To duplicate the image,
- Go to the Layer menu in the top toolbar.
- Next, click the option Duplicate layer.
- Alternatively, use the keyboard shortcut Shift+Ctrl/Cmd+D.

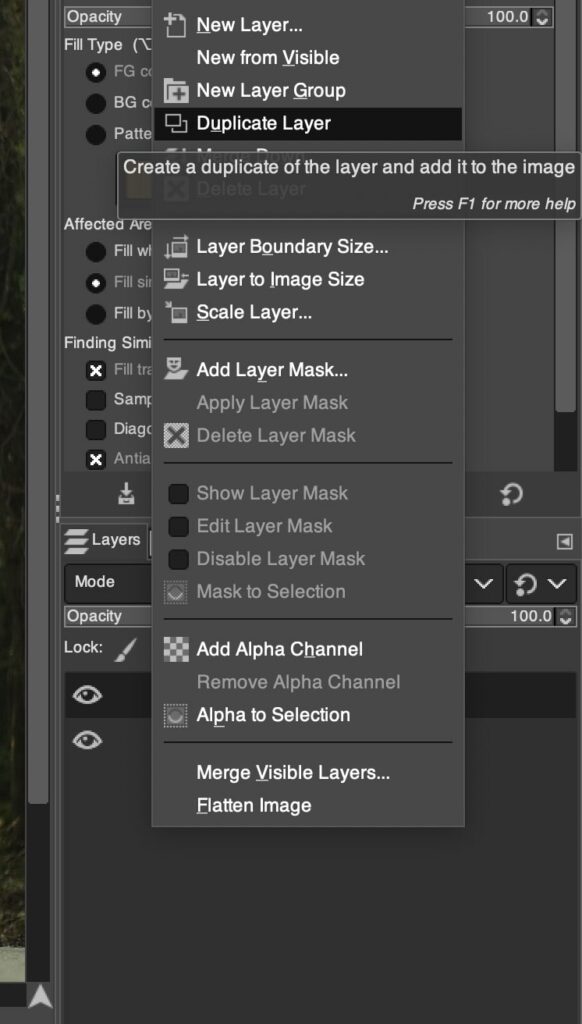
Another way to duplicate the layer is,
- Right-click on the original image.
- Choose the option Duplicate layer among a couple of drop-down options.
Once you duplicate the layer, you would notice that the copy of the original image appears in the Layers dialog. You can also rename the duplicated layer to easily identify it by,
- Double-click on the duplicated layer.
- Enter a name.
- Next, press Enter.
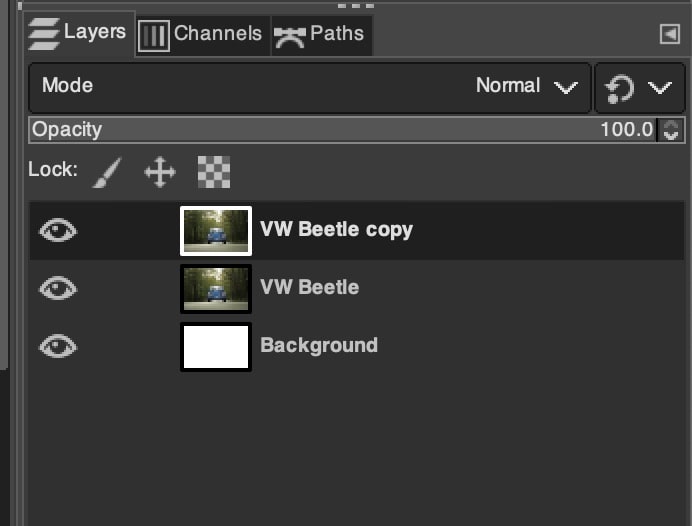
Finally, you have duplicated and renamed the layer for the next step.
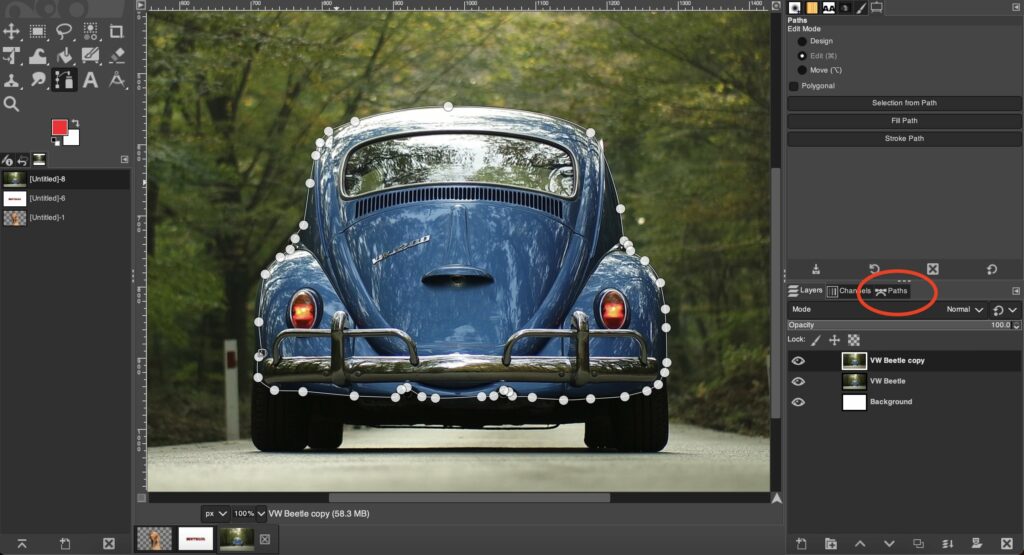
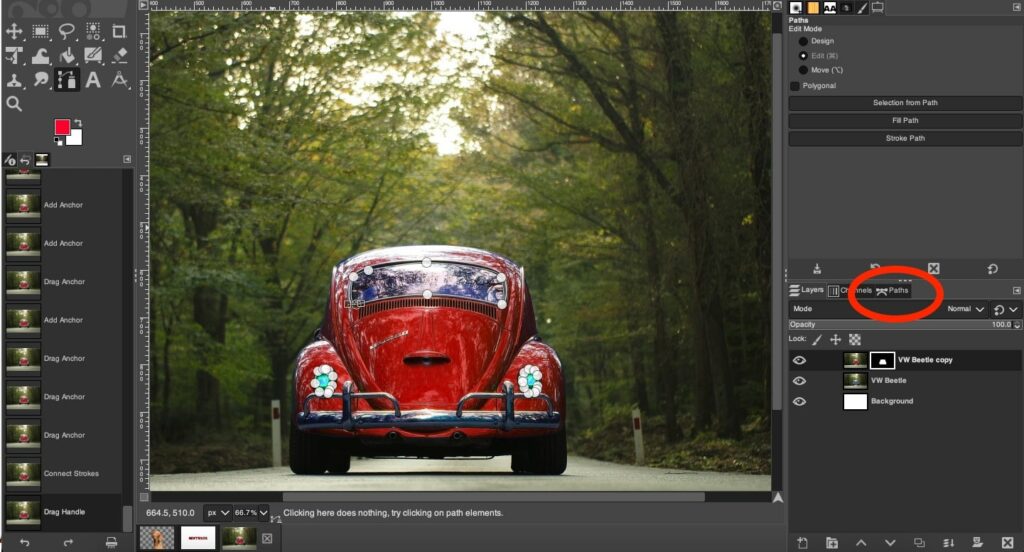
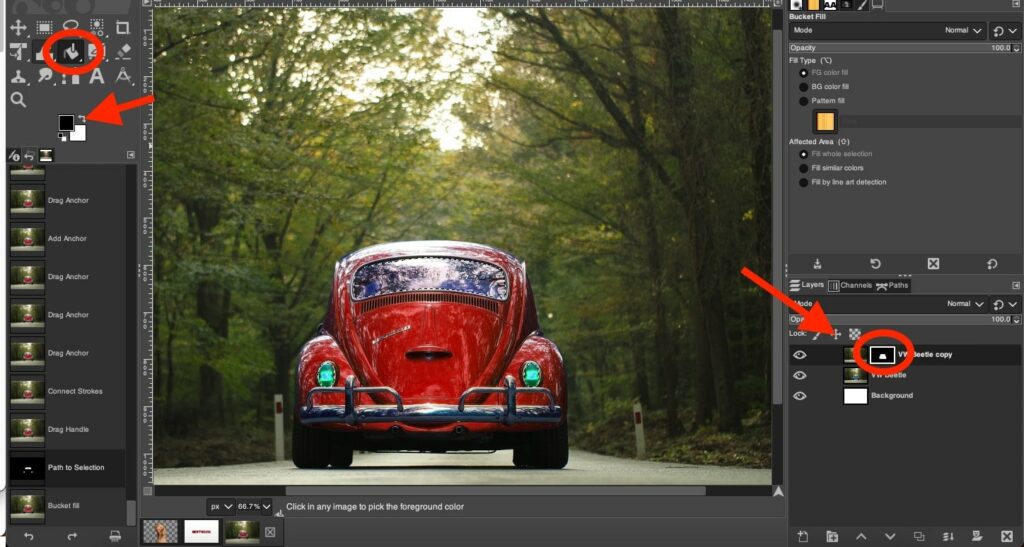
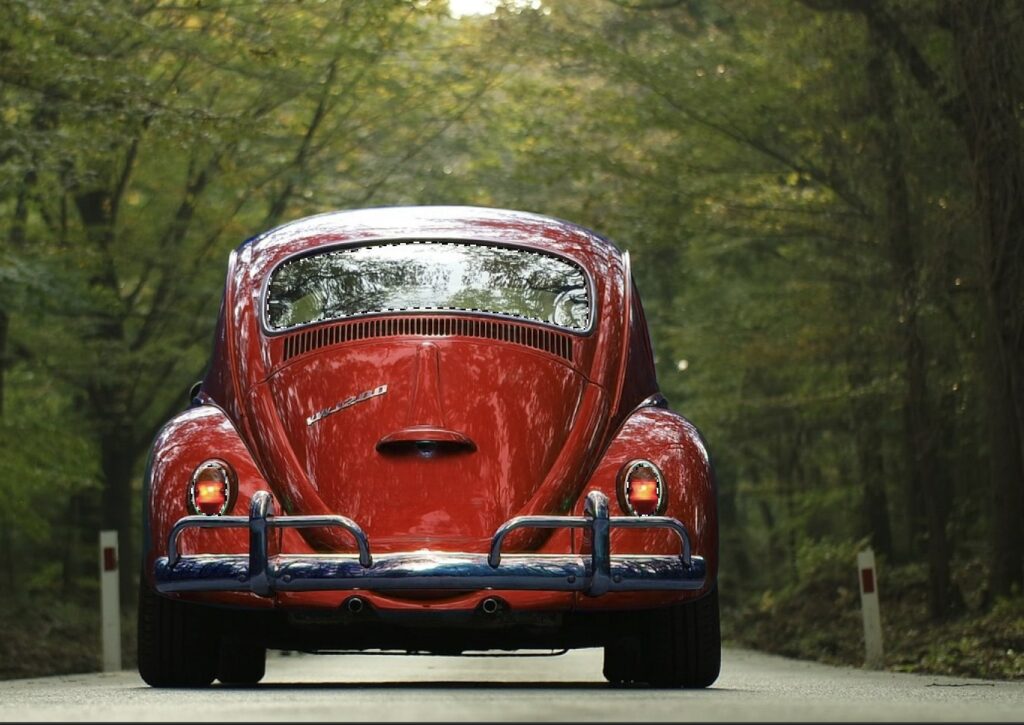
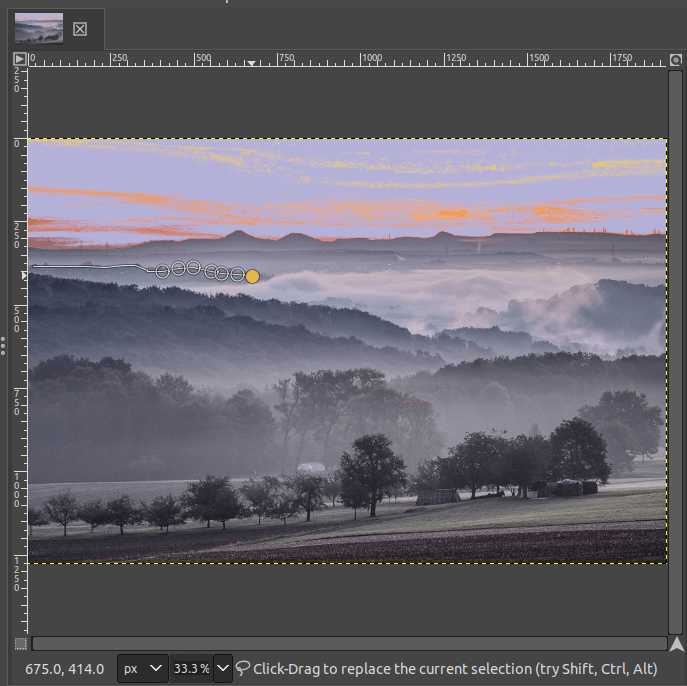
Step 03: Make a Selection using the Paths tool (B)
Select the Paths tool and trace around the subject. To close the path connect the First and last point together. If it doesn’t close, click the hold CTRL/CMD + Clicking the first and last point to join the path.

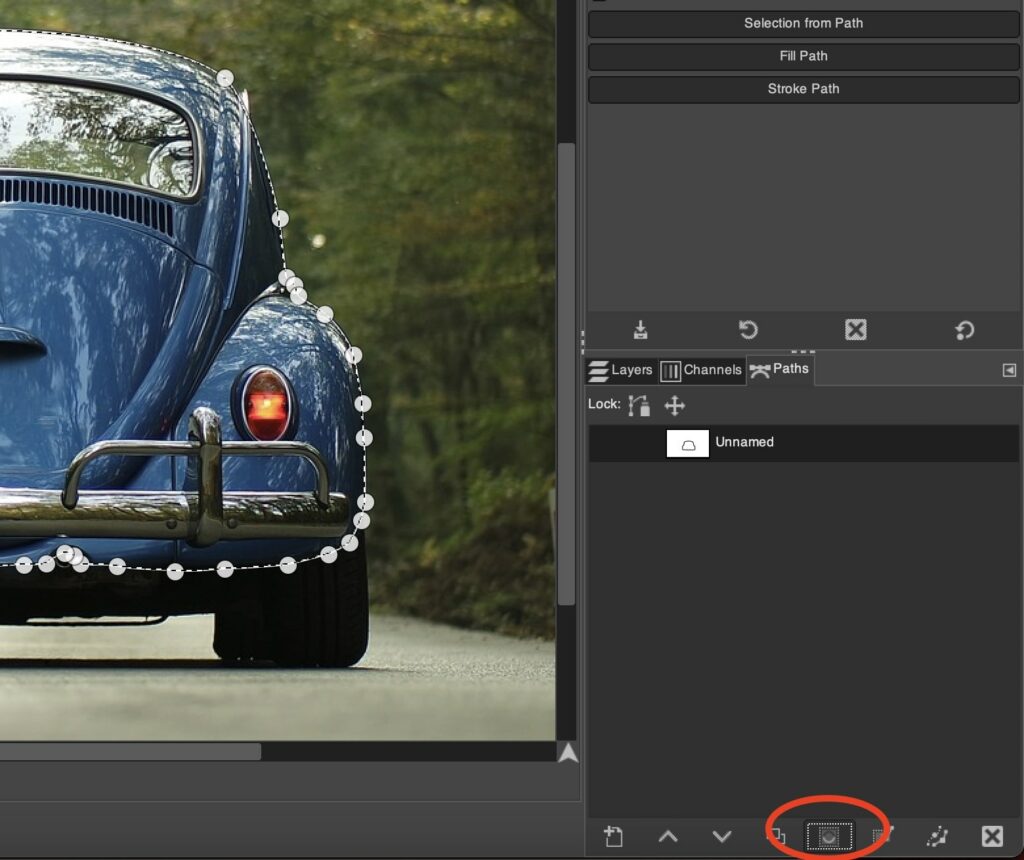
Step 04: From Path to Selection
Next, you need to convert your path to a Selection.
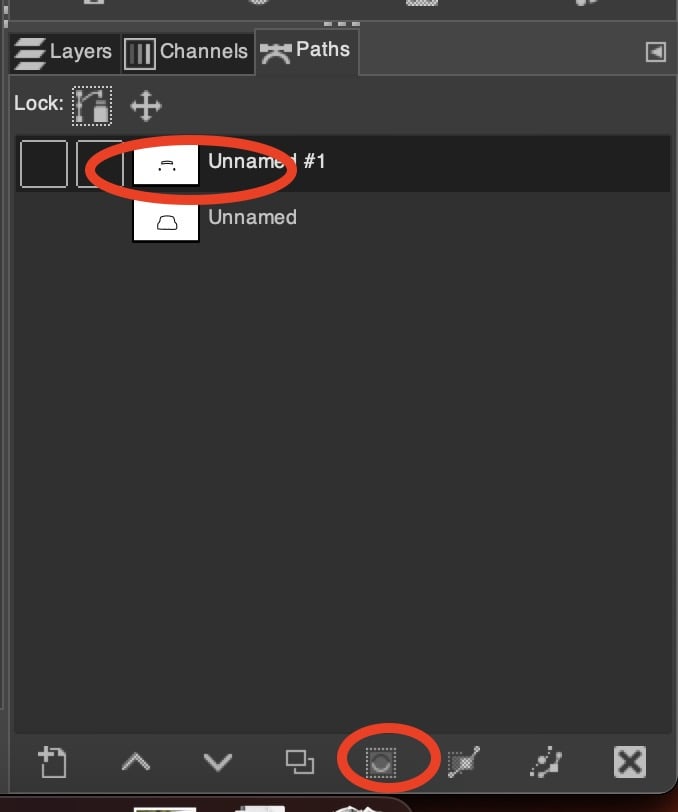
- Go to the Path Dialog/Panel .
- Click on the “Path to Selection” Icon.
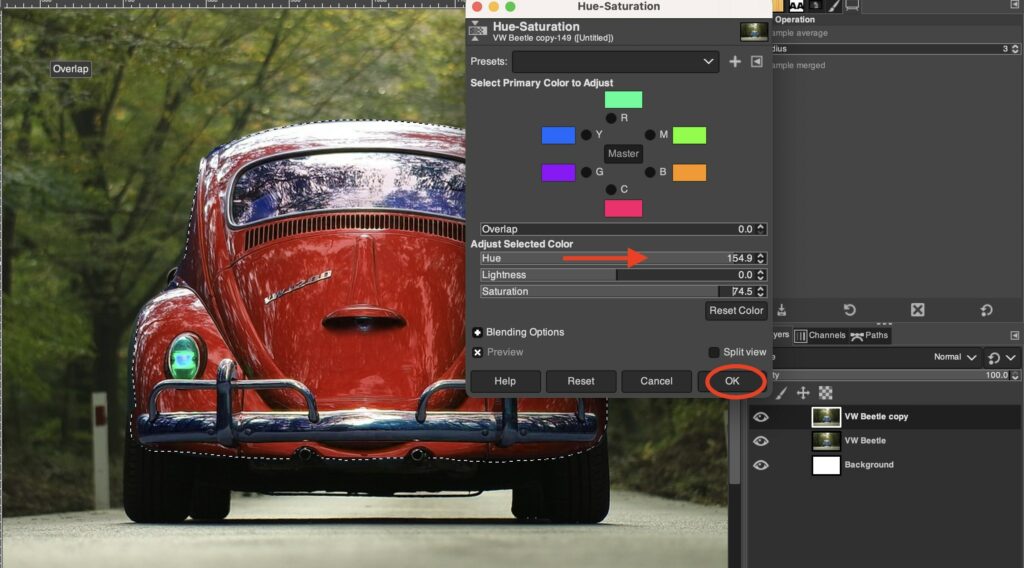
Step 05: Add Hue Saturation Adjustment
With the selection still active navigate to Colour >> Hue-Saturation.
- To Change the colour, play around with the Hue Slider.
- To Increase colour vibrancy, move the Saturation Slider.
- To adjust brightness, move the Lightness Slider.
After adjusting, select “OK” in the dialog box.

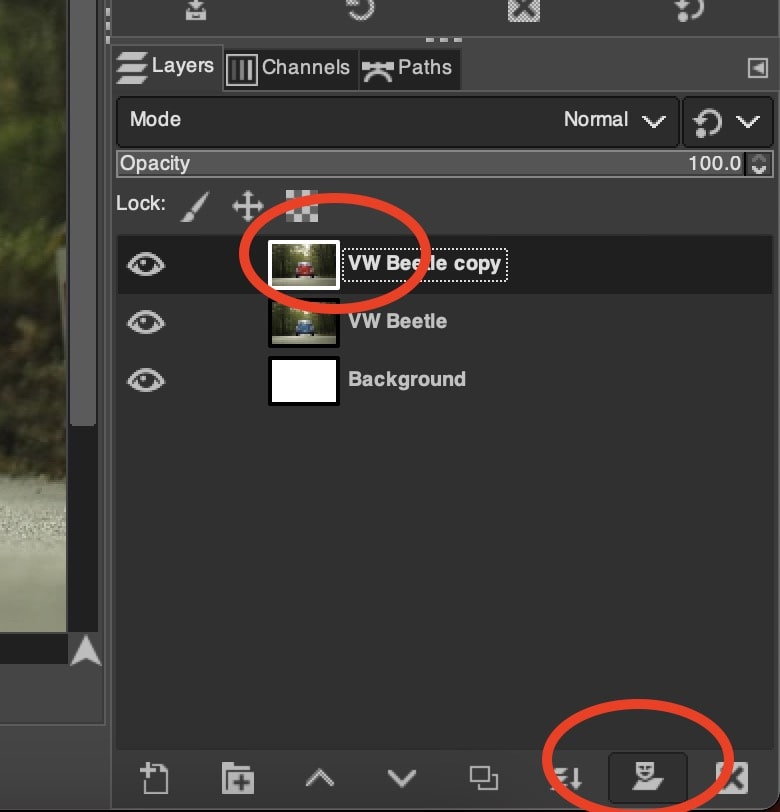
Step 05: Add a layer mask
Now you have to add a layer mask to limit the recolouring to a portion of your image. Start by clicking and selecting the duplicate layer from the Layers dialog. To add the Layer mask:
- Go to the Layer Dialog.
- Choose Mask Icon.
- Click the option Add Layer Mask.
As soon as you click, a dialog would appear to choose the type of layer you require. The first two options in the Layer masks dialog are,
- White (full opacity): Entire layer will be visible
- Black (full transparency): Entire layer will be invisible
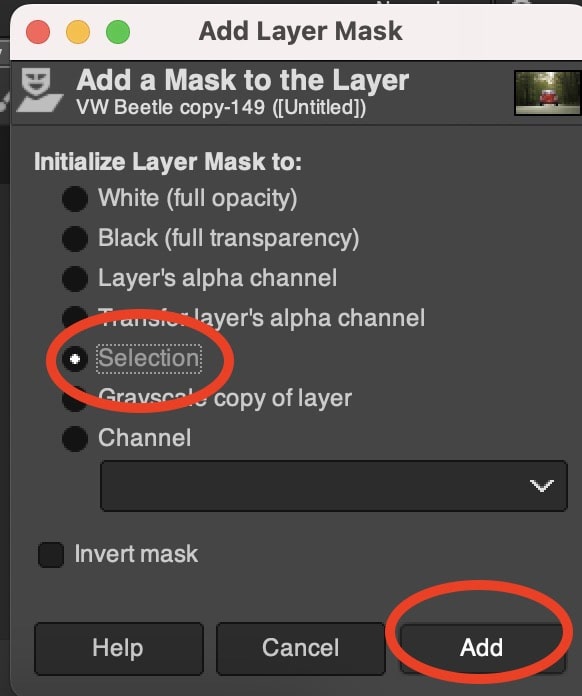
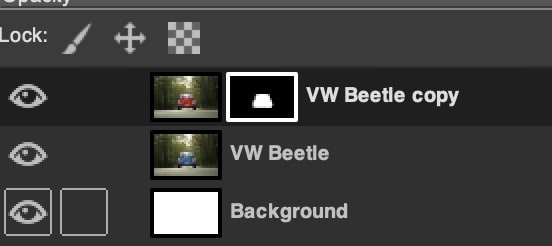
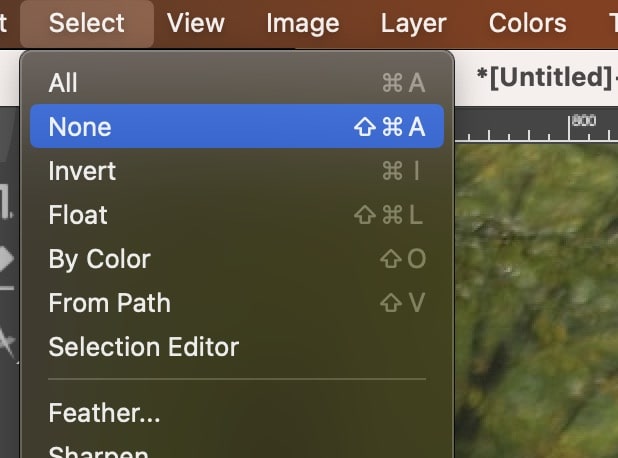
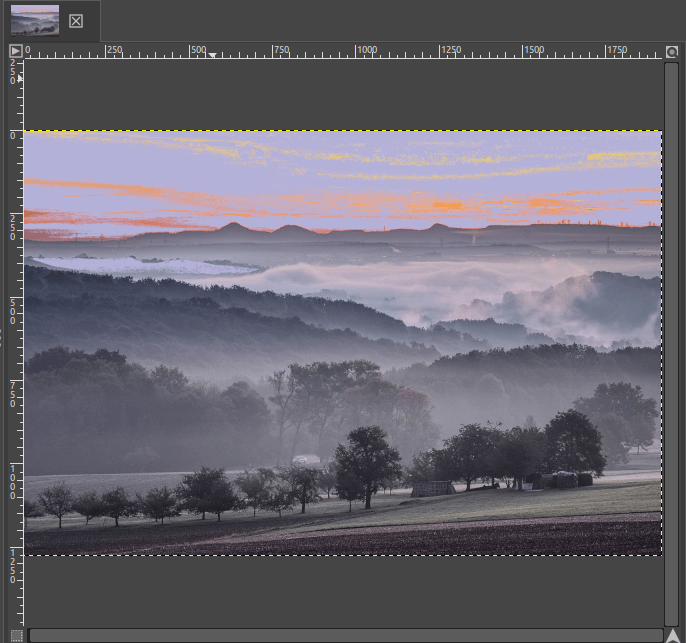
In this case, we’ll be using “Selection” as the selection of the subject is still active. Once the mask is done, we need to deselect prior to moving on to the next step. To do so:
- Go to Select >> None.
Step 06: Make a Selection using the Paths tool (B) & activating Selection
The hue saturation adjustment is applied to all the subject. Let’s do a selection to mask out the areas we do not want to recolour.
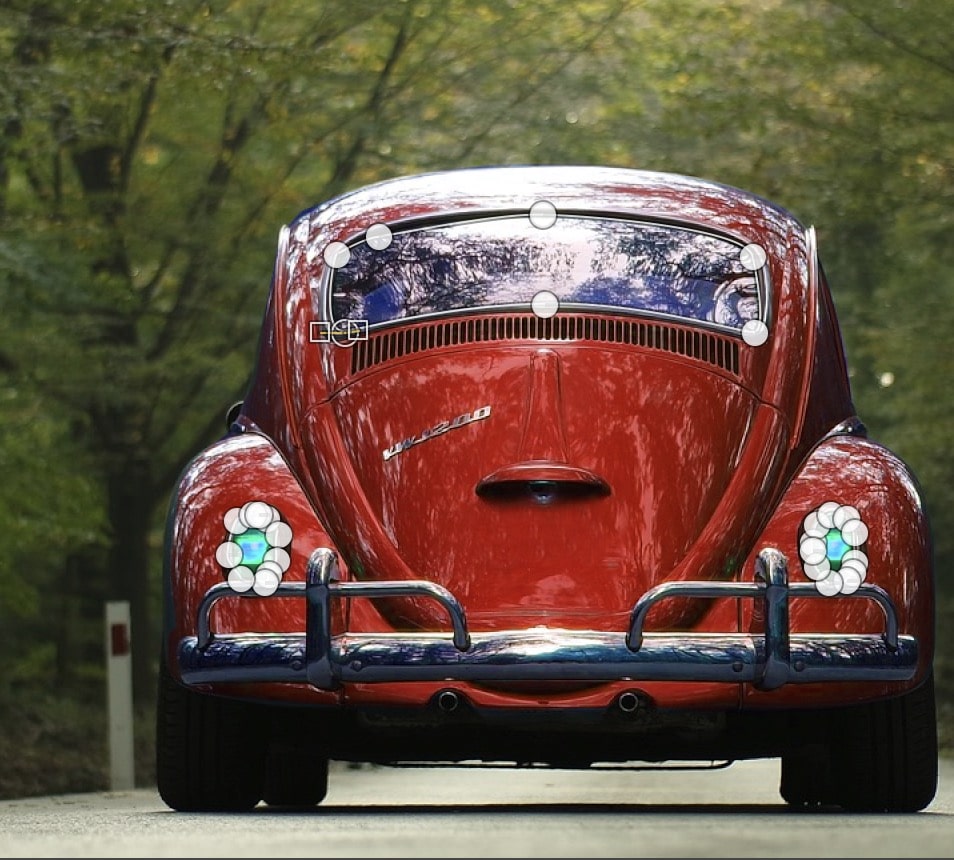
Activate the selection by:
- Go to the Paths dialog.
- Select “Paths to selection”.
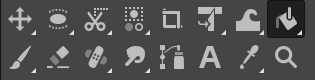
Step 07: Choose the Bucket fill tool
Next, you need to choose the Bucket fill tool to fill the eye color with a new color. To choose the Bucket fill tool,
- Go to the Toolbox.
- Click on the Bucket fill tool icon.
- Alternatively, use the keyboard shortcut “Shift+B”.
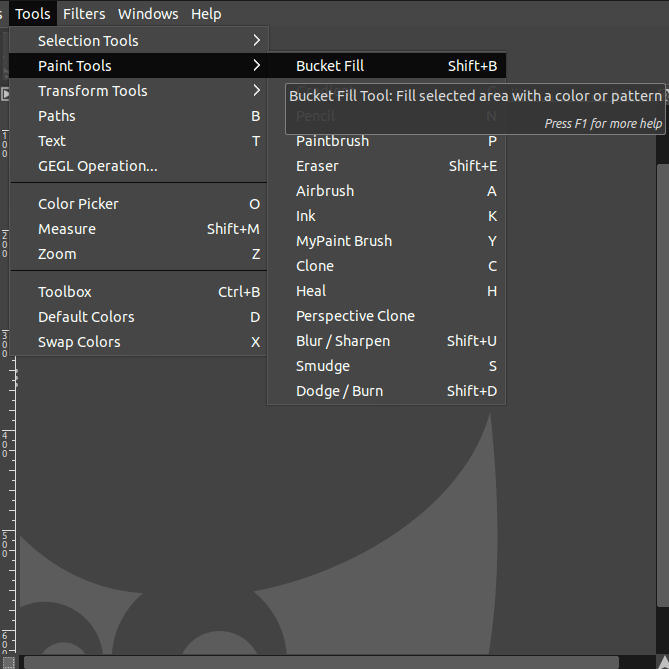
Alternatively,
- Go to the Tools menu.
- Choose Paint tools.
- Click on the Bucket fill tool.
Choose the colour black and then click on the image. You will notice that the selected area is now clear.
Step 08: Deselect Subject
Go to Select >> None to deselect the subject.
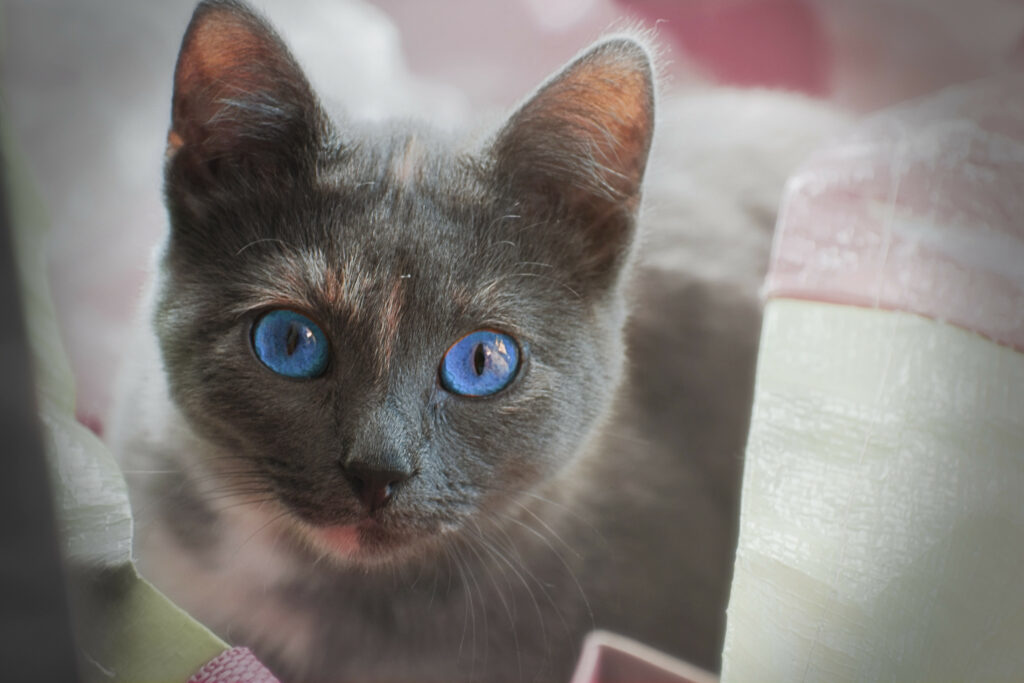
How to change the eye colour in GIMP
A combination of tools, including “Bucket fill” and “Paintbrush,” can be used in GIMP to alter the colour of the eyes. Choosing the subject whose colour you want to change, choosing a new colour, and applying the new colour to the eye are some of the steps in the procedure.
Step 01: Open the image
Open the image in GIMP. To open an image in GIMP,
- Simply go to the File menu. Choose the Open option.
- Alternatively, press Ctrl/Cmd+O.
- Also, you can drag and drop the image to the GIMP workspace.
Step 02: Duplicate the background
To ensure that you don’t edit the original image, you must duplicate the image first. To duplicate the image,
- Go to the Layer menu in the top toolbar.
- Next, click the option Duplicate layer.
- Alternatively, use the keyboard shortcut Shift+Ctrl/Cmd+D.
Another way to duplicate the layer is,
- Right-click on the original image.
- Choose the option Duplicate layer among a couple of drop-down options.

Once you duplicate the layer, you would notice that the copy of the original image appears in the Layers dialog. You can also rename the duplicated layer to easily identify it by,
- Double-click on the duplicated layer.
- Enter a name (Here Duplicate is the new name chosen).
- Next, press Enter.
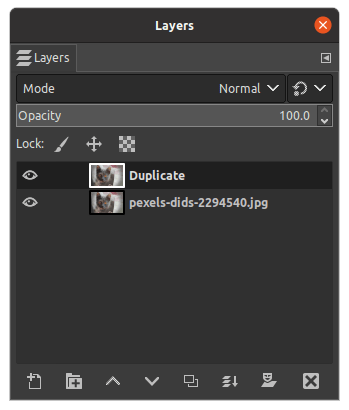
Finally, you have duplicated and renamed the layer for the next step.
Step 03: Add a layer mask
Now you have to add a layer mask to limit the recolouring to a portion of your image. Start by clicking and selecting the duplicate layer from the Layers dialog. To add the Layer mask,
- Go to the Layer menu in the top toolbar.
- Choose Mask.
- Click the option Add Layer Mask.
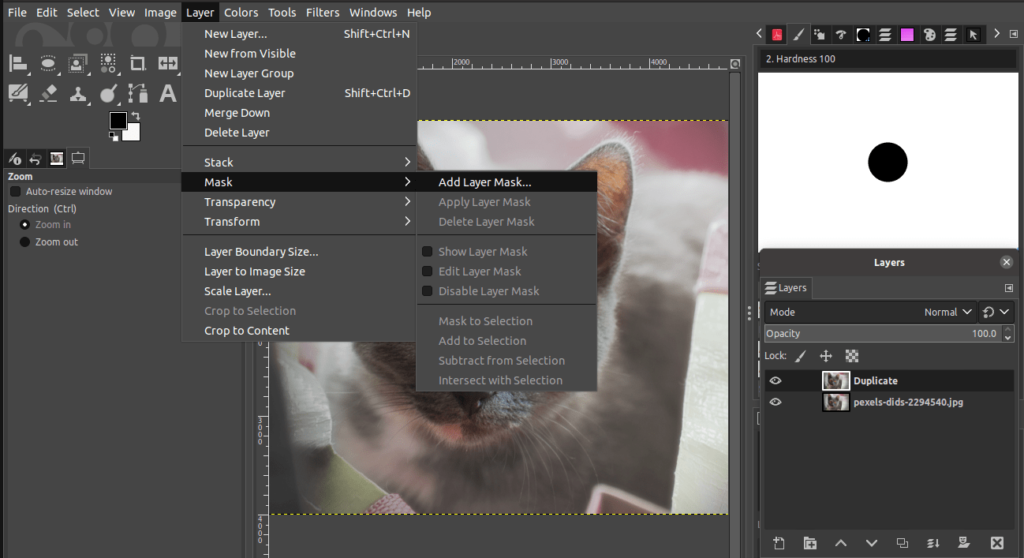
As soon as you click, a dialog would appear to choose the type of layer you require. The first two options in the Layer masks dialog are,
- White (full opacity): Entire layer will be visible
- Black (full transparency): Entire layer will be invisible
In this context, we will choose black (full transparency) as we only need to change the eye colour.
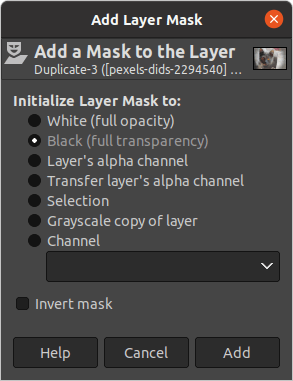
Once you choose Black (full transparency), click on Add in the dialog box. You will notice that a black thumbnail appears next to the duplicate layer in the Layers dialog. This indicates that a black layer mask has been added.
If there is a white border around the black thumbnail, it indicates that the layer mask is active. Now, your layer mask should be active.
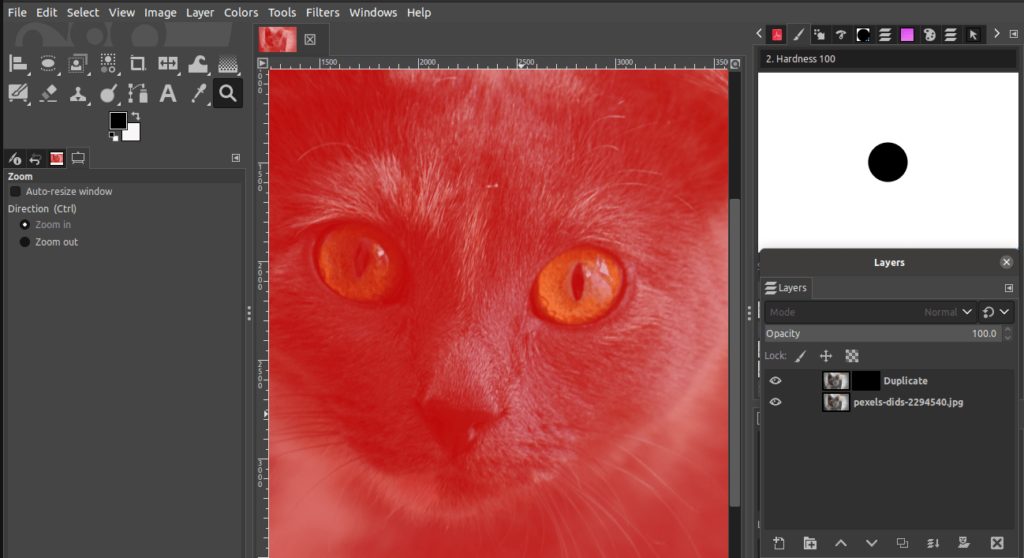
Step 04: Turn on Toggle Quick Mask
To activate a quick mask,
- Go to the Edit menu on the top toolbar.
- Click Toggle Quick Mask.
- Alternatively, use the shortcut Shift+Q to activate the quick mask.
Once you activate it, a red coloured mask appears on top of the image.
Step 05: Choose the Paintbrush Tool
Next, you need to choose the Paintbrush tool to start painting the new colour on the eyes. To choose the Paintbrush tool,
- Go to the Toolbox .
- Click on the Paintbrush tool.
- Alternatively, use the keyboard shortcut “P“.
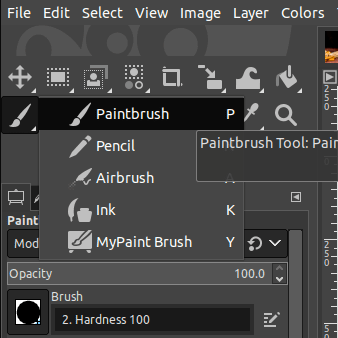
Alternatively,
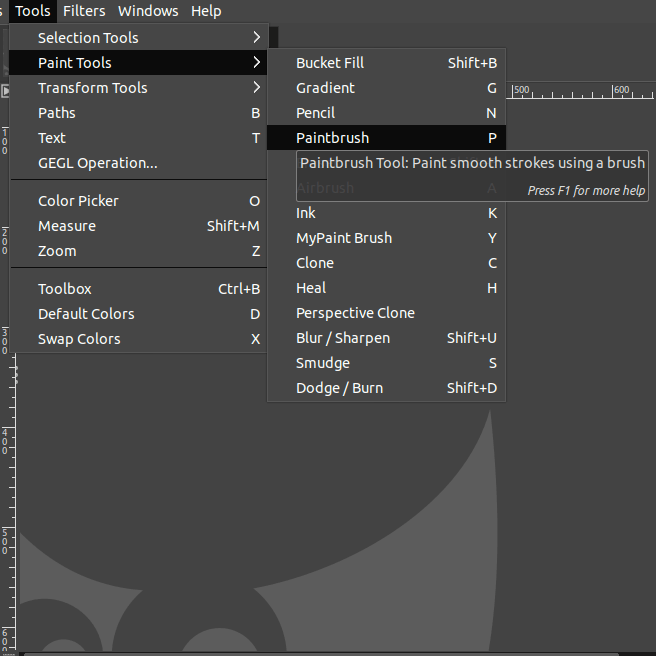
- Go to the Tools menu.
- Choose Paint tools.
- Click on the Paintbrush tool.
Now, change the foreground colour to white and adjust the brush size in the shortcut “[” or “]”. Next, pick the colour white and paint on the eyes to limit the recolouring only to those areas of the image. If by mistake you paint outside the eyes, you can correct this by switching the colour to black and painting over the areas you want to correct.
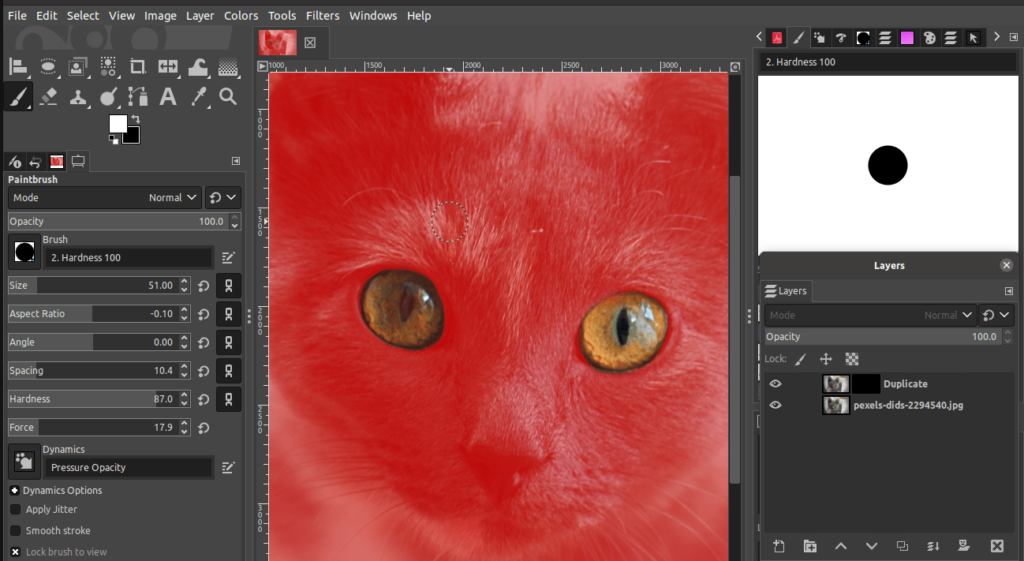
Once you have removed the red mask on the eyes successfully, you need to eliminate it by using the keyboard shortcut Shift+Q to switch off the red mask.
Step 06: Choose the Bucket fill tool
Next, you need to choose the Bucket fill tool to fill the eye colour with a new colour. To choose the Bucket fill tool,
- Go to the Toolbox.
- Click on the Bucket fill tool icon.
- Alternatively, use the keyboard shortcut “Shift+B”.
Alternatively,
- Go to the Tools menu.
- Choose Paint tools.
- Click on the Bucket fill tool.
Choose the colour White and then click on the Marquee selection surrounding the eyes. You will notice that the two eyes will be shown as white in the layer mask indicated in the Layers Dialog.

Step 07: Use the Hue/Saturation filter
Go to the Layers menu and click on the duplicated image to select it. Once you select it, you can apply the filter to change the eye colour. To select the filter,
- Go to the Colours menu.
- Click on Hue-Saturation.
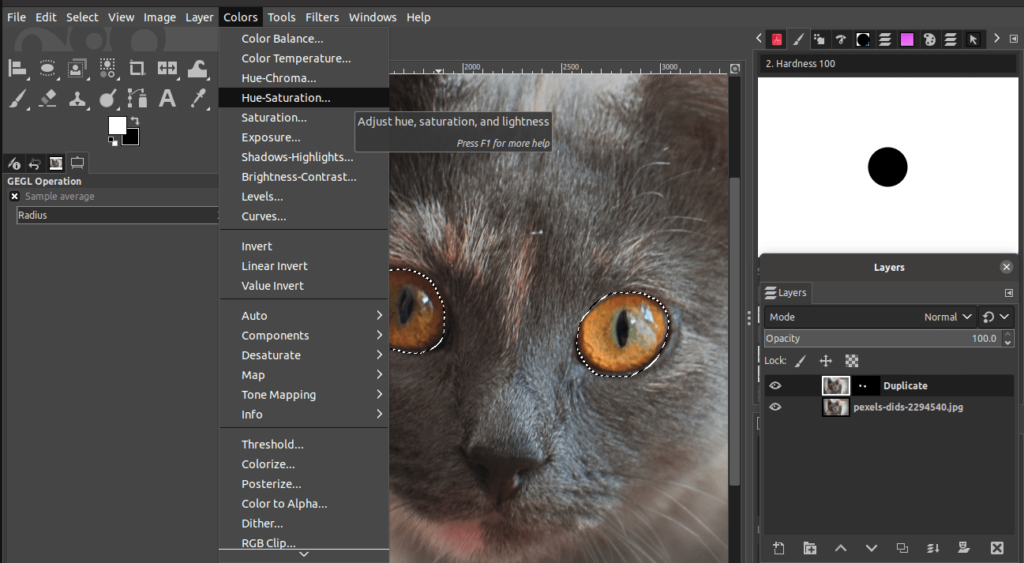
Apart from the above filter, you can use the Colour balance, Hue-chroma, or any other filter you prefer. Once you select the filter, a dialog will appear and you can choose the preferred colour for the eye and preview the changes in real-time.

Once you amend the colours in the filter dialog, click OK. To remove the marquee selection,
- Go to the Select menu.
- Select None.

That’s all! Now you can notice the colour changes.
Changing or Replacing Colours in GIMP (Different selection Tools)
In GIMP, there are 6 tools and features that allow you to recolour images in GIMP:
- Select by Colour
- Fuzzy Select tool
- Hue-Saturation
- Bucket Fill tool
- Colour Balance
- Colourize
We will discuss each and every tool in detail. Let’s get down to it!
How to replace solid colours Using the Select By Colour tool
This method is handy when you want to replace a solid colour or shades of a particular colour. You can easily use this tool for changing the colour of logos, pixel art, and outlined texts. These examples typically feature a few colours rather than plenty of colours or distinct shades.
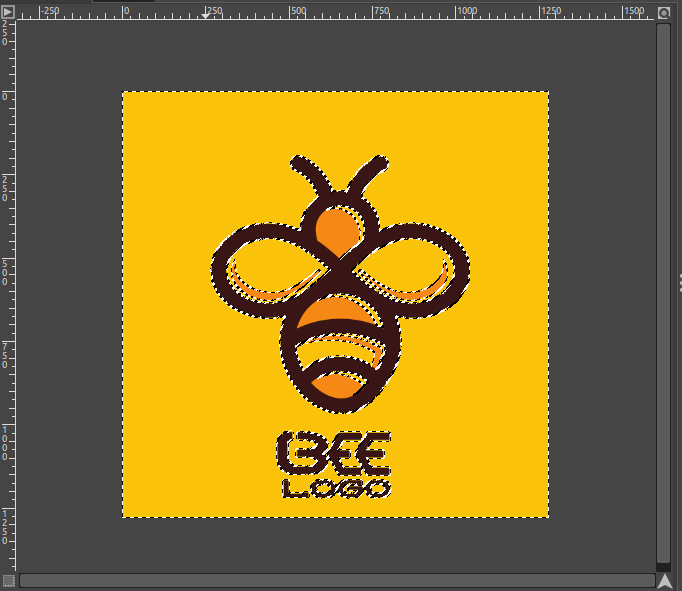
In the below example, I will change the yellow coloured pixels to a different colour.

Step 01: Open the image
Open the image in GIMP. To open an image in GIMP,
- Simply go to the File menu. Choose the Open option.
- Alternatively, press Ctrl/Cmd+O.
- Also, you can drag and drop the image to the GIMP workspace.
A dialog will be displayed as soon as you perform any of the above actions. Simply go to the folder with the image to open it in GIMP.
Step 02: Apply the Selection with Select By Colour
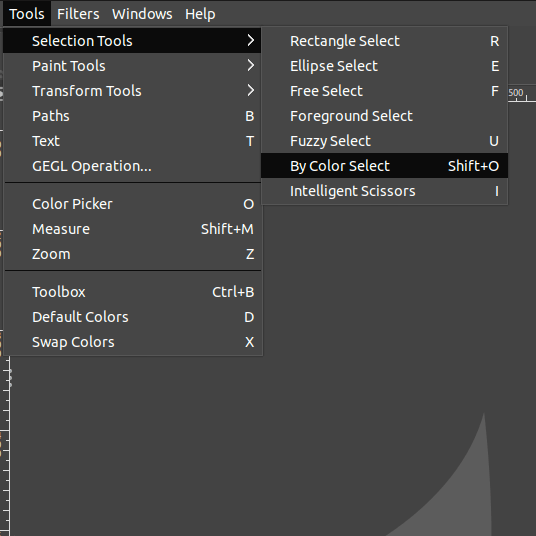
In this step, you can select the pixels you want to recolour using the Select By Colour tool. The specialty of this tool is that it selects multiple pixels having a similar colour in one click. To select the By Colour Select tool,
- Go to the Tools menu, click on Selection tools and select the By Colour Select option.
- Alternatively, you can choose the By Colour Select tool from the Toolbox.
- Else, use the shortcut Shift+O.
Once you select the tool, click anywhere on the canvas to select pixels with the colour you wish to replace.
- Here, I clicked on the yellow-coloured pixels.
- As soon as you click, a selection will appear marked by a marching ants line.
- Increase the Threshold from the tool’s Options if you need to include more pixels in the selection.
Step 03: Apply the Filter
Next, we need to apply a filter to the selected pixels. There are many filters you can choose for recolouring, such as the following:
- Hue-Chroma
- Hue-Saturation
- Colour Exchange
- Colourize
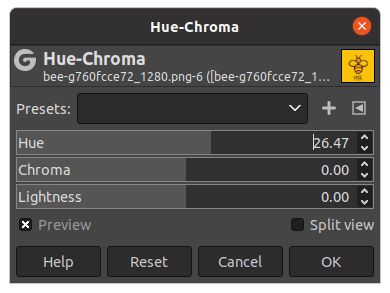
In this example, we will show you how to apply a Hue-Chroma filter,
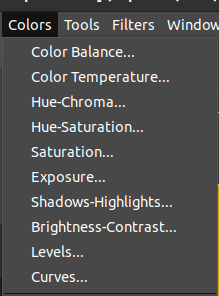
- Go to the Colours menu.
- Choose the Hue-Chroma filter.
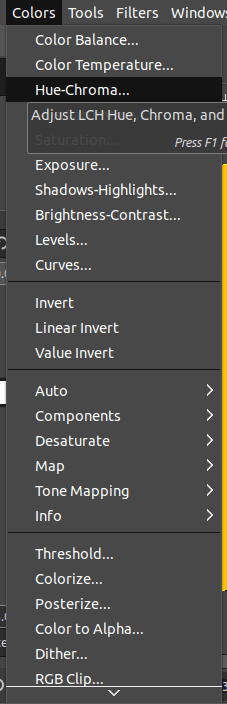
You have three sliders in the Hue-Chroma filter dialog as follows:
- Hue: The hue determines the saturation and the purity of the colours in your image.
- Chroma: Chroma sets how strong or the intense the colors are.
- Lightness: Lightness represents the darkness or lightness of the specific colour.
Step 04: Adjust the filter
In this step, we’ll experiment with these three sliders.
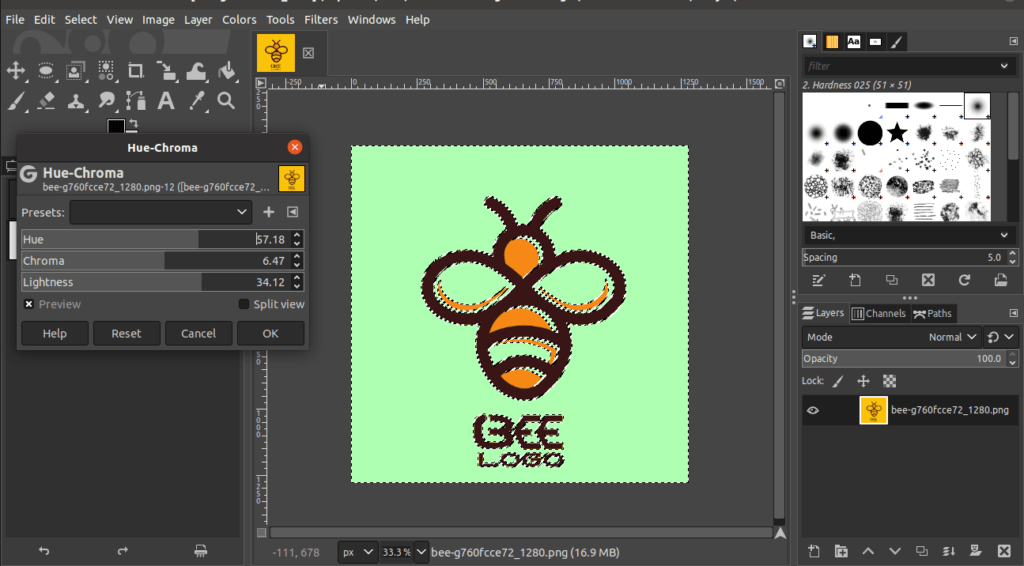
Example 01
In the below image, I increased the Hue slider to generate a green colour with a value of 57.18. If you prefer to increase the intensity of the colour, you can use the Chroma slider. Also, if you prefer to create a lighter image than the represented Hue colour, drag the lightness slider to the right.
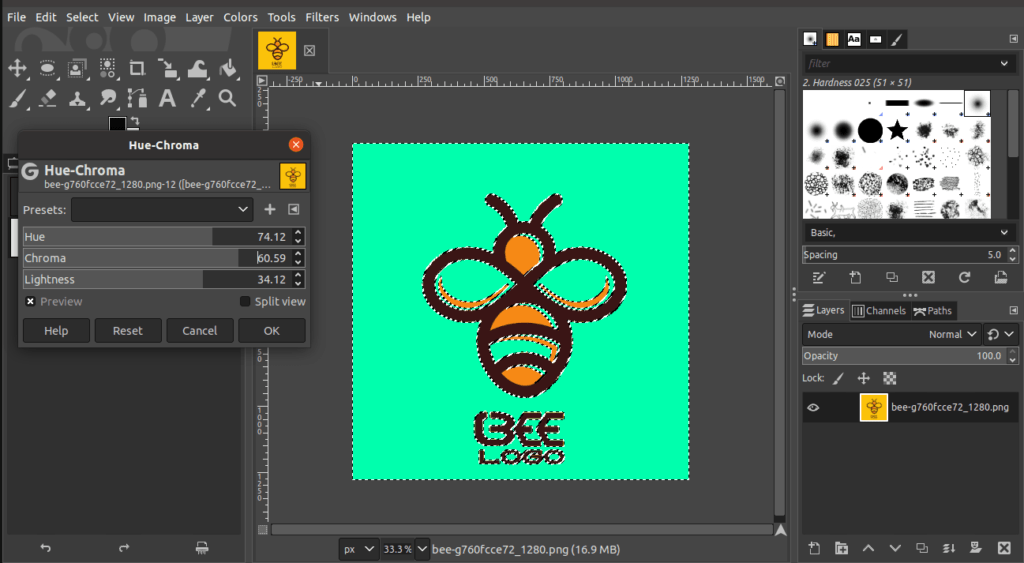
Example 02
To demonstrate the different shades you can create, see the example below. If you drag the Hue to the right, you gain different shades of colours as below. As you can see, a stronger intensity of colour is evident in the below example.
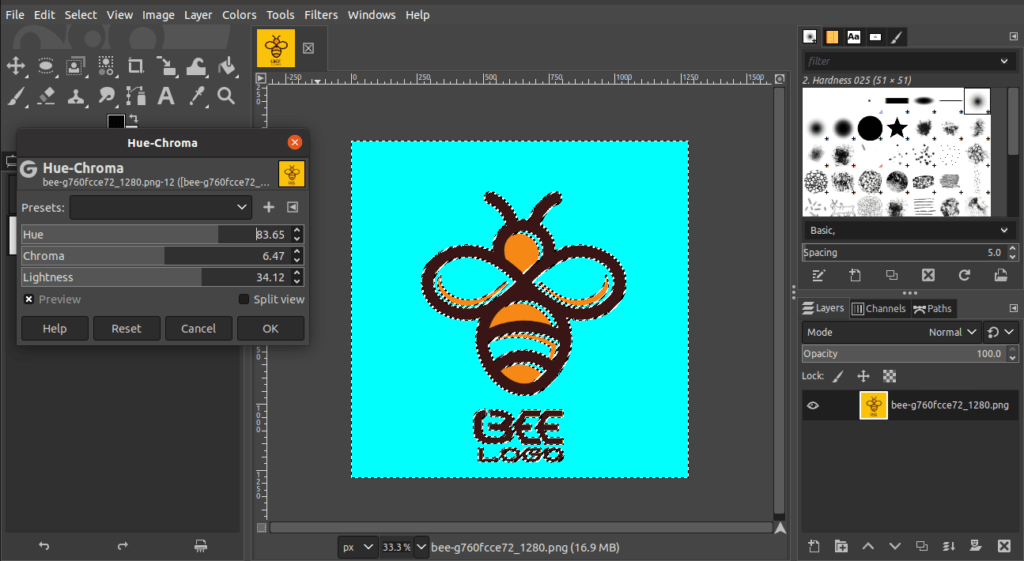
Example 03
In the final stage, the Hue was increased to 83.65 to achieve a blue shade. If you prefer a less strong colour, drag the Chroma slider to the left. You can experiment with these sliders as per your requirement.
Finally,
- Once you are ready, simply click on OK in the Hue-Chroma dialog.
- All the colour changes will be automatically applied.
Step 05: Deselect the selection
Finally, you need to deselect the selection,
- Go to the Select menu.
- Click None.
The final result can be viewed below. You will notice that only the yellow pixels of the original image became blue. The rest of the colours remained unchanged.

That’s it! That is how you can change colours in an image using the Select by Colour/By Solor Select tool.
How to replace colours Using the Fuzzy Select Tool
The Fuzzy Select tool is handy to select contiguous regions of colours. Therefore, make sure that your image has similar shades of the colour you wish to replace. Follow the below steps to learn how to use this tool effectively.
Step 01: Open the image
To open an image in GIMP,
- Initially, go to the File menu. Click the Open.
- Alternatively, press Ctrl/Cmd+O.
- Or, drag and drop the image to the GIMP workspace to open an image.
Locate the image from your folders and open it in GIMP. Make sure to open the right image to change the colour.
Step 02: Apply the Selection with Fuzzy Select Tool
To select the Fuzzy Select tool,
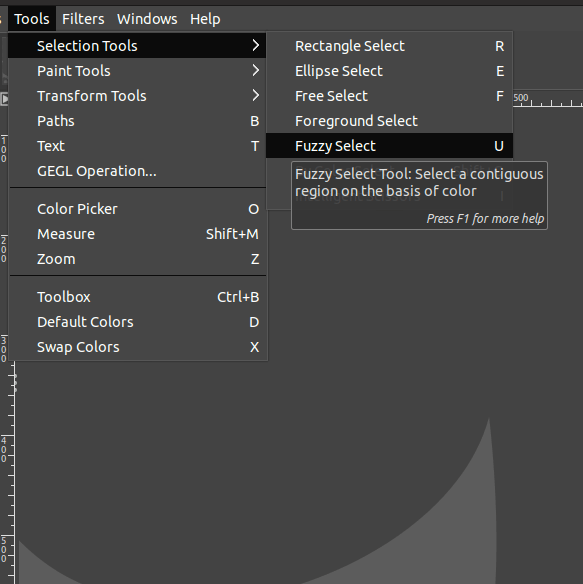
- Go to the Tools menu. Next, click on Selection tools and choose the Fuzzy Select tool.
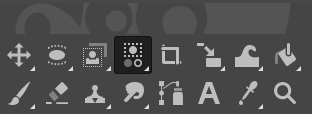
- Alternatively, head to the Toolbox and click on the Fuzzy Select icon (magic wand) as displayed below.
- You can also use the shortcut ‘U’.
Once you select the tool, click anywhere on the image where there is the colour you wish to replace.
- The selection will occur as soon as you click on the image.

Step 03: Apply the Filter
Next, we will apply a Hue-Chroma filter to the selection. To select the Hue-Chrome filter,
- First, go to the Colours menu.
- Click the Hue-Chroma filter.
Play with the sliders according to your preferences.
Step 04: Adjust the filter
In this step, let’s experiment with the Hue, Chroma, and Lightness.
Example 01
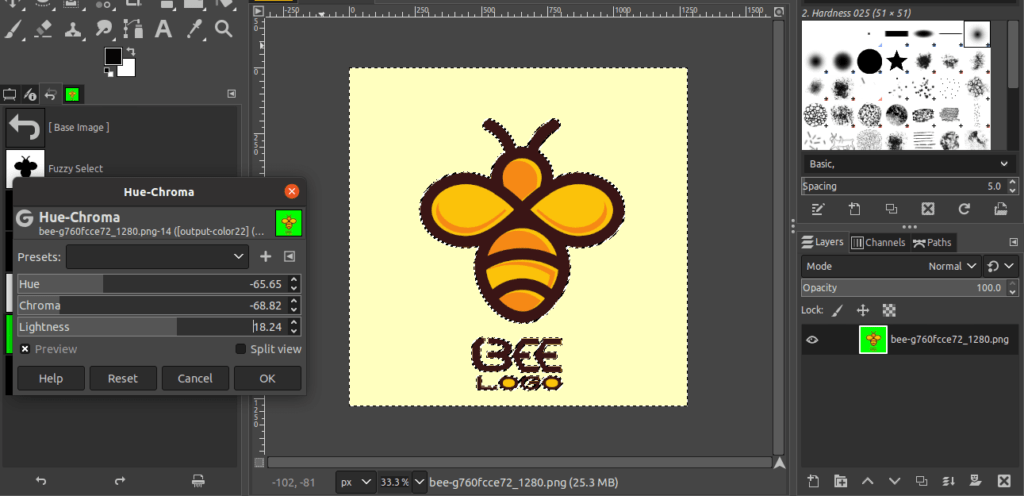
We have dragged the Hue slider to the right for 47.65. If you prefer to take a dark shade of blue, increase the Chroma. Also, to gain a light shade of blue, increase the lightness slider as displayed below.
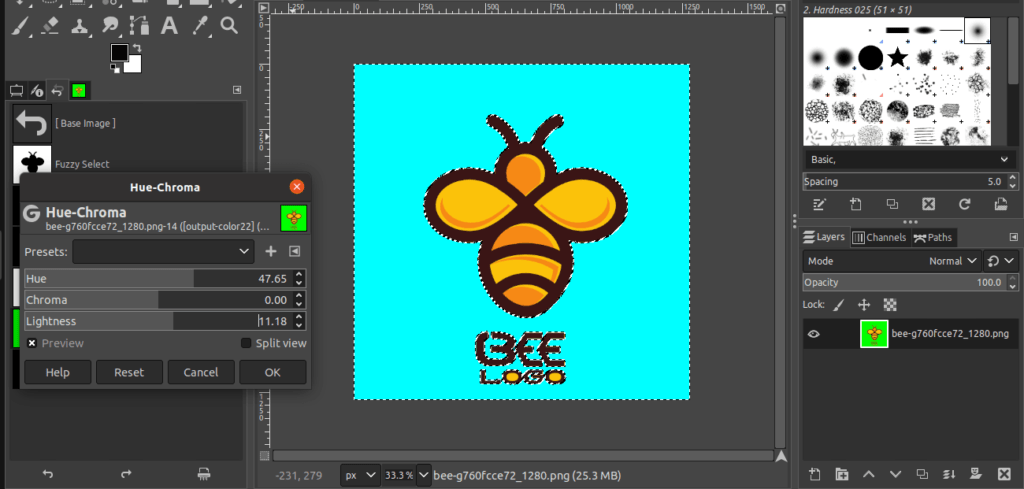
Example 02
To obtain a lighter shade of the existing colour, drag the Hue slider to the left for about -65.65. To intensify the picked colour, choose the Chroma as -66.82. Also, if you prefer to gain a lighter shade of this colour, change the lightness to 18.24.
These colour preferences are picked to suit the yellow bee colour in the image. Therefore, depending on your image, you can choose to play with sliders creatively.
You can notice that only the background pixels of the contiguous selection is changed.

How to change colours of Complex Images
In this section, we will use the Hue/Saturation filter to change the colour of more complex images. Complex images include scenes having multiple colours, making it difficult to use the Select By Colour or the Fuzzy Select tool. The Hue/Saturation filter makes recolouring extremely simple.
Let’s dive in!
Step 01: Open the image
To open an image in GIMP,
- Initially, go to the File menu. Click the Open.
- Alternatively, press Ctrl/Cmd+O.
- Also, drag and drop the image to the GIMP workspace to open an image.
Step 02: Select the Hue-Saturation filter
The contrasts, tones and brightness of an image are divided into several colours. These can be adjusted separately using the Colour wheel of this filter Hue-Saturation filter. To select the Hue-Saturation filter,
- Go to the Colours menu.
- Choose the Hue-Saturation.
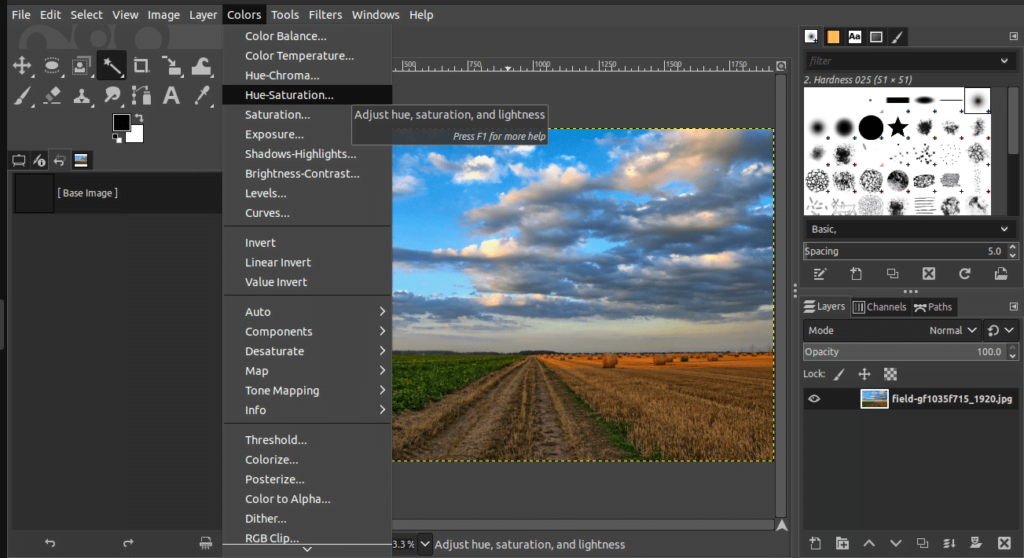
Then, the Hue-Saturation dialog is displayed as follows:
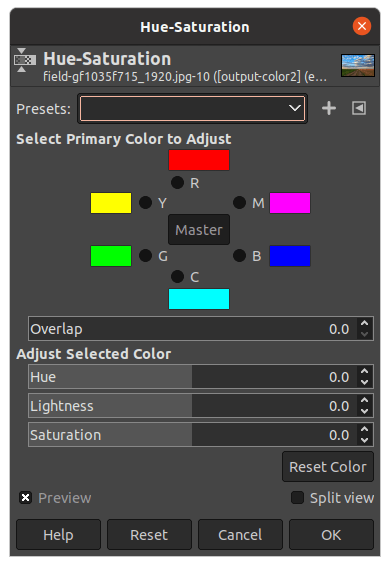
The above dialog might be confusing at first glance. No worries, we got you covered! There are two methods to use Hue-Saturation filter.
- Method 01: Use the Master option.
- Method 02: Use the Colour wheel to change specific colours.
Method 01
If you click on Master, it deals with all the colours in your image at one go. Method one is pretty simple,
- Click on the Master option in the middle of the Hue-Saturation dialog.
- Then, adjust the Hue, Lightness, and Saturation sliders.

Method 02
This method is ideal for targeting a particular colour without affecting others. To use this method,
- Click on one of the 6 colours found in the image. For example, you can click on ‘C’ to change the Cyan colours in your image.
- If the specific blue colour you wish to change is not in the Colour wheel, you can select an identical colour and use the Overlap slider to target that desired colour.
- For example, if you need to recolour the orange pixels in your image, you can click either red or yellow. Then, use the Overlap slider to convert it into orange colour.
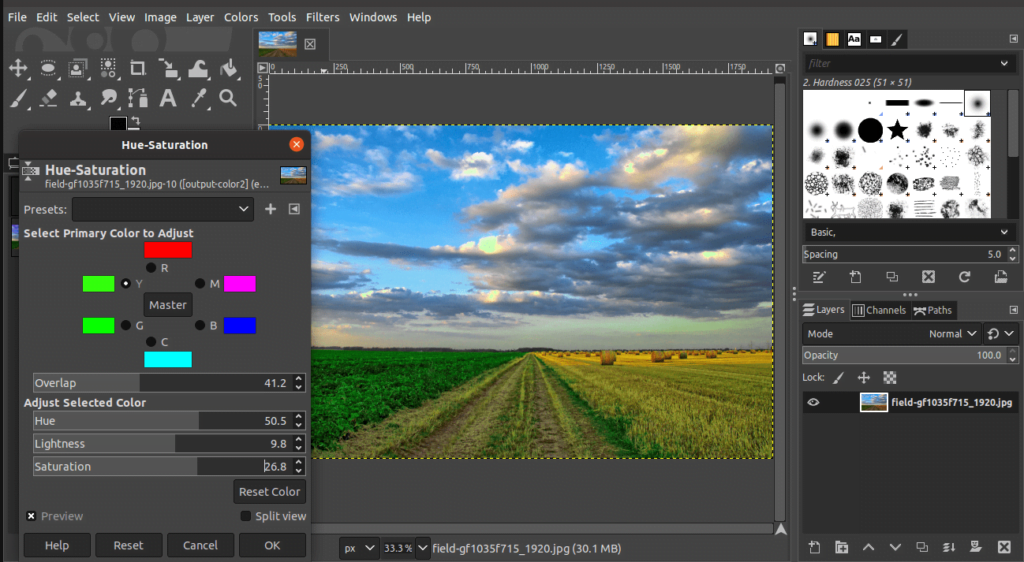
Example 01
In the below example, I clicked on the ‘B’ which is Blue. Then, I adjusted the Overlap. Hue, and Saturation sliders to make them pink as displayed below. The colour box in the colour wheel would display the applied colours across the image.

Example 02
In the below example, the ‘Y’ option is clicked. The ‘Y’ indicates yellow.
Then, the Overlap, Hue, Lightness, and Saturation sliders are adjusted to bring out more green in the image. This recolouring is applied across the grass in the image.
This way you can play with the colours as much as necessary
Step 03: Apply the Colour changes
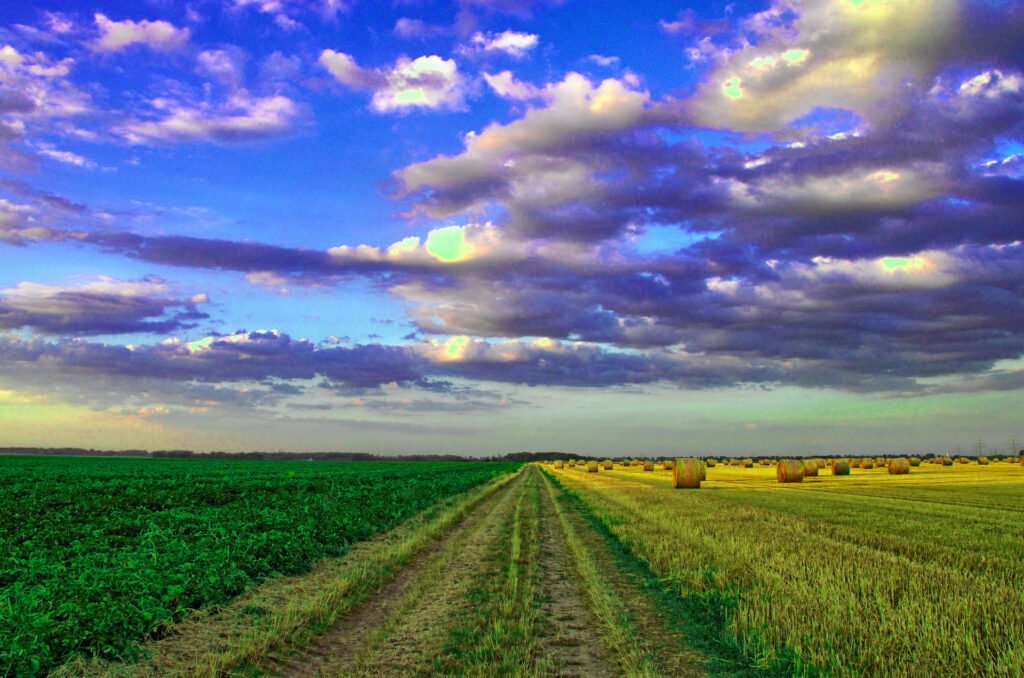
Simply, press OK in the Hue-Saturation dialog to finish off the colour changes, both when using Method 1 and Method 2. That’s it! You have changed the colours of the image as per your requirement. The final result after changing multiple colours is as follows:
How to use the Bucket Fill tool to Change Colours
In this tutorial, we will use the Bucket Fill tool combined with the Free Select tool to change the colours in an image. The Bucket fill tool helps to choose the desired colour to apply the recolouring. On the other hand, the Free Select tool is handy to select the regions where you wish to change the colour. The fusion of these tools results in an interesting colour change effect!
This method is handy for recolouring complex images. Follow the below steps to learn how to use these tools.
Step 01: Open an image
To open an image in GIMP,
- Simply go to the File menu. Choose the Open option.
- Alternatively, press Ctrl/Cmd+O.
- Also, you can drag and drop the image to the GIMP workspace.
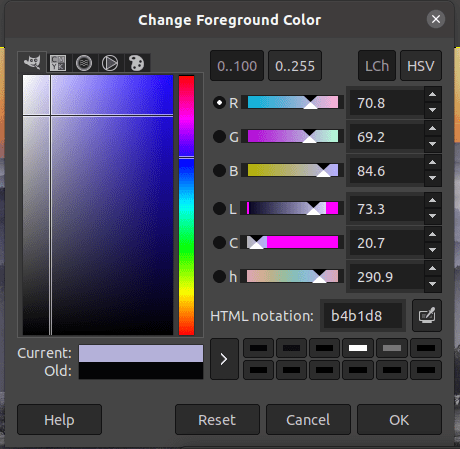
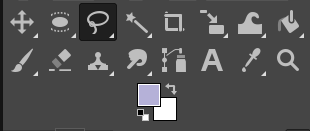
Step 02: Change the foreground colour
The colour you choose as the active foreground is the new colour that you want to apply to the image. To change the foreground colour,
- Click on the foreground colour which is displayed below.

- Then, the Change Foreground Colour dialog will be displayed as follows.
- Choose the desired colour to apply to the image. In this example, a light shade of blue is chosen as the active foreground.
- Once you choose the desired colour, click OK.
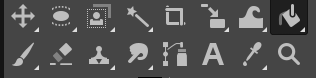
Step 03: Choose the Bucket Fill tool
We will use the Bucket Fill tool to apply the newly selected foreground colour. Select it using one of these methods:
- Click on the Bucket Fill tool from the Toolbox.
- Go to the Tools menu. Choose Paint tools and select the Bucket Fill tool.
- Alternatively, use the shortcut Shift+B.

Next, you can click on the image to change the colours as per your requirement. In this example, I clicked on the sky to change the orange colour to light blue. The following is the result of a few clicks to apply colour changes using the Bucket Fill tool.
To undo any colour changes perform one of the following,
- Use the keyboard shortcut Ctrl/Cmd+Z.
- Go to the Edit menu and click Undo.
You can continue to click on the regions you want to recolour using the Bucket Fill tool until you are satisifed with the changes.

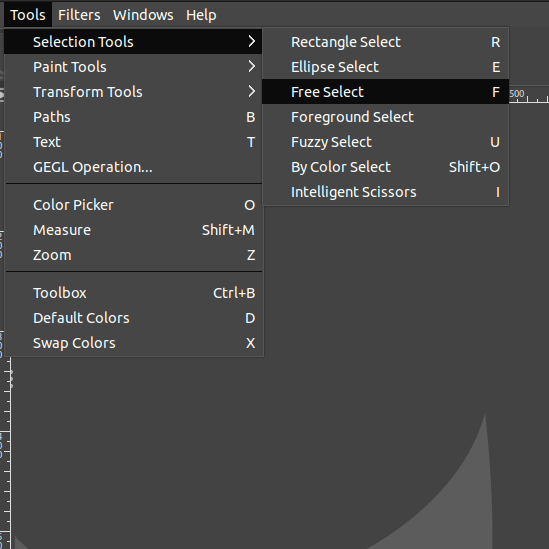
Step 04: Choose the Free Select tool
In order to recolour areas that cannot be targeted using the Bucket Fill tool, we will use the Free Select tool to make freehand selections. Then, we will use the Bucket fill tool to fill the selection with a desired colour. First,
- Click the Free Select tool from the Toolbox.
- Or, go to the Tools menu. Choose Selection tools and select the Free Select tool.
- Alternatively, use the shortcut “F”.
Now, apply the selection over the area you want to apply the new colour,
- Start by clicking to create the first point..
- Keep clicking to make the selection.
- Finally, combine the start and end nodes.
- Once you combine the start and end nodes, the selection will be completed.

Next, choose the Bucket Fill tool and click inside the selection to fill it with a chosen colour.
That’s it! This is how you pair the Bucket Fill tool with the Free Select tool to change colours in an image in GIMP.
How to use the Colour Balance Tool to Change Colours
The Colour Balance tool allows you to control the tonal ranges in your image. This tool is handy to correct balance the colours in your image by correcting dominant tones.
Step 01: Open an image
To open an image in GIMP,
- Simply go to the File menu. Choose the Open option.
- Alternatively, press Ctrl/Cmd+O.
- Also, you can drag and drop the image to the GIMP workspace.
Step 02: Use the Colour Balance
To pick the Colour Balance tool,
- Go to the Colours menu.
- Then, click on Colour Balance.
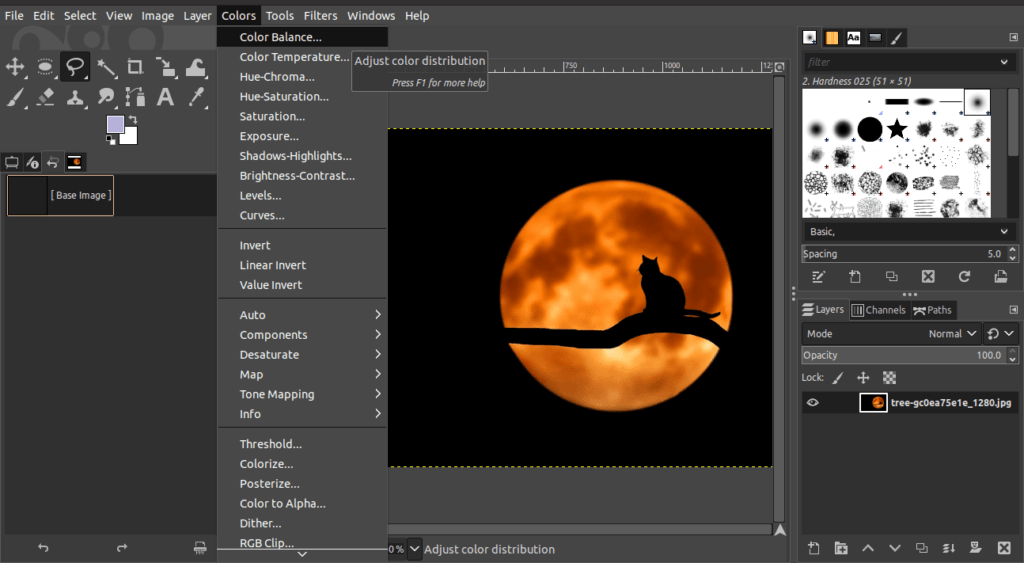
A dialog showing the Colour Balance options will be displayed. Generally, you can adjust three colour levels in the Colour balance as follows:
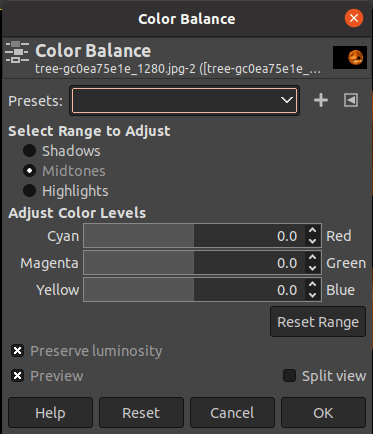
- Cyan-Red: If you pull the slider to the left, cyan-coloured pixels will be intensified. If you move the slider to the right, the amount of red will be increased.
- Magenta-Green: The direction you move the slider will result in an expansion of either Magenta or Green pixels.
- Yellow-Blue: This slider works the same way as the two above. Dragging the slider to the left will result in a surge of yellow in the image, and vice versa.
The colour changes made using these sliders are reflected in the image parallelly.

After you adjust the colour levels, click OK in the Colour Balance options dialog. As you can see below, you can gain amazing results by changing colours using the Colour Balance method.
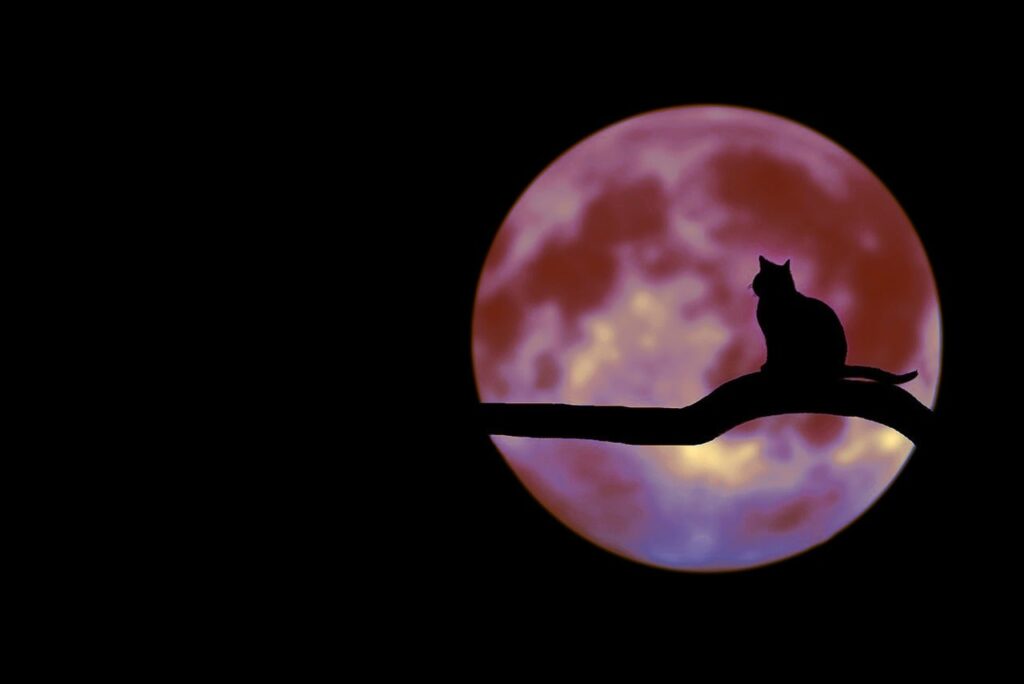
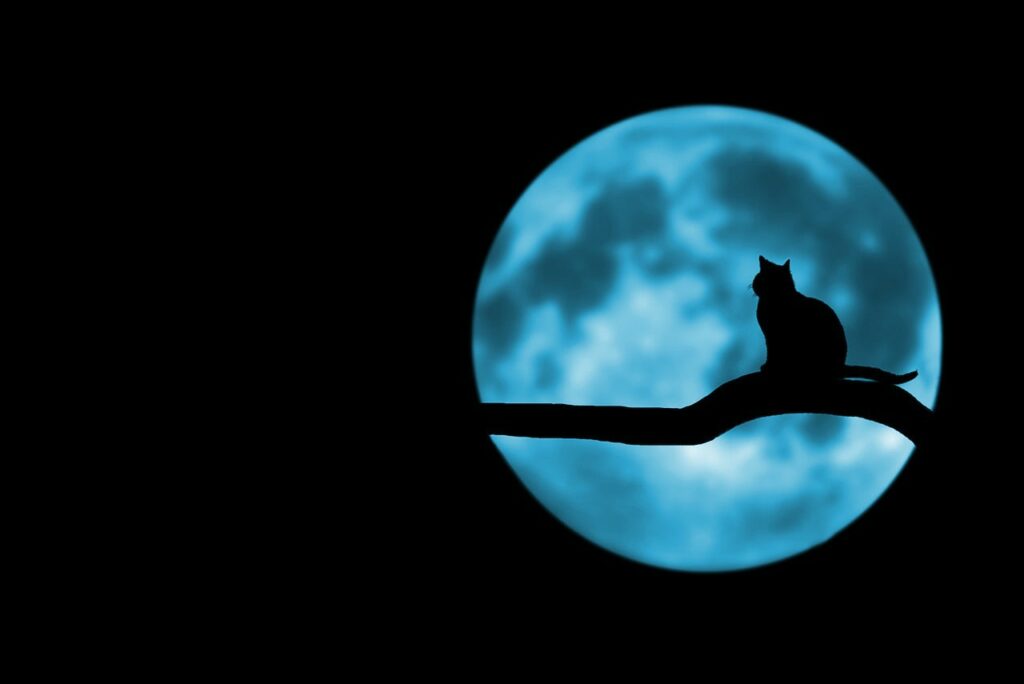
How to use the Colourize filter to Change Colours
The Colourize filter allows you to colour black and white or sepia-toned images.
Step 01: Open an image
To open an image in GIMP,
- Simply go to the File menu. Choose the Open option.
- Alternatively, press Ctrl/Cmd+O.
- Also, you can drag and drop the image to the GIMP workspace.
Step 02: Use the Colourise filter
To pick the Colourise filter,
- Go to the Colours menu.
- Then, click the Colourise option.
- The Colourise filter dialog will be displayed.
The dialog features the following options:
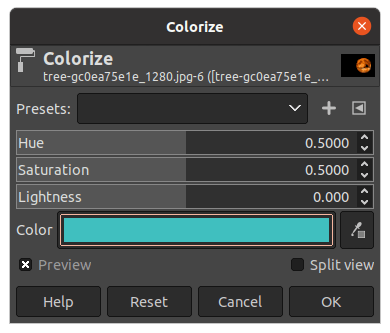
- Hue: Determines the hue you want to apply
- Saturation: Shows the intensity of the chosen colour
- Lightness: Displays the brightness of the chosen colour
- Colour: Allows you to choose the Colour you want to apply.
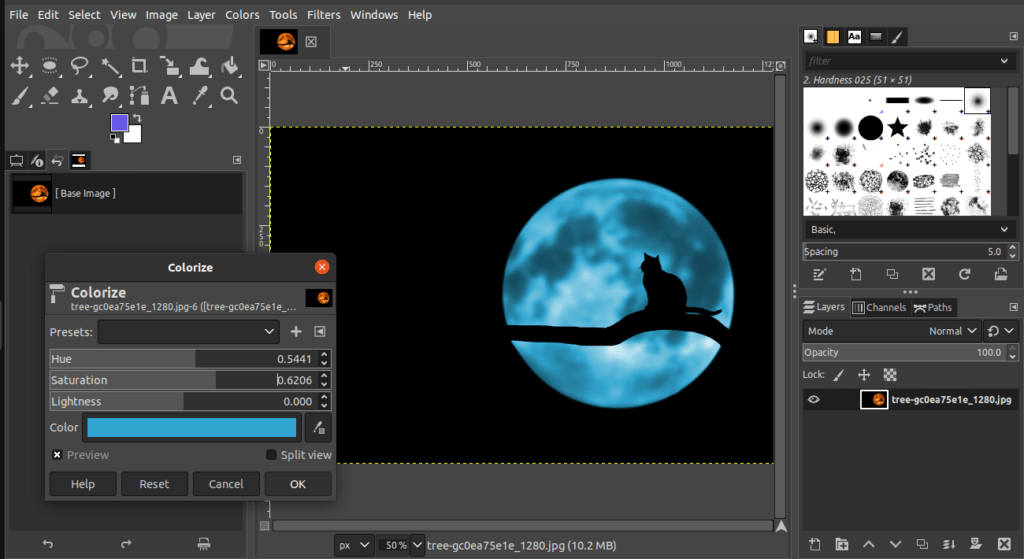
Drag the sliders to apply the changes. These will be reflected on the image in real time.
Conclusion
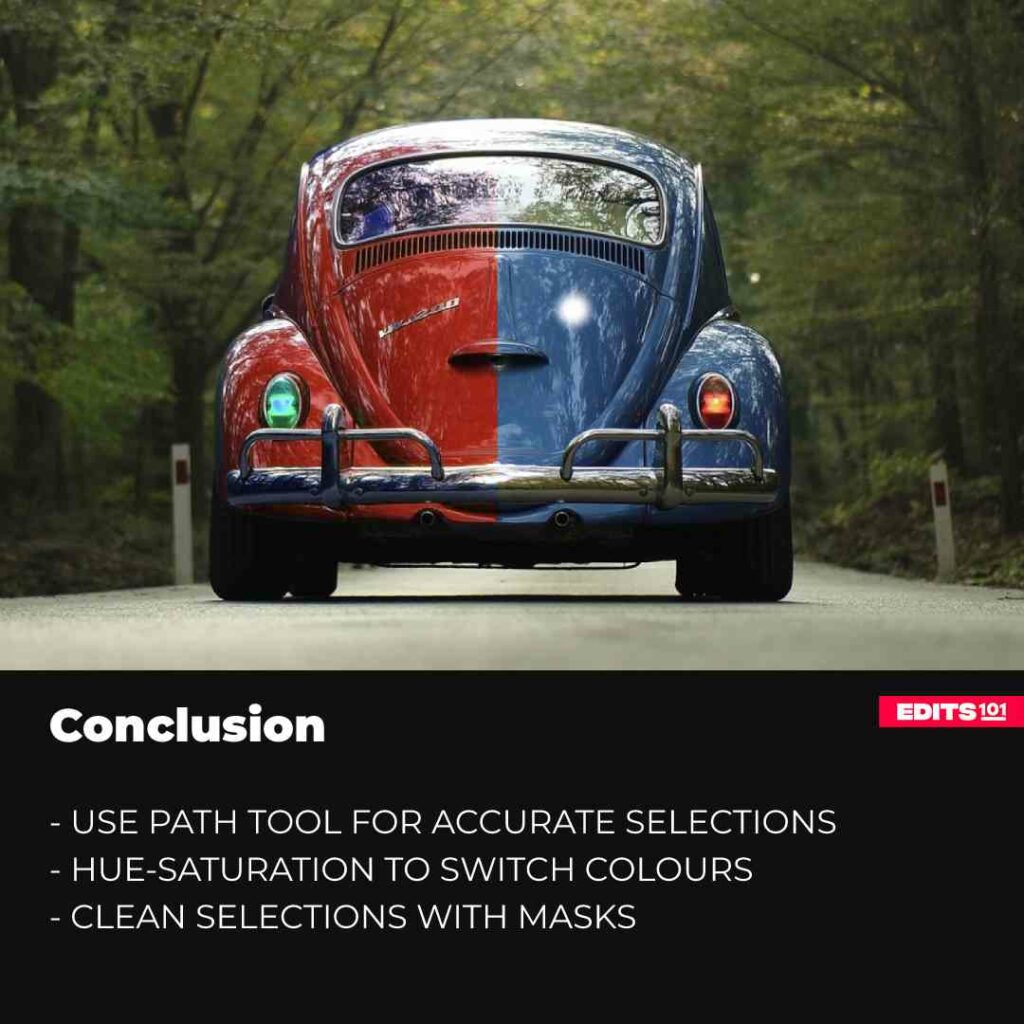
In conclusion, we have learned the different ways to change or replace colours in an image.
These are by using the Select by Colour tool, Fuzzy Select tool, Hue-Saturation filter, Bucket Fill tool, Colour Balance tool, and the Colourize tool. We can use these different methods to change the colour of any object in an image, including complex backgrounds and small areas such as eyes.
Thanks for reading & feel free to check out more of our articles!
Expert Rating
Summary
Recolouring images is an essential skill to learn in photo-manipulation. As a skill, it isn’t too difficult to learn, however, practice & learning how to implement different techniques are a must.
Thanks for reading & feel free to check out more of our articles!


