
When you need to resize an image in GIMP, there are two main methods: the Scale image option and the Scale tool.
Both methods have their pros and cons, so it’s important to know which one is best for the task at hand. The Scale image option is best for when you need to change the size of the image automatically by setting the amount of pixels within it. The Scale tool is ideal for when you wish to resize an image manually.
We will discuss the different options you can adjust in detail as well.
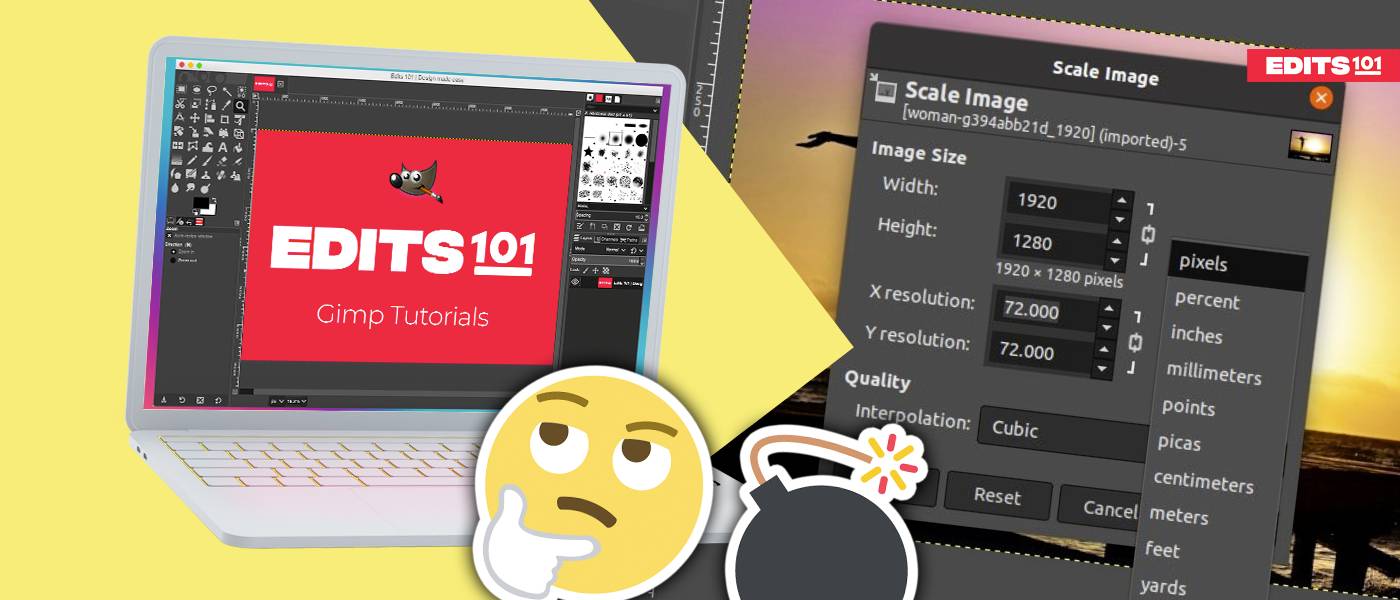
Introduction to Resizing An Image In GIMP
Have you ever tried to upload an image to a website, only to receive an error message telling you the image is too large? Then you know the frustration that comes with not knowing how to resize an image.
GIMP is a free program that offers a wide range of features for image editing and manipulation, including the ability to easily resize an image. There are two main ways to resize an image as follows:
- Use the Scale Image option
- Use the Scale tool
In this quick and easy guide, we will show you how to use these tools to resize your image without losing quality.
How to Resize images using the Scale Image Option in GIMP
With this tool, you can easily resize an image numerically. The canvas will be resized accordingly. Here’s how to use it:
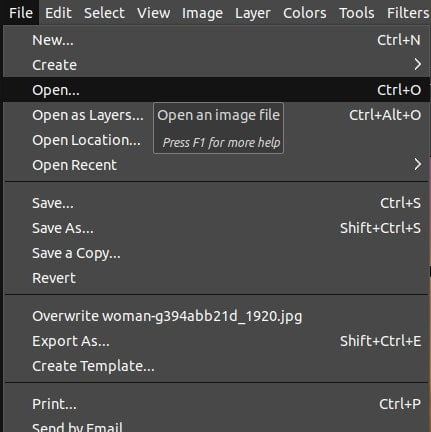
Step 01: Open the image
To open an image in GIMP,
- Simply go to the File menu. Choose the Open option.
- Alternatively, press Ctrl/Cmd+O.
- Also, you can drag and drop the image to the GIMP workspace. This saves you time if the image is located inside various sub-folders.
Step 02: Scale Image
Next,
- Go to the Image menu.
- Then, click on the Scale Image option.
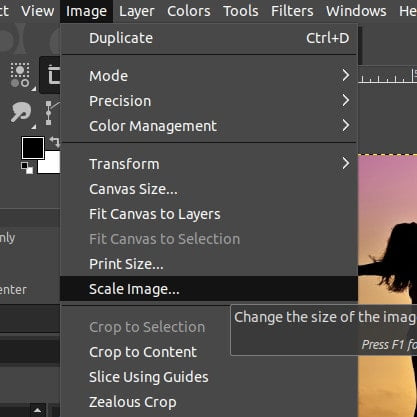
As soon as you click on the Scale Image option, the Scale dialog will be displayed. This dialog allows you to make changes to the dimensions and the resolution.
Step 03: Change the height and width
To adjust the height and width of the image, you can either:
- Use the arrows to make increase or decrease the width and the height.
- Alternatively, type in the values you require to make the necessary changes.
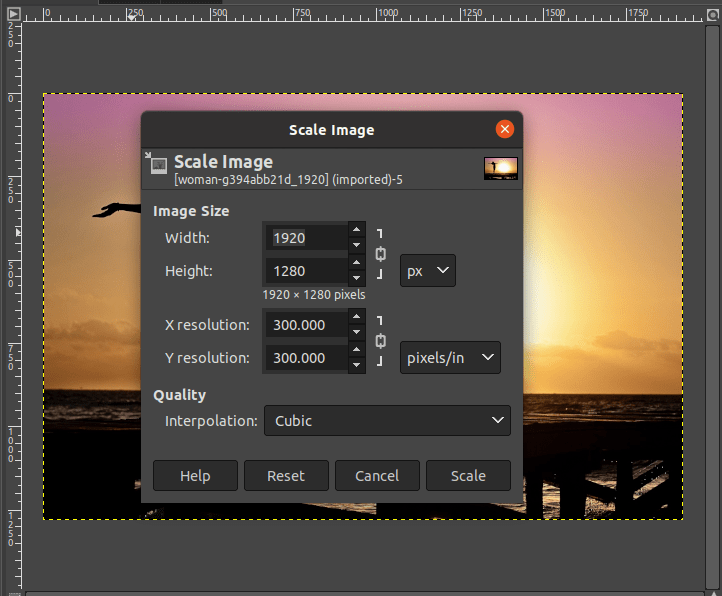
In order to lock the aspect ratio, click on the chain icon. This will keep the width and height proportionate to each other. For example, if you change the height to 500px, the width will also change to retain the ratio of the image. Simple as that!
Step 04: Change the Units
You can choose between the various units of measurement from the drop-down menu. These include,
- pixels
- percent
- millimeters
- centimeters
- feet
- yards
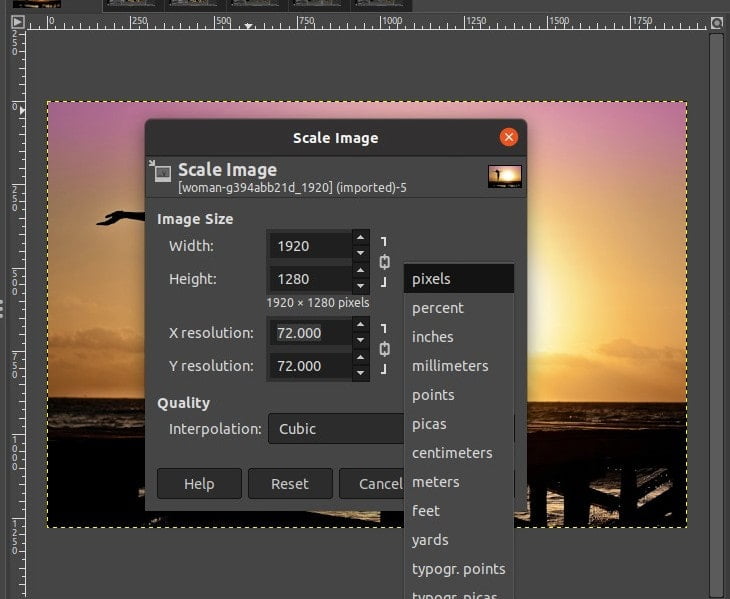
Each of these units has different properties. We’ll discuss them in depth in the following section.
Step 05: Change the resolution
Next, this is how you can change the X and Y resolution. Remember, if you are resizing images for a website, 72 is the best resolution size.
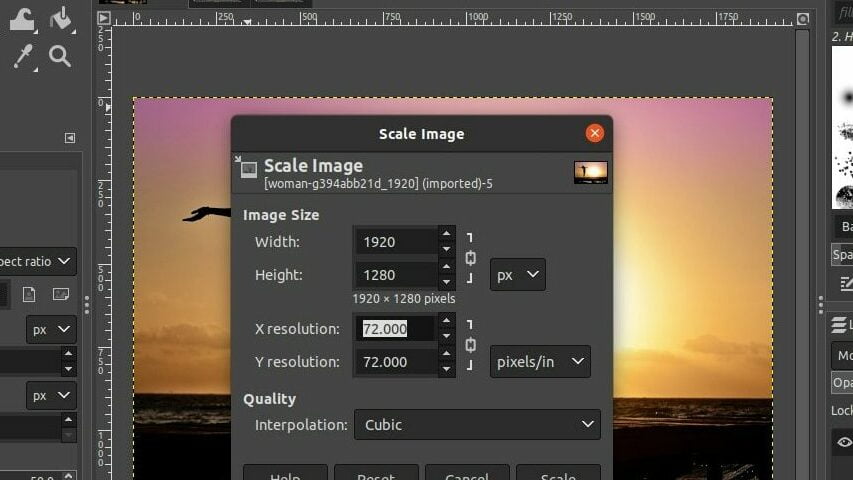
The ideal units of measurement are pixels/in. Once again you can use the arrows or manually type the X and Y resolutions.
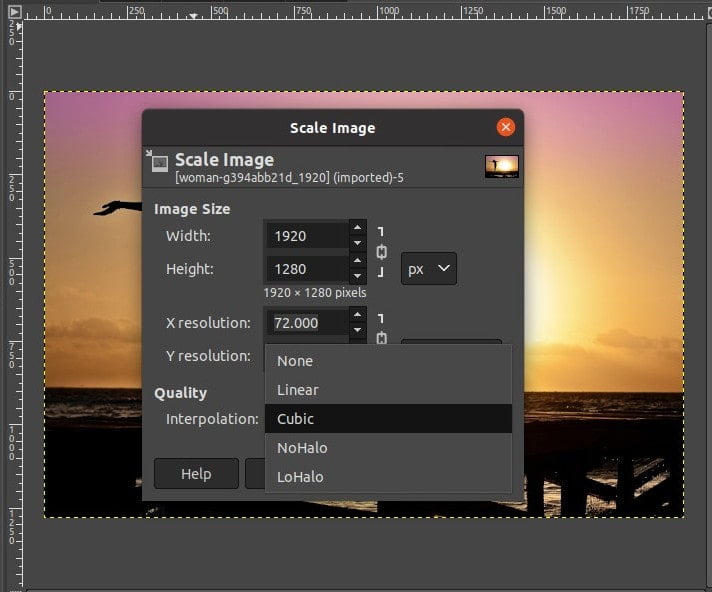
Step 06: Change the Units of Measurement
Click on the drop-down menu to check out the units available:
- None
- Linear
- Cubic
- NoHalo
- LoHalo
Step 06: Export the image
After resizing, you can export the image by,
- Go to the File menu.
- Click Export As.
- Choose the location where you want to save the file and name it as preferred.
- The Export dialog will be displayed, and you can change the file size, and the quality, amongst others.
- Next, click Export.

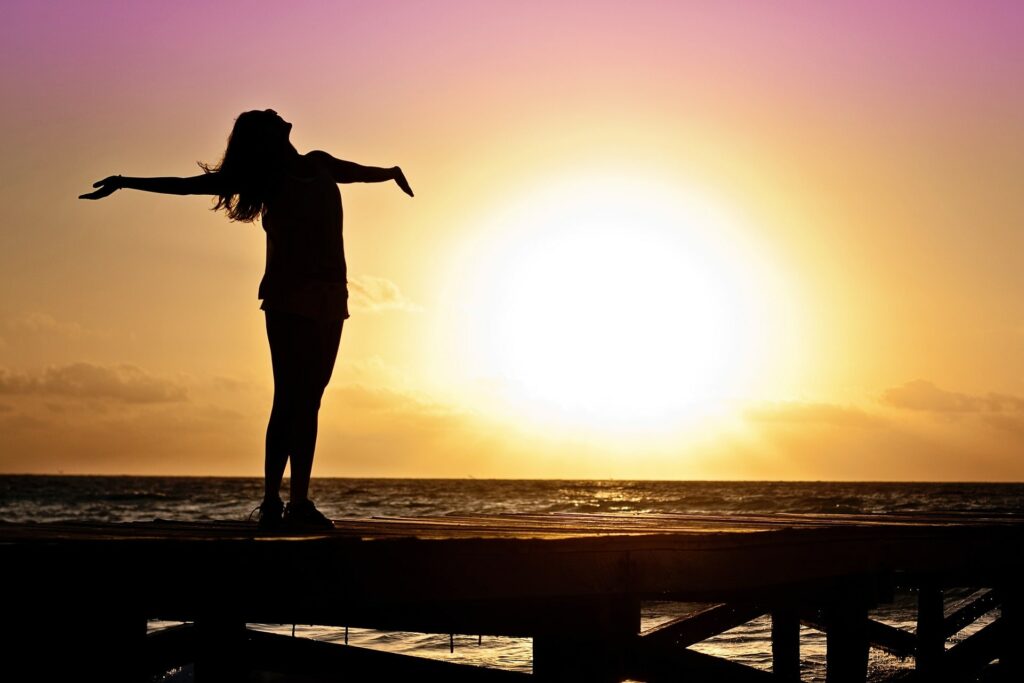
The below image is our example of a scaled image in GIMP.
The resized image is exported to the desired location. If you don’t export it, you won’t be able to view the image for later use or save it for future needs.
Importance of using the Scale Image Option in GIMP
When it comes to resizing images, the Scale image option is one of the most popular methods for resizing an image. This is because it has a number of advantages that other methods do not.
- For one, it is very easy to use. All you need to do is to alter the dimensions and/or resolution in order to resize the image.
- The software will then automatically calculate the new dimensions for you. This can be a huge time saver, especially when you are dealing with a large number of images.
- Another advantage of using the Scale image option is that the aspect ratio of your image can be preserved with the click of a button.
- Your image will not become distorted or stretched out of proportion. This can be a problem with some other methods of resizing, such as when changing the pixel dimensions.
- Finally, using the Scale image option usually results in a higher-quality final product in GIMP.
How to Resize images with the Scale Tool in gimp
When you want to manually resize any layer in GIMP, the Scale Tool is the way to do it.
Step 01: Open an image
Initially, open the image you want to resize,
- Go to the File menu
- Choose Open. Go to the location of the image.
- Alternatively, use the shortcut Ctrl/Cmd + O.
Step 02: Click the Scale tool
You can find the Scale Tool by,
- Picking the Scale tool from the Toolbox. Right-click on the below icon and choose the Scale tool.
- Alternatively, press “Shift+S” on your keyboard.
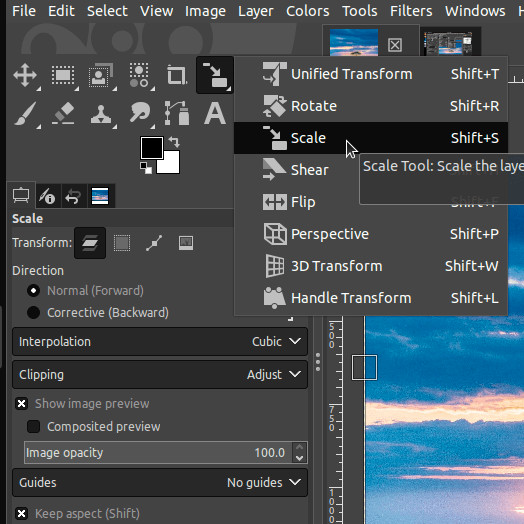
- Alternatively, go to the Tools menu.
- Click on Transform tools.
- Choose the Scale Tool.
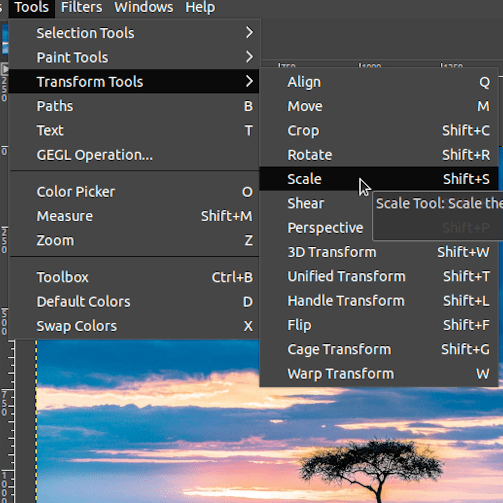
Once you select the tool, the cursor will change.
Step 03: Use the Control handles to resize the image
To resize an image with the Scale Tool,
- Simply click and drag the corner handles.
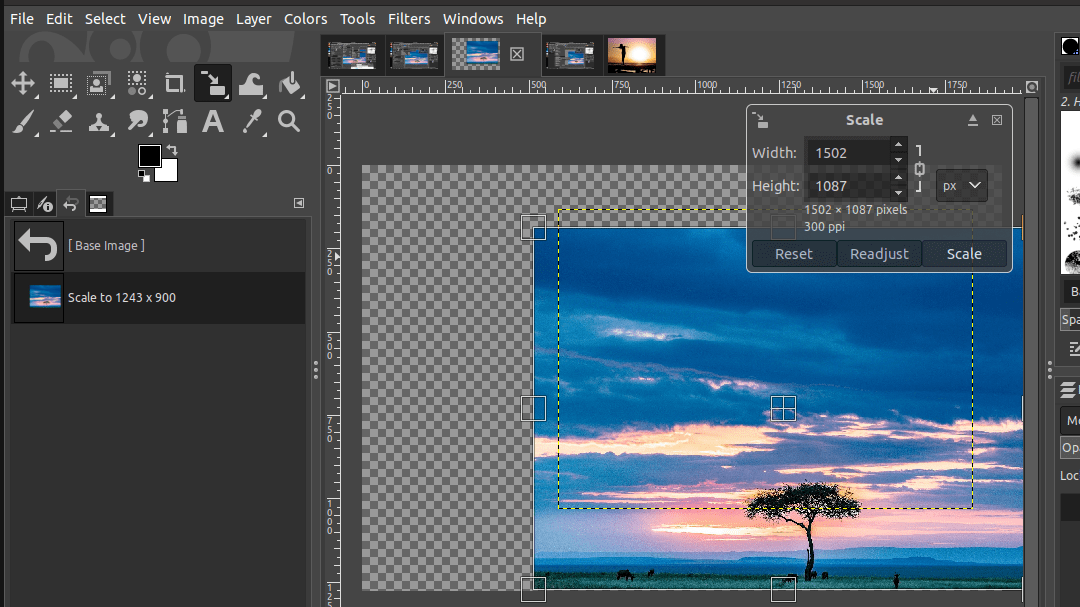
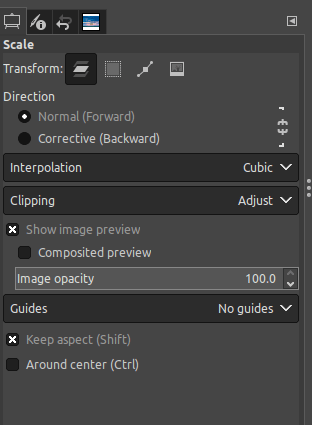
- You can adjust the settings of the Scale tool from the options displayed on the left-hand side of the screen. These options are displayed below:
As you drag,
- You’ll see the width and height values change in the Options dialog.
- You can also enter specific values for the width and height.
- You can also hold the Shift key to preserve the aspect ratio while resizing. You can do this so that the image doesn’t appear distorted and it remains proportionate.
Step 04: Finish resizing
When you’re happy with the new size of your image, simply press “Enter” on your keyboard to save the changes. You can see the image resized on the workplace behind the checkboard background.
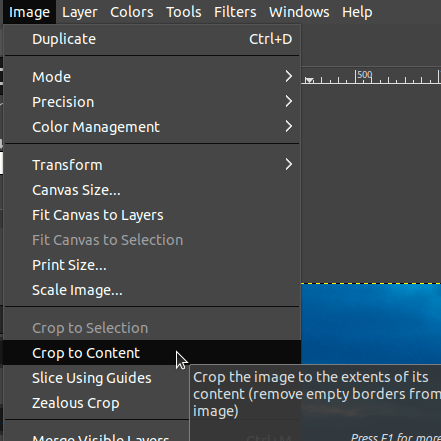
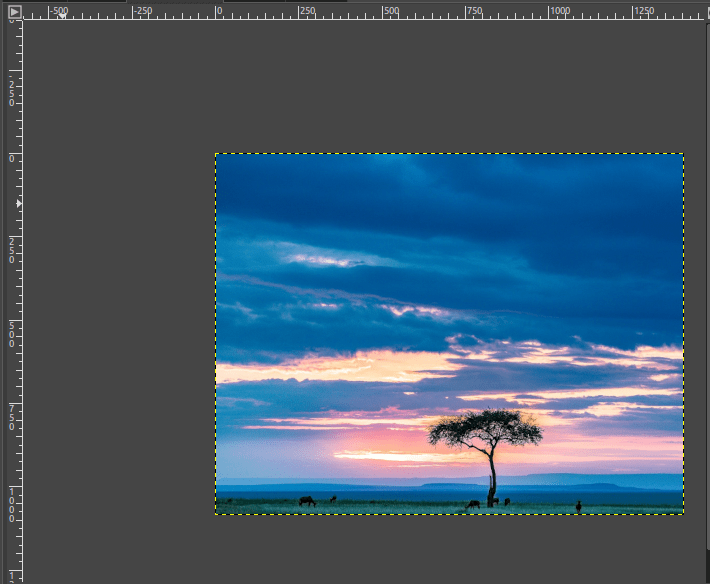
Step 05: Resize the Canvas to Crop the Content
Next, you need to remove the checkboard background to display the image properly. To resize the Canvas or crop the content,
- Go to the Image menu.
- Choose Crop to Content.
Now, the size of the canvas will become the same size as the image. As you can see below, the checkerboard background will disappear. Now, you have resized the image successfully!
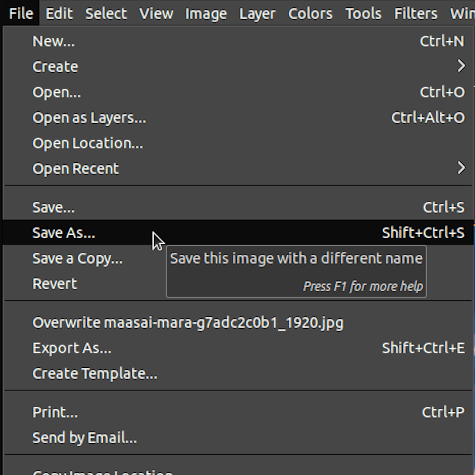
Step 05: Save the Image
Finally, it’s time to save and export the image. If you want to edit this image later, save the image. To save the image,
- Go to the File menu.
- Choose Save As.
- The location where you want to save the image has to be chosen.
- If you are hoping to edit the file in GIMP, you can save it in XCF format.
- But, if you are planning to edit the image in other applications such as Photoshop or Affinity Photo,save it in PSD format.
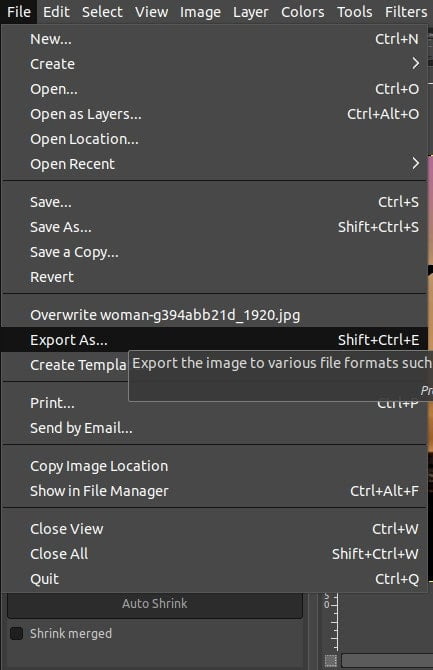
Step 06: Export the image
Next, you need to export the image,
- Perform one of the following:
- Go to the File menu and choose Export As.
- Alternatively, use the shortcut Ctrl/Cmd+Shift+E to export the image.
- Then, choose the folder where you want to export the image.
- You can export the image in any format desired.
Understanding Scaling Options in Gimp
units of measurement Mean in gimp
There are many units of measurement to choose from when Scaling an image. It is essential to know the functionality of each one to choose the best one according to your preferences.
So, let’s start:
- Pixels: Pixels represent the number of pixels displayed per inch in an image. If you want a high-quality image, choose a higher resolution and pixels for a crisp image.
- Percent: If you have a higher percentage, you will have a high-quality image.
- Inches: Measures the size of the image in terms of inches.
- Millimeters: The image size is prescribed as millimeters. The general formula for measurement is (pixels * 25.4d) / dpi.
- Points: A point (pt) is equal to 0.352778 millimeters, 0.0138889 inches, or 1.333 pixels.
- Picas: A pica is a typographic unit of measurement. It consists of 1/72 of a foot or 1/6 of an inch.
- Centimeters: Measures the image size in centimeters.
- Meters: Calculate the number of meters per pixel, takes the relative scale and multiplies it by the pixel size (0.000265).
- Feet: Measures the image based on the foot size.
- Yards: The image size is rescaled in terms of yards in GIMP.
- Typogr.points: The DTP point is defined as 1⁄72 of an international inch ( 172 × 25.4 mm ≈ 0.353 mm). Based on earlier American point sizes, it is considered to be 1⁄12 of a pica.
- Typogr.picas: The pica is a typographic unit of dimensions coordinating to approximately 1⁄6 of an inch, or from 1⁄68 to 1⁄73 of a foot.
Resolution Settings in gimp
It is also essential to know the different Resolutions units of measurement in GIMP.
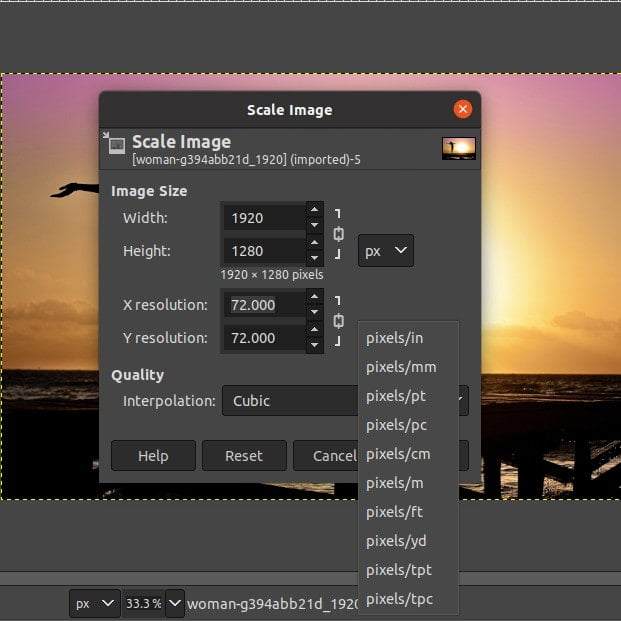
- Pixels/in: Pixels Per Inch
- Pixels/mm: Pixels Per Millimeter
- Pixels/pt: Pixels Per Point
- Pixels/pc: Pixels Per Picas
- Pixels/cm: Pixels Per Centimeter
- Pixels/m: Pixels Per Meter
- Pixels/ft: Pixels Per Feet
- Pixels/yd: Pixels Per Yard
- Pixels/tpt: Pixels Per Typogr.points
- Pixels/tpc: Pixels Per Typogr.picas
Quality settings In GIMP
There are four main quality or Interpolation settings in the Scale Image dialog. These are:
- None: The color of the pixels will emulate the color of nearby pixels.
- Linear: The color will be calculated according to the average color of the four closest pixels.
- Cubic: With this interpolation method, the color will be calculated according to the average color of the eight closest pixels.
- NoHalo: NoHalo is a new GEGL sampler which is developed by Nicholas Robidoux in order to reduce the blur effect of the resampled images. It is family used when the image is downscaled than the original size.
- Lohalo: NoHalo is a new GEGL sampler which is developed by Nicholas Robidoux. It is mainly handy when you don’t reduce the image size.
Conclusion
In conclusion, it is recommended to resize images using the Scale Image option for quality purposes in GIMP. However, the Scale tool is ideal when you want to resize an image manually. Image settings, resolution settings, and quality settings are all important factors to consider when scaling or resizing an image.
We hope that this tutorial was helpful and provided you with all you need to know about resizing in GIMP.
Thanks for reading & feel free to check out more of our articles!
Expert Rating
Summary
Scaling and resizing images is a vital part of the publication process and when exporting your image to various sized media such as on-site banners, social media, billboards and hoardings. As a skill, it isn’t too difficult to master, however you should be aware of the dimensions required and keep a check on the image quality when resizing and scaling images.


