
In this step by step guide, we will talk about everything you need to know about brushes, how to use them, every tool and setting, and how to install custom brushes.
We will also cover on how you can create the brushes of your own choice, let’s get to it!
Using Brushes in Photopea
You can do all sorts of things with brushes in photopea. Brushes can be used to create certain effects, like softening the edges of the image, adding certain effects, etc.
In this section, we will talk about the brush tool, where to find it, and how to use it.
Where is the Brush tool in photopea?
You can find the brush tool in the tools bar on the left side of the screen, indicated by a brush icon.
You can also select the brush tool by hitting the shortcut key B. When you will select the brush tool, you will see a few of the brush settings on the bar below the menu.

How to Choose a Brush in photopea?
When you have selected the brush tool, you will see a top bar with some brush options. There will be a dropdown menu that allows you to select the brush you want to use.
There are a lot of default brushes to choose from, Choose the brush of your choice, and let’s get to work.

Adjust Brush Properties
Before you start using the brush, consider adjusting the settings to achieve the desired effect. You can adjust the:
- Brush size
- Opacity
- Flow
- and Hardness
You can also select different blending modes to apply the brush in different ways.

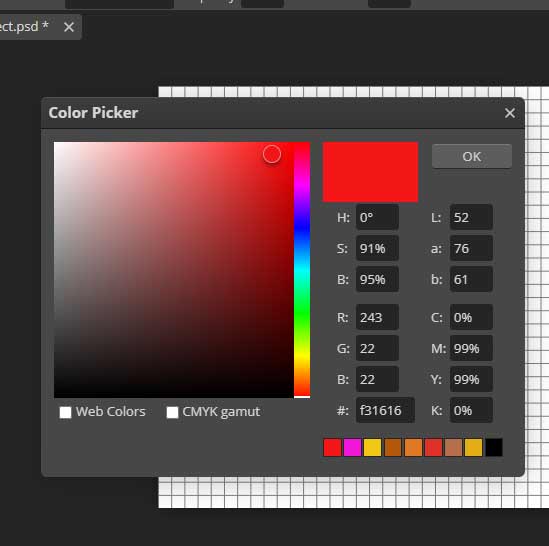
How To change the Brush color in photopea?
To change the color of the brush, all you have to do is to come to the end of the tools panel, you will see two boxes of color ( foreground and background color).

Click on any of the boxes and choose the color of your choice.
Choose the color of both boxes, and now when you choose the brush or pencil tool, the color will automatically be changed to the color of the upper box.(foreground color)
You can switch instantly between the foreground and background color by pressing the x key on your keyboard.
Use the Brush
With the brush tool selected and the desired brush settings, you can start painting with the brush on your image.
You can click and drag the mouse to paint with the brush in a freeform manner, or you can use the shift key to draw straight lines. You can also use the bracket keys [ ] to adjust the brush size on the go.

Why can’t you use the brush tool over the current layer?
If your layer is a smart object or locked, you cannot use the brush on that layer, either rasterize the smart object or create an empty layer over the image.
Brush Settings in Photopea
Photopea offers several brush settings that allow you to customize the effect you are applying to your image.
Here are the most commonly used brush settings:
Brush Size
How much a brush size you want, this is the setting to select it. You can adjust it by using the bracket keys ([ and ]) or by clicking and dragging the slider in the top toolbar.

Opacity
With opacity, you can control the transparency of the brush strokes.
- A lower opacity will result in a more subtle effect,
- Whilst a higher opacity will give a more prominent output of the brush stroke.

Flow
This setting controls how quickly the brush applies the effect.
- If you have a higher flow setting, the effect will be prominent at the first click
- But if you have a lower flow, the effect will be subtle at first, and you can build on the effect by clicking multiple times.

Hardness
This setting determines how sharp or soft the edges of the brush strokes are.
- A harder brush will have more defined edges
- Whilst a softer brush will have more blended edges.

Blending Mode
This setting controls how the brush strokes interact with the image. This is used to create different effects on the image.

For example, the “Multiply” blending mode will darken the image where the brush is applied, while the “Screen” blending mode will lighten the image.

Brush Properties In Photopea
We have discussed the brush setting, now, lets talk about the brush properties. It is a very important to understand. Once you have understood these properties, you will be able to get more creative with the brush tool.
You can create a lot of effects with minimum effort and time.
Tip Dynamics
For this step, please make sure that only the Shape Dynamics are activated in the Brush Panel.
Size Jitter
This setting determines the size of each brush tip every time a new stroke is painted on your canvas. You don’t have to use the same-sized strokes, and with a higher Size Jitter setting, you’ll get an even larger range in sizes between the tiniest and largest strokes.
Minimal Diameter
With this setting, you can set the smallest size a brush can go when using the tip dynamic.
Angle Jitter
Angle Jitter changes the orientation, or angle, of your brush.
Roundness Jitter
This option randomizes the roundness of your brush tip.

Scatter
The Scattering setting gives us three simple sliders.
Position Jitter
To give you an idea of how the brush tips spread out, with a Scatter of 0%, they will be in a perfectly even line. However, once we move the slider to 100%, the strokes dissipate from this straight line.
Count
With this slider, you can manage how many brush tips Photopea paints on the canvas with each click.
- By default, when clicked down, it acts like a stamp – one image at any given time.
- Yet if you increase your count to five using this function, Photopea will paint five brushes instead of only one – providing much more color and texture variation than the single-stroke option!
Count Jitter
Photopea provides an incredible feature that randomly changes the count value when you use the brush.
Dragging the slider to the right increases randomness, however, be sure that you have set your Count Value higher than one before applying any of this jittering!

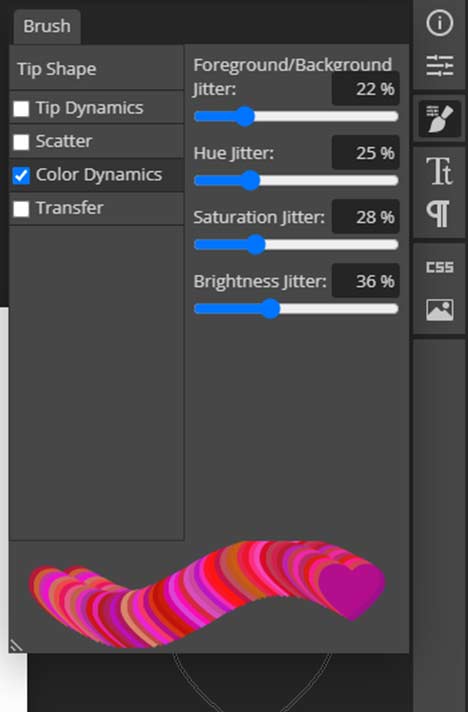
Color Dynamics
With Color Dynamics you can control the color which will be applied to the brush stroke.
Foreground/Background Jitter
The Foreground/Background Jitter determines the degree of background color to be applied to your brush stroke.
- A value of “0%” indicates that only foreground colors will be utilized,
- While opting for a 100% setting is tantamount to adding both foreground and background colors into one.
Hue/Saturation/Brightness Jitters
The Jitter settings enable you to manipulate the colors of your stroke with greater precision. By controlling how random the hues are, you can create a unique and interesting visual appeal. The image below displays each setting at its maximum value (100%).
Transfer
Transfer randomize the opacity and flow parameters.
Opacity Jitter
This parameter will randomize the opacity of the brush, when you paint with the brush, sometimes the opacity will be higher, and sometimes it will be lower.
Flow Jitter
The same is the case with flow jitter. It allows you to randomize the flow parameter of the brush.

Installing Custom Brushes in Photopea
In addition to the default brushes that come with Photopea, you can also install custom brushes to achieve more specific effects. Here’s how to do it:
Step 1: Download the Brushes
Find the custom brushes you want to use and download them to your computer. Make sure they are in a compatible file format, such as ABR.
For example brusheezy is a great free brush website, though download & use at your own risk.
Step 2: Open the Brushes Panel
In Photopea, go to the “top brush options bar” and select “brush with dropdown arrow.” This will open the Brushes panel.
Step 3: Load the Brushes
In the Brushes panel, click the down arrow icon and select “Load .ABR.”
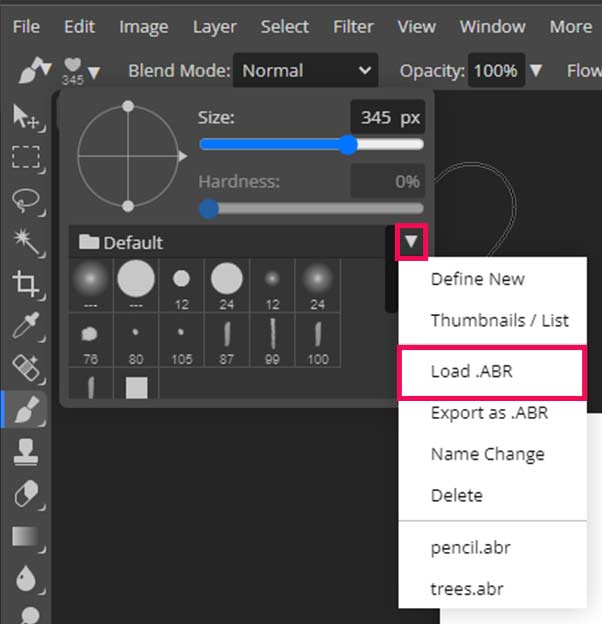
Navigate to the location where you saved the custom brushes and select them.

Step4: Access the Brushes
The custom brushes should now be available in the Brushes panel. You can select them and use them just like any other brush.

How To Create A Custom Brush In Photopea
To create a custom brush in photopea, create a new square sized document.
The Background color should be white, and the shape you want to create for the brush should be in black.
For our example we used a black brush scattered on a white background.

Once the shape is ready, go to the edit menu and click on define.
Then choose brush.
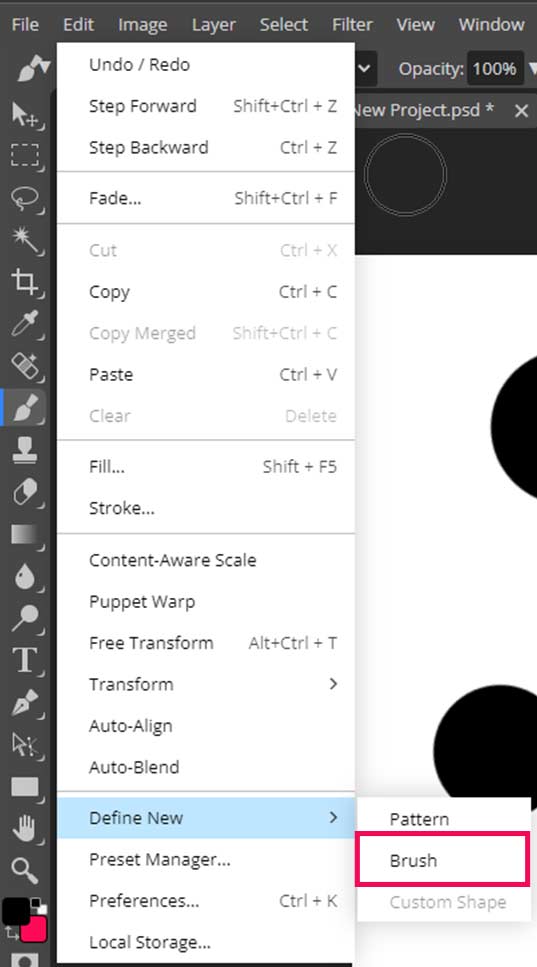
Once you click on the brush, the brush will be created and will be selected to use, or you can find it in the brush panel.

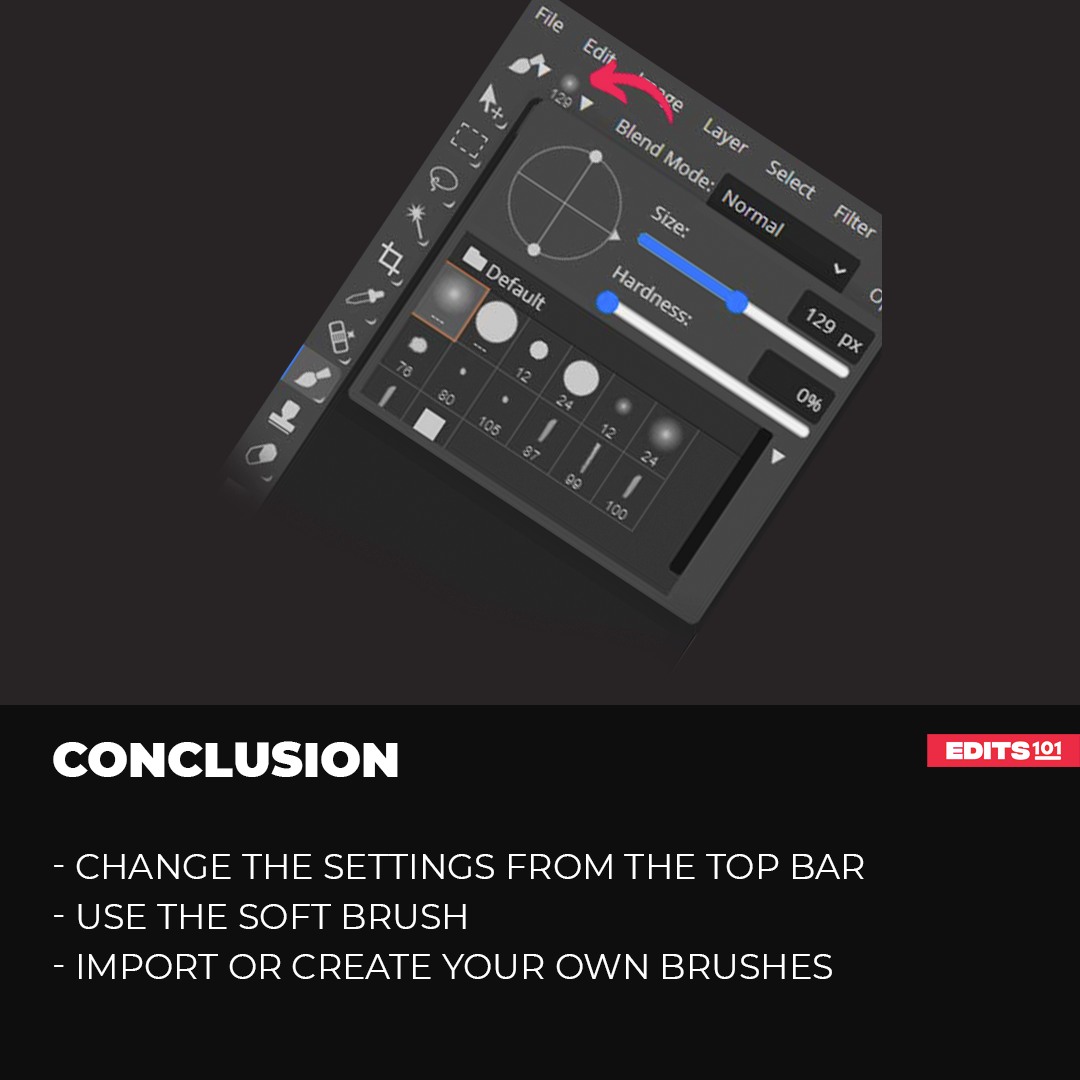
Conclusion
Using brushes in Photopea can add depth and dimension to your images. There are some differences between the brush settings in photopea. It offers a wide range of options for creating the perfect look for your images. You can import the brushes in ABR format, or you can create custom brushes as well.
Change the brush color to create dynamic effects, you can also create your own brushes or import the brush downloaded from the internet.
Thanks for reading & feel free to check out more of our articles!
Expert Rating
Summary
Brush tool is an amazing tool, it is easy to master but once you have complete control over it, you can create some amazing effects with it. Great functionality & scalability.


