
Being able to quickly move, rotate, flip, scale, or duplicate images in Photopea can save you tons of time if you’re designing something simple or working on a complex project.
In this guide, we’ll walk you through all the basics, yet very important methods to transform an image in Photopea.
How To Move An Image in Photopea
Step 1: Open Photopea and Create a New Project
You can either click on the New Project button or simply dragging and dropping your photo directly into Photopea, and the software will automatically create a project based on the photo’s dimensions.
Step 2: Preparing the Image
Prior to moving the image, make sure your layer is ready. Here’s how:
- Select the correct layer from the Layers panel.
- If there’s a lock icon on the layer, click it to unlock it (otherwise, you won’t be able to move it)
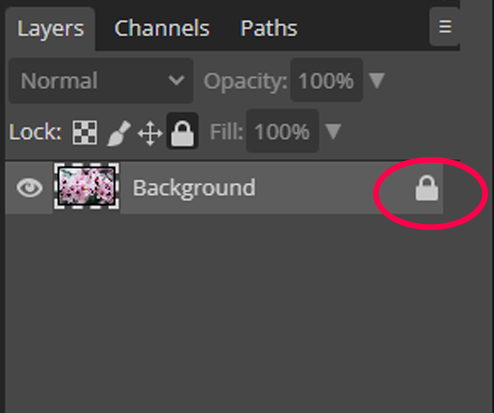
- Choose the Move Tool from the Toolbar or press ‘V’ on your keyboard.
Step 3: Move the image (Shortcut: V)
Once the Move Tool is active and your layer is unlocked, you can move the layer.
Make sure that you’ve got the Move Tool (V) active and do either one of the following:
- Click directly on the image in the canvas and drag it to a new position.
- Press the Shift key to move the image in a straight path (up/down and left/right).
- Alternatively, select the image from the Layers panel, then use the arrow keys or drag it with your mouse

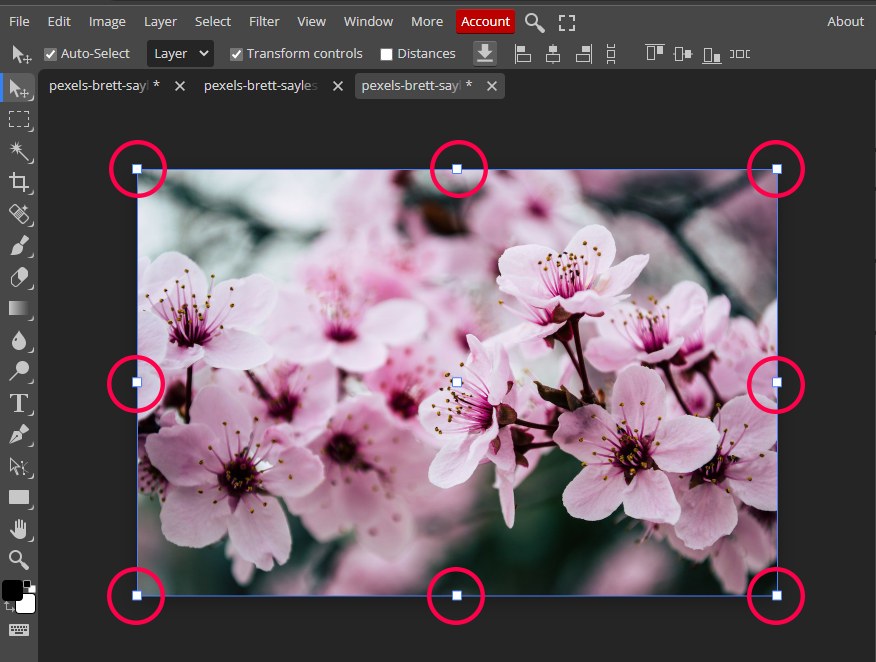
Free Transform Mode
For even more flexibility, activate the Free Transform Mode. This allows you to move, scale, and rotate all in one go.
You can enable it in a few ways:
- Press Ctrl/Cmd + T
- Or use Ctrl/Cmd + Alt/Option + T to create a copy and transform it
- Or go to Edit > Free Transform
- Or simply check the ‘Transform Controls’ box from the top toolbar

Once Free Transform mode is active, a bounding box will appear around your image.
When the Free Transform Mode is activated, new settings under the main menu bar will appear. You’ll see values for X and Y (your image’s position in pixels).
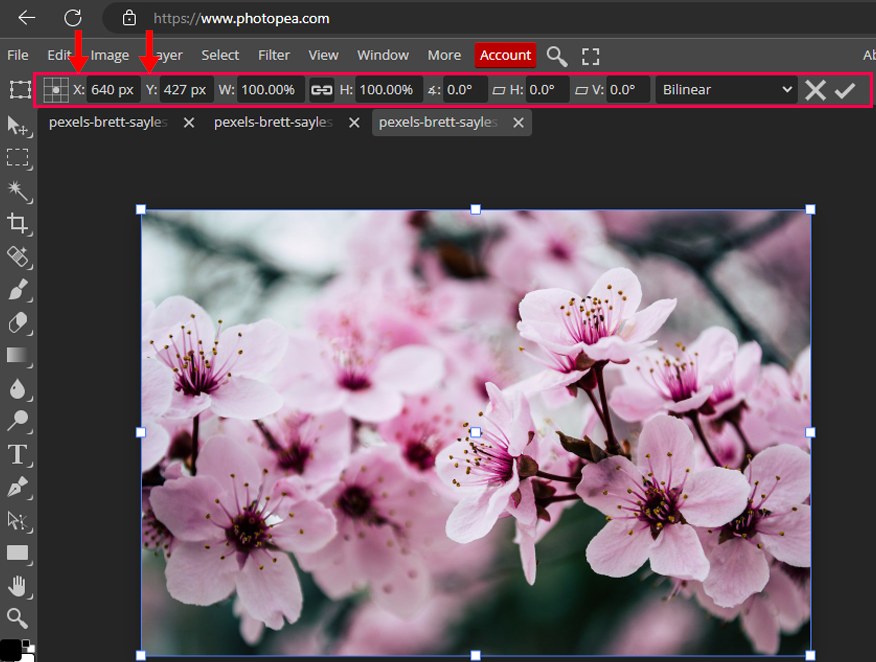
- Click and drag left/right over the X or Y value to move the image interactively
- Or type in exact pixel values if you want to move your image by a specific number of pixels.
Using this mode is ideal for aligning images or creating consistent layouts.
How To Rotate An Image
If you want to rotate an image for creative purposes or simply straighten it out, rotating an image in Photopea is quick and simple. There are different methods available, depending on whether you want to rotate just the image layer or the entire canvas.
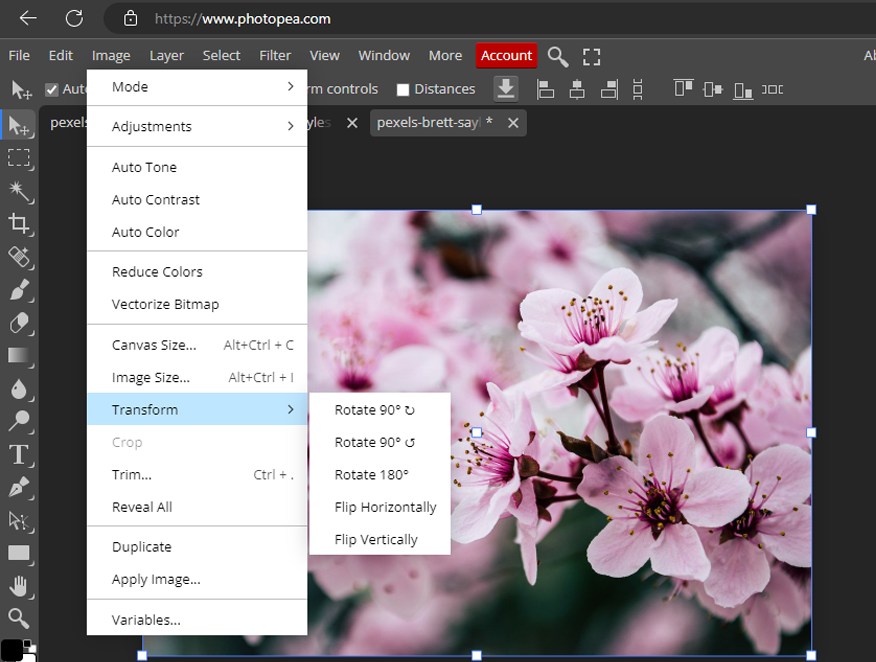
Rotating via the Image menu (Canvas will also rotate)
Remember that this method rotates the entire canvas, not just a single layer.
All you have to do is to:
- Go to the Menu Bar and click on Image > Transform
- Click on the preferred options:
– Rotate 90° Clockwise
– Rotate 90° Counterclockwise
– Rotate 180°
– Flip Horizontally
– Flip Vertically
If you’re only trying to rotate a specific part of your image, you’ll want to use the Free Transform Mode mentioned above instead.
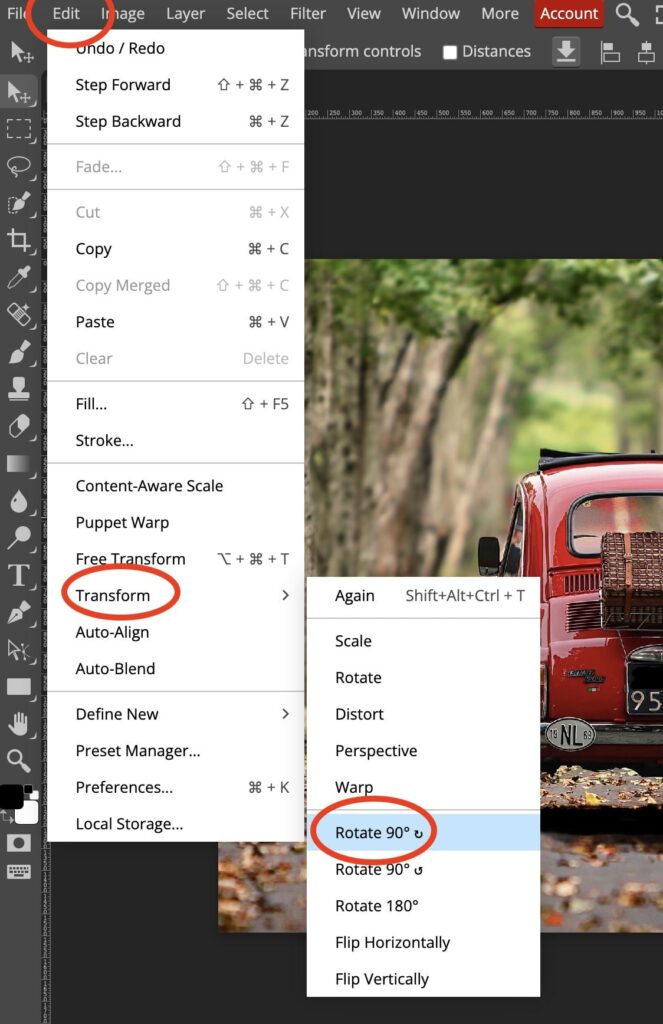
Rotate a Layer From the Edit Menu
If you only want to rotate a single layer without affecting the whole canvas, this method is quick and beginner-friendly.
Here’s how:
- Click on Edit > Transform
- Choose from the following rotation or flip options:
– Rotate 90° Clockwise
– Rotate 90° Counterclockwise
– Rotate 180°
– Flip Horizontally
– Flip Vertically - Your selected layer will rotate accordingly.
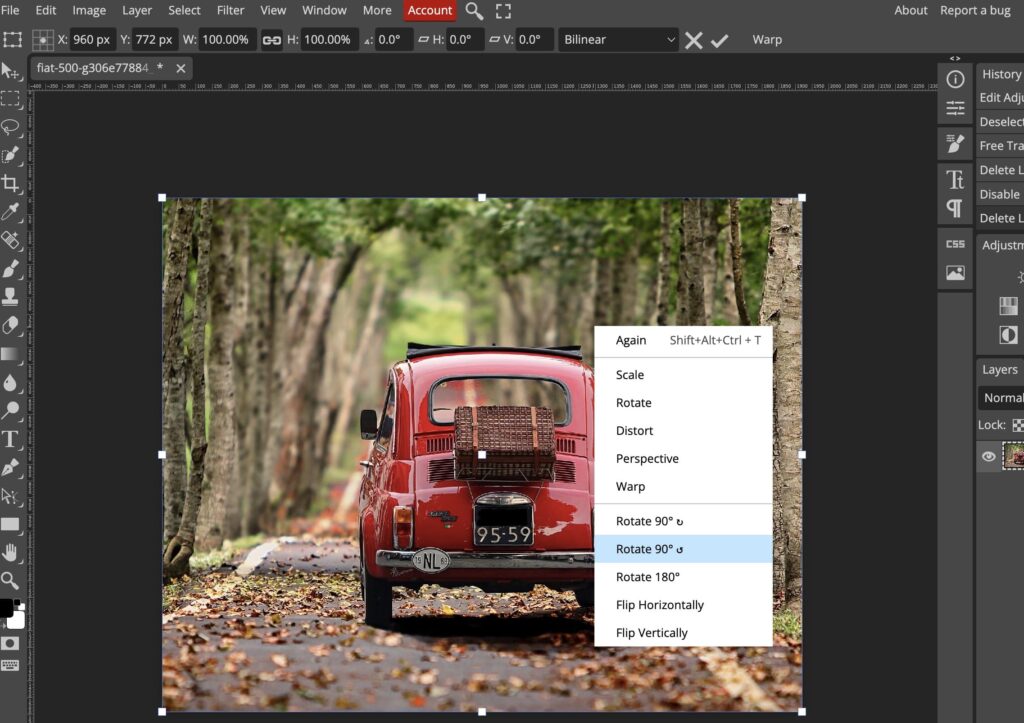
Use Free Transform for Quick Access
For a faster, more flexible way to rotate layers, use Free Transform option by:
- Pressing Ctrl/Cmd + T to activate it
- Then right-click on the image to bring up the Transform Menu with all rotation and flip options
This method is useful for frequent edits because every option is at your fingertips and avoids unnecessary menu-hopping.
Rotate freely using Transform Points
If you want to rotate an image to a custom angle (not just 90° or 180°), this is the best option for you.
First of all, you need to activate the Free Transform Mode as explained above (by pressing ‘Ctrl/Cmd + T’, or by going to ‘Edit > Transform’).
- Hover your mouse over any of the corner handles.
- Your cursor will change into a curved, double-sided arrow (????) and this means you can now start rotating.
To Rotate:
- Click and drag to freely rotate the image to any angle.
- Hold ‘Shift’ to rotate the image in 15° increments for more precise alignments.
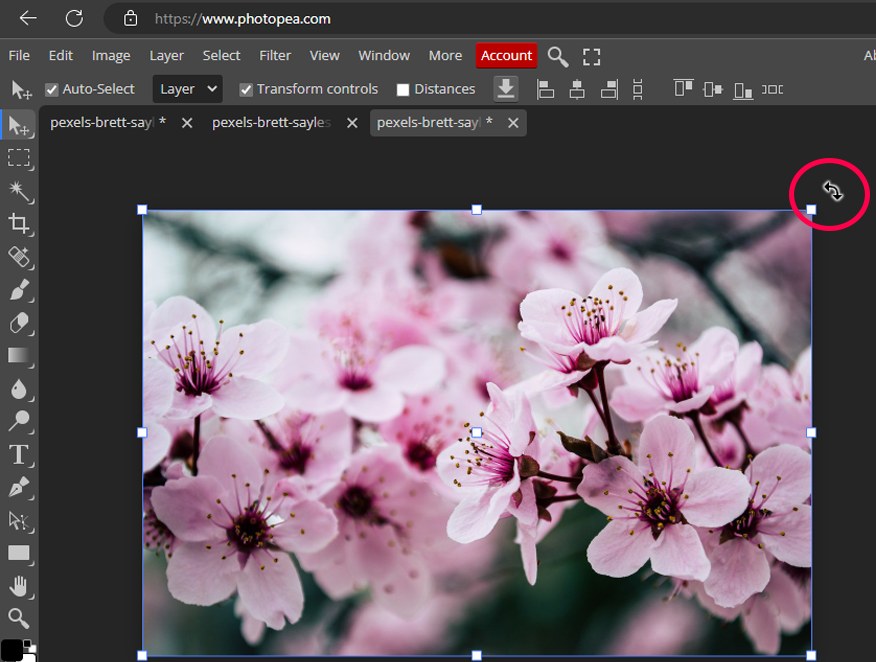
If you use this method, you’ll have complete flexibility on the rotation of your image.
Rotate using the Settings bar
When you enter the Transform Mode, a toolbar appears at the top of the workspace with options for position, size, and rotation. Look for the ∡ (angle) symbol to start rotating your image.
- Hover over the angle value and your cursor will change into a two-sided arrow with lines.
- Click and drag left or right to rotate the image manually.
- Or type in a specific angle (e.g. 45, -30, etc.) to rotate the image to an exact degree.
This method allows you to be more precise down to the degree.
How To Scale An Image
In Photopea, scaling an image can be done with just a few clicks.
Using Transform Controls
- Select your image layer from the Layers Panel.
- Tick the checkbox labelled ‘Transform Controls’ in the top toolbar.
- A bounding box will appear around the image (with control handles).
To Scale the Image:
- Click and drag any of the corner handles to resize the image.
- To scale from the centre, hold ‘Alt’/’Option’ while dragging.
- If your image is scaling unevenly, make sure:
– You’re holding ‘Shift’ for proportional scaling
– That the width and height are linked (look for the chain icon in the settings bar).
With Transform Controls, you can quickly adjust the image size while keeping full visual control over the placement and dimensions.
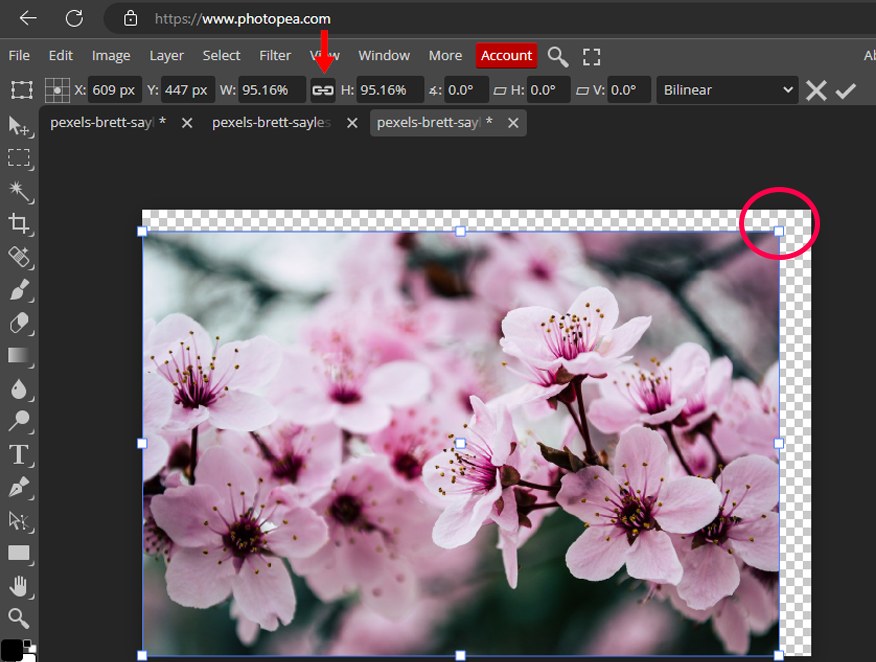
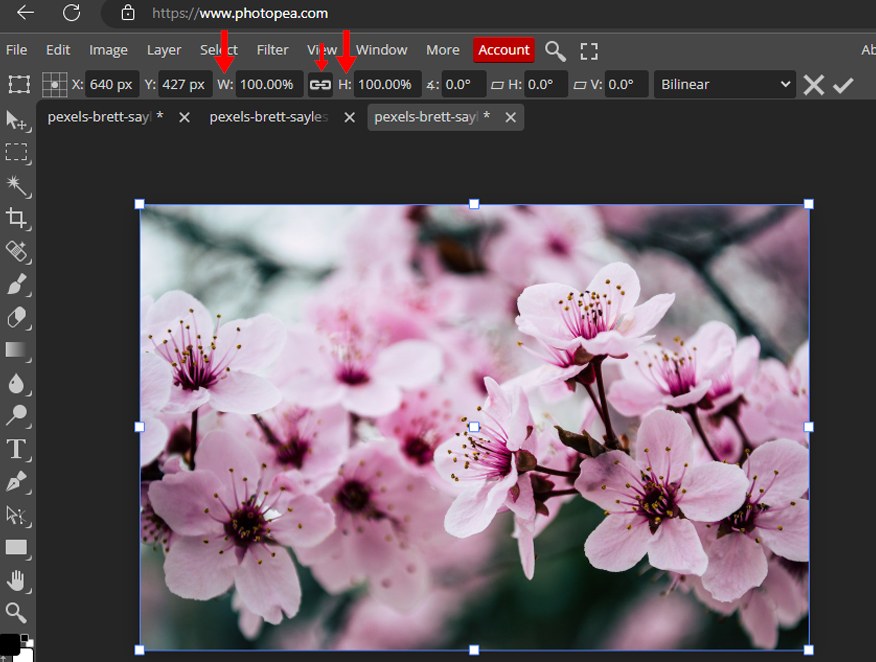
Scale from the Settings Bar
If you prefer more precision when scaling your image, the Settings Bar offers exact control. This is how:
- Start by activating the Transform Mode.
- Once active, the Settings Bar will display W (Width) and H (Height). They are usually set to 100% by default.
- To scale:
– Hover over either ‘W’ or ‘H’ — your cursor will change to a double-sided arrow.
– Click and drag left or right to increase or decrease the size.
– Or, type in a specific value if you want exact dimensions.
If you want to scale the width and height separately, simply click on the chain icon between “W” and “H” to unlink them. You’ll then be able to stretch or squash the image independently along either axis.
Tip: Leave the chain icon linked if you want to scale the image proportionally without distortion.
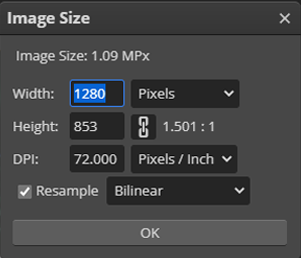
Change the dimensions in the image menu
If your image is too big or you require it to be at a specific size, you can change its dimensions to scale it down form the Image Menu.
- Select the ‘Image menu’ from the Menu Bar and choose ‘Image Size’
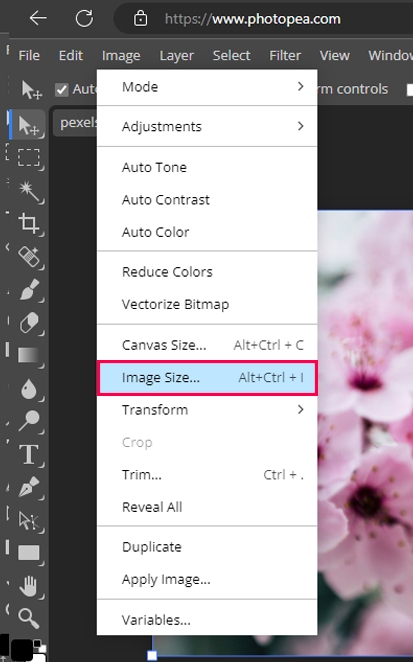
- Type in the new width or height. Since they’re linked by default, changing one will automatically update the other to maintain the image’s proportions (this is valid when the chain is linked)
How To Flip An Image
There are various ways to flip an image in Photopea.
Flip via the Image menu (Canvas will also Flip)
This first method allows you to flip the entire canvas, together with your image. Simply follow these steps:
- Go to the ‘Image menu’.
- Hover over Transform.
- Choose either Flip Horizontally or Flip Vertically.

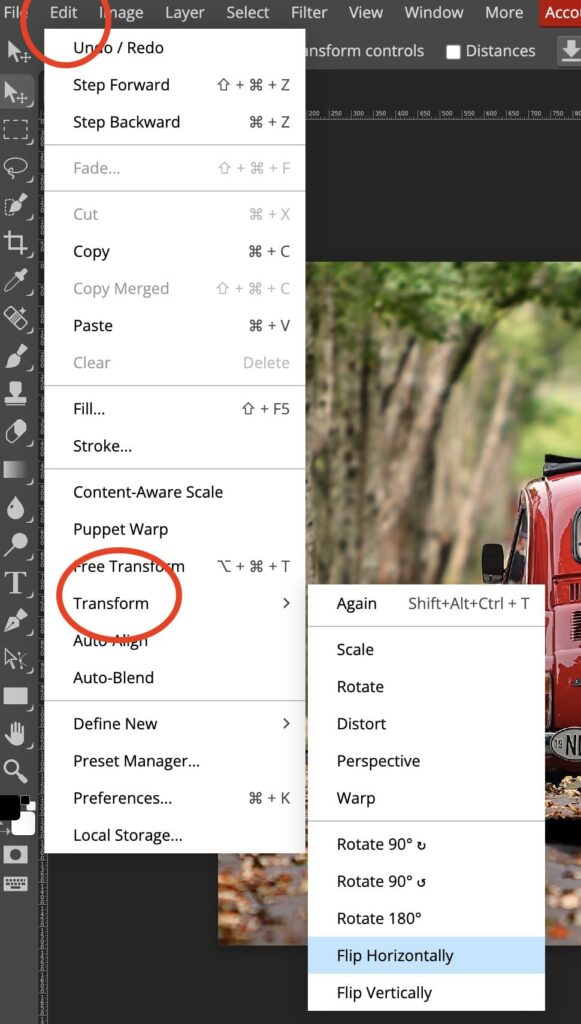
Flip Layers through the Edit Menu
Use this method when want to flip just a single layer and not the whole canvas. Here’s how to do it:
- Go to the ‘Edit menu’ in the Menu Bar.
- Hover over ‘Transform’.
- Choose ‘Flip Horizontally’ or ‘Flip Vertically’.
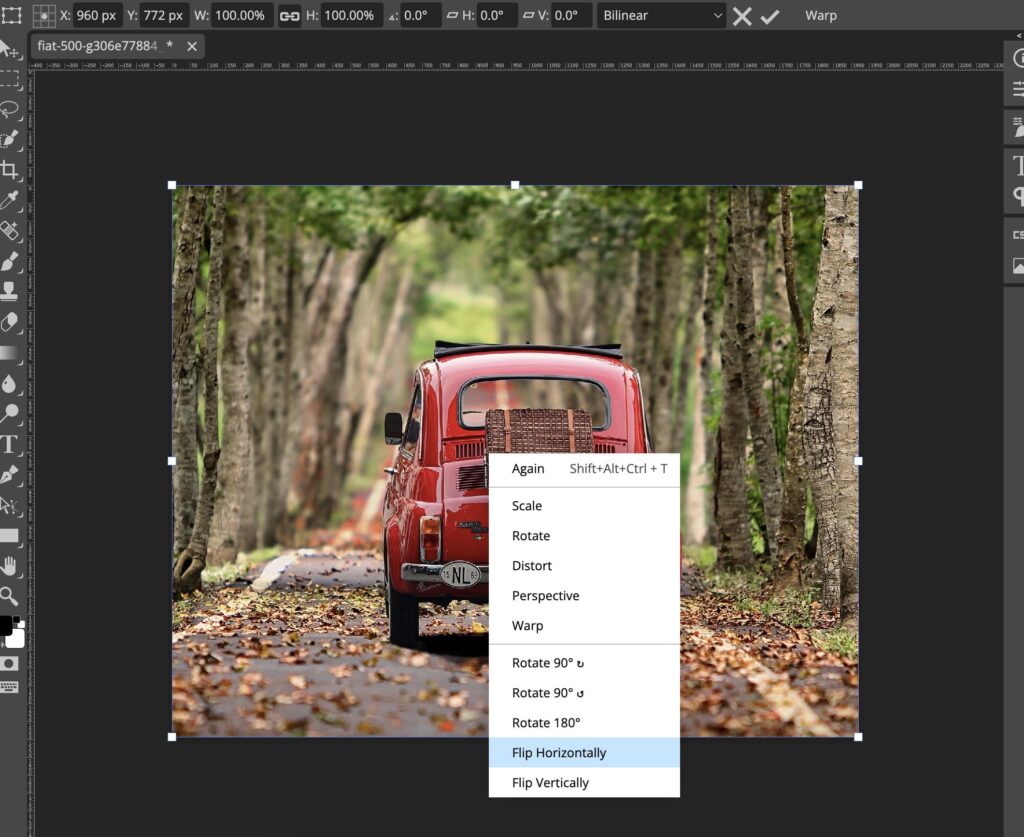
This is a faster way to access these options:
- Press Ctrl/Cmd + T to activate ‘Free Transform’.
- Right-click on the image while in transform mode.
- Select Flip Horizontally or Flip Vertically.
How To Duplicate An Image
Duplicating layers in Photopea is easy and super useful when you want to work non-destructively or experiment with various designs.
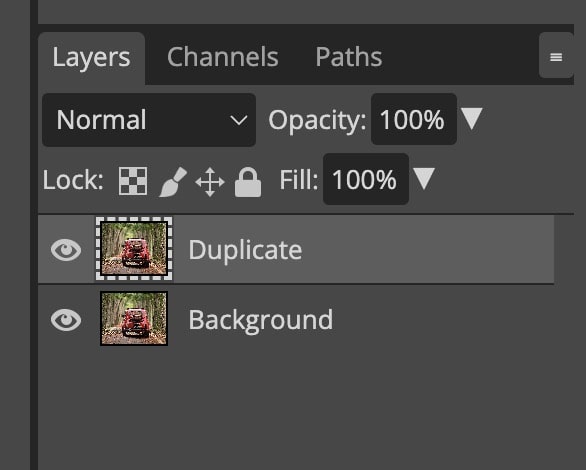
Use the Shortcut (Cmd+J or Ctrl+J)
- Select the layer you want to duplicate — either from the Layers Panel or directly on the canvas.
- Press Cmd+J (Mac) or Ctrl+J (Windows).
Your selected layer will be instantly duplicated. Press the shortcut multiple times to create more copies.
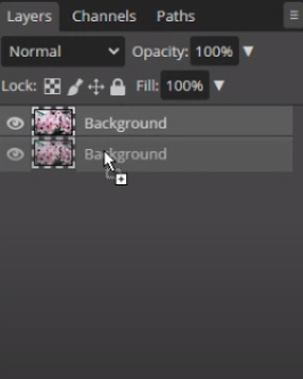
Duplicate From the layers panel
Duplicate a layer directly from the Layers Panel in Photopea:
- Click and drag the layer onto the ‘New Layer’ icon at the bottom of the Layers Panel. This will instantly create a copy of the selected layer.
The second method of duplicating alayer from the layers panel is to:
- Hold down the Alt key (or Option key on Mac), then click and drag the layer up or down within the panel. When your cursor changes to a pointer with a plus (+) icon, release the mouse button first, then release the Alt/Option key. You’ve just created a duplicate!
Duplicate From the Layer Menu
Another way to duplicate an image in Photopea is through the Layer menu.
- Go to the Layer menu.
- Select ‘Duplicate Layer’.

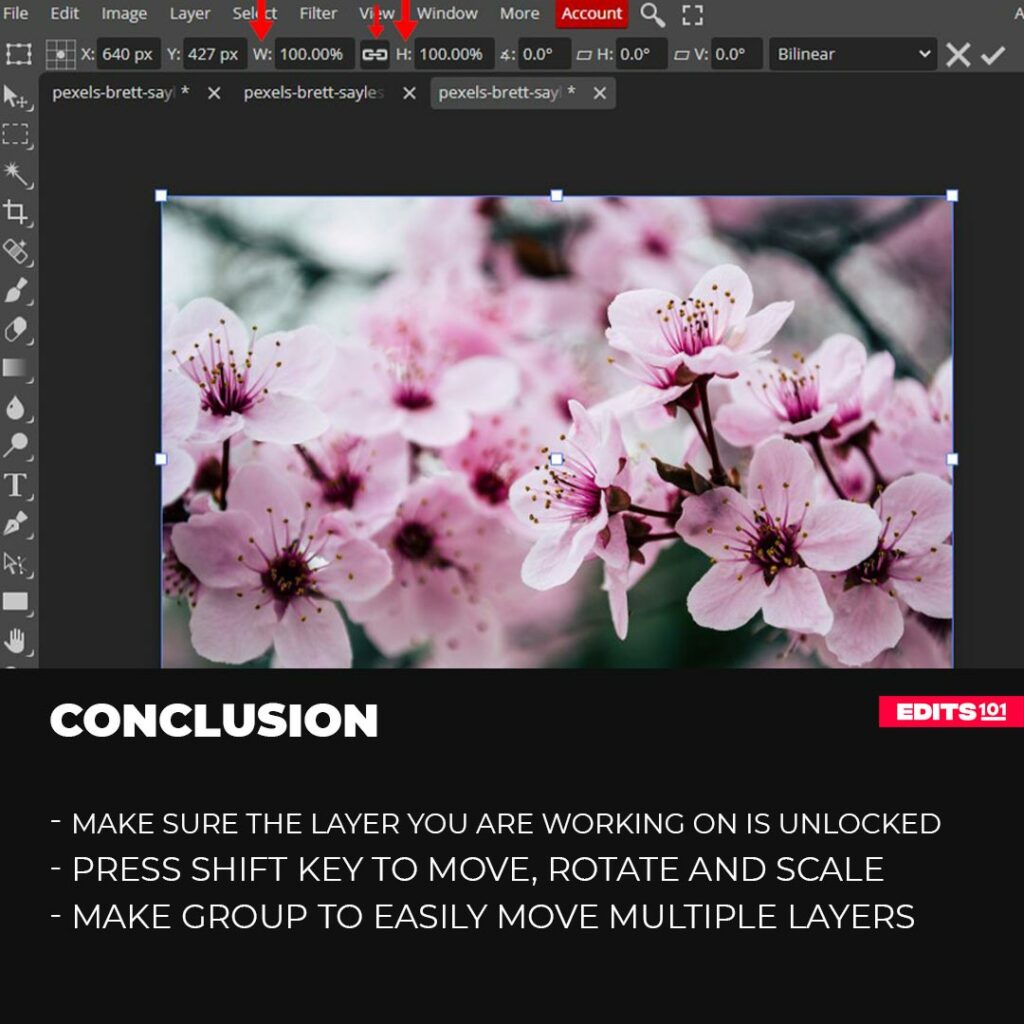
Conclusion
With just a few simple tools and shortcuts, Photopea lets you easily move, rotate, scale, flip, and duplicate images. Mastering these basics can speed up your workflow and give you more control over your designs.
Thanks for reading & feel free to check out more of our articles!
Expert Rating
Summary
The move, rotate and scale tools are very important to learn if you want to get good at photopea. These tools are easy to learn but have alot of scaling and functionality, the more you practice the more you will get good at them.


