
We will be showing you how to create stunning mockups using Affinity Photo. We will also take a look at the different types of Mockup templates and Mockup objects.
Furthermore, are you facing difficulties when searching for free mockup templates? No worries, we got you! We will go through the entire process, from finding and downloading mockups – to opening & editing them in Affinity Photo. Let’s get started!
What are Mockups in Affinity Photo?
Mockups are simply images, models or prototypes that show how a final product or design will look. Mockups are very useful for teaching, marketing and manufacturing purposes. They are mainly created to get feedback, to promote, and to make changes before the final product is created.
Since Affinity Photo doesn’t offer mockups natively, you can download them from other sources such as GraphBerry, Mockup World, Iconfinder, Placeit, and more. You can also create them from scratch as per your requirements.
Mockups are usually images with a smart object layer. When you update the smart object, it automatically updates the main mockup. However, in Affinity they are not called smart objets, instead they are called Embedded Documents.
Let’s go into how to create embedded documents(Smart objects) in Affinity Photo.
So, how do you create Embedded Documents (SmartObjects) in Affinity Photo?
They are quite simple to create. However, let’s understand the difference between a smart object & an embedded document.
In photoshop, you can create a smart object easily. Simply right click on the layer and convert to smart object.
When creating a smart object layer, it creates a photoshop file, within the main photoshop file.
Smart Object Concept
Once you update the smart object, it updates the main file.
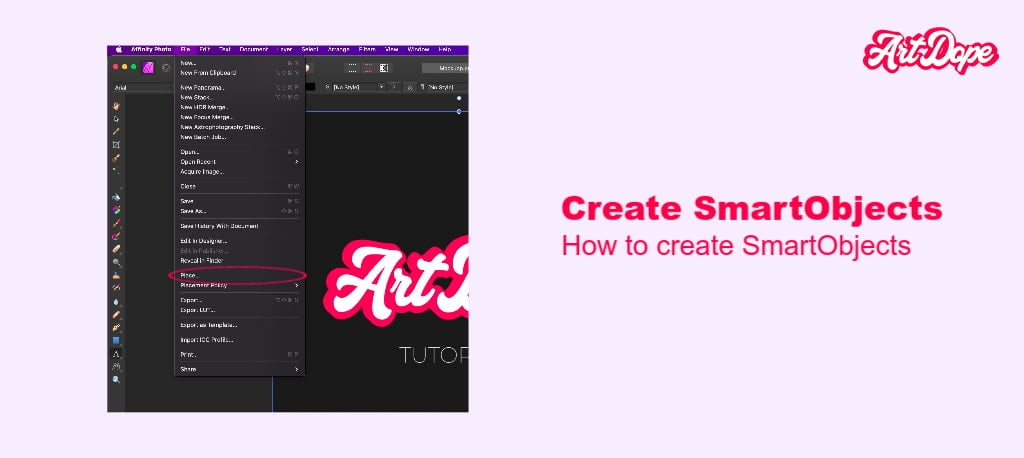
However, on Affinity the concept is essentially the same, but the process is different. You cannot simply convert a layer to a smart object/embedded document. so you would need to do this:
- Create a new Affinity Document & save it as an Affinity File
- Open the Target file & place the newly created Affinity File. (From the top bar: File > Place) This will create an Embedded File.
- Once Placed, adjust the Embedded Layer as you’d like within the composition. You can replace content within the layer by double clicking the layer within the layer’s panel.
By doing so, it essentially creates a smart object (with a few more steps). Having said that, let’s go into creating a mockup!
How to Create a Mock-up in affinity photo?
You can make customized mockups using this method. We will give you an example!
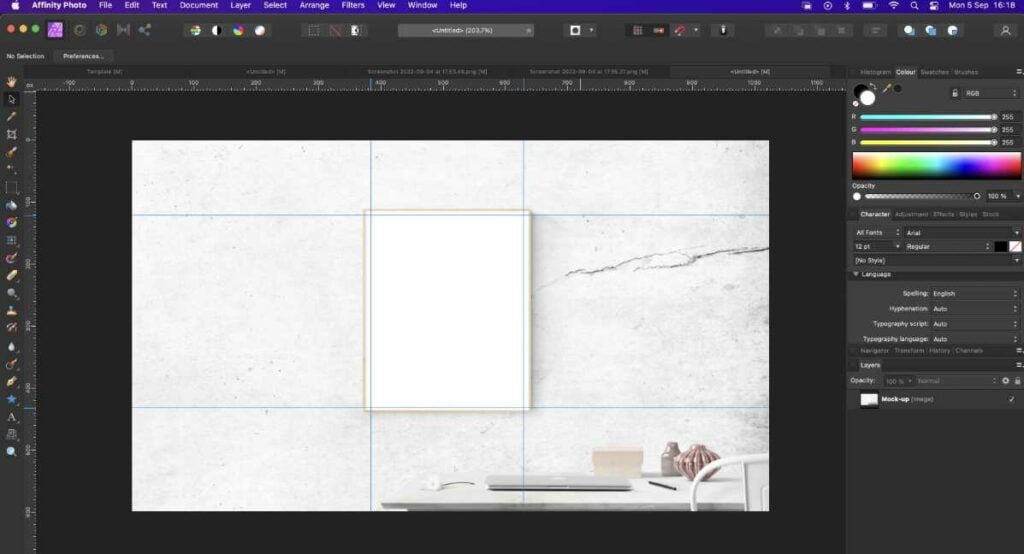
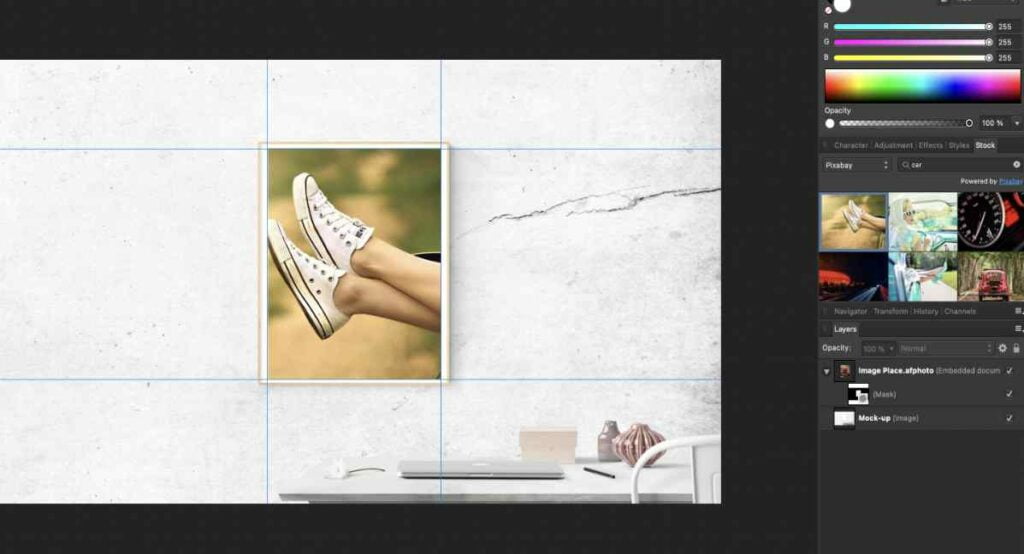
We will be using a frame image as a mockup template.
Start by opening the image in Affinity Photo by going to File and selecting Open. Alternatively, you can drag and drop the image as well.
Next, we need to create the smart object.
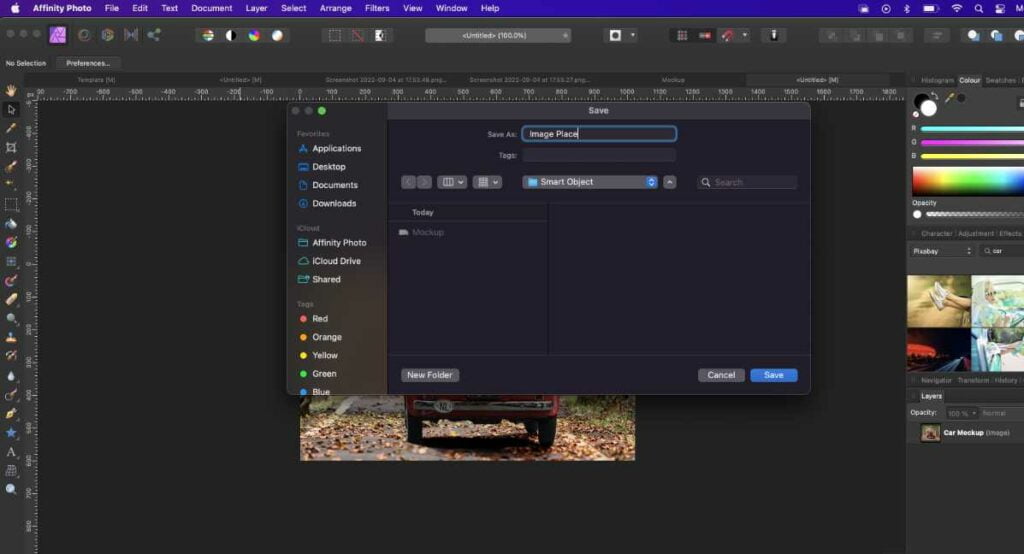
- Open the Image (you’d like to place) in affinity & Save it as an Affinity File
- Then we’ll go ahead & Place it within the document.
Next, place the design onto the document. Go to the File menu, and select Place.
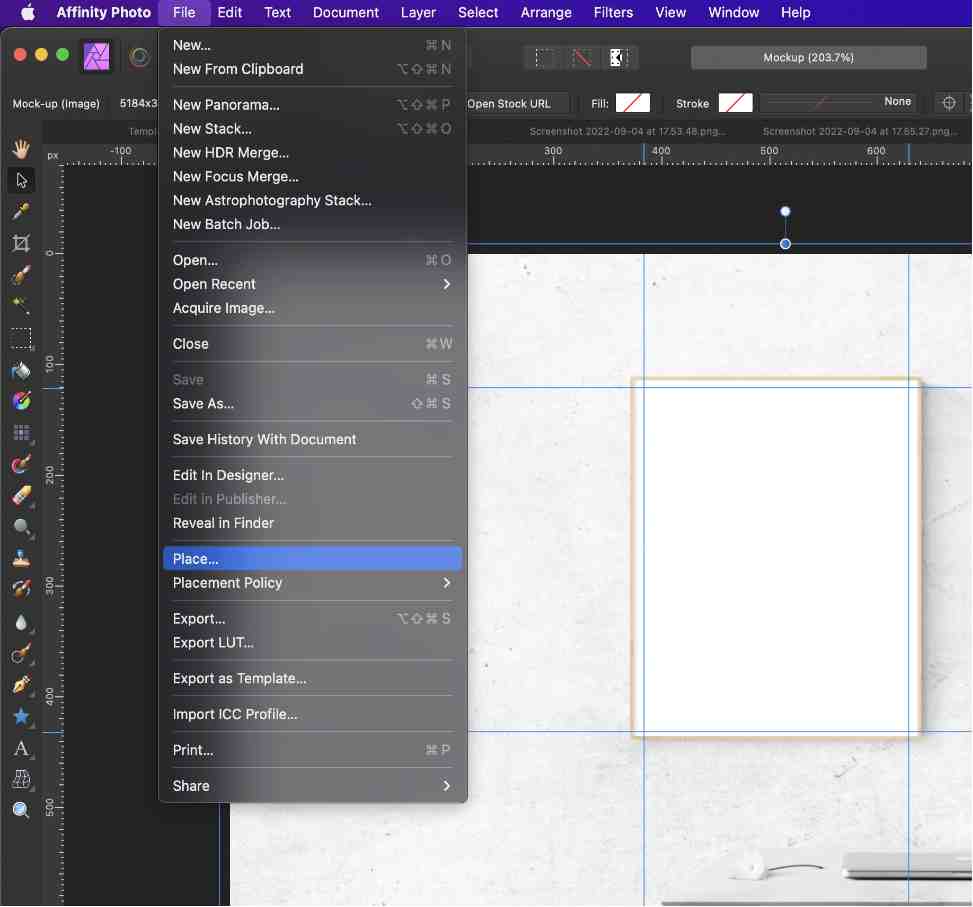
The file will be Placed as an Embedded file.
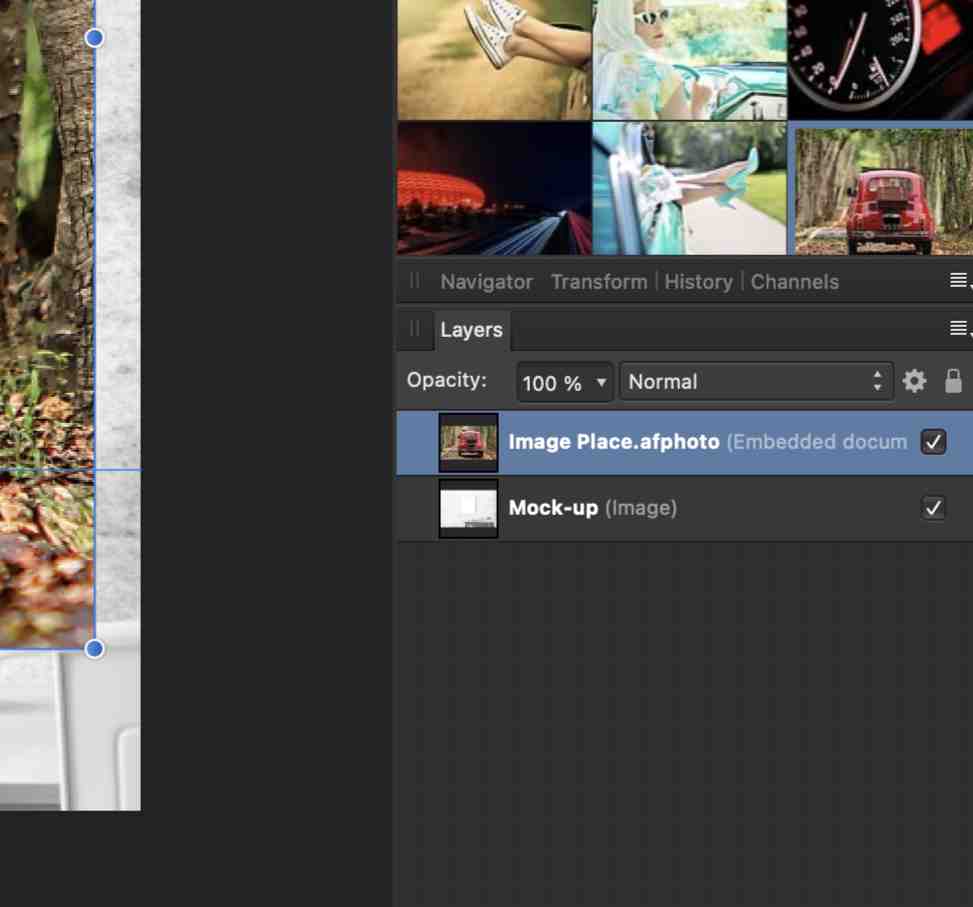
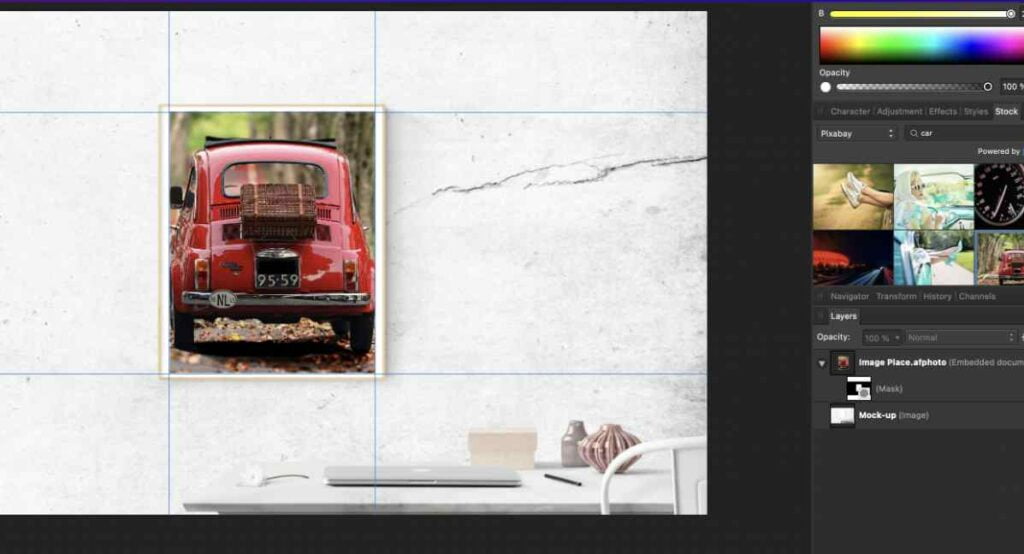
Following adjust the image and composite it to your liking. We have added a selection and then a mask to mask it within the frame.
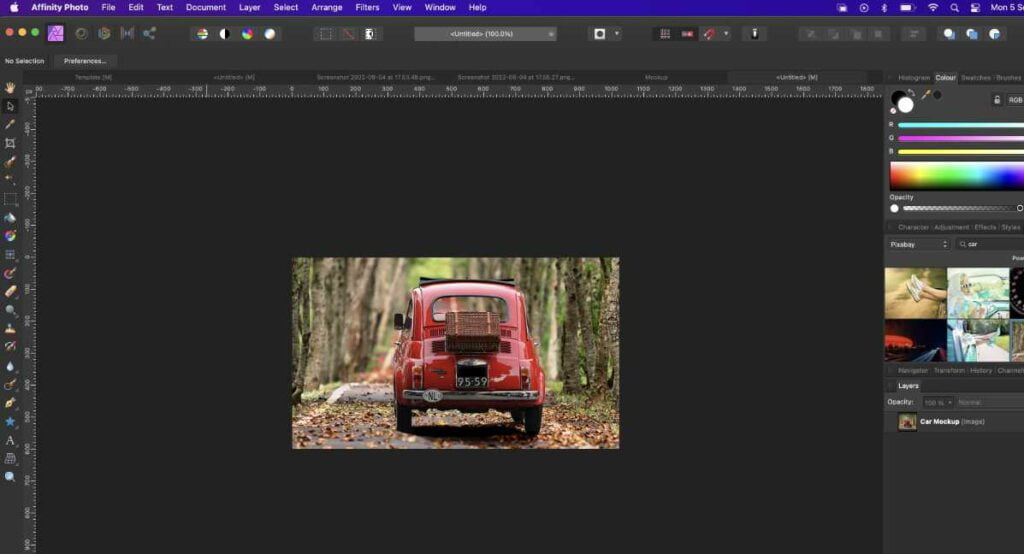
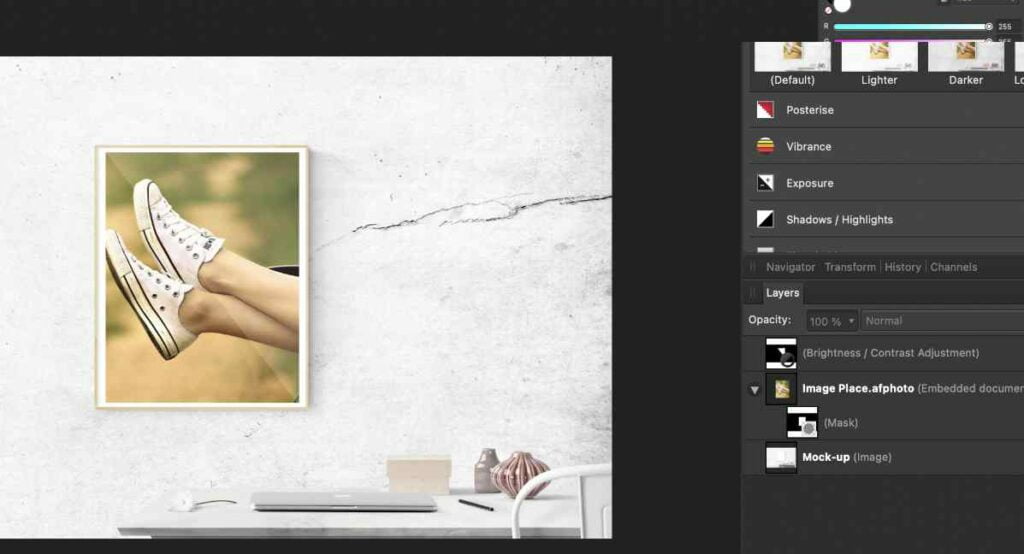
To change the image within the mock-up, simply double click the layer within the layers panel & place your new image within the file.
It will automatically update the main file.
You can always fine tune the mockup by adding ambient lighting, reflection on the glass and maybe adding some noise. In our case we have added a brightness and contrast adjustment, paired with a mask to add an element of realism.
Types of Mockup templates
There are a variety of mockup templates available that you can use to design through Affinity Photo. The common Mockup Templates are:
- Wireframes– They are low fidelity but show structure.
- Product Mockups– Used for websites or apps. Used for marketing purposes as well.
- User flows– Shows how a user will navigate through your product
- Maps– Shows the hierarchy of your product through UI UX patterns for devices.
- T-shirt– used for marketing purposes for advertisements or contract negotiations.
- Screens– used for websites or apps to show the design of the screen beforehand working on building it.
- Logo– used for marketing purposes, business identities, and recognition.
- Stamps– used for marketing purposes and considered a very versatile tool.
When creating a mockup, the first thing you need to do is choose the right template. There are many different types of mockup templates available. They are all created for a specific purpose.
For example, if you want to create a mockup of a website, you would use a website mockup template. If you want to create a mockup of a product, you would use a mockup template with that product.
There are also many different sizes and orientations of mockup templates available, so you can choose the one that best fits your needs.
Additions to Mockups
A variety of object can be incorporated into mockups to make them appear more realistic and to enhance their quality.
The most common objects added to mockups are:
- Text– Adding labels or descriptions to the mockup.
- Images– Include pictures to enhance the mockup.
- Logos– Promote a brand and increase the authority of the design.
- Buttons– Add interactivity to the mockup.
- Maps– Show location data on the mockup.
- Charts– Provide statistical data on the mockup.
When adding objects to your mockups, it’s important to keep in mind the overall goal of the mockup.
For example, if you’re creating a mockup to show off a new product, you’ll want to make sure that the object you’re adding is relevant to the product.
Where can we find free mockups?
Free mockups are found in many places on the internet. There are several websites that offer a wide variety of free mockups, ranging from devices to packaging:
- GraphBerry
- Iconfinder
- Futuramo
- Placeit
- FreePik
- Designmoo
- Pixeden
- Graphic Burger
- Mockplus
- Mockup World
- Premium Pixels
GraphBerry is a great place to start if you are looking for free mockups. This website offers a wide variety of free mockups, ranging from devices to packaging. Iconfinder is another great website for finding free mockups. This website has a wide selection of icons that you can use in your designs.
Another great place to find free mockups is Mockup World. This website offers a constantly-updated library of free mockups, and it is definitely worth checking out if you are in need of some high-quality mockups.
Finally, if you are looking for specific types of mockups (such as iPhone mockups), a quick Google search will usually reveal a few good options.
For us, we would suggest freepik as being one of the best options overall for any designer.
Expert Rating
Summary
Generally speaking, mockups are not difficult to use nor create. However, if you’re using a photoshop file in affinity it might not always work perfectly a 100%. Having said that, you could use a lot of photoshop mockups over on affinity. Not difficult & does not require a lot of practice. Good for scale & highly functional.
Conclusion
There you have it! A guide on how to create mockups in Affinity Photo. You now know all the basics, including examples of websites where to find mockups, how to download them and a few examples guiding you on how to create them.
Thanks for reading & feel free to check out more of our articles!


