
This article provides an in-depth introduction to the Color Page in DaVinci Resolve 18. The Color Page in DaVinci Resolve 18 offers a comprehensive set of tools and features to help users achieve professional-quality color grading.
It covers the basics of the Color Page, including the color grading process, color grading techniques, and the different types of grading tools available in the software. Additionally, the article provides tips and tricks to help you work efficiently and effectively on the Color Page.
How do I get to the color page in DaVinci Resolve 18?
The Color Page is the dedicated space to adjust the color correction of the media of the video content. The Color Page is used to edit the clips creatively and in an artistic manner including all the fancy stuff on the Color Page in DaVinci Resolve 18.
It includes contrast, timeline adjustment, viewer adjustments, saturation, color grading, adjusting the curves, and automation. You can do some basic color correction using the Color Page and use the cut, edit, and other pages alongside. You don’t have to import separately using the Color Page in DaVinci Resolve 18.
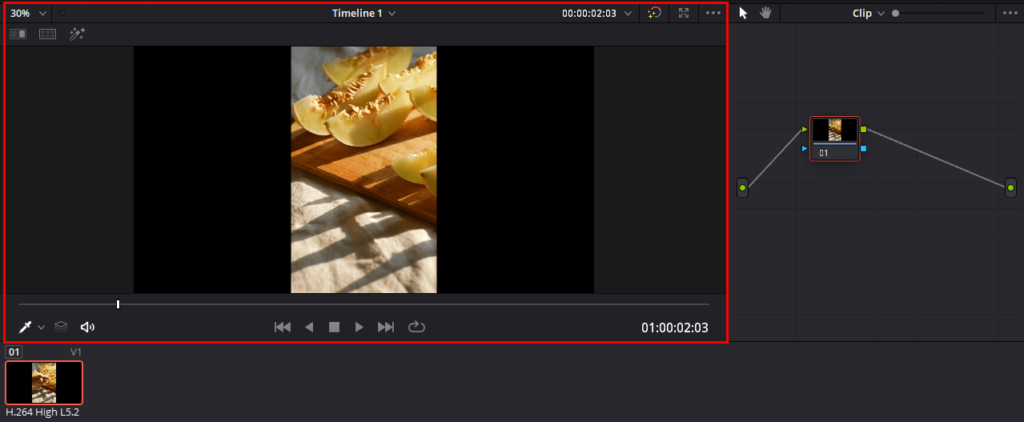
What is the Viewer on the Color Page?
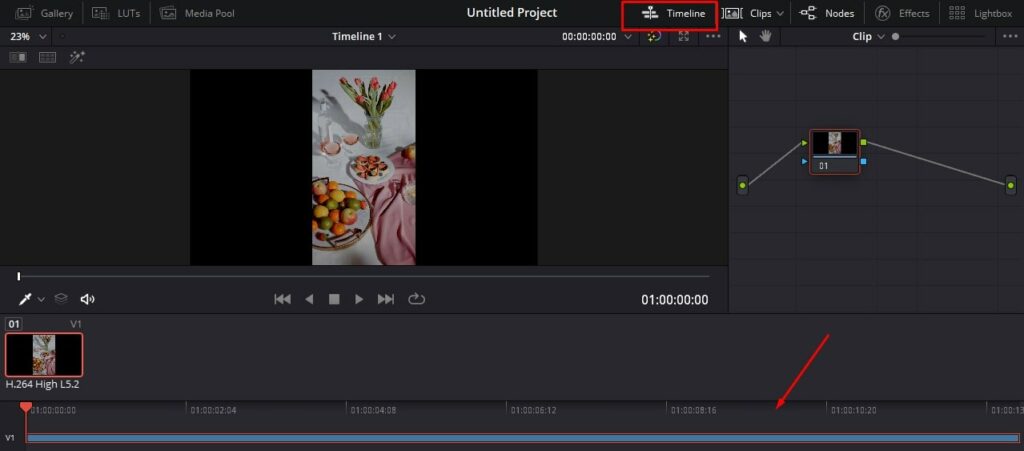
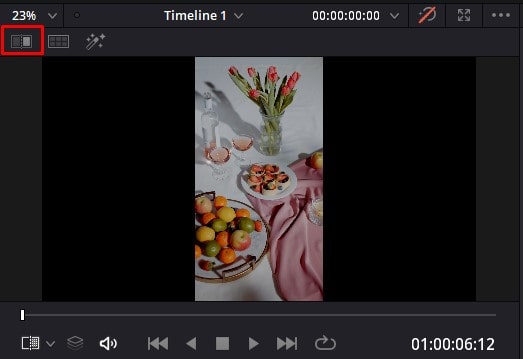
The viewer is where you want to view the media you have selected to edit. The viewer is present at the top of the Color Page. It helps to scrub, view, play, loop, and pause across the clip.
What is the Timeline on the Color Page?
The timeline is located after the viewer of the Color Page. As usual, the timeline is handy to move back and forth across the media. To color a clip, you need to click on the clip and make the necessary adjustments.
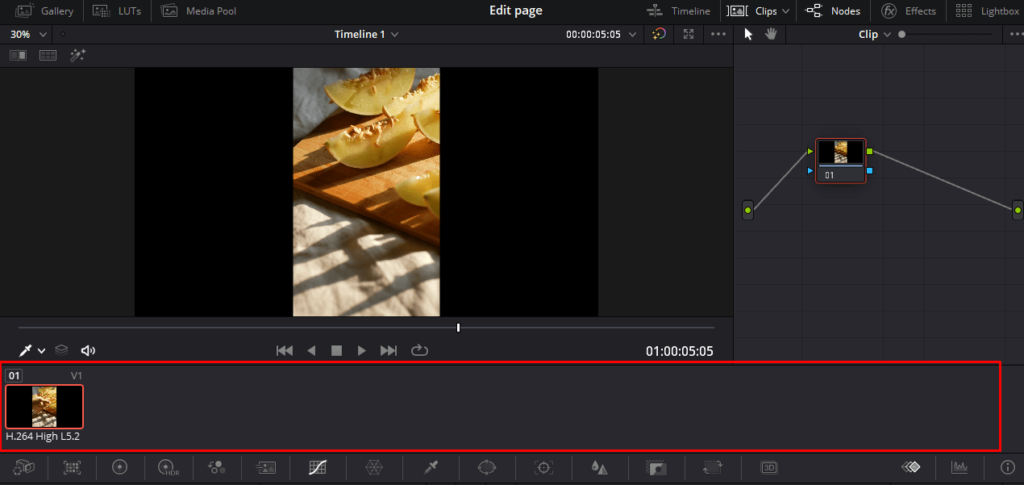
If you want to see the thin miniature timeline on the Color Page,
- Click the Timeline option placed on the top right-side corner.
- This displays the miniature timeline of the clips you have selected in the media.
When you start a project, it is important to set a timeline as this is where you place your edits, set your edits and work further.
How do you do color grading in DaVinci Resolve?
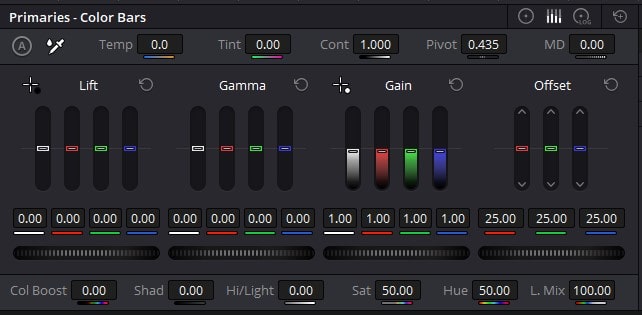
The color wheel helps to adjust the color correction of the media. All you have to do is twist the wheel based on your chosen colours and apply it accordingly. For example, to apply the color correction, select the clip where you want to apply it.
Next, adjust the different options in the Color wheel as follows:
- Lift: Lift adjusts the lighter part of the clip including the intensity of the shadow.
- Gamma: Gamma controls the intensity of the mid-tone color correction applied to the clip.
- Gain: Gain controls how saturated the clip is, the intensity of the highlight is presented and you need to drag the pointer toward the direction you prefer to apply the effect.
- Offset: Focus on applying the color in the entire image.
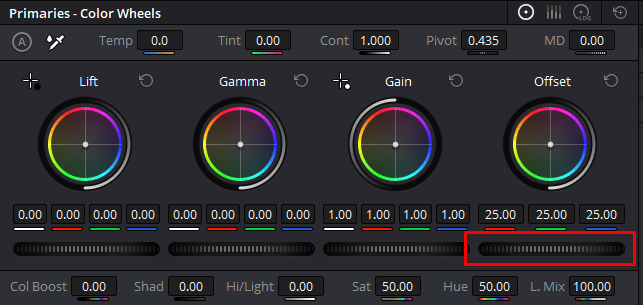
Below the color wheel, you have a thin wheel named the Master wheel to roll to the left and the right.
The functions applied to the left and right differ accordingly:
- If you drag the Master wheel to the right, it brightens the clip.
- If you drag the Master wheel to the left, it lightens the clip.
If you want to reset the color wheel,
- Double-click on the color wheel
- Then, you will notice that the color wheel is reset
What is Primary Image Color in DaVinci Resolve 18?
There are many activities that you can achieve using primary color correction. The primary color correction involves the color wheel activity. You can choose to handle the 4 main wheels of the color wheel as per your requirement and by using the Master wheel as well.
The following are the main activities performed through the primary color correction:
- Image contrast
- Saturation
- Hue
- Temperature
- Midtones
- Color boost shadows
- Highlights
- Tints
Apart from that, at the bottom of the color wheel, you have a few options as mentioned below:
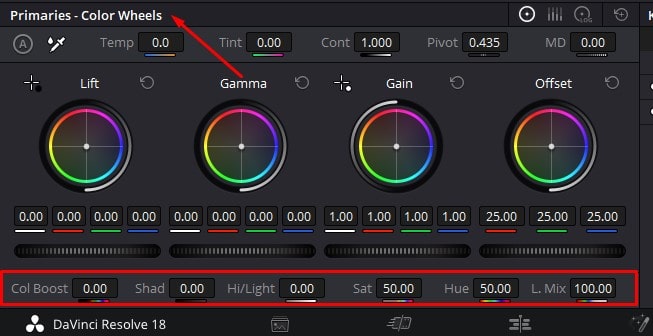
- White Balance: Helps to adjust the weird colors on the image by using the eyedropper
- Contrast: Controls the contrast across the white and dark areas of the clip
- Pivot: Controls the centre point of the contrasts.
- MD (Mid/Detail): Revises the mid-tones of a clip.
- Color Boost: Adapt the vibrance of the clip across the colors.
- Shadows: Controls the bright and dark areas of the image.
- Highlights: Controls the intensity of the brightness on the bright areas of the clip.
- Saturation: Controls the vibrant colors on the clip.
- Hue: Controls the hue color based on red and green contrast.
Depending on your requirements, you can achieve to do the above activities using the Color Page of DaVinci resolve 18.
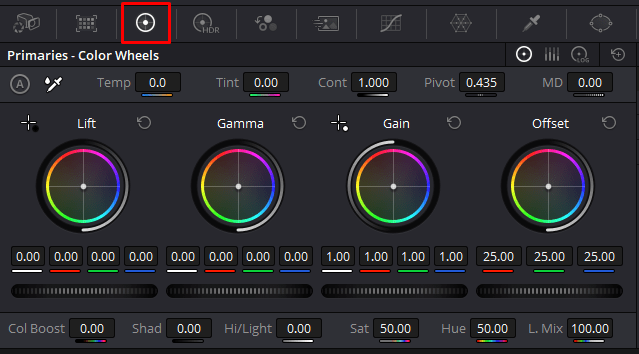
What are Primary Adjustment Controls?
There are primary adjustment controls that help to adjust different aspects of the images. For example, you can manage the changes related to saturation, temperature, tint, color shadows, highlights and much more settings in the images. Different settings deal with different aspects and you need to identify the right choice.
Among the primary adjustment controls, there are two types of controls as follows:
- Primary Bars: The primary bars allow to change colors based on channels and luminance.
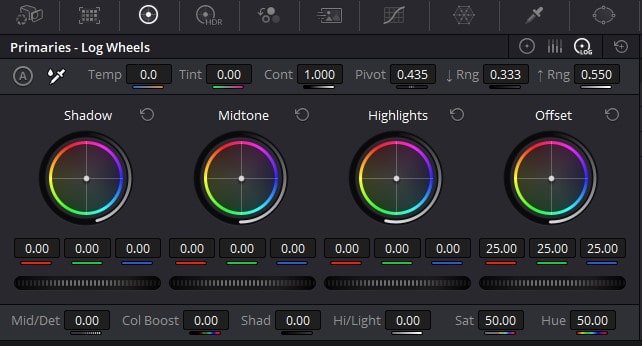
- Log Grading: The log grading aids to change the shadows, highlights, and mid-tones present in the image.
It is important to learn the functionality of the above 2 primary wheels to master your color editing skills.
What is the secret of Balancing Image Color?
Balancing image color is the primary way to adjust the clips. There are only main ways to adjust or balance the image color as mentioned below. You can adjust the image color using the primary correction tools or the color wheels.
The primary correction tools are located at the bottom of the screen which helps to adjust the basic color correction applied to the image. Using these options helps to brighten or darken the clip and keep the image in a neutral color. Apart from that, the master wheel also helps to change the overall color to a bright or light color.
How to do Auto Balance in DaVinci Resolve 18?
There are auto balance tools that are handy to automatically balance the color correction of shots that look alike. For example, you can choose one clip and let the other clip automatically adjust itself based on the initial clip you selected.
Method 01: Adjust one clip
First, click the clip you prefer to adjust the color correction. Next, click on the auto color button which is located on the left side of the color wheel. As soon as you click on it, the clip is automatically adjusted based on the shot’s contrast.
Method 02: Adjust one or more clips
Here, the color between different forages is adjusted automatically. To adjust one or more clips,
- Click on the clip.
- Next, right-click on another clip and choose the option ‘Shot Match to This Clip’ from the drop-down menu.
Then, the color correction is applied automatically across your selected images. It also includes adjusting the color, brightness, and contrast between the clips.
What are the Curves on the Color Page?
Curves let you adjust the red, highlights, shadows, saturation, hue, and many more features through itself. Above the curve graph, you can notice some options to differently view curves.
How to adjust Contrast and Color?
The curves are the features handy to adjust the color and contrast of the image. Each curve helps to adjust the specific region of the image based on the 3 main factors namely hue, luminance, and saturation. Apart from that, you have the default custom curve which helps to adjust the red, green, blue, and luminance curves separately.
There are 6 curves in DaVinci Resolve 18 as mentioned below:
- Custom curves
- Hue Vs Hue
- Hue Vs Sat
- Hue Vs Lum
- Hue Vs Sat
- Sat Vs Sat
Custom Curves
The custom curves aim to adjust the luminance and the tonal areas of the clip depending on the different colors.
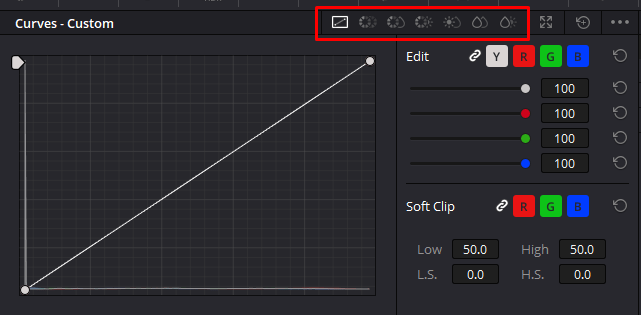
To create a contrasting effect follow the below guidelines,
- Increase the red color in the highlights
- Decrease the shadow
Hue Vs Hue
Just like the name signifies, the Hue Vs Hue adjusts the hue color against another hue color.
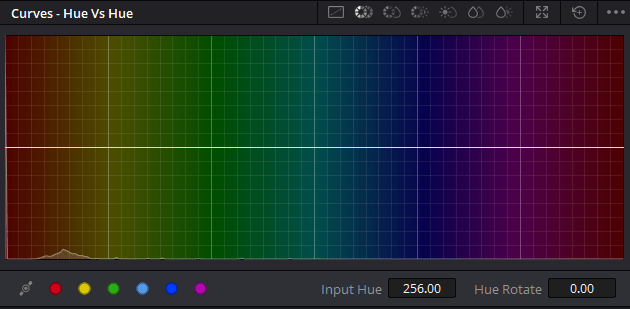
To create a brighter contrast follow the below guidelines,
- Increase the hue color using the curves manually.
- Alternatively, input a higher hue value in the input box displayed at the bottom of the screen and adjust it accordingly.
Hue Vs Sat
The Hue Vs Sat is handy to adjust the saturation color of the hue placed on the clip. You can adjust the hue and saturation manually using the curves or by inputting a value in the input box displayed in the right-side corner of the curve box.
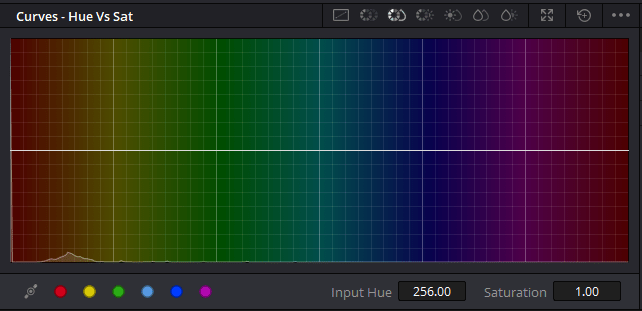
Moreover, the saturation is increased more than the hue in the clip.
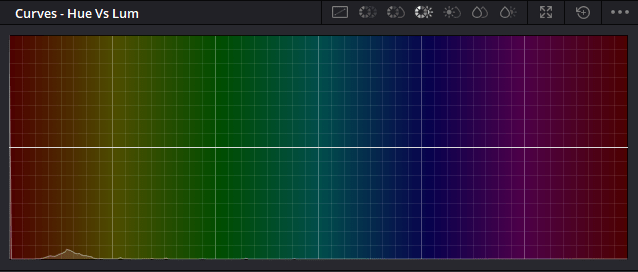
Hue Vs Lum
The Hue Vs Lum is responsible to adjust the lightness of the objects present in the clip based on a specific color on the clip. Its function also includes adding depth and looking for specific hues of the clip. Alongside this, it involves lightening the color elements based on your requirement.
Lum Vs Sat
Lum Vs Sat is dedicated to increasing or decreasing the saturation. Here, it helps to adjust the saturation based on the tonal areas of the image as well.

Alongside this, you can increase the saturation. Then, decrease the lum or mid-tone depending on your requirement.
Sat Vs Sat
Sat Vs Sat is handy to adjust the saturation on a specific range. When you adjust the saturation in this situation, it prevents it from affecting the rest of the image.
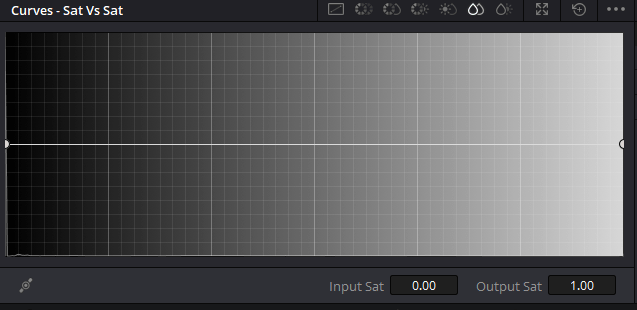
To do this, click on the viewer and pick a value. Next, increase or decrease the saturation as per your requirement.
How to use Nodes on Color Page
When you apply color correction, nodes play a pivot role in balancing the quality of the clip. The node section in the Color Page appears at the top right corner of the canvas. The initial node resembles the image balancing section of the clip. The other intersected nodes are responsible for color correction activities. Moreover, this works like a flowchart by interconnecting each node to one other.
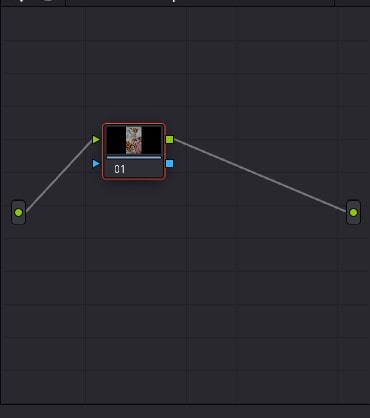
At first, the usage of nodes can be daunting. once you experiment with the edits by dealing with nodes, you will understand that nodes are the easy way to apply editing with less hassle.
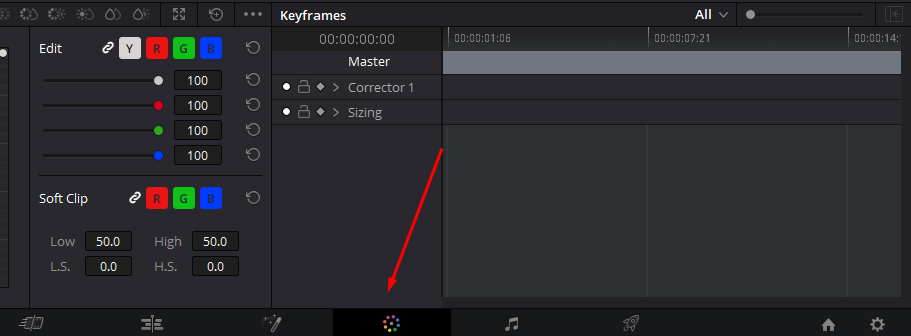
What are Keyframes in DaVinci Resolve 18?
The keyframes are helpful to adjust the animation that is applied to the clip. You can use the red timeline to play across the clip and adjust the setting as per your requirement.
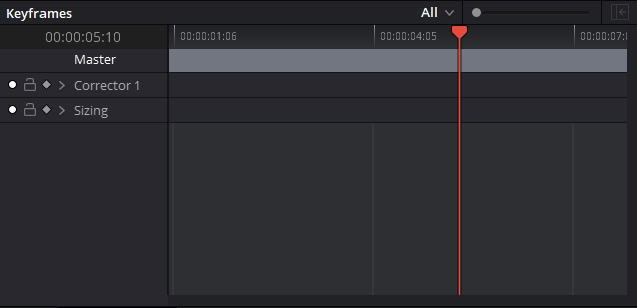
To set a keyframe,
- Choose to edit a specific setting. For example, edit the clips by using the Clip settings.
- Next, go to the Edit Page and select the clip.
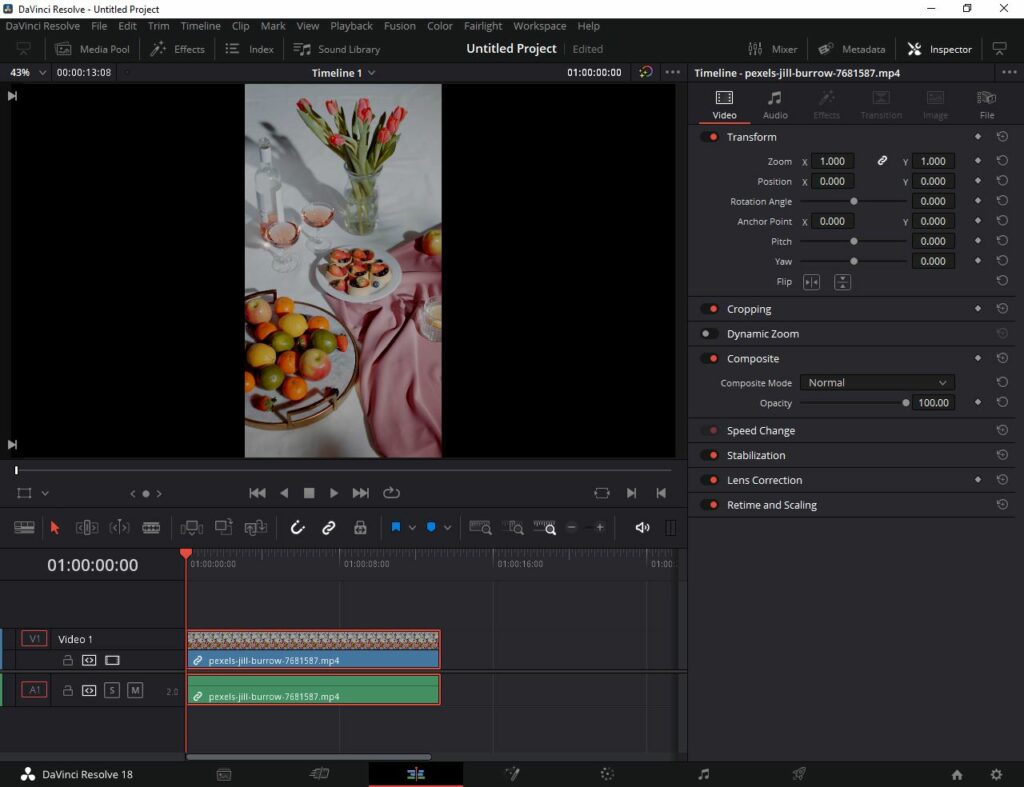
- Go to the Inspector to change the settings of the clip.
- For example, you can add zooming, position, scale, and any effect and click on the diamond beside the setting.
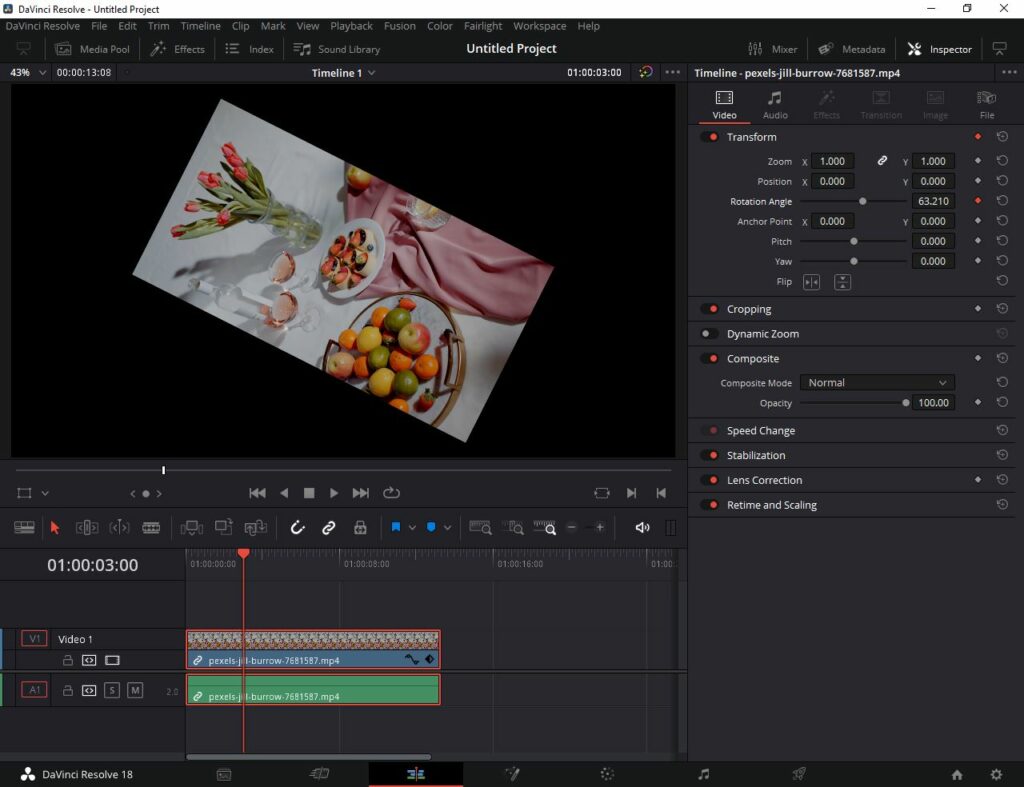
- The diamond adds the keyframes to make animations.
- Repeat the 4th step as much as you require by moving the playhead to the right destination.
How to adjust the Scope
To get an insight into the professional scope based on the image data, the scope comes in handy! Mainly the scope handles the luminance, saturation, chrominance, hue, white points, and much more of the specific clip.
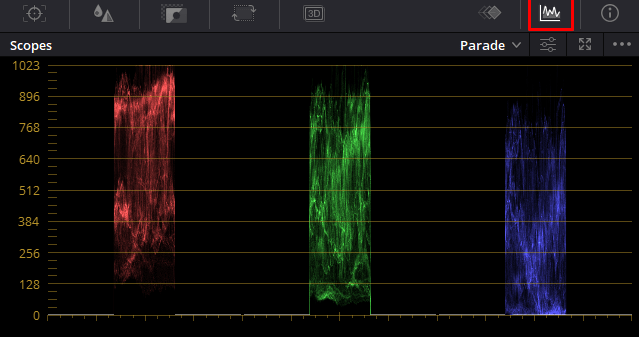
The scope palette is located on the bottom right side of the image which is used to measure the color tones. There are several benefits of scope as mentioned below:
- Check tonal ranges
- Balance footages
- Match clips one to another
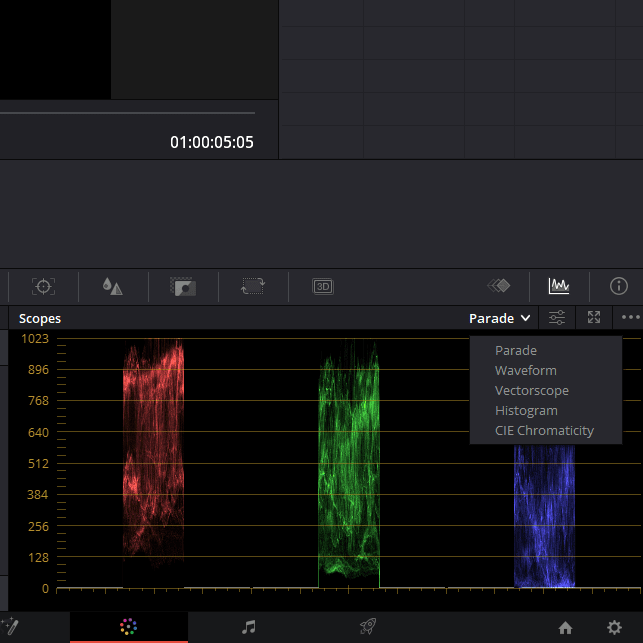
Alongside, you have 5 main scopes on the Color Page as mentioned below:
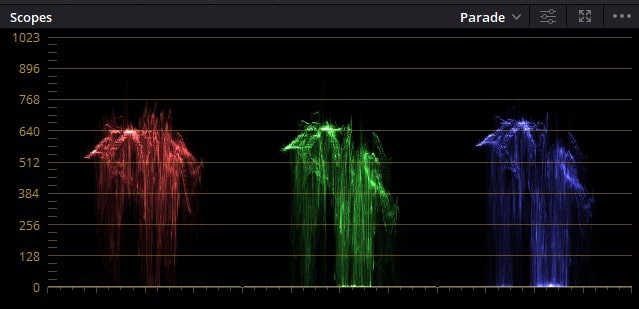
- Parade: Checks if one specific color is stronger than the other color. You can adjust the RGB, YRGB, and Y Cb Cr.
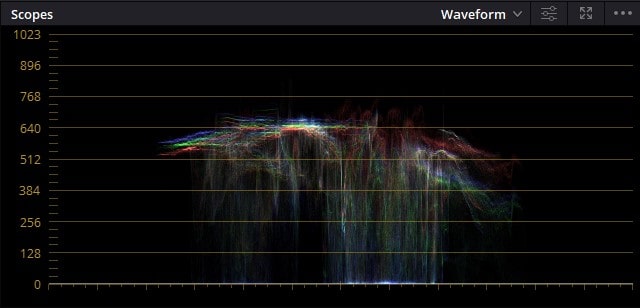
- Waveform Monitor: Adjusts the luminance and color values of a specific frame. It helps to maintain equal intensity across the clips.
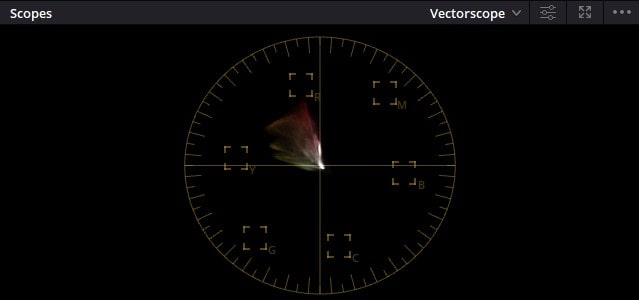
- Vectorscope: Monitors the circular graph by adjusting the hue and saturation levels. It is specifically used to adjust skin tones.
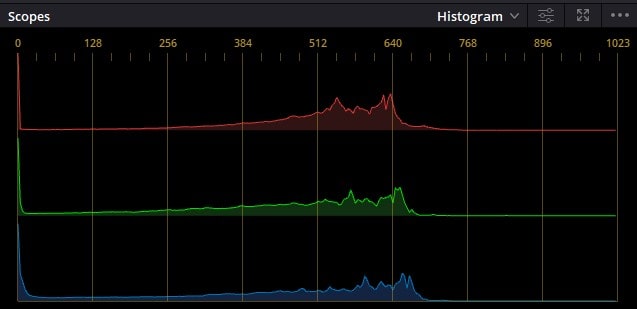
- Histogram: The histogram represents the graphical representation of the tonal distribution of the clips. You can adjust the brightness and contrast here.
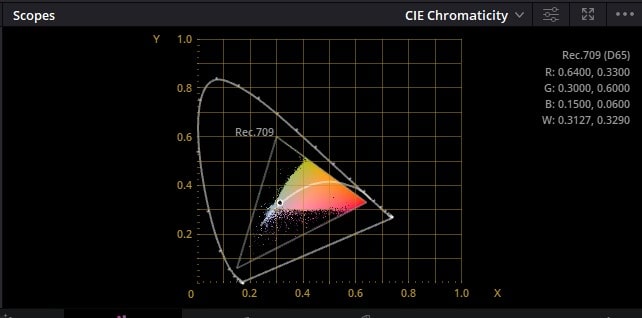
- CIE Chromacity: Identifies whether the colors are placed within the boundaries of the clips.
How to use Power Windows
The Power window on Color Page is an enhancing tool that focuses to draw different types of shapes. For example, if you want to draw around an object, you can use the pen tool from the power windows. It helps to draw geometric shapes using tools such as pen tools, curves, blur and much more!
To choose the power windows tool,
- Go to the bottom of the canvas and choose the windows icon from a couple of tabs.
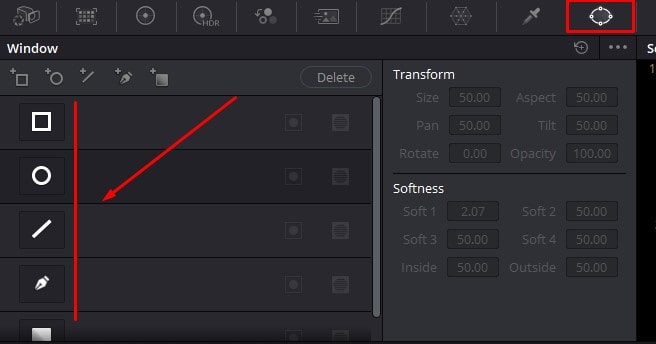
- You would notice a couple of options displayed on the left and choose the best fit to use in your edit.
How to use the Tracker Window
The tracker window is a dedicated workspace to track objects using the power window. For example, if you pause and select an object in the clip by using the pen tool or any specific tools- you can go forward and activate the tracker to track the specific object throughout the moving clip. If you change the color or invert a color and use the tracker option, the object remains the same throughout the clip.
To activate the tracker,
- Go to the tracker icon on the windows at the bottom of the canvas.
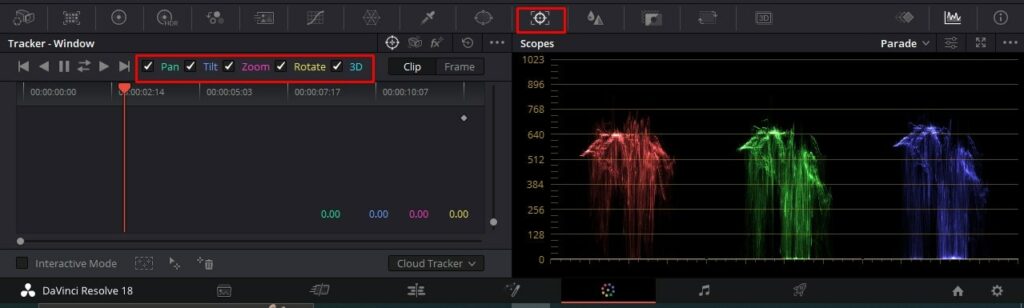
- Choose one of the options among pan, tilt, zoom, 3D or rotation to apply the tracking.
- Next, move the playhead at the beginning of the clip and track forward and backwards.
- Finally, play the clip and you will notice that the image is tracked throughout the clip.
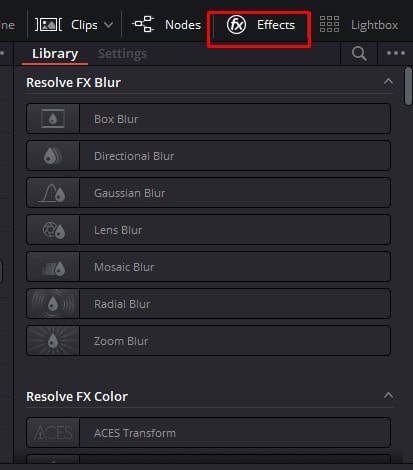
What is Resolve FX?
Resolve FX is a library of different types of effects in DaVinci Resolve 18. The main goal of using the Resolve FX library is to add blurs, glows, lens flares, styles, textures, color effects, and much more to enhance the quality and look of the image.
To add the Resolve FX effect,
- Go to the Resolve FX effect placed on the top right corner of the canvas.
- Next, click and drag the specific effect as per your requirement.
- You can add Resolve FX Color, Resolve FX Blur, and much more effects in this section.
How to Compare different shots
You can view around 4 shots under view in DaVinci Resolve 18. By comparing different shots, you get an idea of how to work on the different shots and the missing factors alongside gaining a competitive advantage as well.
To compare shots,
- Go to the preview window at the top of the canvas.
- On the top left of the preview window, you can notice the ‘Image Wipe’ option.
- If you click on it, it automatically sets the view frames of 2 clips.
- Under the Image Wipe, you can change the setting to adjust it horizontally, vertically, mixed or as an alpha model.
- Based on the comparison view, you can get a brief idea on how the clips work and whether you require any further edits and much more info as well.
Conclusion
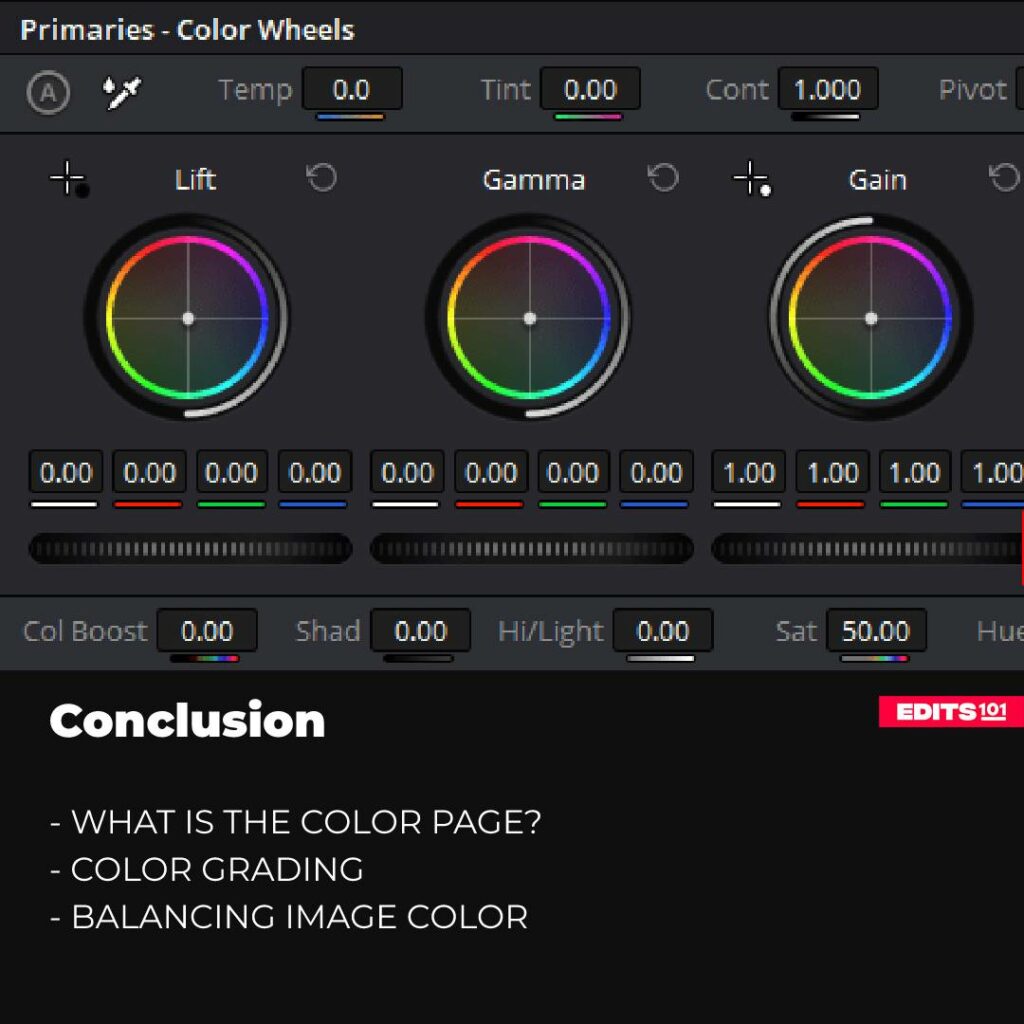
In conclusion, the Color Page in DaVinci Resolve 18 is a comprehensive and versatile tool for color grading that provides users with the tools and features necessary for professional-quality results.
This article has covered the advanced features of the color grading process, the different types of grading tools, timelines, viewers, color wheel, automation, nodes, auto-balancing, tracing, shots comparison and much more from the software, and tips and tricks. By following the guidelines and techniques outlined in this article, you can become a skilled colourist and take your video projects to new heights with the power of DaVinci Resolve 18.
Thanks for reading & feel free to check out more of our articles!
Expert Rating
Summary
In summary, you learn to use the viewer, timeline, color grading, scopes, grading tools, color wheel, automation, nodes, auto-balancing, tracing, shots comparison, keyframes, and much more in the color page.


