

Affinity Photo streamlines the photo editing process with its unique Personas, distinct workspaces tailored for photographers and designers at every level.
The five personas are:
- Photo Persona
- Liquify Persona
- Develop Persona
- Tone Mapping Persona
- Export Persona
Affinity Photo Layout: Persona Toolbar
The Persona toolbar houses all five personas you’ll need to work on and edit your photos (see image below). Personas are like designated workspaces that you can easily switch according to the tasks being undertaken.
The Persona Toolbar is an efficient way to work on different types of projects with your photos, as it allows you to access all five personas from one central location in Affinity Photo.

They are designed to be intuitive and easy to use, so it’s important to understand what each one is used. Each persona has a unique set of tools and features.
If the Persona Toolbar is hidden on Windows: you can click on File, click on ‘Personas’ and pick the Persona you wish to use. You may notice that some tools are shared when using different personas.
On Mac, you can access the toolbar from the top. Or else you could go to “Affinity Photo” & a dropdown will appear with the available personas.
Brief Description of the Five Personas of Affinity Photo
The first persona is the “Photo Persona”. This is the most commonly used one as it is designed for general photo-editing tasks such as adjusting exposure, cropping, rotating images, photo-manipulation & much more.
The second persona, “Liquify Persona” is used for manipulating photos by distorting their shape and size.
The third persona, “Develop Persona” is a dedicated space for colour image correction, remove any blemishes & imperfections.
Persona four is Affinity Photo’s “Tone Mapping Persona” persona which is used for tuning HDR images.
The fifth persona, “Export Persona” is used for exporting your images in the correct format for whatever use you have planned.
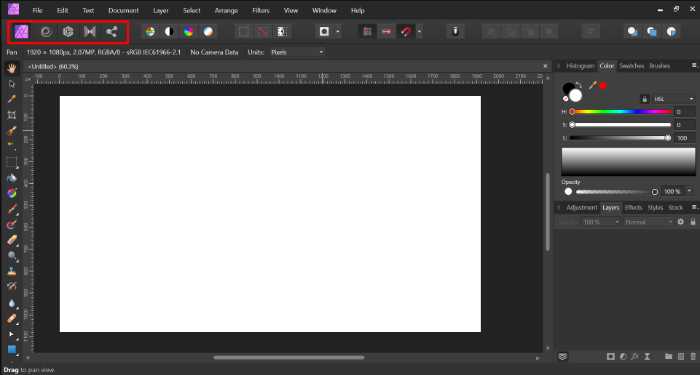
1. Photo Persona in Affinity Photo
You are first welcomed with the “Photo” Persona when opening up Affinity.
It’s called ‘photo’, because it offers all of Affinity Photo’s photo-editing features in one place. The tools in the Photo persona are designed for multiple photo-editing tasks such as removing backgrounds, cropping, rotating images, changing colours, manipulating images & more.
This persona offers over a 100 tools and features designed specifically for various types of image adjustment tasks including exposure correction, colour adjustments, perspective corrections, retouching skin tones and blemishes. The Photo persona also offers several photo editing tools such as cropping, selections, warping and different vector tools.
With this persona, photo-editing is limitless. For example, you can remove unwanted objects from an image, change the background of a photo, or add creative effects to your photos. The Photo persona is Affinity Photo’s most versatile persona and it should be your go-to for all photo editing tasks.

2. Liquify Persona in Affinity Photo
The “Liquify” Persona is Affinity Photo’s persona for distorting and manipulating images.
It allows you to enlarge or shrink different parts of an image, distort the shape of a face, warp perspective in an image or create mirror effects. Affinity Photo’s Liquify Persona also allows you to create your own custom brushes for use with other personas such as Affinity Designer and Affinity Photo.
Tip: Please note that the layer has to be a ‘Pixel’ layer in order to edit it with Liquify Persona. To turn an image into a ‘Pixel’ Layer, left click on the layer and click on ‘Rasterize…’..
The Liquify persona is also great for creating abstract or surreal images by distorting the shapes and sizes of objects in an image. Affinity Photo’s Liquify Persona should not be used to edit photos that require high levels of precision as it can often result in distorted or warped images.
This persona can also be used when editing photos of people because it allows you to make subtle changes to facial features, or if necessary, completely re-shape a person’s face.
You can also use this Persona for tasks such as removing people from group photos by cloning other areas of the image.

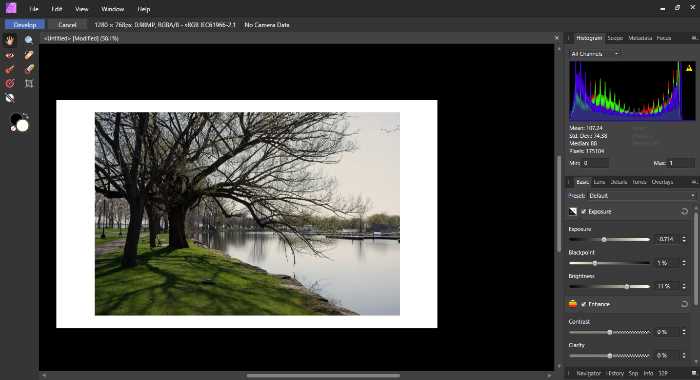
3. Develop Persona in Affinity Photo
If you wish to edit a RAW file, you will be automatically taken to the “Develop Persona”. A RAW image is a file that has not been compressed or altered in any way.
It includes all of the information from an image that was taken with your camera. The Develop persona allows you to develop and edit RAW images and any type of pixel image.
When using this persona, you may modify the colour and tone of your photograph as necessary. The basic exposure settings and the control lens corrections can also be changed.
In this persona you can fix-up any blemishes and focusing on perfecting the image as much as possible.
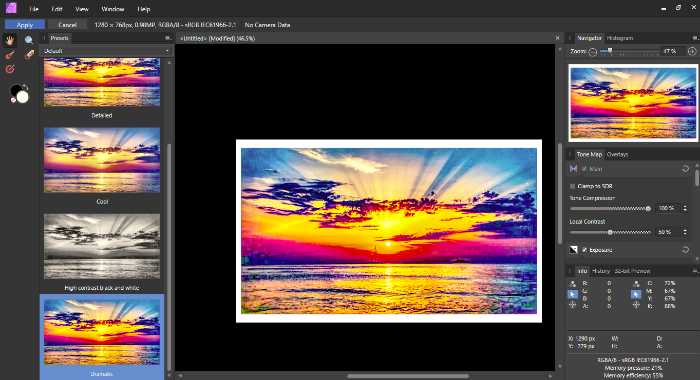
4. Tone Mapping Persona in Affinity Photo
The “Tone Mapping Persona” is Affinity Photo’s persona for creating High Dynamic Range (HDR) images. HDR images are 32-bit images, but this persona can also be used to edit 8-bit, 16-bit or non-HDR images.
These images are created by combining several different exposures of an image into one photo. These photos have a much higher dynamic range than standard photos allowing you to see more detail in the highlights and shadows of your image.
Affinity Photo allows you to create HDR images by merging multiple photos together. These merged images are called ‘exposures’. It makes it easy for you to merge several exposures into one image with its intuitive tone mapping persona which offers great control over the exposure settings of your photo.
The Tone Mapping Persona is best used when creating surreal or abstract images as it can often create unusual and eye-catching results.
Within the Persona, you could do final tweaks to your composition and balancing it out.
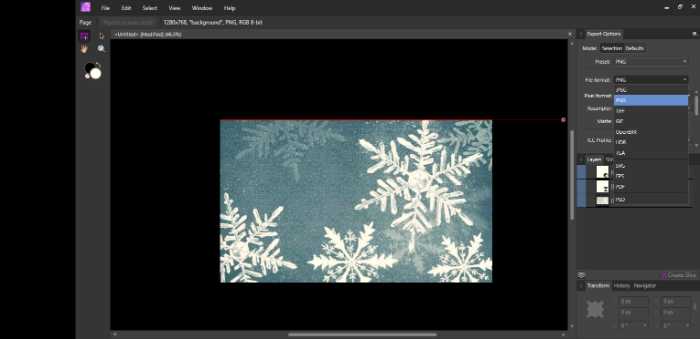
5. Export Persona
The Affinity Photo Export Persona allows you to export your images in various image formats. You can also scale and control Image compression, watermarks & copyright settings of exported photos.
It offers a wide range of image formats for exporting, including JPEG, PNG, TIFF and PSD. You can also save Affinity Photo documents as PDFs or ePubs.
You’re able to create transparent PNG files or an XCF file for exporting layers as individual PNGs.
Furthermore, within the persona you could export using specific layer or either use slices. This gives a more controlled range on what you’d like to export.
The Export Persona is best used when you have finished editing your photo and you wish to save it as a high-quality image for sharing or printing purposes.
Having said that, if you don’t want to use the export persona, you are able to export your photos in Affinity Photo by going to File > Export.
How to fix “Please select a pixel or mask layer before entering A Persona”?
If you’re getting “Please select a pixel or mask layer before entering ___ Persona” message when accessing the Liquify, Develop & Tone Mapping personas are greyed out, you should select and rasterise the layer. That will convert it to a pixel layer.
This happens because when placing an image, it is considered as an object type. After rasterising it, it converts to a pixel layer. When editing a photo/image (further than distorting like skewing), you should always rasterise it to add raster effects.
Conclusion
Affinity Photo’s five personas provide a powerful, streamlined way to tackle every stage of photo editing. Whether you’re developing raw files, retouching, applying creative effects, or exporting your final work, each persona is tailored to help you focus on the task at hand.
Thanks for reading & feel free to check out more of our articles!
Expert Rating
Summary
This tutorial is a basic overview of what are personas in Affinity Photo – their uses, tools and more.


