
When it comes to exporting in Affinity Photo, there are a couple of methods you can use. In this blog post, we’ll show you how to Slice images and export them.
We’ll start by discussing the Export Persona and then move on to the Slice Tool and Slices Panel. Finally, we’ll show you how to create slices and export your image using different settings.
How to Export Images in Affinity Photo
Finished the project & you’d like to export? There are a couple of ways to do this:
- Use Export Persona
- Quick export Through the File Menu
Export Persona in Affinity Photo
The Export Persona is a workstation that allows you to export:
- Layers
- Groups
- Objects
It allows you to export to multiple file formats and image size at the same time. You’ll also be able to output custom-drawn slices. This persona offers various tools and panels which allow you to export parts of an image and/or an entire document.
The interface of the Export Persona is made of these three panels as follows:
- Layers panel
- Slices Panel
- Export Options panel
In short:
The Layers Panel contains all the layers in your Affinity Photo document and determines which ones are exported.
The Slices Panel contains all the slices defined in your Affinity Photo document. It determines which ones will be exported.
The Export Options Panel contains all the options that are available for exporting.
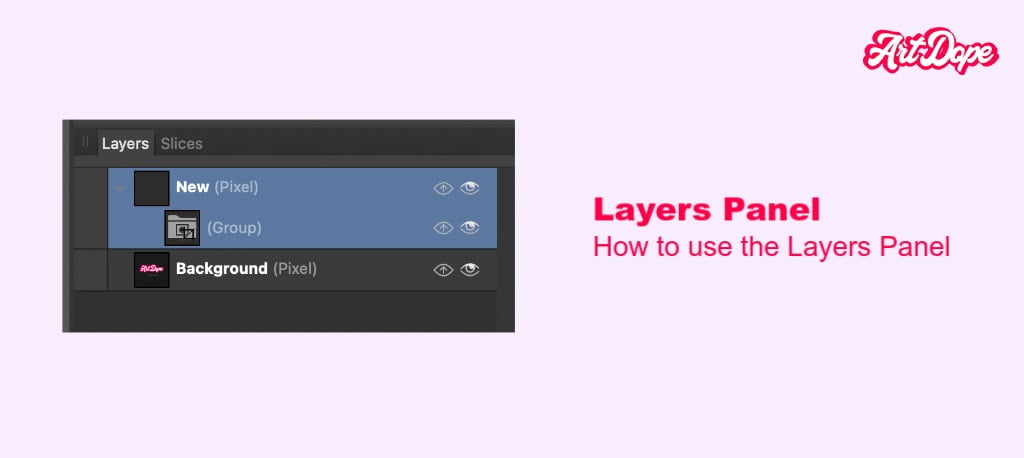
Layers panel
The Layers panel is where you’ll find all the layers, groups, and objects in your document. You can use this panel to turn on/off the visibility of certain layers directly from the export persona.
This is useful if you want to focus on a particular area of your document.
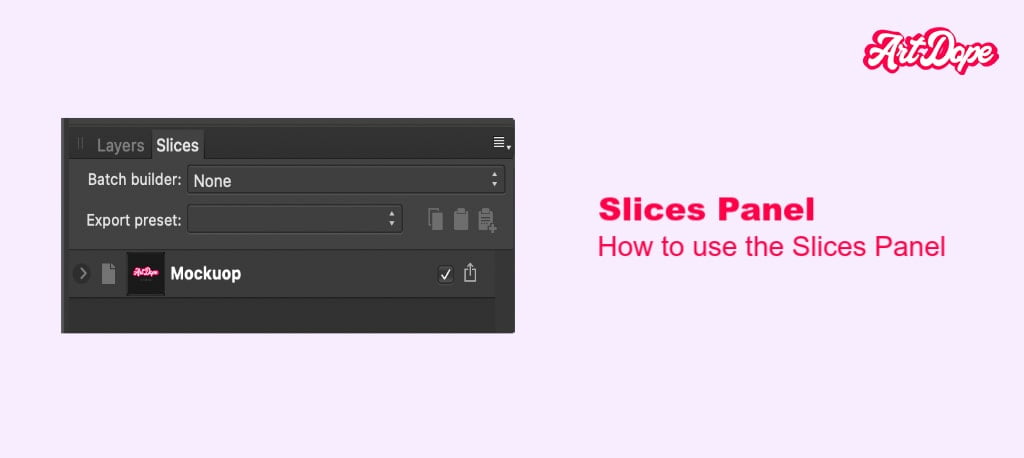
Slices Panel
Slice creation is done using a combination of panels and tools in the Export Persona. Slice areas are export regions that you choose to output from your document.
The Slices Panel observes all the slices created in your document. You can use this panel to turn on and off the visibility of certain slices, as well as delete or rename them.
When you want to export slices in Affinity Photo, the program will automatically proportion them according to the size of the selected part.
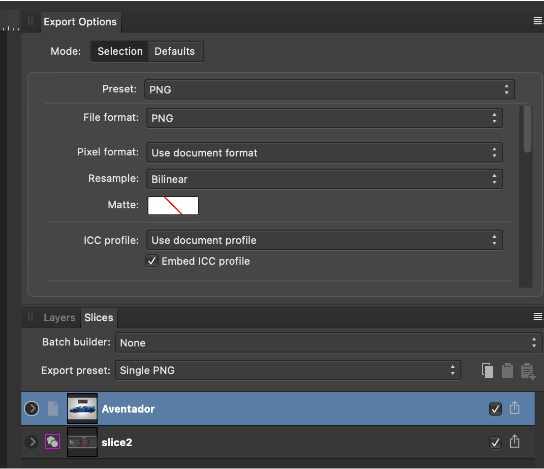
Export Options panel
The Export Options panel allows you to set up your default export settings, as well as those for the item that you’re currently working on, before generating a slice.
Quick Export in Affinity Photo
This is quite a simple process. To Quick export, simply navigate to ‘File > Export’ in the top bar.
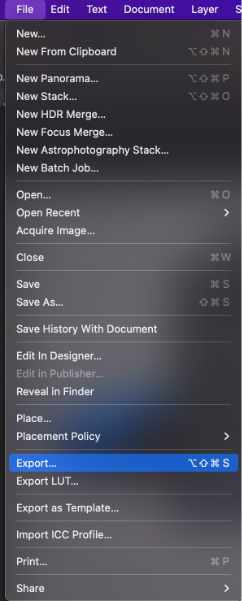
You will then find multiple file types to export your image.
How to create & Export Slices in Affinity Photo
You can create slices multiple ways:
- Using Layers to create slices
- Using Groups within the Layers
- Using the slice tool
Slice Tool in Affinity Photo
The Slice Tool is a popular tool in the Export Persona handy for the production of slices.
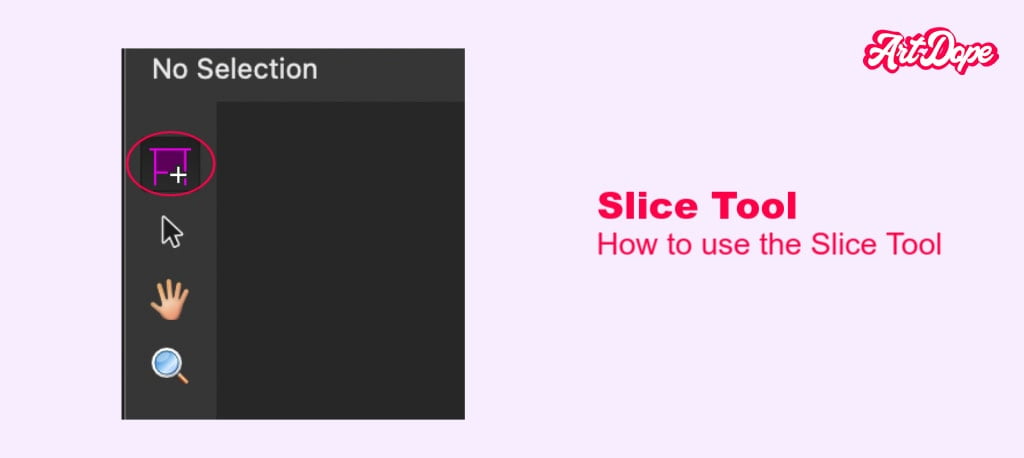
To use it,
- Simply click and drag on your document to create a slice.
- You can also hold down the Shift key while dragging to constrain the slice to a square.
- Once you’ve created a slice, you can move it around by clicking and dragging on it.
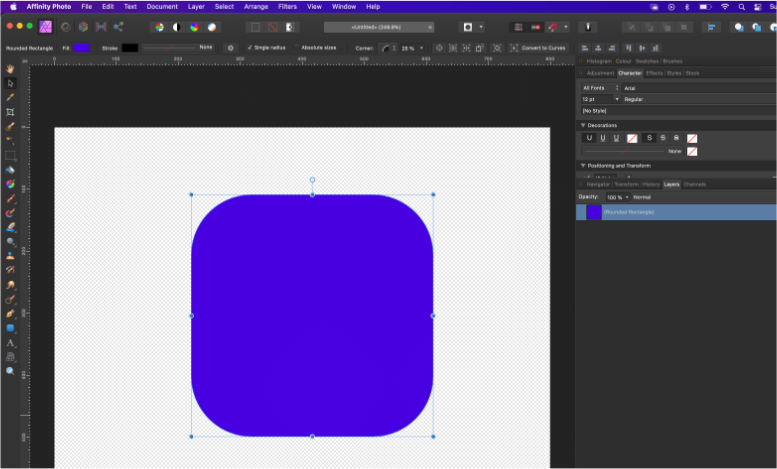
Select the slice, the top-right circle sign indicates- it is auto-sized and the square symbol indicates- it is re-sized.
If you want to delete a slice, simply select it in the slice panel and press the Delete key on your keyboard.
When creating a slice, automatically a name is placed based on the layer it was created from. However, you can rename it by double-clicking on the name in the panel and typing in a new one.
Exporting Layers as Slices in Affinity photo
This is a game changer in affinity photo. You can actually export a layer with its own dimensions & on it’s own!
For example: Let’s say you have created a document and you’ve got 2 layers which they’ve got there own size. However, you don’t want to create a new document to simply export it. Not a problem.
To export the layers as slices do this:
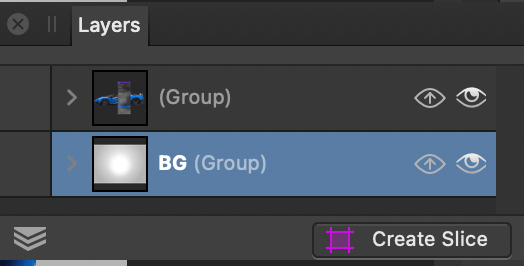
- Go to the Export Persona
- Layer Panel
- Select the Layer & make sure it is visable
- Select “Create Slice”
- Go to the Slices Panel & Export
- Done!
Exporting the slices Created in Affinity photo
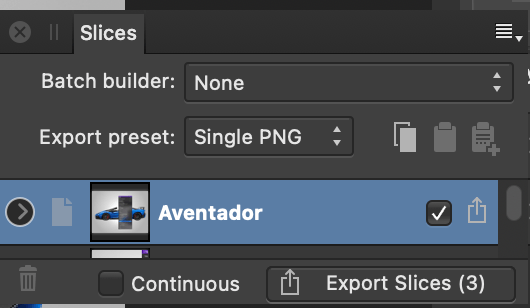
Once you’ve selected the areas/layers you want to slice, the slice panel be on the right side of the screen. It contains all the recently sliced areas.
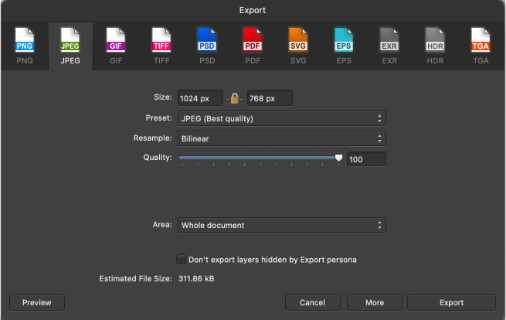
Once you’ve created your slice, you can adjust the settings by clicking on the Export Options. This is usually on top of the slice panel, where you can choose your file format, quality, and other settings. Once it is finished, click on the Export button to export slices.
You can also use the Slices panel to output your slices to different file formats. To do this, select the slices you want to export and click on the Export Selected button. This will open up the Export dialog, where you can choose your file format and destination.
Things to remember when exporting slices
There are a couple of things to keep in mind when exporting slices:
- By default, Affinity Photo will export your slices as PNG files.
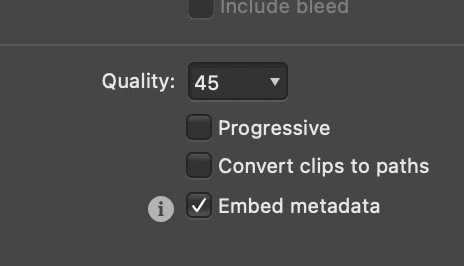
- If you want to export your slices as JPEG files, you’ll need to change the file format in the Export dialog.
- When exporting JPEG files, you’ll need to specify the quality of the image. The higher the quality, the larger the file size will be.
- You can also choose to export your slices as PDF files. This is useful if you want to send them to someone else or print them out.
What are Export settings in Affinity Photo? What do they mean?
Each file type is accessible in the Export Options panel and the Export Dialog has a variety of options that influence the generated files.
General settings in Affinity Photo
The following settings are available for all file types. The availability of these options is determined via the export process.

- Mode– The export options for the selected export area vary from the default export option settings if Selection is enabled. When Defaults are switched on, default export options are set for new slices.
- Preset– The Export dialog box lets you choose from a variety of pre-defined export settings for a number of popular file types, color modes, and bit depths. Choose one from the pop-up menu.
- File Format– Choose the desired format for your exported file. Select from the pop-up menu.
- Resample– Select the resampling method you want to use. On export, up-sampled or down-sampled is selected. This option is available when you pick More for the PDF, SVG, and EPS file types.
- Area– With the ‘Select Layer(s) Only‘ option, export the layer content currently selected. You may also choose to export only the current layer’s content using the ‘Selection Area.’
- Don’t export layers hidden by Export Persona– Layers that are hidden in Export Persona are removed from the exported file if they appear on the page.
If this option is switched on, all objects on the page (which are within the Area chosen above) will be included in the export regardless of whether they are hidden in Export Persona.
Resampling methods in Affinity Photo
You may also choose between the following resampling methods:
- Nearest Neighbour- The ideal choice for super-fast processing. The fastest resampling method is simple resampling, which takes the fastest time to complete. It’s appropriate for hard-edge photos.
- Bilinear- The algorithm is handy to optimize photographs.
- Bicubic– After you’ve created your original image, you may use resampling to make it appear more accurate. Resampling is smoother than Bilinear and has a longer processing time.
- Lanczos 3– This setting takes a long time to compute. There are two types: separable and non–separable, the latter of which produces slightly better outcomes but takes somewhat longer to execute.
Separable and Separable resampling provides excellent results but with longer computation times.
You also have Multi-Format Settings to export based on several other conditions as per your requirement.
What are the different formats in Affinity Photo?
These are the different export formats in Affinity Photo;
- Adobe Illustrator(AI)
- Adobe Freehand(10 and MX)
- Adobe Photoshop(PSD)
- Adobe Photoshop(PSB)
- DNG
- EPS
- GIF
- HEIF
- JPEG
- J2K,JP2
- JPEG-XR/JXR (WDP/HDP)
- PNG
- RAW
- SVG
- TGA
- TIFF
- WEBP
- OpenEXR
- Radiance HDR
- FITS
The most common formats are:
- JPEG– Best for standard online graphic photos. Also, it is highly recommended to compress images consisting of multiple ranges of colors.
- PNG– Best for graphics with transparent backgrounds, images with high contrast, and retaining even the finest details during exports.
- SVGs– Best for vector graphics and as the file storage is quite small, it saves a lot of space. It doesn’t lose the quality of images as well.
Export size and resolution in Affinity Photo
Image density is the number of pixels per inch in an image. Affinity Photo uses a default resolution of 72ppi for new documents (As web is the most common usage), but this can be changed by going to Image > Resize Document.
When you export an image, you can change the resolution of the image. The higher the resolution, the more detail will be retained in the image. However, exporting at a higher resolution will result in a larger file size.
It’s important to choose the right balance of resolution and file size for your needs.
Also, different devices differ in screen size and have different dimensions. The export sizes increase depending on the document’s dimension and DPI.
Exporting for print using Affinity Photo
You can export for print in multiple ways. However, you have to make sure that the file is prepared properly. The common rule of thumb is that the file should be:
- 300 DPI
- CMYK
This depends on the printer you’ll be using. Usually industrial printers advise to set up the document in CMYK, however, with home printers & light use you could simply use RGB.
When exporting the file, the printing company usually guides you on their preferences/guides. However, a common file type is TIFF.
Exporting it in TIFF format (Tagged Image File Format):
- From the File menu, choose Export.
- Click on the Format drop-down menu and choose TIFF.
- Configure your export settings and click Export to save a copy of your Affinity Photo document in the chosen format.
Let’s look at what TIFF is all about.
TIFF (Tagged Image File Format) is the most suitable format for high-quality print graphics.
Because the image is not compressed when exported to this format, it is an appropriate format for printing images in large sizes.
It’s also a good choice for files that will be modified later since they can be modified without sacrificing picture quality. TIFF images preserve more fine details than many other picture types. They retain finer details more than most other image formats.
It is not the greatest choice if you’re looking for a web graphics format since it has a large file size.
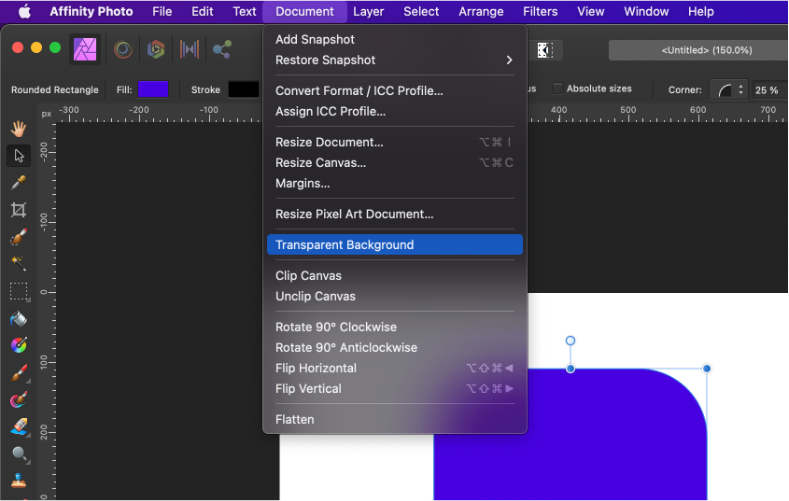
How to export an image with a transparent background in Affinity Photo?
This is a quick and easy thing to do, however, I would not blame you if you don’t know where the “transparent background” button is hidden.
Step 1:
Go to Document > Transparent Background.
Step 2:
All Done, Simply Export as discussed within this article!
Cannot Find the Export or Slice Panels in the Export Persona?
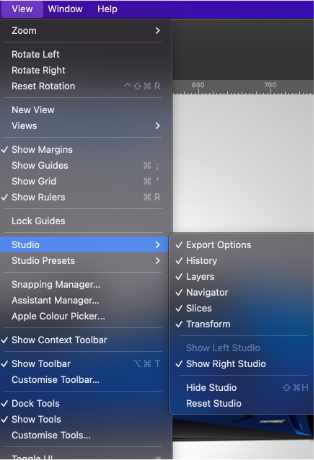
If you closed the panels by mistake, no need to worry! Simply navigate to ‘View > Studio’.
You’ll find all the panels over there!
Expert Rating
Summary
In summary exporting is not a difficult, however, there are a lot of file types for different use cases. Tools such as slices come in quite handy.
Conclusion
That’s all there is to how you can export in Affinity Photo! We went over some of the basics of Exporting, the Slice Tool and Export settings and the various export options.
Thanks for reading & feel free to check out more of our articles!


