
If you’re looking for an easy guide on how to crop in Affinity Photo iPad, you’ve come to the right place! In this blog post, we will walk you through the steps of cropping an image using all the different tools available!
How to Crop in Affinity Photo iPad?
Cropping can be used to improve the composition of your photos. It involves removing unwanted parts of an image, such as excess background or foreground. When done correctly, cropping can make a big difference in the overall look of your photo.
Affinity Photo for iPad allows you to crop freely or create custom, proportional ratios. You may select conventional print sizes or craft pixel-accurate custom crop areas for print or web distribution.

The Crop Tool is the main tool dedicated to cropping and it works non-destructively. There are different settings in the context toolbar of the Crop Tool, such as the crop modes, straighten modes and composition overlays.
Let’s have a look at these different settings one after the other. First let’s check out the different crop modes.
Cropping in a few simple steps
To crop a picture, the first thing you need to do is to make sure you have selected the Photo Persona.

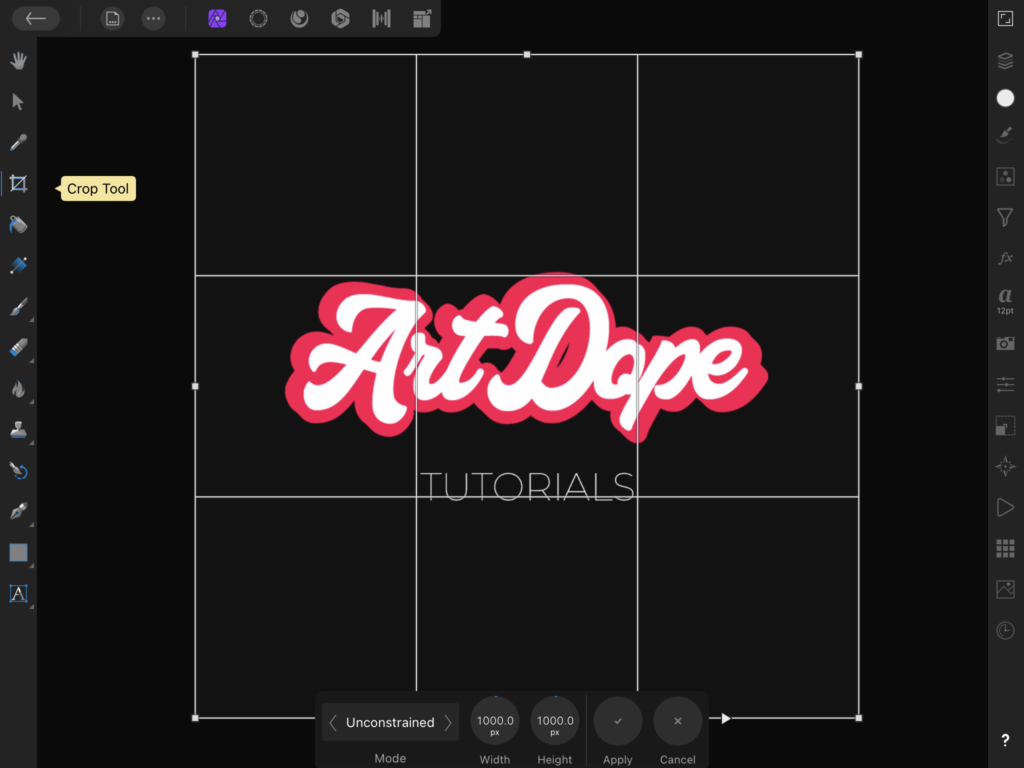
- Select the layer you want to crop and tap on the Crop tool located in the toolbar at the left of the screen.
- When you select the Crop tool, a box will appear around your image. You can move this box around by dragging it with your finger as well as using the handle.
- To resize the box, simply tap on one of the corner or edge handles and drag it in or out.
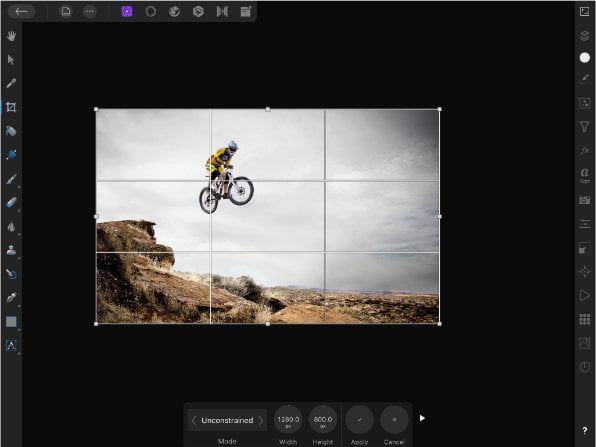
- Initially, you will be in unconstrained mode where you can adjust the x and y dimensions as per your requirements. But you can change it to a constrained mode as well.
- In a constrained mode, you can change the x and y dimensions by tapping on x option and entering a value and enter a value for y as well in order to the aspect ratio.
- In the context toolbar, you have several options to adjust. You can use rotate to flip the orientation. If you need to rotate the crop area, use two fingers and twist them in a clockwise or counter-clockwise motion.
- You also have absolute dimensions where you can change the units. For example, you can change the units to inches.
As we discussed previously, you can also straighten your image or tap on Darken to preview better the edges of the crop box.
When you’re happy with the size and position of the crop box, tap on the check mark in the toolbar to confirm your changes. That’s all there is to it!
Let’s discuss the different modes that the crop tool has to offer!
Crop modes in affinity photo iPad
Crop modes determine the technique of the behavior of cropping tool located in the bottom toolbar in Affinity Photo iPad.
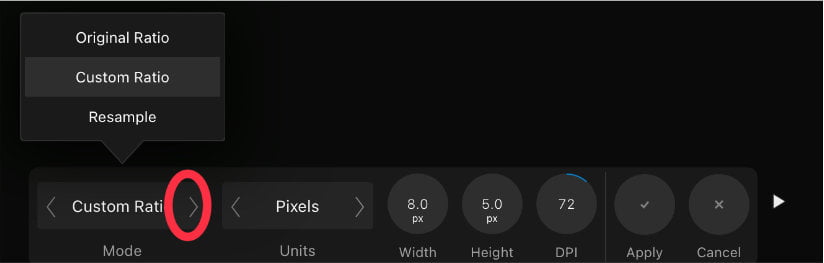
The context toolbar’s Mode options are include the following:
- Unconstrained- The crop area is resized as per your requirement.
- Original Ratio- Returns to the original aspect ratio of the image.
- Custom Ratio- To set a custom ratio, use the adjacent X and Y radial sliders. X represents width, and Y represents the height.
- Resample- Use the adjacent Width and Height radial sliders to define the crop area’s absolute dimensions. If required, enter your units.
Next, let’s look at how to use the Straighten mode.
Straighten mode in Affinity Photo iPad
Straighten mode is used to straighten an image taken at an angle. This is a common problem when taking photos with your iPad, as it’s easy to tilt the device when taking a picture. The image will be reoriented to be aligned with a drawn line.
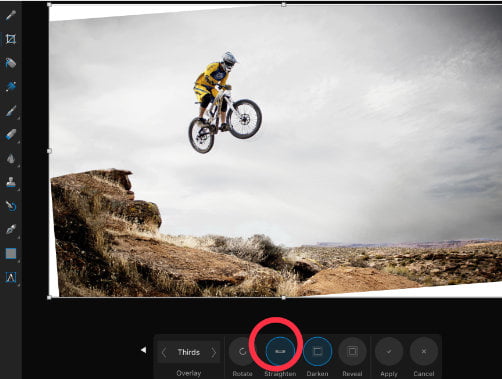
To use Straighten mode, pick the Photo Persona and select the Crop tool from the tools located on the left of the screen. Then, tap on Straighten and tap and drag on the canvas to create a new alignment/horizon.
You can also manually straighten an image by tapping and dragging outside the Crop Window. This will rotate and crop the image according to your preference. When you finish, tap on the Check icon at the bottom of the screen.
This is a useful feature if you want to make sure your photos are level with the horizon. Next, let’s look at Composition Overlays.
Feel free to test & play around with the source image here!
Composition overlays in Affinity Photo iPad
Composition overlays help you improve the composition of your photos.
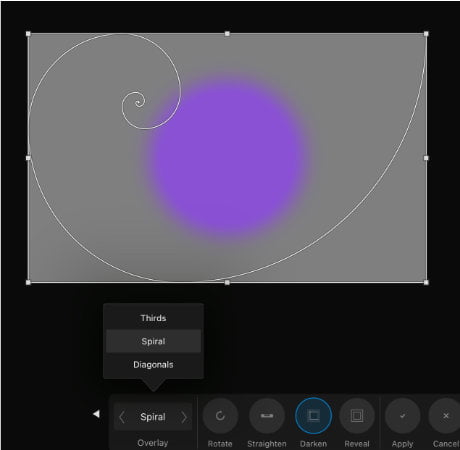
To access the composition overlays, select the Crop tool and then tap on the Overlays icon in the toolbar. You will see a list of available overlays, which are the following:
- Thirds- The intersection lines of the Rule of Thirds grid can be placed over an object of interest in your picture by default.
- Spiral- When positioning and sizing the grid, the inner origin of the spiral can be positioned over the subject of interest. This helps to balance the image naturally.
- Diagonals- To achieve a balance between the objects, place two objects of interest under the diagonal line intersections.
Expert Rating
Summary
In summary, it is not a difficult tool to learn. Not too much to practice is needed, but it’s good to understand what some functionalities mean. Furthermore, theres not much scale to this tool, however you might end up using it from time to time (depends on your needs – photo editing = a lot ; photo-manipulation = not too much).
Conclusion
In this article, we discussed cropping and the various options available, such as the different crop modes. We also looked at some of the composition overlays which can be used to improve the composition of your photos.
Even though it is a very simple tool to use, there are a lot a features to play around with.
Feel free to check out our other helpful tutorials!


