
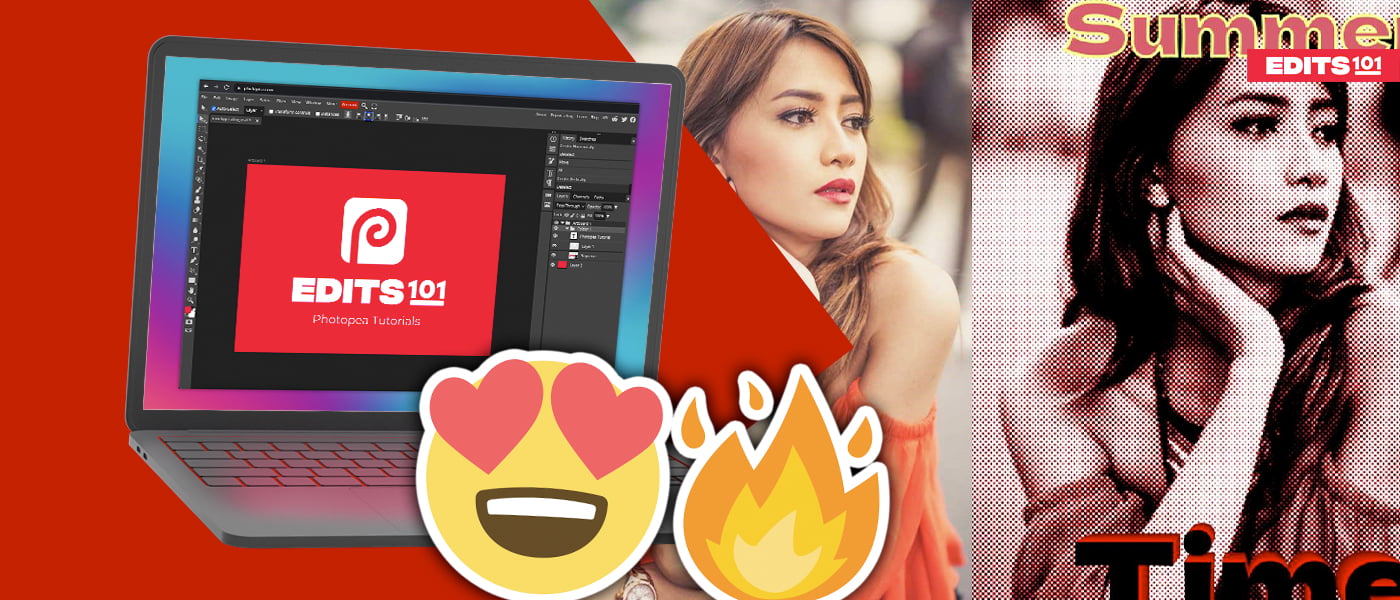
Do you wish to design your own T-shirt design? This tutorial is for you. In this step-by-step tutorial, you will learn how to design your own custom T-shirt design in Photopea.
In this tutorial, we will guide you on how to create a personalized t-shirt design using an image or text. Our instructions are step-by-step and easy to follow, even if you have never used Photopea before. So, let’s begin!
Create a New Project
The first thing you have to do is create a new project for your T-shirt design. Failing to prepare the New Project correctly may lead to problems after you are done creating your T-shirt design.
With Photopea.com open, go to File >> New
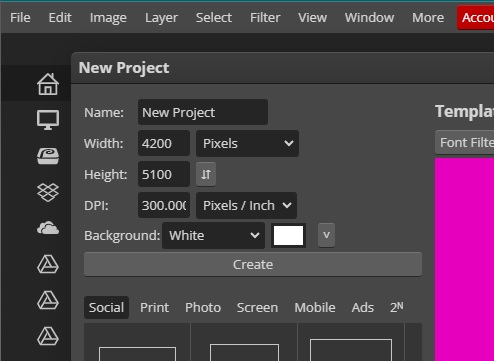
Let’s adjust the settings by clicking on the window that pops up after clicking on the new button. Set the page dimensions to match the image above – width of 4200 and height of 5100. Additionally, set the DPI to 300.
Keep in mind that if you print your design with the default resolution (DPI) of 72, it may not look great. We suggest changing it to 300 DPI for better results.
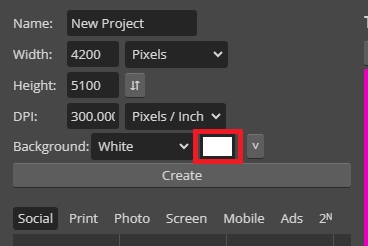
To match your T-shirt, the background color should be the same. For our example, we kept it White, but you can change it by selecting a new color with the Color Picker button.
Once you are done, click Create to load the new project.
Turn Your Photo into a T-Shirt Design
Have you ever heard of the halftone effect? It’s a printing technique that utilizes dot patterns to form an image. Let’s explore how to turn a photo into a halftone effect for a T-shirt design in photopea.
Step 1: Open Your Image in Photopea
- With the Photopea.com window open, the quickest way to load an image is to drag and drop the image into Photopea.
- Alternatively, you can go to File, select Open, choose the image from your computer, and click Open.
Step 2: Move the Image to the New Project
Using the File >> Open & Place option, the image will open in your newly created project.
Simply click on the Check box next to Transform Controls in the Options Bar. Then, grab the points and adjust the image until it fills the canvas according to your preference.
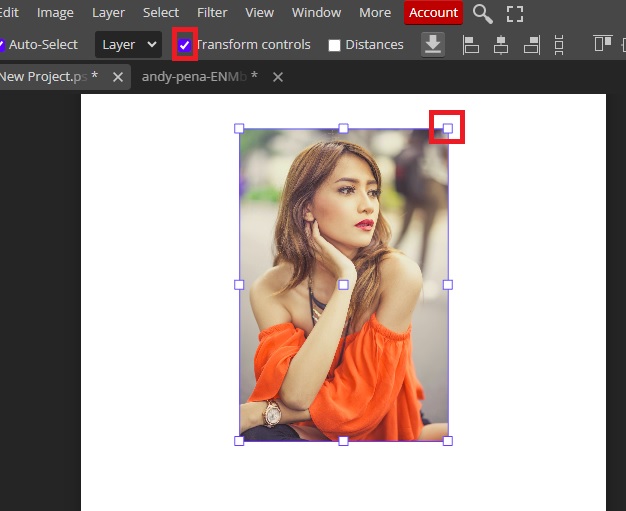
Once you are done, deselect the check box next to Transform Controls.
Step 3: Turn the Image Layer into a Smart Object
Go to the Layers Panel and right click on the Image Layer, then select Convert to Smart Object.
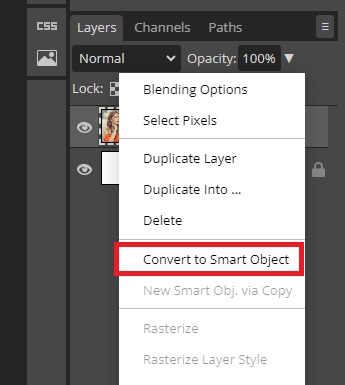
Once that is done, we can now apply the filters to the image.
Step 4: Apply Filters
With the Image Layer selected, go to Filters from the Menu Bar and select Filter Galleries.
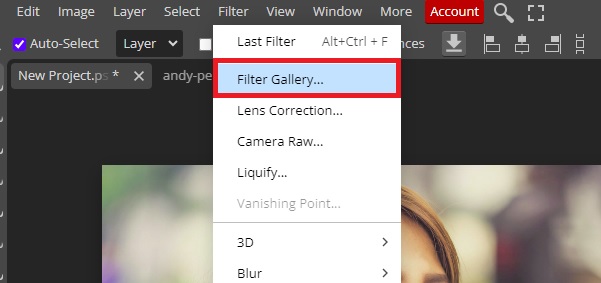
The Filter Gallery window will open.
The first filter we will use is the Reticulation filter. It is located under the Sketch category.
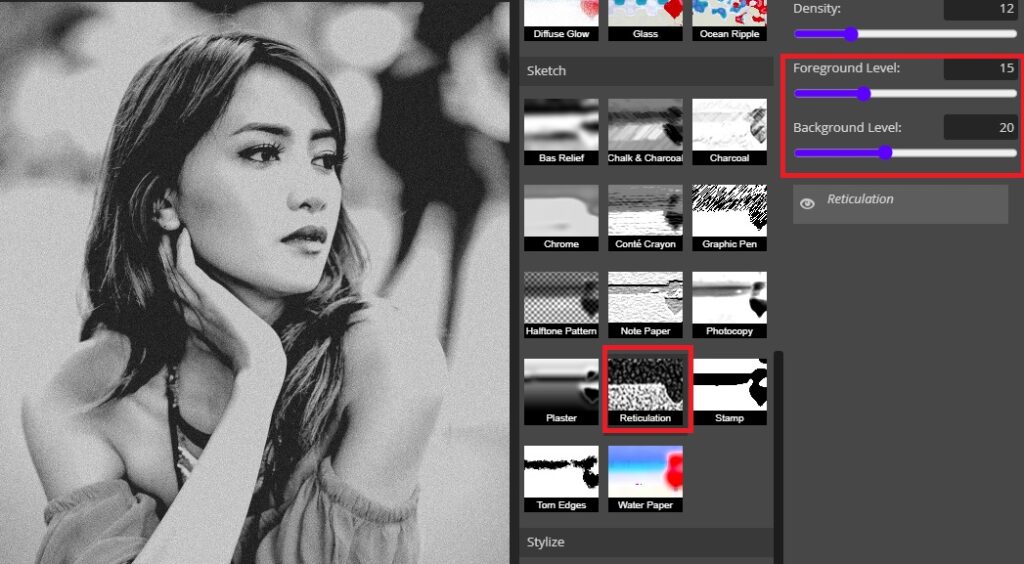
The filter will turn the image into black and white while adding a bit of texture to the image. You can use or change the default filter settings to get better results.
For our image, we adjusted the Foreground and Background levels to 15 and 20, respectively.
Next, we will add the Halftone Pattern filter. It is located under Sketch. We will set the size to 10 and the contrast to 40 for this.
We used the default Dot pattern. You can choose the pattern you want from the dropdown.
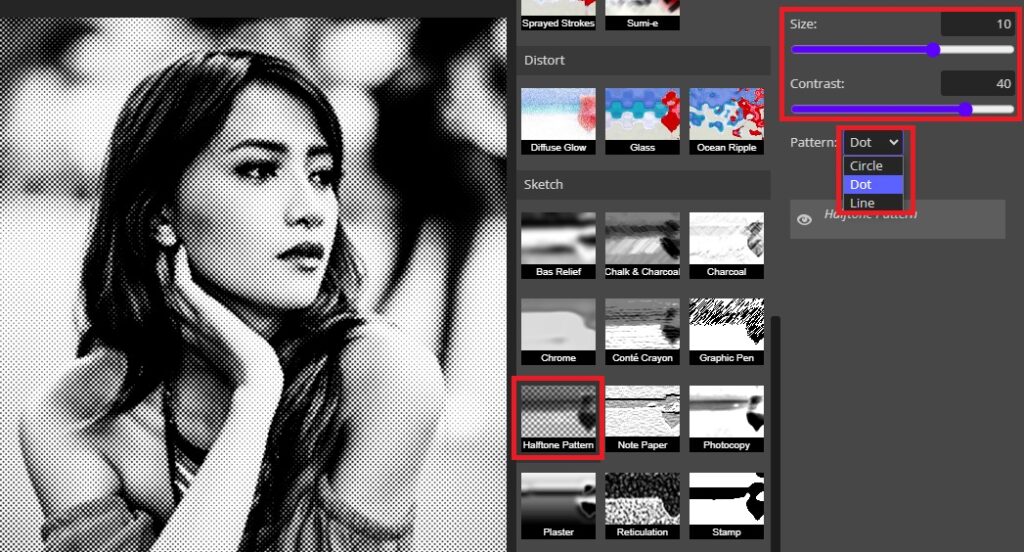
Those are the two filters we will be using for now. You can play around with more if you wish. Once you are done, click OK at the top right corner of the Filter Gallery window.
Step 5: Change Color Using Color Overlay
If you want your image to be in black and white, you can leave it as it is. However, if you want to add some color to it, you can do so using the Color Overlay.
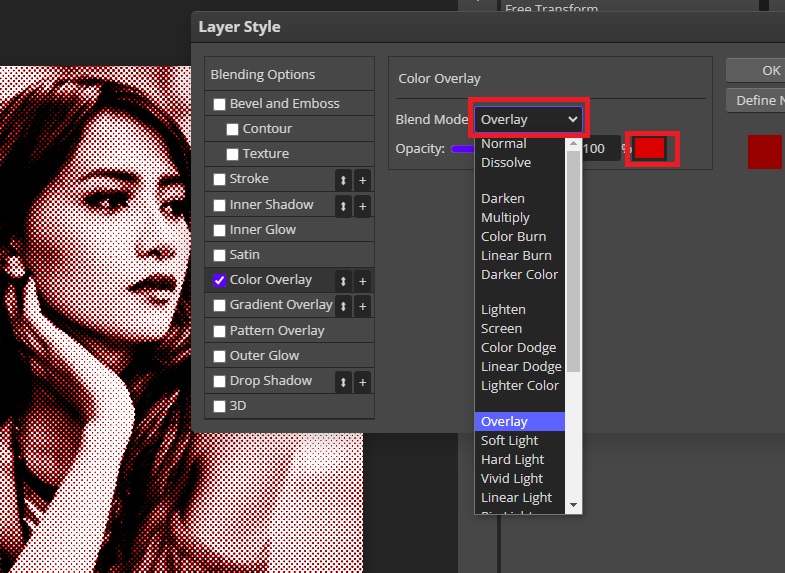
To do so, with the image layer selected, click on the Layer Style button at the bottom of the Layers Palette and select Color Overlay.
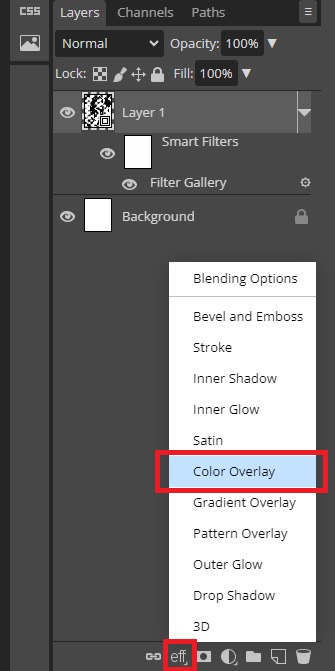
You can select the color you want and play around with the Blending Options. We will go with the Overlay Blending mode and the color Red for our image. Once you are done, click OK.
Turn Text into a T-Shirt Design
You have the option to either use the existing design or add some text as well. In the following section, we will guide you through the process of adding text into a T-shirt design.
Step 6: Create New Layer and Deactivate the Image Layer
We will continue using the same Project. First, we need to turn off the Image Layer by clicking on the Eye icon next to the image.

Next, we need to create a new layer by clicking on New Layer at the bottom of the Layers Panel.

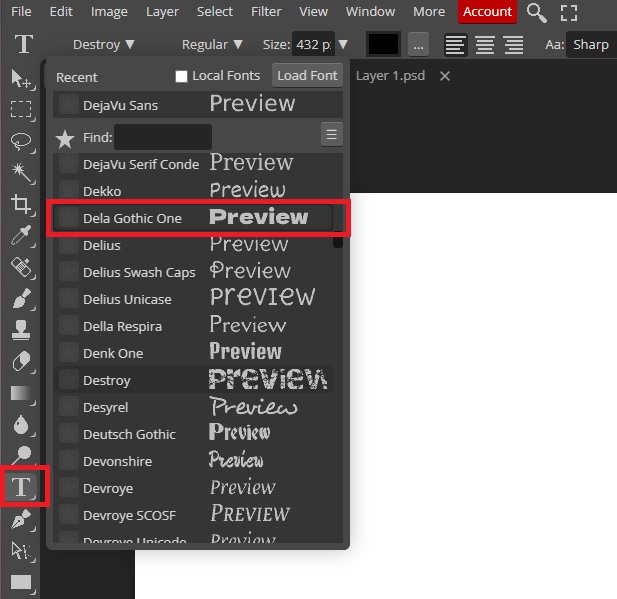
Step 7: Write Your Text
With the new layer selected, select the Type tool and choose your preferred font type. For our case, we will go with the Dela Gothic One font type.
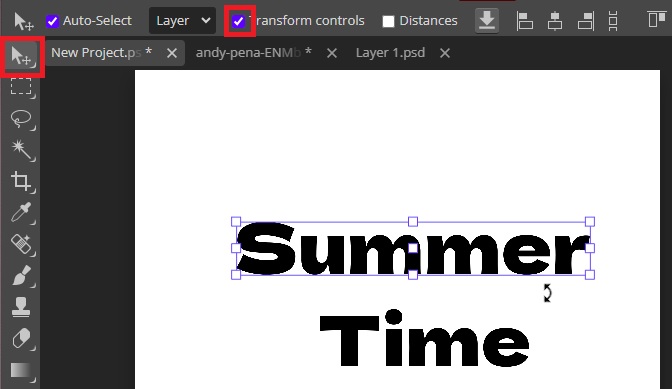
Type what you want in the Canvas. For easy control, we will type our two words separately so that we have two separate layers.
In order to achieve this, we first typed “Summer” and then reselected the text tool to type “Time” on a separate layer. This will put the two words on different layers which will make it easier to apply the text effects.
With the Move Tool selected, check the radio button next to Transform Controls and click on the words you typed and adjust their size and location accordingly.
Step 8: Customize Your Text
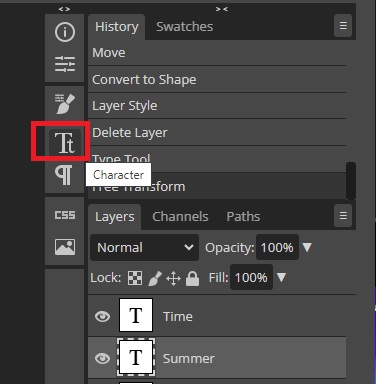
Once you are done positioning your text, we will select the Summer text layer and go to Character Settings in the Character Palette.
From here, we can change the fill and stroke color by clicking on the three-dotted lines next to the Color Picker.
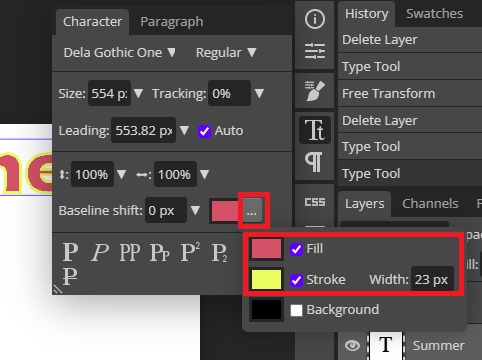
To change the colors, simply click inside the box next to Fill or Stroke to open the color picker. Pick the color you want and click OK once done.
For the second text, we will convert it to 3D text. To do so, we will select the text layer, go to Layer Style and select Blending Options.
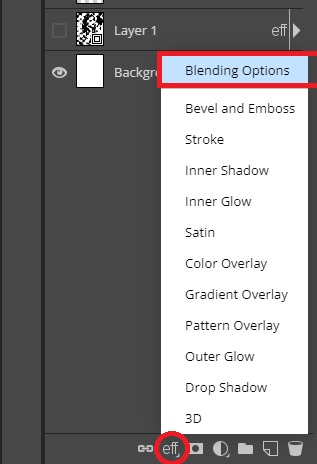
When the Layer Style pops up, go to the 3D blending option at the bottom left panel. From there you can make adjustments to your liking.

If you want to use text alone as your T-shirt design, you will definitely need larger text and more text effects. For our case, since we will be using it with an image, we will keep it simple.
Step 9: Turn on the visibility of the image layer
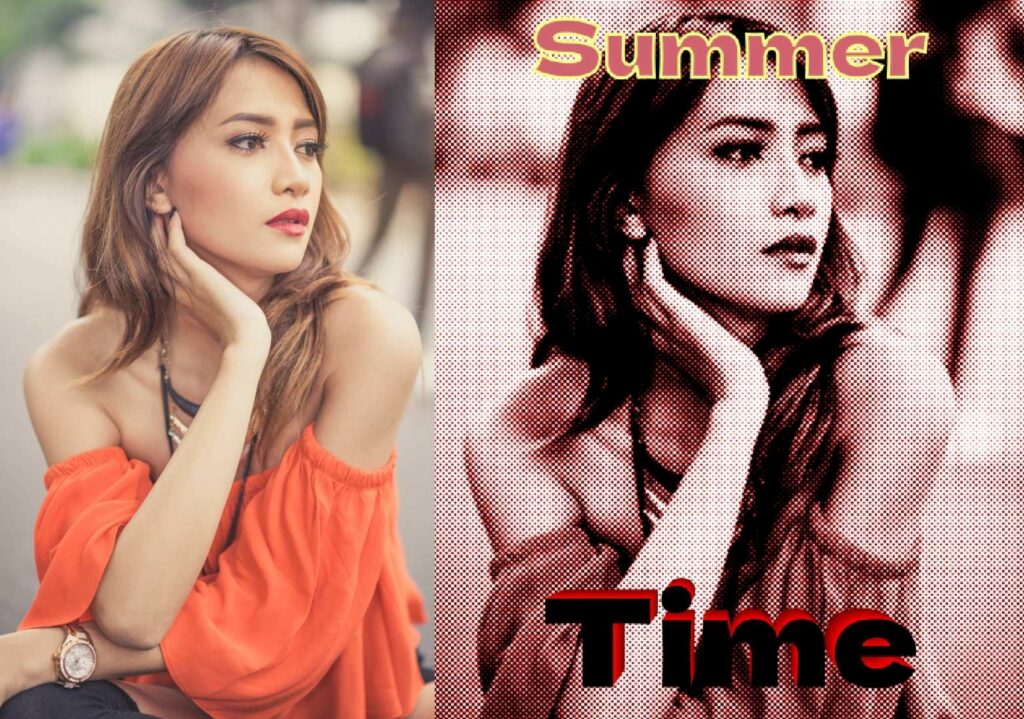
To make the image layer visible, you can easily click on the eye button located next to the image layer. The final results are shown in the below image.

Step 10: Save Your Work
To save your image, go to File >> Export As and select your preferred file format. To be able to edit your work later, you should go to File >> Save As PSD.
Conclusion
In this tutorial, we have explored the process of designing a T-shirt using Photopea and a photograph. We have covered the necessary steps to personalize your image according to the design you want to create.
We also explored the process of designing a T-shirt using text. This involved utilizing Photopea to customize the text, including changing the Fill and Stroke colors and creating 3D effects.

Thanks for reading & feel free to check out more of our articles!
Expert Rating
Summary
Creating a T-Shirt design in Photopea is a creative and versatile process. With Photopea’s extensive features and tools, you can design a unique and eye-catching T-Shirt. From customizing colors, adding graphics and text, to incorporating effects and textures, Photopea provides the flexibility and functionality to bring your T-Shirt design ideas to life with professional quality.


