
Blurs are often used to soften or reduce the sharpness of an image, making it more aesthetically pleasing. You have 9 different options available to you. We’ll discuss all 9 blurs in the Filter menu in this article.
We will cover everything you need to know about them. What are they, and how to use them in your images to get good results?
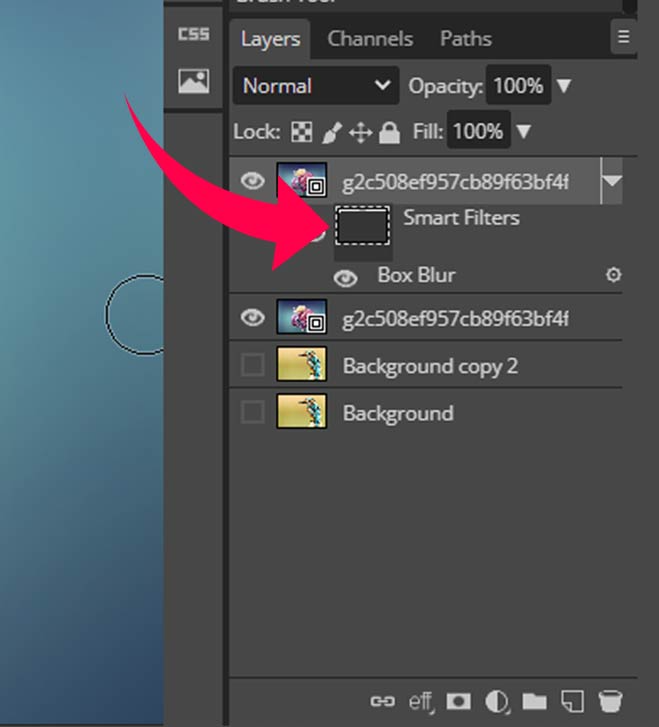
Things to Keep in Mind While Working with Blur Tools inside Photopea
Before experimenting with any blur, read these important notes. We will follow these notes in every blur tool.
- Always make a duplicate of your image to work on so that in case you mess things up, you will have a backup.
- Add the blur filter to the duplicated layer while keeping the original layers intact.
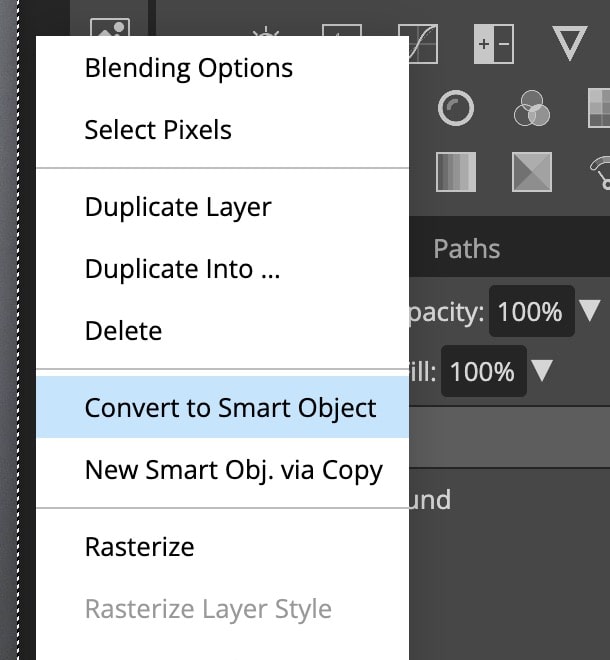
- Convert your image to a smart object. Otherwise, you won’t be able to edit the blur once it’s applied. To convert a layer to smart object, right click on it inside the layers panel and choose convert to smart object
- Use the mask on the smart object to remove the blur from certain areas or decrease its strength by painting with opacity and flow of 50%.
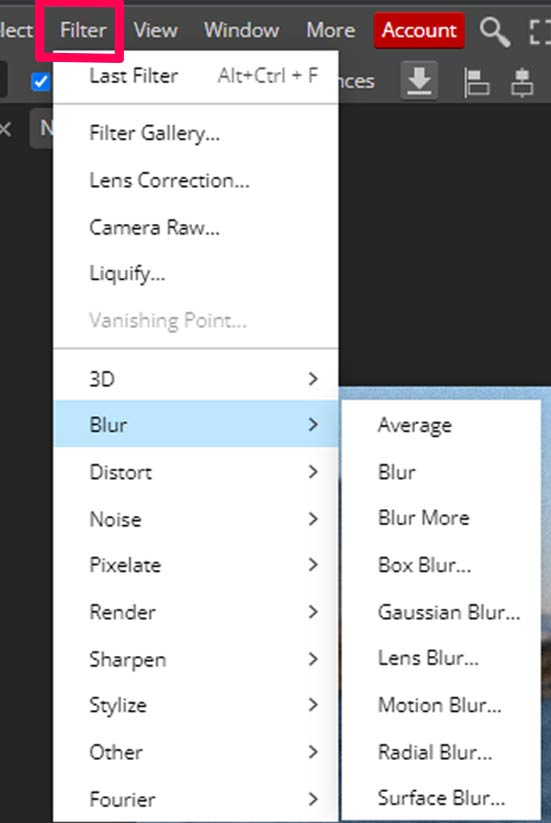
Where Are Blur Tools Inside Photopea?
Blur tools in Photopea are under the filter menu.
Filter menu > Blur > All the blur tools are there.
Average Blur Filter
This is the first tool in the list of blurs available in the Photopea filter menu. It creates an average color layer of the whole image. It is mostly used to remove color casts from the images.
This is not used very often.
Blur Filter
Have you ever taken a picture or seen an old picture that has a lot of small dots, scratches, or lines on it?
The blur tool in photopea helps make those dots, scratches, and lines look less noticeable. It’s kind of like rubbing a pencil eraser over a drawing to make it look smoother.
Blur can also help make an object and jagged edges in a picture look less sharp or smooth.
For example, if you cut out a person or an animal from a background, the edges might look really rough. But with blur, you can make those edges look softer and smoother.
Blur is a tool that can make pictures look nicer by smoothing out rough edges and making small dots and scratches less noticeable.
How to Use the Blur Filter in Photopea?
Select the image, go to the filter menu, and choose blur.
You won’t see a huge amount of change in the image, and you need to zoom in real close to see the changes. If the effect is not as strong as you like it to be, use the blur more tool we have discussed below.
As you have converted the image to a smart object, there will be a mask under the layer you have applied the blur on.
You can use the mask to remove the blur effect from certain areas of the image.
- Click on the mask, and choose the brush tool by pressing B on the keyboard.
- Make sure the foreground color is black.
- Make the brush softer, reduce the opacity and flow to 40-50% and paint over the areas you want to remove the blur from.

Blur More Filter
The Blur More filter is designed to create an even blurrier image after applying the general Blur filter. With each click of the Blur More button, the image is blurred three to four times more than the original amount of blurring.
This filter is good for creating a more hazy and dreamy look in high-resolution images. While it can also be used on lower-resolution images, the effect will be more pronounced.
How to Use Blur More Filter in Photopea?
To use this tool, you need to apply the normal blur first; after applying the blur, go to the filter menu and choose more blur.
Keep clicking on it until you are happy with the result.
Make sure you don’t go too far with blur more; otherwise, the image may lose its sharpness and quality.
Box Blur Filter
The Box Blur filter is different from other blur filters because it uses the average of nearby colors to make the picture look blurry.
This means that it takes the colors around each pixel and blends them together to make it look less sharp.
The Box Blur filter is smart and can find edges in the picture where there are two different colors next to each other. It makes sure to keep those edges looking defined and not too blurry.
One thing to keep in mind is that the Box Blur filter can create distortions.
Because of this, it’s not always used for regular pictures. It’s usually used for special effects when you want the picture to look different on purpose.
How and Where to Use the Box Blur Filter in Photopea?
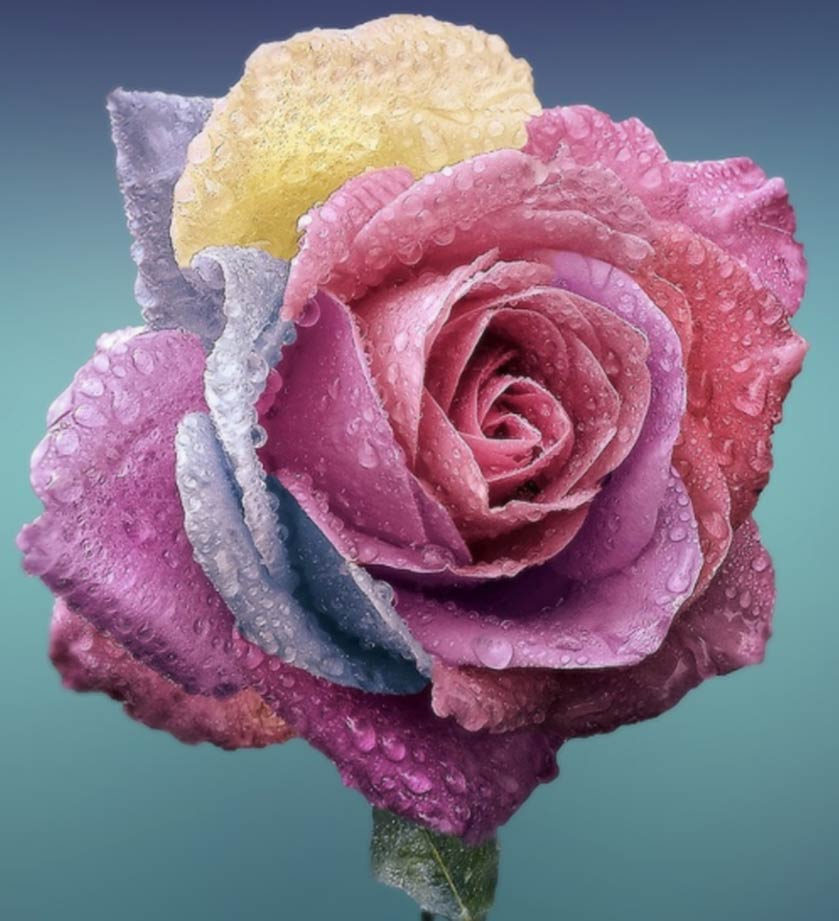
We will use it on a flower image to give it a soft and dreamy look.
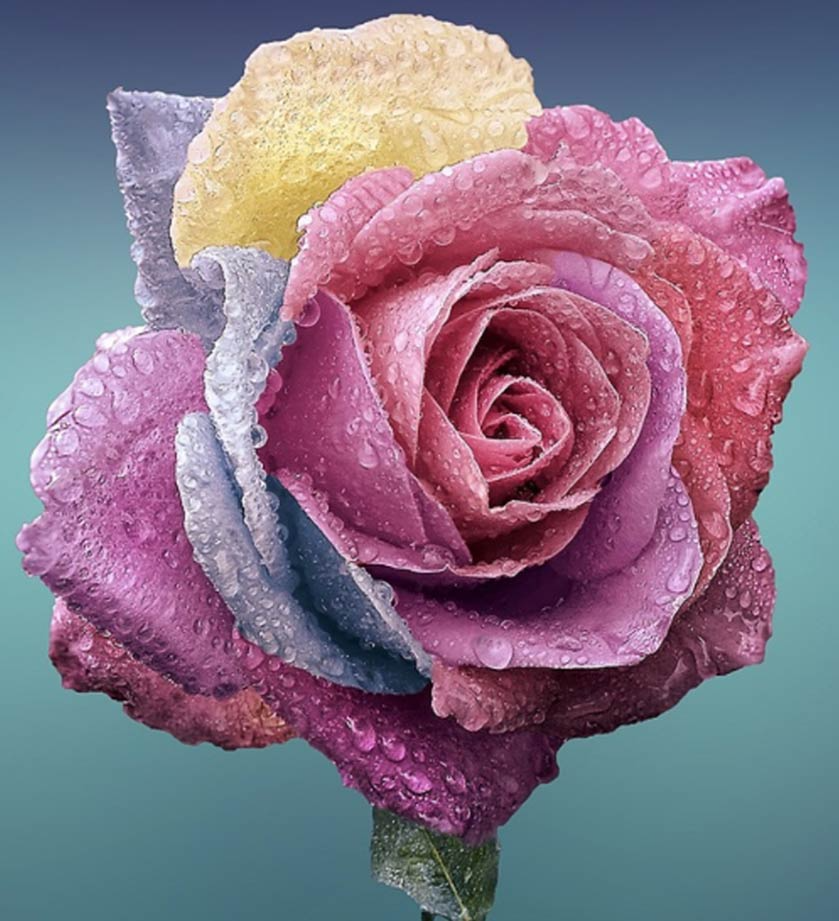
- Convert the image to smart object, duplicate it, and apply the box blur.
- Keep the value at 5 and press ok. Now everything is blurred, but don’t worry, we will fix it in a minute.
- Click on the mask icon under the flower layer.
- Press B on the keyboard to choose the brush tool, make sure the foreground color is black, reduce both opacity and flow to 50%, make the brush soft, and paint over the flower.
- The blur effect will start to reduce. Paint until the flower is visible, don’t paint too much; otherwise, the blur will disappear, and you won’t have the soft and dreamy look.
Gaussian Blur Filter
This is the one of the most popular filters. The Gaussian Blur effect is popular because it makes things look very smooth and even.
It works by using a special curve to blur certain parts of the picture, which makes it look softer.
How and Where To Use Gaussian Blur Filter in Photopea?
One cool thing about the Gaussian Blur effect is that you can use it to make skin look smoother. Sometimes in pictures, skin can look a little rough or bumpy.
But if you use the Gaussian Blur effect on it, it can make it look smoother and nicer.
Another thing you can use the Gaussian Blur effect for is to reduce noise in pictures. If you use the Gaussian Blur effect on it, it can make the picture look softer and nicer.
You can also use it to blur the background or certain parts of the image.
Let’s use gaussian blur to blur the glass on the left to bring the focus to the soda can.
- Choose the pen tool and make sure it’s set to path and draw a path around the glass.
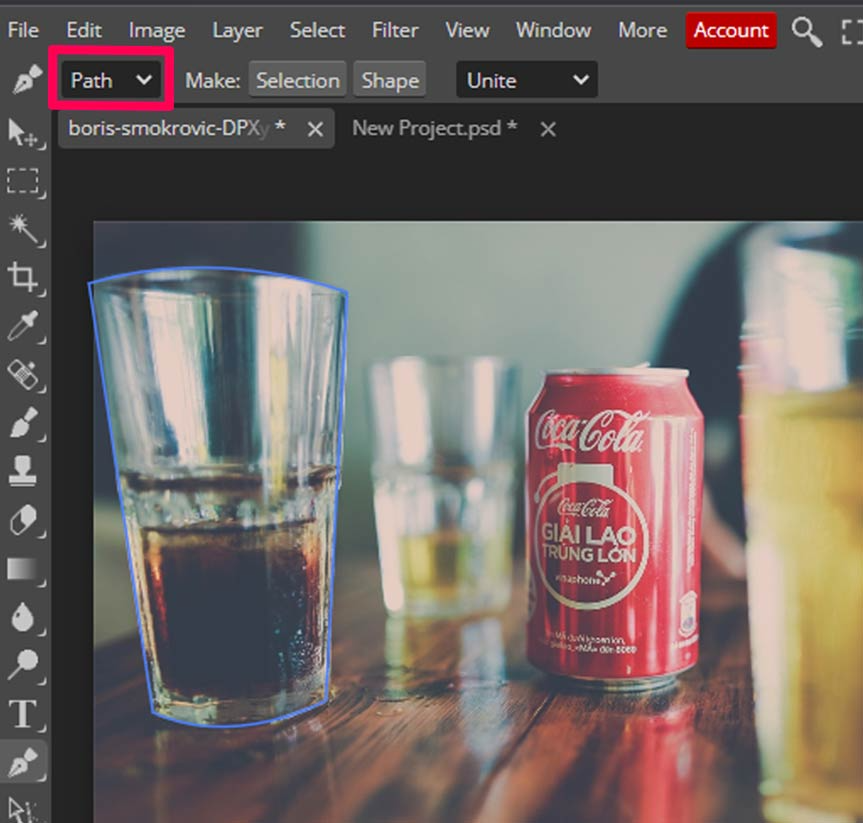
- Click on the point where you started and the path will be complete, right click and choose make selection.

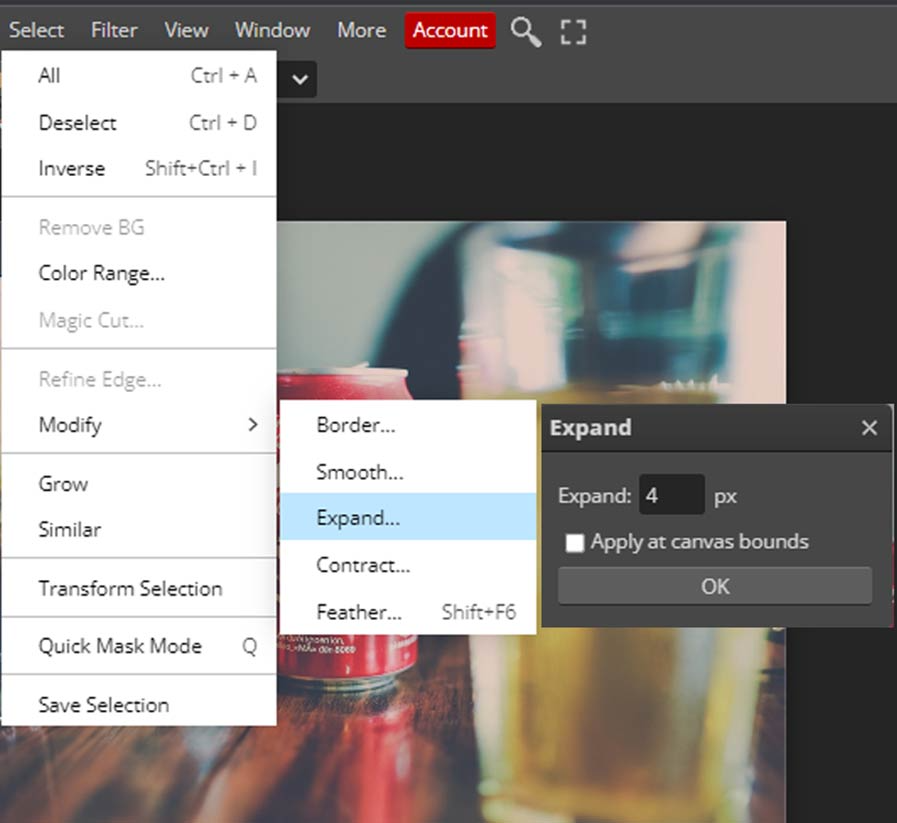
- Go to select menu > modify > expand, and expand the selection by 4 pixels.
- Now go to the filter menu, choose gaussian blur, and adjust the sliders until you are happy with the result.
- If you see harsh edges, select the mask under the image layer and paint around the edges with a soft and black brush, as we have discussed above.
Lens Blur Filter
Lens Blur in Photopea is a tool that you can use to make your pictures look better.
With this tool, you can create a realistic and cinematic depth-of-field effect, which can help make the main object in the picture stand out more.
You can also use Lens Blur to make an uneven or distracting background look even blurry or to make a cluttered background look less distracting.
How and Where to Use the Lens Blur Filter in Photopea?
We will be working on an example image to blur the background. To begin with,
- Duplicate the the layer & convert to smart object. (Right click on the layer & convert to smart object.
- Select the quick select tool and click on the select subject option on the properties bar.
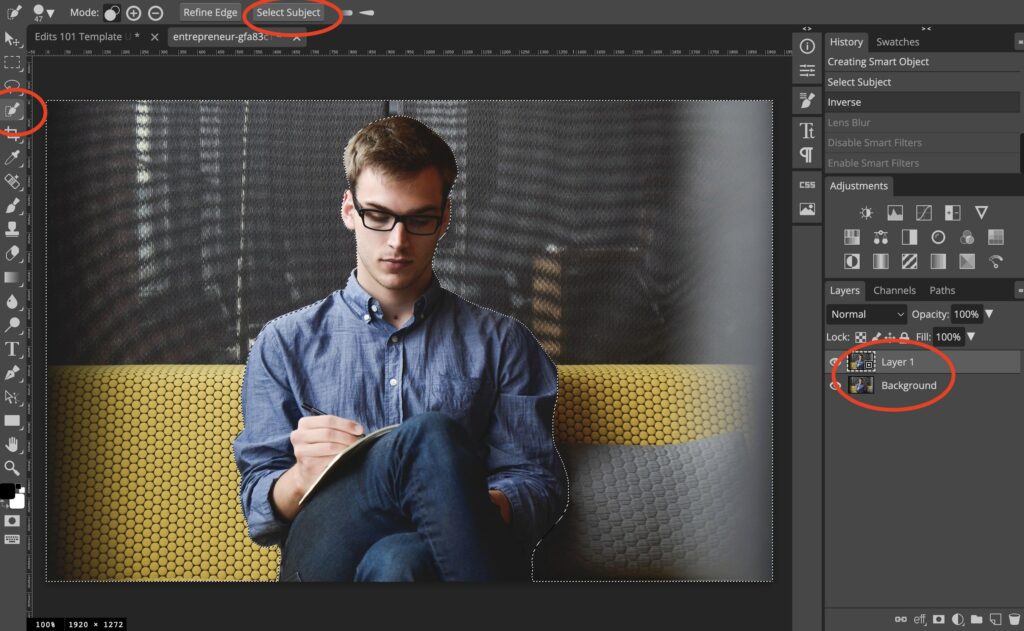
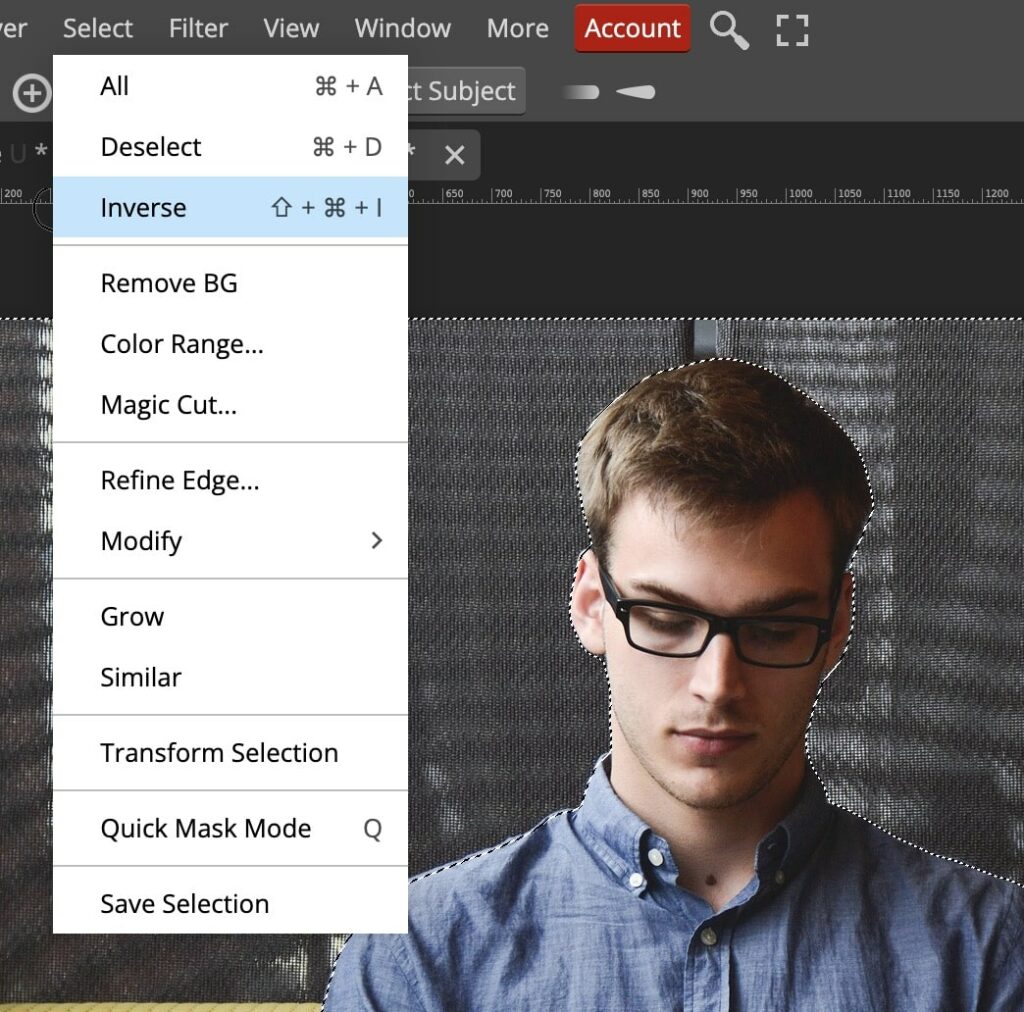
- Invert the selection – CTRL/CMD + SHIFT + I or go to Select > Inverse
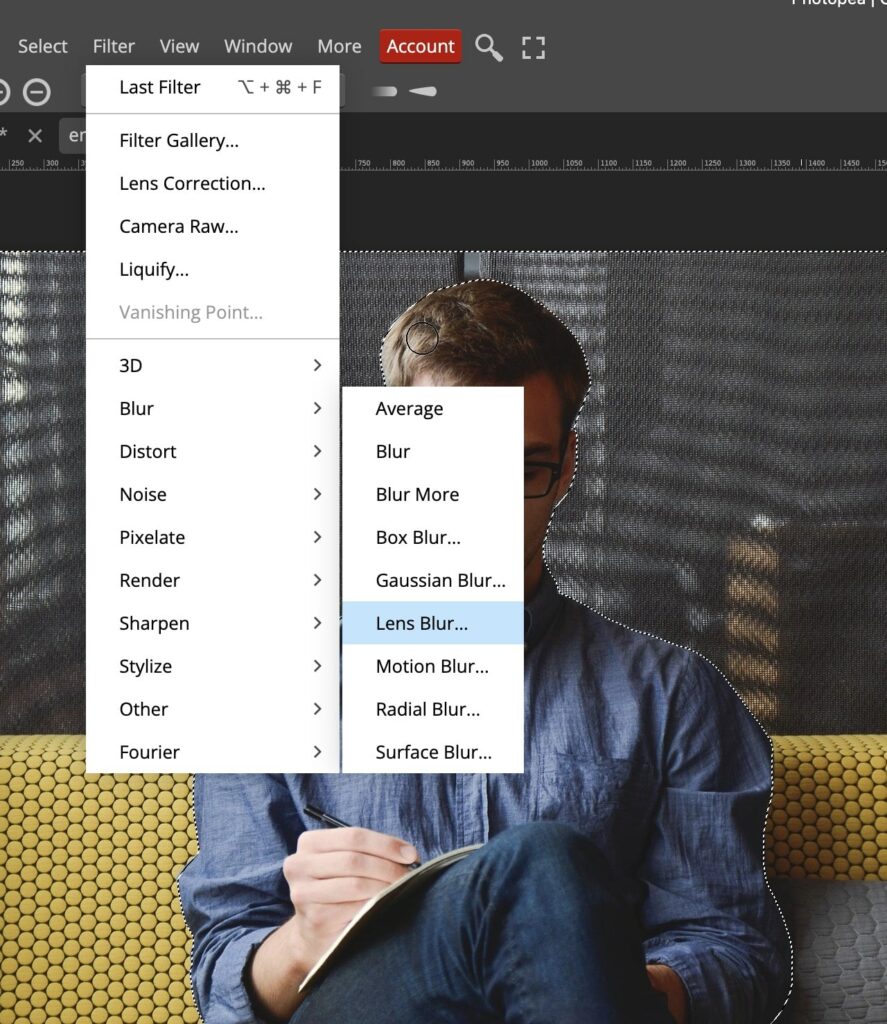
- Let’s add the Lens Blur Filter. Go to Filter > Blur > Lens blur.
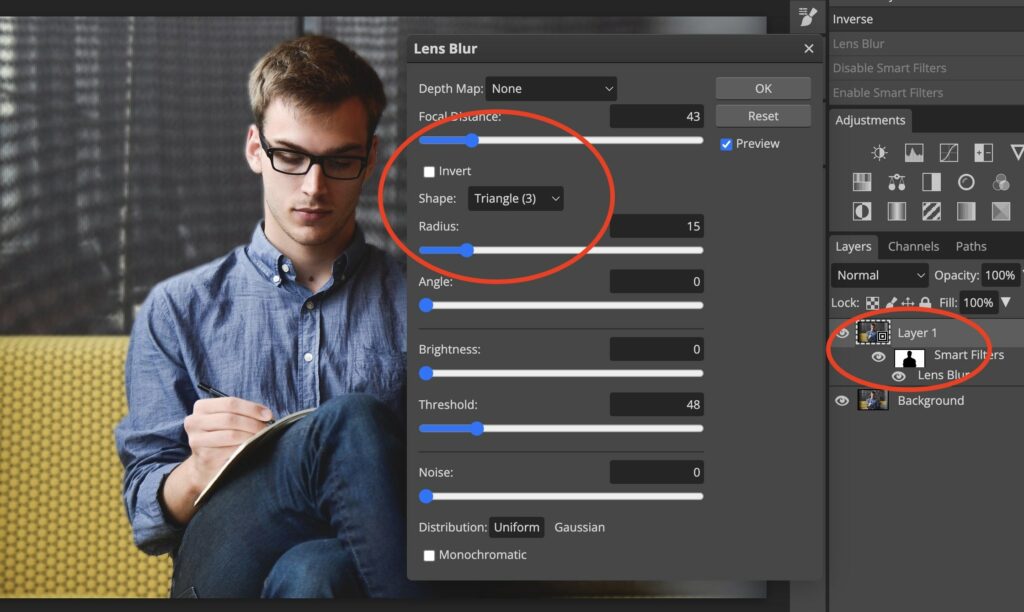
- Since we selected the subject, the filter will automatically apply around the subject. You will see a mask added to the smart object in the layers panel.
- Play around the blur settings until you find one that you like. To apply a subtle blur we suggest playing around the Focal Distance, Shape & Radius.
Here’s the before and after.
Before
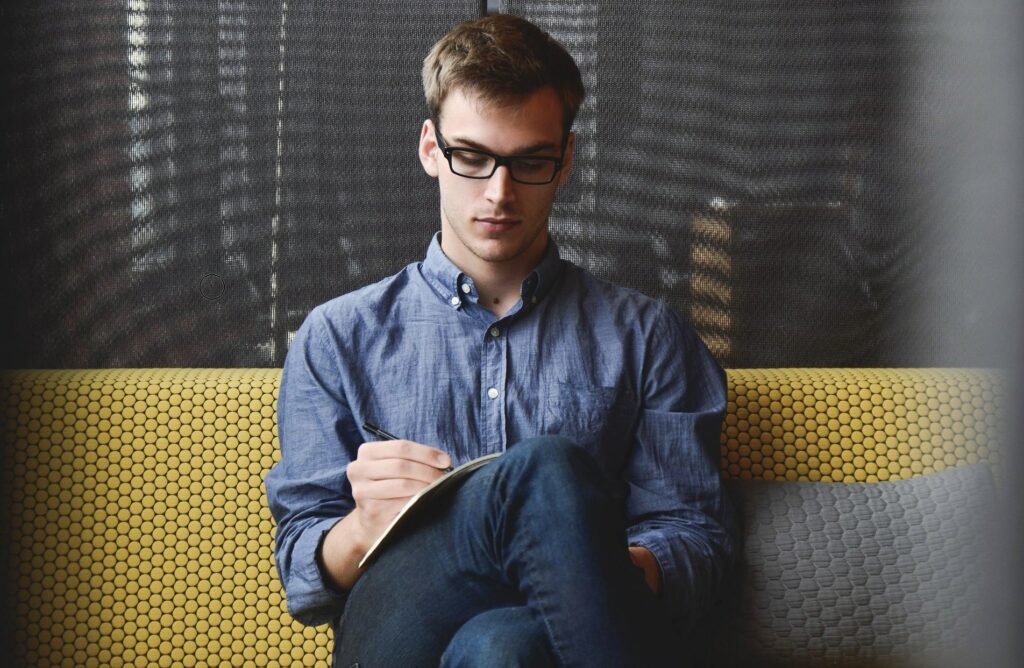
Image by StartupStockPhotos from Pixabay
After
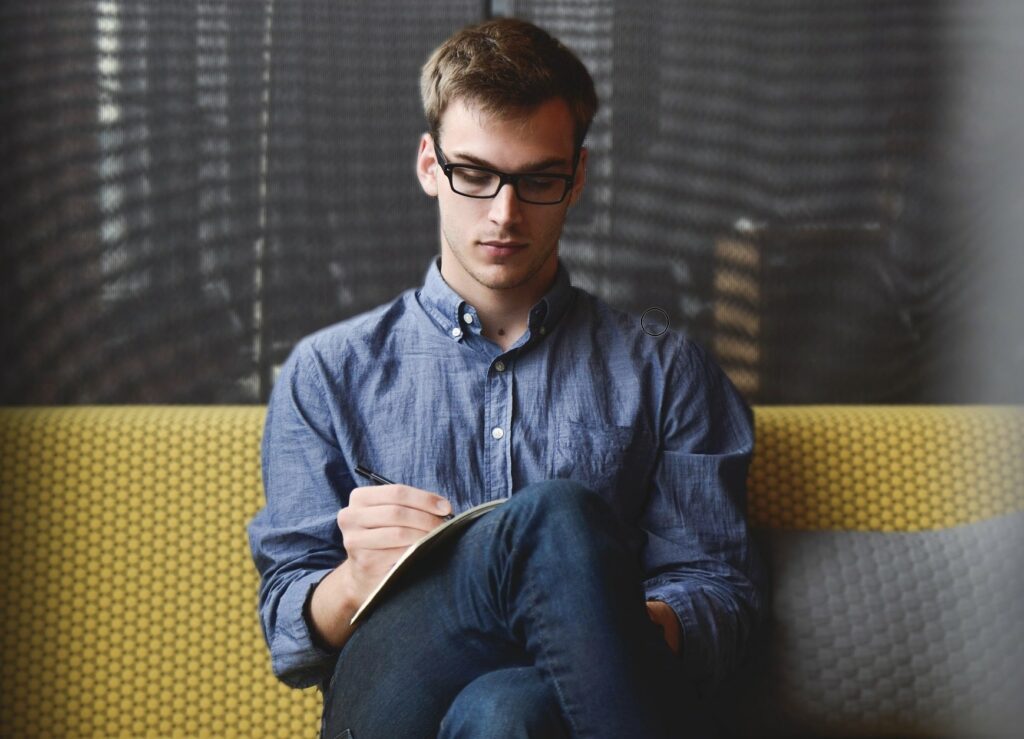
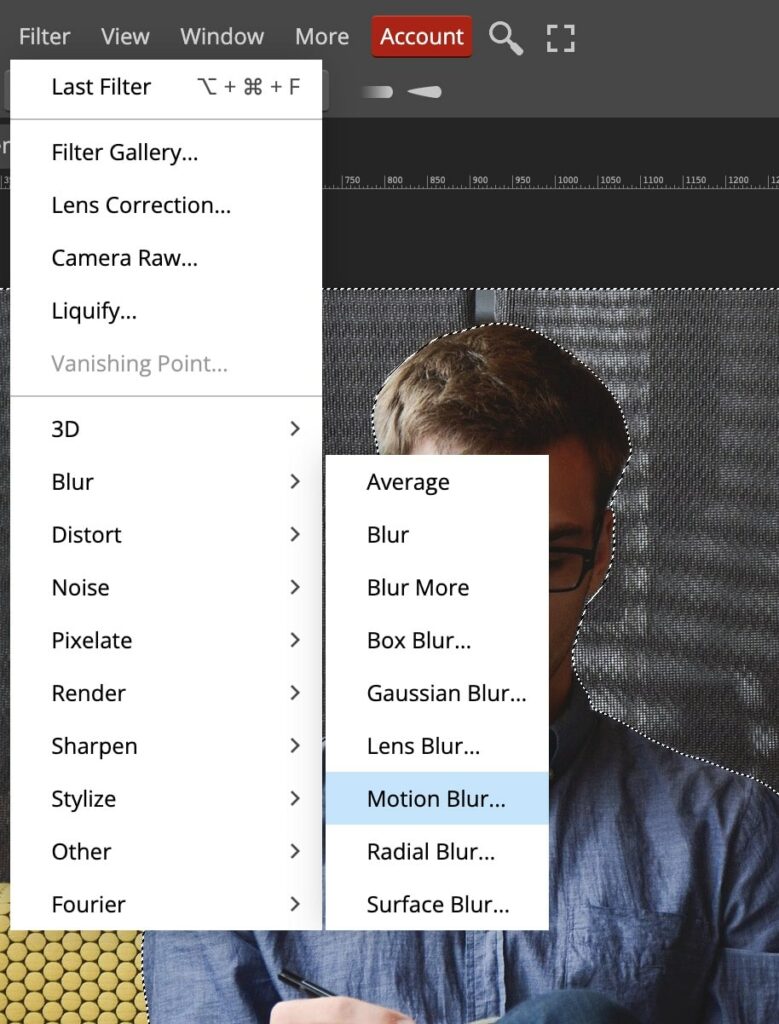
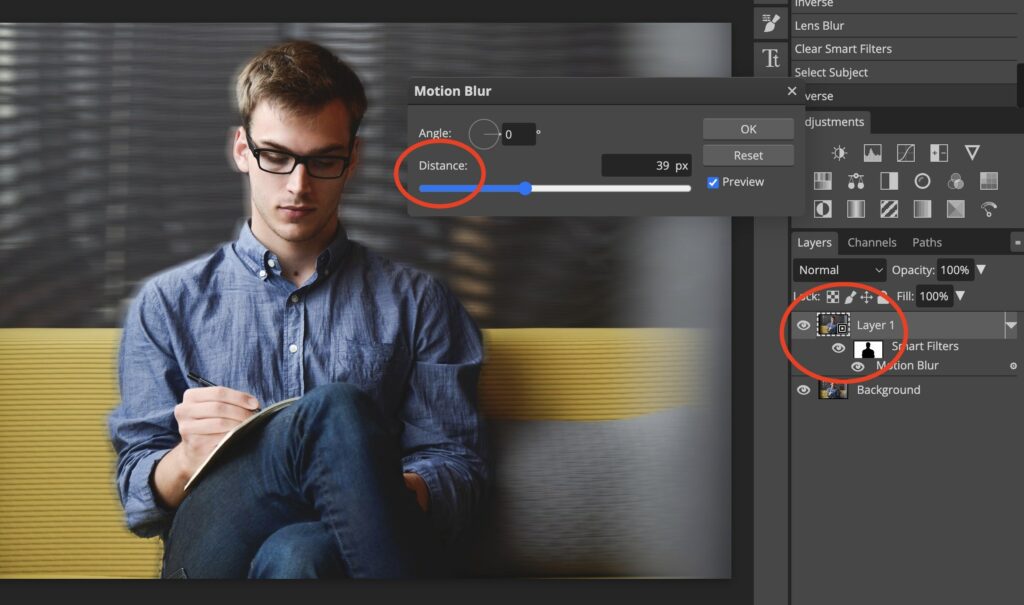
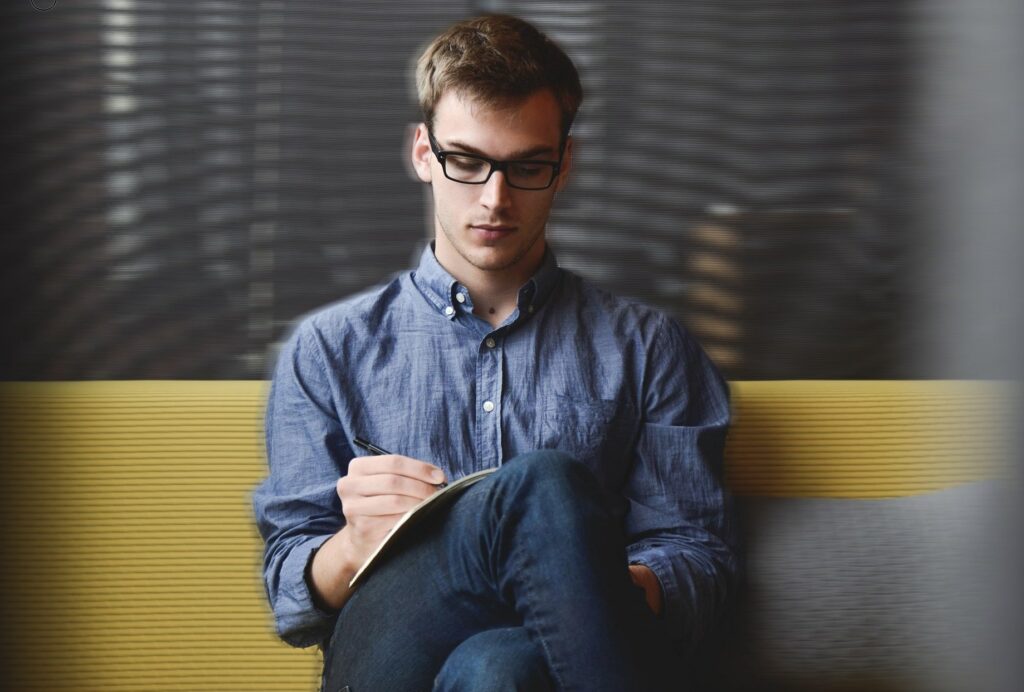
Motion Blur Filter
Motion Blur is a tool that can make it look like something in your picture is moving really fast.
You can choose which direction the movement looks like it’s going in and how blurry it looks. This can make your pictures look more exciting and dynamic.
How and where to use Motion Blur Filter in Photopea?
We will be taking the same example as the Lens Blur Filter Section. This will give the illusion that the background is moving fast. Let’s repeat the process mentioned in the lens blur.
- Duplicate the image and convert it to a smart object.
- Select subject, using the quick selection method & selecting subject.
- Go to Select & Inverse the selection. Now the filter will apply to the background.
- Go to Filter > Blur > Motion Blur. – Mask will be automatically applied to the subjects background as we inverted the selection.
- Choose the direction and amount, press ok, and you are good to go.
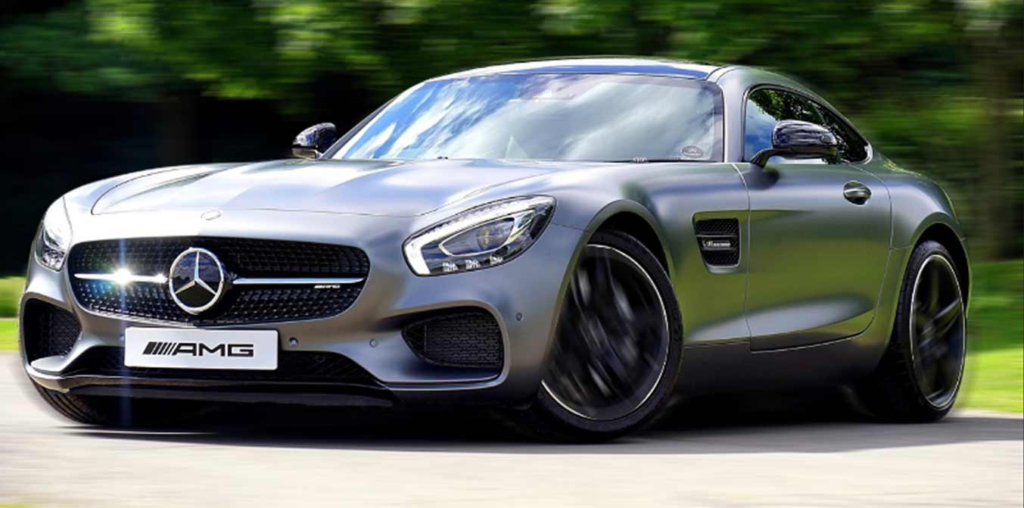
Radial Blur Filter
The Radial Blur tool makes your picture look like it’s either zooming in or spinning, just like a camera would do.
How and where to use the Radial Blur Filter in Photopea?
We will use the same car image we used in the motion blur section and apply radial blur to the rims of the tires to simulate the rotating motion.
Select the car layer and then select the pen tool by pressing P on the keyboard, and draw a path on both the front and back tire.
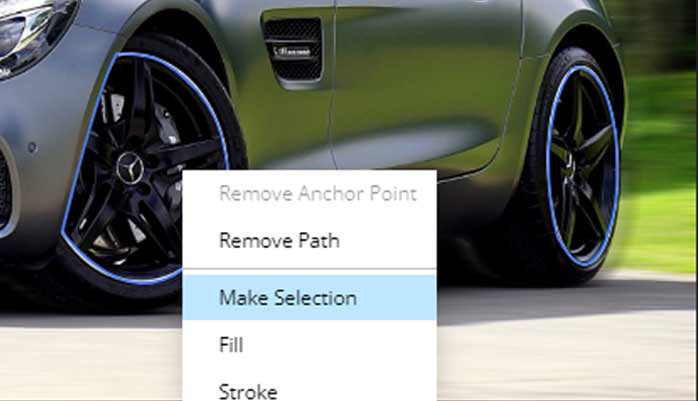
Right-click and choose make selection, then apply radial blur.
Adjust the values, and once you are happy, click ok.
Surface Blur Filter
The Surface Blur filter blurs the whole image other than the edges. The Surface Blur filter can make things like skin look smoother, but sometimes it can make the picture look fake by blurring out too much detail.
To fix this, you can use a special tool called a layer mask to bring back some of the details you want.
Think of it like having a magic eraser that you can use to remove some of the blur from certain parts of the picture. So, you can choose which parts of the picture you want to be blurry and which parts you want to be clear.
How and where to use Surface Blur?
You can use it to smooth out a noisy image. It can be a portrait or any other image with noise.
- Duplicate the image, convert it to a smart object, and apply the box blur.
- Adjust the settings that work well for your image and click ok.
- Now select the mask under the layer, choose a brush.
- Make sure it has a black foreground color, and erase the blur where you don’t want it.
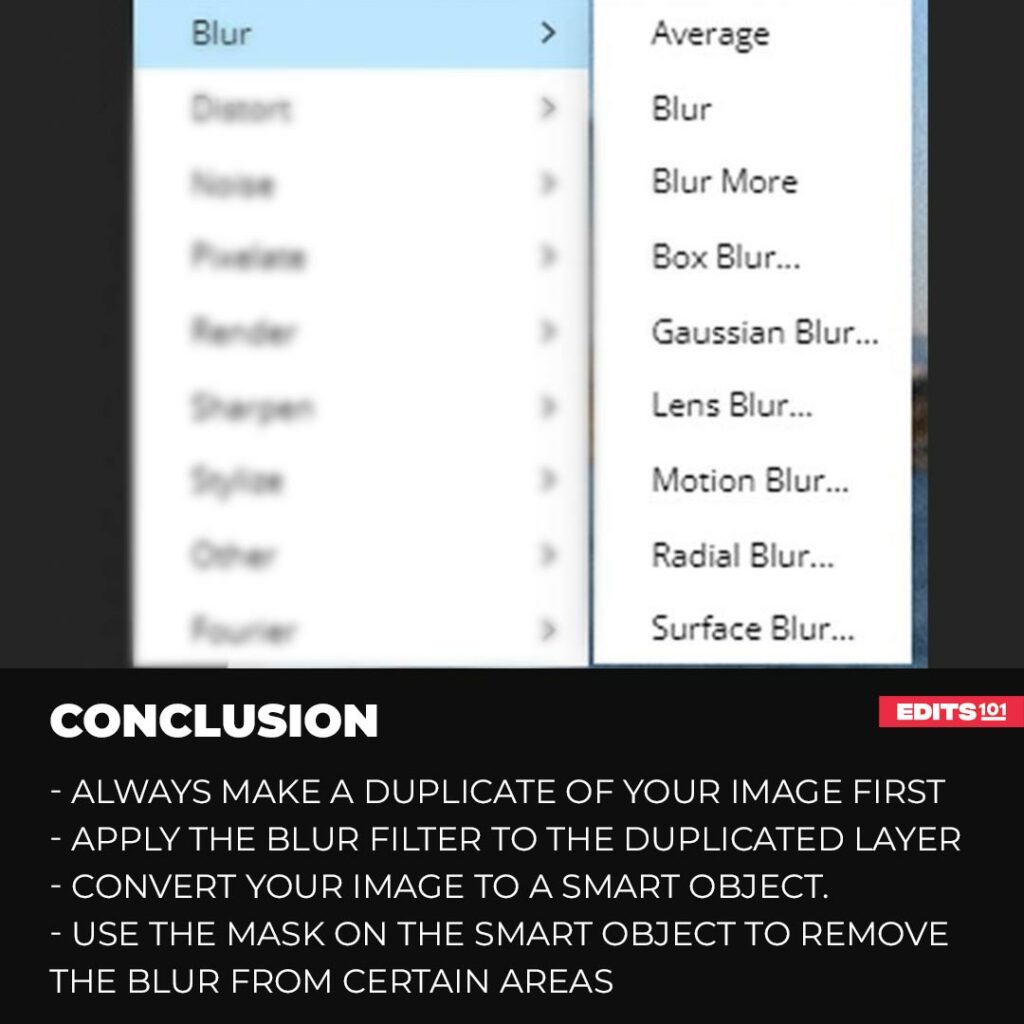
Conclusion
We have discussed all the blurs available inside Photopea and their uses. All images are different, and not all blurs will work well on every image.
You may have to use multiple blurs to get the effect you are looking for. In the business person example, we discussed in motion blur and radial blur. We used two blur filters to create the fake illusion of motion in the image.
The important thing is to analyze your image and decide which blur will work best. Don’t go too far with the blur; otherwise, your images will look unprofessional.
Convert the image to a smart object before applying the blur, which will help in two ways:
- One is you can edit the blur whenever you want.
- Second, you can remove the blur from specific areas with the help of a smart filter mask.
Thanks for reading & feel free to check out more of our articles!
Expert Rating
Summary
Blurs have wide range of usability, they can be used in a lot of creative ways. you can blur background, remove blemishes, remove noise etc. It takes a lot of practice to master the blurs in Photopea. The more you practice the greater results you will achieve. Great functionality & scale.


