
Sometimes you may have to change the DPI of an image or design for several reasons, including a web conversion or print conversion. Keep in mind that increasing the DPI will not make a low-res photo suddenly crystal clear.
Although having correct DPI settings is important, so is having good-quality images and designs to work with from the beginning. In this guide, we will look at the step-by-step method to change the DPI of an image or a design.
Understanding the DPI and PPI
Before diving into the step-by-step guide to changing the DPI, let’s first understand what it is and why it matters. DPI refers to the density of pixels in one inch of an image.
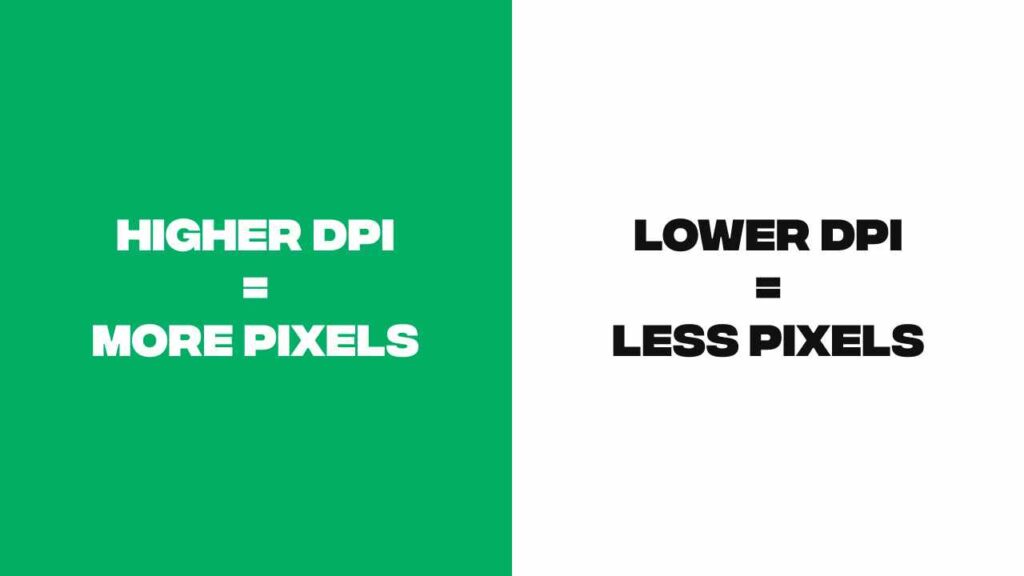
- The higher the DPI, the more pixels there are in one inch of the Image, resulting in a higher-quality image.
- On the other contrary, a lower DPI means there are fewer pixels in one inch, leading to a lower-quality image.
DPI is crucial when it comes to printing an image, as it determines the quality and size of the final print.
Similarly, the PPI refers to the number of pixels in one inch of the Image. PPI is used in images that are specifically created for the web.
DPI and PPI are mostly referred to with the term DPI when you use the Image for printing, these will be perceived as DPI, and for the web, these will be perceived as PPI.
Don’t get confused if you don’t find PPI because DPI also represents PPI.
How To Change The DPI in Photopea?
You can change the DPI of a document in Photopea at any time while working. Here are two ways to change the DPI in photopea.
- When creating a new document
- While you are working on a document.
Let’s have a step-by-step look at both ways.
Change The DPI of A New Document In Photopea
To change the DPI of a new document In photopea:
- Go to the File menu.
- Then click New or press Control + Alt + N for windows or Command + Option + N for Mac.
Then, enter the resolution value of your choice in the box named DPI.
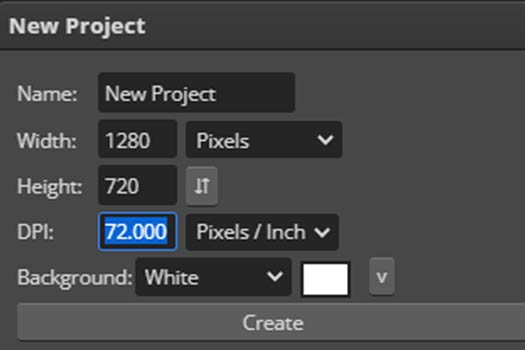
When you create a new document, changing the resolution is the first step in ensuring that your final printed product looks its best.
Additional Settings
There are a few additional settings in the New Document panel that you should consider adjusting.
Measurement Unit
You’ll need to choose a unit of measurement for your document, such as pixel, inches, or centimeters.
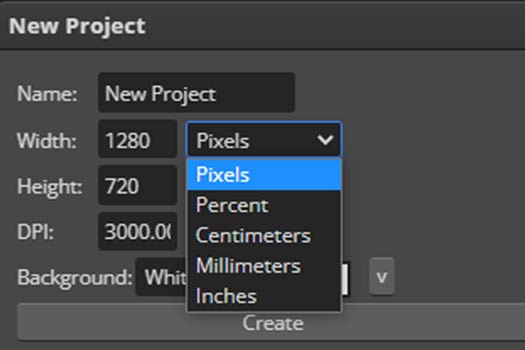
This will determine the size and layout of your document, and it’s important to choose the right settings for the material you plan to print it on.
After that, click on create, and now the document is created.
Color Mode
Next, you’ll want to select a color mode for your document. If you’re planning to upload the design to the web or print it at home, RGB is the best option.
RGB
This is because it’s the best mode for Web & online mediums. Furthermore, it’s compatible with most household inkjet printers, which are the most common type of desktop printer.
Photopea’s default color mode is RGB.
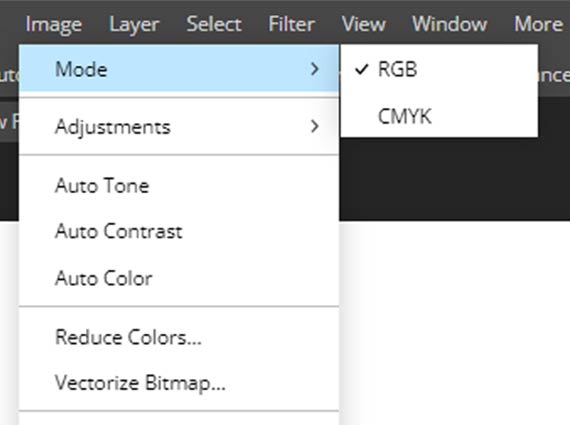
CMYK
But if you’re planning to send your document to a professional print shop that uses offset printing, you’ll need to change the color mode to CMYK.
Important Note: You can not work in the CMYK color mode in photopea, but there’s a way to check how your design will look after it’s printed so that you can make the changes you want before printing.
To check the CMYK mode, go to the image menu, choose the mode, and then choose CMYK.
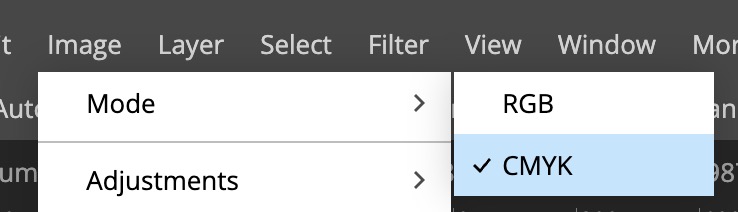
If you select it before making the design and right after the document creation, then you can ensure the printed design’s color will be accurate.
We have a new option: Image – Mode – CMYK. This lets you see, how will your image look like after printing on an average printer (precisely, the image is displayed using the CMYK SWOP v2 color space). If there are bright and saturated colors, they will be replaced with a less saturated version. If there are no such colors, the image will stay indentical.
According to the photopea blog,
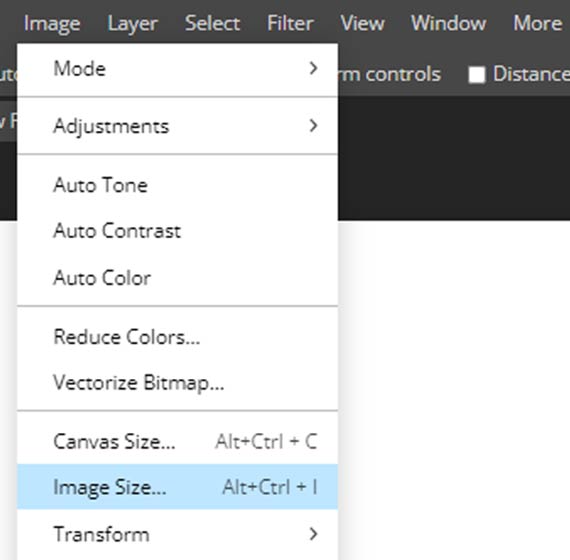
Change The DPI of The Existing Document In Photopea
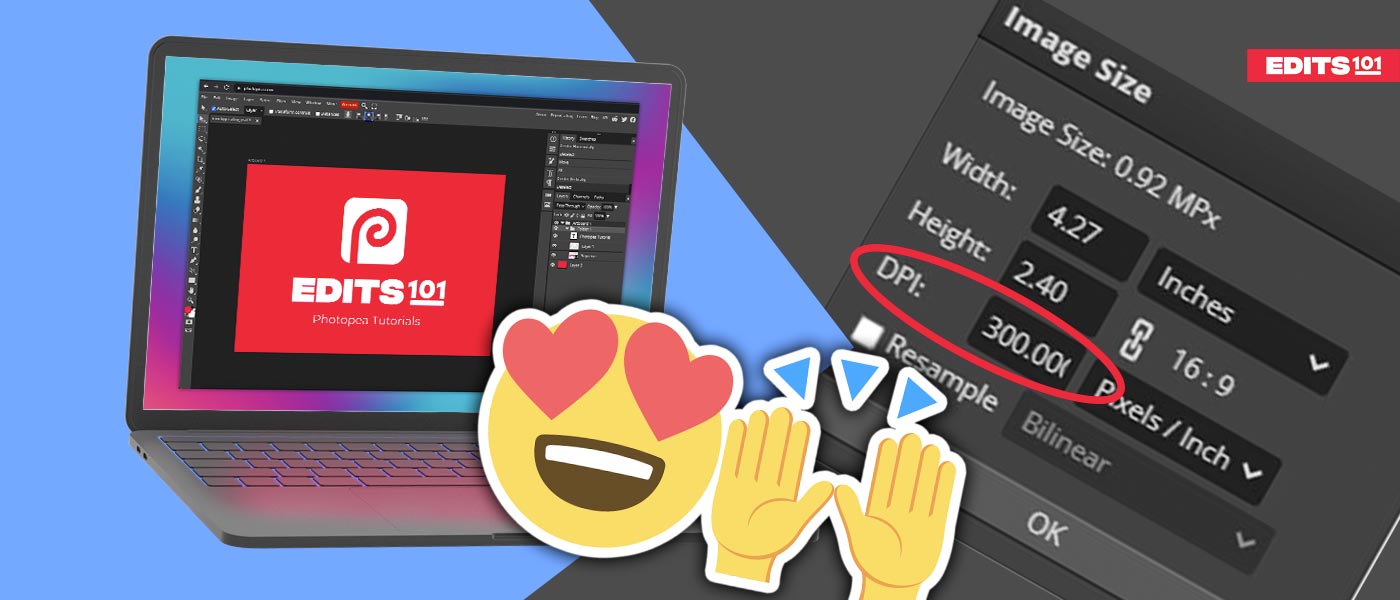
To adjust the DPI (dots per inch) of an image in Photopea, you can utilize the Image Size feature by navigating to Image> Image Size or by using the keyboard shortcut Alt + Control + I (Win) or Option + Command + I (Mac).
Once you are in the Image Size panel, select a physical unit for the image dimensions.
Next, uncheck the Resample checkbox. It is important to avoid enabling the Resample option as it may result in issues such as blurred areas in the Image due to artificial pixel addition.
Next, adjust the image resolution in the DPI box. As an example, let’s set the resolution to 300 pixels per inch.
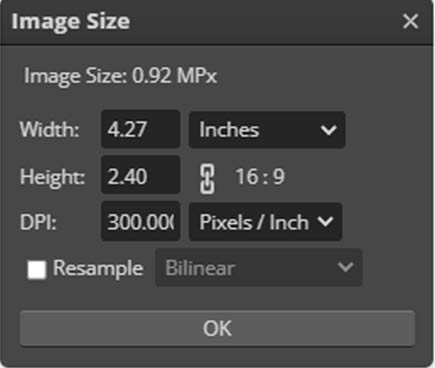
It is important to note that pixels will ultimately be converted to dots during printing, resulting in a 300 DPI output.
When you increase the resolution, the image dimensions may also increase if Resample is checked.
Similarly, if Resample is unchecked, the dimensions may shrink. Increasing the resolution adds more dots or pixels per inch, which requires more material to be placed on.
Resampling duplicates the existing pixels to create new ones, resulting in a larger physical workspace.
Click ok once you have entered the DPI value.
Test DPI with both resample box checked and unchecked to see whats work best for you.
What Is The Difference Between DPI and PPI?
The full form of DPI is dots per inch, while PPI means pixels per inch. The main difference between them is:
- DPI is referred to the resolution applied to printing.
- PPI refers to the resolution applied to designs or images that are displayed on the web or digital screen.
Photopea only has the option to set the PPI because you are working on a digital screen. When sent to a printer, the resolution will automatically change to DPI, and the conversion is equal, meaning that 300 PPI is equal to 300 DPI.
What is the Best DPI for Printing And PPI for Web images?
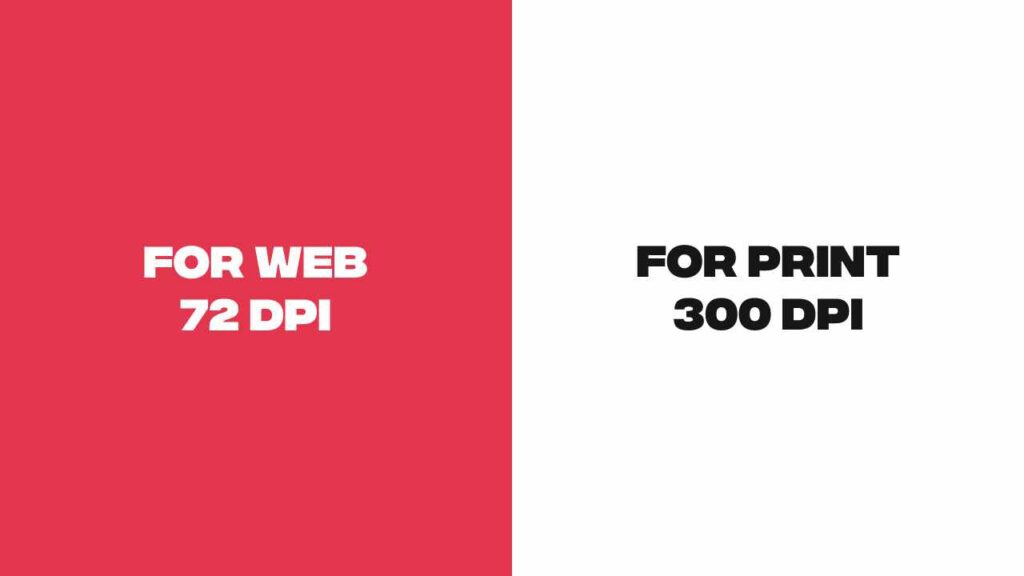
Choosing the proper PPI or DPI for picture resolution is essential for producing high-quality results.As mentioned earlier, 300 DPI is the ideal resolution for print prints, while 72 or 96 PPI is adequate for Web/Online images.
It’s crucial to note that the ideal PPI or DPI for your photographs may vary based on your project’s individual requirements.
For example, if you are printing a big format poster, a greater resolution than 300 DPI may be required to guarantee that the image remains sharp and clear even at a larger scale.
Similarly, if you’re making artworks for a website or social media platform, the best resolution may be determined by the platform’s specifications – though the rule of thumb is 72 DPI – as this is the industry standard for web.
Twitter, for example, recommends using photos with a resolution of 1200 x 675 pixels and an aspect ratio of 16:9 at 72 dpi.
Another crucial thing to consider is the original image’s quality. When working with a low-resolution image, increasing the PPI or DPI may not always increase image quality.
In fact, it frequently results in distorted or hazy images. Always start with a high-quality image and then modify the resolution as needed.
Is 72 or 300 DPI better?
The goal of the project will determine the optimal DPI for it. If you intend to print your image or design, 72 is considered too low. It may be appropriate for small designs, such as icons, that do not require high-quality printing.
300 DPI is the industry standard for printing pictures and designs, such as professional brochures, that need to be sharp, clear, and detailed.
72 DPI is suitable for web & 300 DPI for Print.
Conclusion
When planning to change the DPI of your Image or design, first, you must understand what type of design or Image you are working on or planning to work on. Whether it’s for the web or for printing, in both cases, DPI will be different.
It’s better to change the DPI while creating a Document in photopea rather than changing the DPI of the working document, as it may introduce blurriness or artefacts in the Image or design.
You should consider certain factors while creating the document other than DPI, like color mode. It can also affect your Image if you choose the wrong color mode for the wrong purpose. CMYK is for printing, and RGB is for digital images.
Choose CMYK mode in Photopea right after creating the document if you are working on the design for print.

Thanks for reading & feel free to check out more of our articles!
Expert Rating
Summary
DPI is very important especially if you are working for print. It is easy to change DPI in Photopea as explained above. The functionality and scalability is good and can be used while creating any design.


