
If you have edited a great video in Davinci, resolve 18, but if you dont choose the right way and right settings to export, your greatly edited look video might end up being below average.
But the good thing is we have got you covered, in this step-by-step guide, we will go over the deliver page (export page) in DaVinci resolve and discuss everything available on that page and how it can impact your final video.
We will also discuss the best export settings for Youtube.
Let’s Get Started.
Deliver Page in Davinci Resolve 18
To access the deliver page, click on the last page button with the rocket icon at the bottom of the resolve.

Let’s take the overview of the deliver page.
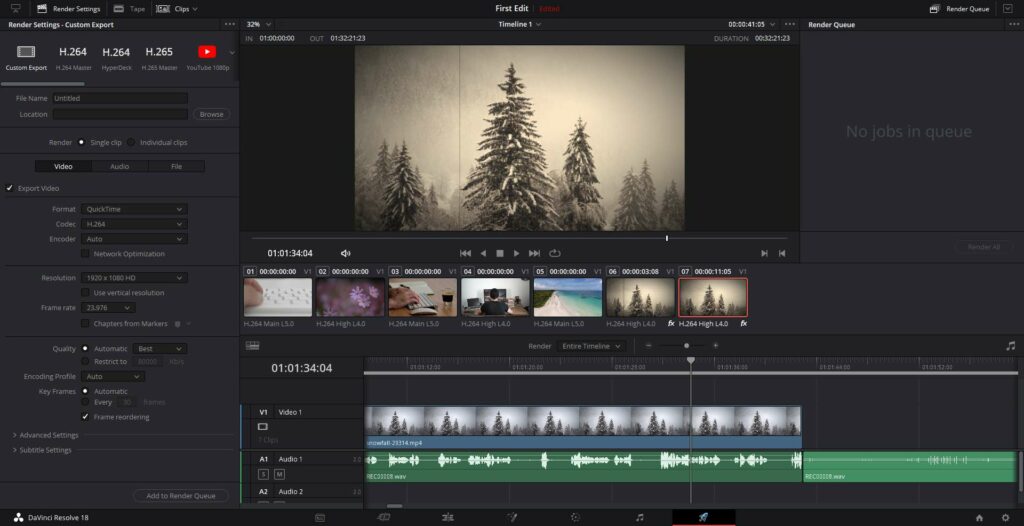
Overview of the Deliver Page
When you go to the deliver page, it will have a lot of panels which may seem overwhelming, but we are gonna break these down for you so that you can understand them easily.
The deliver page is divided into 4 main sections.
- Render Settings
- Preview Monitor or Timeline viewer
- Clips
- Timeline
- Render Queue
Let’s discuss these in detail.
Render Settings
The render settings tab is the tab that will make or break your video in terms of quality.
You will set all the export settings here, including resolution, bit rate, etc.
Preview Monitor
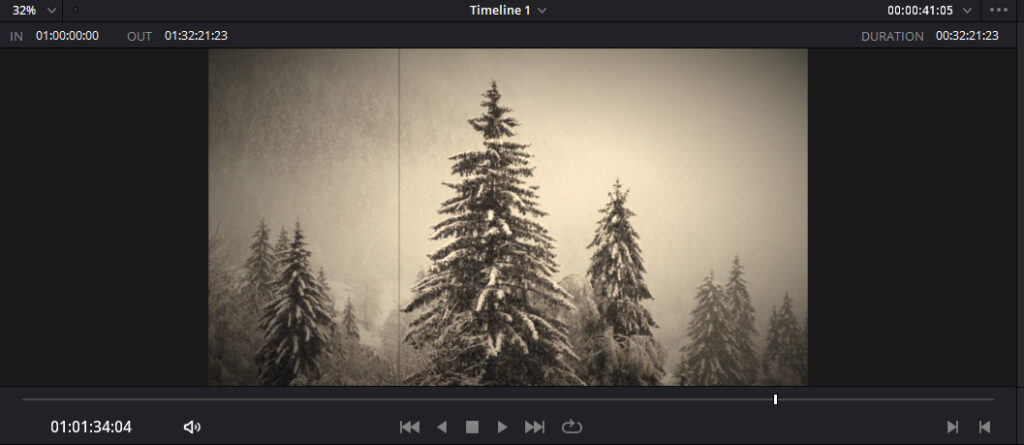
The preview monitor or timeline viewer is in the center of the screen and shows the video preview.
It will also show a preview of what’s being encoded at the moment.
This is really helpful if any of the clips cause any issues, then you will know from the preview which clip you need to fix.
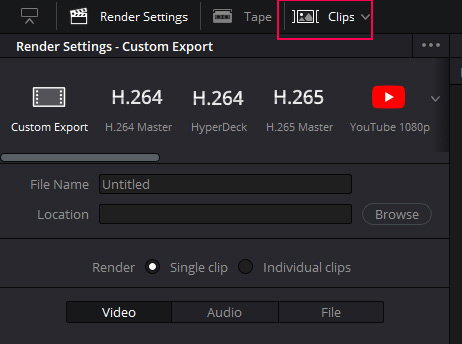
Clips
You may not see the clips panel, if you dont see it, move to the timeline section below.
Clips show all the individual clips you have used inside your edit. Keep in mind that you will only see the thumbnails of the clips.

Note: you can hide the clips section to get more space for the timeline and preview monitor, as it has no use on the deliver page.
To hide this panel, click on the clips button on the top right of the resolve screen.
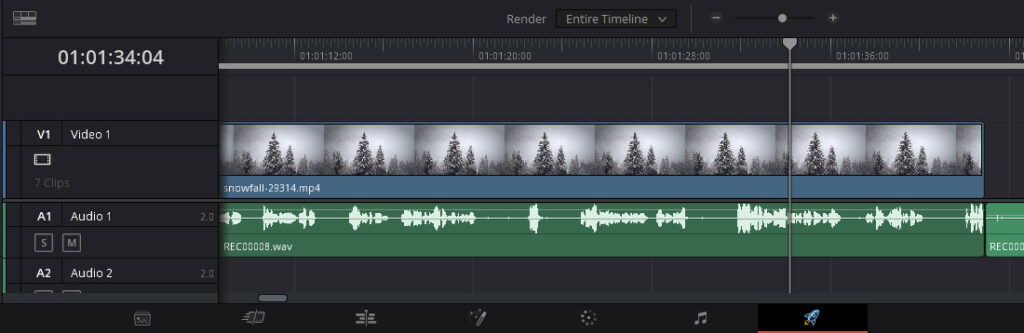
Timeline
The deliver page looks like the edit page in terms of the layout, especially the timeline.
You will see the playhead, which you can move to see the preview of your edit in the preview monitor.
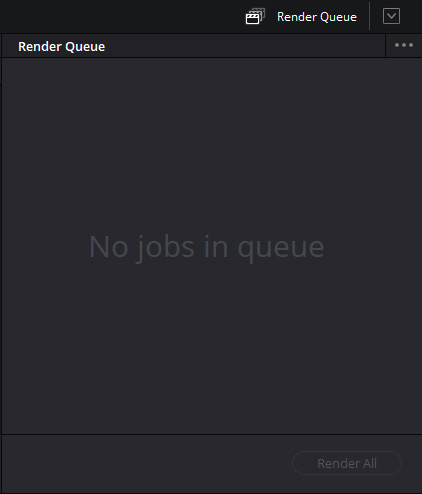
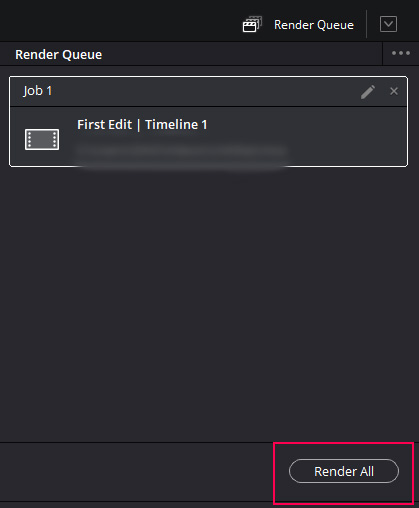
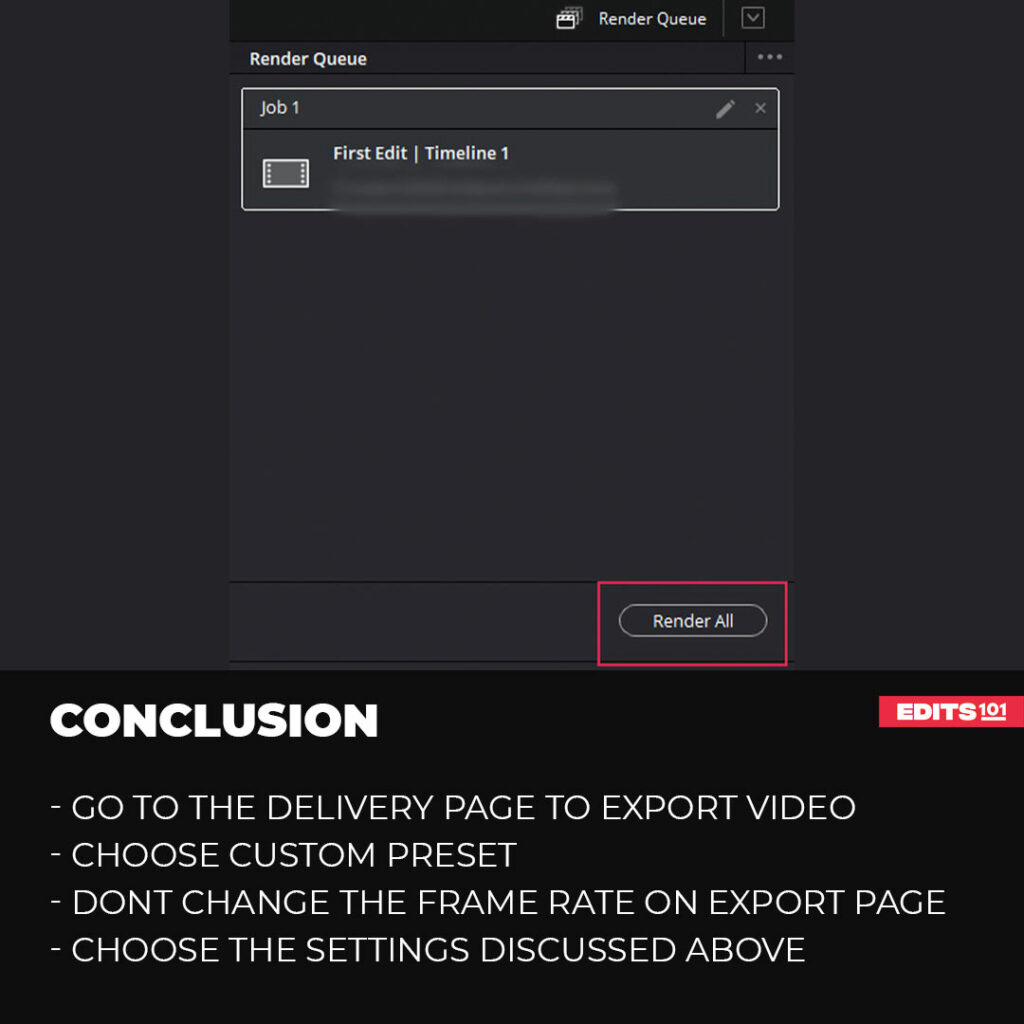
Render Queue
The render queue is where all of your projects are saved before you can start encoding.
You can create multiple versions of your edit and put them in the queue, and they will be rendered one by one when you click on start encoding.
How to Export A Video In Davinci Resolve 18
In this section, we will cover almost every setting that a beginner need to know to export a high-quality video.
Let’s Start with the Render Settings tab.
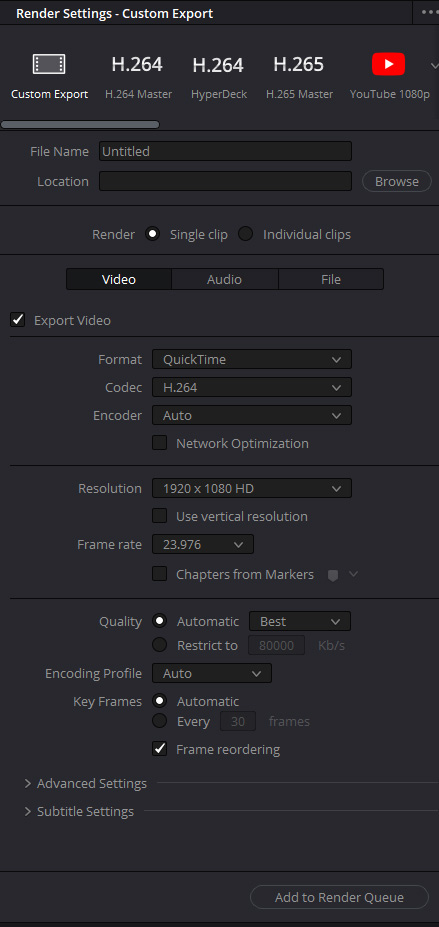
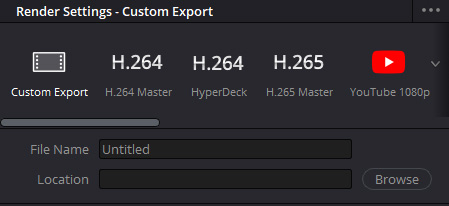
Presets
Resolve has provided various presets for you to choose from, you can choose one and hit export if you know what you are doing.
There are 3 main ones that are widely used.
- Custom Export
- H.264
- H.265
We will cover the custom export because after mastering this preset, you can handle any of the available presets.
File Name And Location
After selecting the preset, next, you need to choose the file name and the location where you want to save the final video.
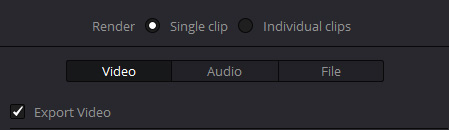
Render Single Clip or Individual Clips
You can choose if you want to export a single video combining all the clips you have used in your video.
Or you can choose to export every individual clip on its own. This is useful when you use resolve only for color grading, and the main editing is taking place on another software.
Export Video Chech box
Next, you will get a check mark that says export video, make sure it’s checked Otherwise, you will only export the audio.
Format, Codec, and Encoder
Format
In the format section, you need to choose the format in which you want to export your video.
The most commonly used and accepted formats are mp4 and QuickTime. If you are exporting for social media, then choose mp4. You can also use QuickTime, but you may get a large file size.

Codec
Set the codec to social media as it gives the best quality for social media.
For youtube settings, go to the end of the article .
As a beginner, you should not mess with other codecs as they are designed for other purposes like exporting video to other editing software, etc.
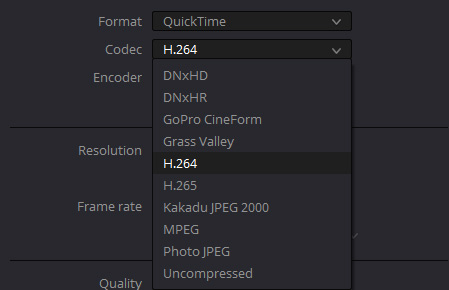
Encoder
Keep the encoder at Auto.
Resolution
In this section, you need to set the resolution of your video. If you want to export in 2k or 4k, choose the resolution setting accordingly.
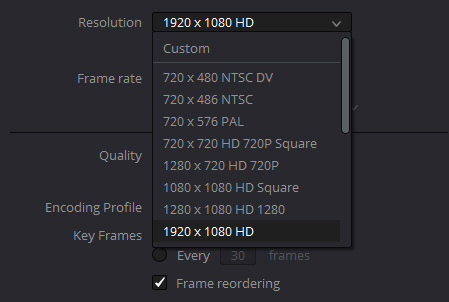
Use vertical Resolution
You will see a checkbox under the resolution, if you check this box, you will see the resolution will be revered.
1920*1080 will become 1080*1920. Your video will be exported in vertical format.
This is useful when you want to render two versions of your project, one for landscape and one for vertical platforms.

Frame Rate
Frame rate means how many images your video will have in one second.
This is an important setting, so you must be careful with this.
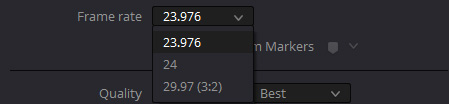
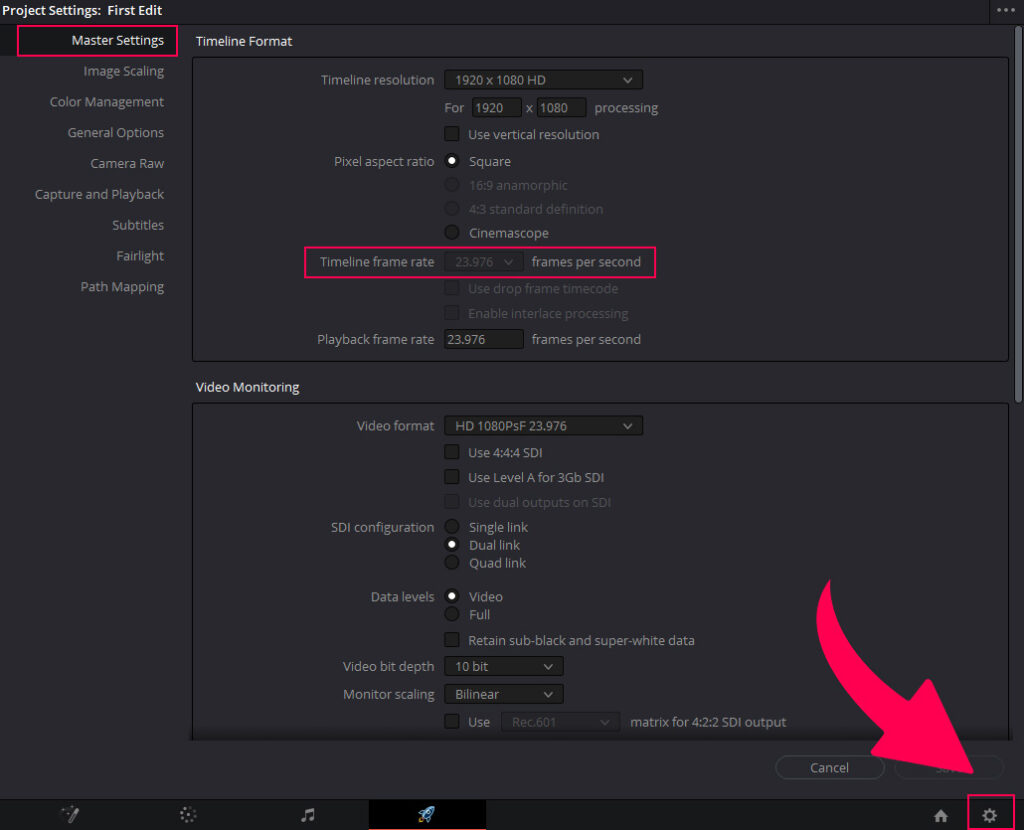
Important: Your frame rate in the render settings should be the same as you kept it in the project.
To check the project resolution and frame rate, go to the file menu > Project Settings > Master Settings.
Here you will see the resolution and frame rate of the project.
Quality (Bitrate)
This is where you will control the bitrate of your video.
How does bitrate work?
The bitrate is what control the quality of your video.
It is often measured in kb/s and Mb/s, but in resolve, it is measured in kb/s.
In easy language, it means how much data will be encoded into your video in one second.
If you choose a higher bitrate, then your file size will be much bigger, and it will take longer to render the video, obviously, the quality will be better too.
There are two options available under quality.
- Automatic
- Restrict to
Automatic
In automatic, you will get 5 different options:
- Least
- The least amount of data will be encoded into your video.
- Low
- A bit more data than the least option will be encoded.
- Medium
- The amount of data will increase as you move down in options
- High
- Best
- Best encodes the most amount of data and gives the best quality.
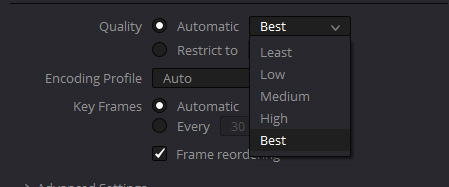
You should go for the best option if you want a higher quality video.
Restrict To
In this option, you can control the bitrate of your video by entering the custom value.
Let’s do some calculations on how the bitrate you enter will affect the size of your video.
- If the bitrate you set is 20,000kb/s, that will be 20,000 kilobits of data per second in your video.
So if the length of your video is 15 seconds will be 15*20,000, which will be 300,000 kb.
- As you know that 1 kilobyte is equal to 8 kilobits.
So if we divide 30,000kb by 8, the answer will be 37500.
The size of your 15-second video will be close to 37.5 Mb.

The main thing to note here is the more the bit rate better will be the quality of the video.
Keyframe
Keep it to Auto.
This shouldn’t concern you if you are a beginner because the automatic option will give you the best possible quality.
As it uses pretty advanced algorithms, if you want to understand it, you can do some research there is a lot of data available on this topic.
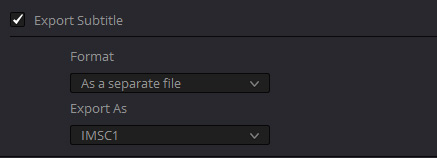
Subtitle Settings
If you have subtitles in your video, then you need to check the option to export subtitles.
There are two options under the subtitle settings:
- Format
- Export As
Format
Under format, you will again get multiple options.
- As a separate file:
- The subtitles will be exported in a separate file which you can share or upload.
- As embedded captions
- The captions will be embedded in your video, which can be turned on or off in the video player.
- Burn into video
- Captions will be placed in your video permanently, which can be turned on or off.
The 2 options are recommended.
Export As
If you want to export a separate file, you must choose the subtitle file type.
There are multiple options, but the SRT is the most used subtitle file format.
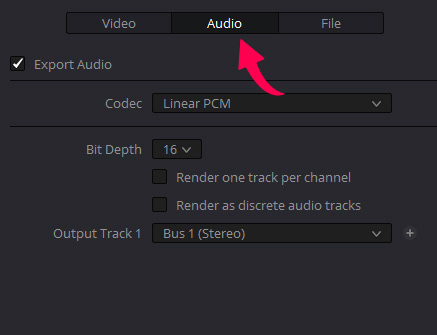
Audio Export Settings
There is an audio tab beside the video tab; click on it, and you will access the audio settings.
Leave everything to automatic.
Make sure that the output track 1 is set to Bus 1 (Stereo).
Add to Render Queue
When everything is set, you have dialed in every setting, and click on the add to render queue button.

Export the Video
Go to the render Queue and click on render all, everything you added to the render queue will start to render.
How To Choose The Best Export settings for Youtube in Davinci Resolve?
The settings we discussed above will give you more than good quality, but if you want to get some extra spice in your videos, you can follow the settings below.
Choose 265 as a Codec.
Set the format to Quick Time.
Choose the Ultra HD resolution 3840*2160.
- Even If your video is shot at 1920×1080, you should set it to Ultra HD. Upscaled videos perform better on YouTube.
The frame should be the same as your source clips.
Under Quality, choose restrict to.
- Set the bit value twice the frame rate and multiply by 100.
- If your video frame rate is 24, it will be 24*2*100= 48,000.
Change the Keyfrom setting from automatic to every and set the value half of the frame rate.
- If the frame is 24, then the keyframe value will be 12.
Under the Audio settings, choose, and set the codec to linear CPM.
These settings are tried and tested by a lot of people, and the quality was top-notch.
Conclusion
We have covered almost everything available on the deliver page in Davinci Resolve 18. From render settings to hitting the add to render queue button and then hitting the encode button to render the final video.
We have discussed what option to choose in every panel available in render settings. You can use the settings we have discussed with your eyes closed.
We left out some options because they are pretty advanced, even for some experienced resolve users, so that’s why we didn’t include them in a beginner’s tutorial.
We have also covered the render settings for youtube to get the most out of the video in terms of quality.
Thanks for reading & feel free to check out more of our articles!
Expert Rating
Summary
Learning the Deliver page in DaVinci Resolve can be highly beneficial as it allows you to export and deliver their video projects to various platforms and devices. With customizable settings for different output formats and resolutions, you can ensure that their final product meets the specific requirements of the intended audience. The Deliver page offers various options for adding metadata and subtitles, further enhancing the final product’s accessibility and reach.


