
If you’re a beginner designer and want to learn about shapes and other design tools inside photopea, then this guide is for you.
In this complete Photopea guide, we will teach you how to use the Shapes from scratch and explore other essential design tools.
By the end of this guide, you’ll be able to easily draw various shapes and use other design tools. You will be ready to create any design project using Photopea’s Shape Tools and other design tools, like a social media design.
So, save this article now, and let’s get started on your design journey!
Create The New Document
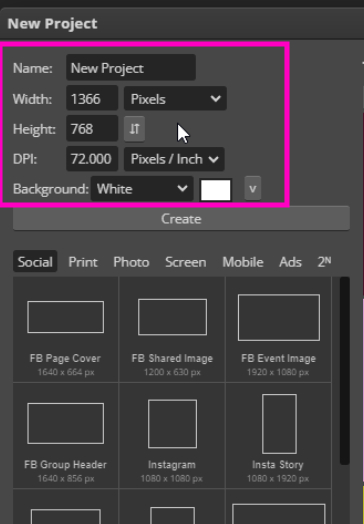
When you open photopea.com, you will see 3 options; click on the first one, “New Project.
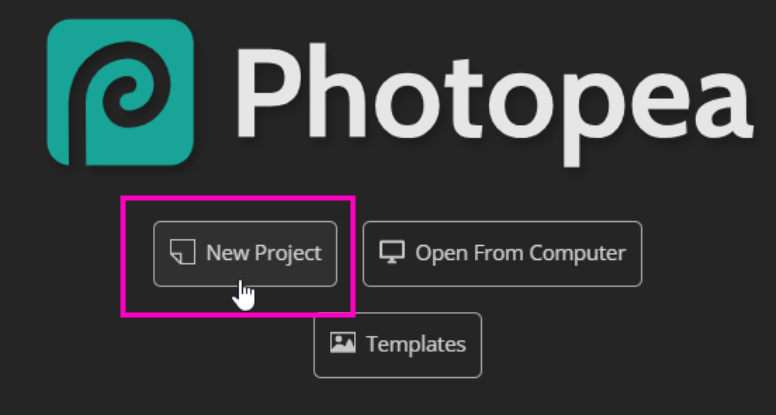
Choose the dimensions of your liking, and click Create.
Shapes In Photopea
First of all, we will cover everything you need to know about shapes, from how to create them in multiple ways to how to change color, size, stroke, and other settings.
How To Create Shapes In Photopea?
Now we will have a detailed look at the process of creating different shapes.
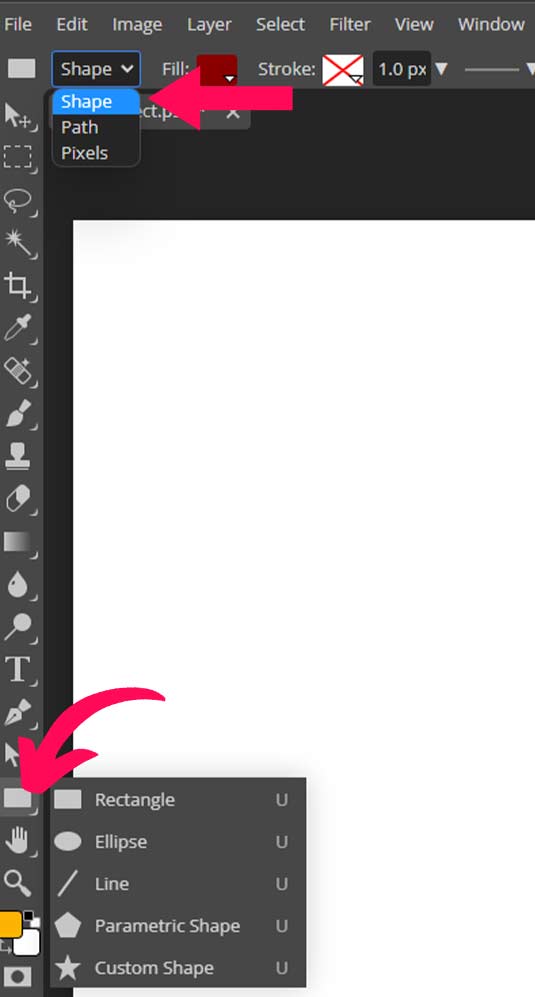
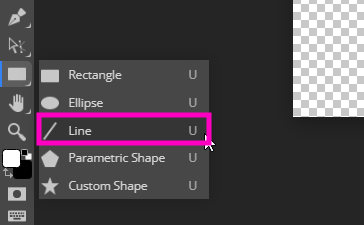
Step 1: Select the shape tool
To access the Shape Tools in Photopea, go to the Tools bar and click and hold until all the Shape Tools appear.
You can also use the shortcut “U” and press Shift + U to cycle through the shape tools.
Once you’ve selected a tool, choose “Shape” in the Options Bar to save the shape as a vector shape layer.
If you choose “Path,” the shape will be a vector path; if you choose “Pixels,” it will be a pixel drawing on the active layer.
We’ll select the shape.
Step 2: Drawing Shapes
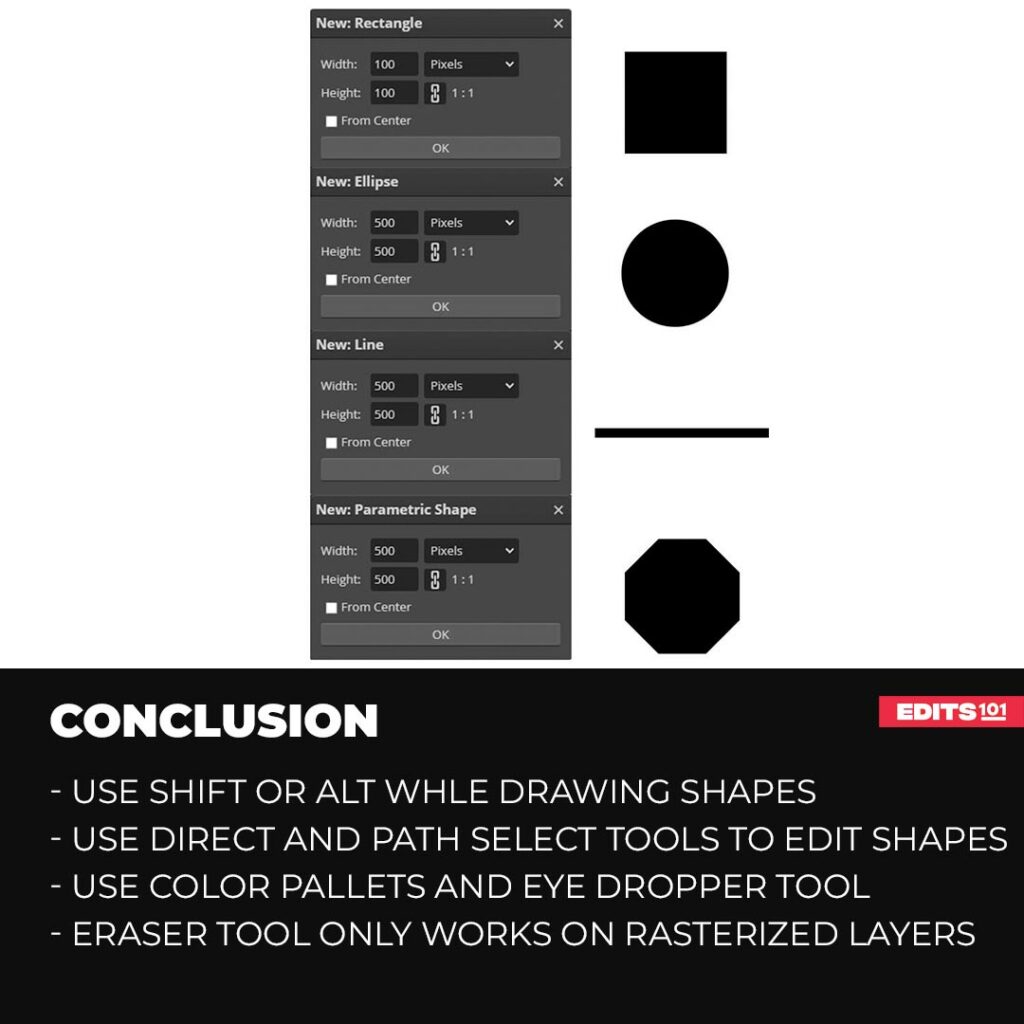
To create a shape, click and drag your cursor. Holding down the Shift key will help you make a perfect square or circle, depending on the selected tool.
Holding down the Alt key will let you draw the shape from the center out. If you hold both Alt and Shift, you can do both.
This works for Rectangles, Rounded Rectangles, Ellipses, and Polygon tools. Check out the image below to see what a rectangle shape looks like.

Step 3: Draw Shapes At a Particular Place
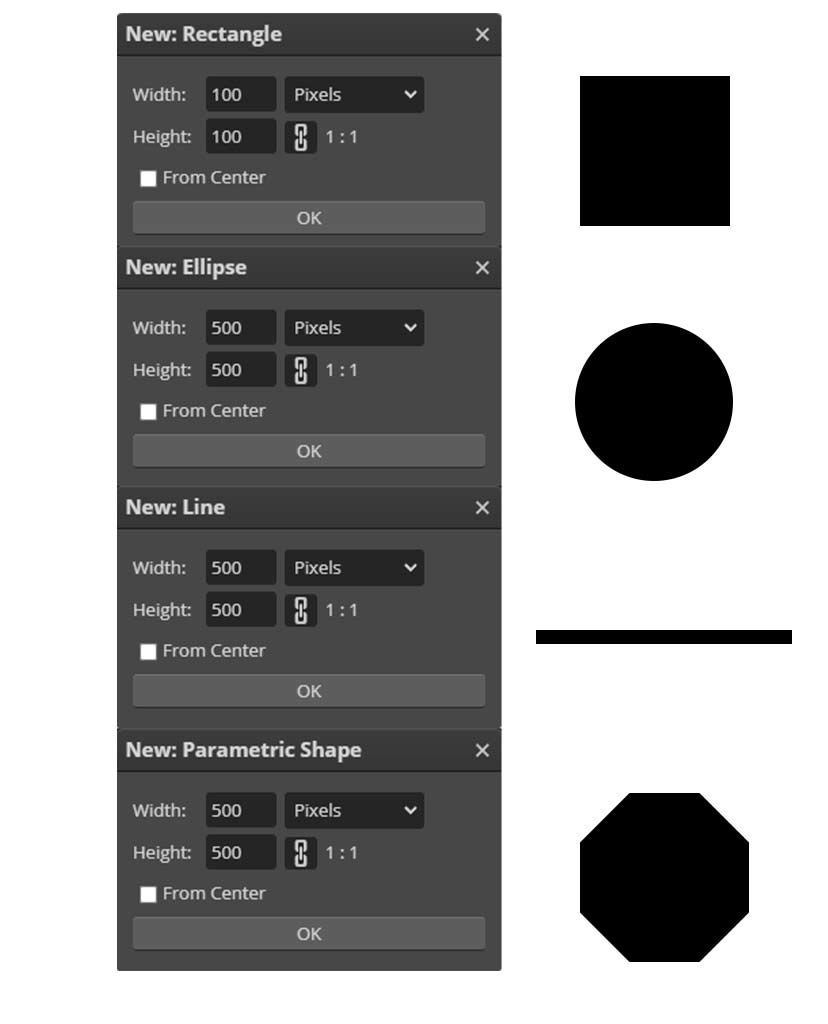
You can click on the point on the canvas where you want to create the shape for more precise results. The shape tool must be selected before clicking on the canvas.
A dialog box will pop up where you can enter all the parameters, i.e., length, width, height, etc.
This method will work for all shapes, including rectangles, ellipses, lines, and parametric shapes (polygons).
Step 4: Draw lines and Arrows
Choose the line tool from the toolbar.
You will get all the shape options and two extra options.
- Width
- Arrow
The width will determine the thickness of the line.

Click on the arrow option and click on the start or the end box, depending on where you want the arrow to be.
You can check both options if you want an arrow on both ends of a line.
You can see the preview of the arrow at the bottom of the arrow panel.
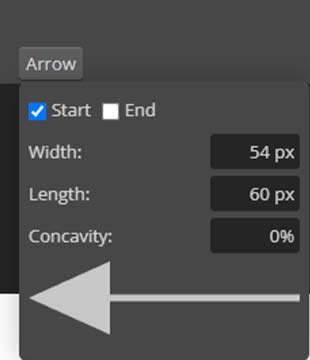
Once happy with the settings, click inside the canvas and draw.
Step 5: Custom Shapes Inside Photopea
The Custome Shape tool is at the end of the list of shape tools. Selecting this tool will give you a properties bar like other shape tools with the same fill and stroke options.
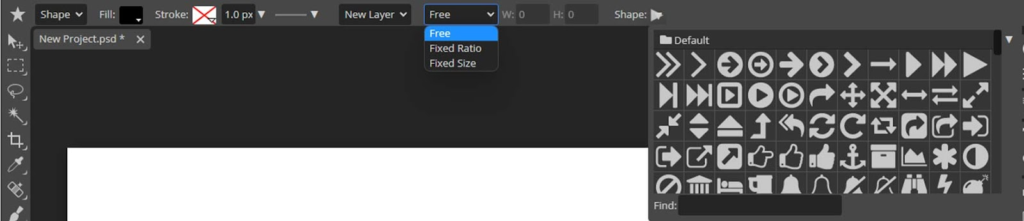
There’s a drop-down menu for choosing how you want to draw a shape. There are 3 ways
- Free
- Fixed Ration
- Fixed Size
The free option will draw the shape without locking its height and width. If you select a fixed ratio, the dimensions will be locked to what you write in the boxes.
In fixed size, you have to enter the exact size of the shape, like 100*100.
You can also use shift and alt to draw the shape in a fixed ratio and from the center of your click.
You will find a dropdown menu at the end of the properties bar for custom shapes inside photopea.
Step 6: Change Shape Properties
Before creating a shape, you can adjust its dimensions by modifying its width and height values in the corresponding input boxes W and H using the Options Bar.
For this setting to work, you need to choose a Fixed ratio or Fixed size.

It is important to note that you must specify the number of sides for parametric shapes before creating the shape.

With these options, you can easily fine-tune the properties of your shapes to meet your specific needs.
Step 7: Change The Color
You will see a fill option in the properties bar, click on it and choose the type of stroke from the 3 available options.
- Plain color
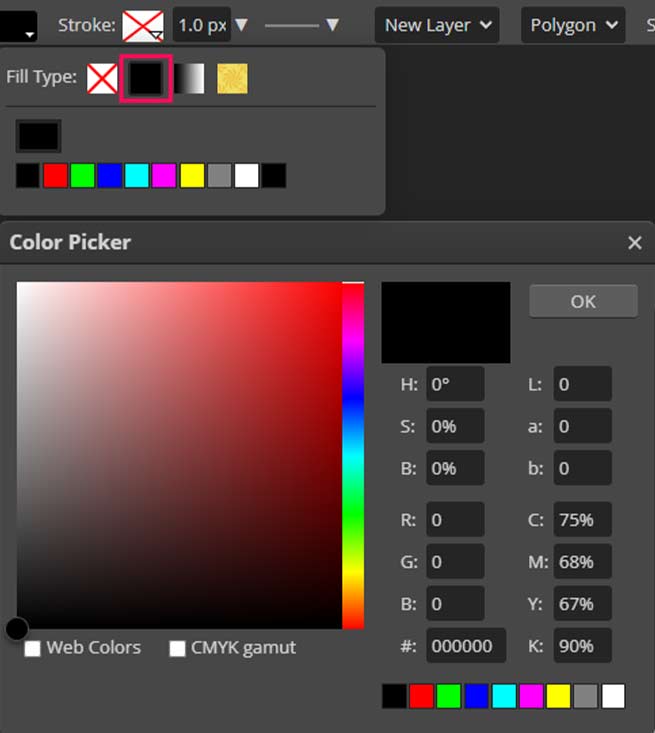
- Gradient color
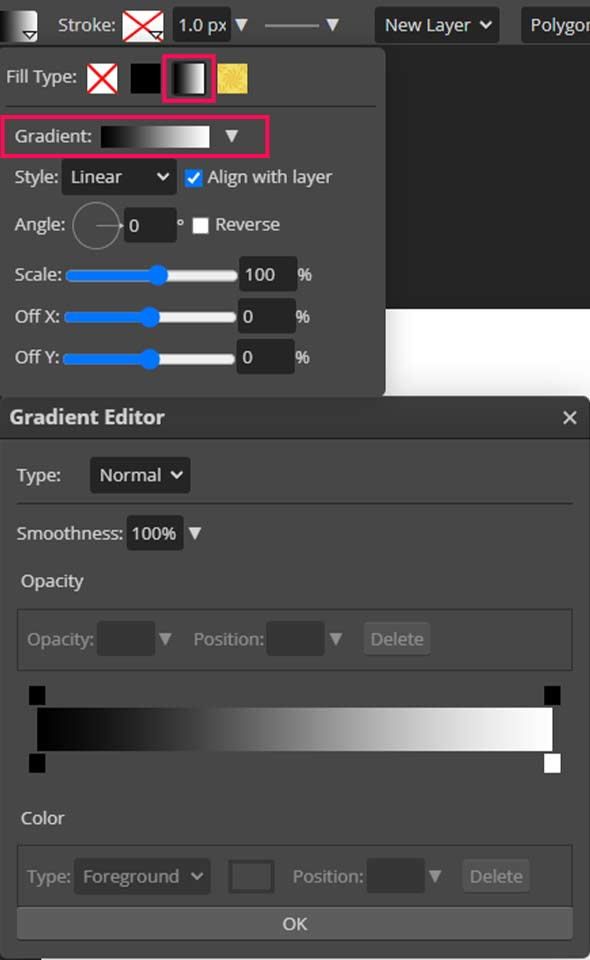
- Pattern
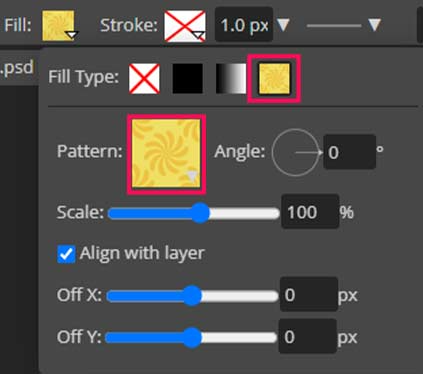
Click on each one to change its settings.
Click on the plain color and choose the color you want.
Whatever color you want to apply.
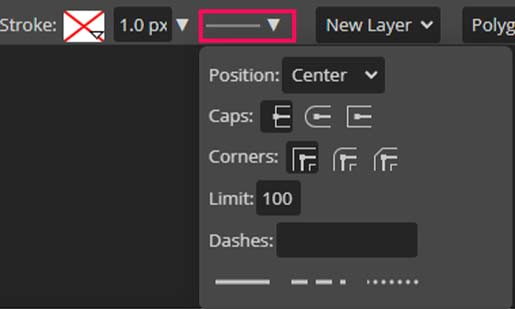
Step 8: Add stroke
There’s an option to add a stroke beside the fill option. Click on it and choose what type of stroke you want.
There are 3 types of stroke fill you can add:
- Plain color
- Gradient color
- Pattern
These options work just like the fill options.
The Next option is stroke width, click on it and change it to your liking.
Right next to stroke fill, there’s an option to choose what kind of stroke you want.
You can change the following options:
- Caps
- Corners
- Dashes (you can covert the stroke to dashed lines)
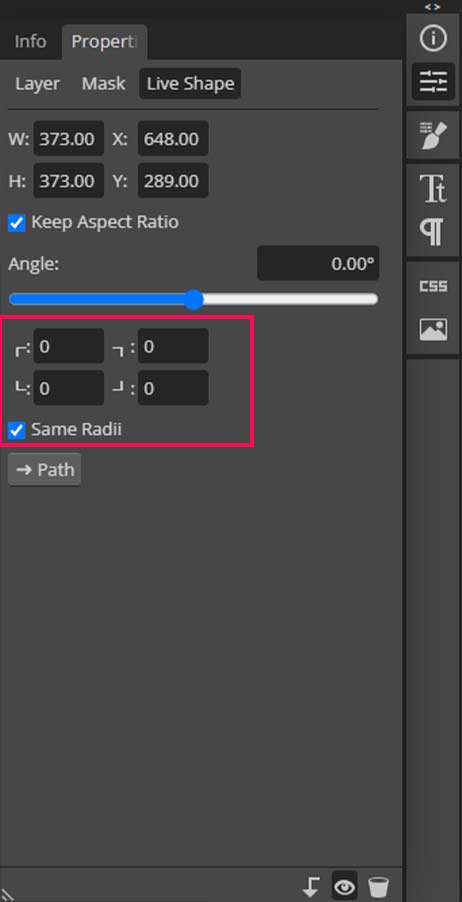
Step 9: Explore Properties Panel
The properties panel is straightforward and minimal. There are a few options you can tweak.
- Width
- Height
- X and Y positions
- Color
If you have a rectangle, you will get an extra option to round its corners.
Check mark the same option, same radii, to round all corners equally. Uncheck it if you want to round all corners separately.
How to Edit Shapes In Photopea?
There are multiple ways to edit shapes in photopea.
Method 1
Check mark the Transform controls box on the properties bar.
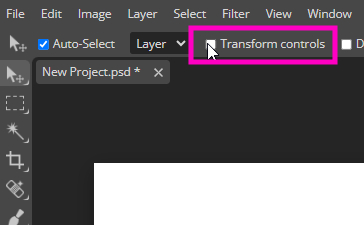
Press Ctrl or Cmd, grab any corner of the shape, and drag.
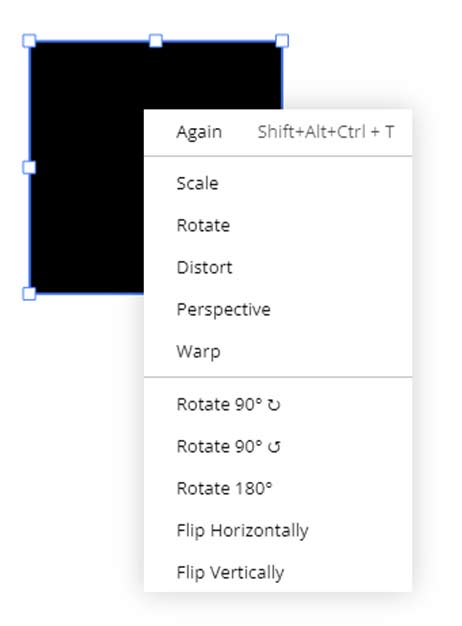
Method 2
Select the shape and then press Ctrl + Alt + T or Cmd + Option + T on the keyboard to activate the free transform tool.
Right-click and choose from the following options:
- Scale
- Distort
- Rotate
- Perspective
- Warp
Now click on the points on the 4 corners of the shape and drag to see the changes.
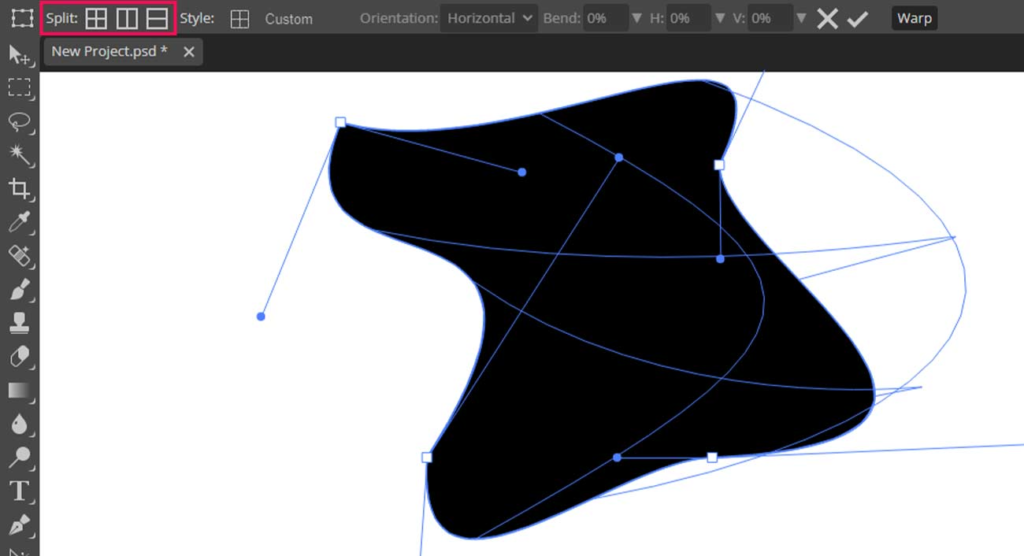
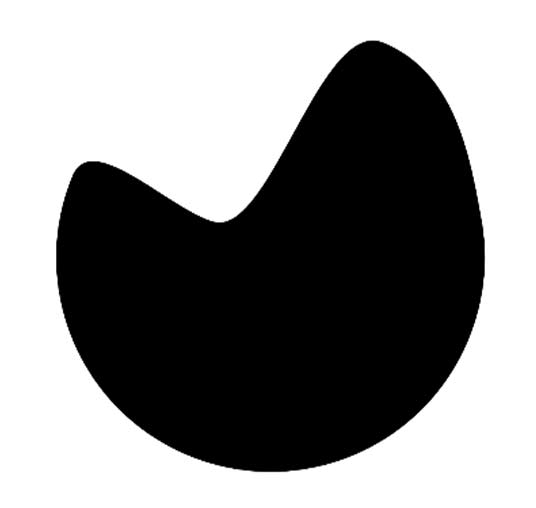
In Warp, you can freely distort the shape in any way you want. You can also add more points to customize the warp settings.
Method 3
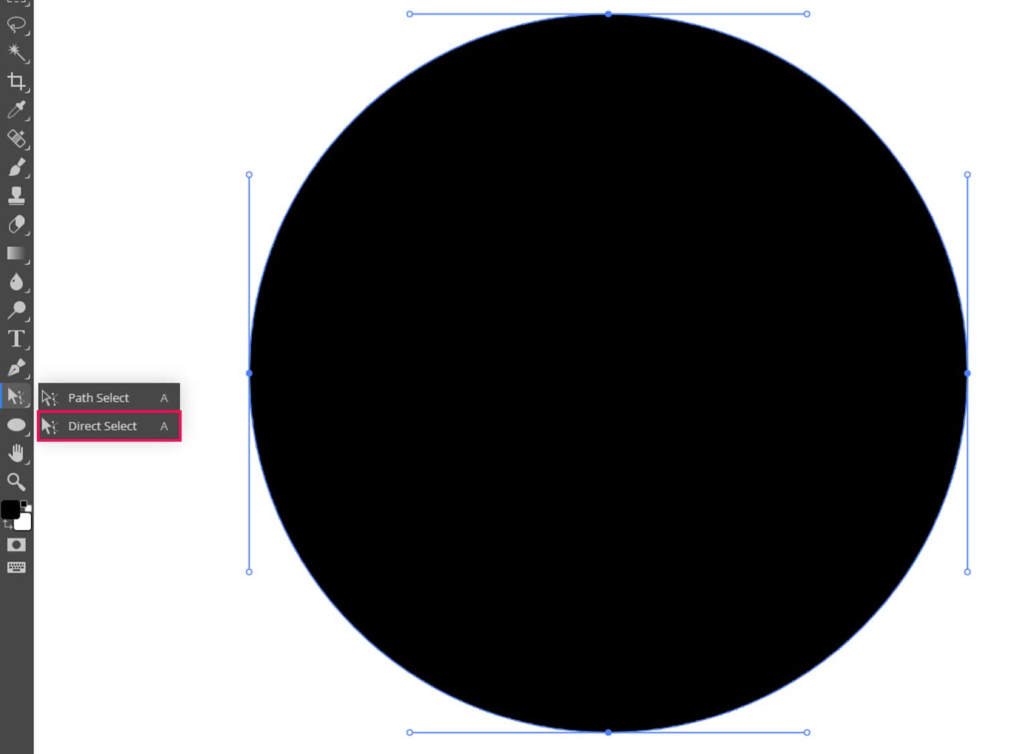
You can also use path and direct select tools to edit the shapes.
Choose the Drect select tool and drag a selection over the shape. All the points of the shape will be selected. Click and drag the point in any direction to edit the shape.
Make sure the shape you want to edit is selected in the layers panel.
You can also add points with the help of the pen tool.
Choose the pen tool or press P on the keyboard, click where you want to add the point, and then go back to the path and select the tool to edit the point.
Click on any point with the pen tool, and it will be deleted. Pr click with the path selection tool on the point and press delete.
Important Design Tools
Now that we have covered the shape tools in detail, let’s look at the other design tools, what they do, and how to use them.
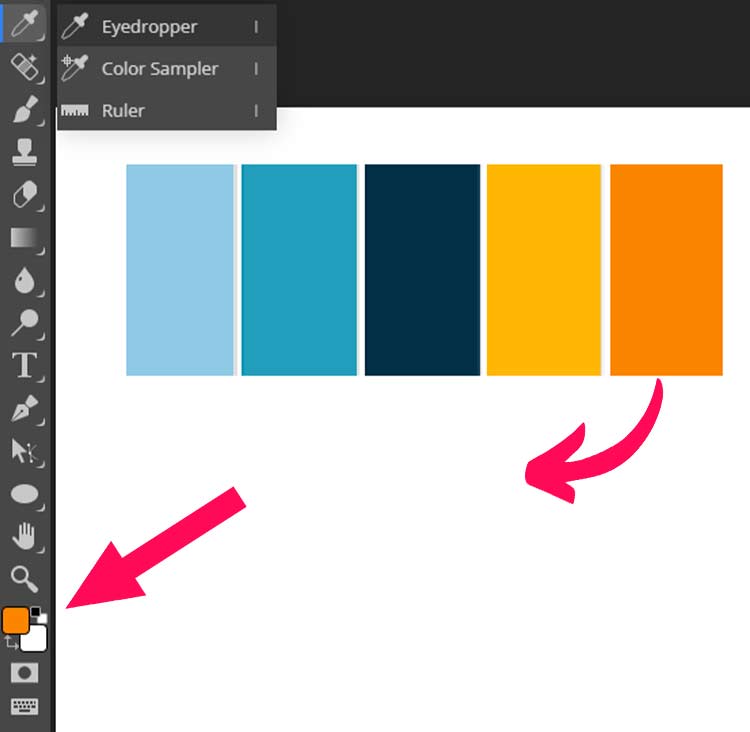
Eyedropper Tool In Photopea
When you click on the color, it will become the foreground color.
Now, this color will be used when you work with different tools like:
- Shape tool,
- Text tool,
- Brush tool
It is especially helpful if you are using a color pallet for colors in your design. You can import the color pallet, keep it in the corner, and choose the colors with the eyedropper tool.
Click on the color you want to use and create a text or shape layer, which will automatically be created with that color.
This can save you a lot of time.
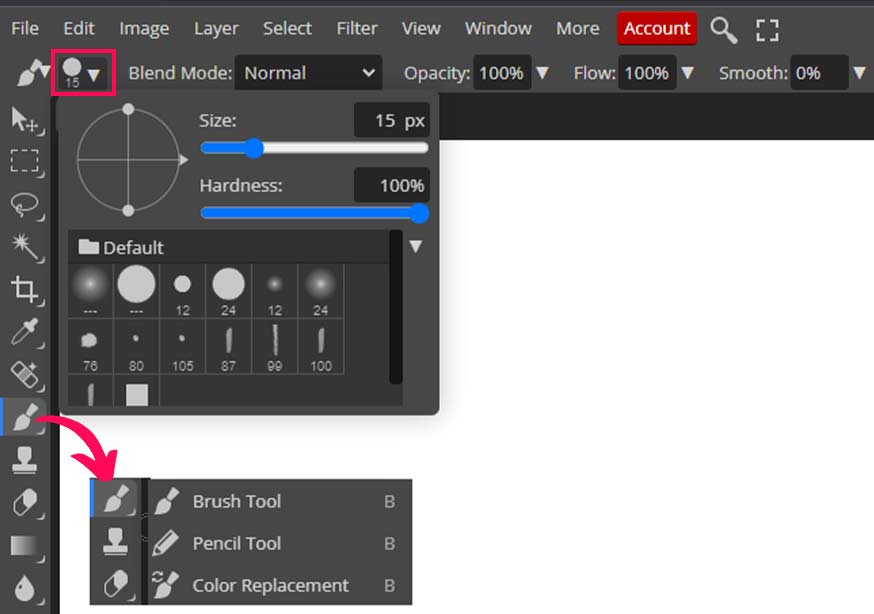
Brush Tool In Photopea
With the brush tool, you can draw whatever you want inside photopea.
There are custom brushes available that you can download and import to photopea.
The properties bar will appear with different settings when you select the brush tool.
- Size, and hardness
- Brush presets
- Opacity (Controls how strong the brush effect will be)
- Flow (how much it will paint if you click, click multiple times for stronger effect)
- Smooth (Smooth out the jagged edges).
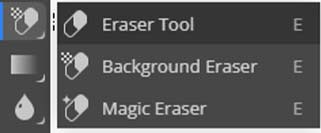
Eraser Tool In Photopea
As the name suggests, the Eraser tool is used to erase something in photopea.
Keep in mind that it only works on raster layers. It won’t work on text layers, shape layers, and on smart objects.
Magic Eraser Tool In Photopea
Magic Eraser tool removes a similar color from an image with a single click. For example, if you have an object with a white background, the white area will be deleted or erased when you click on the white background with the magic eraser tool.
Gradient Tool In Photopea
The gradient tool creates cool-looking gradients. The keyboard shortcut for the gradient tool is G.
When you select the gradient tool, the properties bar will appear on top.
In the first option, you have to choose two colors you want in the gradient.
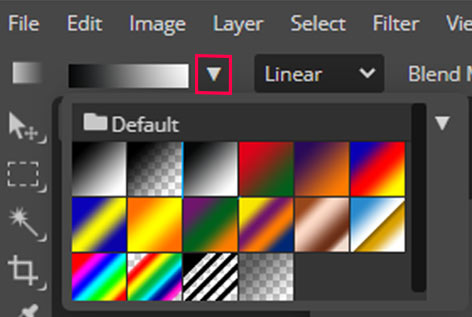
Or you can choose from the few presets provided by photopea.
You can also choose custom colors for the gradient.
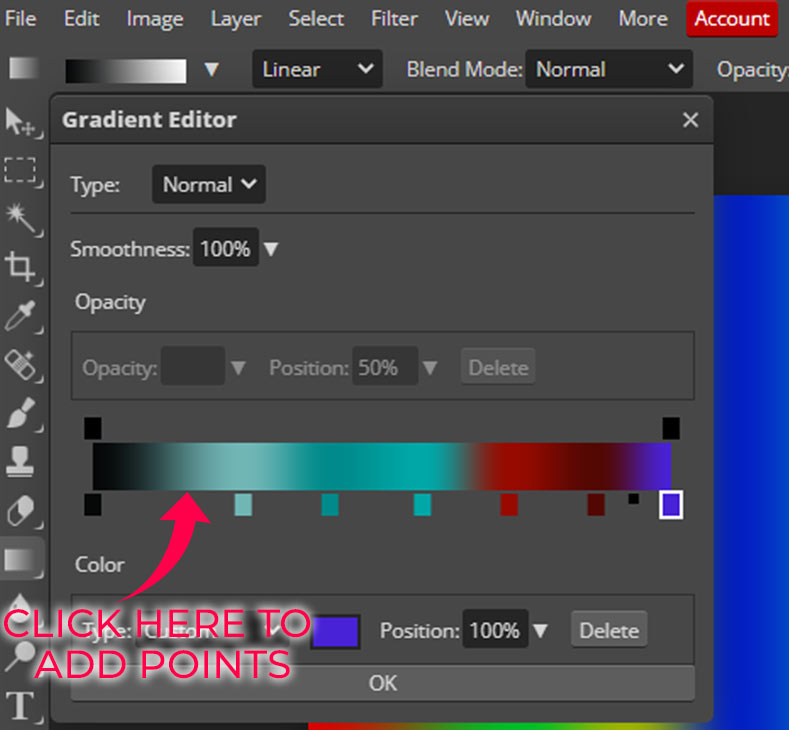
Click anywhere below the color box to add points to the gradient, you can add as many points as you want and choose a separate color for each point.
There are different options :
- Gradient color
- Gradient type
- Blend Mode
- Opacity
Then you need to choose gradient type, and these are the types:
- Linear
- Radial
- Angle
- Reflected
- Diamond
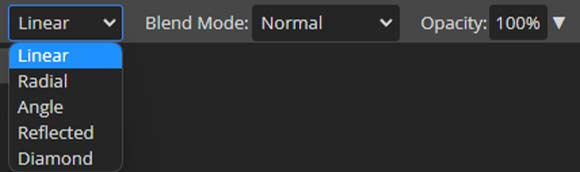
The two most used types are Linear and radial.
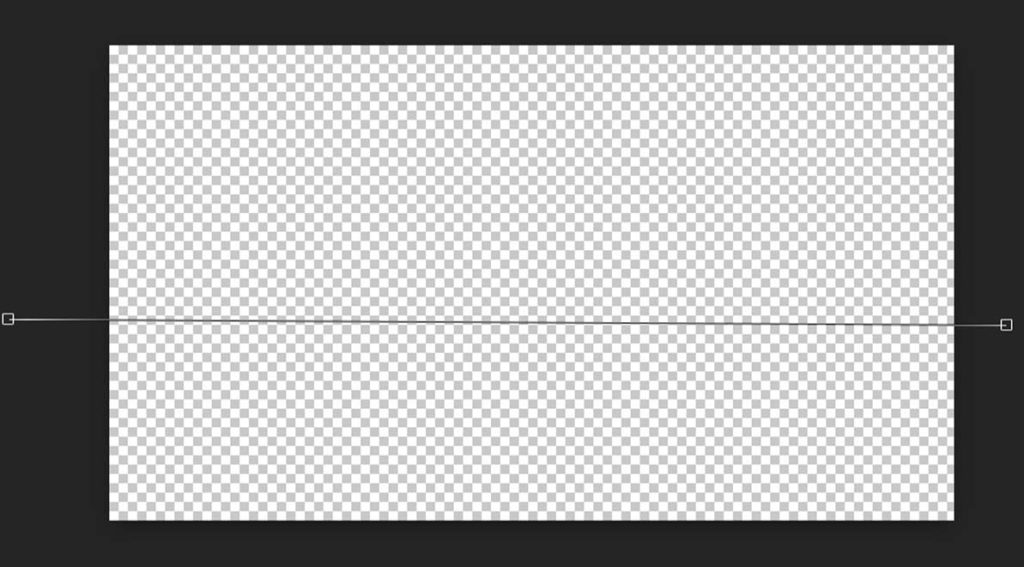
To make a linear gradient, you need to select a raster layer or create an empty one, then draw a line from one end of the document to the other.
You need to click and draw from the center to create a radial gradient.
Text Tool In Photopea
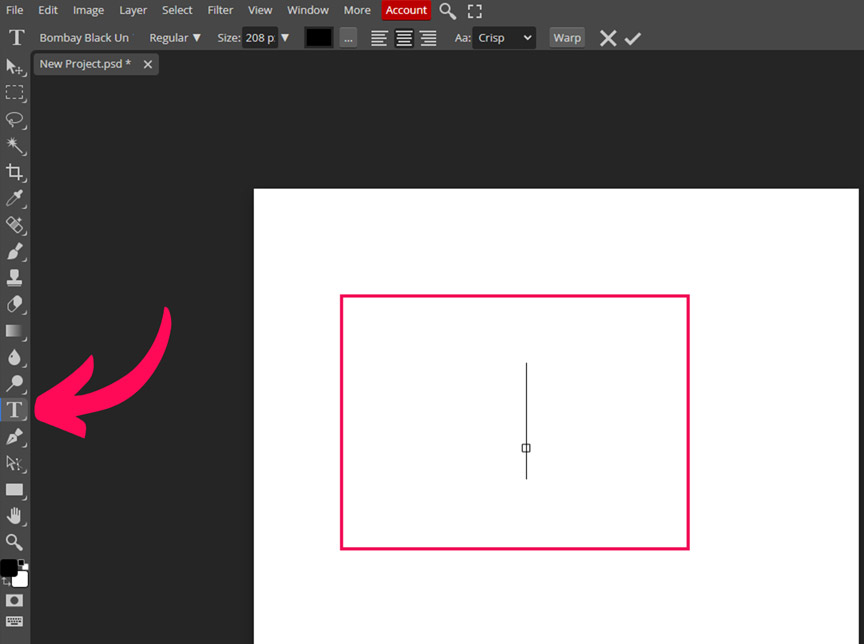
Select the text tool from the toolbar or use the keyboard shortcut T. A bar with text options will appear at the top. That’s how you will know that the text tool is selected.
- To create the text layer, click inside the canvas (document), and you will see a text layer inside the layers panel and a straight line with a small box inside the document, start typing, and you will see the text.
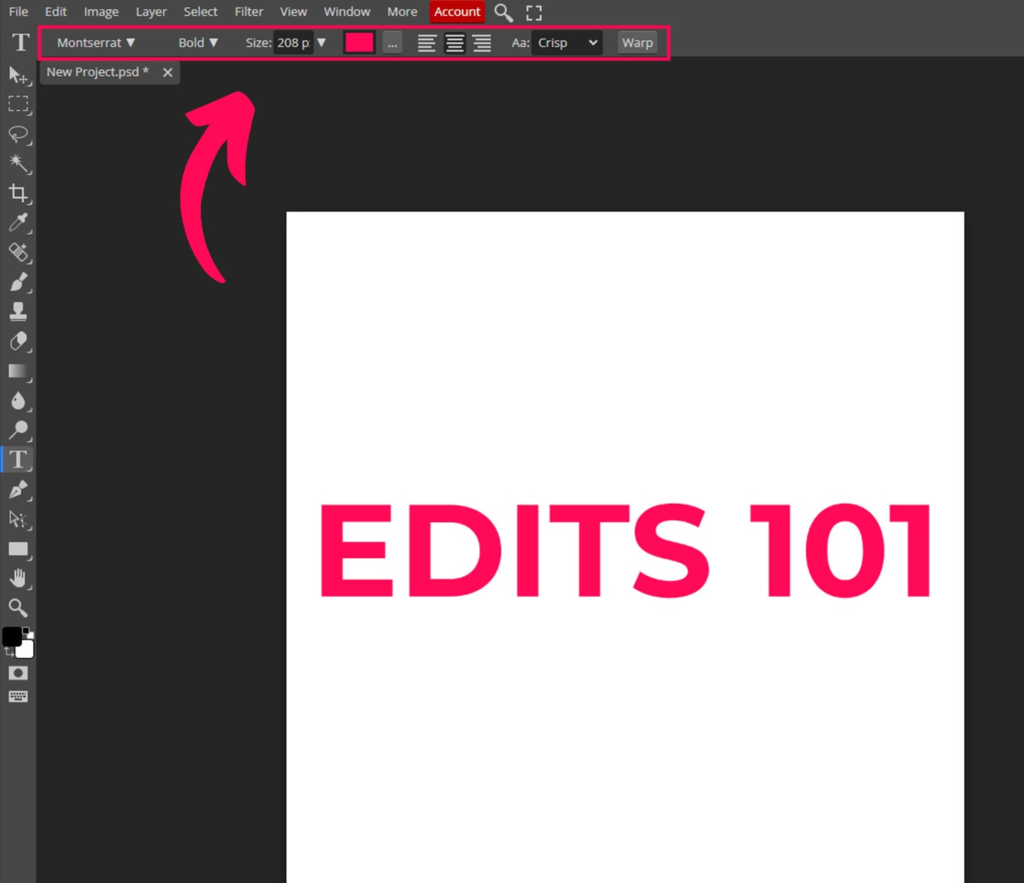
- You can adjust the font, size, color, alignment, and other text properties in the text options bar. You need to select the whole text first before changing any text parameter.
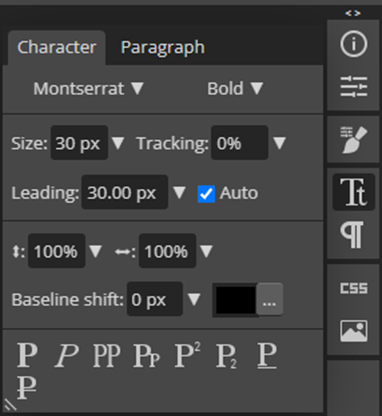
You can also change text properties from the character panel.
Pen Tool In Photopea
The pen tool is used to draw freehand shapes and paths.
As we have mentioned above, you can add or delete points in a shape or path with the help of the pen tool.
Click here to Read this comprehensive guide on how to use the pen tool in photopea.
Pen tool guide
Conclusion
We have covered a lot in this guide, starting with the shape tool and ending with the pen tool.
You will use these tools in almost every design project, so you need to get a good grip on these tools to create professional designs quickly.
Use alt and shift (Option + Shift) to draw a perfect circle or a square; alt or option will help you draw from the center of your click.
When you select the shape tool, the properties bar will appear at the top, where you can adjust the shape settings before or after drawing. Settings like fill type, fill color, stroke, etc. The properties panel can also be used to change shape settings.
There are multiple methods to edit shapes; we have mentioned 3 of them.
Use the eye dropper tool to sample colors. We have also discussed the gradient tool in detail. The text tool is also easy to use; select the text tool the properties bar will appear at the top.
Expert Rating
Summary
Photopea is a great and a free tool for graphic design. The shapes are the fundamental element of a good design. The shape tools are a bit complicated to master along with all the settings but with practice you can get good at them.


