
In this tutorial, we will explore the process of smoothening skin and blemish removal in Photopea.
We will cover different techniques, including Hue and saturation adjustment, Spot healing brush, invert, blending modes, gaussian blur, and much more which will make you a pro in photo retouching using photopea.
Let’s get started!
Retouch Skin In Photopea
Follow this step by step guide to learn how you can soften and retouch the skin in photopea.
Step 01: Create and set up a new Project
Open Photopea, drag and drop the image to be edited into the highlighted dialog as below.
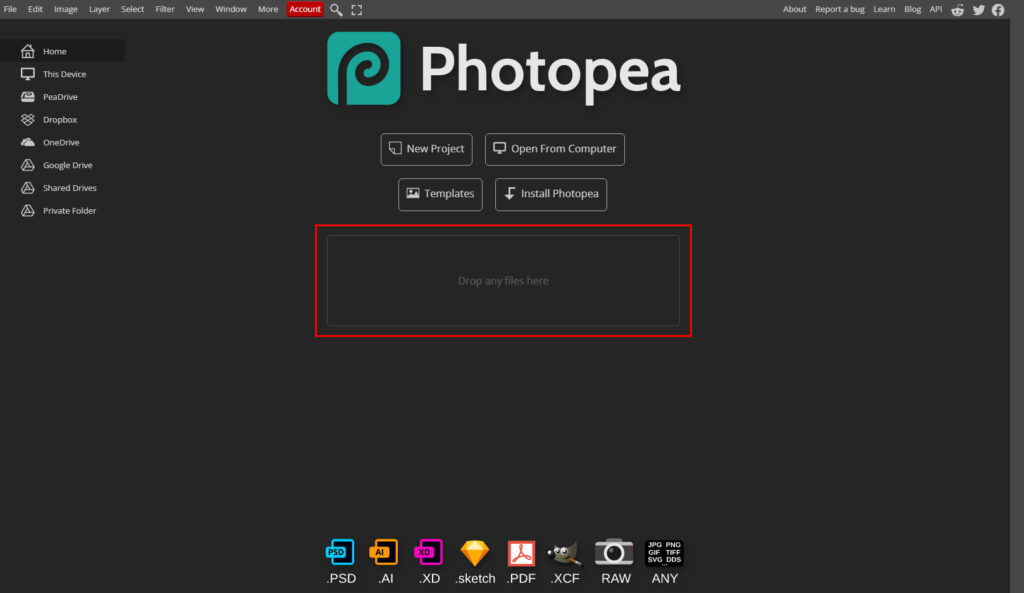
As you can see, this will open up a new project automatically with your image loaded in and ready to edit. Alternatively, you can click Open From Computer and choose the image from your files.
Step 02: Reducing the intensity of redness
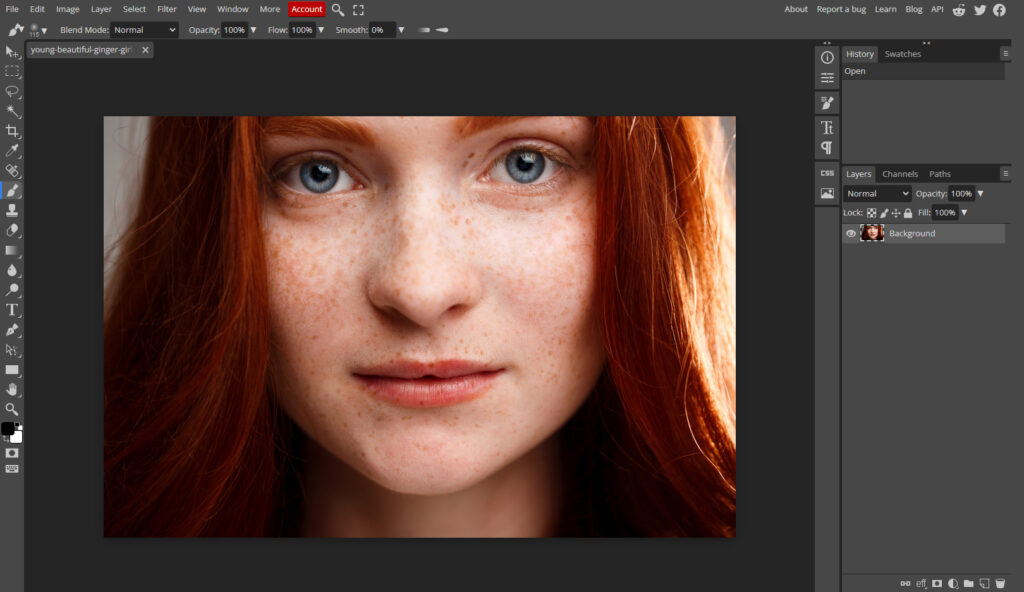
Duplicate the image by pressing CTRL + J or COMMAND + J. It is always good to have a copy of the image in case you mess up the image.
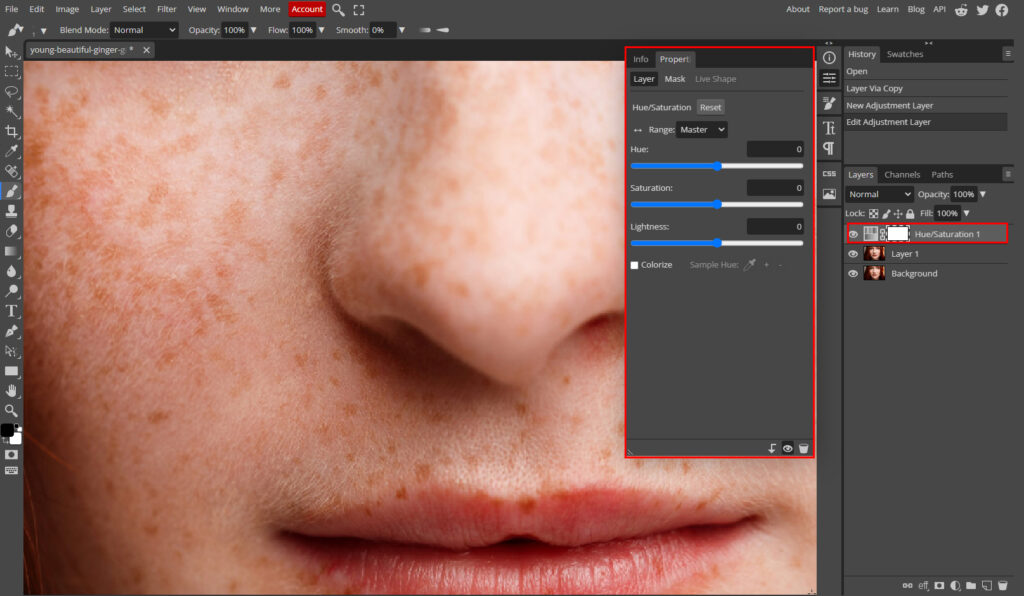
Add a Hue/Saturation adjustment layer.

A new layer is created in the Layer dialog, and the options to adjust your hue and saturation are highlighted below.
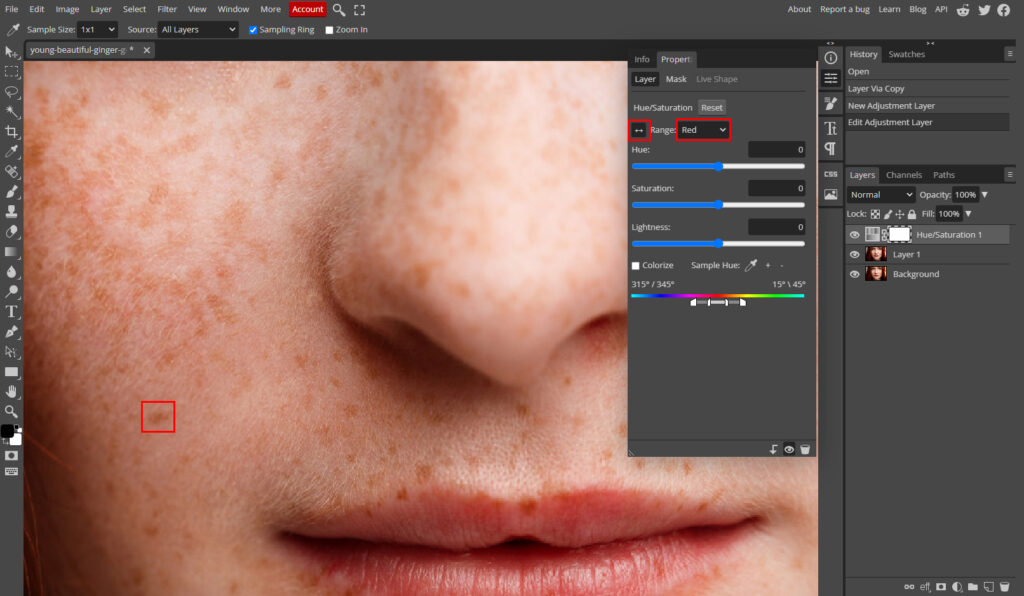
Now zoom in to your image by pressing Ctrl and + keys, click on the double-sided arrow button below, and then click on one of the blemishes or spots you wish to remove.
You will also notice the box next to the arrow changes from Master to Red.
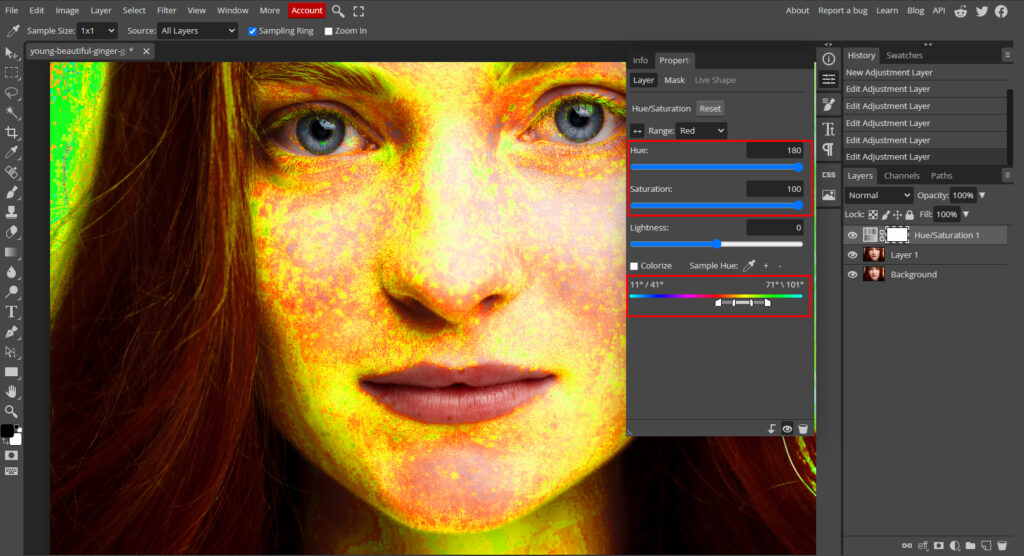
Now, toggle the Hue and Saturation all the way up to the Maximum value (180 for Hue and 100 for Saturation) and adjust the slider at the bottom of the Dialog.
We move the sliders to maximum values because we can get the best contrast for selecting the blemished areas. As can be seen below, the blemishes that need to be removed are highlighted in the image.
Note that the adjustment required on the lowest slider will vary depending on the image and intensity of blemishes.
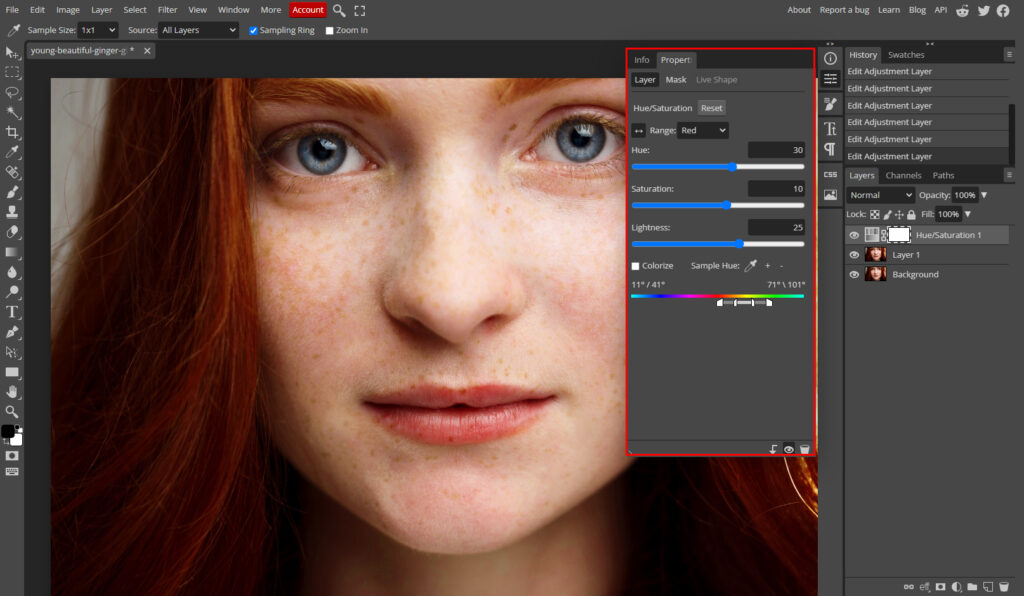
Now, move the Hue and Saturation sliders back to 0. Then, slowly increase the Hue to a value that slightly decreases the redness, increases Lightness in the same way, and adjust the Saturation as shown below. You will notice a slight decrease in the amount of redness.
TIP: In case the adjustments made above interfere and desaturate with the color of the lips or hair, for example, you can use the following method to clean it up and restore the colors to areas you do not wish to modify:
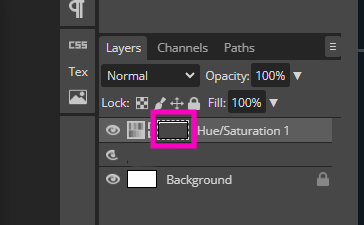
- Click on the Raster Mask, the white box on your Hue/Saturation 1 layer. It should be highlighted by a dotted box, as shown in the above image.
- Then, select your Brush Tool from the toolbox on the left or use shortcut B to select it.
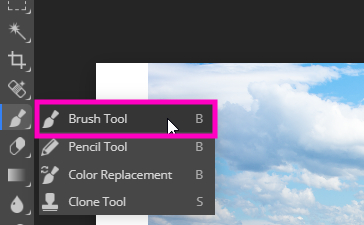
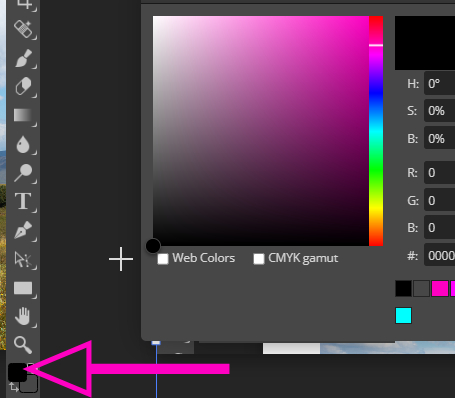
- Make sure you select the Foreground Colour for the brush as Black.
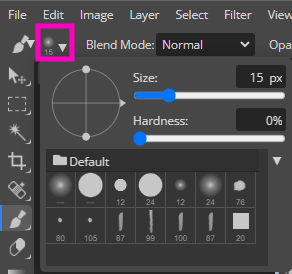
- Select the brush Size and Hardness box, which is generally located under the EDIT menu when the Brush tool is active.
- Change the brush size to the desired value and make sure the hardness value is 0.
- You can then start ‘painting‘ over the areas where you wish to remove the effect of the Hue/Saturation tool. This could be the hair or lips, as I mentioned.
I have not found a need to do this in this tutorial, but this step may be necessary depending on the image and the settings you use.
Step 03: Removing the acne or blemishes using the spot healing brush
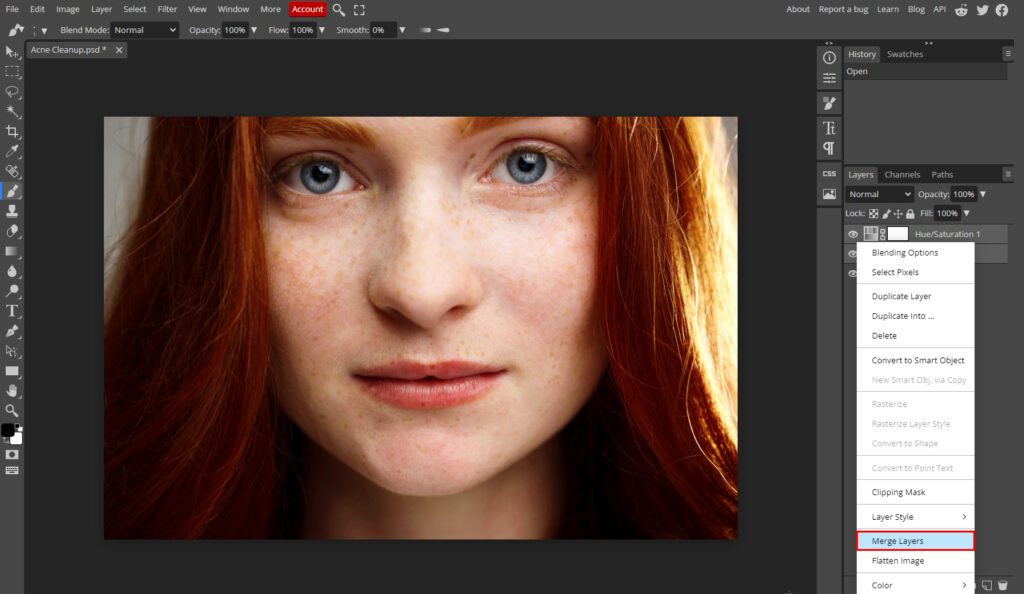
Once you are satisfied with the results of the previous steps, merge both your Hue/Saturation layer and the image layer beneath it by clicking on any one of the layers, holding CTRL or COMMAND, and then clicking on the other layer. Then right-click and select Merge Layers.
Now, let us select the Spot Healing Brush Tool from the left-hand side toolbar or use the shortcut J to activate the brush.
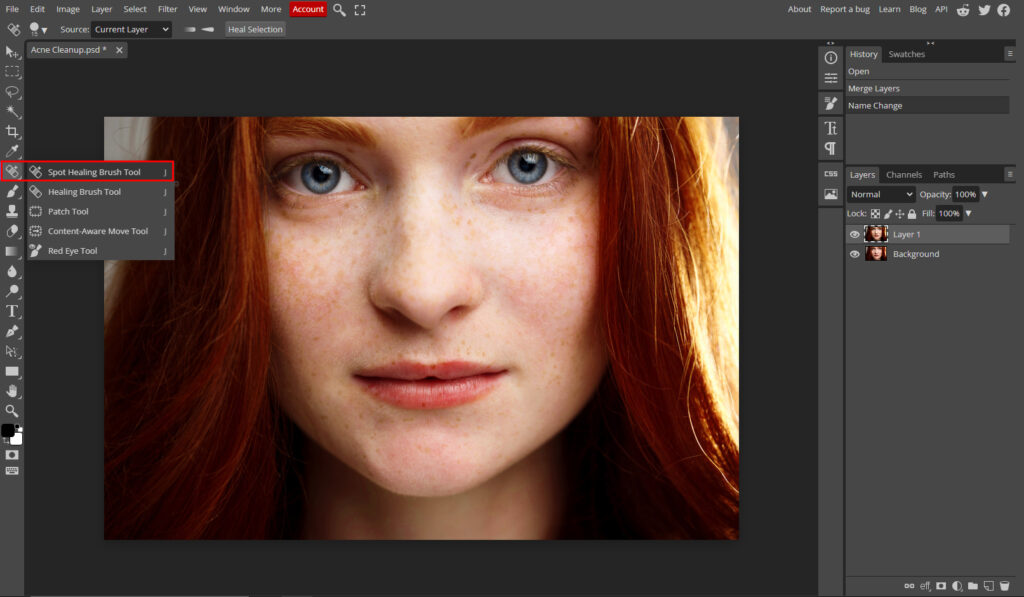
Reduce the Hardness of the brush to 0% and change the brush Size as desired.

You want to start tapping on the blemishes or pimples you wish to remove to ‘heal’ the skin. Take your time; the more attention to detail you apply in this step, the better the final result will be.
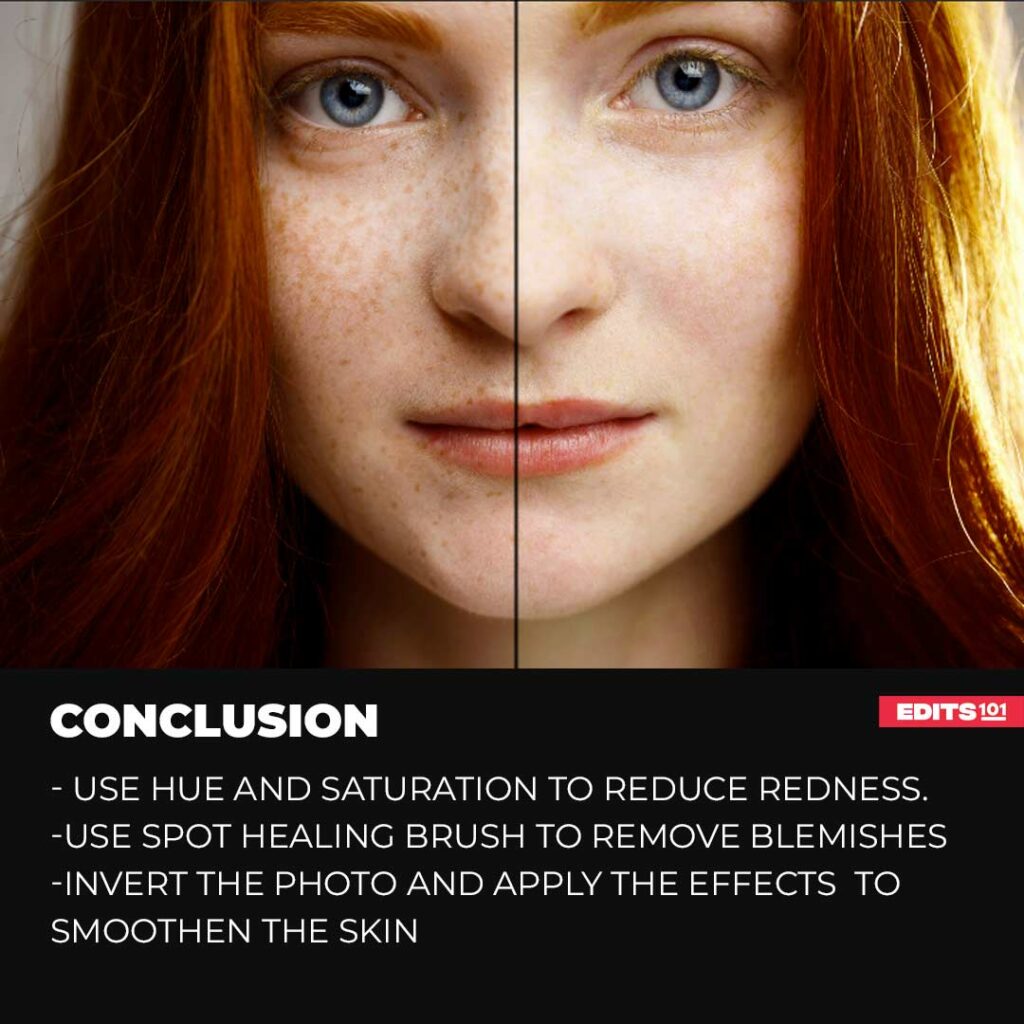
As seen in the image below, the model’s skin on the right side looks much cleaner compared to the original image on the left.
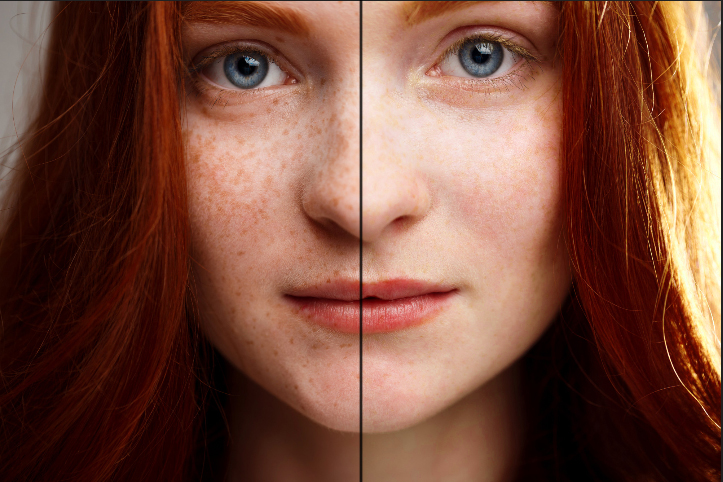
soften the skin in photopea
Until now, we have achieved quite a dramatic difference in our model’s skin. We are now going to go even further to make her skin smooth and perfect.
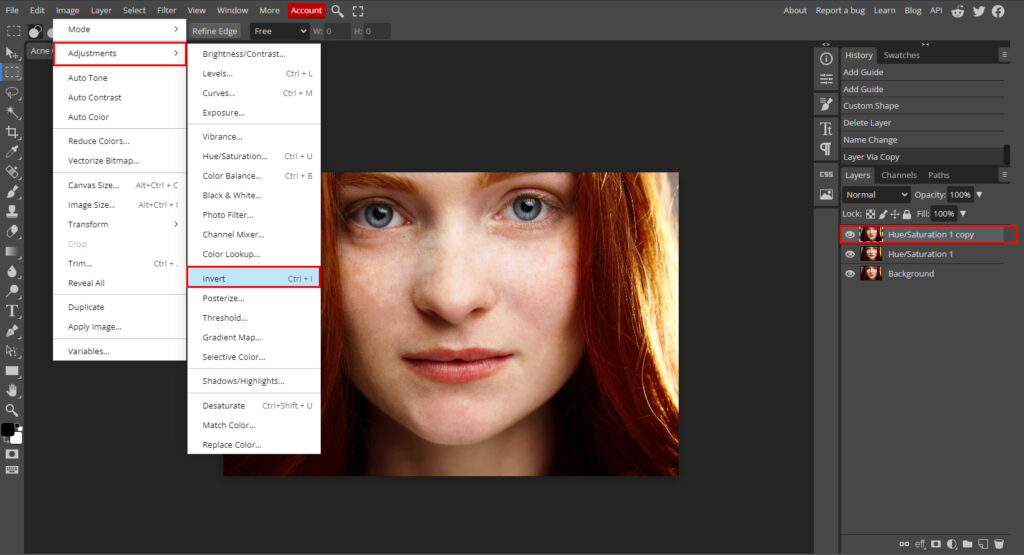
- Duplicate the image (Hue/Saturation 1) by selecting it and pressing CTRL or COMMAND + J.
- Then go to the Image>Adjustments>Invert on the top toolbar or use the keyboard shortcut CTRL or COMMAND + I.
This will invert the colors of the image, as shown below.
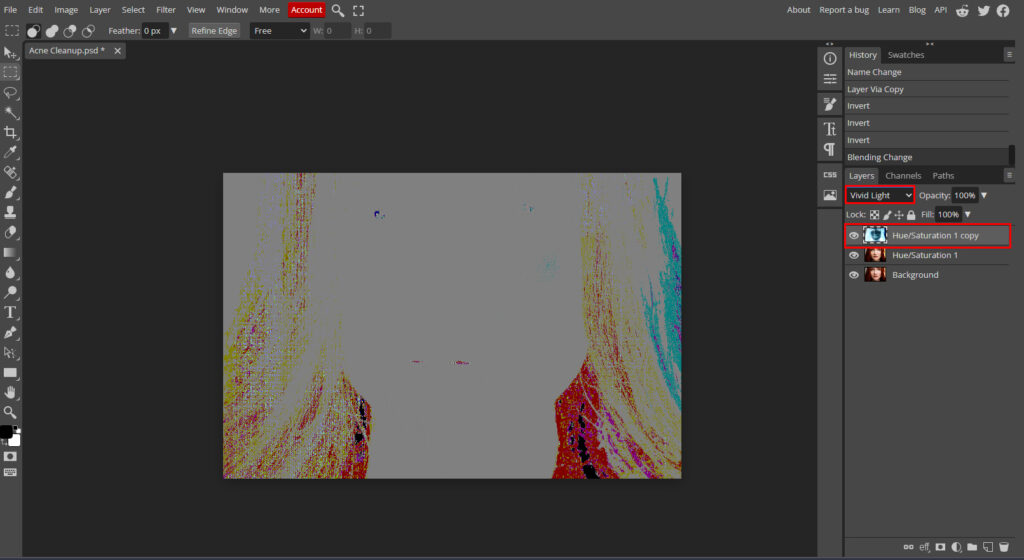
- Then, change the inverted layer Blending Mode to Vivid Light, as shown below. The image now looks kinda strange and distorted, but don’t worry about that.
- Now, go to Filter>Other>High Pass, as shown.
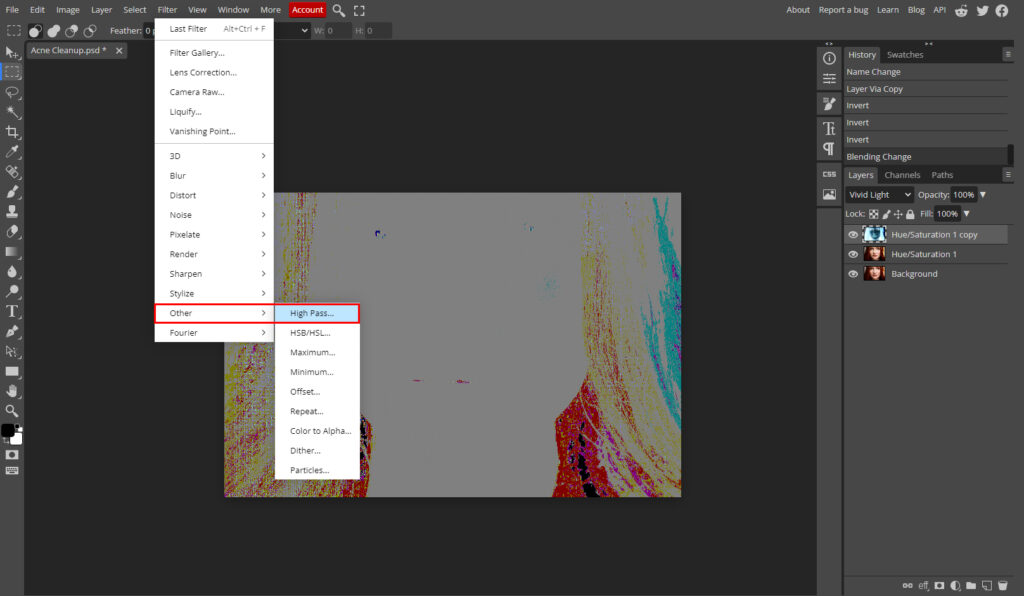
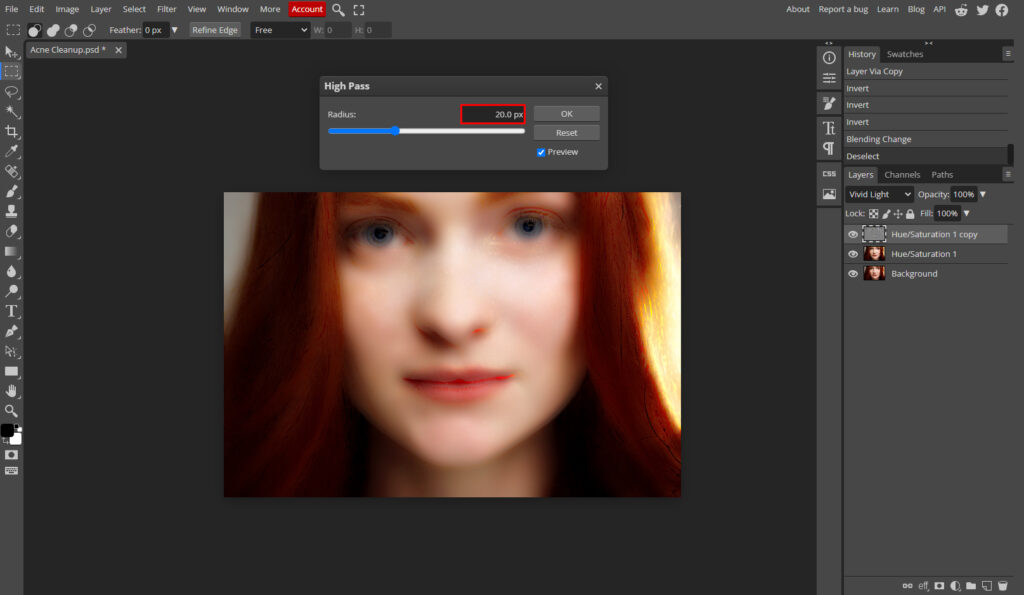
- I’ve selected a radius of 20 pixels in the dialog that gives a strong effect. Play around with this depending on your image; when satisfied, hit OK.
- The next step in this process is to apply a Gaussian Blur. In order to do this, go to Filter>Blur>Gaussian Blur, as shown below.
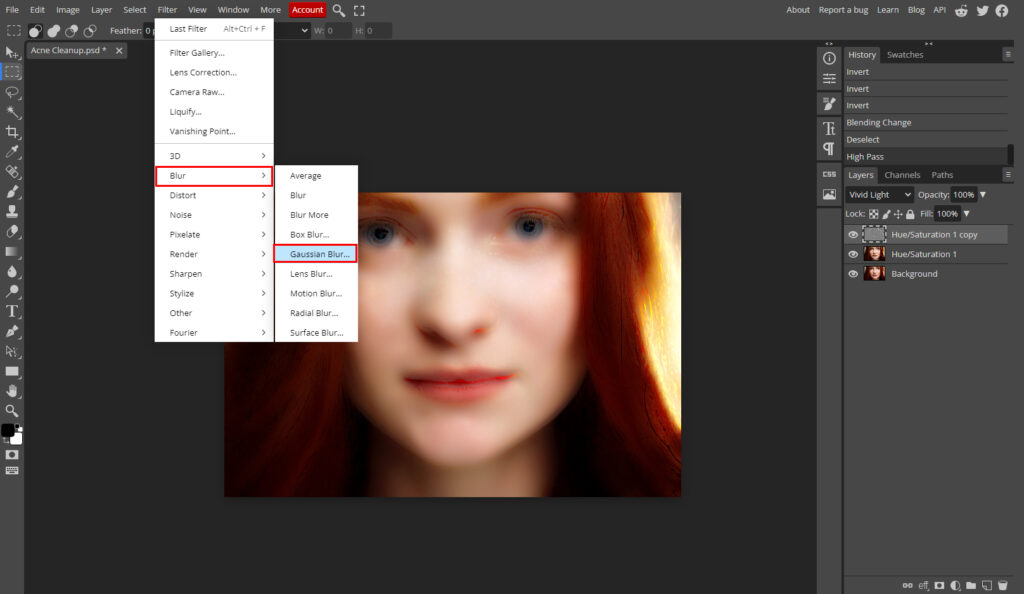
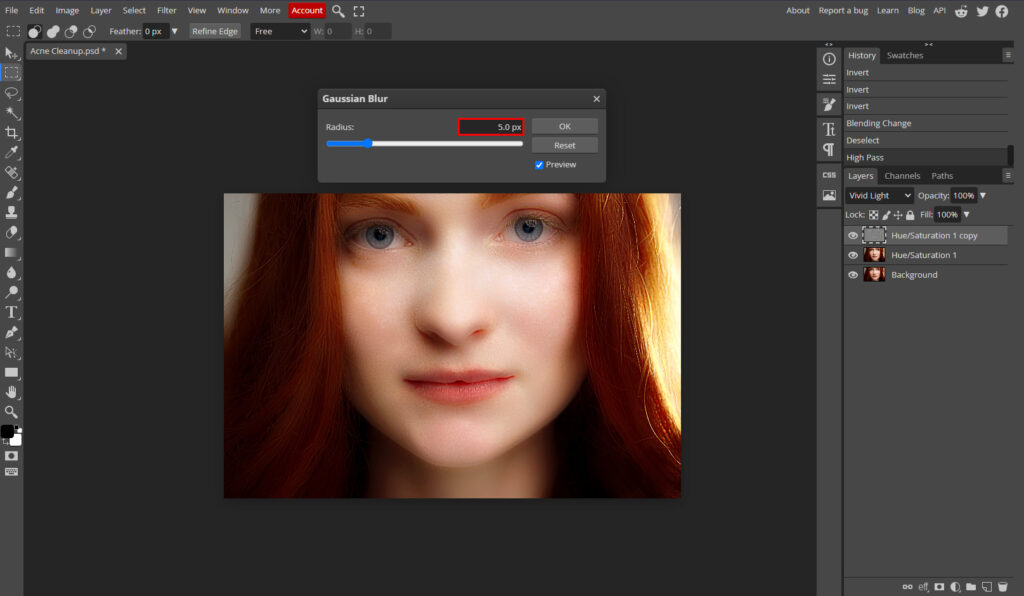
- In the dialog that appears, I’ve selected a radius of 5 pixels. Again, this setting is dependent on the image, but remember that a lower setting will soften the face to a very high degree which is not what we want.
- Play around with this depending on your image; when satisfied, hit OK.
As can be seen, the smoothing effect has been applied to the entire image. We want this to only apply to the face.
- In order to do that, add a Raster Mask to the current layer by clicking on the highlighted button on the bottom right of the screen.
- Then press CTRL or COMMAND + I to invert the mask. This will make the raster mask thumbnail turn black, as shown below.
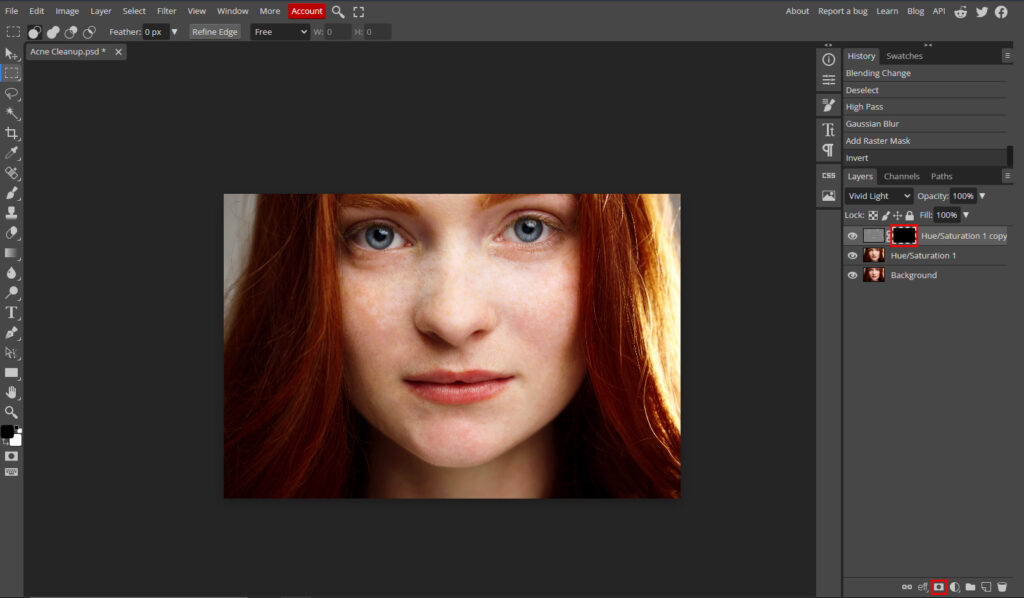
- Select your Brush Tool (B), change the Hardness to 0%, and change the Flow to 50%. And change the foreground color to White.

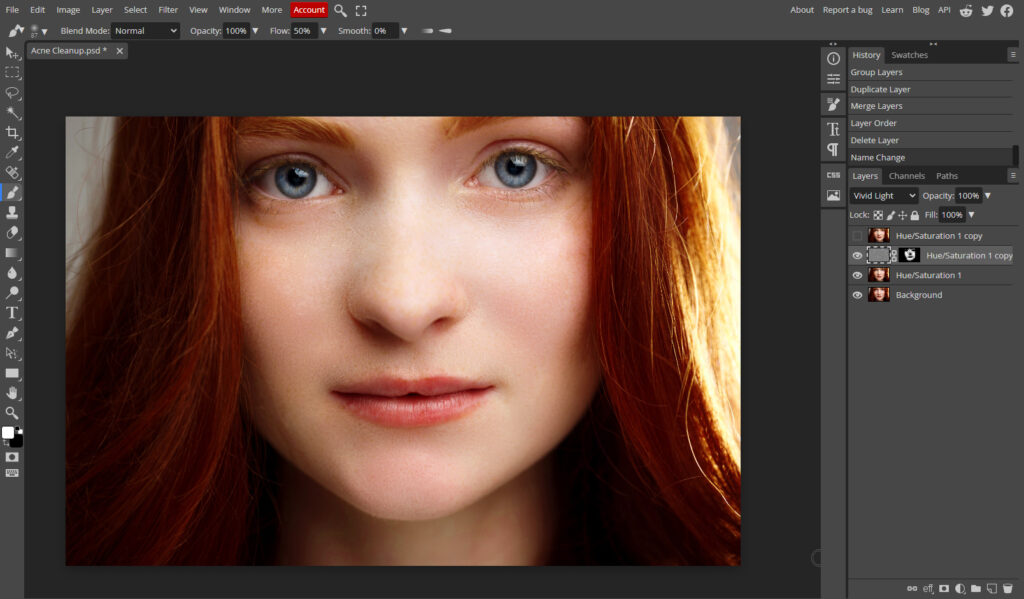
- Now using the brush, start going over only the skin areas making sure to avoid the eyebrows, eyes, lips, and hair. Take some time with this step to get a good effect, as shown below.
Conclusion
Open your image in photopea and remove the redness with Hue and saturation adjustment layer. Use the spot healing tool to further retouch the image by removing the blemishes and red spots on the skin.
Invert the image and then change the blend mode to vivid light. Apply High pass filter and then apply the Gaussian blur. Create a raster mask and then invert it. Paint with a white and softer brush to apply smoothing to the skin.
Expert Rating
Summary
Learning how to clean up and ‘beautify’ faces is an essential skill that will benefit every graphic artist. This method is easy to learn but requires a bit of time and practise to achieve a good effect.


