
While GIMP is fairly straightforward to use, installing plugins can be a bit confusing for new users.
Basically, all you need to do is to download the desired plugin and place it in the Plugin folder. Then, it’s time to locate the installed plugin
This article will explain how to install GIMP plugins briefly in just 3 steps. We will also discuss a few exceptional cases where you might face difficulties, and the ways and means to solve these difficulties as well.
So, are you ready? Let’s show you how to install plugins for GIMP in just 3 steps.
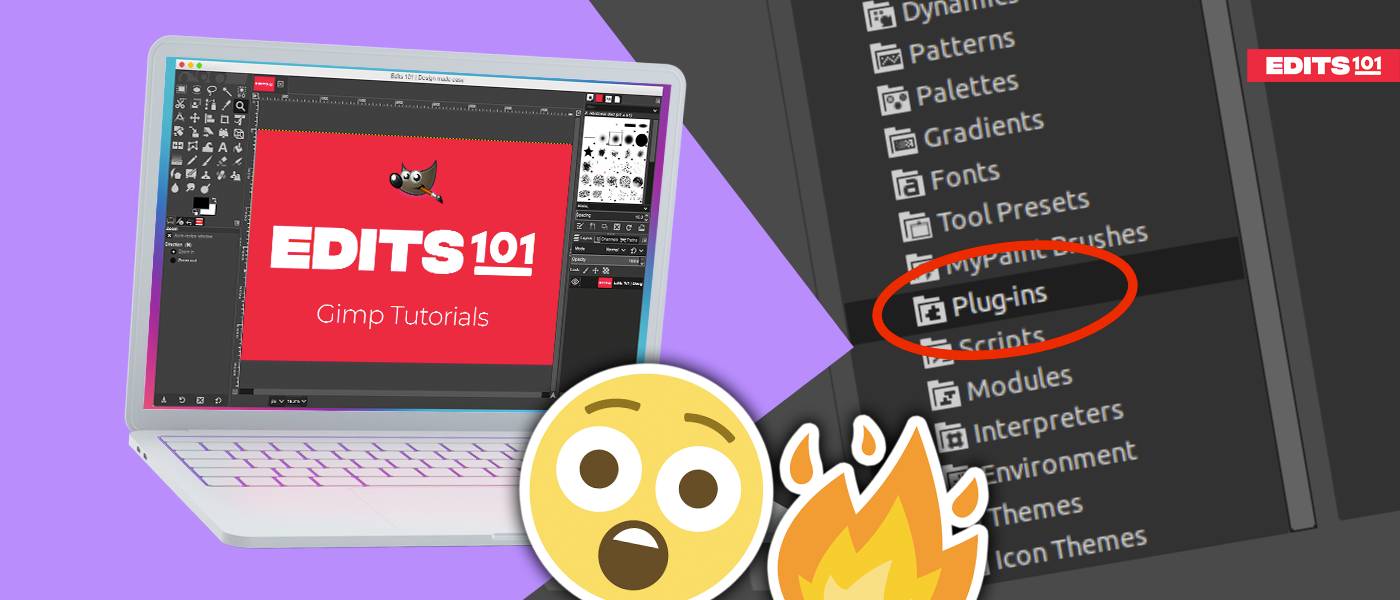
How to Install GIMP Plugins
One of the best ways to use GIMP effectively using plugins. Plugins help to add extra features and functionalities to enhance the experience with GIMP.
Next time if you don’t have a feature in GIMP, you don’t need to worry! You can simply add it via a plugin. Through these plugins, you can add various features to your program, namely editing tools, new filters, and technical features. Certain plugins require an installer in order to be able to install them on your system.
Be careful because certain plugins don’t have guidelines. In most cases, they have guidelines on how to be installed and you can simply have to follow them.
Step 01: Download the GIMP Plugin
Initially, you need to download the desired plugin from the website of the plugin’s developer.
You can download free, paid as well as software from GitHub and Sourceforge. Depending on your requirement, you can choose the best option and download the desired plugin to get started with the installation procedure.
That’s it! Next, let’s get started with the installation procedure.
Step 02: Where is the plugins folder located? Open a Preferences menu
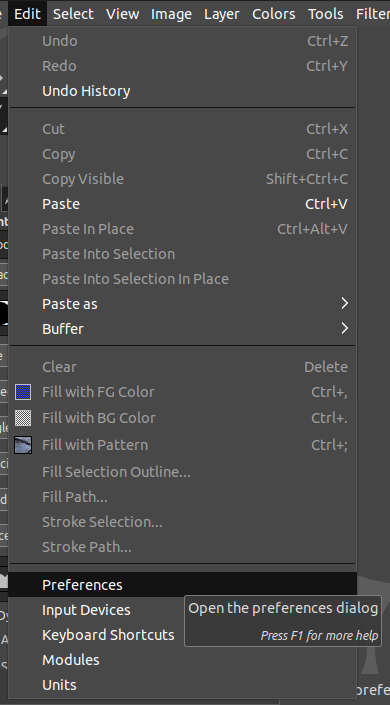
After installing the desired plugin, let’s locate the folder location in order to add them to GIMP. Firstly, go to the Preferences menu to locate the folder location. Follow the below steps to go to the Preferences menu,
- Go to the Edit menu.
- Click Preferences.
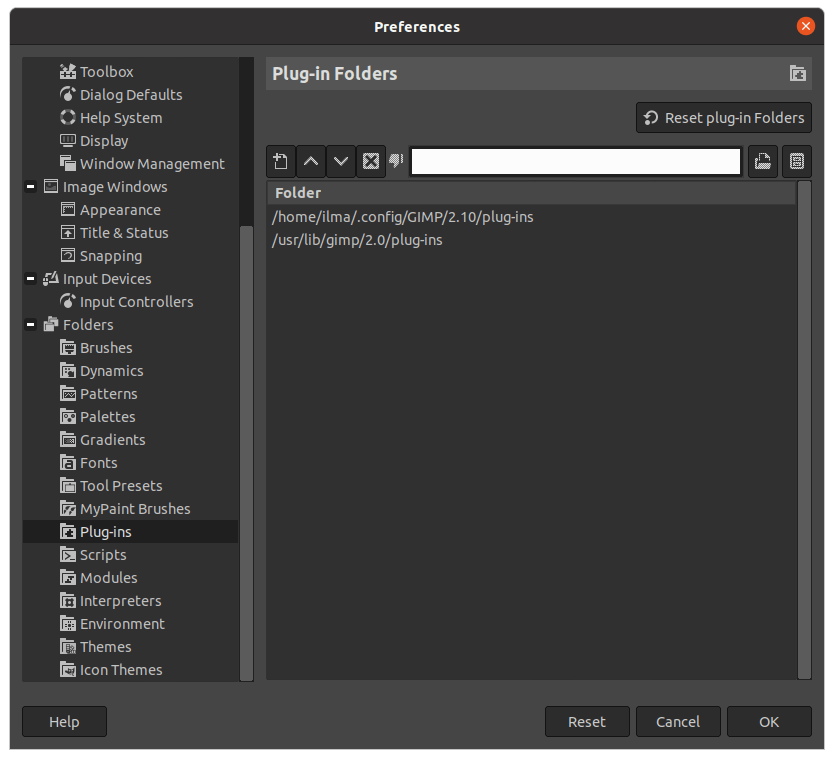
A dialog would appear displaying plenty of options on the left-hand side. Each one consists of the main folder and a few sub-folders below them indicating what these folders offer.
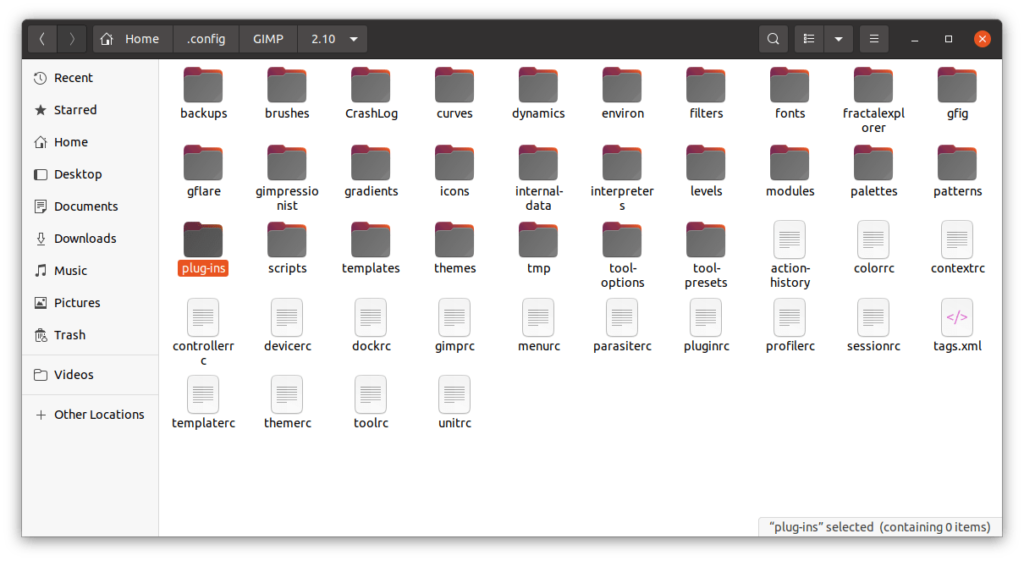
Step 03: Locate the “Plugin” folder
Among the folders on the left-hand side of the dialog,
- Click the “+” icon which is beside the Folders option.
- As soon as you click, it drop-downs plenty of Folders located below itself appear.
- Now, click the Plugin option.
Step 04: Find the Plugin in the folder location
As soon as you find the Plugin folder, the two locations where GIMP stores the Plugin are displayed on the right-hand side.
There are two folders, namely the user profile folder and the system installation folder. Among them, you can click any of the folder locations and click on the “Show file location in the File Manager “ icon (which is a small cabinet icon located in the upper right side of the current dialog).
As soon as you click the first option in the Preference dialog, this would open the location of the Plugin folder as displayed below.
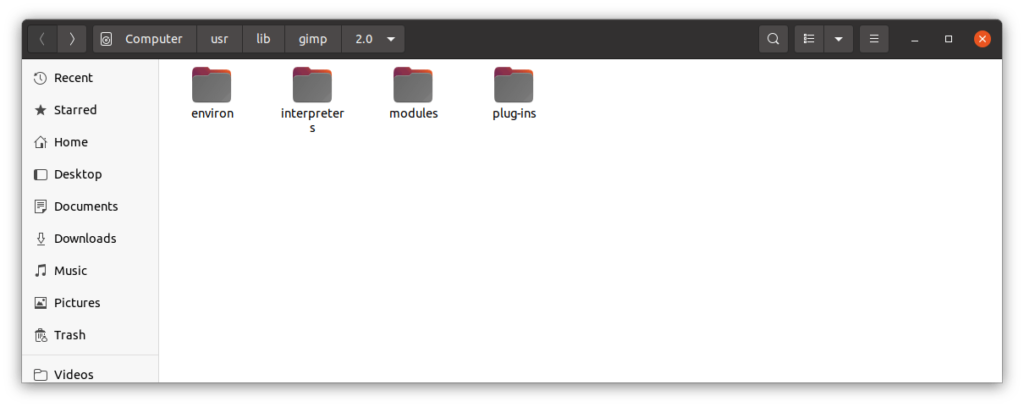
If you choose the second option, you are redirected to the below folder.
Whatever option you choose, simply open the Plug-ins folder and drop in the plugin file which you downloaded. It is difficult to locate the right folder manually, therefore this is an easy way to locate the specific Plugin folder.
Simply, go to the specific folder where you downloaded your plugin. Generally, all the downloads are stored in the Downloads folder as displayed.
Once you open the specific downloaded Plugin. Cut and paste or copy and paste the specific plugin file into the opened folder location. Once you have completed this step, simply click OK in the Preferences dialog.
Exception:
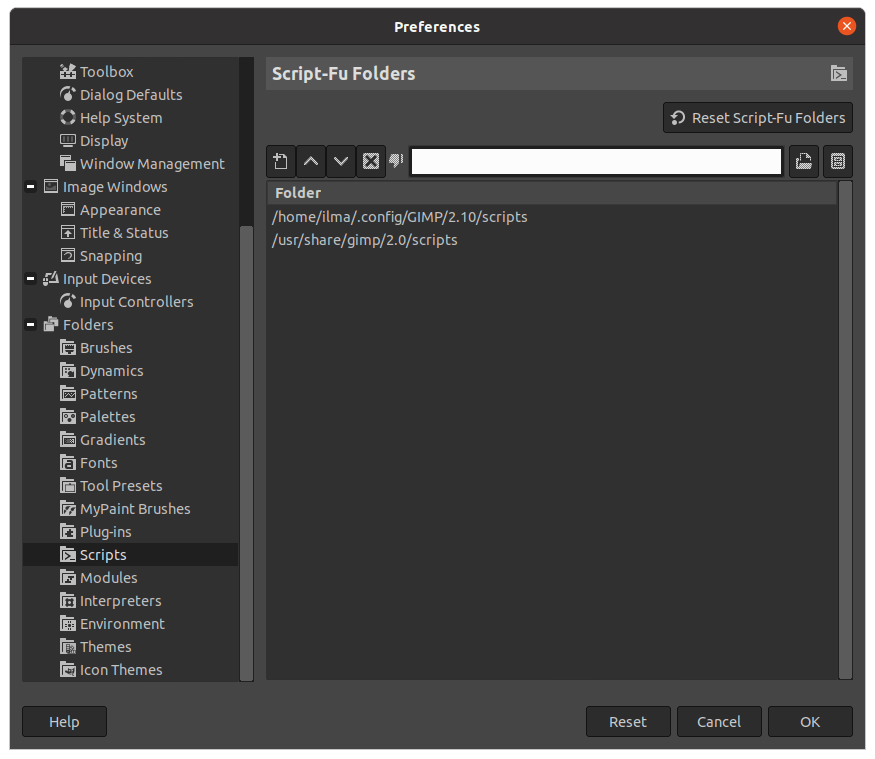
- If your plugin has the extension .scm, choose the Scripts folder instead of the plugins folder and paste it into the folder location.
- Below is the image you will see when you locate the Scripts folder through the Preference dialog
- The reason behind it is that .scm files are scripts created in the Script-Fu scripting language in GIMP.
How to locate the installed plugin?
After you have placed the desired plugin in the Plugin folder, it’s time to check the functionality of the plugin you have installed.
Now, close the GIMP application if you have opened it previously. Then, open it again. When you open it again, GIMP would detect the plugin folder including the changes you have made.
Now, it’s time to locate the installed plugin. There are a few easy destinations where you can locate the plugins as mentioned below:
- Edit menu
- Tools menu
- Filters menu
- Image menu
These are the few exceptional cases when you are unable to locate the desired plugin:
- Certain plugins open only if you open an image.
- Certain plugins are displayed in their specific dockable windows.
- If you are unable to locate it using these methods, please check the plugin guidelines on the way to locate the specific plugin.
That’s it! We have covered all the essentials. You learned how to install GIMP plugins and the different ways to locate the GIMP plugins as well. We also gave you an insight into the exceptional cases when you will not be able to locate a plugin, in case you face any difficulties.
Is GIMP safe?
It’s important to download plugins for GIMP from official websites to ensure that you are getting the legitimate version and not a malicious file that would attack your device.
Also, as with any software, it is important to keep GIMP updated to the latest version to ensure that any security vulnerabilities are fixed and to benefit from new features and updates.
In general, GIMP is considered to be a safe software, but it’s always a good idea to take the appropriate precautions to protect your computer and personal information when downloading files online.
Conclusion
In conclusion, installing GIMP plugins is a simple process that only requires three steps. First, download the plugin you want to install. Next, unzip the plugin folder and place it in the GIMP plugin directory. Finally, restart GIMP and the plugin will be ready to use.
With just a few clicks, you can add new features and functionality to GIMP.
Thanks for reading & feel free to check out more of our articles!
Expert Rating
Summary
The ability to add third party plugins to GIMP is one of the best features made available to an end user. These plugins can expand Gimp’s scalability and functionality. The tutorial covers the 3 steps required to install plugins within GIMP. Following this tutorial will give the user the best shot at installing such plugins successfully.


