

In this article, we will show you how to blur the background in GIMP using the Blur tool, the Gaussian Blur, and other Blur filters.
These methods can be useful for creating depth in an image or for isolating and drawing attention to the subject. By blurring the background, the foreground will automatically appear sharper and more vibrant.
How to Blur a Background in GIMP
If you want to make your subject stand out in your photo, blurring the background is a great way to do it. GIMP makes it easy to blur backgrounds, and in this article, we’ll show you how. There are various ways to blur the background in GIMP. These are listed below:
- Blur tool
- Gaussian Blur
- Advanced Blur filters
Using The Blur tool in GIMP
You can easily blur the background of an image with a few clicks using the Blur tool. This is the easiest and quickest way to blur the portions of an image in GIMP.
The limitation of using the Blur tool is that the blurring wouldn’t be uniform throughout the image. This is because the more you paint over an area, the more blurred it will become. Play with the opacity in order to control the intensity of the Blur Tool brush strokes.
If you have a simple background that you wish to blur, then the Blur tool is the best tool available.
Step 01: Open an image
To open an image in GIMP,
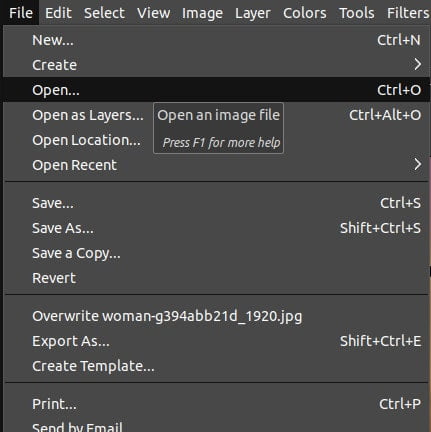
- Simply go to the File menu. Choose the Open option.
- Alternatively, press Ctrl/Cmd+O.
- Also, you can drag and drop the image to the GIMP workspace.
Step 02: Select the Blur tool
Next, let’s select the Blur tool,
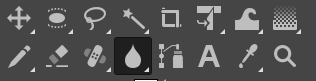
- Click on the Blur tool icon (looks like a teardrop) from the Toolbox.
- Alternatively, use the keyboard shortcut Shift+U to select the Blur tool.
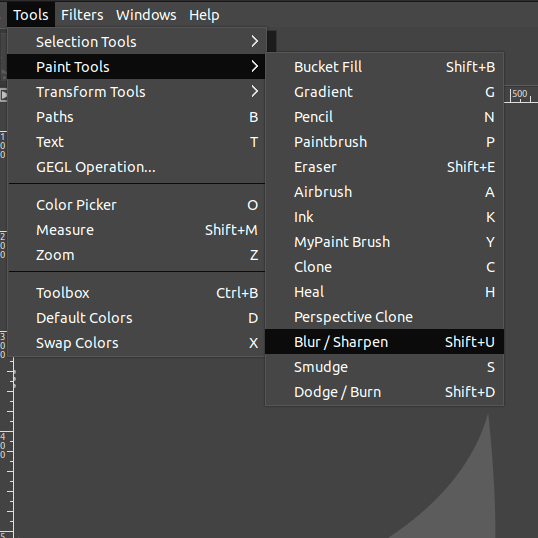
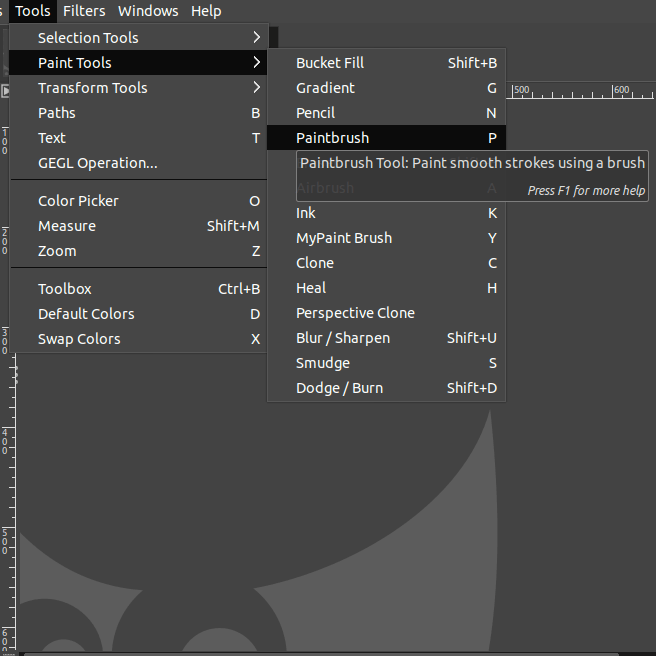
Another method to select the Blur tool would be to:
- Go to the Tools menu.
- Select Paint tools.
- Click the Blur/Sharpen Tool.
You can adjust the Tool options of the Blur tool on the left-hand side of the canvas as per your requirement.
Step 03: Adjust the blur tool settings
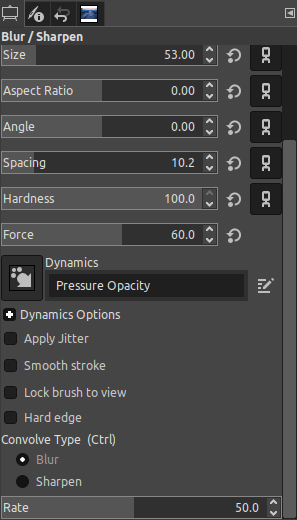
On the left-hand side of the canvas, you can see the Blur tool’s settings. Here, you need to pay attention to a few key points as mentioned below:
- Make the Convolve Type as Blur.
- Adjust the Rate of the blur tool which is placed at the bottom of the blur tool’s settings.
- Adjust the Brush size as needed.
Step 04: Begin to apply the Blur
Now it’s time to apply the blur to the image. It is always ideal to zoom in on the image in the first place before beginning to blur.
To zoom in,
- Press the Ctrl/Cmd key and scroll the mouse wheel to zoom in on the image.
Now you can adjust the position of the image after zooming in, by moving the scrollbars horizontally and vertically across the canvas. Now you can start blurring the background of the image as per your requirement.
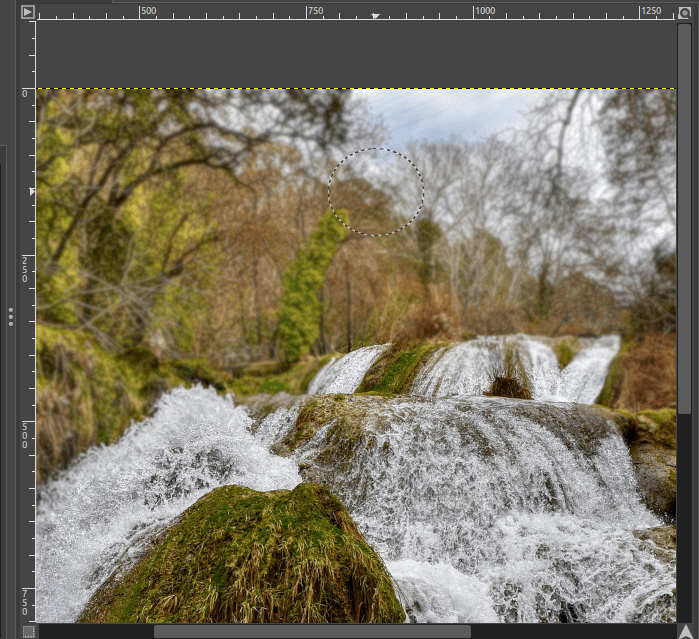
Depending on the brush size for each section, you can use the “[” or the “]” keys to enlarge or reduce the size of the brush stroke.
If you are using it for larger images, the blur tool is very effective. This is because you don’t have to worry about the consistency and the accuracy of the blur level. That also depends on the amount of overlapping brush strokes of the Blur tool. The more strokes, the stronger the effect of the Blur tool.
That’s it! Once you have completed blurring the background, simply zoom out to see the entire image and refine it as necessary.

Using the Gaussian Blur filter in GIMP
Using a Gaussian Blur filter is a great way to extend the blurring of the background for complex images.
Please note that it has some additional work but it’s definitely worth it for amazing results. If you practice this method a couple of times, you will get the hang of it very easily
Before using the Gaussian Blur, you need to duplicate or create a copy of the original image. Then, you will apply the Gaussian Blur filter and use Masking to get the best outcome. Adding the mask layer allows you to selectively apply the blurring to portions of your image.
Step 01: Open an image
To open an image in GIMP,
- Simply go to the File menu. Choose the Open option.
- Alternatively, press Ctrl/Cmd+O.
- Also, you can drag and drop the image to the GIMP workspace.
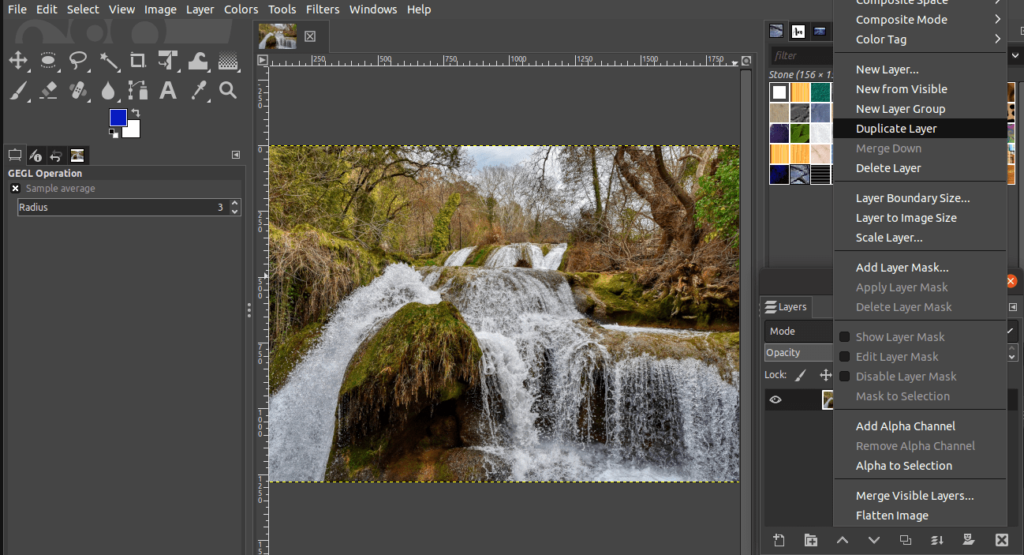
Step 02: Duplicate & Rename the layer
To duplicate the current layer,
- Go to the Layers Dialog on the right-hand side of the canvas.
- Right-click on the current layer.
- A couple of options drop-down. Choose the Duplicate layer option.
- Alternatively, you can simply use the shortcut Shift+Ctrl+D on Windows or Shift+Cmd+D on Mac.
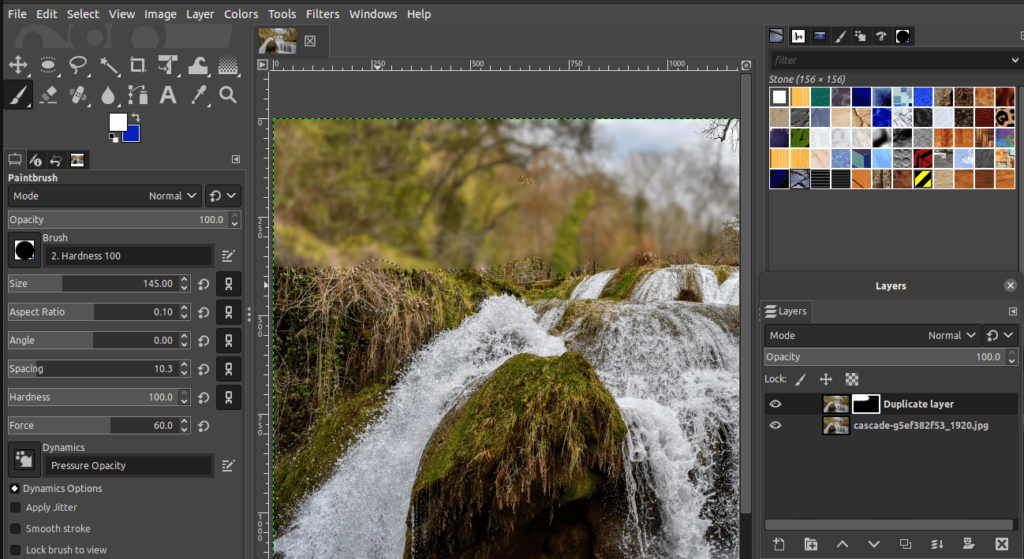
It is important to duplicate the layer as we would apply the Gaussian Blur to the duplicated layer. Now, you need to rename the duplicated layer. You need to rename the current layer to differentiate between the original and the duplicated layer.
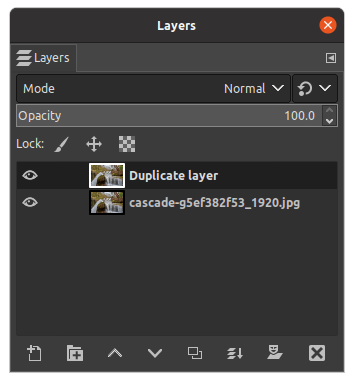
To rename the duplicated layer,
- Double-click on the copied layer.
- Enter the desired name. In this example, it is renamed as a Duplicate layer as displayed below.
- Press Enter.
Step 03: Apply Gaussian Blur
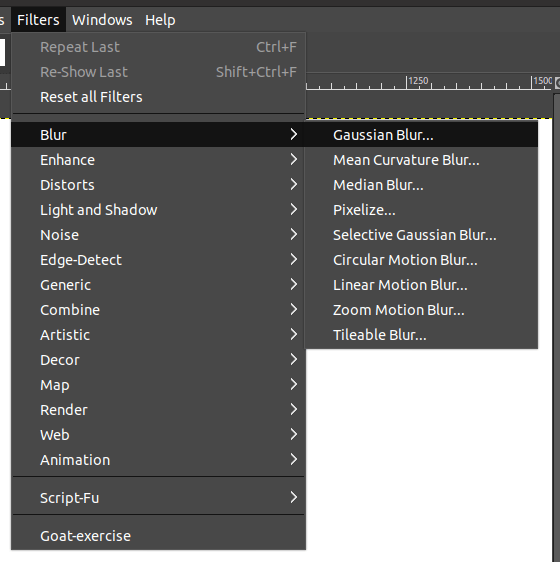
It’s time to apply the Gaussian blur filter onto the copied layer. First, click and select the duplicated or copied layer. To select the Gaussian blur,
- Go to the Filters menu.
- Choose the Blur option.
- Finally, pick the Gaussian Blur.
As soon as you click the Gaussian Blur, a dialog appears to adjust the preferred settings of the filter to be applied. You can adjust the extent to which the blur is applied through the Size X and Size Y sliders.
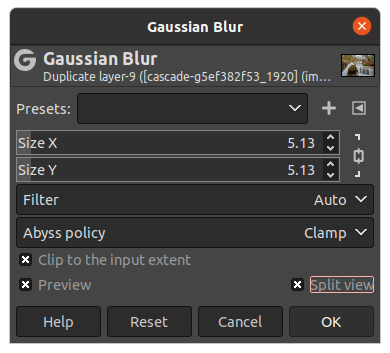
It is recommended to keep the sizes linked to maintain consistency throughout the image.

After you apply the desired blur level, simply click OK.
Step 04: Add Layer Mask
After applying the Gaussian Blur, a layer mask is to be placed over it to control the final outcome of the image. Click and select the duplicated layer onto which the layer mask is applied.
To apply Layer Mask,
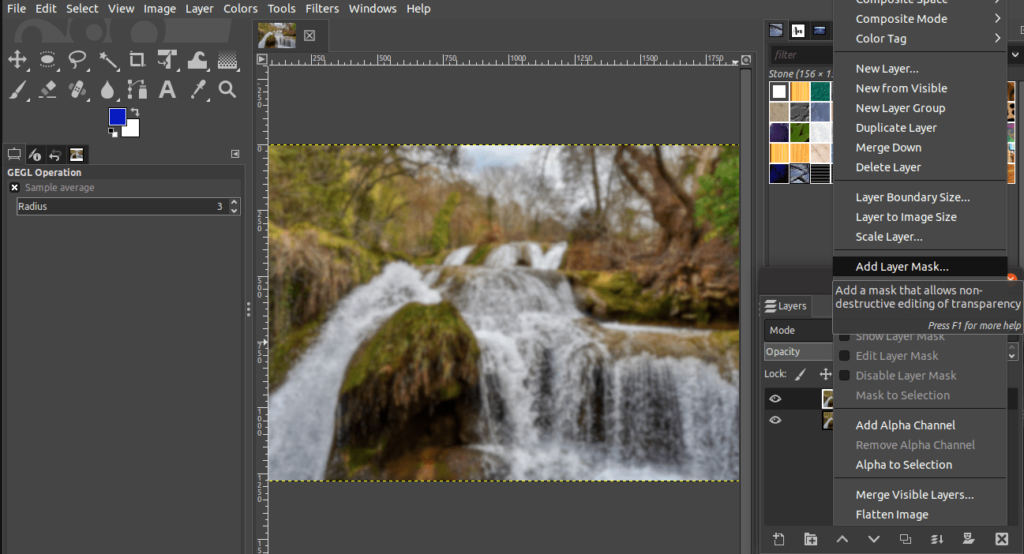
- Go to the Layers Panel on the left-hand side.
- Right-click on the duplicated layer.
- Pick the option Add Layer Mask.
A dialog displaying the “Add a Mask to the Layer” option will pop up. In this case, simply choose the Black (full transparency) option.
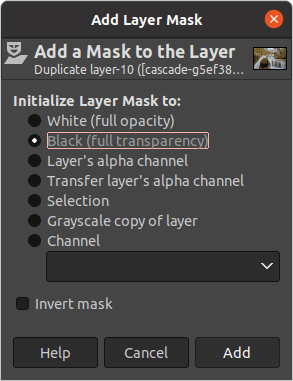
Once you choose the Black Layer Mask, click Add and complete the process. The Black (full transparency) layer adds a mask that hides the blurred pixels which are on the layer we applied the Gaussian Blur filter to.
Here, white pixels indicate that the pixels are 100% visible. The Black pixels indicate that the pixels are 100% transparent.
Step 05: Pick the Paintbrush tool
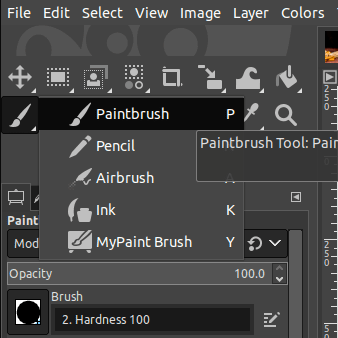
Now, choose a Paintbrush to reveal the blur layer. To choose a Paintbrush,
- Click the Paintbrush tool icon from the Toolbox.
- Alternatively, use the keyboard shortcut ‘P’.
Another way to select the Paintbrush tool,
- Go to the Tools menu.
- Choose the Paint tools.
- Click the Paintbrush tool.
Now, pick the white color as the foreground color and begin to apply it to the image. You would notice that the blur layer appears on the sections where you paint.
If you prefer to display the blur you applied,
- Go to the Layers Panel on the right-hand side canvas.
- Right-click on the duplicated layer.
- Click the option Show Layer Mask.
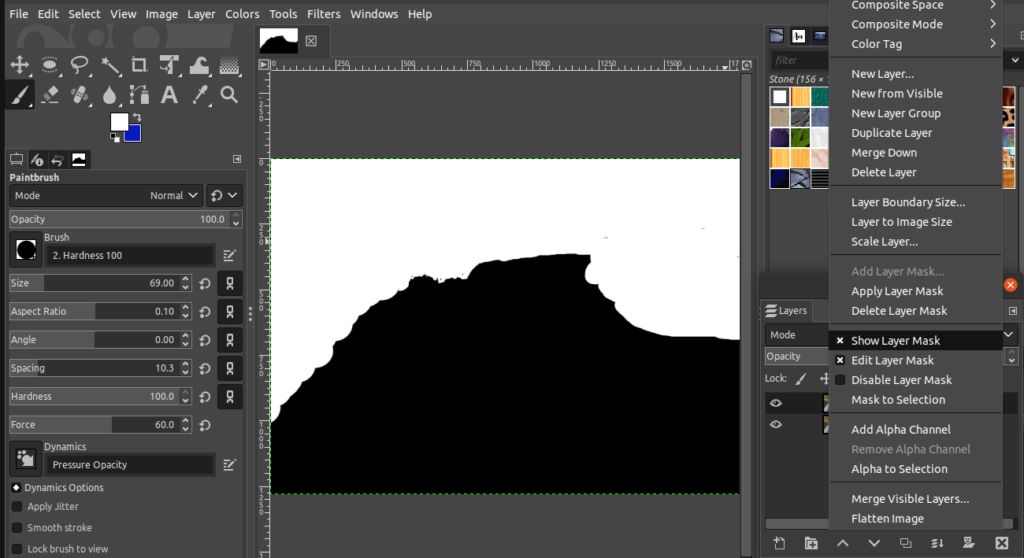
This displays the layer masks on the Layers Dialog.
What are Advanced Blur filters in Gimp?
You can also apply advanced blur filters to the images. To choose a Blur filter,
- Go to the Filters Menu.
- Choose the Blur option.
- Choose the desired blur filter.
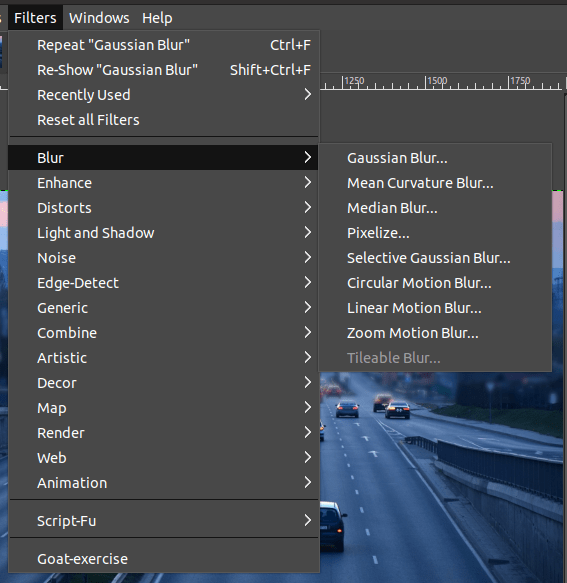
You have a couple of blur filters under the blur option as displayed below:
- Mean Curvature Blur
- Median
- Pixelize
- Selective Gaussian Blur
- Circular Motion Blur
- Linear Motion Blur
- Zoom Motion Blur
Among them, you can choose a blur filter that suits your requirements to blur the background of the image.
Bonus Tips
What if the blur tool is not working?
If for some reason your blur tool isn’t working, you can try the following:
- Check Hardness:
Incase the hardness level of the blur tool is set to 0 or a very low number, it is possible the effect is not applied or too subtle, respectively. Increasing the hardness setting to 100 may help to solve the issue. - Reset Settings:
If increasing the hardness did not fix the blur tool, you can also reset the blur tool from it’s tool settings dialog. This should reset the tool to it’s default state and should almost always fix any issues with the tool.
Conclusion
In conclusion, blurring a background in GIMP can be done using the Blur tool, Gaussian Blur, and other Blur filters. Each filter has its own unique settings that can be adjusted to create the perfect blur effect.
By following the steps outlined in this article, you can achieve a professional-looking image with a soft, dreamy background.
Thanks for reading & feel free to check out more of our articles!
Expert Rating
Summary
Blurring elements of an image or an entire image is very easy in GIMP. Following the tutorial will help you get the best results. Great functionality & scale overall – using a bunch of easy techniques together to achieve an intermediate difficulty outcome.


