
Exporting your project in GIMP can be a daunting task, especially for beginners. Initially, you need to export the image using the Export As option and amend the necessary export settings. Finally, you can export the file effectively.
This article will provide step-by-step instructions on how to export your images from GIMP quickly and easily. We will discuss different file types, export settings, and tips for optimizing the quality of your exported images.
How to Export in GIMP
The standard file format assigned for GIMP is the XCF file format. Once you complete your editing process, you can convert the XCF file format to any desired file format. In this article, you will learn all you need to know about exporting in GIMP.
Step 01: Export the image
If you want to export an image in GIMP, follow the below steps. To begin exporting,
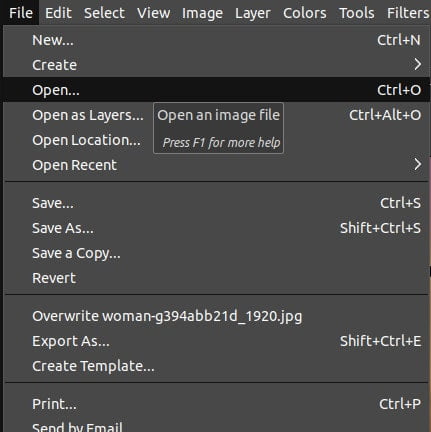
- Go to the File menu.
- Click Export As.
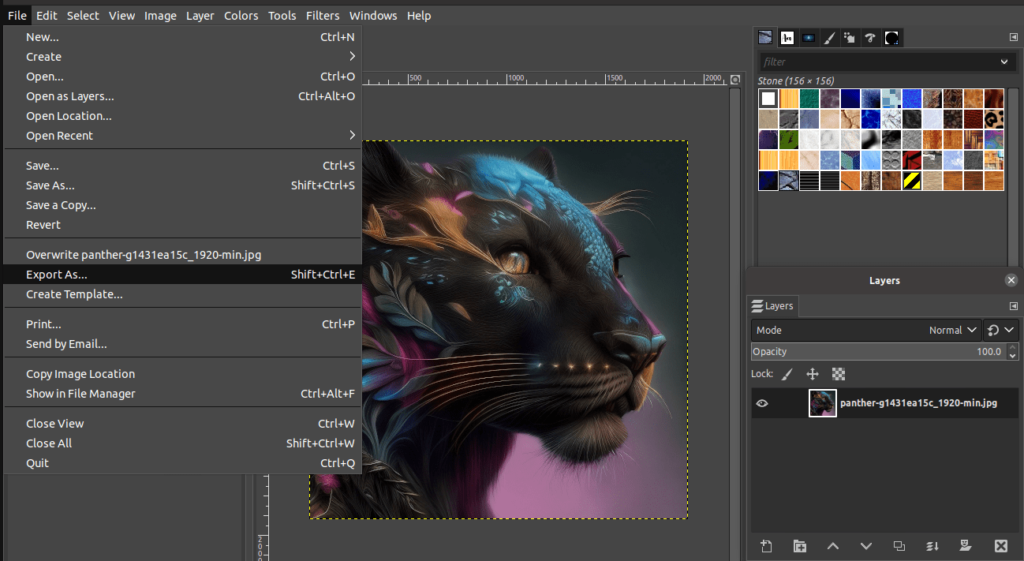
Note– You can also use the keyboard shortcut Ctrl+Shift+E to begin the exporting process.
Step 02: Choose the desired location Where You Want to Export
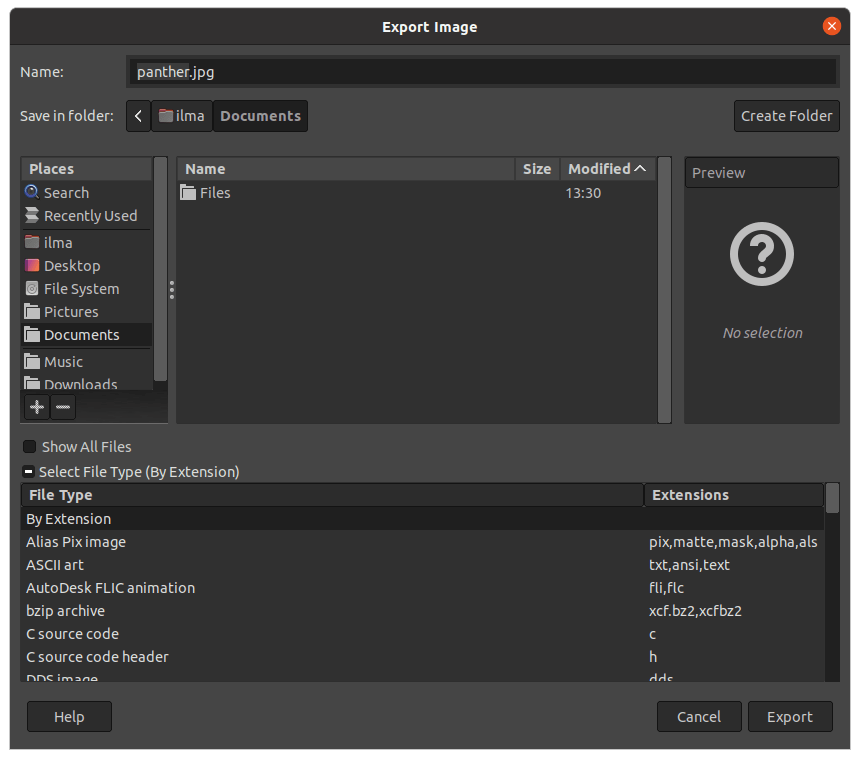
As soon as you click the Export As option, the below dialog will appear. On the left-hand side of the dialog, the folders of your device are displayed. You can click and go to the desired location where to export the image.
The image is exported and saved to the location you chose. So, make sure to choose the correct destination to export your image.
Step 03: Type the desired name
After you choose the preferred location to save your image, you can type the desired name for the file next to the displayed extension. You can replace that name with another name as per your requirement.

The name that appears before the extension, is the name that will help you to locate the image. If the file extension that you require is different, don’t worry we will show you how to amend it in the next step. After you type the name, it’s time to change the file format.
Step 04: Choose the desired file format
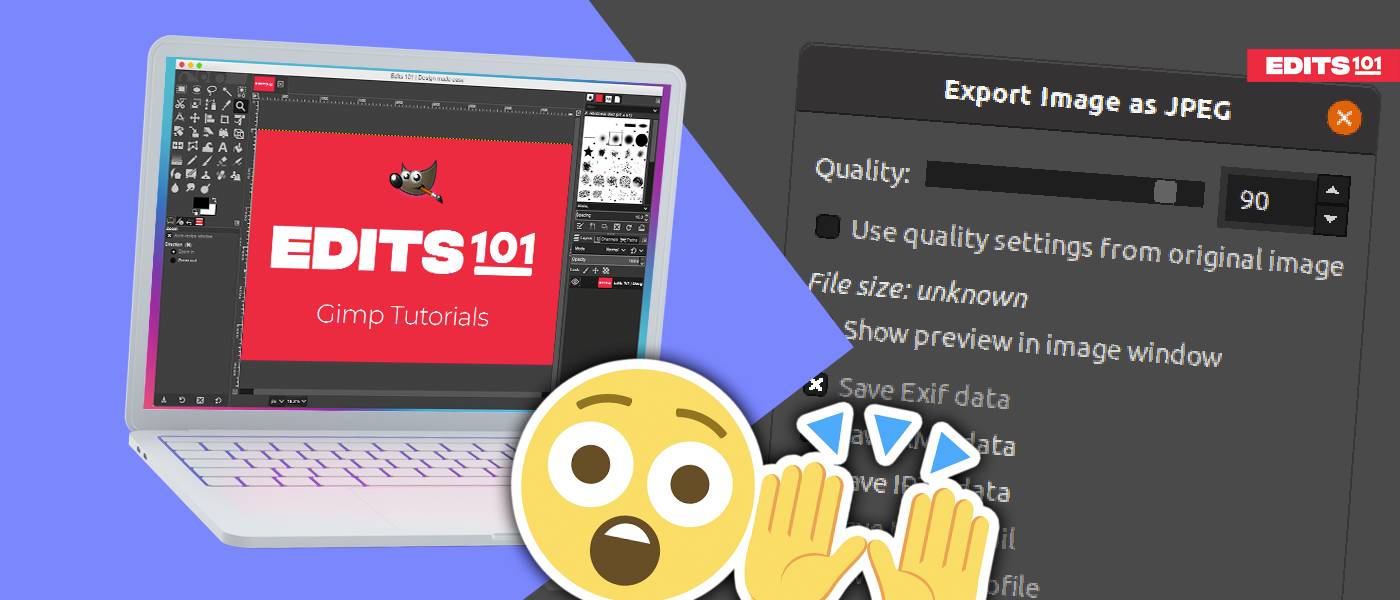
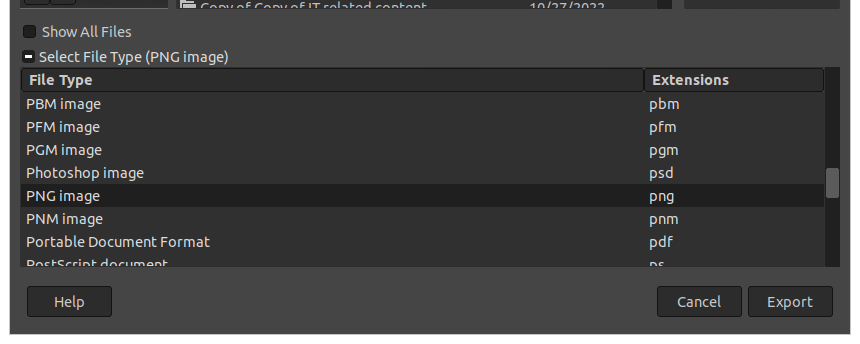
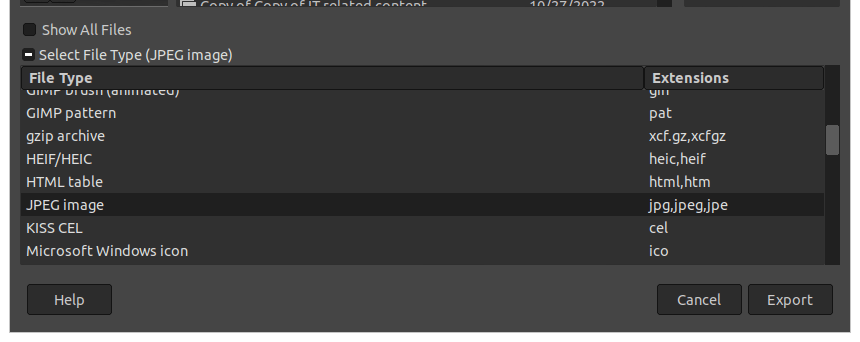
As soon as you click Export As, a dialog with all the export options which are available will appear. As shown below, the list of file types is endless. The most popular are JPEG, PNG, or GIF.
If you click on a file type, for example JPEG, the extension of the file automatically changes. JPEG as well. It indicates that the image or the file can be exported as JPEG.
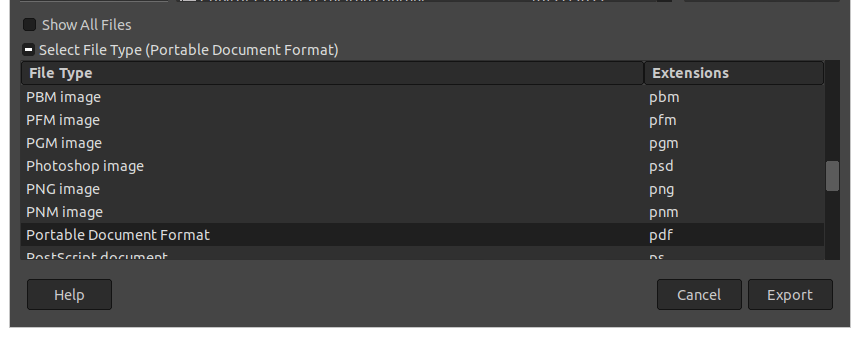
You can also export images in PDF format as displayed below.
By following these steps, you can choose the desired export file type as per your requirement. After you choose the file format, click Export. Another export dialog appears to further adjust the export settings.
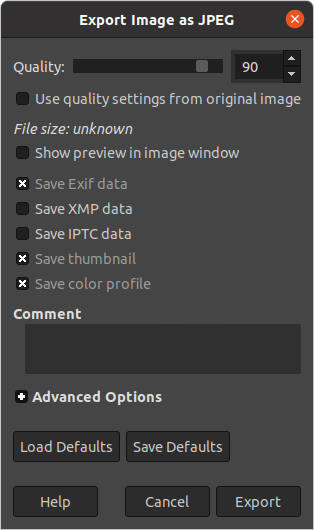
Once you confirm the options, simply click on Export.
Step 05: Locate the export image
After you have exported the image successfully, it’s time to locate the image.
You can find the image in the file you chose to export your image in Step 01. Once you go to the specific location, you can find the exported image in the name you provided in Step 02.
If you were able to locate the image successfully, you have completed the exporting of the image successfully.
How to export as an SVG in GIMP
In this guide, we’ll provide an example by showing you how to export your GIMP creation as an SVG file while preserving all of its crisp, scalable lines and shapes.
Step 01: Open the image
Open the image in GIMP. To open an image in GIMP,
- Simply go to the File menu. Choose the Open option.
- Alternatively, press Ctrl/Cmd+O.
- Also, you can drag and drop the image to the GIMP workspace.
Step 02: Add a layer
To add a layer,
- Go to the Layers Menu.
- Click New Layer.
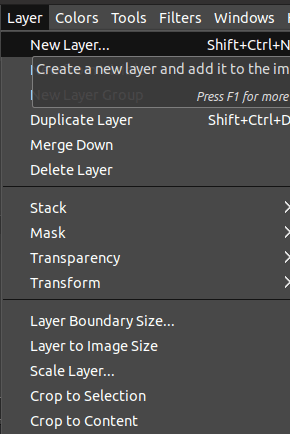
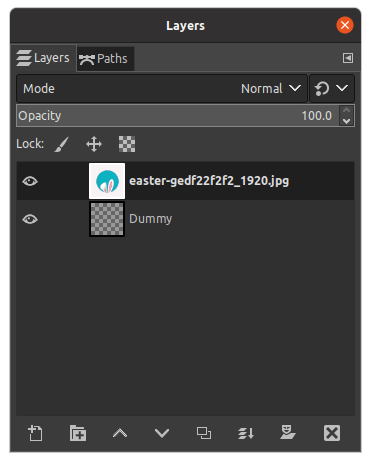
You will notice that the layer is shown in the Layers dialog on the right side of the canvas.
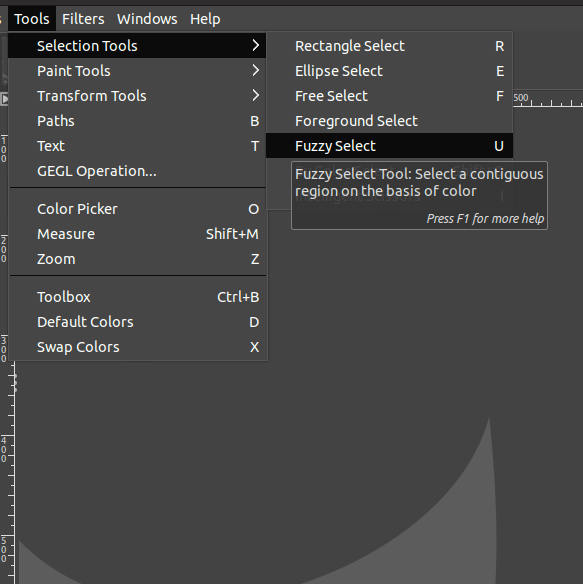
Step 03: Choose the Fuzzy Select tool
Next, you need to choose the Fuzzy Select tool to select portions of the image having a similar color. To choose the Fuzzy Select tool,
- Go to the Toolbox.
- Click on the Fuzzy Select tool icon.
- Alternatively, use the keyboard shortcut “U”.
Alternatively,
- Go to the Tools menu.
- Choose Selection Tools.
- Click the Fuzzy Select tool.
Once you choose it, click on the area you wish to select. Once you click on it and you’re happy with the selection, press the Delete key to remove the selection.
Step 04: Create a path
You need to create a path to export as an SVG file. To do so,
- Go to the Select menu in the top toolbar.
- Click On To Path.
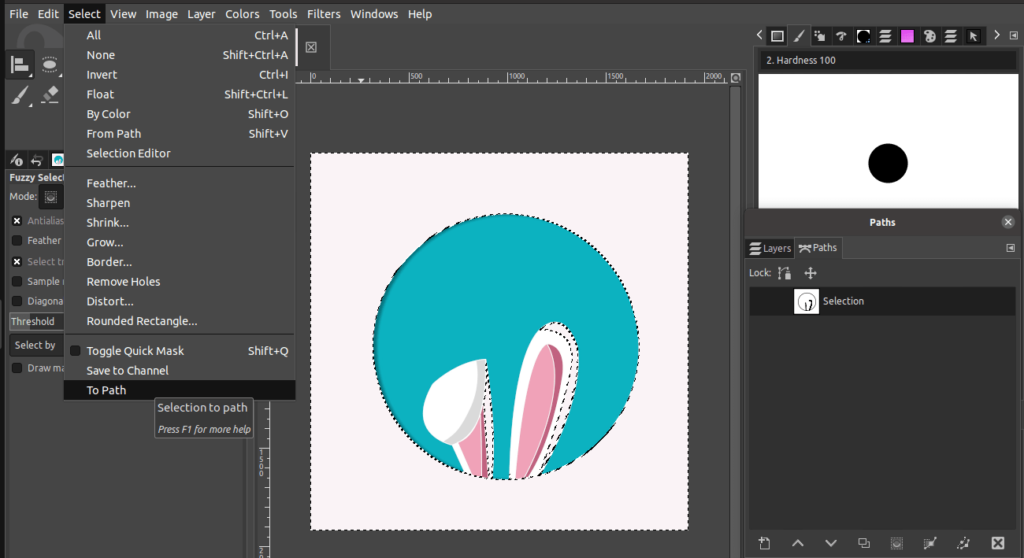
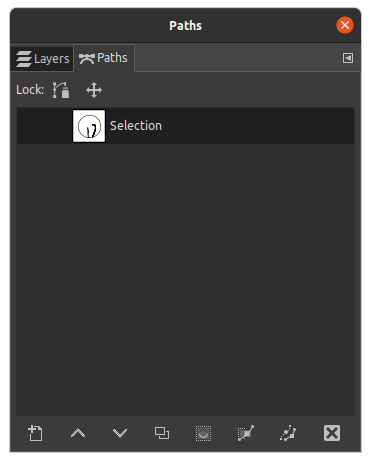
As soon as you choose it, you will notice that the path appears in the Paths dialog.
Next, you can export this path as SVG.
Step 05: Export the path
To export the path as SVG,
- Go to the Paths dialog.
- Right-click on the path layer created.
- Choose the option Export path.
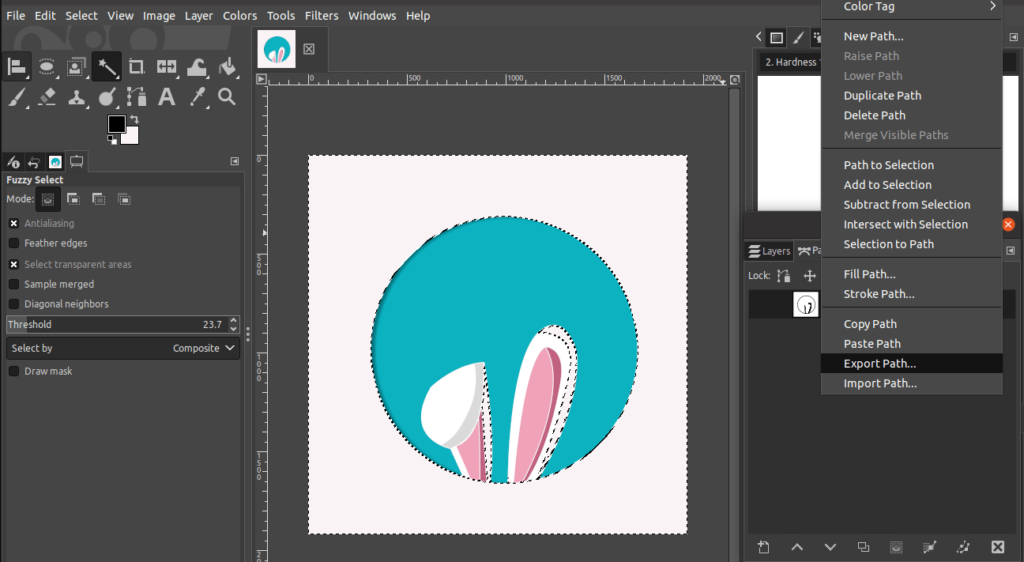
As soon as you click, the export dialog will be displayed. Choose the desired location to save the SVG file and the desired name. Next, click Export.

You will notice that the image is exported as SVG.
Conclusion
In conclusion, exporting images in GIMP is a straightforward process.
To export an image, you first need to navigate to the File menu, then select Export As. Next, you should enter a file name and choose your desired file type. Then, click on Export to save the image. Finally, if necessary, you may also need to adjust your image’s size or quality before exporting it.
Thanks for reading & feel free to check out more of our articles!
Expert Rating
Summary
The ability to export your projects from GIMP to the desired format is the final step in the design journey and the most vital in order to successfully realise and bring your vision to reality. Coversely it is also an extremely straightforward process and doens’t take much practise to execute.


