
Creating a precise image cut out from its background can be a difficult task. Fortunately, the open-source image manipulation software GIMP has the perfect tools to make this process easier and faster.
In this article, we will show you how to use two of these tools – Fuzzy Select and Paths – to cutout an object in GIMP.
Cut Out an Object using the Paths Tool
No matter if the image has a complex or a simple background, you can cut out the subject of an image precisely using the Paths tool in GIMP.
Step 01: Open an image
To open an image in GIMP,
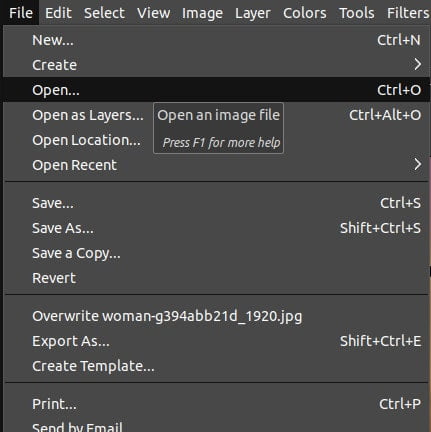
- Simply go to the File menu. Choose the Open option.
- Alternatively, press Ctrl/Cmd+O.
- Also, you can drag and drop the image to the GIMP workspace.
Step 02: Choose the Paths tool
Next, we will use the Paths tool to select the subject of the image. To select the Paths tool,
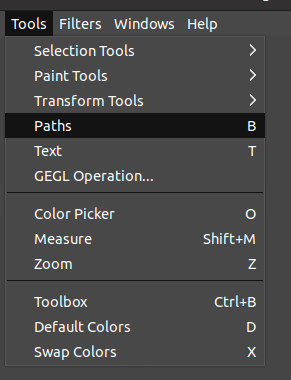
- Go to the Tools menu and click on Paths to select the Path tool.
- Alternatively, use the keyboard shortcut “B”.
Another way to select the Paths tool is to:
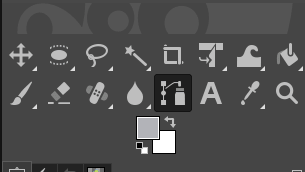
- Click on the Paths tool icon from the Toolbox.
Step 04: Perform the selection
Now it’s time to make the selection using the Paths tool. You can simply start clicking on the outline of the image and keep on clicking to create points using the Paths tool.
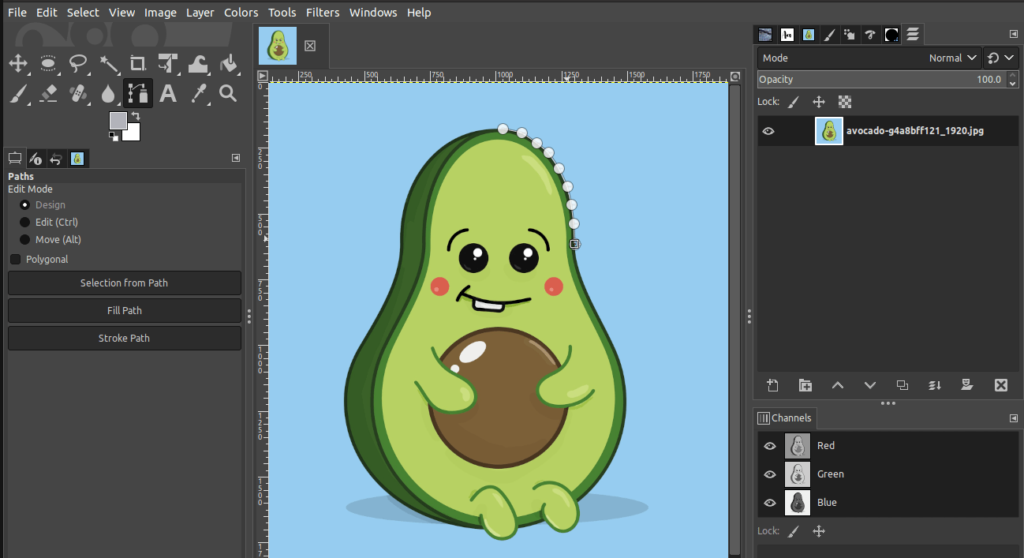
The lines created using the Paths tool display the selection applied to the image. You can adjust the anchors of the Paths tool by simply dragging and moving them. By following these steps you can make a precise selection of the image.
When you reach the end, make sure to join the final anchor with the first anchor by left-clicking and pressing the Ctrl/Cmd button on your keyboard.
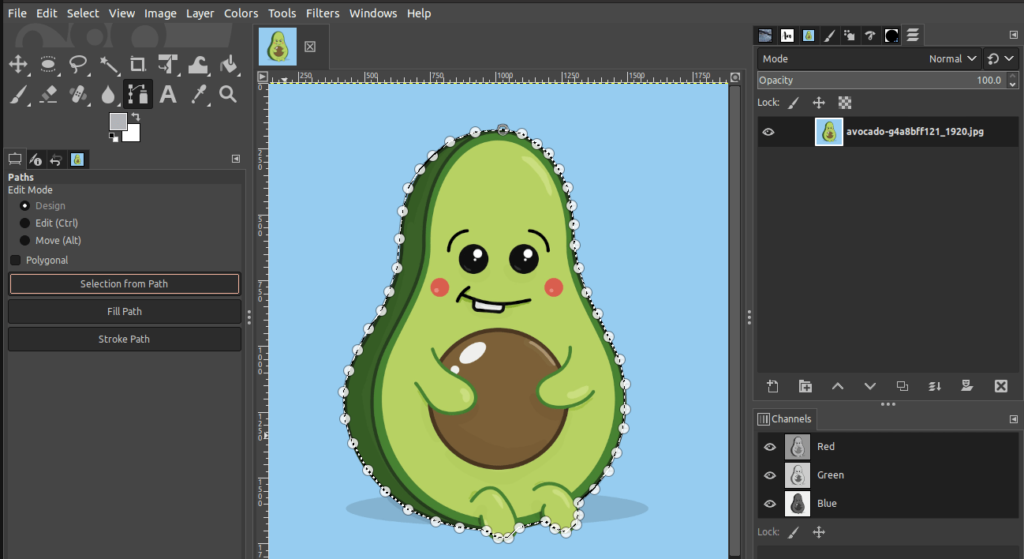
When you join the first and last dots, the path around the subject you want to cut out will be complete.
Step 05: Confirm the Selection
After you complete the path using the Paths tool, it’s time to apply the selection.
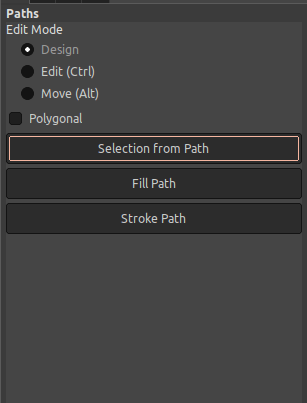
- On the left-hand side of the canvas, the Tool options of the Paths tool are displayed.
- A couple of options are displayed here. Simply choose the Selection From Path option. This will create a selection out of the path you previously made.
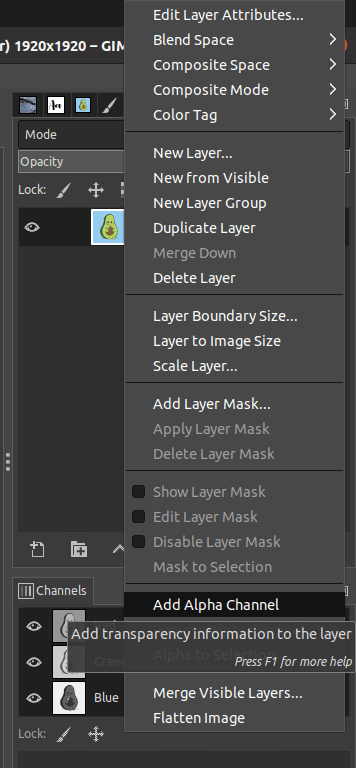
Step 06: Add an Alpha Channel
Next, you need to create an Alpha channel. The Alpha channel helps to create a transparent background for the image. To add the alpha channel,
- Right-click on the current layer.
- A couple of options are displayed here. Choose the Add Alpha channel option.
Step 07: Invert the selection
After applying the alpha channel, the next step is to invert the selection you have made. To invert the selection,
- Go to the Select menu in the top toolbar. Then, select the Invert Selection option.
- Alternatively, press the keyboard shortcut “Ctrl/Cmd+I” to invert the selection.
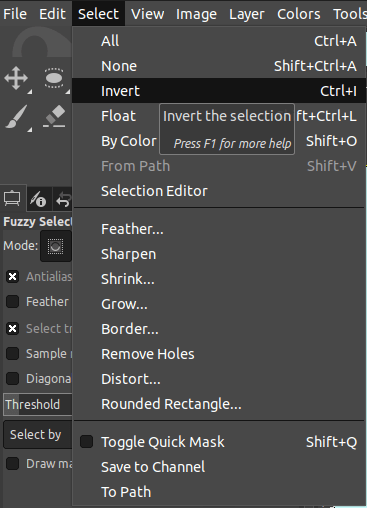
Once you complete the inversion, the selection marquee is displayed around the subject of the image.
Step 08: Delete the background
The inverted selection separates the subject from the background of the image. It allows you to remove the background of the image easily as well. Next, press the Delete key to remove the background of the image.
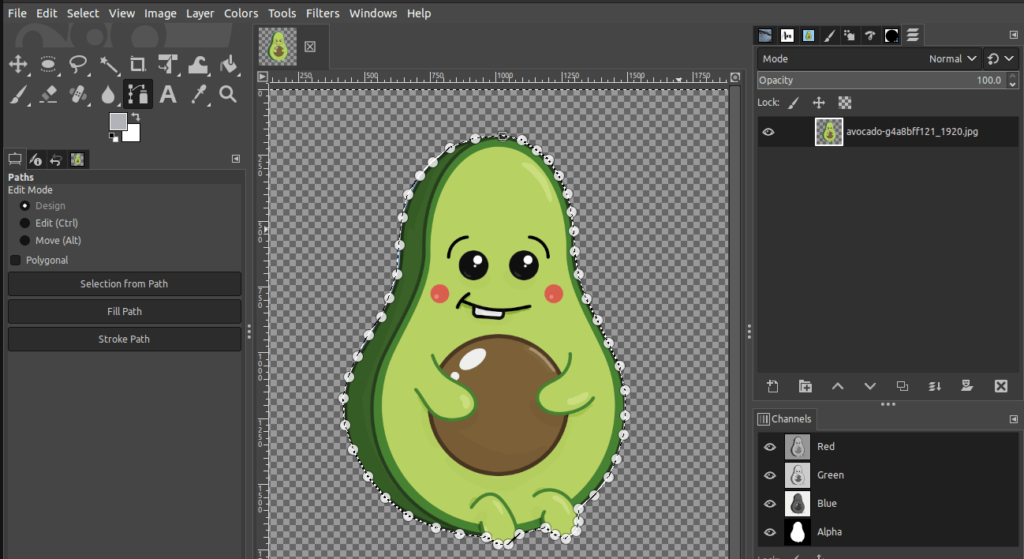
As soon as you press the Delete key, the transparent checkerboard background is displayed.
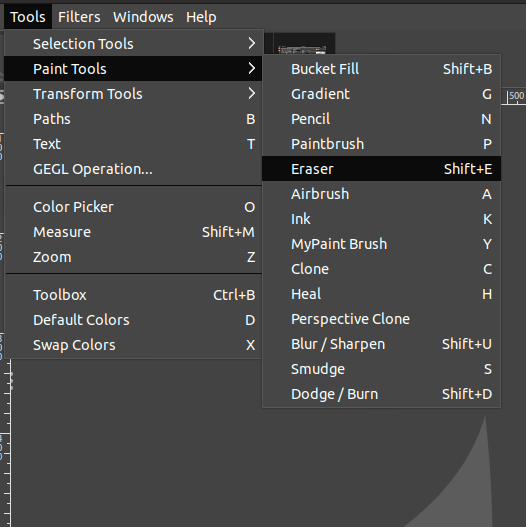
You will see that the background was cut out and the object has been preserved. To correct any mistakes, you can use the Eraser tool. To select the Eraser tool,
- Click on the Eraser tool icon from the Toolbox.
- Alternatively, use the keyboard shortcut “Shift+E”
Another way to select the Eraser tool is to:
- Go to the Tools menu.
- Pick on Paint tools.
- Choose the Eraser tool.
Now you can edit your selection further in order to enhance it. You can create softer edges, change the size, opacity, and hardness of the eraser tool. If the opacity and hardness are lesser, it creates softer edges for the cut-out.
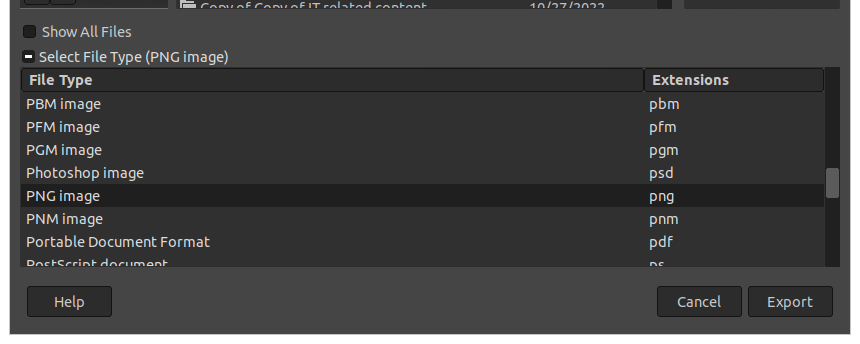
Step 09: Export the Cut-out
Next, you can export the cut out of the image. To export,
- Go to the File menu.
- Choose Export As.
- Alternatively, use the keyboard shortcut “Shift+Ctrl/Cmd+E”.
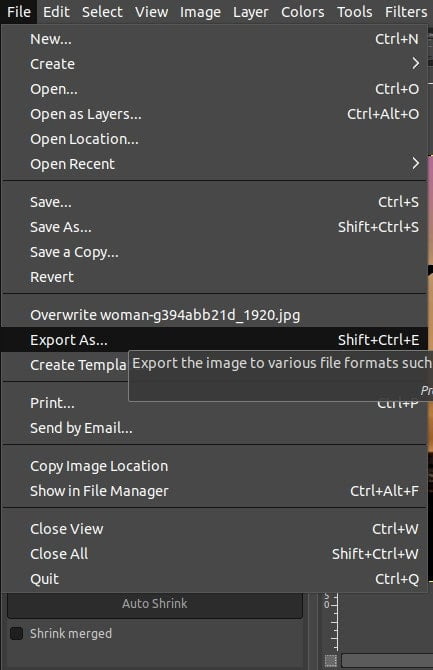
- Next, you can type out the desired name and choose the desired file format to save the image.
- It is recommended to choose PNG because the cut-out consists of a transparent background.
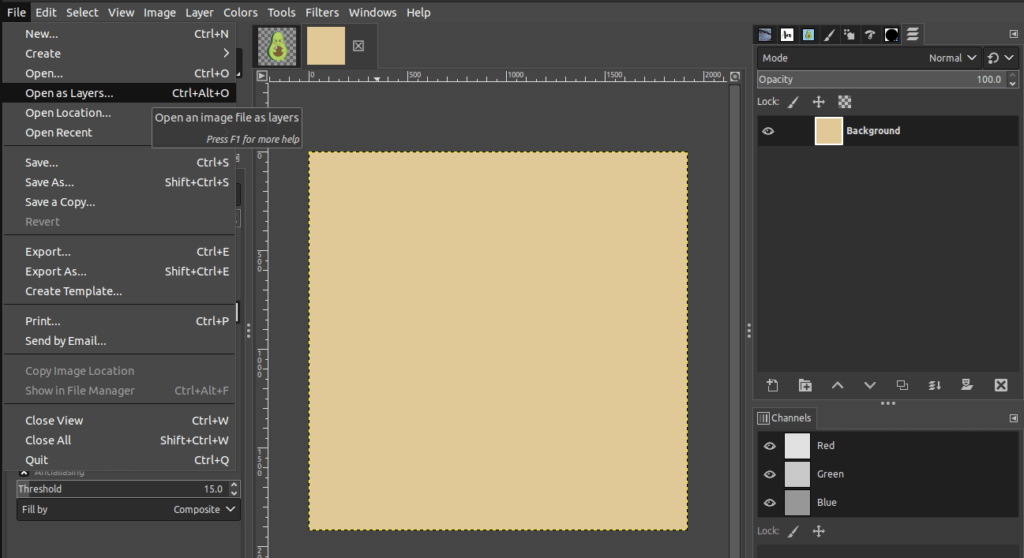
Step 10: Using the cut-Out
Next, we will open a new background and place the cut out of the image over it. We will also go through the merging of the background and the cut-out of the image.
To open the background in GIMP,
- Simply go to the File menu. Choose the Open as Layers option.
- Alternatively, press Ctrl/Cmd+O.
- Also, you can drag and drop the background to the GIMP workspace.
To open the cut-out image follow the below steps,
- Simply go to the File menu. Choose the Open as Layers option.
- Alternatively, press Ctrl/Cmd+O.
- Also, you can drag and drop the image to the GIMP workspace.
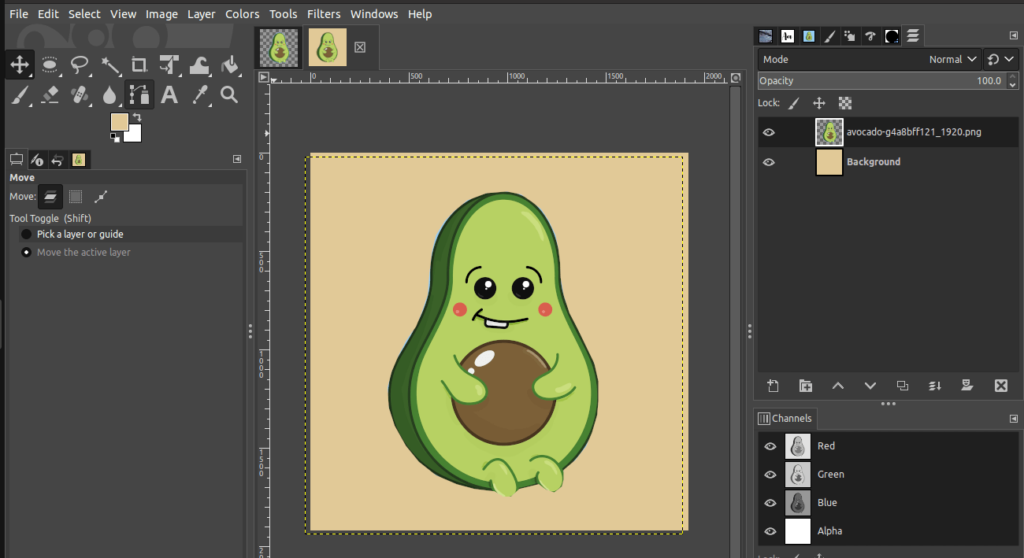
You would notice the addition of two layers in the Layers dialog displayed on the right-hand side of the canvas.
Cut Out an Object using the Fuzzy Select Tool
If you need to cut out an object with a background having a similar color throughout the image, the Fuzzy Select Tool best suits your needs. Deleting portions of your image using the Fuzzy Select tool is very simple and straightforward.
This helps to make a perfect cut-out image in simple steps.
Step 01: Open an image
To open an image in GIMP,
- Simply go to the File menu. Choose the Open option.
- Alternatively, press Ctrl/Cmd+O.
- Also, you can drag and drop the image to the GIMP workspace.
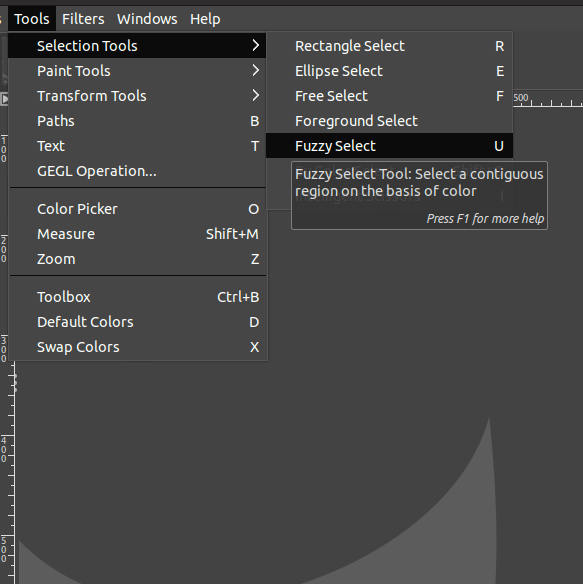
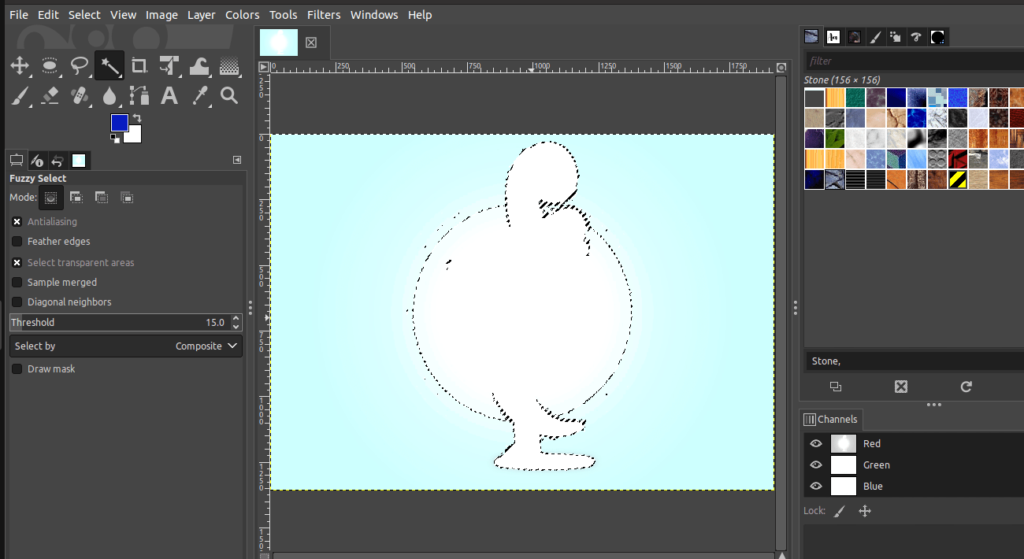
Step 02: Choose the Fuzzy Select tool
To select the background for the cut-out, use the Fuzzy Select tool. To select the Fuzzy Select tool,
- Click on the Fuzzy Select tool icon from the Toolbox.
- Alternatively, use the keyboard shortcut “U”
Another way to select the Fuzzy Select tool is to:
- Go to the Tools menu.
- Choose Selection tools.
- Finally, click on the Fuzzy Select tool.
Now, click on the background to select the background of the image. Once you click, all the pixels having a similar color will be selected. Adjust the Threshold amount from the tool options as necessary.
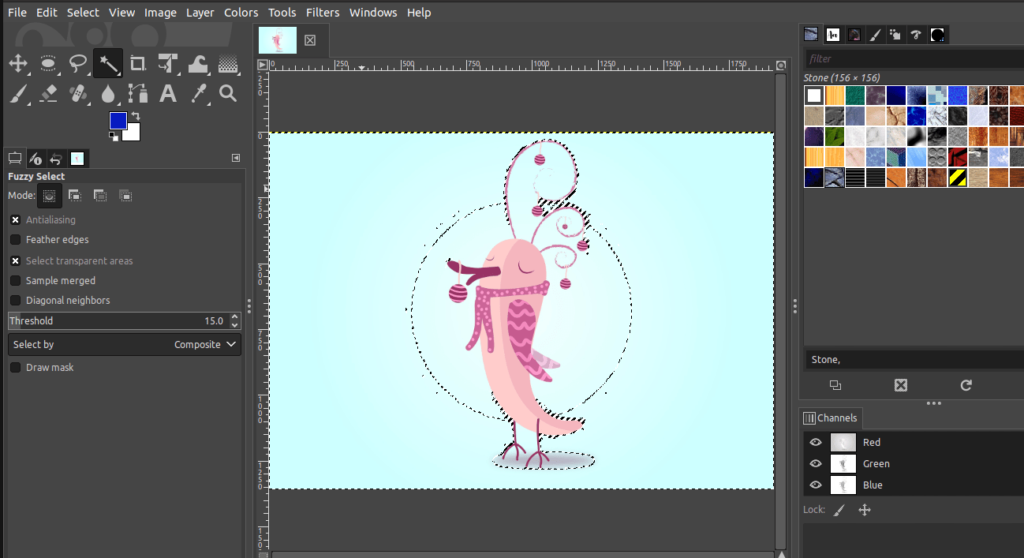
You can recognise the selected regions by the dotted lines displayed on the canvas.
Step 03: Invert the selection
Next, you need to invert the selection to cut out the background. To invert the selection,
- Go to the Select menu. Then, clock on the Invert option.
- Alternatively, press the keyboard shortcut “Ctrl/Cmd+I” to invert the selection.
As soon as you invert it, the selection marquee will be displayed around the subject of the image.
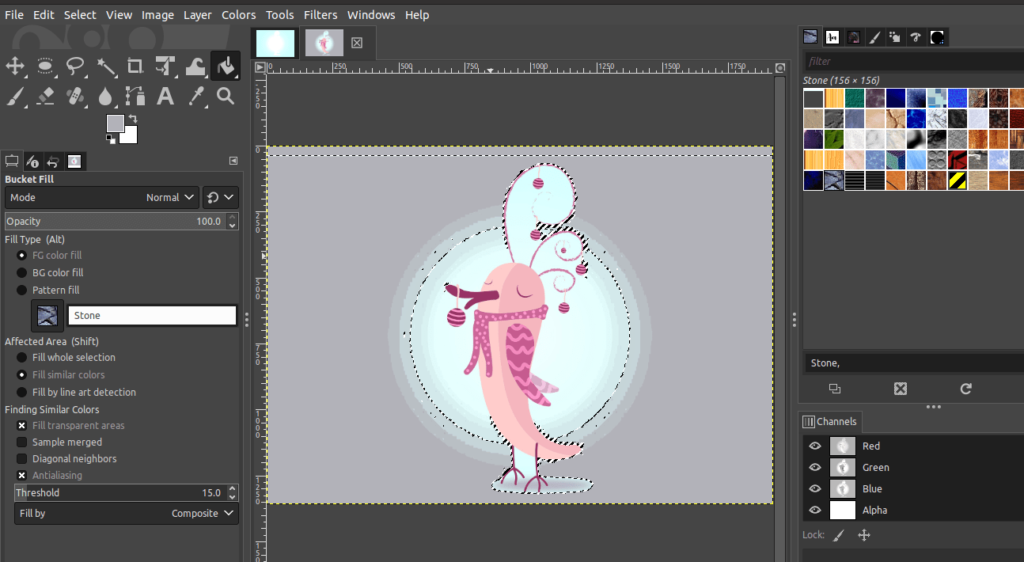
Step 04: Cut the selection
After you invert the selection, you can cut and paste the selection accordingly. To cut the image,
- Simply use the keyboard shortcut “Ctrl/Cmd+X” on Windows and “Command+X” on Mac.
After you cut the selection, the subject of the image would be cut out from the background. Also, the cutout would be on the clipboard of your computer memory.
Step 05: Paste the Selection
Next, you have to paste the cut out of the image. Before you paste, make sure to open the other image you chose as the new background.
To open an image in GIMP,
- Simply go to the File menu. Choose the Open option.
- Alternatively, press Ctrl/Cmd+O.
- Also, you can drag and drop the image to the GIMP workspace.
Next, paste the selection you cut out. To paste the selection,
- Press “Ctrl+V” on Windows and “Cmd+V” on Mac.
Now, you will notice that the selection is pasted on the new background.
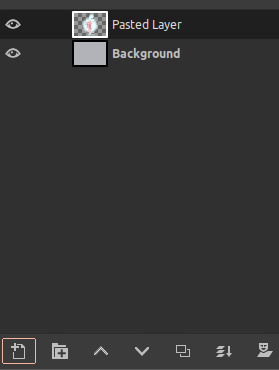
Step 06: Final touch
Once you paste the selection, you would notice that a floating selection layer is created in the Layers dialog on the right-hand side of the canvas.
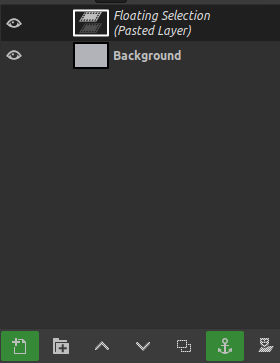
The floating selection is the temporary layer that is created. This layer would not allow you to edit the image further until you merge the background and the cutout selection. To merge the layers, click on the Anchor icon displayed in the above image.
That’s all! You learned how to cut out an object using the Fuzzy Select tool and paste it into another background.

Conclusion
In conclusion, cutting out an object in GIMP is a quick and easy task using the Fuzzy Select tool and the Paths tool. It doesn’t matter if you’re a novice or a professional, these instructions will help you to carry out this task in no time.
Thanks for reading & feel free to check out more of our articles!
Expert Rating
Summary
There are times you may want to cut a particular object from an image and use it elsewhere. This tutorial will show you just how to do that. The fuzzy select tool is simpler and faster to use but not as precise as the path select tool. Objects without complex borders and less need for precision can be selected and cut using the fuzzy select tool while more complex objects such as humans and especially hair textures would work better using the paths tool. Overall, it isn’t very hard to learn how to select an image, but the difficulty can increase a bit based on the required precision.


