
The main function of this filter is to sharpen images, but it has many other uses as well. We’ll explain what the High Pass Filter does and how it works, and we’ll also provide some examples of how it can be applied. So if you’re ready to learn more about this powerful filter, keep on reading!
What is a High Pass Filter in Affinity Photo?
The High Pass Filter in Affinity Photo is a tool that can be used to sharpen images. It preserves the details of your image, particularly in areas with significant colour changes. This transition typically occurs along the edges of an image.
This filter achieves this by detecting abrupt transitions in colour and then suppressing the rest of the image. This results in a sharpened version of the original photo, but it also has some other useful effects as well!
The High Pass filter is used for making images sharper, which can be helpful when you want to emphasize small details or make something stand out more clearly against its background.
The two other sharpening filters available are the Unsharp Masking Filter and the Clarity Filter. The difference between these filters is that they are all used for different aspects of image sharpening:
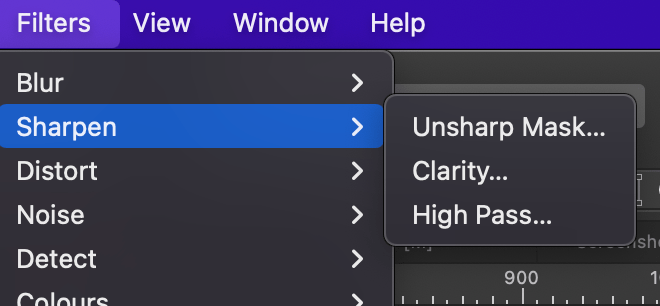
Unsharp Mask – This filter is used to remove blurriness and bring out hidden details in an image. It decreases softness by applying more or less emphasis on certain areas.
Clarity – This filter is intended to improve the local contrast in a photograph. It works best on mid tones by enhancing the edges and details which creates a sharper-looking picture overall.
How to apply High Pass Filter (Destructive)
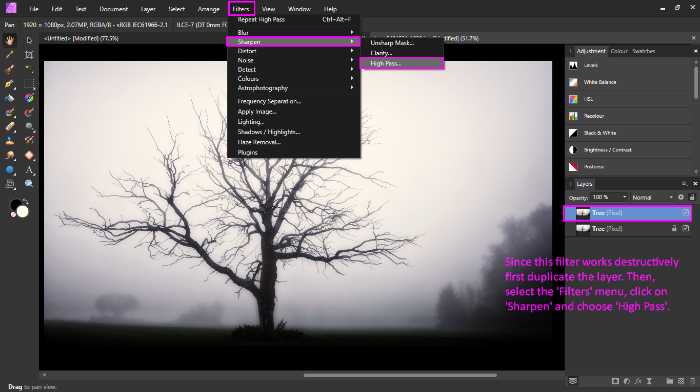
Primarily, it is significant to note that the High Pass filter in Affinity Photo works destructively. Thus, we recommend you make a copy of your image before applying the High Pass filter as it will alter the original photo permanently.
To duplicate a layer, simply select the layer in the layers panel and press ‘Cmd + J’ (Mac) or ‘Ctrl + J’ (Windows) on your keyboard. Another way would be to right-click the layer and select ‘Duplicate’.
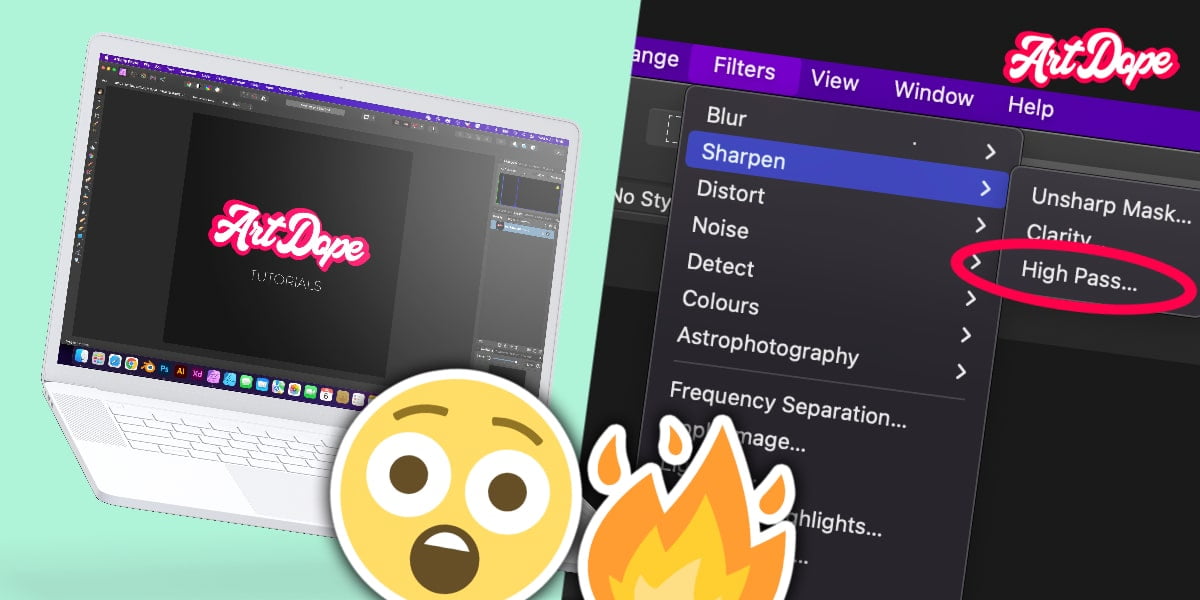
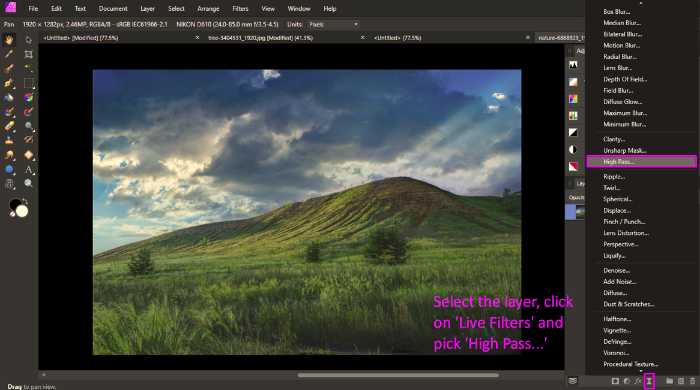
Affinity Photo will then create a duplicate layer of your photo which will be affected by the High Pass filter. Then, make sure that the layer you wish to apply this filter to is selected. You can find Affinity Photo’s High Pass filter from the menu: Filters > Sharpen > High Pass.
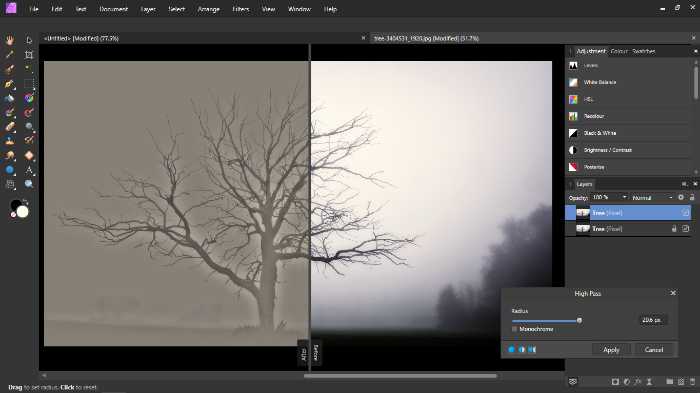
As evident in the image below, applying the High Pass filter to your image is fairly straightforward. Affinity Photo will automatically detect the sharp colour changes in your photo and apply the filter accordingly.
High Pass Filter settings in Affinity Photo
Once you have opened the filter, all you need to do is adjust the Radius slider until you are happy with the results. You can choose how much sharpening you want to add by adjusting its radius slider accordingly.
The higher the value of the slider, the more pronounced the effect will be as only the edge pixels will be preserved. We recommend starting with a small value and then gradually increasing it until you are satisfied with the result.
This filter will produce different results when applied to different images, so there are no perfect settings. Affinity Photo’s High Pass filter is quite versatile and can be used to achieve all sorts of effects, but you’ll need to experiment a bit to find what works best for your photo.
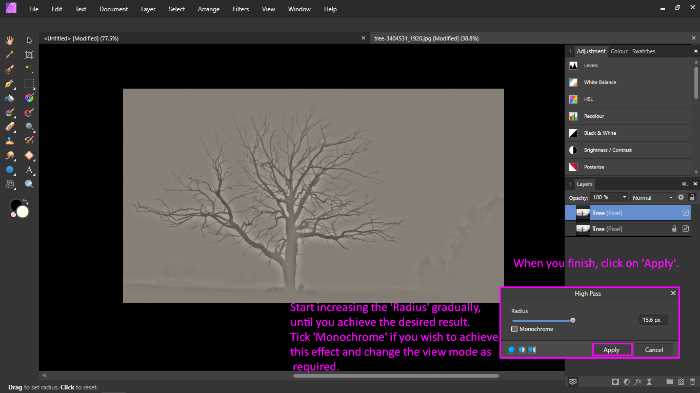
The Monochrome setting is used to give a purely black-and-white, or a slightly monochromatic aesthetic. This can be really effective for emphasizing the tones and details in an image.
The Viewing options allow you to preview the final result. Affinity Photo offers three options: No split view (default), Split View, Mirror view.
- The ‘no split view’ option will show you the photo with the filter applied.
- Whereas the ‘split view’ and ‘Mirror view’ options will show you side by side the before and after results.
This can be really helpful in deciding whether the filter has been applied successfully or not and to compare the results before and after the filter has been applied.
Once you are happy with the settings, simply click ‘Apply’ and Affinity Photo will do the rest.
Highpass & Blending modes in Affinity Photo
The High Pass filter in Affinity Photo can also be combined with different blending modes. Affinity Photo offers a large selection of blending modes for this purpose which you can choose from the drop-down menu in the Layers Panel (see image below).
Simply select the layer you have applied the filter to and select a blending mode. Affinity Photo will then automatically combine the High Pass filter with your chosen blending mode. Affinity Photo’s vast range of blending modes means you can create many different looks and effects using a fusion of these two features.

Some of the most common blending modes which can be used with the High Pass filter are: Overlay, Soft light, Hard light, Linear Light and Pin Light. These contrast blend modes will usually give the best results. The intensity of the sharpening effect will vary depending on the blending mode you choose.
Each of these blending modes will give a different effect, so it’s worth experimenting with them to see which one works best for your photo.
You can also create more advanced effects by combining Affinity Photo’s High Pass filter with other types of filters, such as colours filters. Affinity Photo’s filters are extremely versatile and can be used to create all sorts of different effects.
High Pass Live Filter Layer in Affinity Photo (non-Destructive Method)
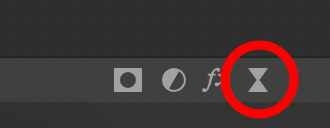
In Affinity Photo, the High Pass filter has its own dedicated live filter layer. Affinity Photo’s High Pass Live Filter Layer can be found at the bottom of the Layers Panel, by clicking on Live Filters. The icon looks like an hourglass. You can add a high pass live filter by going to Layer (Top Menu) > New Live Filter > Sharpen > Highpass.
Affinity Photo’s High Pass Live Filter Layer allows you to apply the High Pass filter to a layer without permanently affecting the layer itself. Affinity Photo’s High Pass Live Filter Layer is non-destructive, meaning you can change or remove the layer at any time.
The live filter comes with a mask as well so you can adjust it as you go along!
Apart from this variation, this live filter layer works just like the High Pass Filter. It offers the same settings, including the radius slider which allows you to adjust the amount of sharpening applied. You can also tick the monochrome box to give a black-and-white effect.
The variations are the Opacity slider which allows you to control the intensity of the filter, and the Blend Mode which gives you the chance to combine Affinity Photo’s High Pass Live Filter with Affinity Photo’s vast range of blending modes.
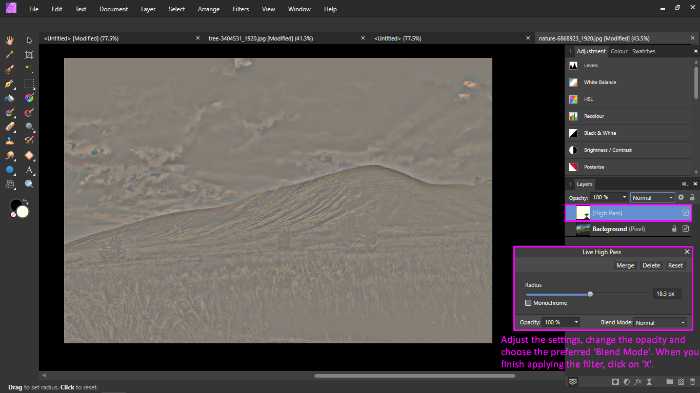
Affinity Photo’s High Pass Live Filter Layer is really useful for tweaking the settings of the High Pass filter, while allowing you to change the settings at any point in time.
Limiting the filter to a selection in Affinity Photo
Affinity Photo’s High Pass filter can also be applied selectively to a particular area of the photo. This is done by making a selection before applying the filter. In Affinity Photo, you can make very precise selections by using the Selection Brush Tool, the Pen tool or other tools.
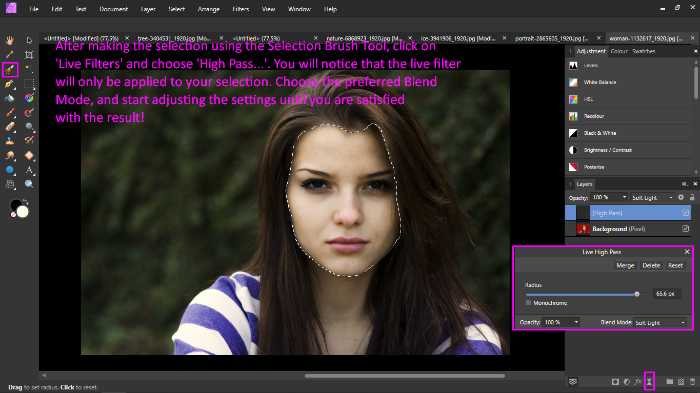
Once you have made the selection and you see the marching ants around it, go to the Live Filters menu and select High Pass or apply a High Pass Live Filter layer. Affinity Photo will then apply the filter only to the selected area.
This is a really useful feature if you want to sharpen a certain part of the photo without affecting the rest of it. For example, you could use this feature to sharpen someone’s face while leaving the background untouched.
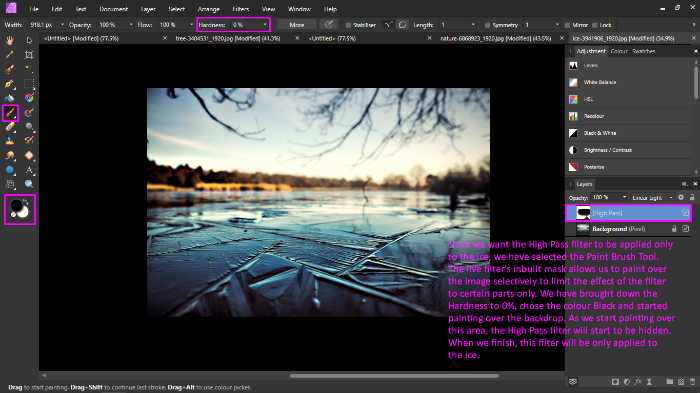
Affinity Photo’s High Pass Live Filter Layer also has an inbuilt mask which can be used to mask the effect of the filter on certain areas of the photo. When selecting the Paint Brush Tool(B), bring the hardness to 0% to make it easier to mask off & feather certain areas.
Then, start painting with black or white paint to mask or reveal the filter. Affinity Photo’s High Pass Live Filter Layer will then automatically apply the filter only to the selected area.
The High Pass filter combined with selections are a great way to sharpen specific areas of a photo while leaving other areas unaffected. It can be used to give photos more impact by sharpening the main subject or focal point.
This creates a visual contrast between the sharpened and unsharpened areas of the photo, which can be really effective.
Apply the High Pass Filter to portraits
You may wish to use Affinity Photo’s High Pass filter on portraits to emphasise the eyes and facial features. If someone wanted their face highlighted so that they looked like they were glowing – using a high pass filter will do just that!
You can make a selection around someone’s face before applying Affinity Photo’s High Pass Live Filter so that it only sharpens their facial features, for example. Simply apply the filter to the photo, set the desired Blend Mode and move the radius slider until you are happy with the result.
Another way would be to create a High Pass Live Filter Layer and then paint over the face using Affinity Photo’s Paint Brush Tool. This way, Affinity Photo will apply the High Pass filter only to parts of the photo that you have painted over.
Applying a High Pass Live Filter Layer in Affinity Photo allows you to non-destructively control the effect of the filter on certain areas of a photo. It’s a really useful way to use this sharpening filter when working with portraits.
To sharpen this woman’s facial features, we have used the Selection Brush Tool to select the face and then applied a High Pass Live Filter Layer.
Expert Rating
Summary
In summary, this is not a difficult technique to learn. However, there are some sharpening technique lessons that are very relevant for your photo-editing tool set. Great tool, not difficult to learn, not too scalable – decent functionality overall.
Conclusion
To conclude, the High Pass filter in Affinity Photo is a really useful sharpening tool. As explained in this blog post, applying it to your photos is very easy. The High Pass Filter Live Filter Layer is also useful and equipped with a mask which make it very versatile and adjustable.
Thanks for reading & feel free to check out more of our articles!


