
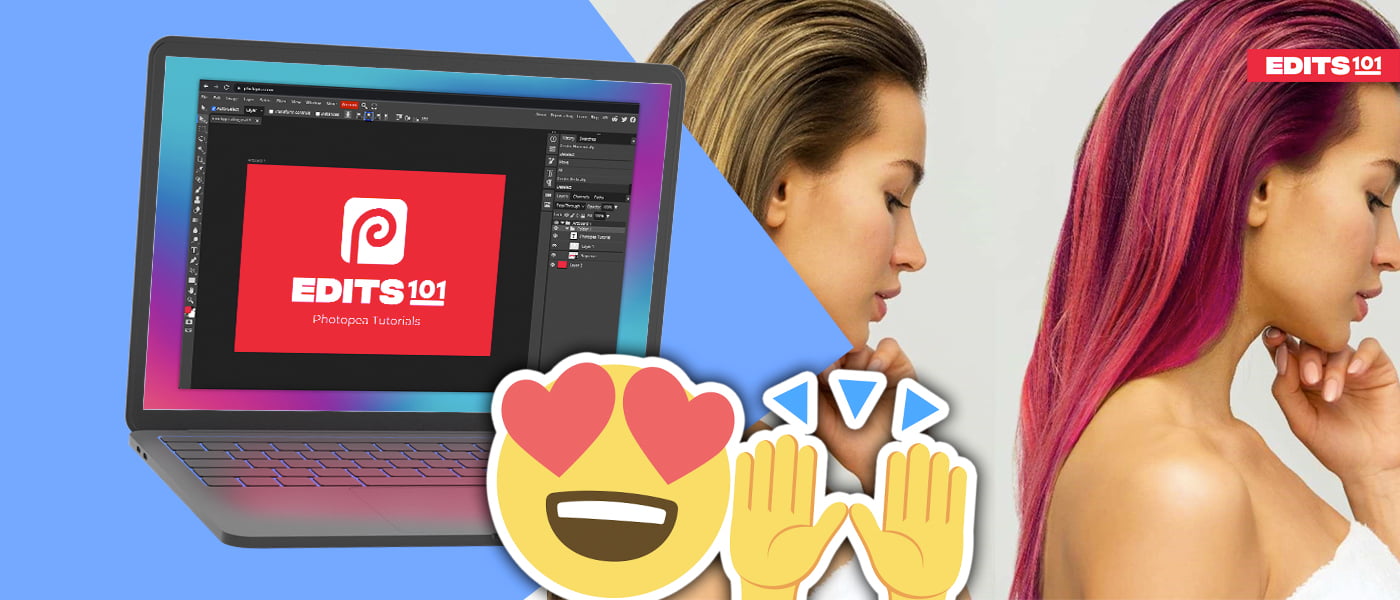
Do you want to learn how to change the hair color from any photograph? This post is a step-by-step guide.
In this tutorial, we will be taking a look at the steps you need to take to change hair color in Photopea to any color you want. To get started, all you need to do now is leave this tab open and open Photopea.com from a new tab or browser.
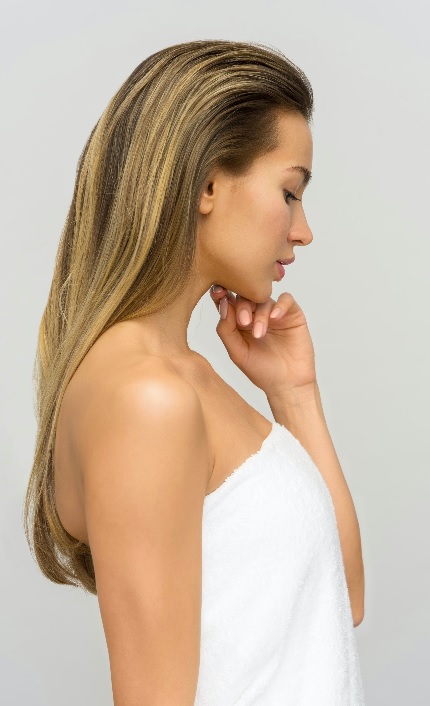
Step 1: Load Your Image
- Go to File, click Open
- Select the image from your computer and click Open
- Alternatively, you can drag and drop your image from your computer onto Photopea.com.
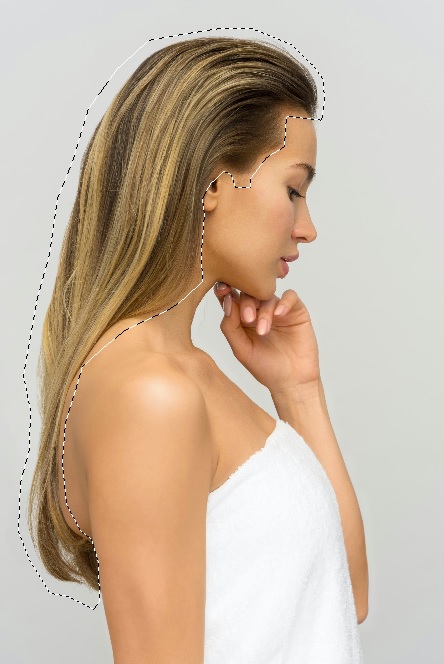
Step 2: Draw a Selection Around the Hair
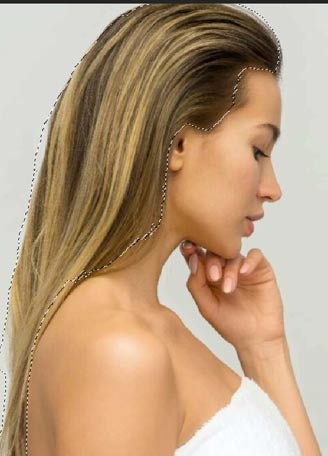
Now we need to select the hair first, otherwise, the color change will affect the whole image. To have more control over the hair selection, we will be using the Polygonal Lasso Tool. You can use any selection tool you feel comfortable using.
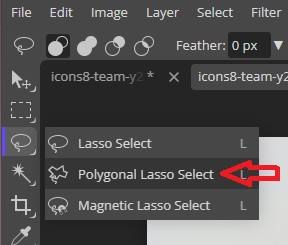
To accurately select all the hair, it is recommended to use this selection tool. Don’t forget to leave a gap around the hair.
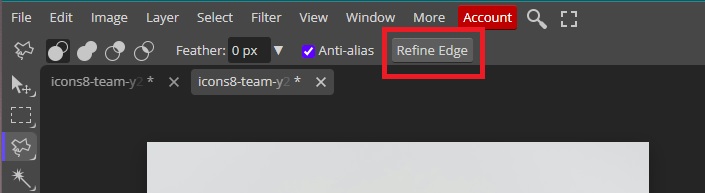
Step 3: Refine Selection
Now that the hair has been selected, it is time to refine our selection. With the Polygonal Lasso Tool still selected, click on Refine Edge.
To refine our selection, let’s use the options in the new window. On the top left, we’ll find a tool to adjust the size of the brush. Right beside that, we’ll see three boxes – white, grey, and black.
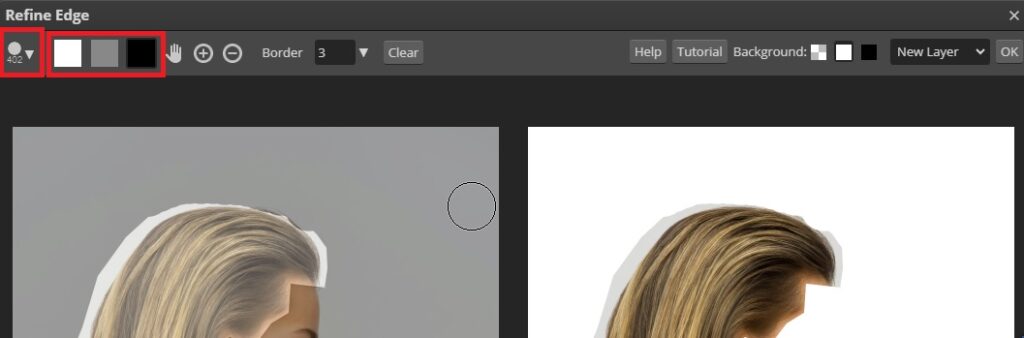
- The white box represents the foreground. You need to tell photopea that the hairs are in the foreground. Everything in white will be included in the selection.
- The grey box represents the unknown areas. Paint on the edges with a small brush after selecting the grey box. It is used to refine the harsh edges.
- Black represents the background. Paint with black on the areas that you want to exclude from the selection.
In our case, we will select the black box, adjust the brush size, and remove all the areas around the hair we wanted to exclude from the selection. Then painted on the edges with the grey brush to smooth out the harsh edges.

If you make a mistake, you can undo the changes by holding the Ctrl + Z keys on the keyboard. Use the + and – options at the top panel to zoom in or out when necessary.
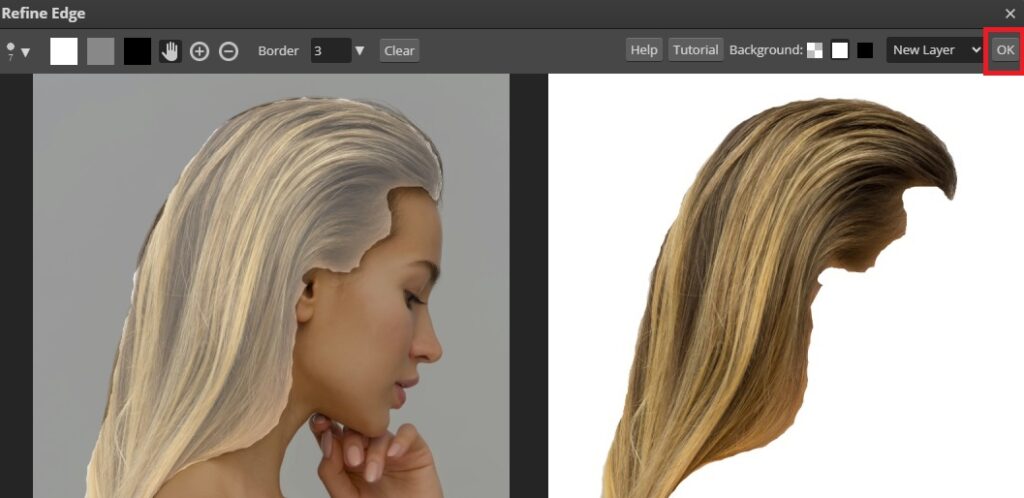
Once you are done with the selection, click OK at the top right corner.
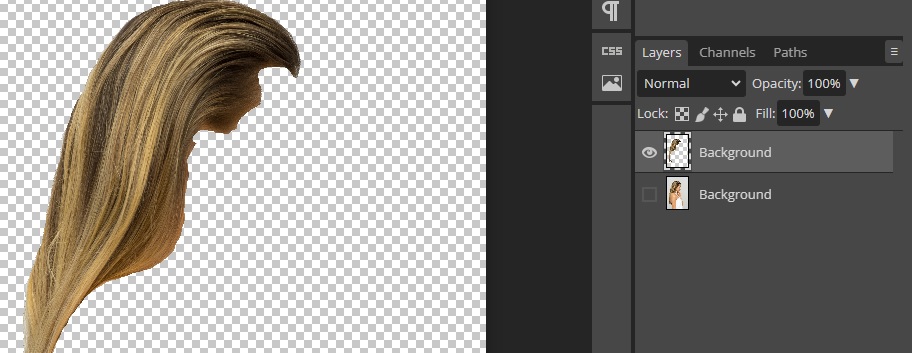
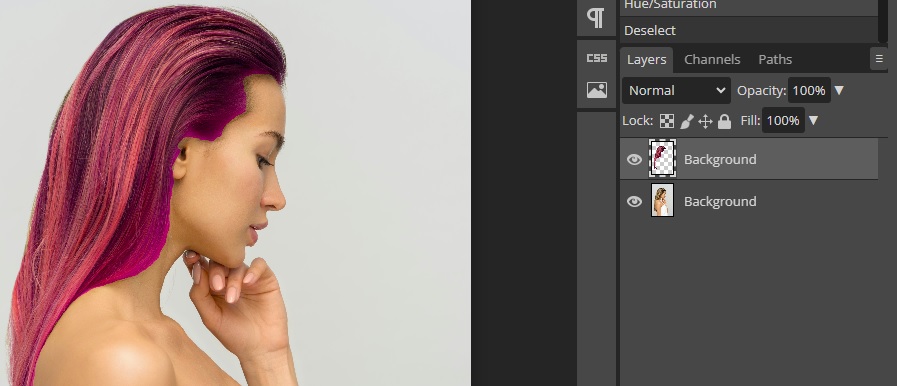
We will now have the hair in a new layer.
Step 4. Manipulate the Hair Color
To get a selection, hold Ctrl (Command in Mac) and left-click on the hair layer, and you will see a selection around the hairs.
Next, we need to go to Image, Adjustments, and select Hue/Saturation.
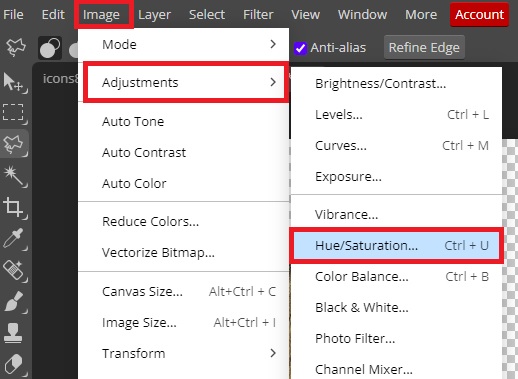
We will now use Hue/Saturation to manipulate the color of the hair.
Important Points
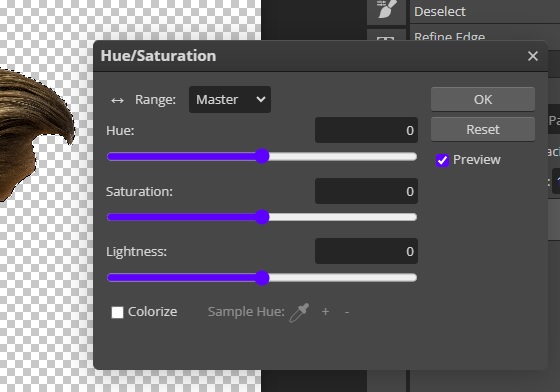
- From the Range section, you can choose the color to manipulate. Simply click on the dropdown and select the color you want.
- The Hue and Saturation sliders adjust the color, whereas the Lightness slider adjusts the brightness.
- For realistic results, keep the Saturation slider to 40 or below.
Here are the settings we are going with for our image.
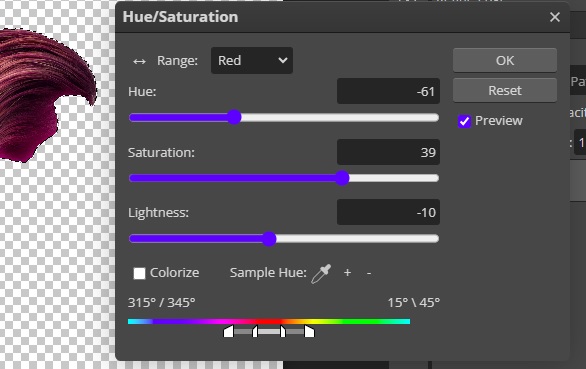
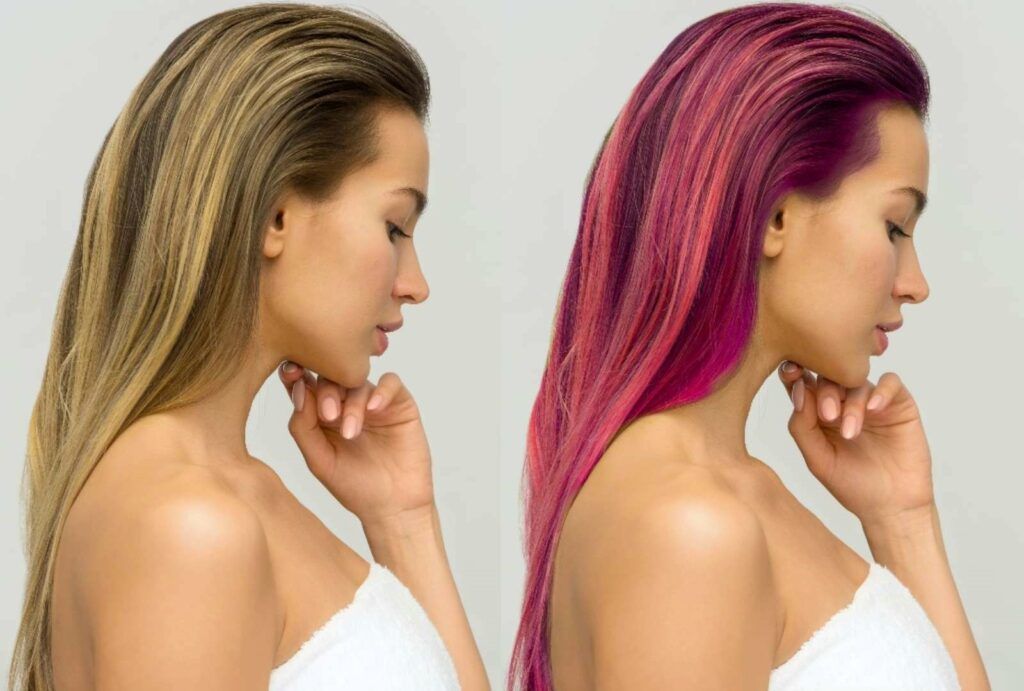
Now we are going to click OK and make the original layer visible. Here are the final results.
As you can see, there is still some work that needs to be done, especially on the hairline.
Step 5: Refine the Hairlines
If you zoom in, you will notice that our hairline looks like it has been painted on; the edges are too harsh. To fix that, we will need to use the erase tool.
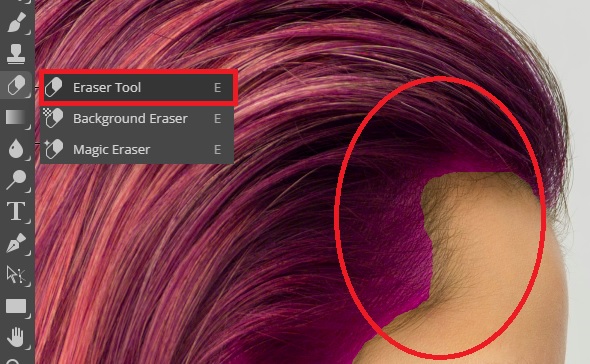
Press E on your keyboard to select the erase tool in photopea.
Zoom in the image and increase the size of the erase tool and reduce the hardness to about 15.
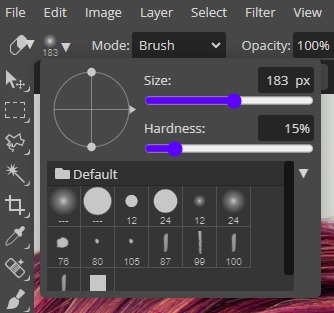
That way, when you delete the edges, you will get a good fade that helps blend the layers perfectly.
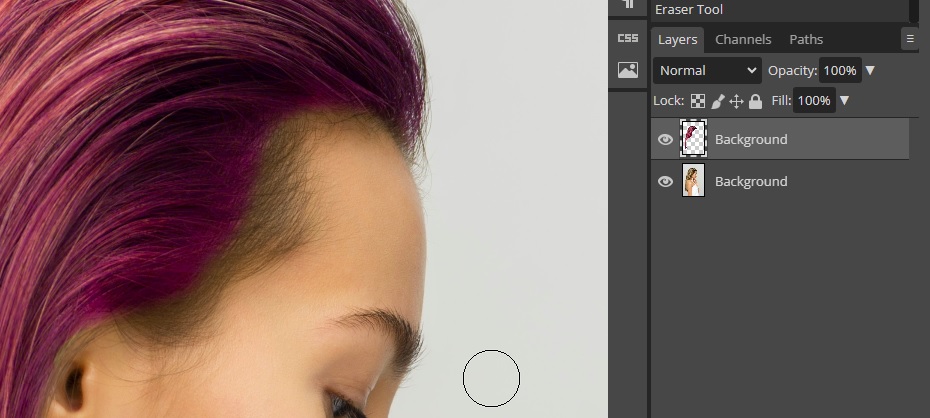
With the hair layer selected, use the erase tool to delete the harsh edges carefully.
Step 6: Use the Brush Tool to Paint Edges
The final step is to refine the edges so that they blend perfectly. To do this, we will need the brush tool.
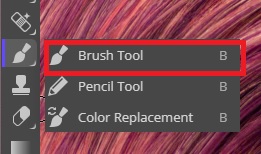
Open the Color Picker and select the color that matches the hair color.
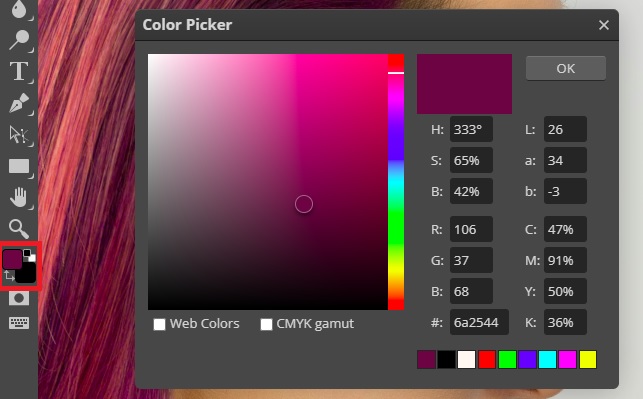
With the Color Picker open, you can simply click on the hair, and the color picker will select a color that matches the hair. Once you are satisfied with the color, click OK.
From the panel below the Main Bar, reduce the opacity of the brush to about 20%. That way, you will get a great blending effect without the harsh appearance.

Now Select the main image layer, and use the brush to color the hairline. Keep in mind that the color will get darker the more times you brush over an area. Adjust the size of the brush accordingly to achieve the best results.
Step 7: Save Your Work
If you are satisfied with the results, go to File, Export As, and select your preferred file format. JPG is a popular file format.
If you intend to make further changes to your project in the future, you need to click on the File tab and then choose the Save As PSD option. This will allow you to edit the image inside the project later on and resume working on it from where you left off.
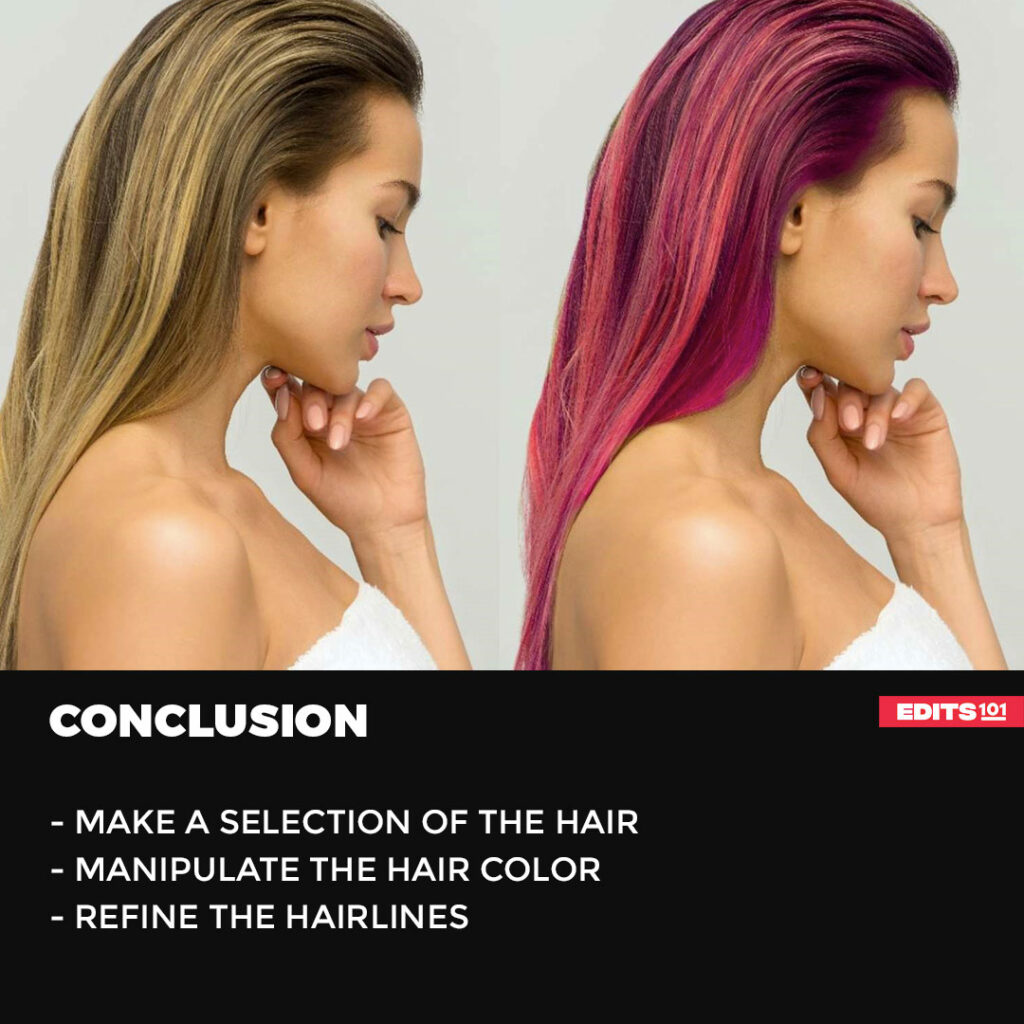
Conclusion
We have covered how you can change hair color in Photopea. First, we covered how to select the hair as a layer and how to refine the layer. We then looked at how to use the Hue/Saturation tool to change the color of the hair.
We later discussed refining the end results using a combination of the eraser and brush tools. We then discussed how to save the final image.
Thanks for reading & feel free to check out more of our articles!
Expert Rating
Summary
Learn how to change the color of hair step by step. We start from how to select the hair to how to refine the color change.


