
Everyone has photos with unwanted objects that they wish to get rid of! Affinity Photo makes it easy to remove such objects. Let’s get started!
Removing an unwanted object in Affinity Photo iPad
Object removal is more than just cropping out the item. These retouching tools can help you remove unwanted objects without compromising the quality of your photo.
It is equipped with different Healing Tools which can be used to remove unsightly objects from your images. Each tool is made specifically for particular tasks in order to improve your image.
Before using a Healing tool, it is ideal to duplicate the layer in order to have a backup in case you accidentally remove something you wanted to keep.
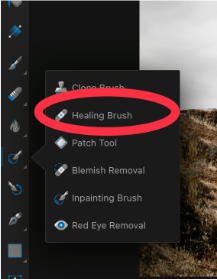
These Healing Tools in Affinity Photo for iPad are:
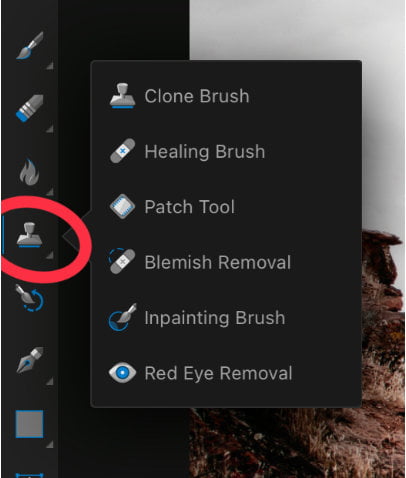
- Inpainting brush tool- The Inpainting Brush tool allows you to restore undesirable or flawed parts of your image.
- Blemish Removal Tool- The Blemish Removal Tool is great for eliminating miniscule imperfections, like specks of dust or lint and skin blemishes.
- Healing Brush Tool- The Healing Brush Tool is similar to the Blemish Removal Tool. It is suitable for eliminating small flaws, which can be replaced by cloning another portion from your image.
- Patch Tool- The Patch Tool is similar to the Healing Brush Tool, but it allows you to replace a larger area from a chosen target area.
- Red Eye Tool- The Red Eye Tool is great for removing the red-eye effect from your photos.
- Clone Brush Tool- The Clone Brush Tool allows you to copy an area of your photo and use it to cover up another area. It is perfect for removing an unwanted object or colour.
Let’s take a look at each of these Healing Tools in detail and how they can be used to remove unwanted objects in Affinity Photo iPad!
What is an Inpainting brush tool in Affinity Photo iPad?

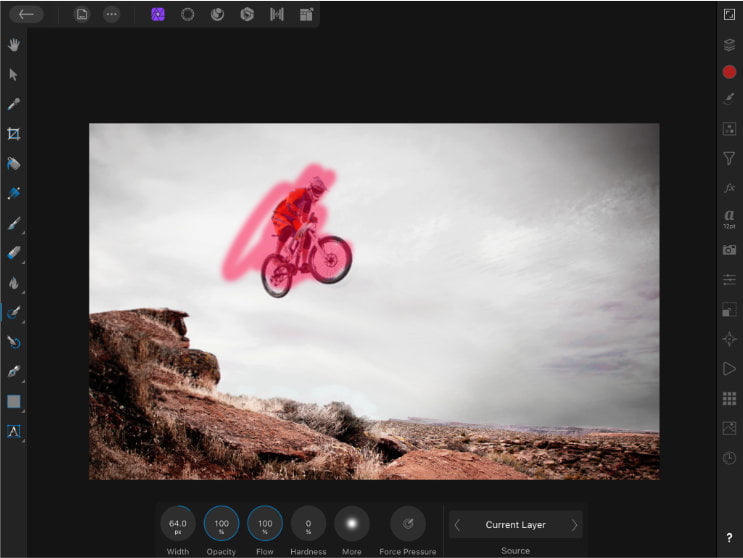
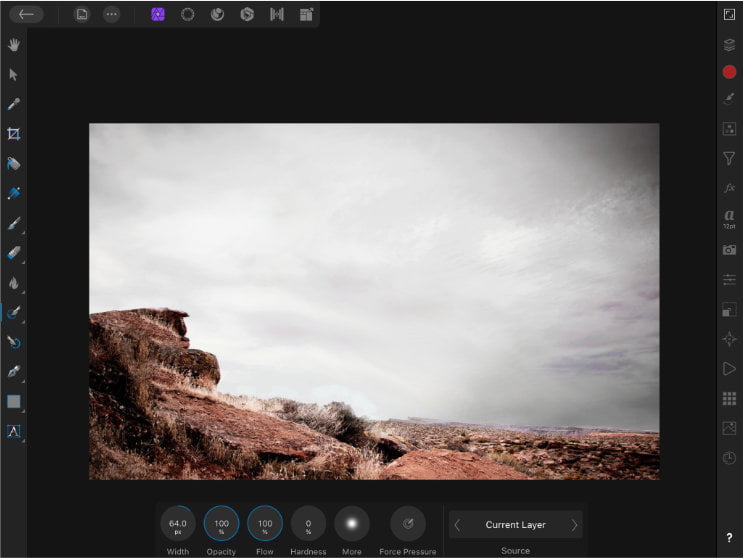
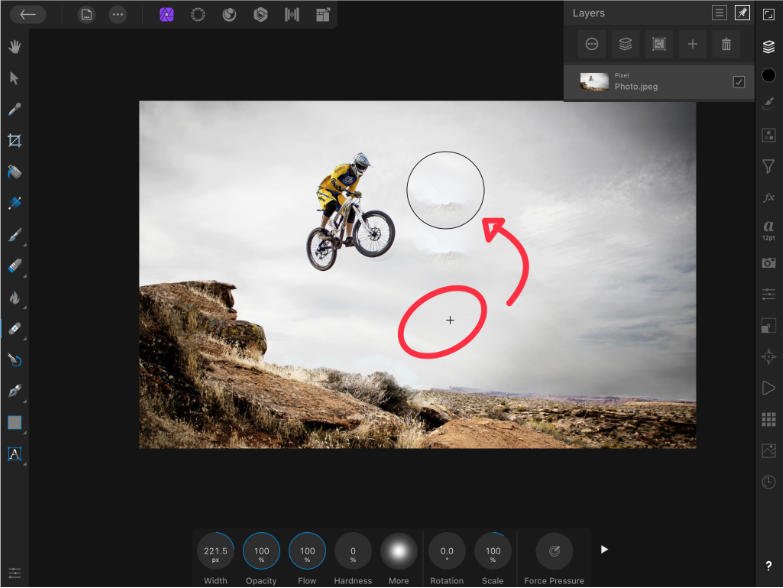
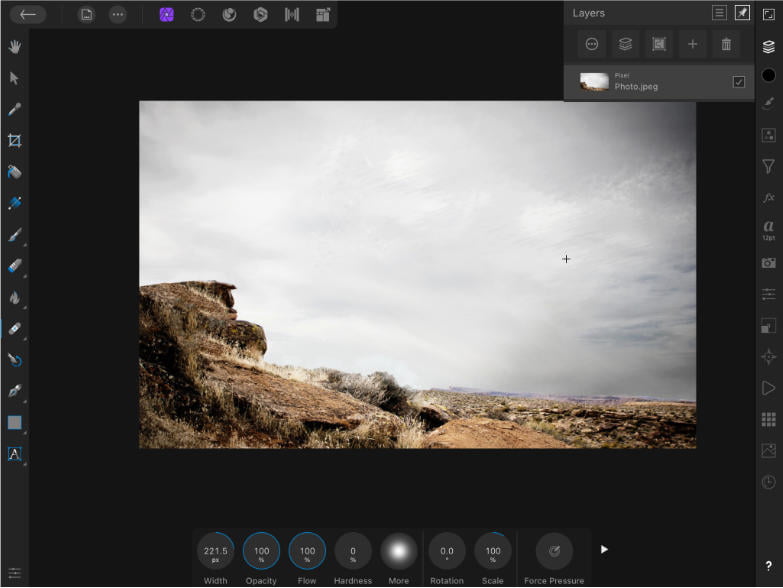
The Inpainting Brush tool is Affinity Photo for iPad’s best weapon for removing unwanted objects, ranging from small to large. This tool allows you to “paint” over an object to remove it from the photo.
It will then intelligently and automatically fill in the area you painted over with pixels from the surrounding area.
This is a great way to remove large objects or objects that are close to other objects (like a branch in front of a tree).
To use the Inpainting Brush tool,
- Select the Inpainting Brush Tool from the drop down menu on the left.
- Simply draw over the object you’d like to erase & you’re done!
If you’d like to test with these assets, find them here.
The Blemish Removal Tool
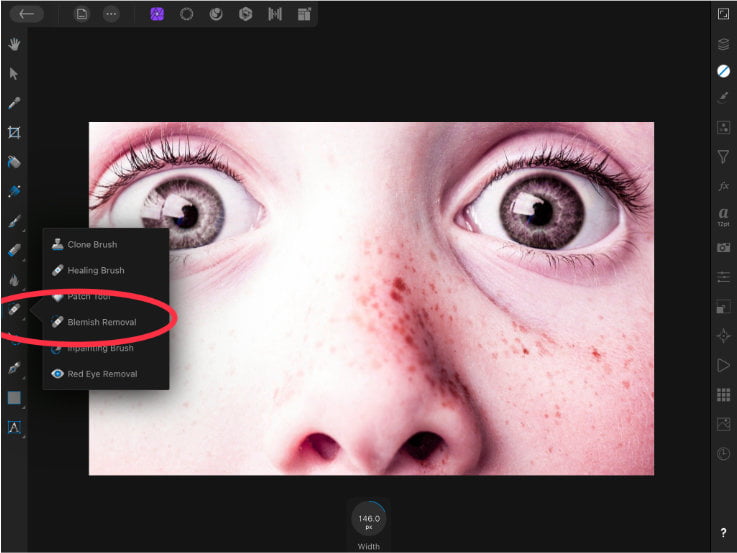
To hide tiny facial specs, we can use the Blemish Removal Tool. It can be found in the same flyout as the Inpainting Brush tool.
With the Blemish Removal Tool, you can simply tap on a particular area, and it will automatically remove it. This is a great way to quickly touch up photos without having to do any complex editing.
To use the Blemish Removal Tool,
- Select the Blemish Removal Tool.
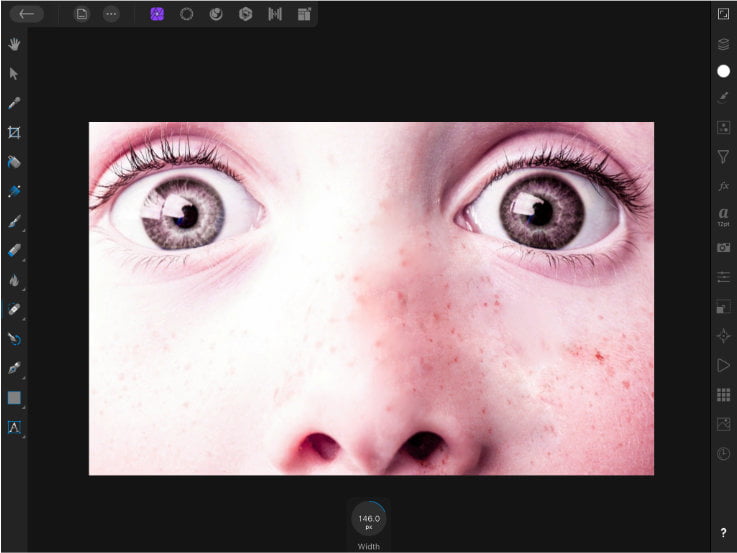
- Adjust the Width of the brush from the context toolbar.
- Tap with one finger and drag with the other from the target area to the sample area. The blemish will be replaced by the same texture as that of the sample area.
- Next, tap on the blemish to automatically remove it!
If you’d like to test with these assets, find them here.
P.S. Freckles are beautiful! I used it only as an example!
How to use the Healing Brush Tool in Affinity Photo iPad?
The Healing Brush Tool is another way to retouch and repair parts of an image that are unsightly. This tool allows you to replace an unwanted section of your image by replacing it with an area you wish to copy.
However, it does more than just sampling from another area of your image. It merges the pixels from the sample area with the target area together by combining their colour, texture and visibility.
This is ideal for removing small imperfections from an image such as pimples, scratches, or dirt.
To use the Healing Brush Tool,
- First, duplicate the layer.
- Select the Healing Brush Tool and adjust the settings from the context toolbar as per your requirement.
- To take a sample from an area, simply tap and hold your finger on it.
- Tap and drag on the area you want to retouch.
Certain imperfections, such as dark circles, scars, and wrinkles, can be easily removed using the Healing Brush tool.
How does Patch Tool remove unwanted objects in Affinity Photo iPad
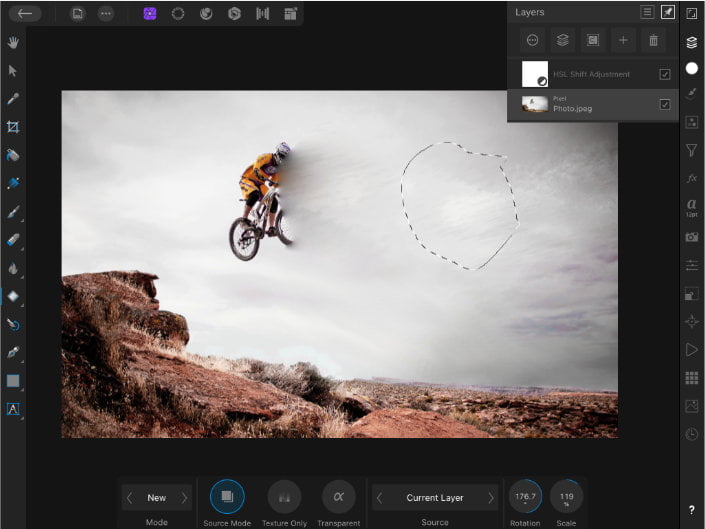
The Patch Tool is ideal for retouching and fixing extensive parts of an image. This is a fantastic technique to get rid of huge imperfections or background elements in your shots.
The Patch Tool enables you to “paint” over an area you wish to repair. After that, Affinity Photo for iPad will fill in the area you painted over with pixels from a sample area.
Just like the Healing Brush Tool, patching also blends the sample pixels with the target pixels by coordinating the tones, transparency and texture.

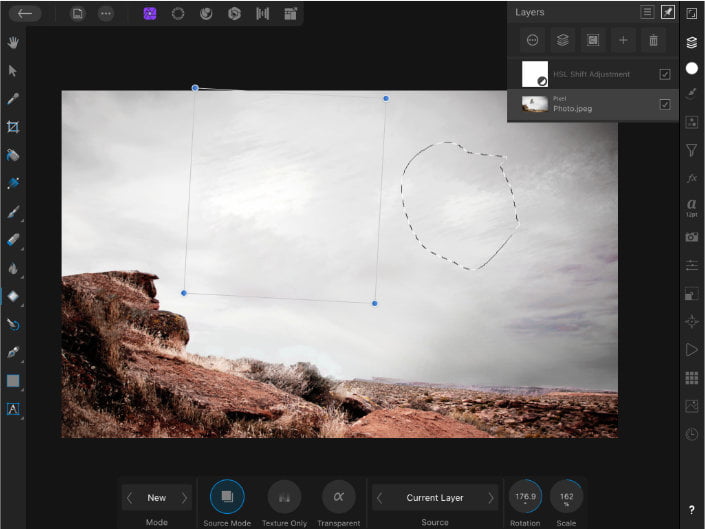
To use the Patch Tool,
- First, Make sure you’ve duplicated the layer (3 dots top left) & selected it from the layers panel.
- Select the Patch Tool.
- Tap and drag on the image to choose the target area.
- Starting from the selection, tap and drag to delineate the source area.
- You can rescale and rotate the selection from the context toolbar.
- Tap anywhere on the image to patch and the selection will be removed.
Avoid drastic colour variations to ensure that the patching looks adequate.
What is the Red Eye Tool used for in Affinity Photo iPad?
Red eyes are caused by the camera’s flash reflecting off the subject’s eyes.
The red eyes of both animals and humans can be removed easily using this tool.

To use the Red Eye Tool,
- Next, select the layer (from layers panel) & Red Eye Tool.
- Tap and drag on the pupil where you want to remove the red-eye portions of your image.
- Affinity Photo will automatically correct this unsightly effect.
- Repeat this process until you are satisfied with the image.
the Clone Brush Tool in Affinity Photo iPad
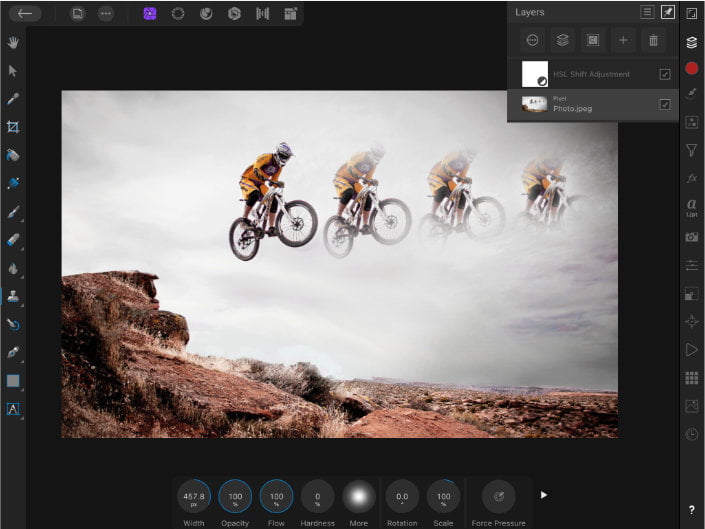
Clone Brush Tool removes objects from your photos by cloning pixels from one area of the photo to another. The. Clone Brush Tool can quickly and easily remove unwanted objects from your photos and replace them by other portions of your image.
Clone Brush Tool is different from other brushes as it selects the area you want to clone before you start painting. This is useful for ensuring that the cloned pixels match with the surrounding area perfectly.

It’s best applied to modify, add, or remove items within an image.
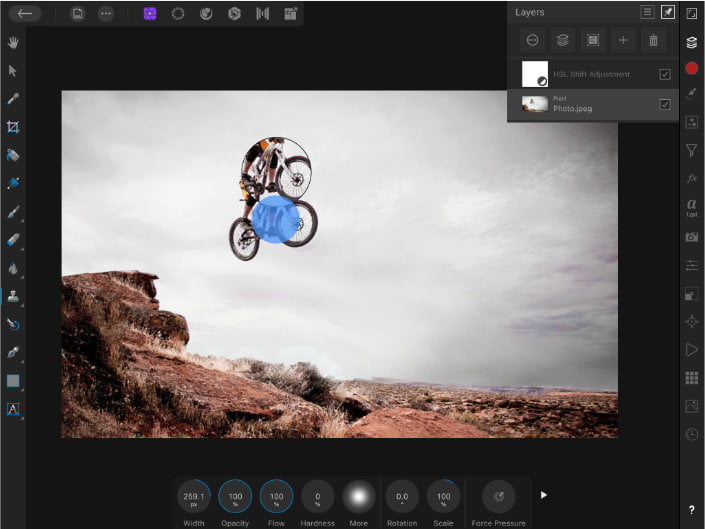
To use the Clone Brush Tool,
- First, select the Clone Brush Tool.
- Adjust the settings from the context toolbar.
- Next, tap and hold on the area of the photo you wish to clone. Affinity Photo for iPad will automatically clone the selected area.
- Now, simply brush over the area you wish to modify. Affinity Photo for iPad will automatically clone the selected area and apply it to the new location.
Expert Rating
Summary
It is not a difficult technique to learn, though it might take a bit of time to master. Very useful generally as you’ll learn how several tools work together.
Conclusion
Whether you’re looking to remove large objects or small imperfections, you can achieve it in no time!
Thanks for reading & feel free to check out more of our articles!


