Affinity Photo Tutorial | Essential Keyboard Shortcuts
In this blog post, we are going to talk about essential keyboard shortcuts you can use when working with Affinity Photo. Since there are so many, it can be a little overwhelming at first. We’ve therefore put together this list of essential shortcuts and divided them in categories to help you get started!
We will be covering Editing shortcuts, Tool shortcuts, File shortcuts, Layer shortcuts, Liquify Persona shortcuts, and many others.
What are keyboard shortcuts?
Keyboard shortcuts are keyboard commands that allow you to perform certain actions in a software program without using your mouse. They are a great way to save time and can help you be more productive when working on your photos.
You may personalize keyboard shortcuts to suit your own habits since they’re highly configurable.
The source for these Keyboard Shortcuts can be found in this link.
Here is a list of the most important shortcuts categories:
- Editing Shortcuts
- File Shortcuts
- Edit Shortcuts
- Layer Shortcuts
- Tools Shortcuts
- Liquify Persona Shortcuts
- Vector-specific Shortcuts
- Painting Shortcuts
- Text Shortcuts
- View Shortcuts
- Pixel selection Shortcuts
- Workspace Shortcuts
- Adjustment and Filter Shortcuts
We’ll start with the Editing shortcuts, since they are the most commonly used shortcuts in Affinity Photo.
Editing Shortcuts in Affinity Photo
In short, Editing Shortcuts are keyboard commands that allow you to perform certain actions related to editing your photos.
Certainly, the most commonly used editing shortcuts are the following:
- Resize document – Cmd/Ctrl + Option/Alt + I
- Resize canvas – Cmd/Ctrl + Option/Alt + C
- Reset selection box – .
- Toggle snapping – ;
- Erase with Pixel tool on current layer – Cmd/Ctrl
- Switch between Stroke/Fill color selectors – X
- Swap Stroke/Fill colour selectors – Shift + X
- Set no fill on Stroke/Fill color selectors – /
- Toggle between crop tool overlays – O
- Flip golden spiral overlay (crop tool enabled) – Shift + O
- Cancel a sizing, moving, or creating operation – Esc
- Move item – Arrows
- Move item in 10x measurement units – Shift + Arrows
Few of the most commonly used Action (Transforming) shortcuts include the following:
- Move with horizontal, vertical or diagonal constraint– Shift + drag
- Rotate in 15° intervals– Shift + drag rotation/corner handle
- Rotate around opposite corner– Cmd/Ctrl + drag corner handle
- Cancel a sizing, moving, or creating operation– Esc
- Resize from centre– Cmd/Ctrl + drag from a corner handle
- Mirror shearing– Cmd/Ctrl + drag
- Nudge– Arrow keys
- Nudge (by modified distance)– Shift + arrow keys
After that, we’ll move on to File Shortcuts.
File Shortcuts
File Shortcuts are keyboard commands that allow you to quickly access as well as use the various file options in Affinity Photo.
Whereas the most commonly used file shortcuts in Windows include the following:
- New document – Cmd/Ctrl + N
- New from clipboard – Cmd/Ctrl + Shift + Option/Alt + N
- Open document – Cmd/Ctrl + O
- Close document, or close app when no documents are open – Cmd/Ctrl + W
- Switch document/view – Cmd/Ctrl + Tab
- Save – Cmd/Ctrl + S
- Save as – Cmd/Ctrl + Shift + S
- Export – Cmd/Ctrl + Shift + Option/Alt + S
- Print – Cmd/Ctrl + P
We’ll continue with Edit Shortcuts.
Edit Shortcuts in Affinity Photo
Edit Shortcuts are keyboard commands that allow you to quickly complete basic editing actions.
Some of the most commonly used Edit shortcuts in Windows include the following:
- Undo – Cmd/ Ctrl + Z
- Redo – Cmd/Ctrl + Shift + Z
- Copy merged – Cmd/Ctrl + Shift + C
- Paste style – Cmd/Ctrl + Shift + V
- Paste FX – Shift + Option/Alt + V
- Paste without format – Cmd/Ctrl + Shift + Option/Alt + V
- Paste inside – Cmd/Ctrl + OptionAlt + V
- Fill – Shift + F5
- Inpaint – Option/Alt + Backspace
Let’s move on to Layer Shortcuts next.
Layer Shortcuts
Layer Shortcuts are keyboard commands used to access various layer options in Affinity Photo.
Some Layer shortcuts in Windows include the following:
- Select all layers – Cmd/Ctrl + Option/Alt + A
- Group – Cmd/Ctrl + G
- Ungroup – Cmd/Ctrl + Shift + G
- Duplicate – Cmd/Ctrl + J
- Invert – Cmd/Ctrl + I
- Move to front – Cmd/Ctrl + Shift + ]
- Move forward one – Cmd/Ctrl + ]
- Move to back – Cmd/Ctrl + Shift + [
- Move back one – Cmd/Ctrl + [
- New layer – Cmd/Ctrl + Shift + N
- Merge down – Cmd/Ctrl + E
- Merge selected – Cmd/Ctrl + Shift + E
- Merge visible – Cmd/Ctrl + Shift + Option/Alt + E
- Toggle between frequency separation layers – F
Now we’ll dive into Tool Shortcuts.
Tools Shortcuts in Affinity Photo
Tool Shortcuts can be used to select particular tools in Affinity Photo.
Some of the most commonly used Tool shortcuts when working with the Photo Persona include the following:
- Flood fill tool/gradient cycle – G
- View tool – H
- Move tool – V
- Crop tool – C
- Selection tools cycle – W
- Pen and Node tool cycle – P
- Zoom tool – Z
- Clone tool – S
- Shape tools cycle – U
- Text tools cycle – T
- Dodge, Burn, and Sponge Brush tool cycle – O
- Retouch tools cycle – J
- Painting tools cycle – B
- Erase tools cycle – E
- Marquee Selection tools cycle – M
- Freehand Selection tool – L
In the next section, we’ll be looking at Liquify Persona Shortcuts.
Tools Shortcuts- Liquify Persona
Some of the most commonly used Tools shortcuts in Liquify Persona include the following:
- Liquify Push Forward Tool – P
- Liquify Push Left Tool – L
- Liquify Twirl Tool – T
- Liquify Pinch Tool – U
- Liquify Turbulence Tool – B
- Liquify Mesh Clone Tool – C
- Liquify Reconstruct Tool – R
- Liquify Freeze Tool – F
- Liquify Thaw Tool – W
- Liquify Zoom Tool – Z
- Liquify View Tool – H
Now let’s discuss Develop Persona Shortcuts.
Tools Shortcuts- Develop Persona
Some of the most commonly used Tools shortcuts in the Develop Persona shortcuts are:
- Key White Balance Tool – W
- Red Eye Removal Tool – R
- Blemish Removal Tool – L
- Overlay Paint Tool – B
- Overlay Erase Tool – E
- Overlay Gradient Tool – G
- Crop Tool – C
- Zoom Tool – Z
- View Tool – H
The upcoming section is dedicated to Export Persona Shortcuts.
Tools Shortcuts- Export Persona
These are the two Tools shortcuts you can use in the Export Persona:
- Slice Tool – S
- Slice Selection Tool – L
In the next part, we’ll be looking at Panorama Persona Shortcuts.
Tools Shortcuts- Paranoma Persona
When working with panoramas, keep in mind the following shortcuts you can use when working with the Panorama Persona:
- Key Transform Source Image Tool – A
- Add To Source Image Mask Tool – L
- Erase From Source Image Mask Tool – U
Let’s dive into Liquify Persona Shortcuts.
Liquify Persona Shortcuts in Affinity Photo
Liquify Persona shortcuts are keyboard commands that can be used while working with the Liquify Persona.
These are the three shortcuts:
- Mask All – Cmd/Ctrl + A
- Clear Mask – Cmd/Ctrl + D
- Invert Mask – Cmd/Ctrl + I
Let’s check out Vector Specific Shortcuts.
Vector Specific Shortcuts in Affinity Photo
Vector-specific shortcuts are keyboard commands that are associated with vector graphic editing.
Some of the most commonly used Vector-specific shortcuts are the following:
- Resize maintaining aspect ratio– Shift + drag from a corner handle
- Edit curves as you draw– Cmd/Ctrl
- Creates cusp node (sharp corner)– Option/Alt + drag control handle
- Snap a curve’s control handle to 45° intervals– Shift + drag control handle
- Create a straight line segment as you draw– Drag + right-click
- Convert to Smooth node– Right-click
- Convert to Sharp node– Option/Alt + click
- Convert to Curve– Cmd/Ctrl +Enter
- Select next node on a curve– ]
- Select the previous node on a curve– [
Painting Shortcuts in Affinity Photo
Painting shortcuts are keyboard commands used to adjust brush settings.
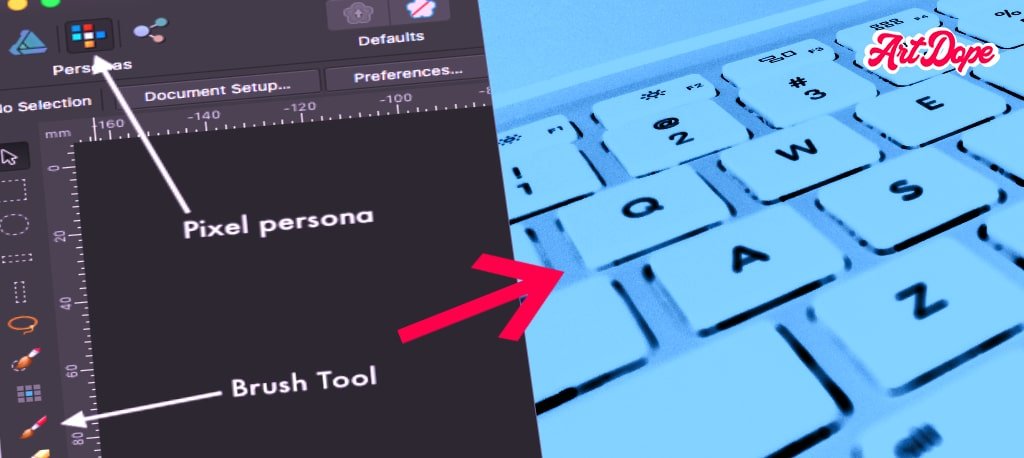
Some of the most commonly used Painting shortcuts include the following:
- Picks up a new brush color– Option/Alt + drag
- Change selected layer content/brush tool’s opacity– Numeric keys (8=80%, 56=56%, etc.)
- Increase/decrease brush width– ] [
- Decrease/increase brush width with on-screen readout– Cmd/Ctrl + Option/Alt + drag (left/right)
- Decrease/increase brush hardness with on-screen readout– Cmd/Ctrl + OptionAlt +drag (up/down)
- Paint a brush stroke along a straight line- Click then Shift + click
- Toggle brush properties (for width, hardness, shape/spacing or rotation)– Cmd/Ctrl + Option/Alt + left-click
- Setting brush properties on the page (after setting the above toggle):
- For width– Cmd/Ctrl + Option/Alt + left-click + drag (left/right)
- For hardness– Cmd/Ctrl + Option/Alt + left-click + drag (up/down)
- For nozzle shape– Cmd/Ctrl + Option/Alt + left-click + drag (left/right)
- For nozzle spacing– Cmd/Ctrl + Option/Alt + left-click + drag (up/down)
- For nozzle rotation– Cmd/Ctrl + Option/Alt + left-click + drag (left/right)
- For width– Cmd/Ctrl + Option/Alt + left-click + drag (left/right)
Text Shortcuts in Affinity Photo
Text shortcuts are a few commands related to the text.
Some of the most commonly used Text shortcuts include the following:
- Show Character– Cmd/Ctrl + T
- Show Typography– Cmd/Ctrl + Shift + T
- Spelling Options– Cmd/Ctrl + Shift + ;
We’ll look at Navigation shortcuts next.
Some of the most commonly used Navigation shortcuts in Text include the following:
- Moves insertion point one character left– Left arrow
- Moves insertion point one character right- Right arrow
- Moves insertion point to start of a word– Cmd/Ctrl + Left arrow
- Moves insertion point to the end of the word– Cmd/Ctrl + Right arrow
- Moves insertion point to start of line– Home
- Moves insertion point to end of line– End
- Moves insertion point to start of text frame– Cmd/Ctrl + End
- Moves insertion point to end of text frame– Cmd/Ctrl + Right arrow
- Moves insertion point to start of the current paragraph– Cmd/Ctrl + Up arrow
- Moves insertion point to start of next paragraph– Cmd/Ctrl + Down arrow
Let’s discuss Deleting shortcuts in the upcoming section.
Deleting Shortcuts
Some of the most commonly used Deleting shortcuts in Text include the following:
- Delete the character to the left of the insertion point– Backspace
- Delete the character to the right of insertion point– Delete
- Delete from the insertion point to the start of the word- Cmd/Ctrl + Backspace
- Delete from insertion point to end of the word– Cmd/Ctrl + Delete
Now let’s discuss Formatting shortcuts.
Formatting Shortcuts
Some of the most commonly used Formatting shortcuts in Text:
- Bigger text– Cmd/Ctrl + >
- Smaller text– Cmd/Ctrl + <
- Precise bigger text– Cmd/Ctrl + Option/Alt + >
- Precise smaller text– Cmd/Ctrl + Option/Alt + <
- Superscript– Cmd/Ctrl + Shift + =(equal)
- Subscript– Cmd/Ctrl + Option/Alt + -(minus)
Typography Shortcuts
Some of the most commonly used Typography shortcuts in Text are the following:
- Tighten (Tracking/Kerning, 10% decrement)– Option/Alt + Left arrow
- Loosen (Tracking/Kerning, 10% increment)– Option/Alt + Right arrow
- Tighten More (Tracking/Kerning, 50% decrement)– Option/Alt + Shift + Left arrow
- Loosen More (Tracking/Kerning, 50% increment)– Option/Alt + Shift + Right arrow
- Increase Paragraph Leading– Option/Alt + Down arrow
- Decrease Paragraph Leading– Option/Alt + Up arrow
- Precise Increase Paragraph Leading– Cmd/Ctrl + Alt + Down arrow
- Precise Decrease Paragraph Leading– Cmd/Ctrl + Alt + Up arrow
To conclude this section dedicated to text keyboard shortcuts, we’ll look at Special Character shortcuts next.
Special Character Shortcuts
Some of the most commonly used Special characters(key) shortcuts in Text include the following:
- Line Break– Shift + Return
- Non-Breaking Space– Option/Alt + Spacebar
- En Dash– Option/Alt + –
- Em Dash– Option/Alt + Shift + –
Let’s move on to View Shortcuts next.
View Shortcuts
View shortcuts allow you to adjust view settings.
Some of the most commonly used shortcuts in View include the following:
- Rotate document view– Option/Alt + scroll while using a mouse scroll wheel
- Reset document view rotation– Cmd/Ctrl + OptionAlt+ Shift + R
- Zoom In– Cmd/Ctrl + =(equal)
- Zoom Out– Cmd/Ctrl + -(minus)
- Zoom to Fit– Cmd/Ctrl + 0 (or double-click View Tool icon)
- (Zoom to) 100%- Cmd/Ctrl + 1 (or double-click Zoom Tool icon)
- (Zoom to) 200%– Cmd/Ctrl + 2
- (Zoom to) 400%– Cmd/Ctrl + 3
- (Zoom to) 800%– Cmd/Ctrl + 4
- (Zoom to) Actual Size– Cmd/Ctrl + 8
- (Zoom to) Pixel Size– Cmd/Ctrl + 9
- Hot key zoom– Spacebar+ Cmd/Ctrl + drag
- Hot key zoom in– Spacebar+ Cmd/Ctrl + click
- Hot key zoom out– Spacebar+ Option/Alt + click
- Hot key zoom in marquee– Spacebar+ Option/Alt + drag
- Hot key panning– Spacebar
- Scroll vertically up/down– Mouse scroll wheel
- Scroll horizontally left/right– Shift + Mouse scroll wheel
- Switch to Next View– Cmd/Ctrl + `
- Show Rulers– Cmd/Ctrl + R
- Show Guides– Cmd/Ctrl + ;
- Show Grid– Cmd/Ctrl + ‘
- Grid Plane cycle– ‘
- Split View cycle (not Photo Persona)– ,
Pixel Selection/Mask Shortcuts in Affinity Photo
Pixel selection/Mask shortcuts allow you to quickly adjust selection settings and apply a quick mask.
Some of the most commonly used shortcuts in Pixel Selection/Mask include the following:
- Select All– Cmd/Ctrl + A
- Deselect– Cmd/Ctrl + D
- Invert Pixel Selection– Cmd/Ctrl + Shift + I
- Add to selection (Marquee/Freehand selection tools only)– Cmd/Ctrl + Option/Alt + drag
- Remove from selection– Option/Alt + drag
- Grow/Shrink– Cmd/Ctrl + B
- Feather– Shift + F6
- Refine Edges– Cmd/Ctrl + Option/Alt + R
- Nudge selection– Arrow key
- Modified nudge selection– Shift + arrow key
- Selection from layer– Cmd/Ctrl + click layer thumbnail or Cmd/Ctrl + Shift + O
- Selection from layer luminance– Cmd/Ctrl + Option/Alt + click layer thumbnail
- Add layer contents to existing selection– Shift + Cmd/Ctrl + click layer thumbnail
- Add layer luminance to existing selection– Shift + Cmd/Ctrl + Option/Alt + click layer thumbnail
- Polygon selection (Freehand Selection Tool only)– Cmd/Ctrl + Shift + click on the page.
- Quick Mask– Q
Workspace shortcuts
In short, Workspace shortcuts allow you to modify the User Interface.
Some of the most commonly used shortcuts in Workspace include the following:
- Show/Hide Studio (panels)– Cmd/Ctrl + Shift + H
- Show/Hide Toolbar– Cmd/Ctrl + Option/Alt + T
- Toggle UI– Tab
- Hide Workspace– Cmd/Ctrl + H
Moreover, we’ll see about the next type of shortcut: Adjustment and Filter Shortcuts
Adjustment and Filter shortcuts in Affinity Photo
Adjustment and Filter shortcuts allow you to quickly access while use the various affinity photo adjustments and filters.
Some of the most commonly used shortcuts in Adjustment and Filter include the following:
- Levels (Adjustment)– Cmd/Cmd + L
- HSL (Adjustment)– Cmd/Cmd + U
- Invert (Adjustment)– Cmd/Cmd + I
- Curves (Adjustment)– Cmd/Cmd + M
- Black and White (Adjustment)– Cmd/Cmd + Option/Alt + Shift + B
- Repeat Filter– Cmd/Cmd + F
Author Rating
Overall Rating
Summary
Using shortcuts are essential to work faster with scale. It takes time, practice & general interest to get quick & efficient. Once you start using them in your workflow, there is no going back.
Useful Links
Conclusion
Reaching the end, we have covered the most important shortcuts to bear in mind when using Affinity Photo. These should help you speed up your workflow and become more efficient when editing photos.
Thanks for reading & feel free to check out more of our articles!

